
Account Login
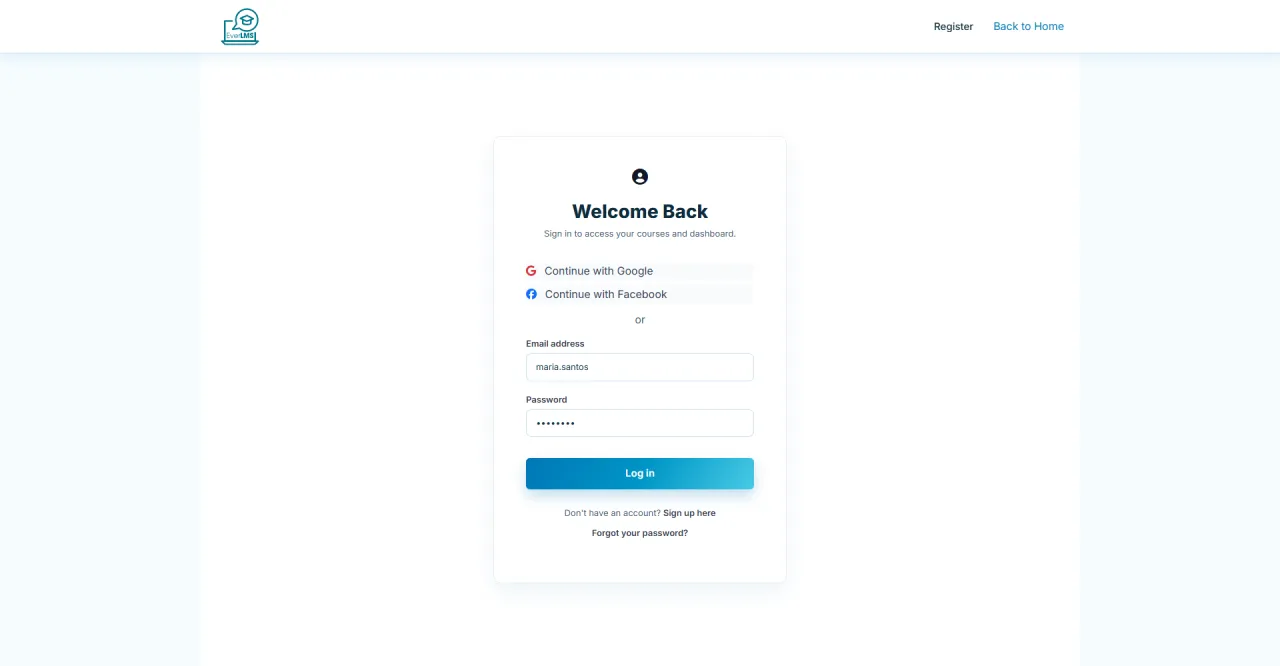
About this screen: The login page allows students to start their learning journey with their assigned account.
Navigation: Homepage → Login
- Demo access: sandbox accounts are issued on request: request a guided demo.
- Check Remember me to stay logged in
- Select "Forgot your password?" to recover your account
Student Dashboard
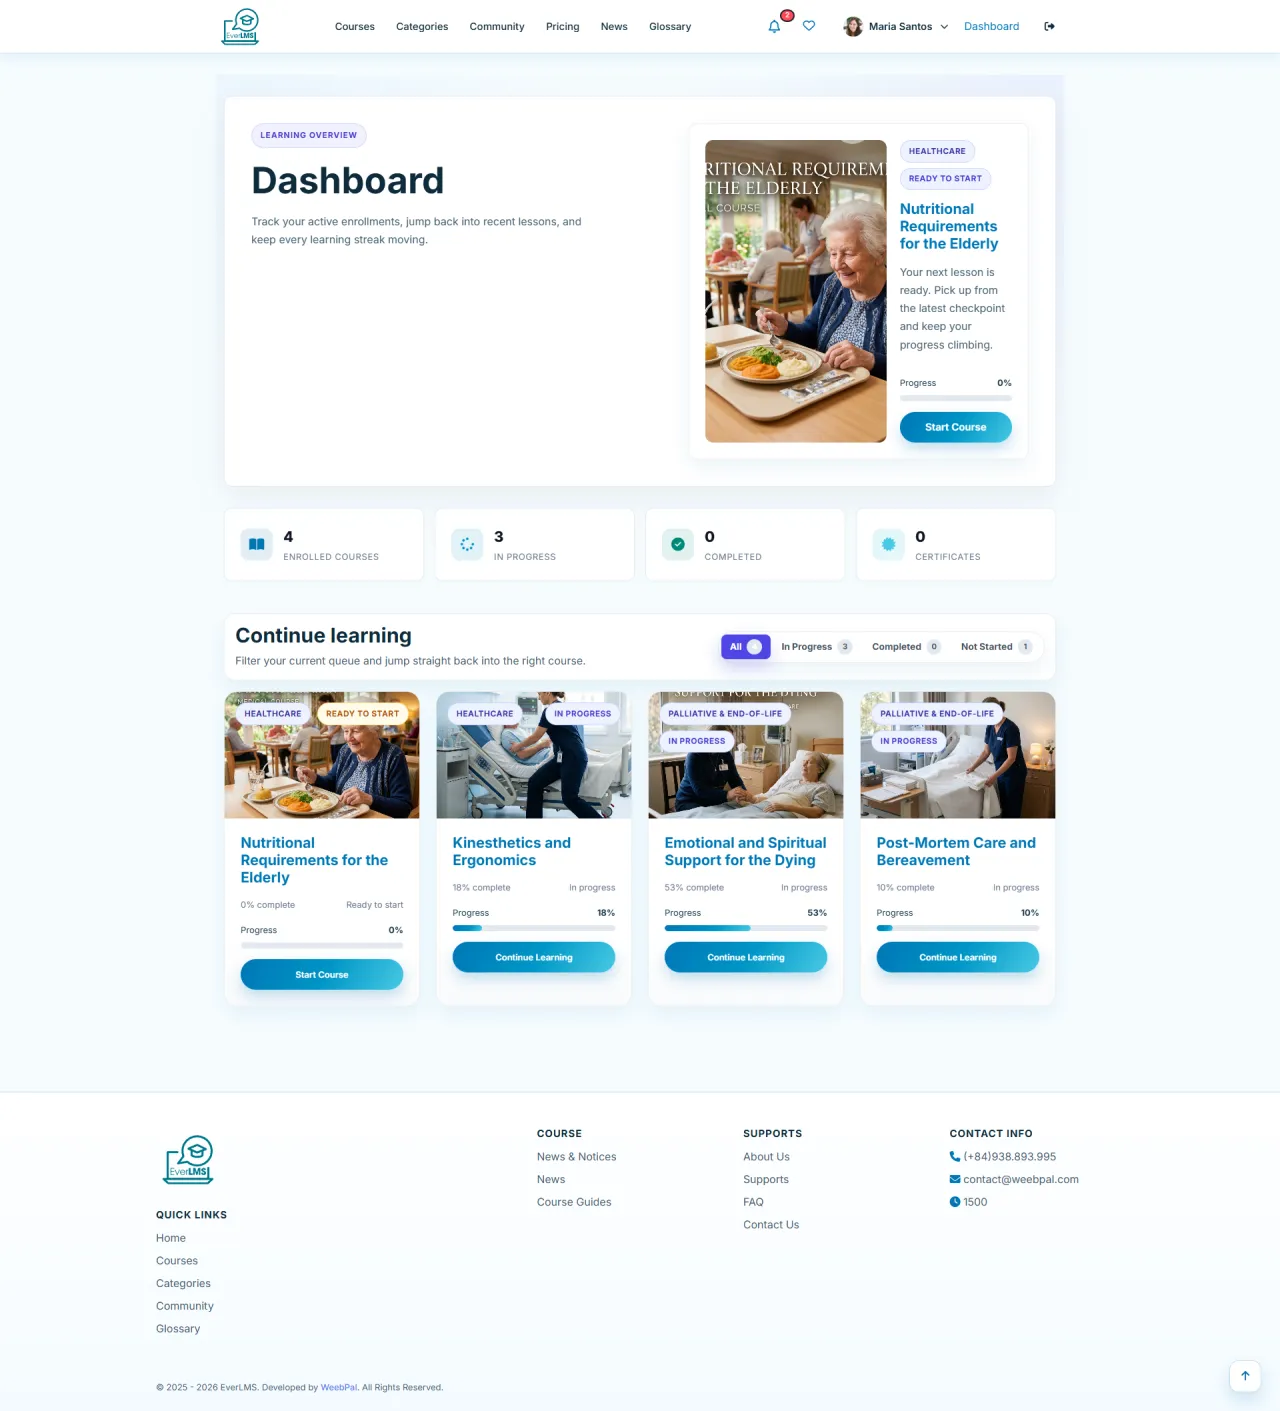
About this screen: The Dashboard page displays your personal learning progress.
Navigation: Login → Dashboard
- Statistics: Enrolled, In Progress, Completed, Certificates
- Continue Learning: Resume courses in progress
- Progress bar tracking % completion for each course
- Discover more new courses from the catalog
Personal Account Options
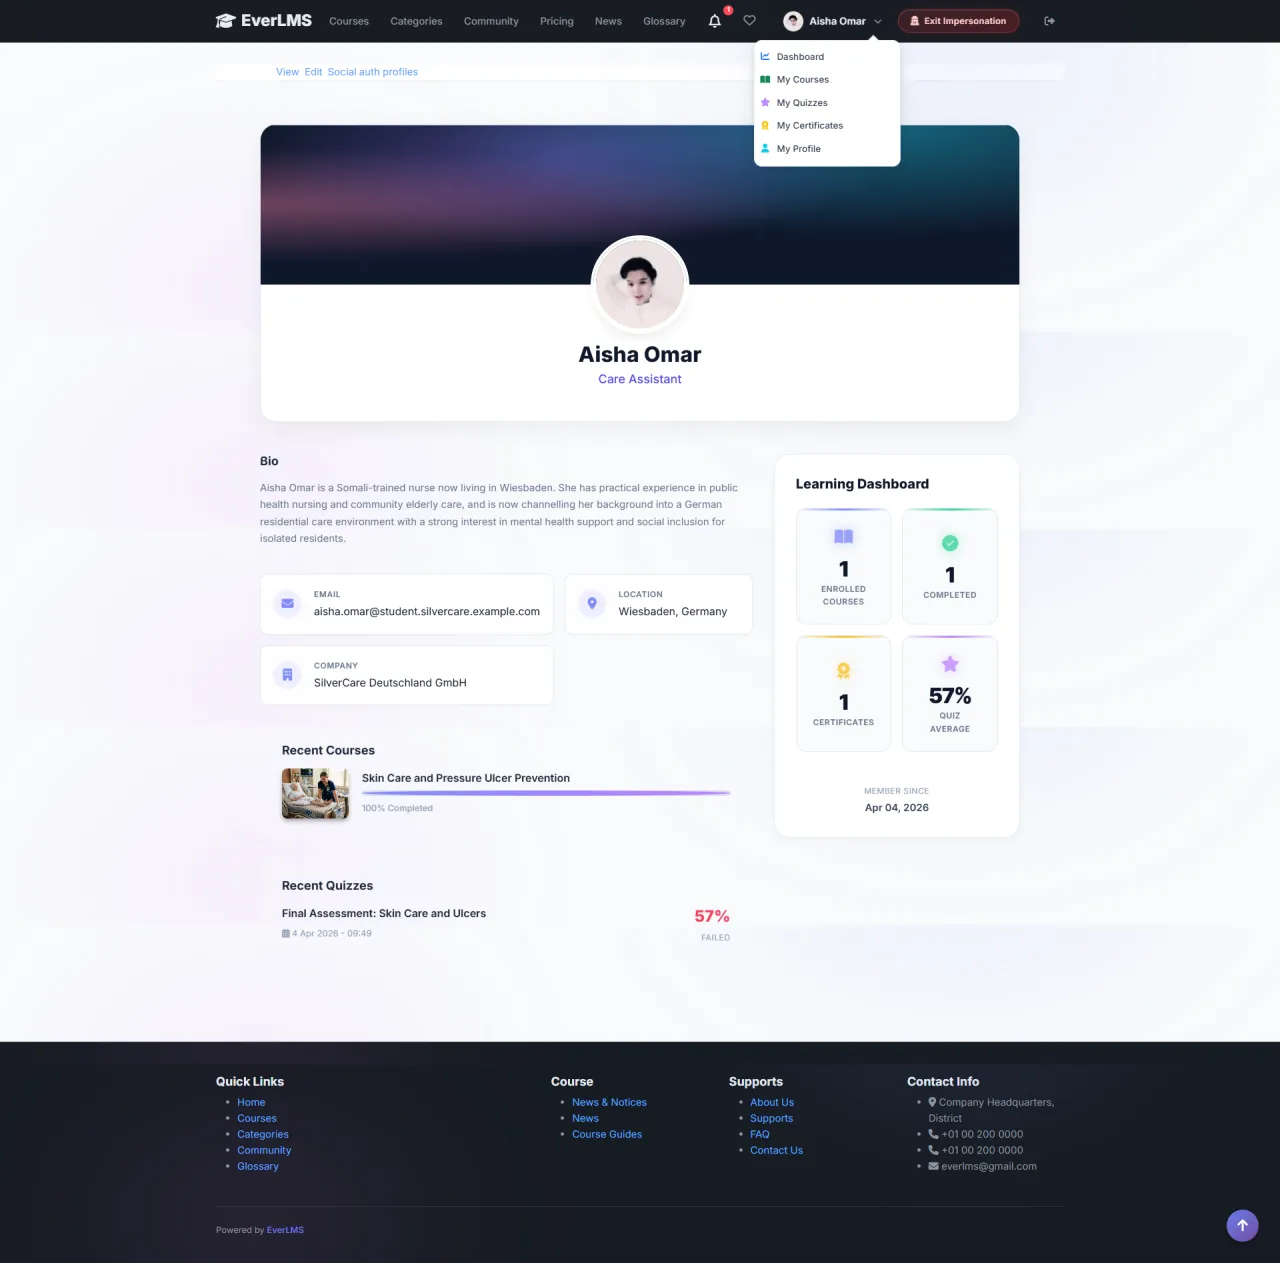
About this screen: Account options provide quick links to personal settings.
Navigation: Click name/avatar in top right corner
- Dashboard: Return to the control panel
- My Courses: List of enrolled courses
- My Certificates: View earned certificates
- My Wishlist: Courses you are interested in
- My Quiz Results: Quiz history
- My Profile: Update personal information
Course Details
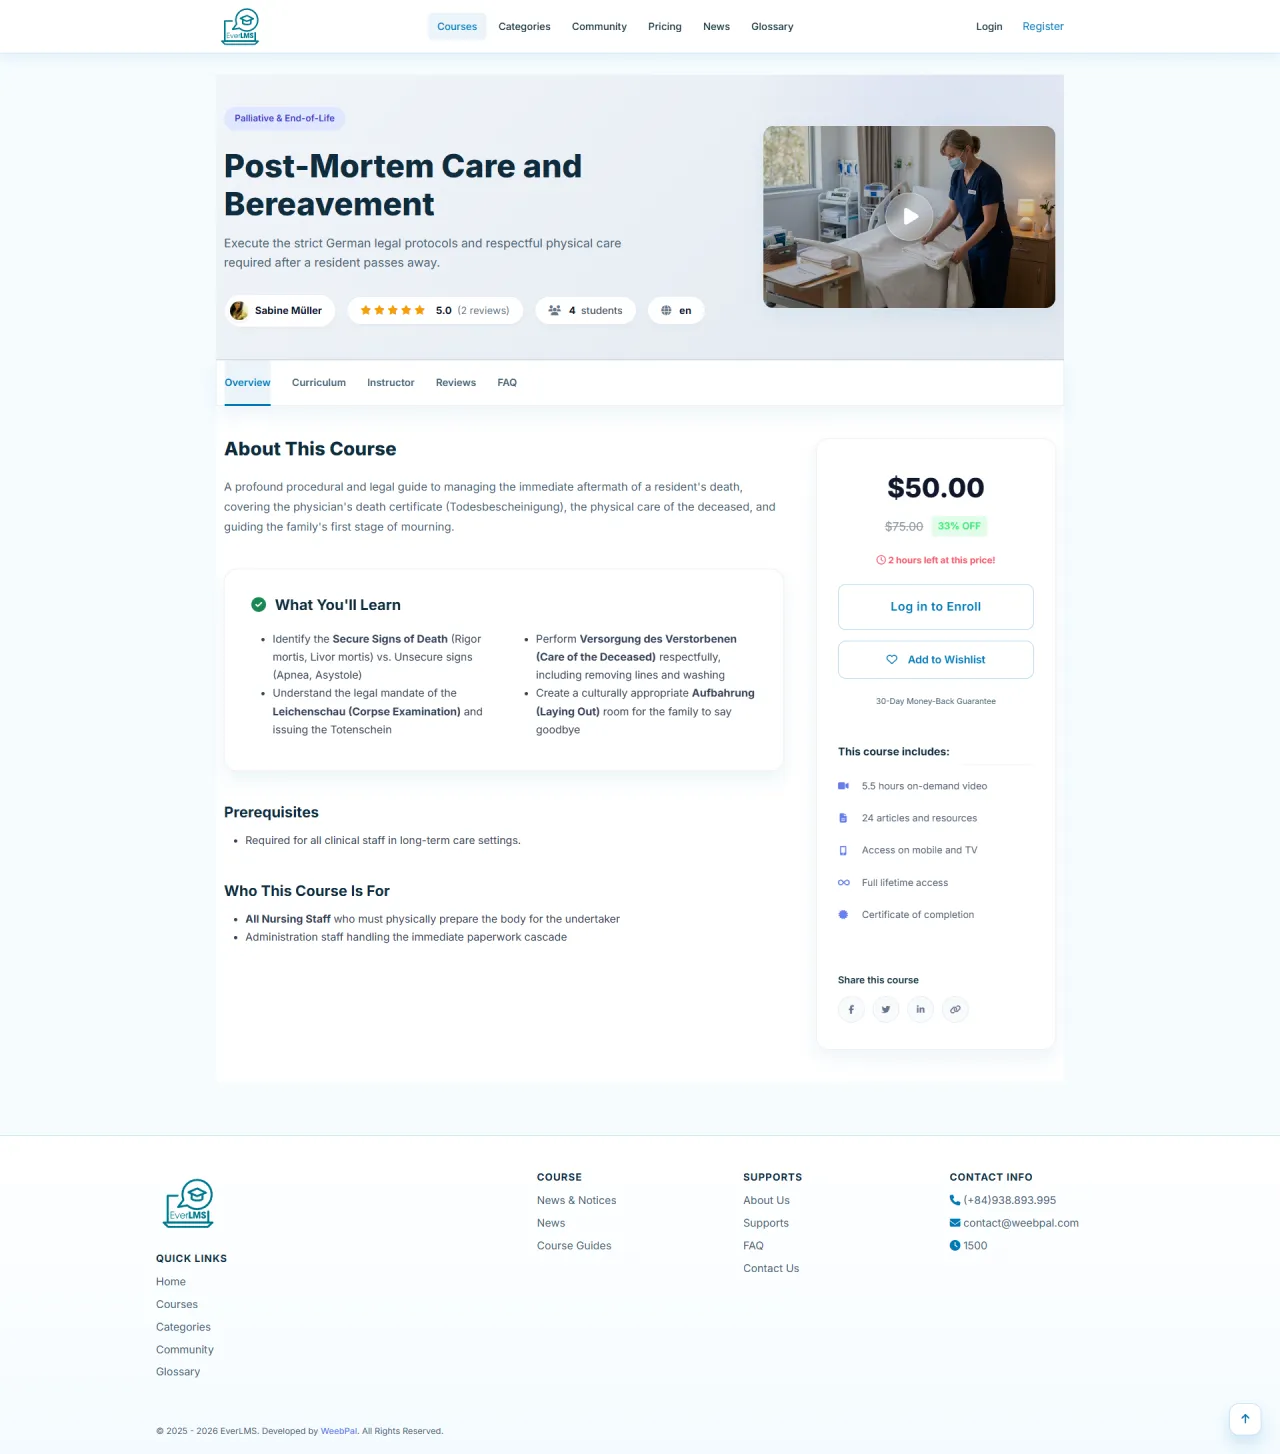
About this screen: The detail page provides comprehensive course information before enrollment.
Navigation: Course list → Select a course
About this screen:
- Overview description and learning objectives
- Instructor information and review statistics
- Course price and Enroll Now button
- Tab to preview curriculum content
Course Enrollment
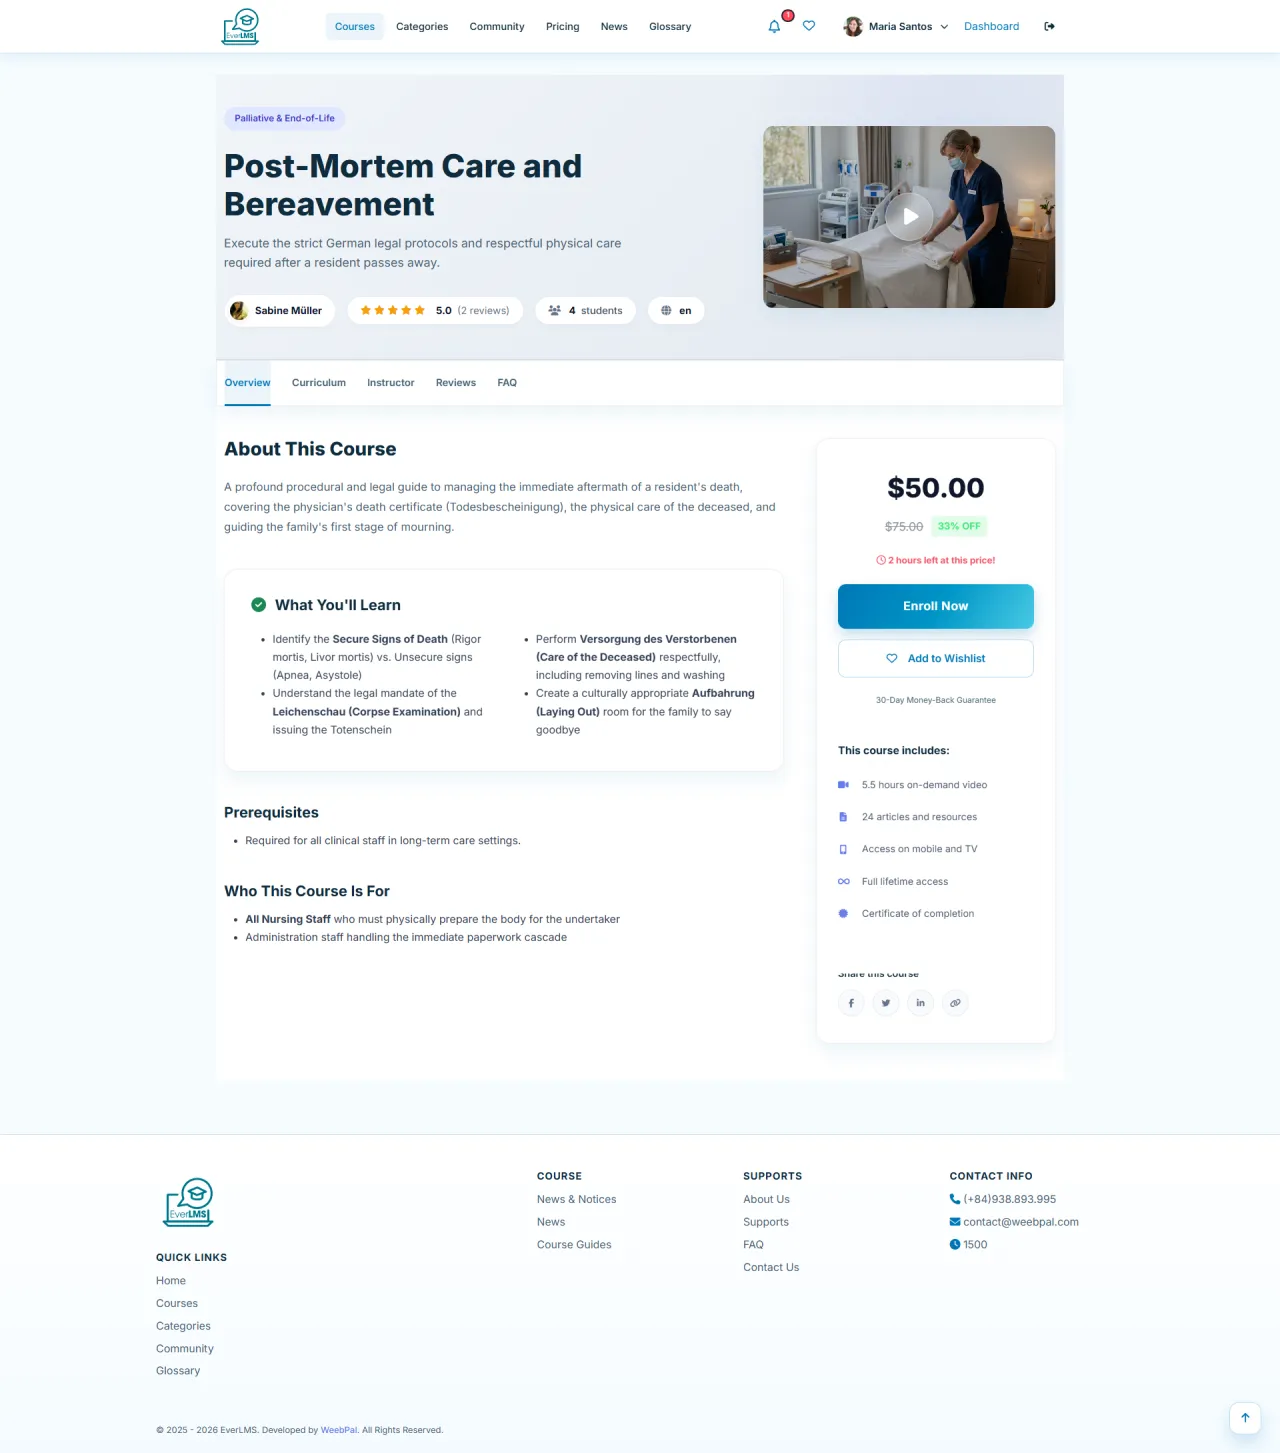
About this screen: From the course detail page, students can purchase or start a free course.
Navigation: Categories → Select a course → Enroll Now
- Click Enroll Now to begin enrollment
- Check the course price and conditions
- Review course information before payment
- Supports both free and paid courses
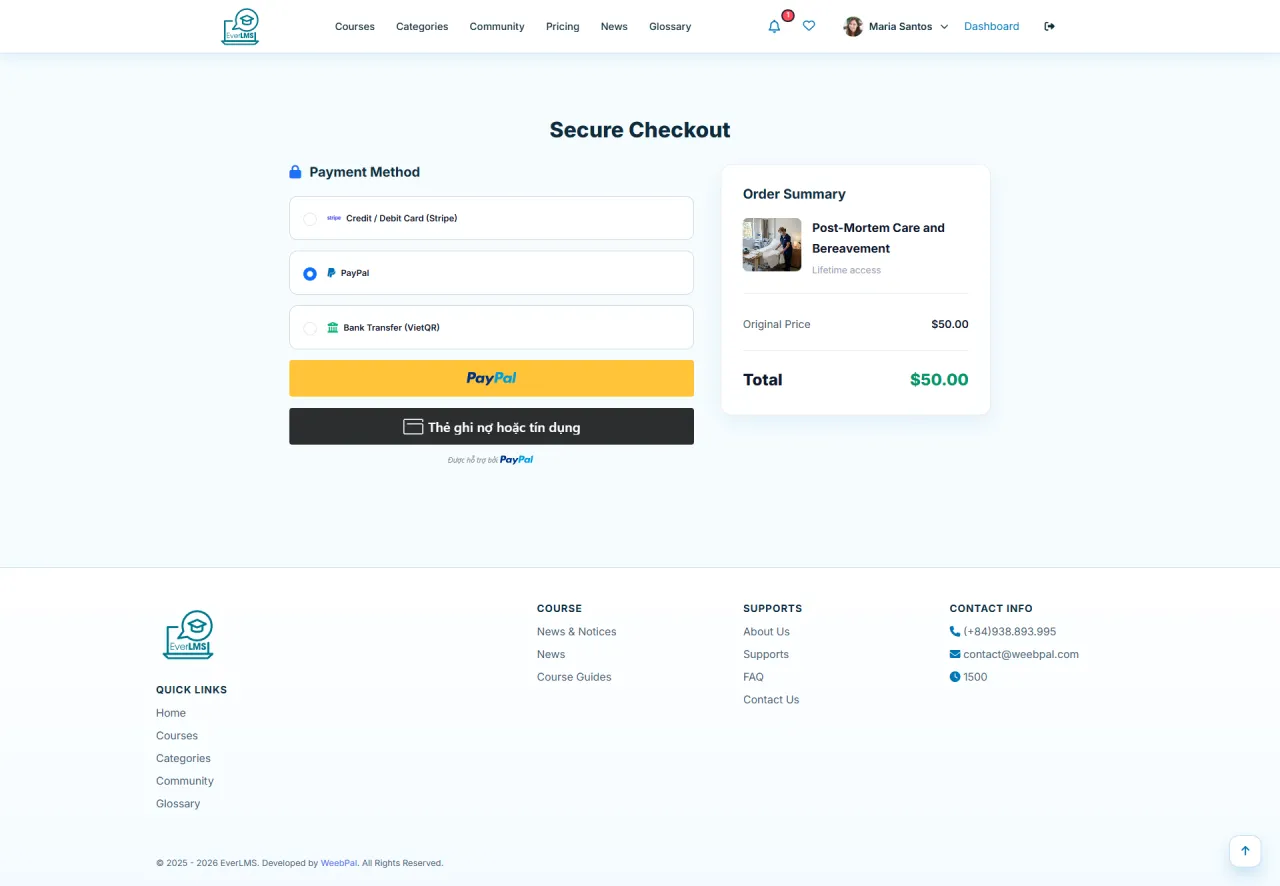
Payment Confirmation
About this screen: The payment confirmation page displays the order summary and payment methods.
Steps:
- Check the course name and price in the cart
- Select a suitable payment method
- Enter payment information (card / bank transfer)
- Confirm and complete the order
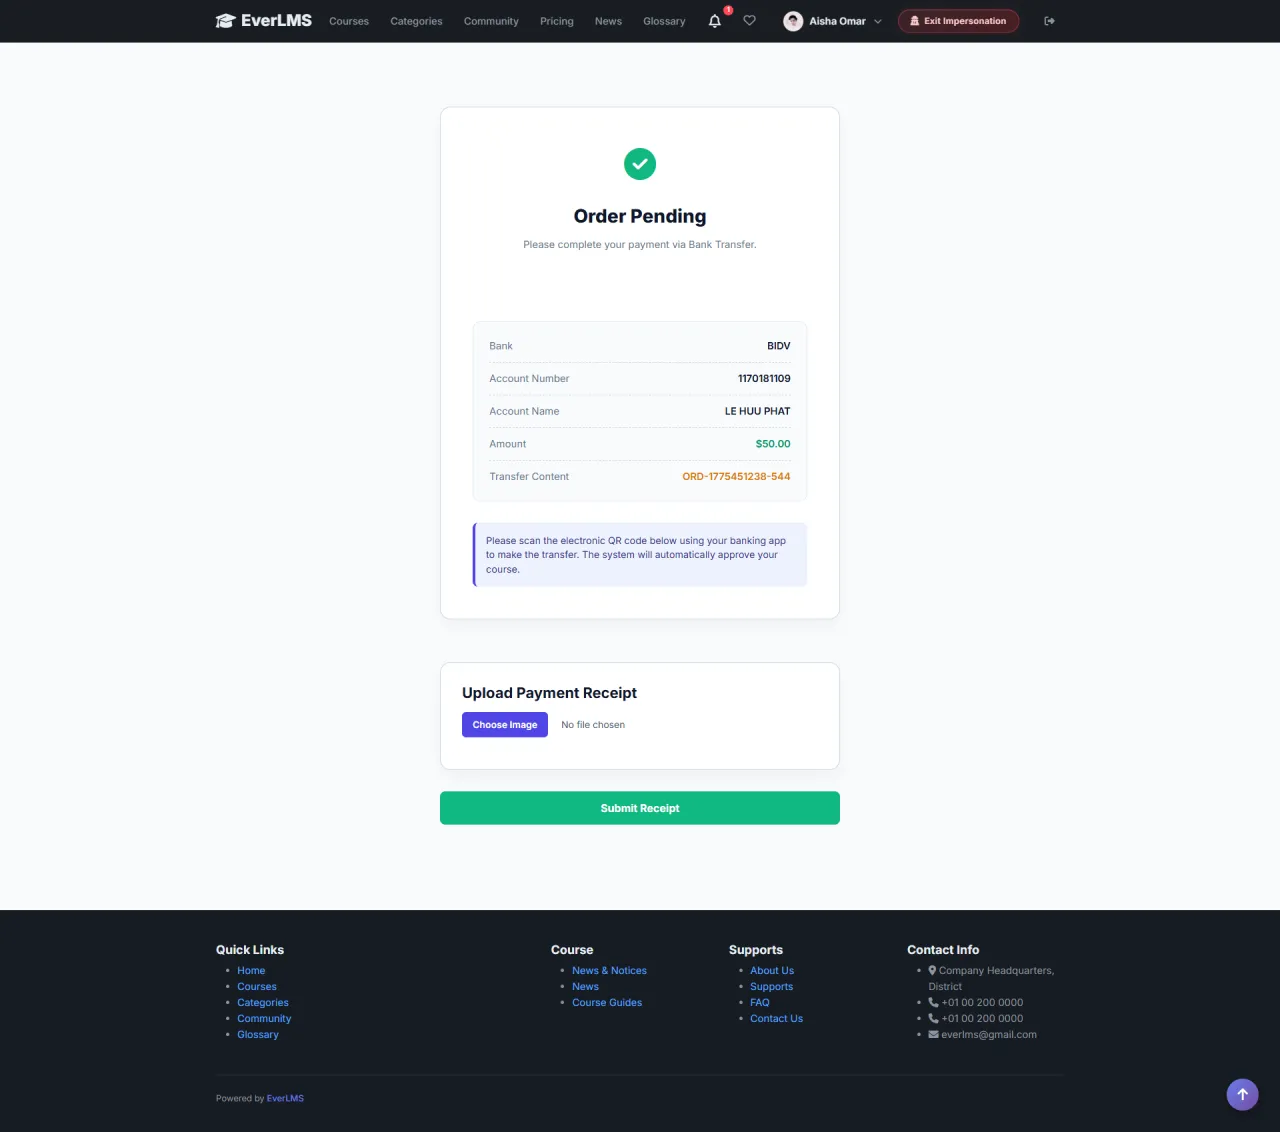
Bank Transfer
About this screen: Bank transfer payment option for students who do not use cards.
How to proceed:
- Select Bank Transfer on the Checkout page
- The system displays the bank account information
- Complete the transfer with the exact transfer reference
- Wait for admin confirmation (1–2 business days)
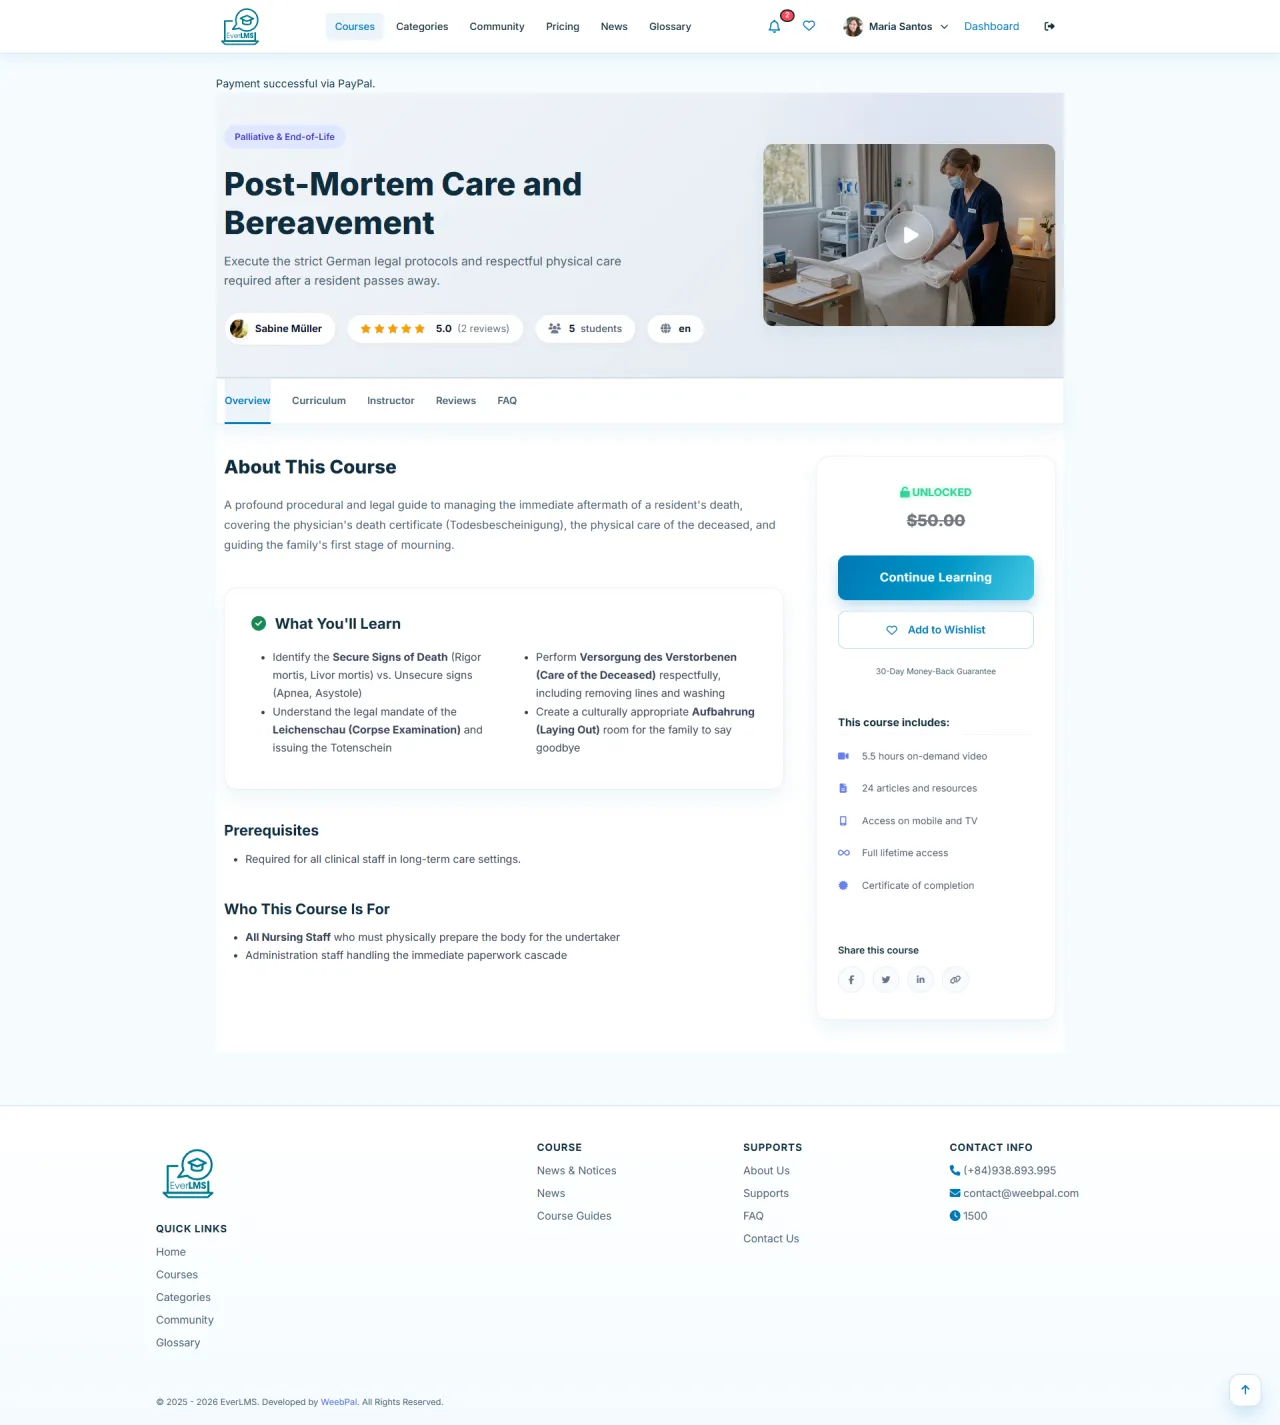
Payment Successful
About this screen: The confirmation page displayed after payment has been successfully processed.
About this screen:
- Payment Successful notification confirming the transaction
- Order details and transaction code
- Go to My Courses button to start learning immediately
- Confirmation email is automatically sent to your inbox
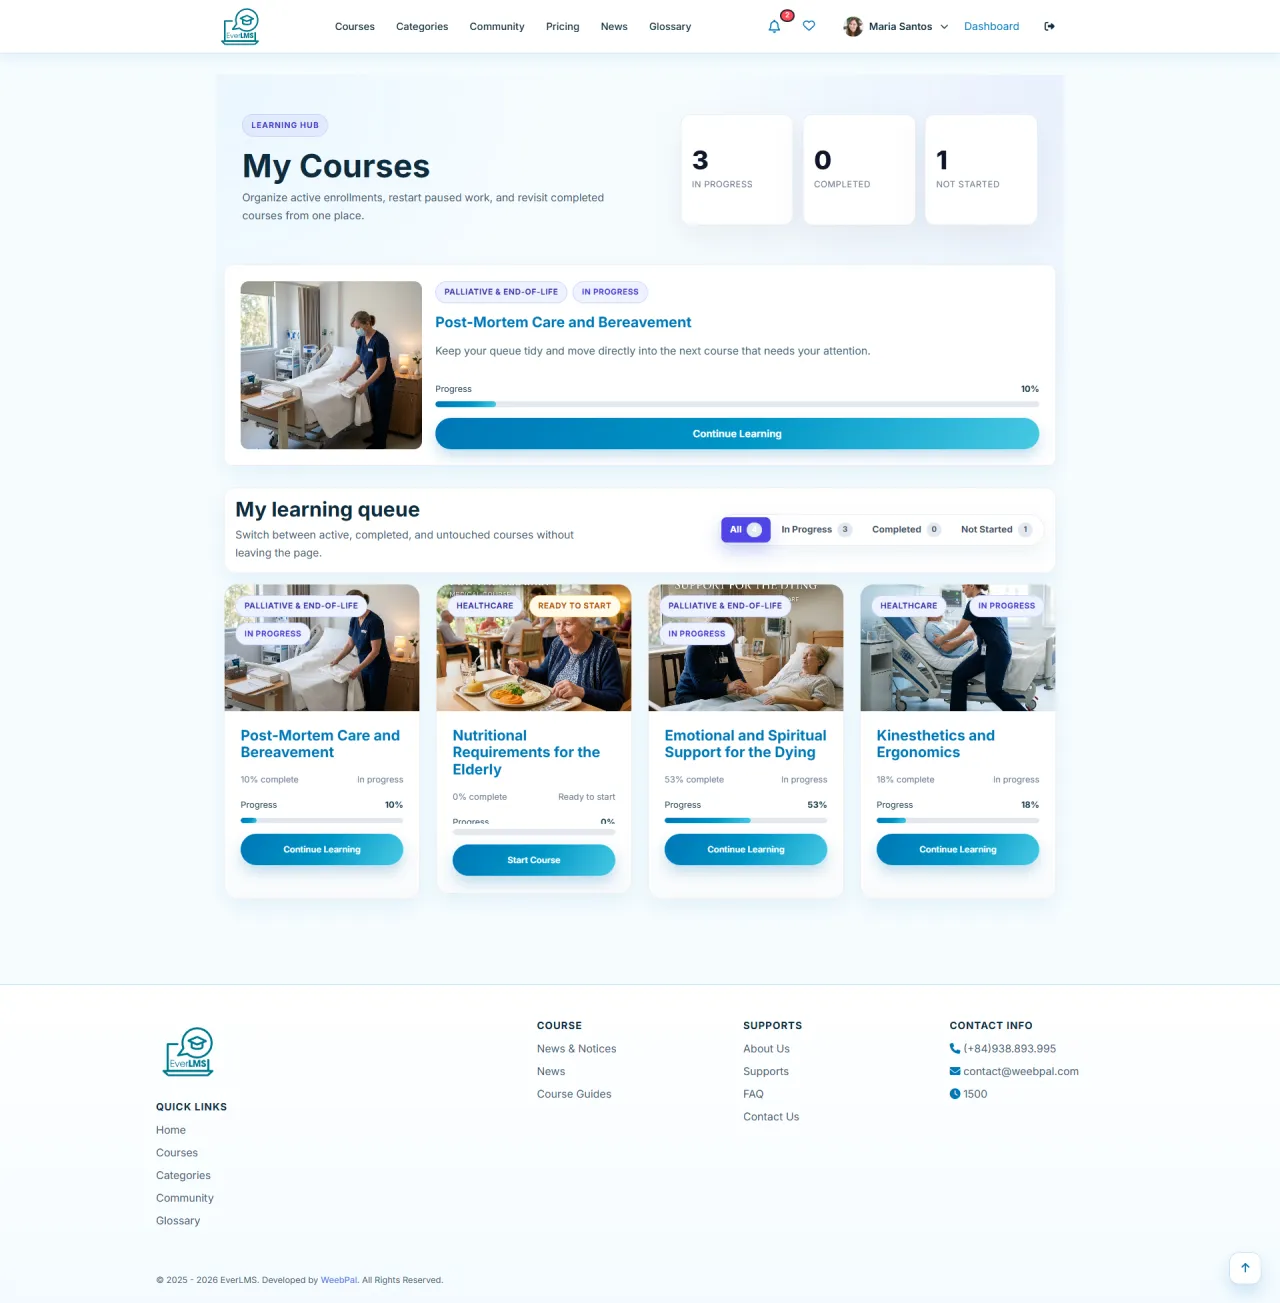
My Courses
About this screen: The My Courses page consolidates all enrolled courses.
Navigation: Account options → My Courses
- View courses in progress and completed courses
- Track progress (% completion) for each course
- Click Continue to resume pending lessons
- Filter by status: In Progress / Completed
Continue Learning
About this screen: The Continue Learning feature resumes exactly where you left off, with no need to manually find your last lesson.
Navigation: My Courses → Click "Continue" on a course card
- The Continue button links directly to the in-progress lesson
- The system remembers your last accessed lesson and position
- Progress bar on each course card shows exact % completion
- Use the Dashboard widget to access the top 3–5 active courses at a glance
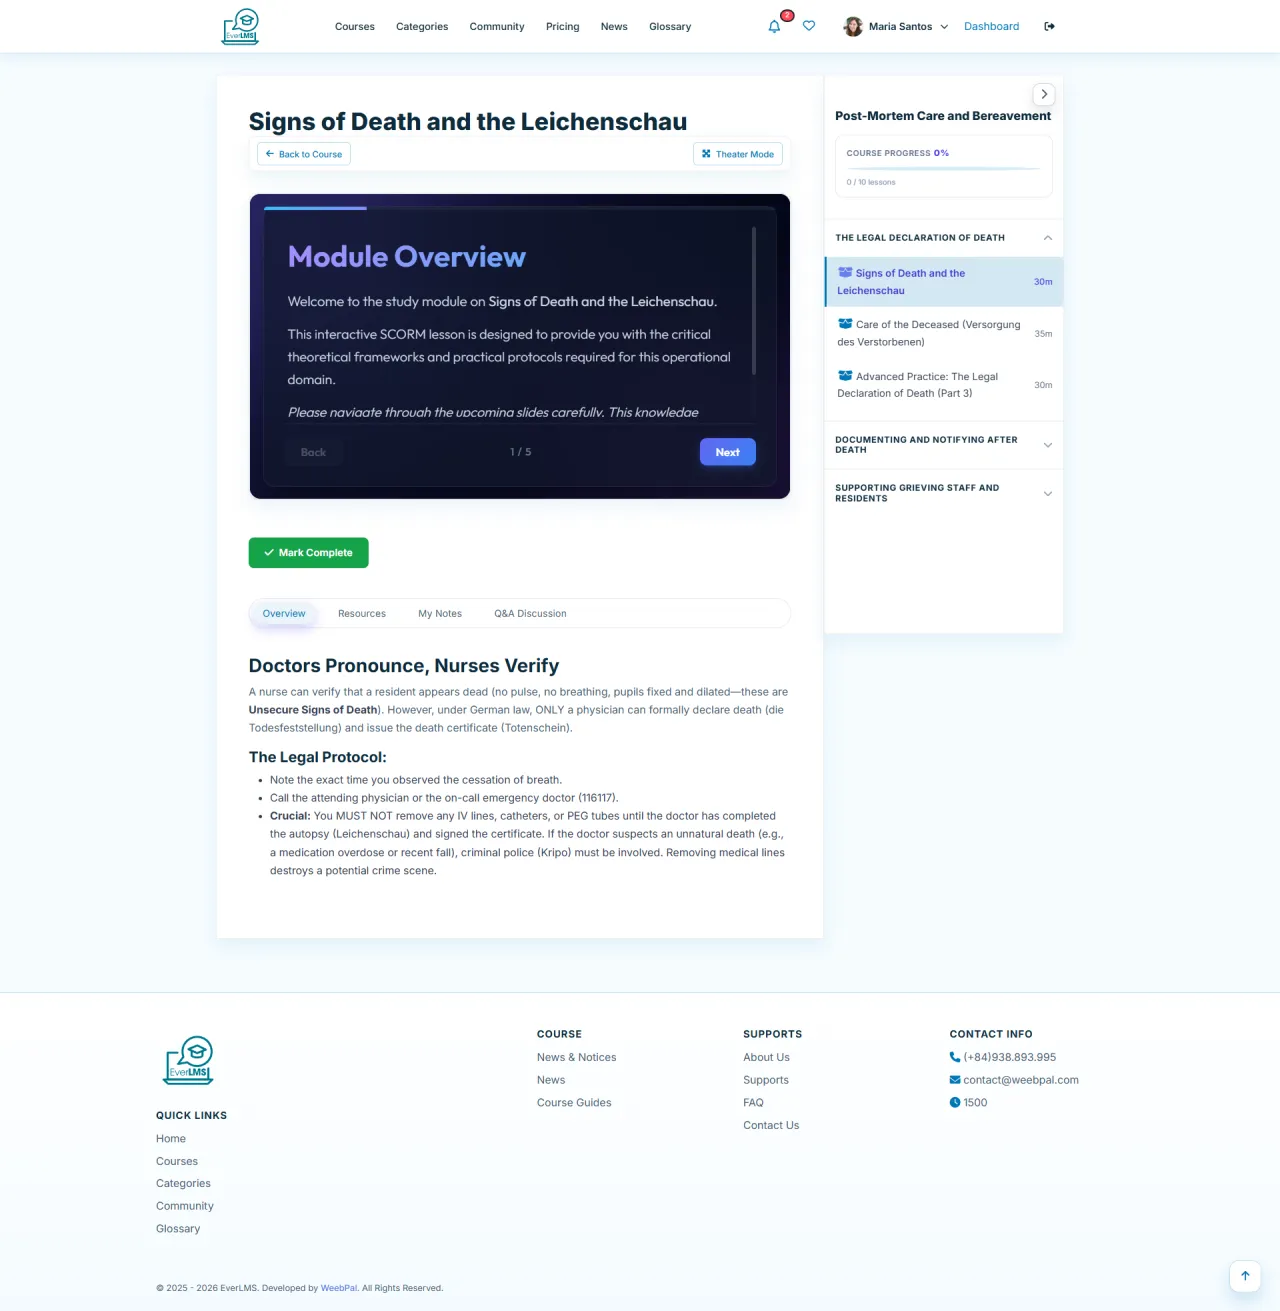
Watch Lessons & Videos
About this screen: The Video Player interface allows you to watch lectures and interact with content.
Navigation: My Courses → Select a course → Select a lesson
- Integrated video player with full controls
- Sidebar displays the lesson list and progress
- Video playback speed can be adjusted (0.5x–2x)
- Supports subtitles and fullscreen mode
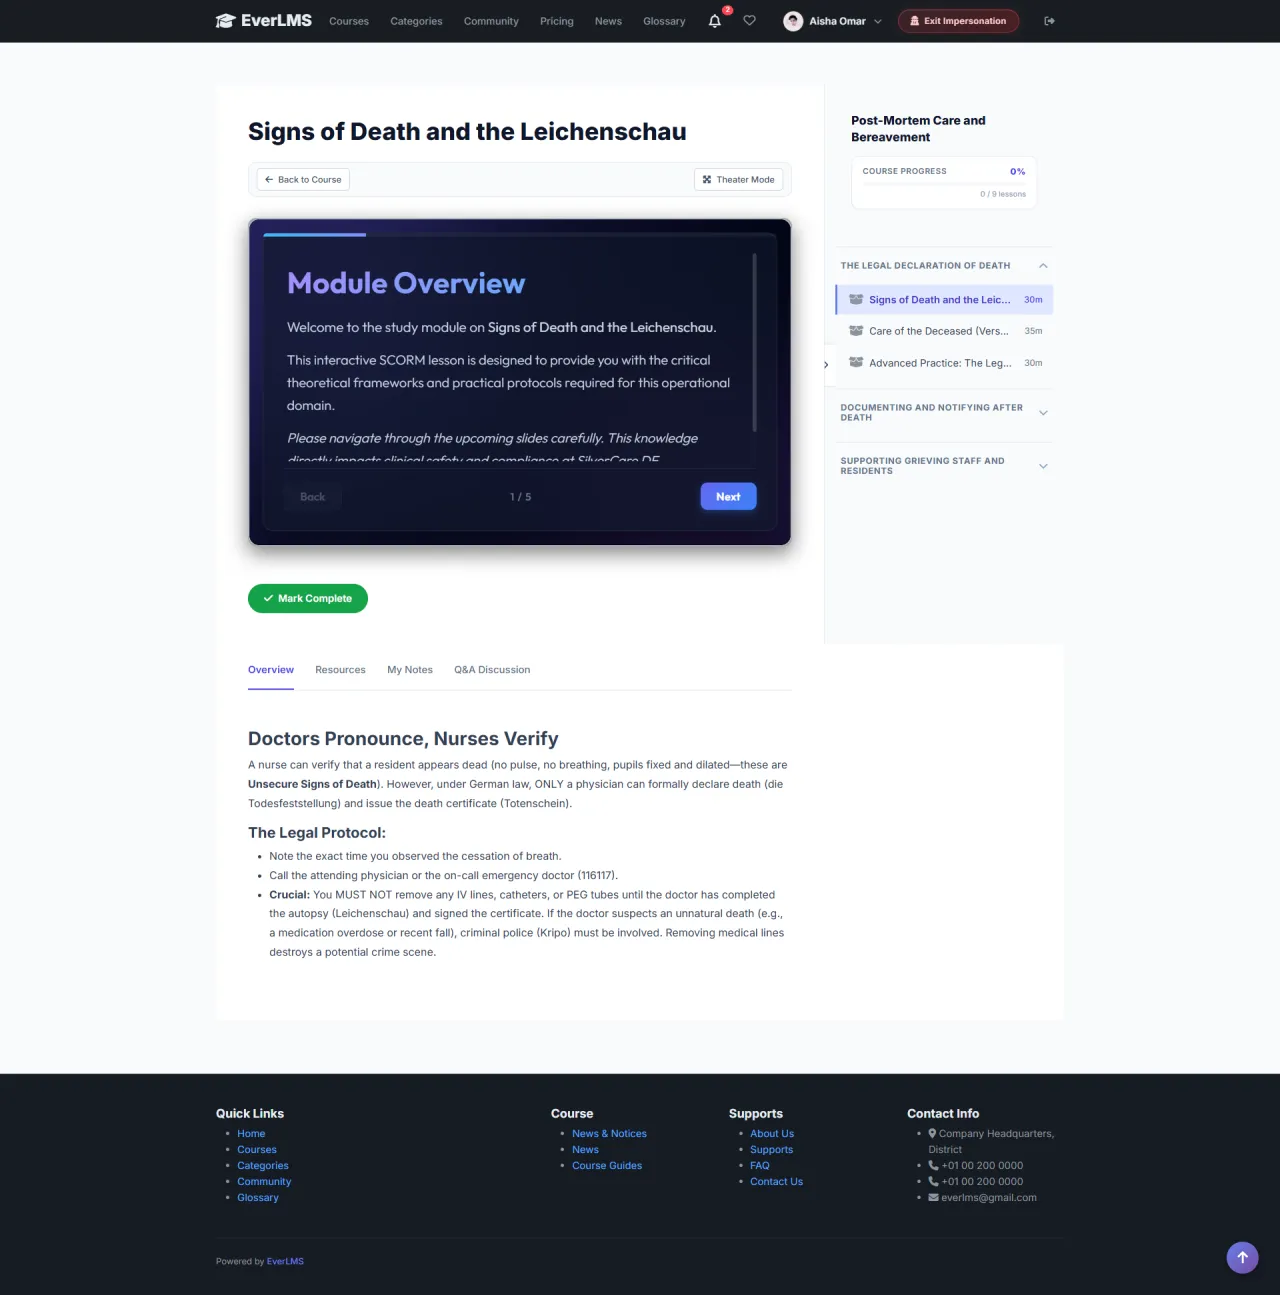
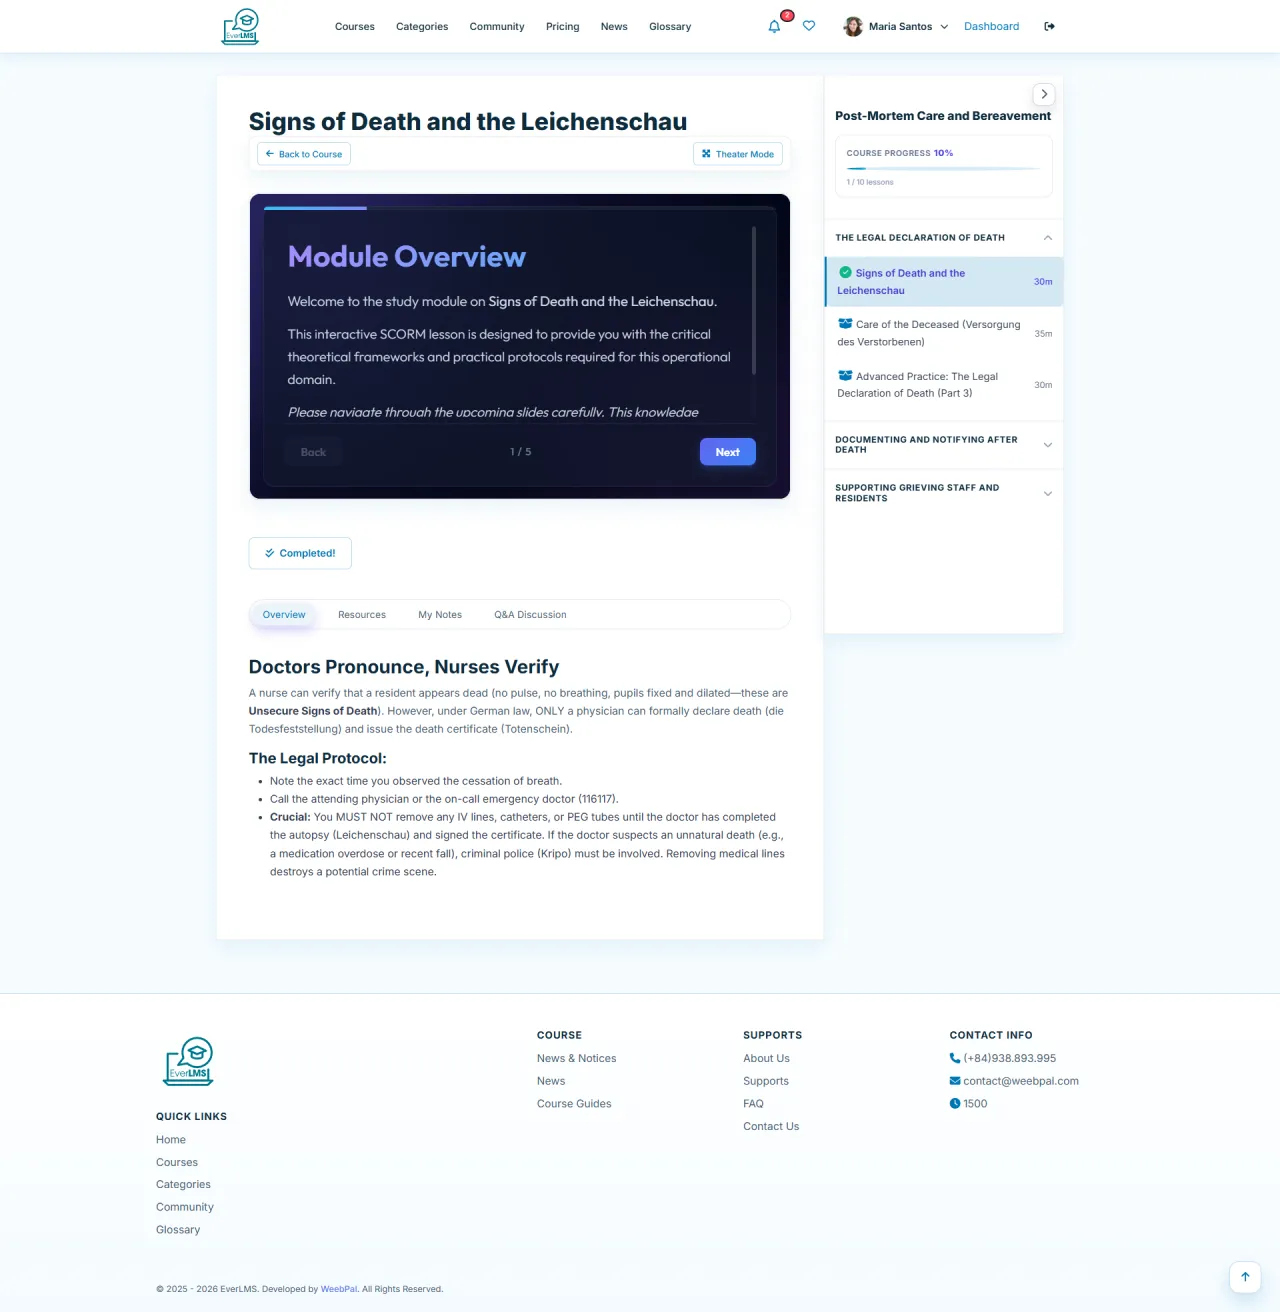
Lesson Overview
About this screen: The Overview tab in the lesson player displays a summary of the current lesson's objectives and description.
Navigation: Lesson Player → Overview Tab
- Read the lesson summary and learning objectives
- Review key concepts before watching the video
- Check prerequisites for the current lesson
- Understand what skills you will gain
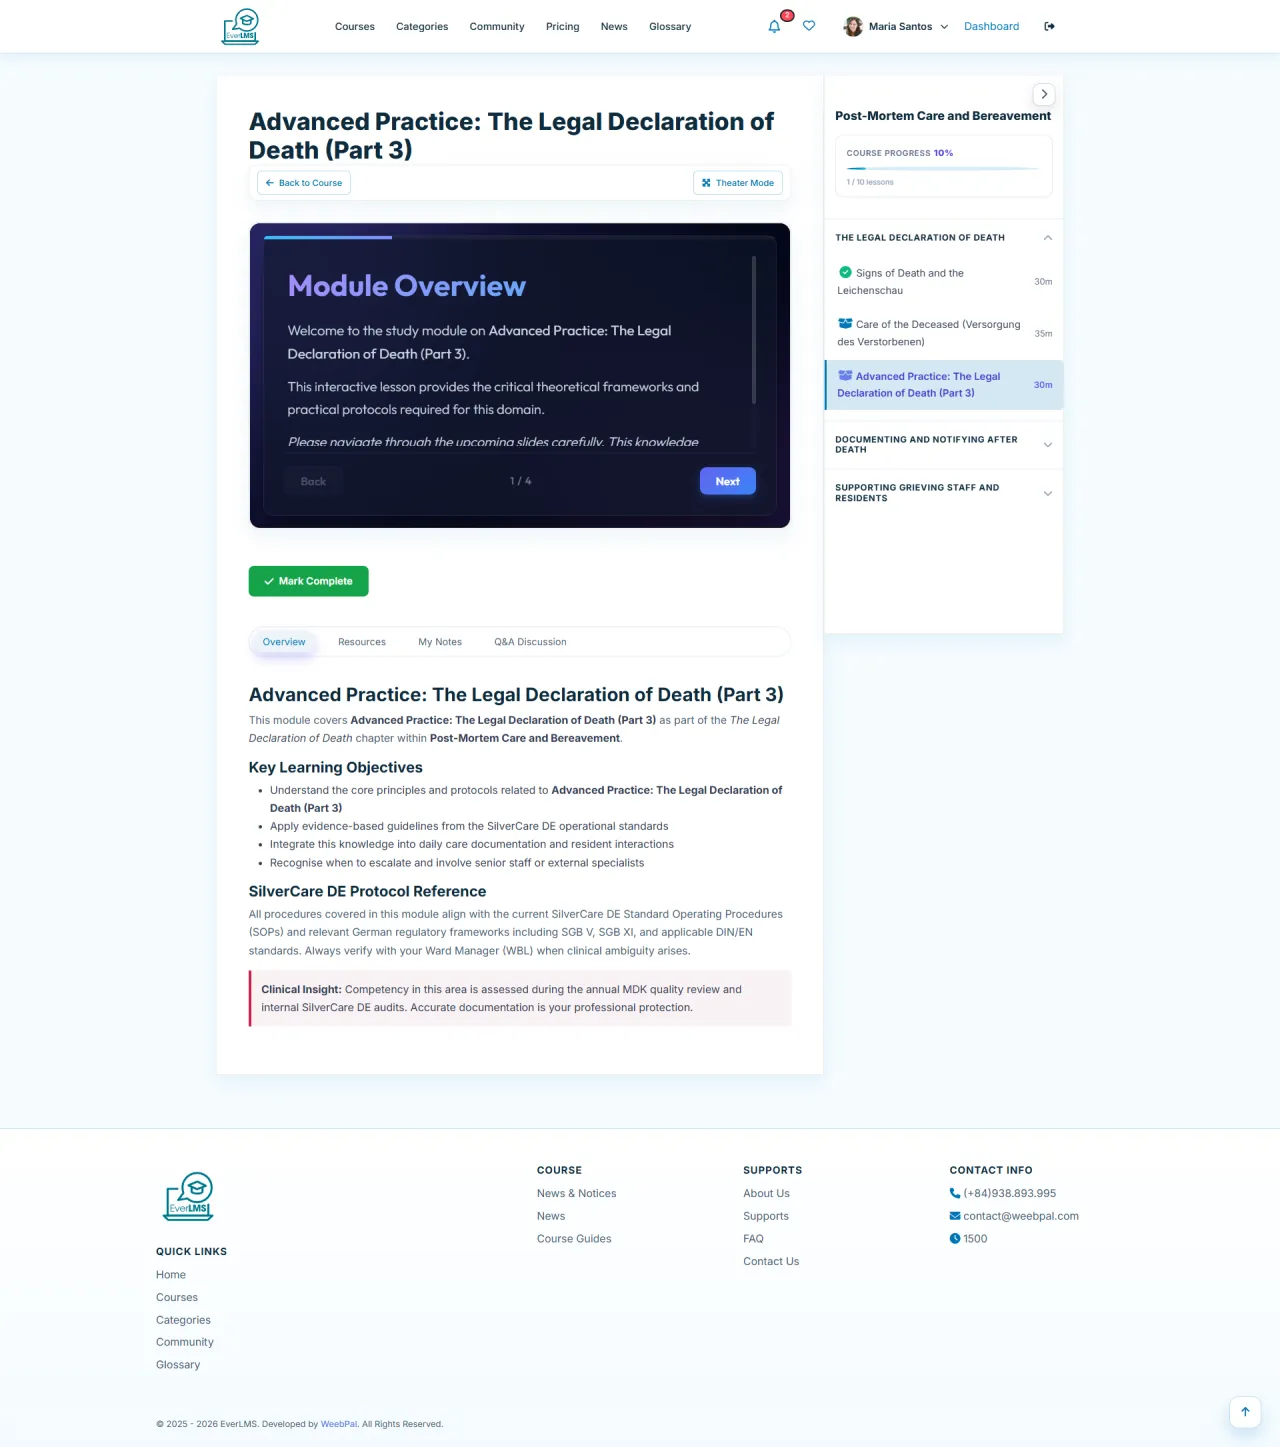
Theater Mode
About this screen: Theater mode expands the video viewing area for better learning focus.
How to activate: Video Player → Theater Mode Icon
- Expands the video player to full horizontal width
- Hides surrounding menus and content
- Ideal for large screens or TVs
- Click the icon again to exit Theater Mode
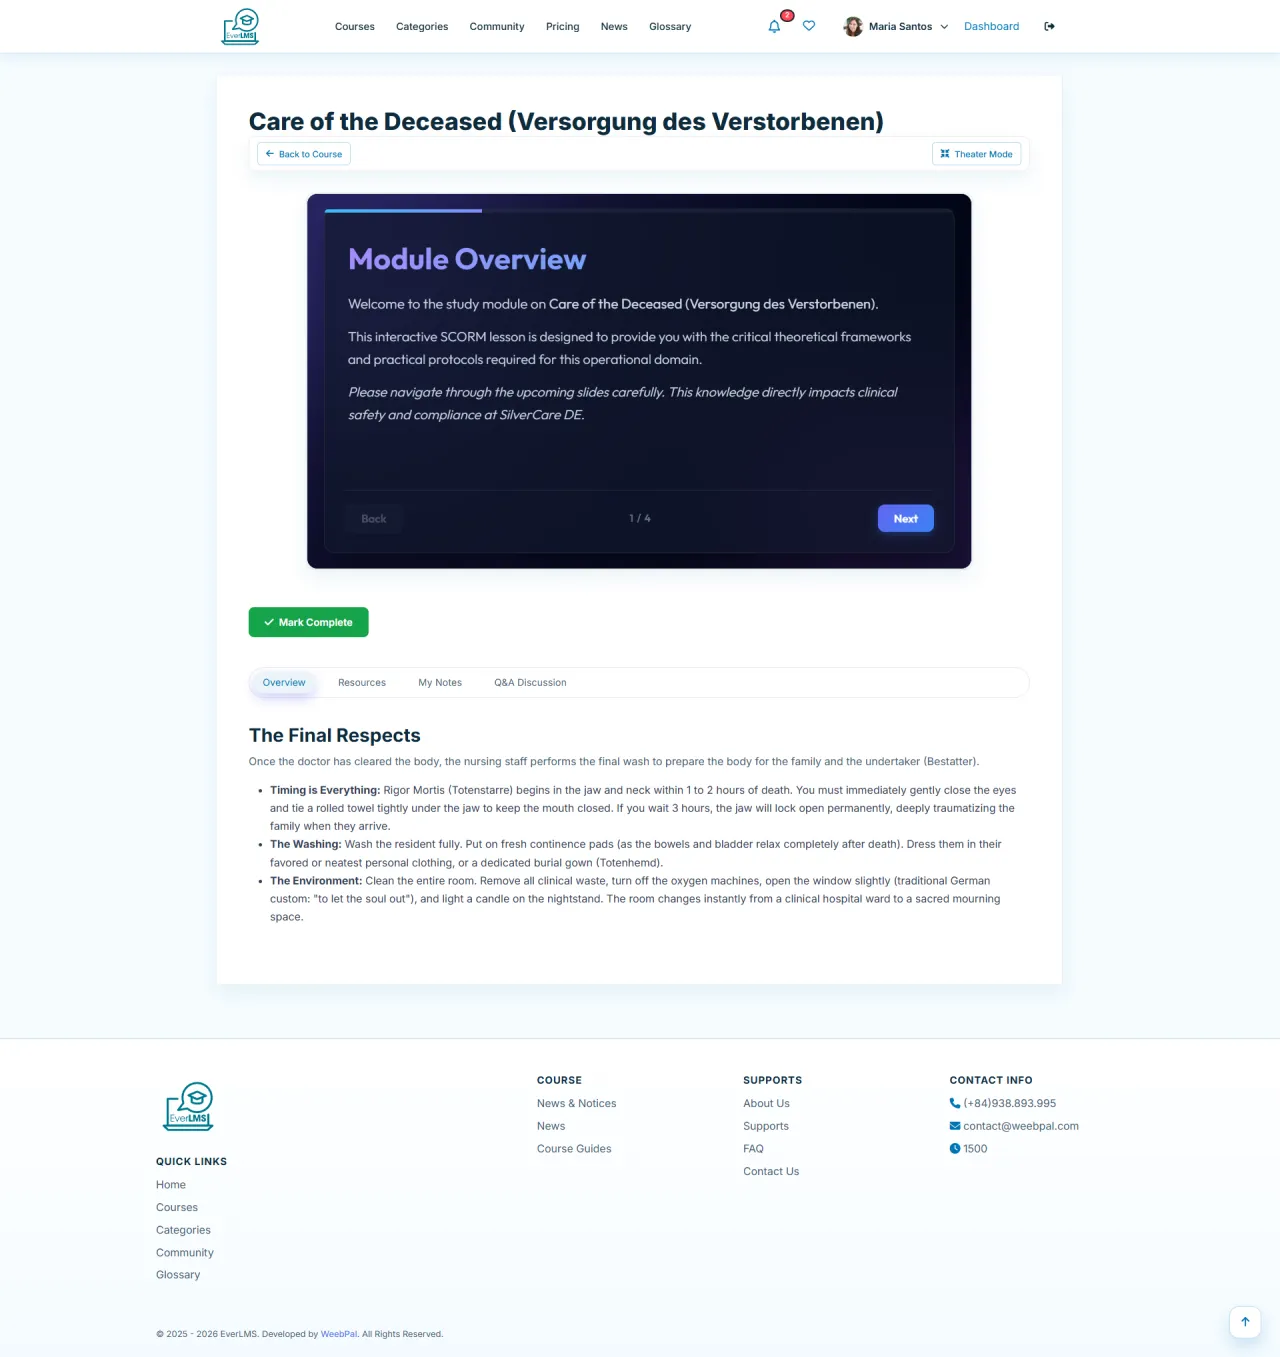
Mark Lesson Complete
About this screen: Students can mark lessons as complete to track their progress.
How to do it: End of lesson → Mark Complete
- Click Mark Complete after finishing the lesson
- The system automatically updates the course progress %
- Completed lessons show a ✓ checkmark in the sidebar
- Complete all lessons to receive your certificate
Lesson Notes
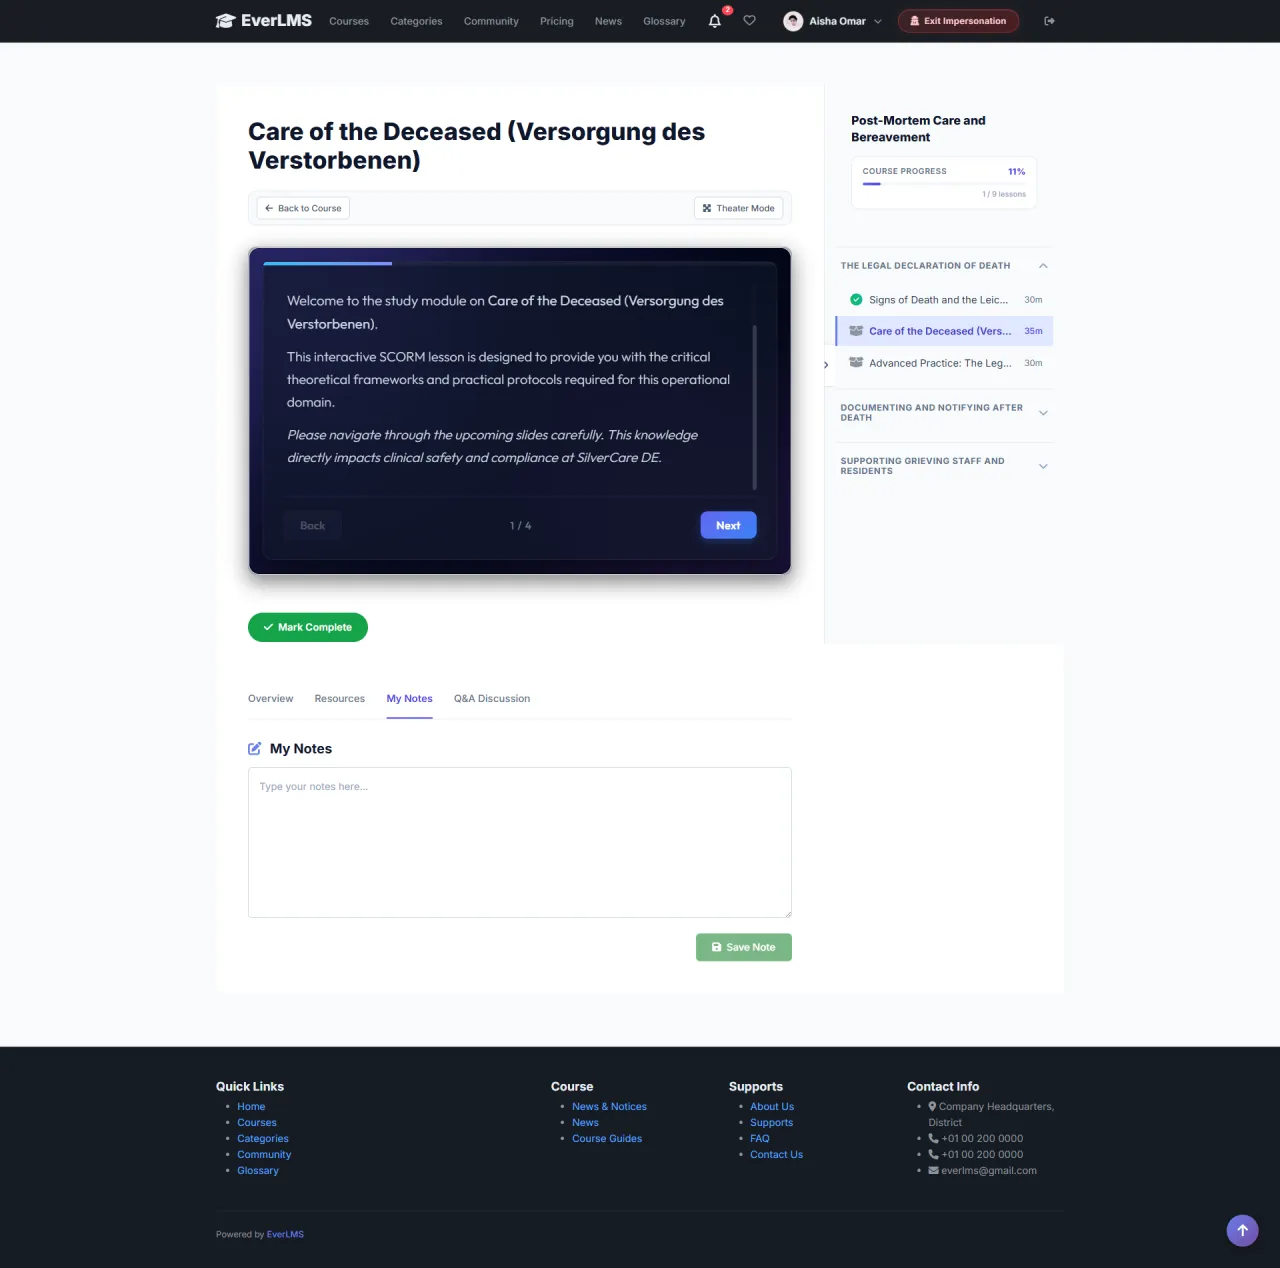
About this screen: The note-taking feature allows you to take notes directly while watching lessons.
How to use: Video Player → Notes Tab
- Notes are saved automatically for each lesson
- Notes include timestamps (time markers in the video)
- Click a timestamp to jump back to that point in the video
- Export notes to a file for later review
Q&A: Lesson Discussion
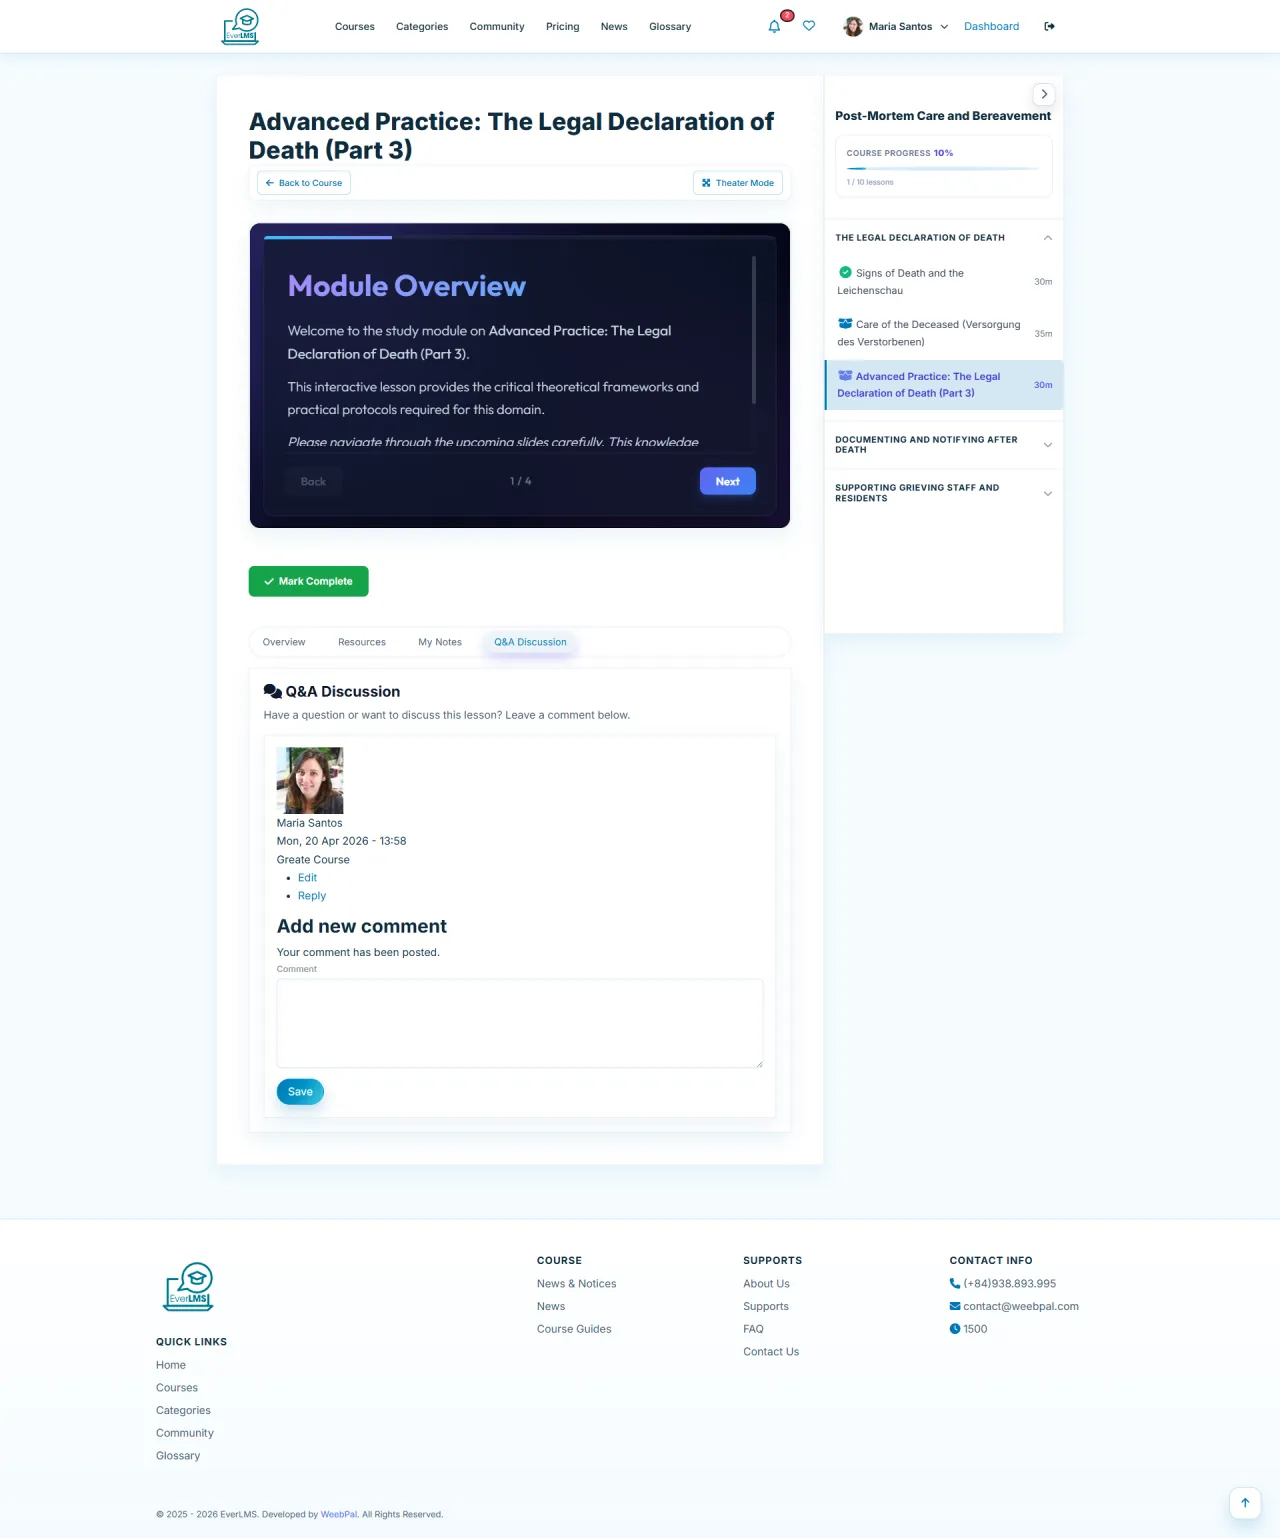
About this screen: The Q&A tab lets students ask questions and discuss lesson content directly within the lesson player.
Navigation: Lesson Player → Q&A Tab
- Post questions about the lesson content
- View and upvote questions from other students
- Instructors respond to questions directly in the thread
- Search existing Q&A to find answers quickly
Lesson Resources
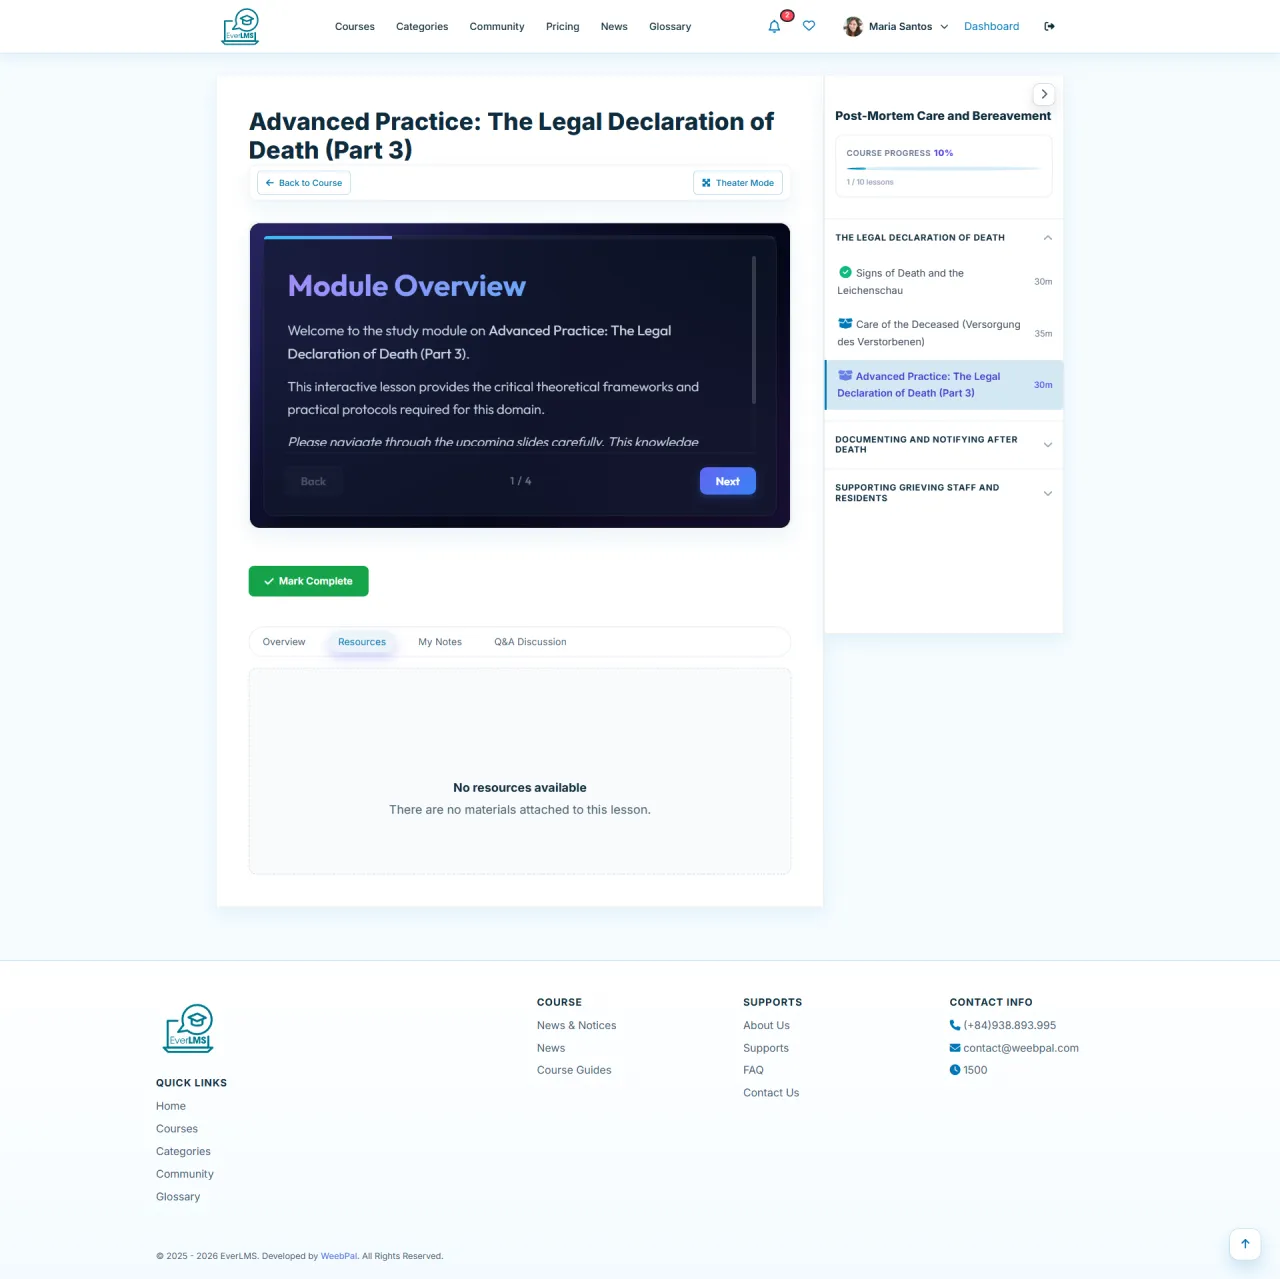
About this screen: The Resources tab displays downloadable materials attached to the lesson, accessible directly in the player.
Navigation: Lesson Player → Resources Tab
- Download attached files: PDF, slides, workbooks
- Materials are organized per lesson
- Study offline using downloaded resources
- Only enrolled students can access lesson materials
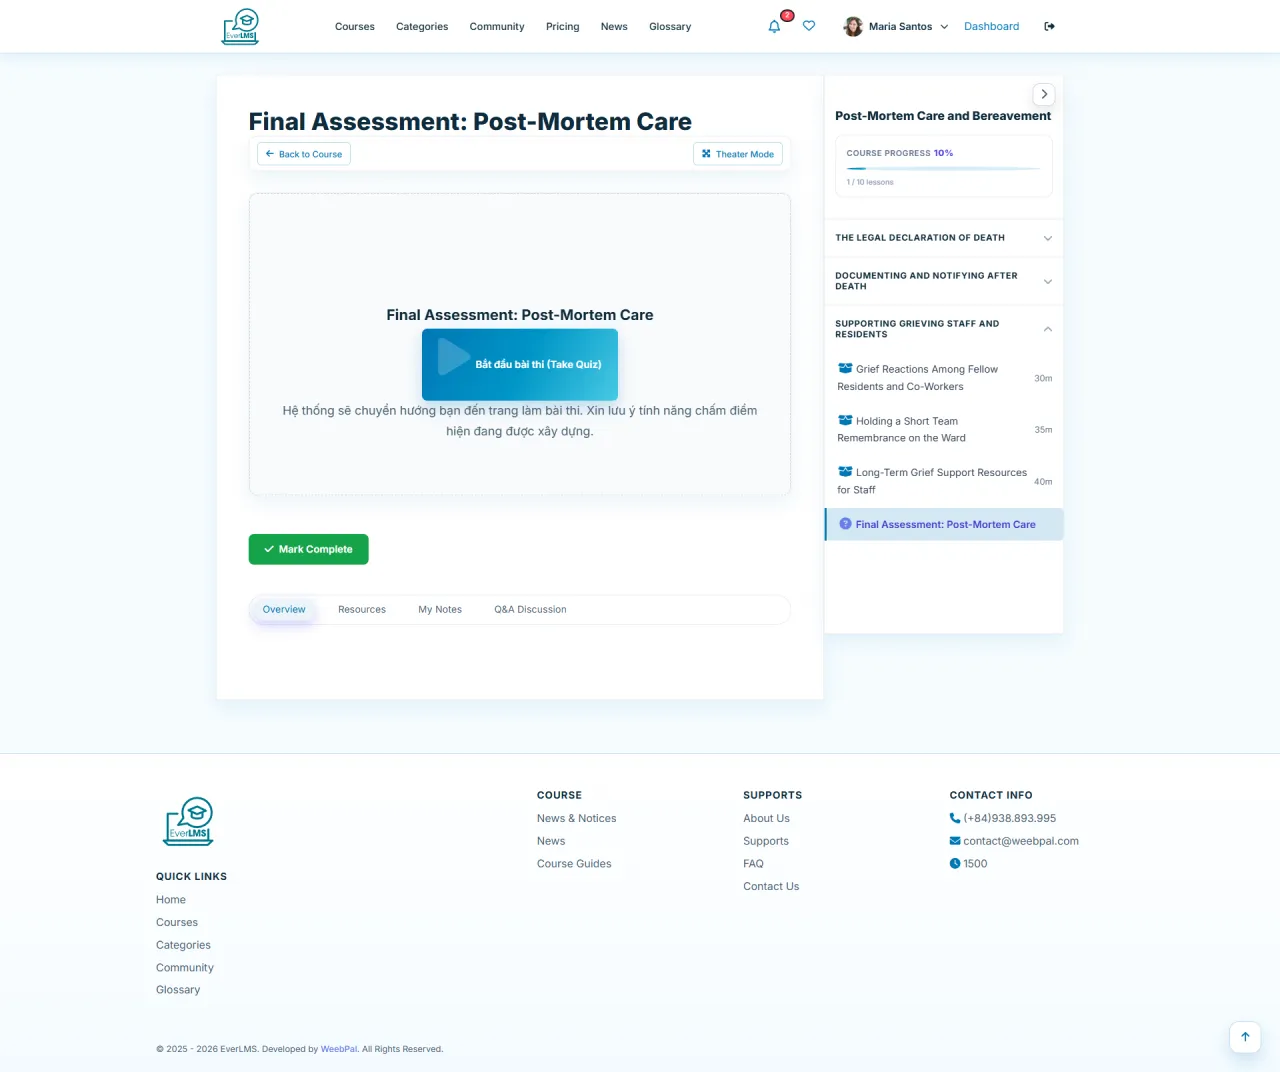
Quiz in Lesson
About this screen: When a lesson is of type Quiz, the lesson player shows the quiz card inline, and students click to enter the full quiz experience.
Navigation: My Courses → Continue → Quiz Lesson
- The lesson sidebar marks quiz lessons with a quiz icon distinct from video/text lessons
- Click Start Quiz to enter the quiz attempt screen
- Quiz progress is tracked the same as other lesson types
- Completing the quiz marks the lesson done and unlocks the next content
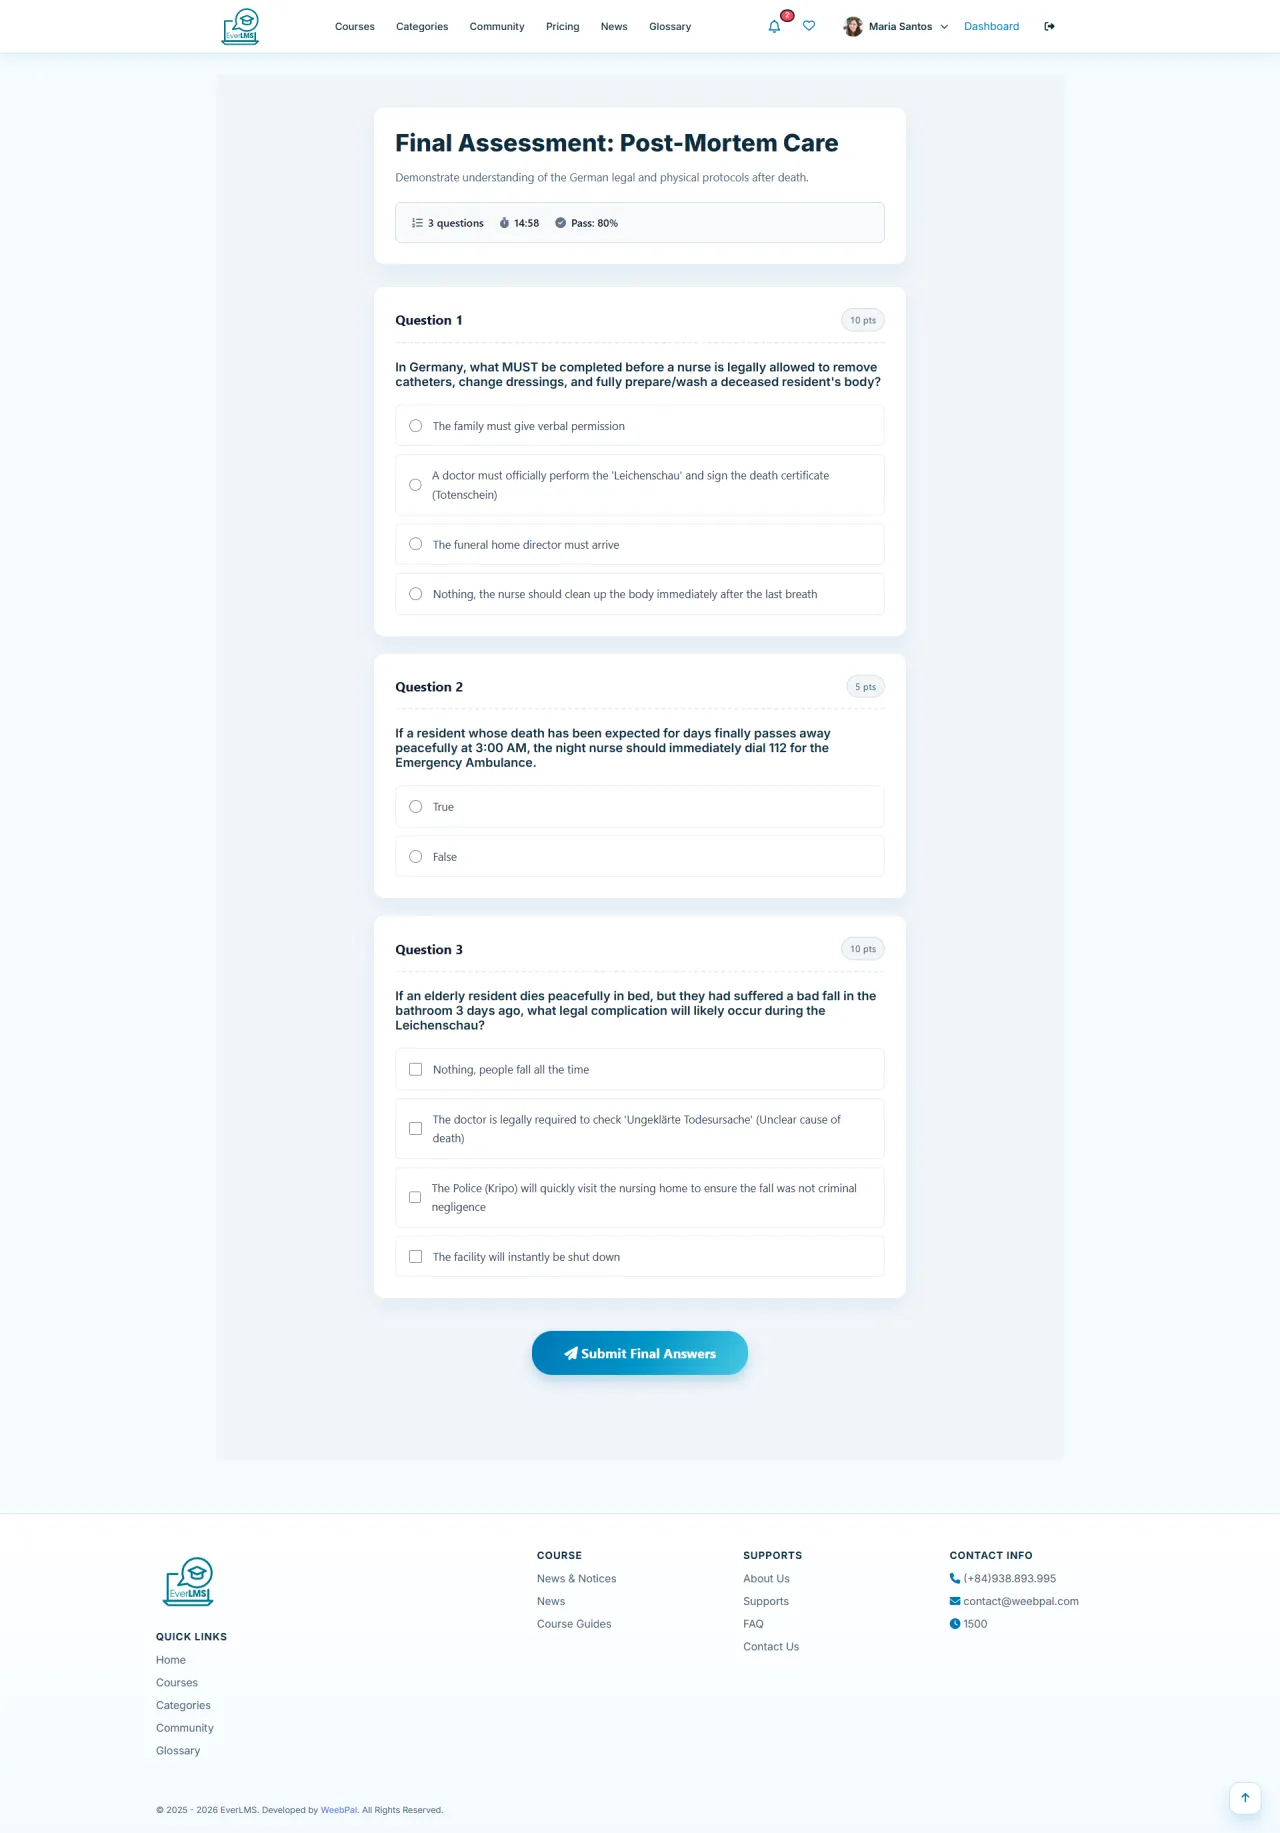
Take a Quiz
About this screen: The integrated quiz system within courses evaluates your knowledge retention.
How to do it: Quiz lesson → Start Quiz
- Read each question carefully before selecting an answer
- The system supports multiple question types (multiple choice, true/false)
- You can go back to previous questions within the same quiz
- Click Submit when finished to submit your quiz
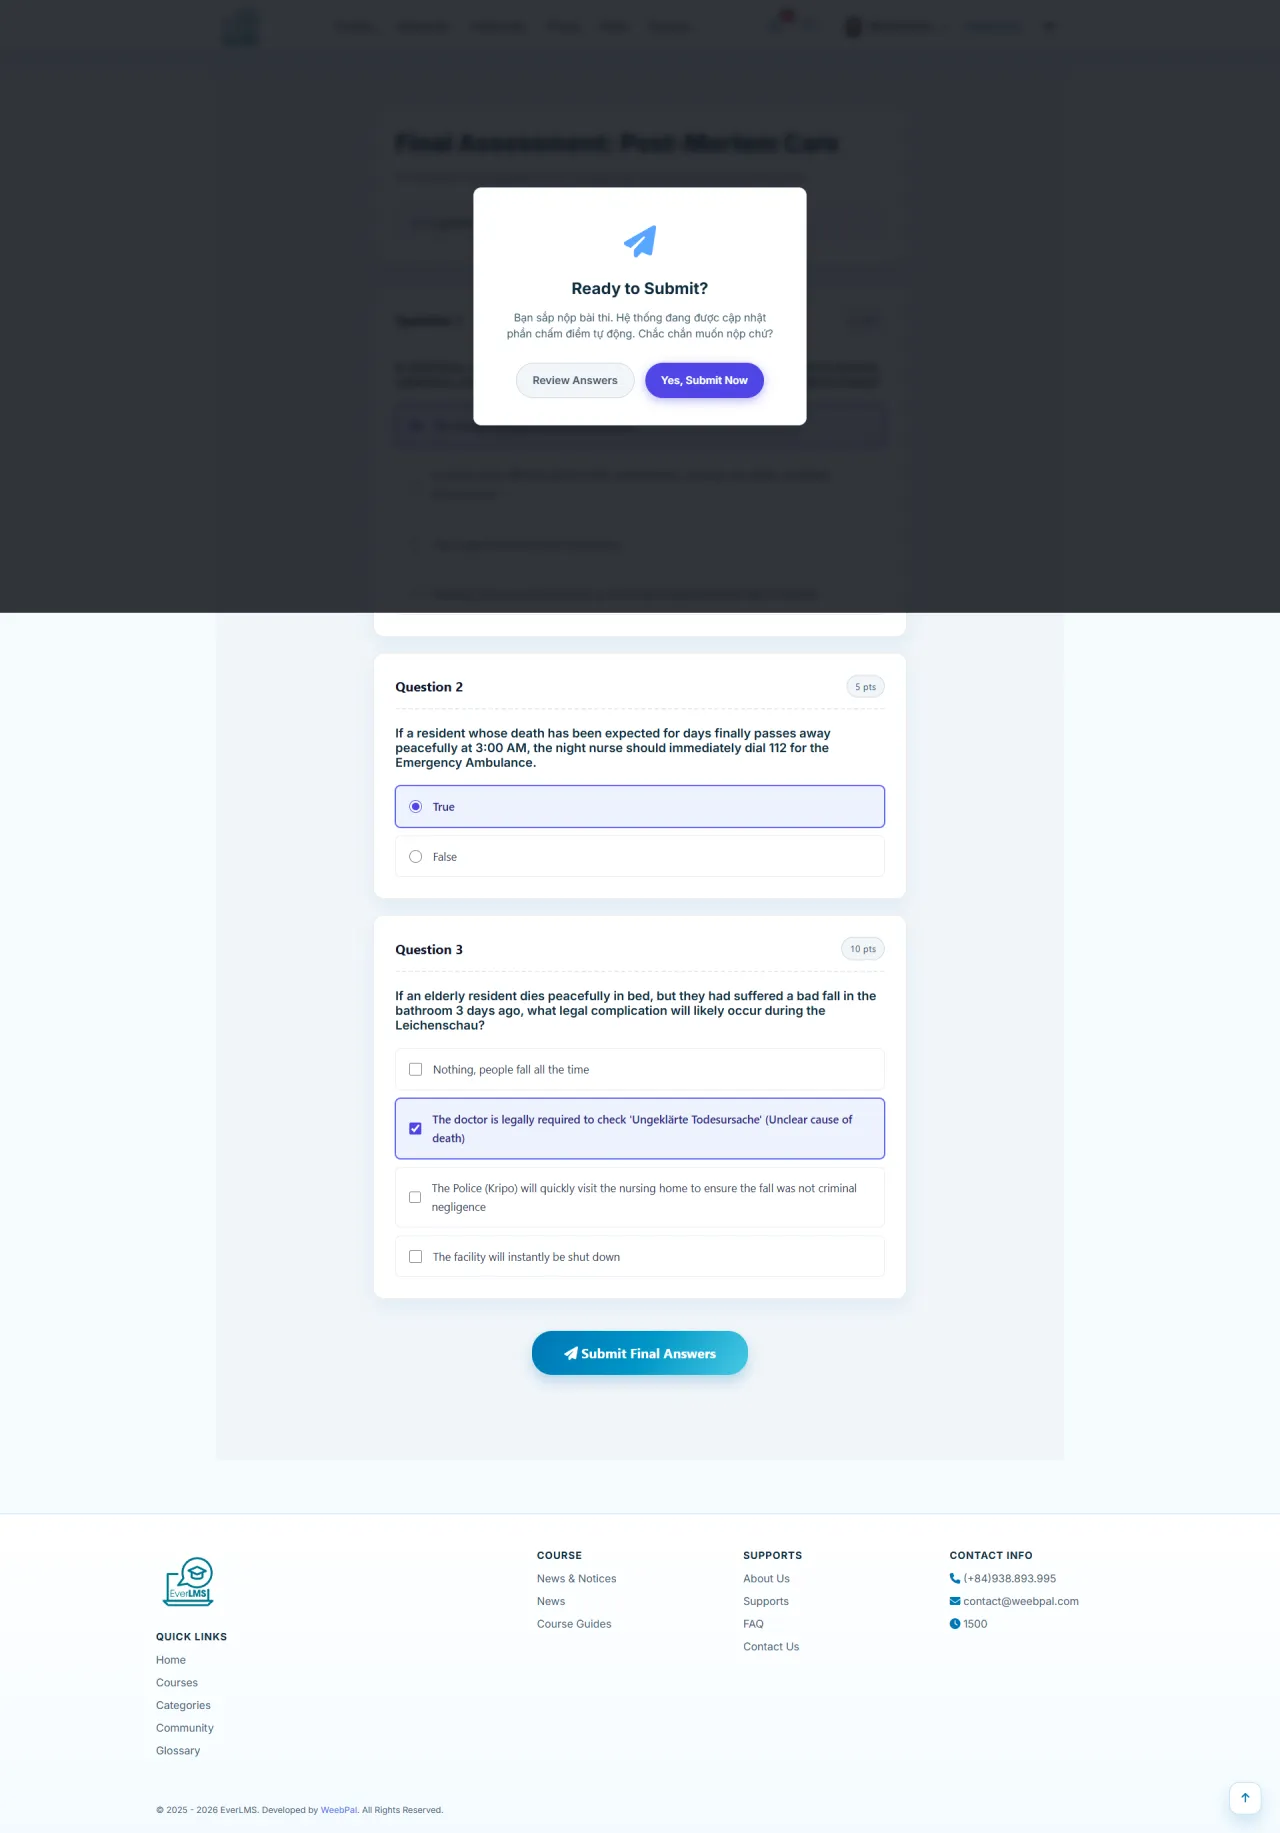
Submit Quiz
About this screen: After completing all questions, the submission step confirms your answers and sends the quiz for grading.
How to do it: Quiz → Answer all questions → Submit Quiz
- Review a summary of your answers before final submission
- The system shows unanswered questions, so go back to complete them
- Click Submit Quiz to confirm: the quiz is locked after submission
- Results are calculated and displayed immediately after submission
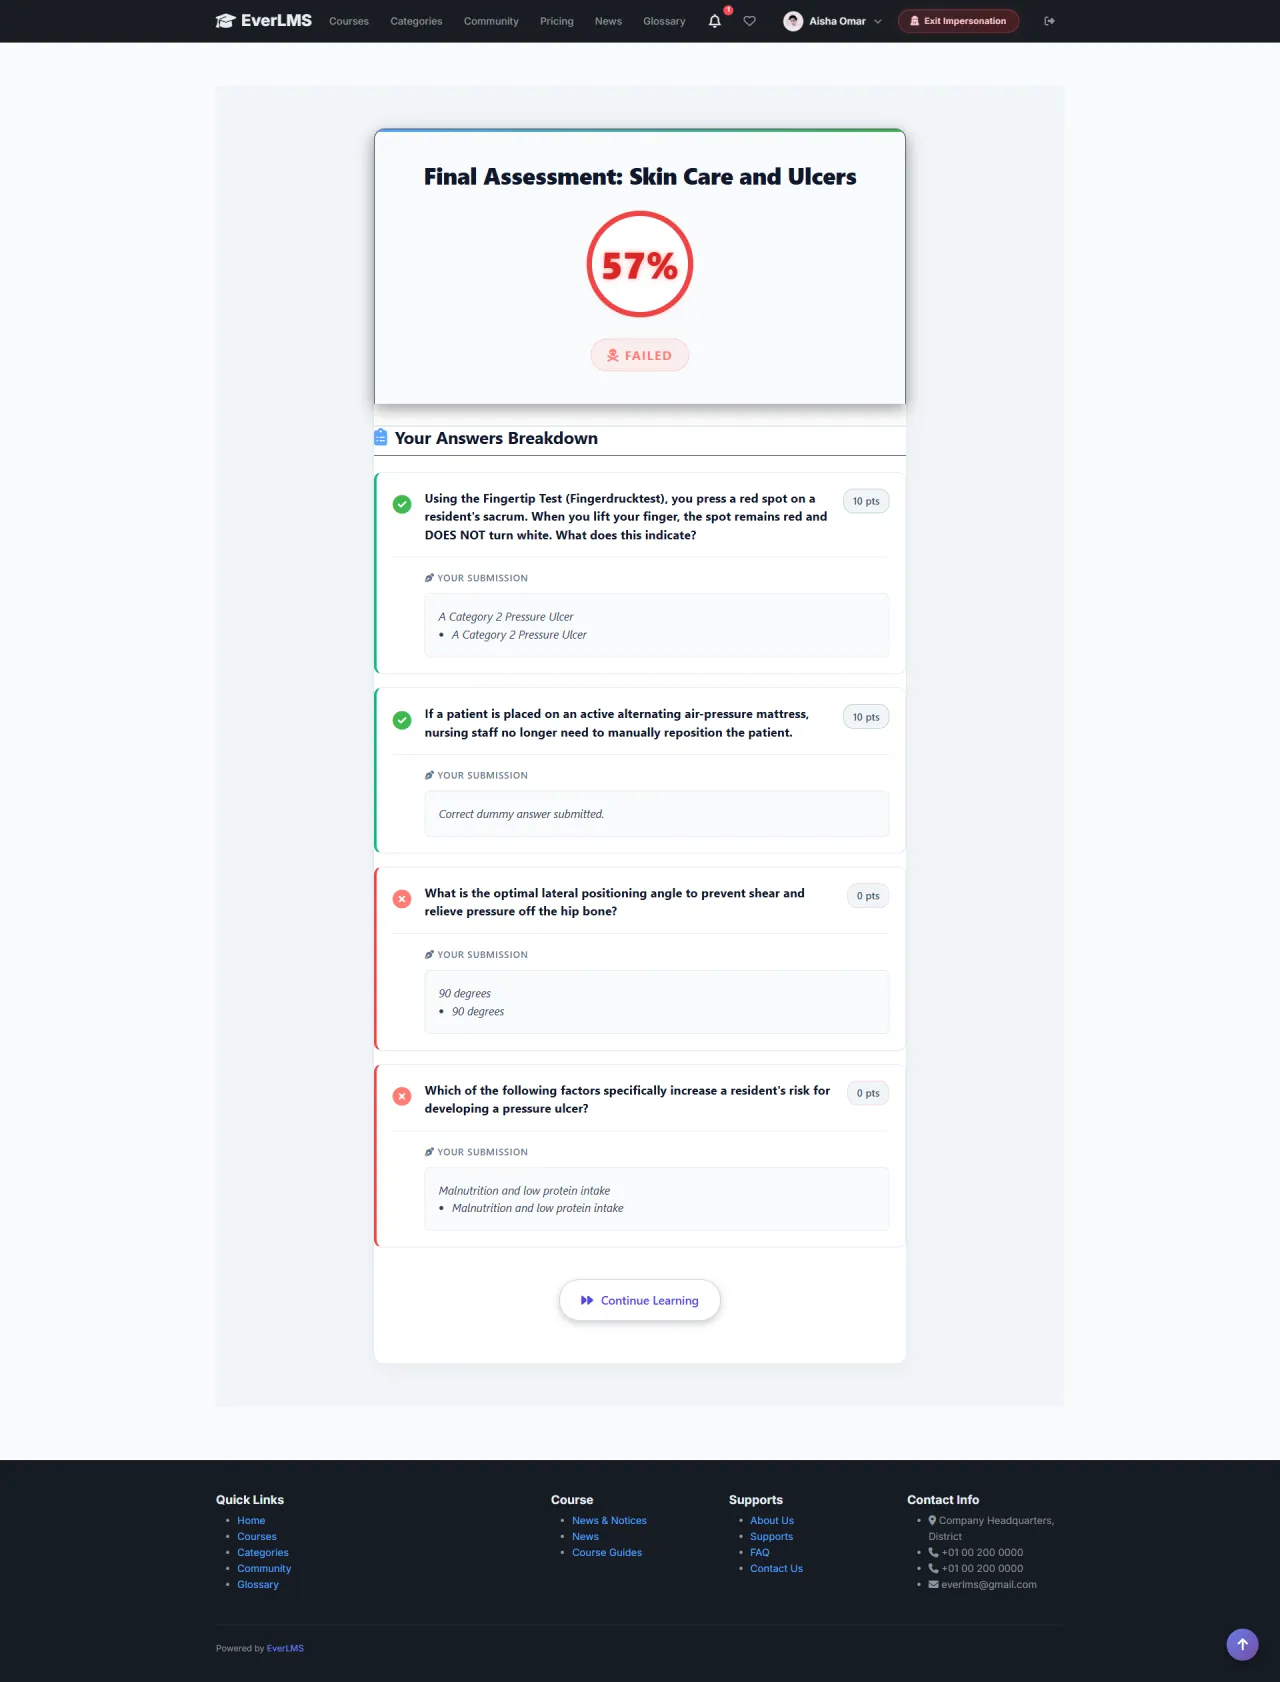
Quiz Results
About this screen: The results page displays your score and allows you to review answers after submission.
Navigation: Account options → Quiz Results
- View your score and correct answer percentage
- Compare results with the minimum passing score
- Review each question and the correct answer
- Retake the quiz if you didn't pass (if allowed)
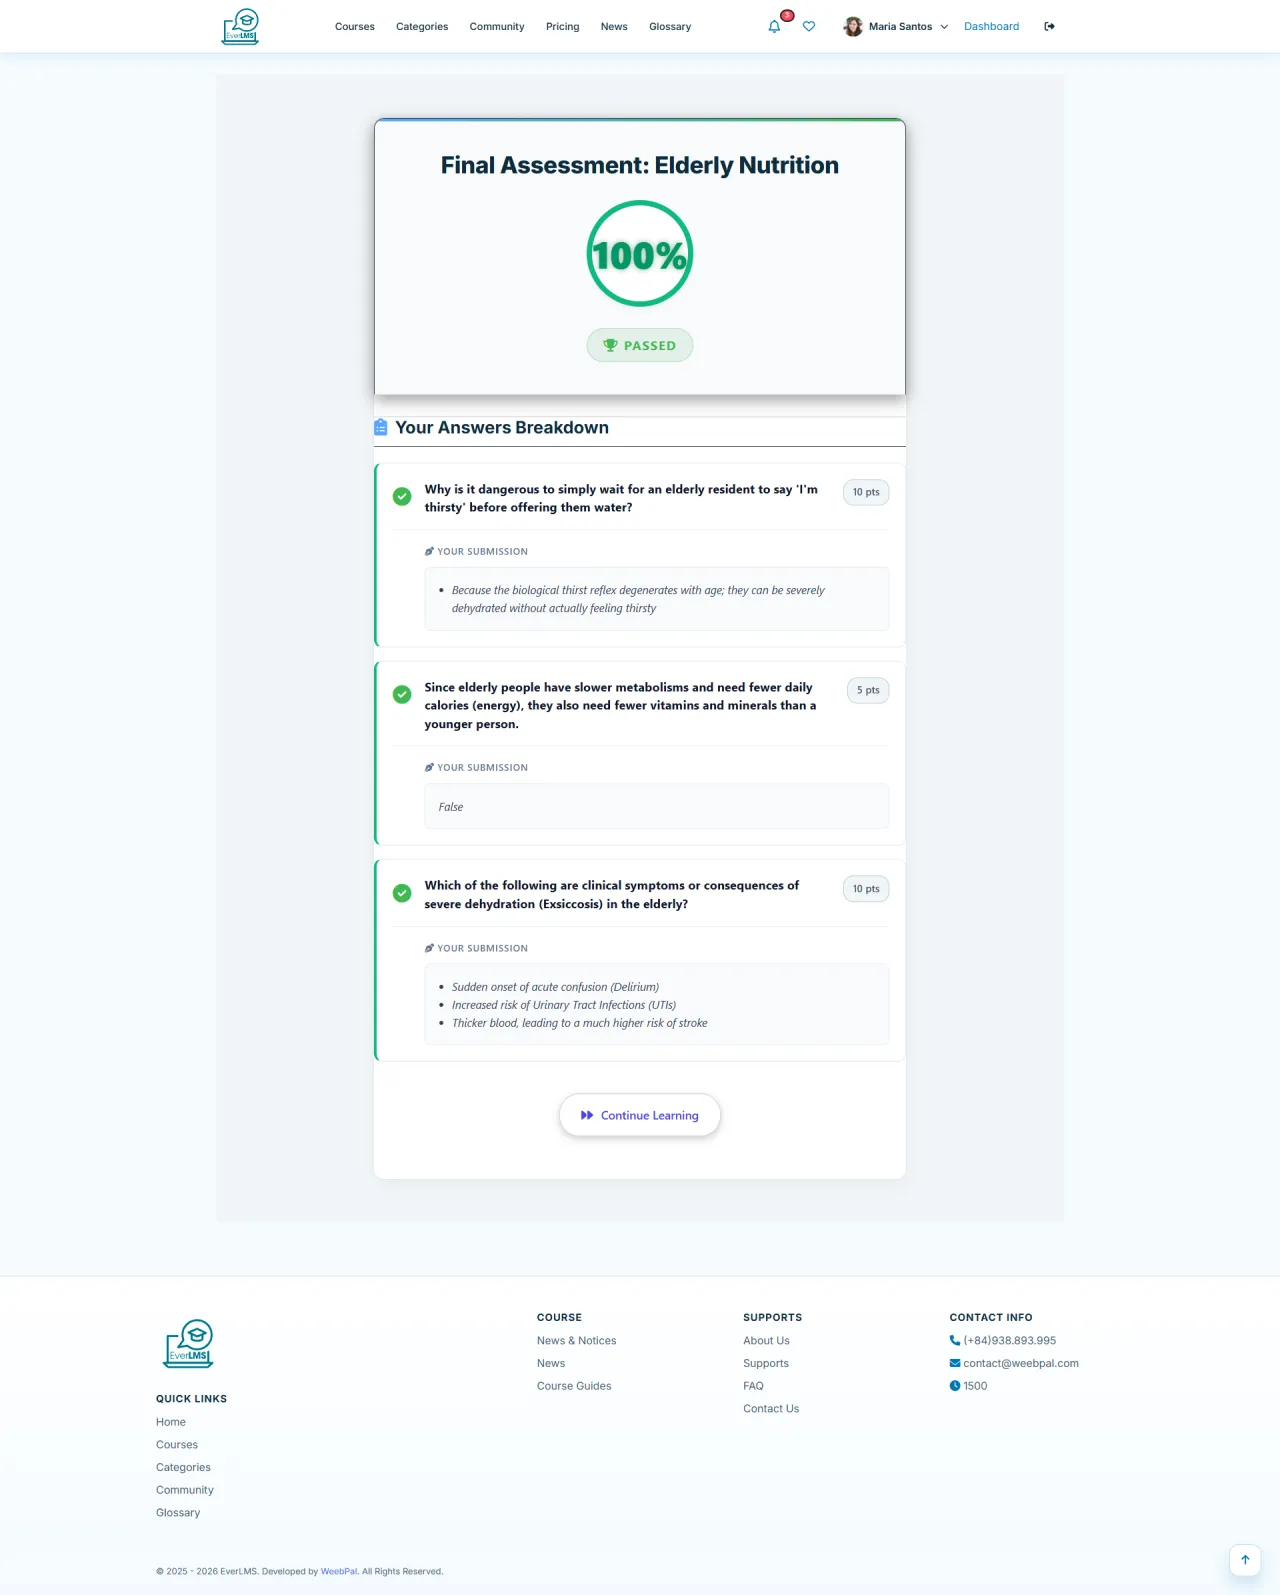
Passing a Quiz
About this screen: The pass result screen confirms you have achieved the required score to advance.
After submitting: Quiz → Submit → Pass Result
- Your final score and Pass status are confirmed
- View the number of correct vs incorrect answers
- Course progress automatically advances to the next lesson
- If this is the final quiz, a certificate may be issued
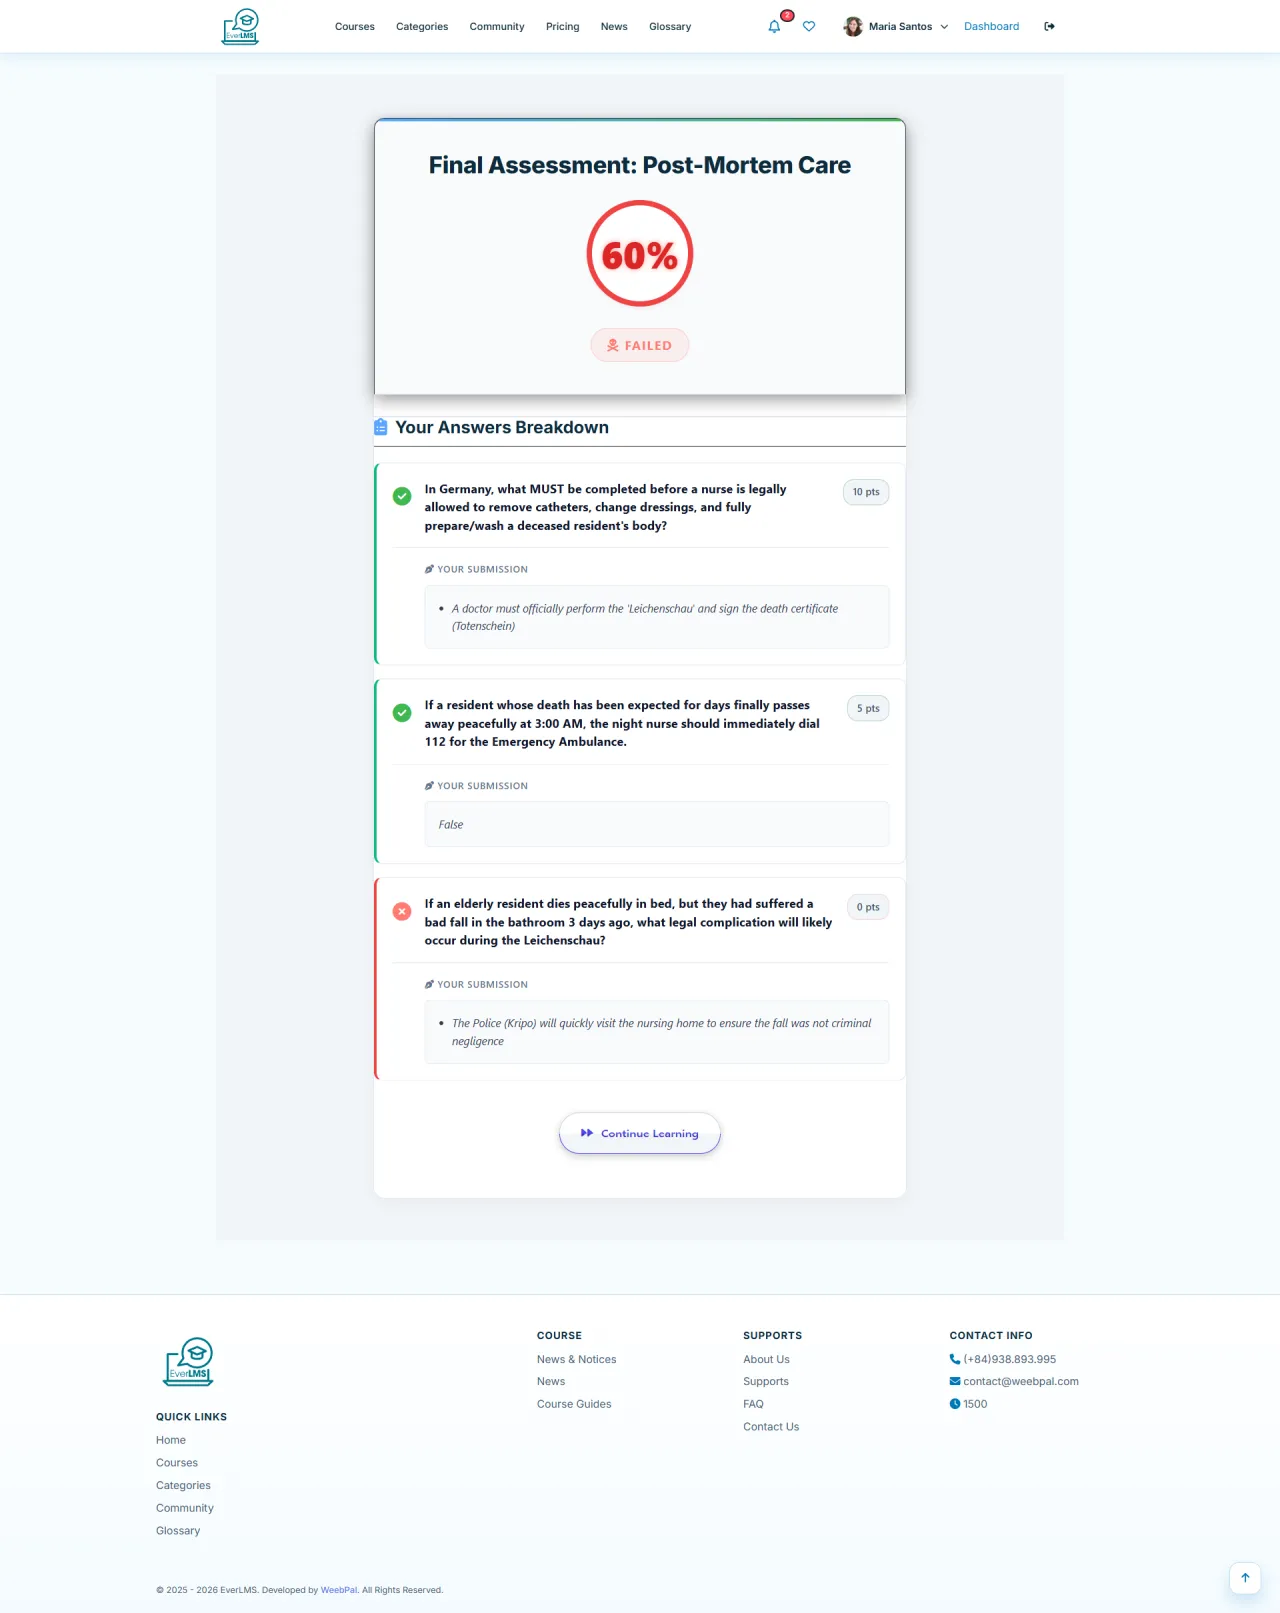
Retaking a Failed Quiz
About this screen: If you do not reach the passing score, the system shows a fail screen with a retry option.
After submitting: Quiz → Submit → Fail Result → Retake
- See your score and Fail status with the required passing score shown
- Review which questions were answered incorrectly
- Click Retake Quiz to attempt again (if retakes are allowed)
- Study the weak areas before retrying
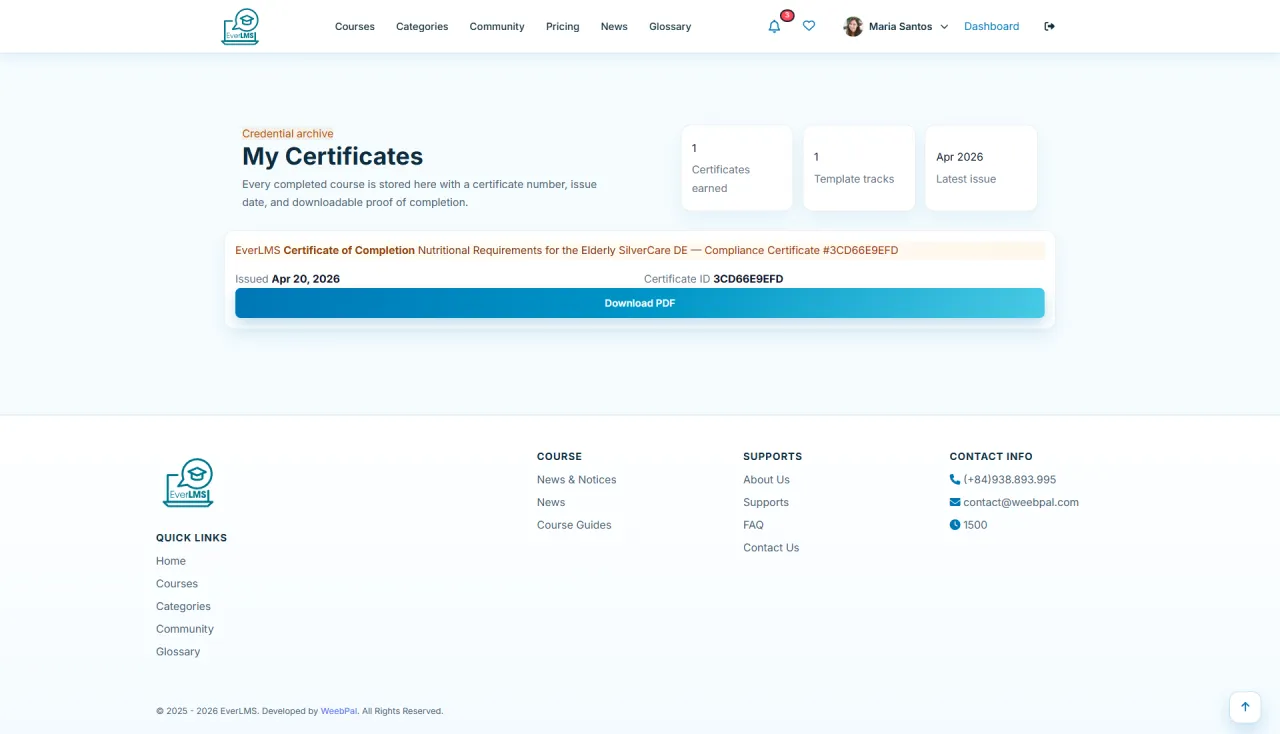
My Certificates
About this screen: The My Certificates page displays all certificates earned after completing courses.
Navigation: Account options → My Certificates
- View the list of certificates received
- Download certificates in PDF or image format
- Each certificate has a unique verification code
- Share certificates on LinkedIn or social media
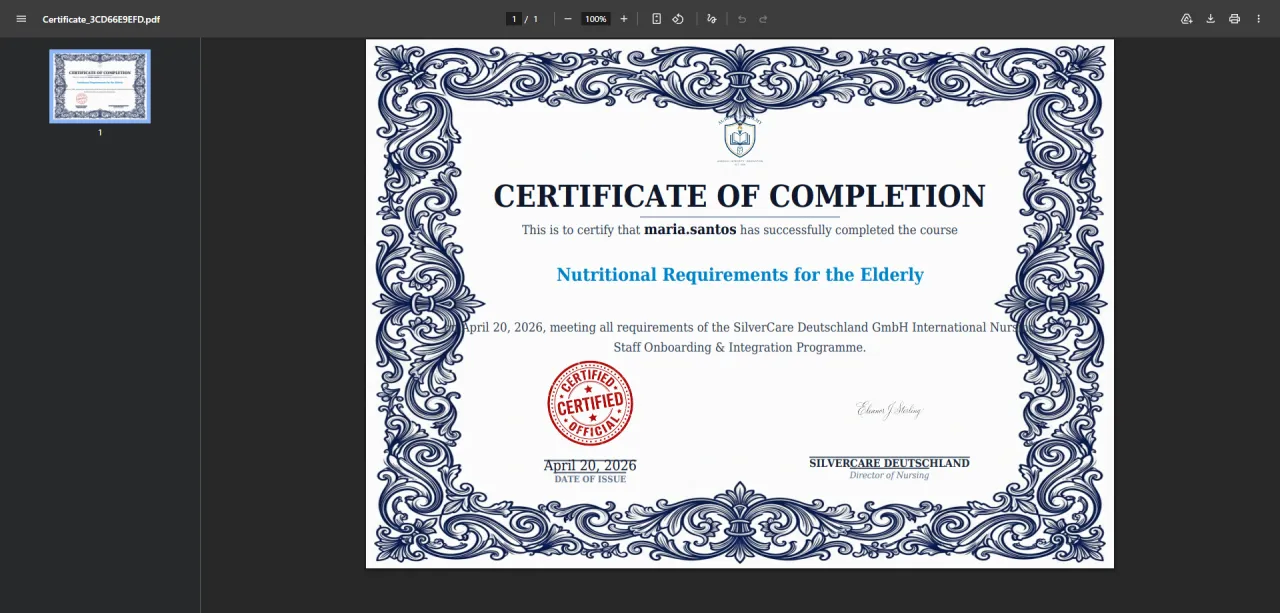
Download Certificate
About this screen: Download your earned certificate as a PDF directly from the My Certificates page.
Navigation: Account options → My Certificates → Download
- Click Download on the certificate card
- Certificate is exported as a PDF file
- Contains your name, course title, issue date, and verification code
- Print or share on LinkedIn to showcase your achievement
Add to Wishlist
About this screen: Save any course to your personal wishlist directly from the course detail page.
Navigation: Courses → Course Details → ❤️ Heart Icon
- Click the heart icon on the course card or detail page
- Course is instantly saved, and the heart turns red to confirm
- Access your full list via My Wishlist in the account menu
- Remove courses from the list when no longer interested
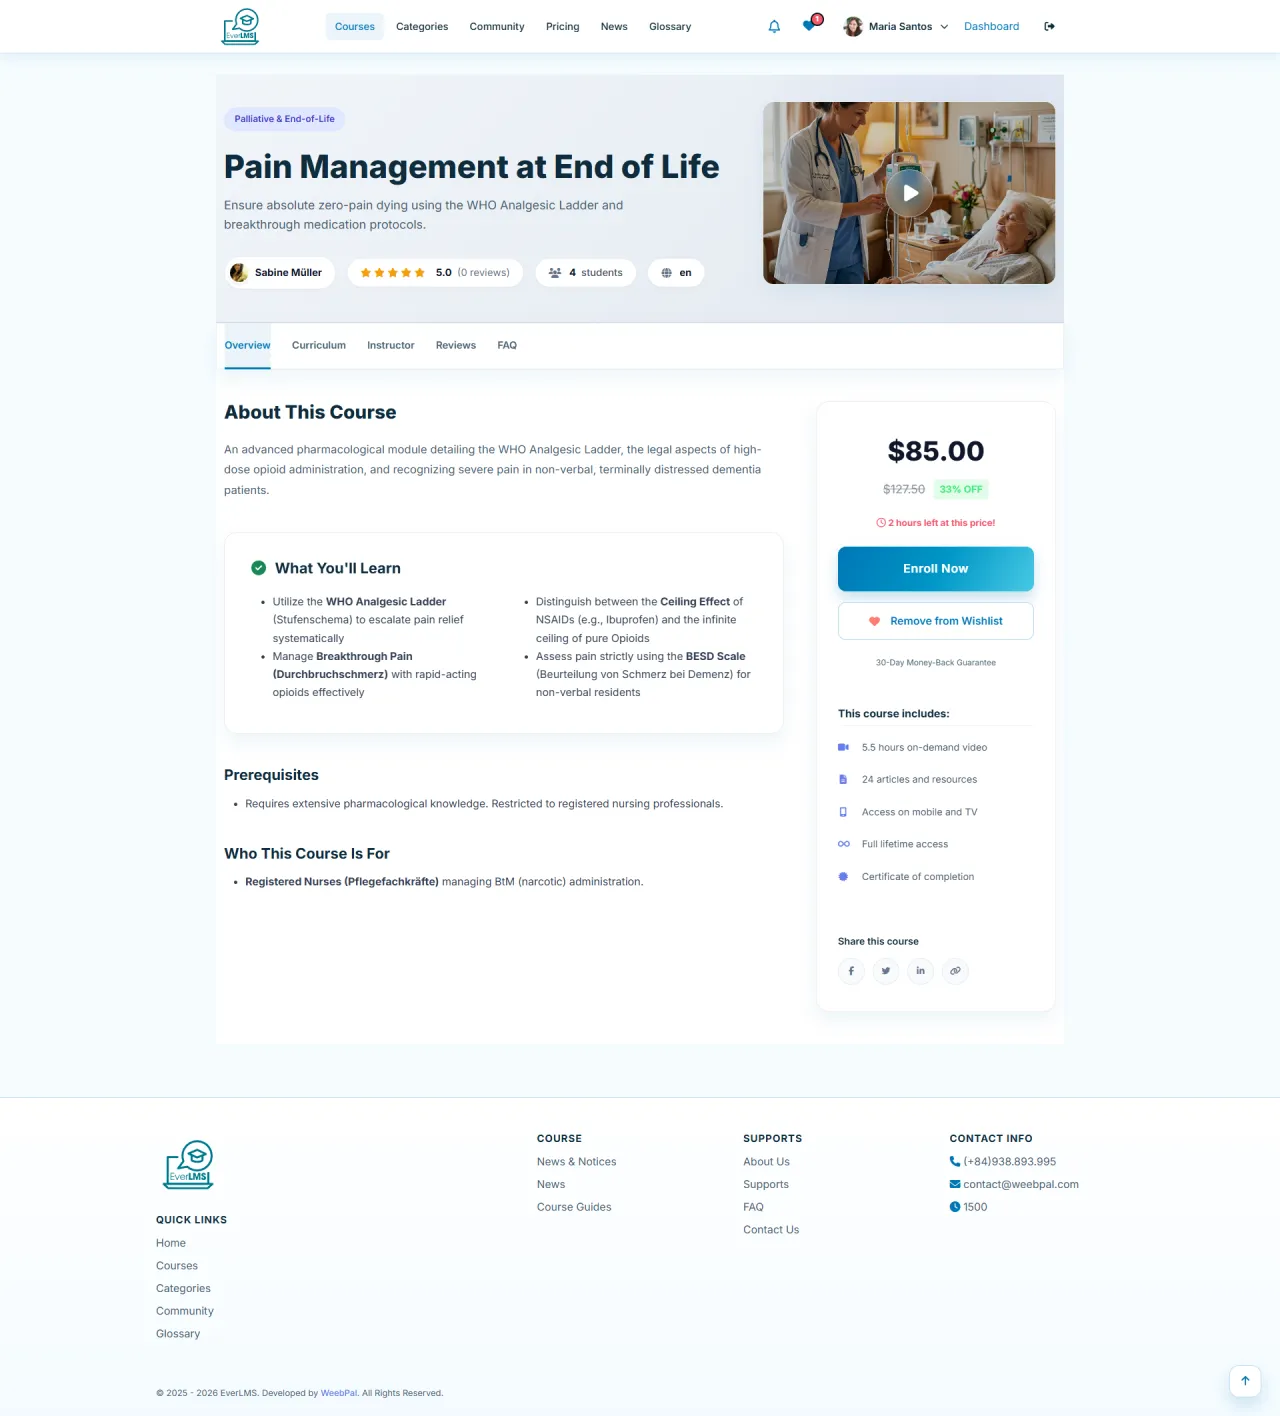
My Wishlist
About this screen: The My Wishlist page displays all courses you have saved for future enrollment.
Navigation: Account menu → My Wishlist
- View all saved courses in one place
- Click Enroll Now to purchase or enroll directly
- Remove courses no longer of interest
- Compare and decide which course to start next
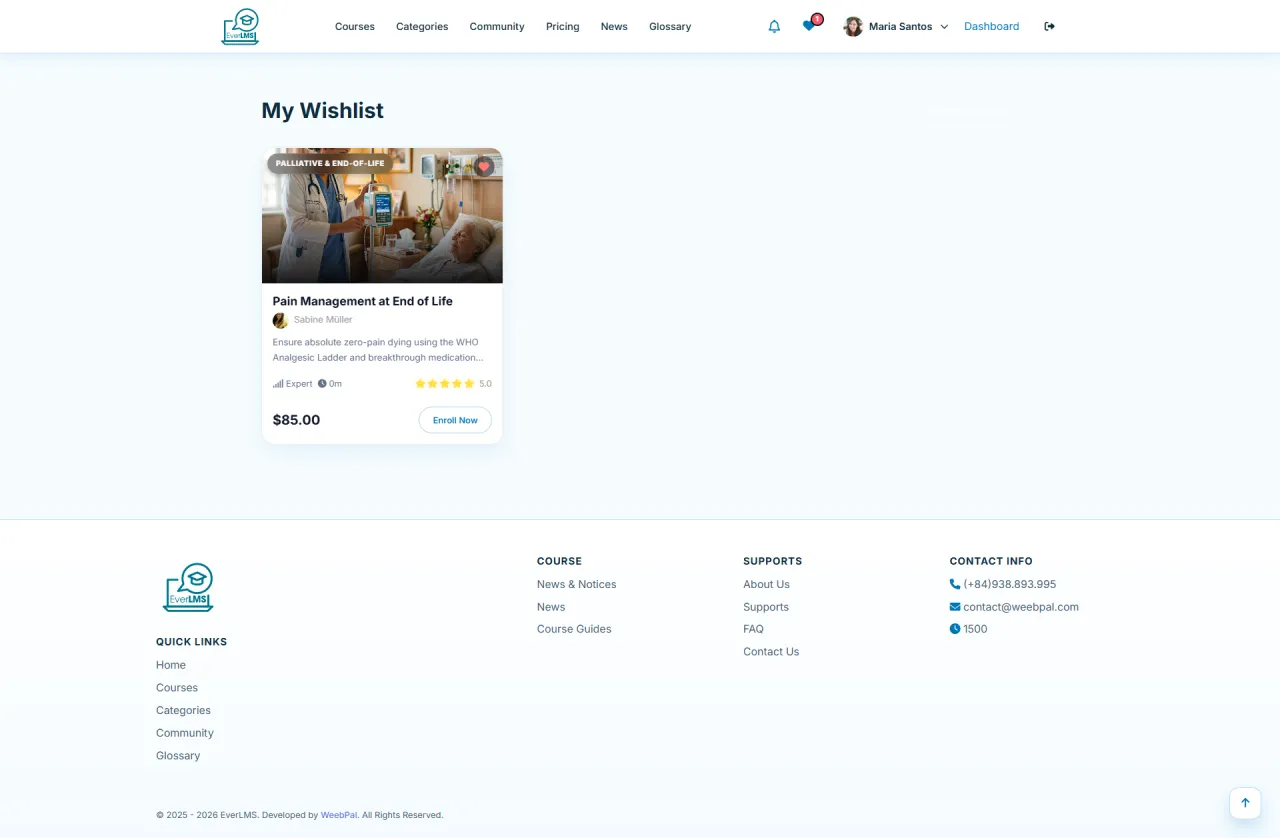
My Notes
About this screen: My Notes aggregates all lesson notes written across every enrolled course into one searchable list.
Navigation: Account menu → My Notes
- View all notes organised by course and lesson
- Search notes by keyword to find information quickly
- Click any entry to jump directly to the lesson it was written in
- Edit or delete individual notes from this page
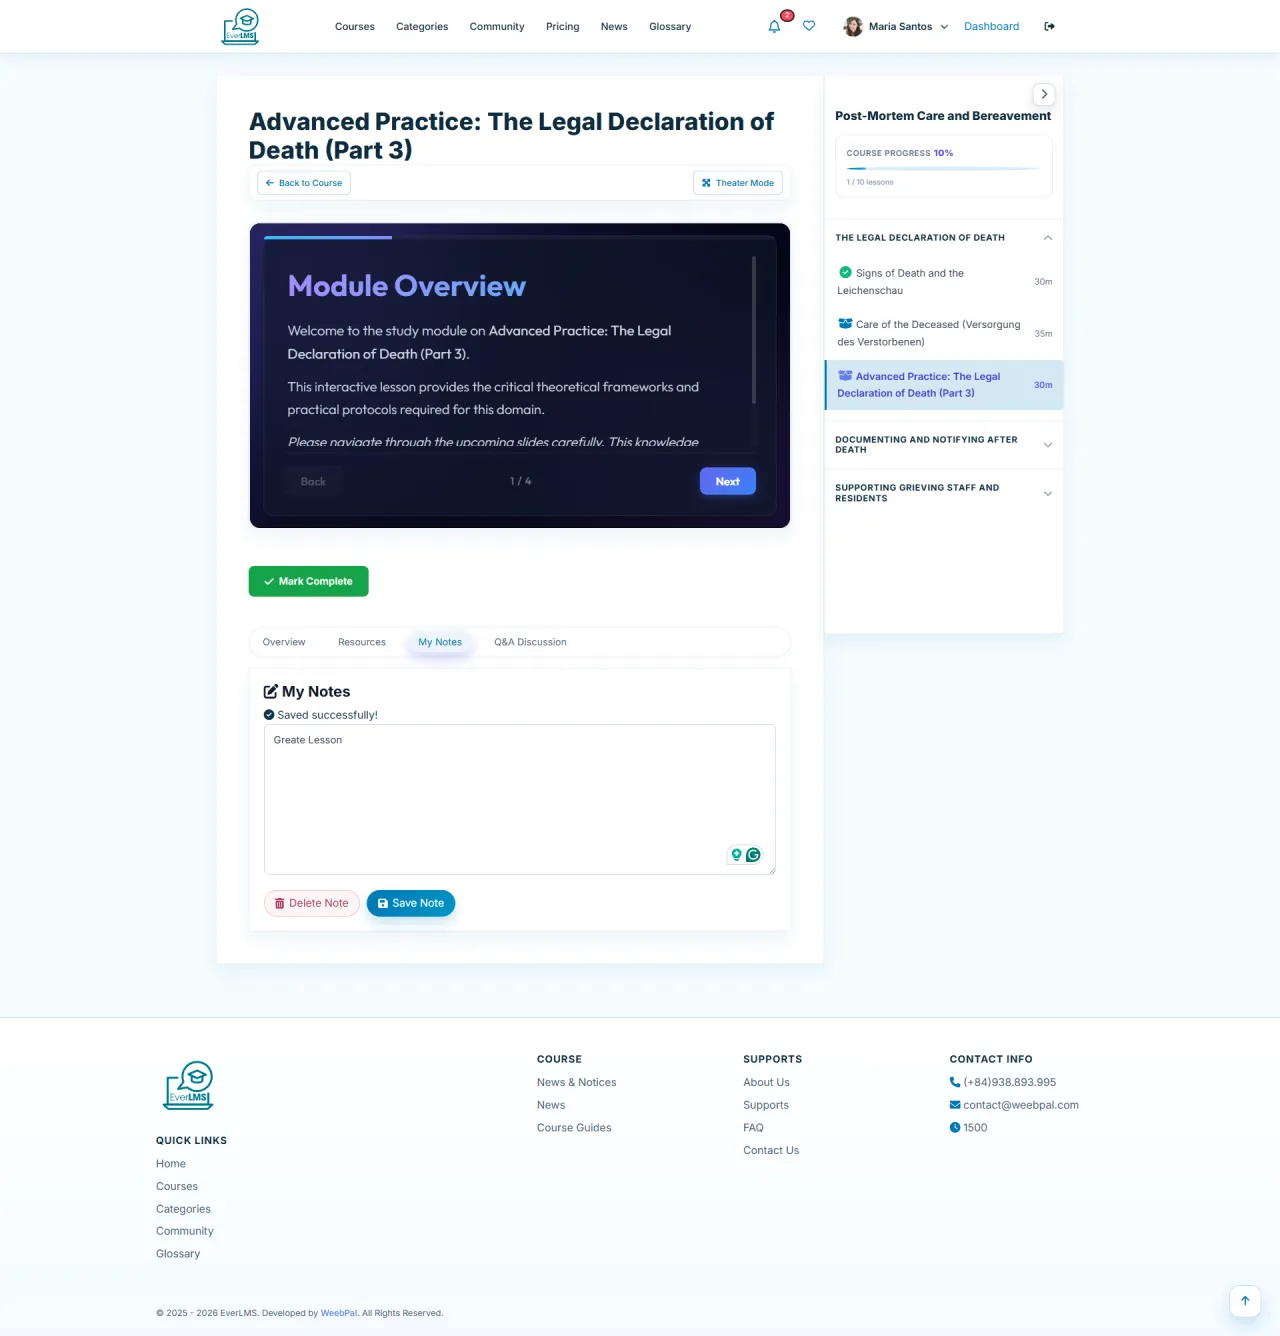
My Quiz Results
About this screen: The My Quiz Results page provides a historical record of all quiz attempts across every enrolled course.
Navigation: Account menu → My Quiz Results
- View all past quiz attempts with date, score, and pass/fail status
- Filter by course or quiz name
- Click any entry to see the detailed answer review for that attempt
- Track your improvement trend across multiple retakes
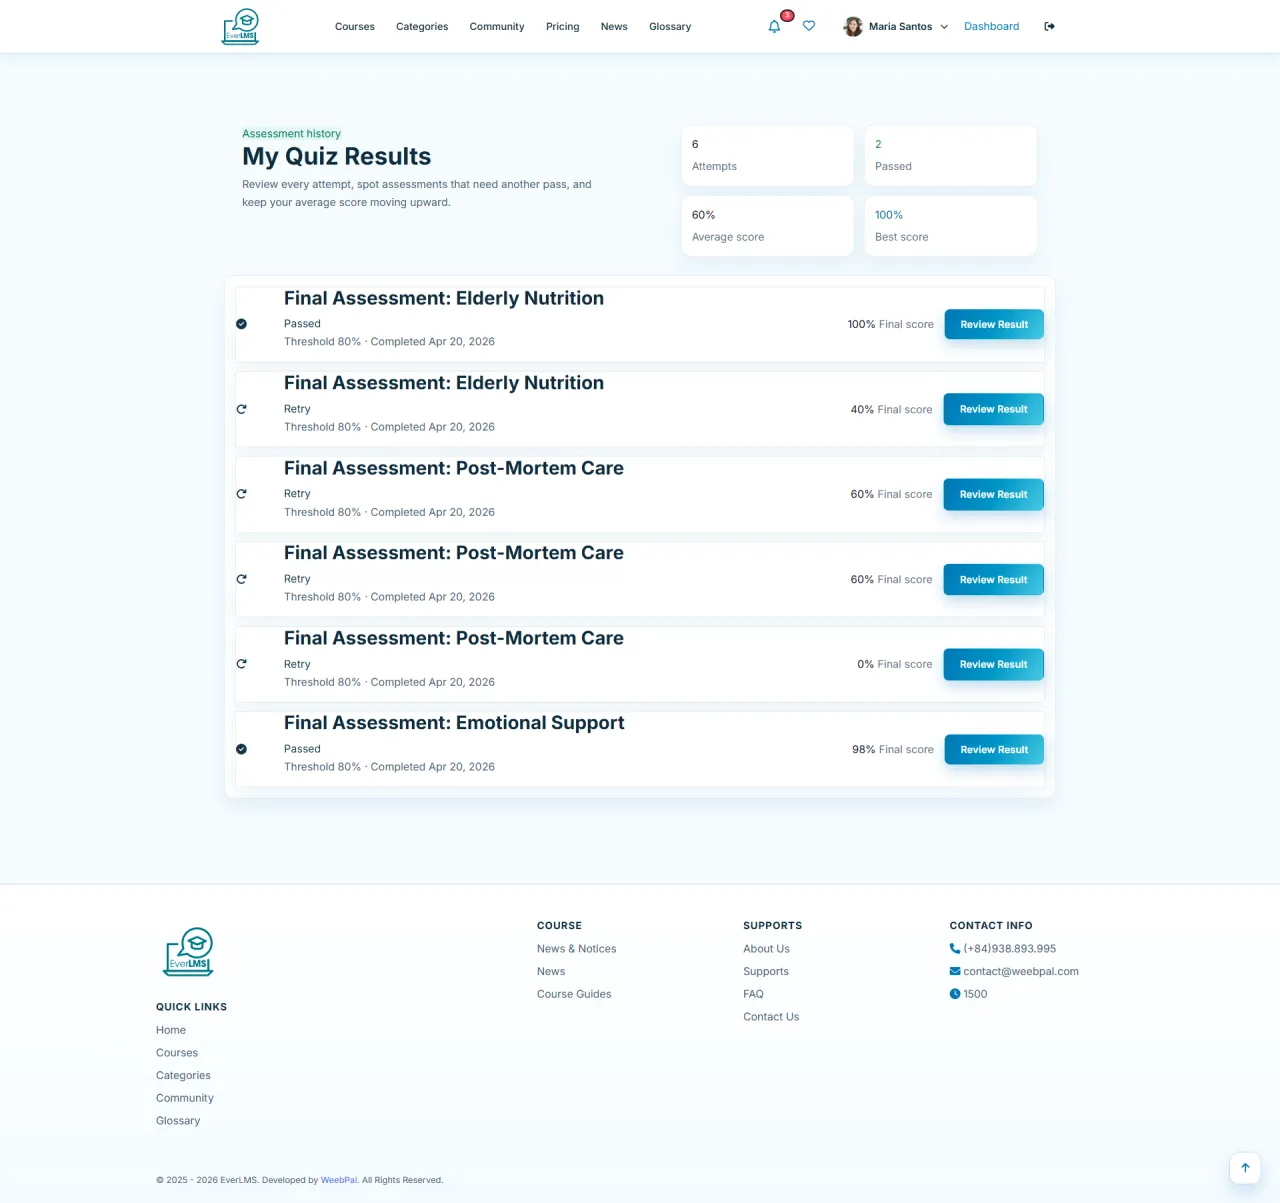
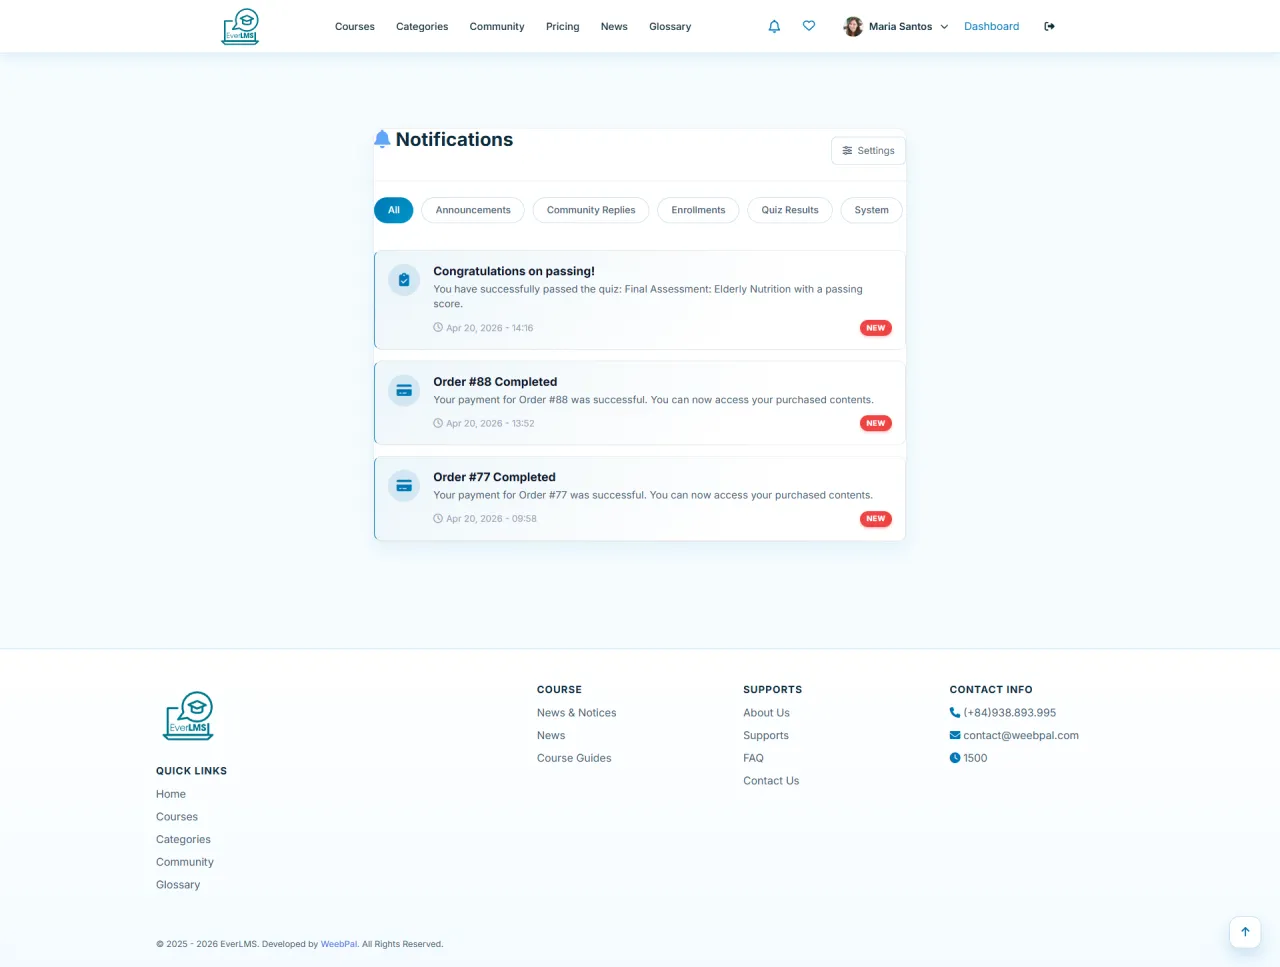
Notifications
About this screen: The notification system provides updates on activities related to your account and courses.
Navigation: 🔔 Icon on the navigation bar
- Notifications about new courses, promotions
- Learning progress updates and reminders
- Quiz results and certificate notifications
- Read/delete notifications to keep your inbox clean
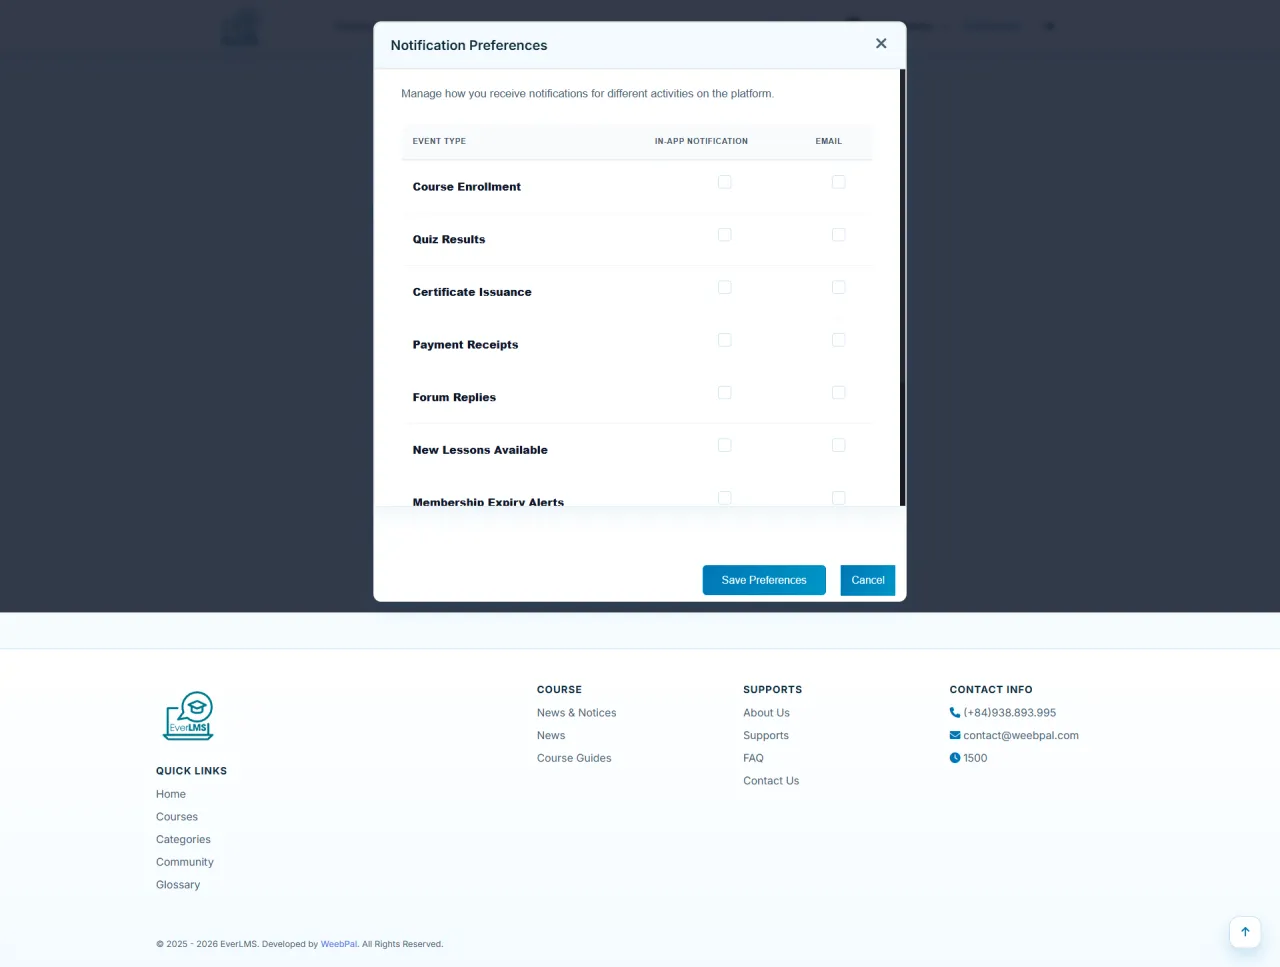
Notification Settings
About this screen: The Notification Settings page allows students to customize the types of notifications they receive.
Navigation: Profile → Notification Settings
- Toggle email notifications for each event type
- Customize the frequency of summary emails
- Choose to receive in-app notifications
- Disable marketing notifications entirely if desired
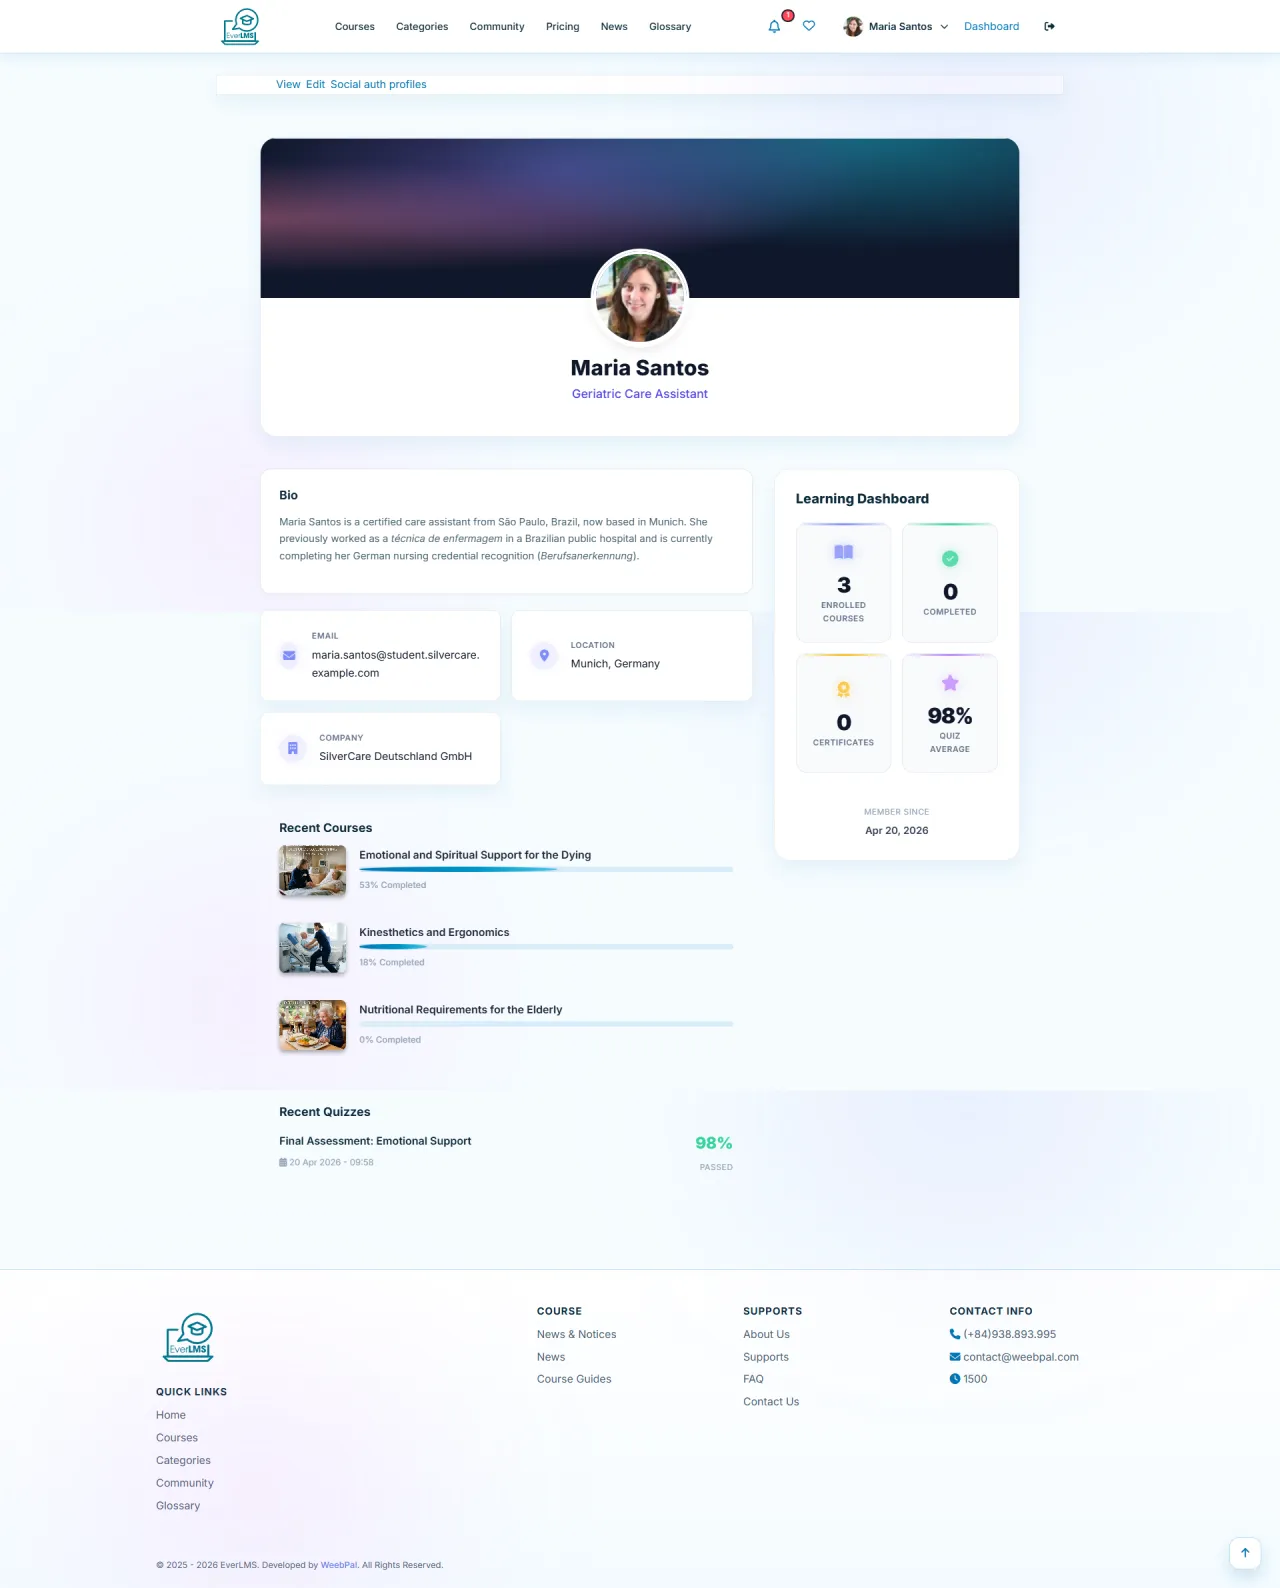
Profile & Account
About this screen: The Profile page allows you to update personal information and profile picture.
Navigation: Account options → My Profile
- Update display name, bio, and personal information
- Change your profile picture
- Update password and linked email
- View activity history and learning statistics
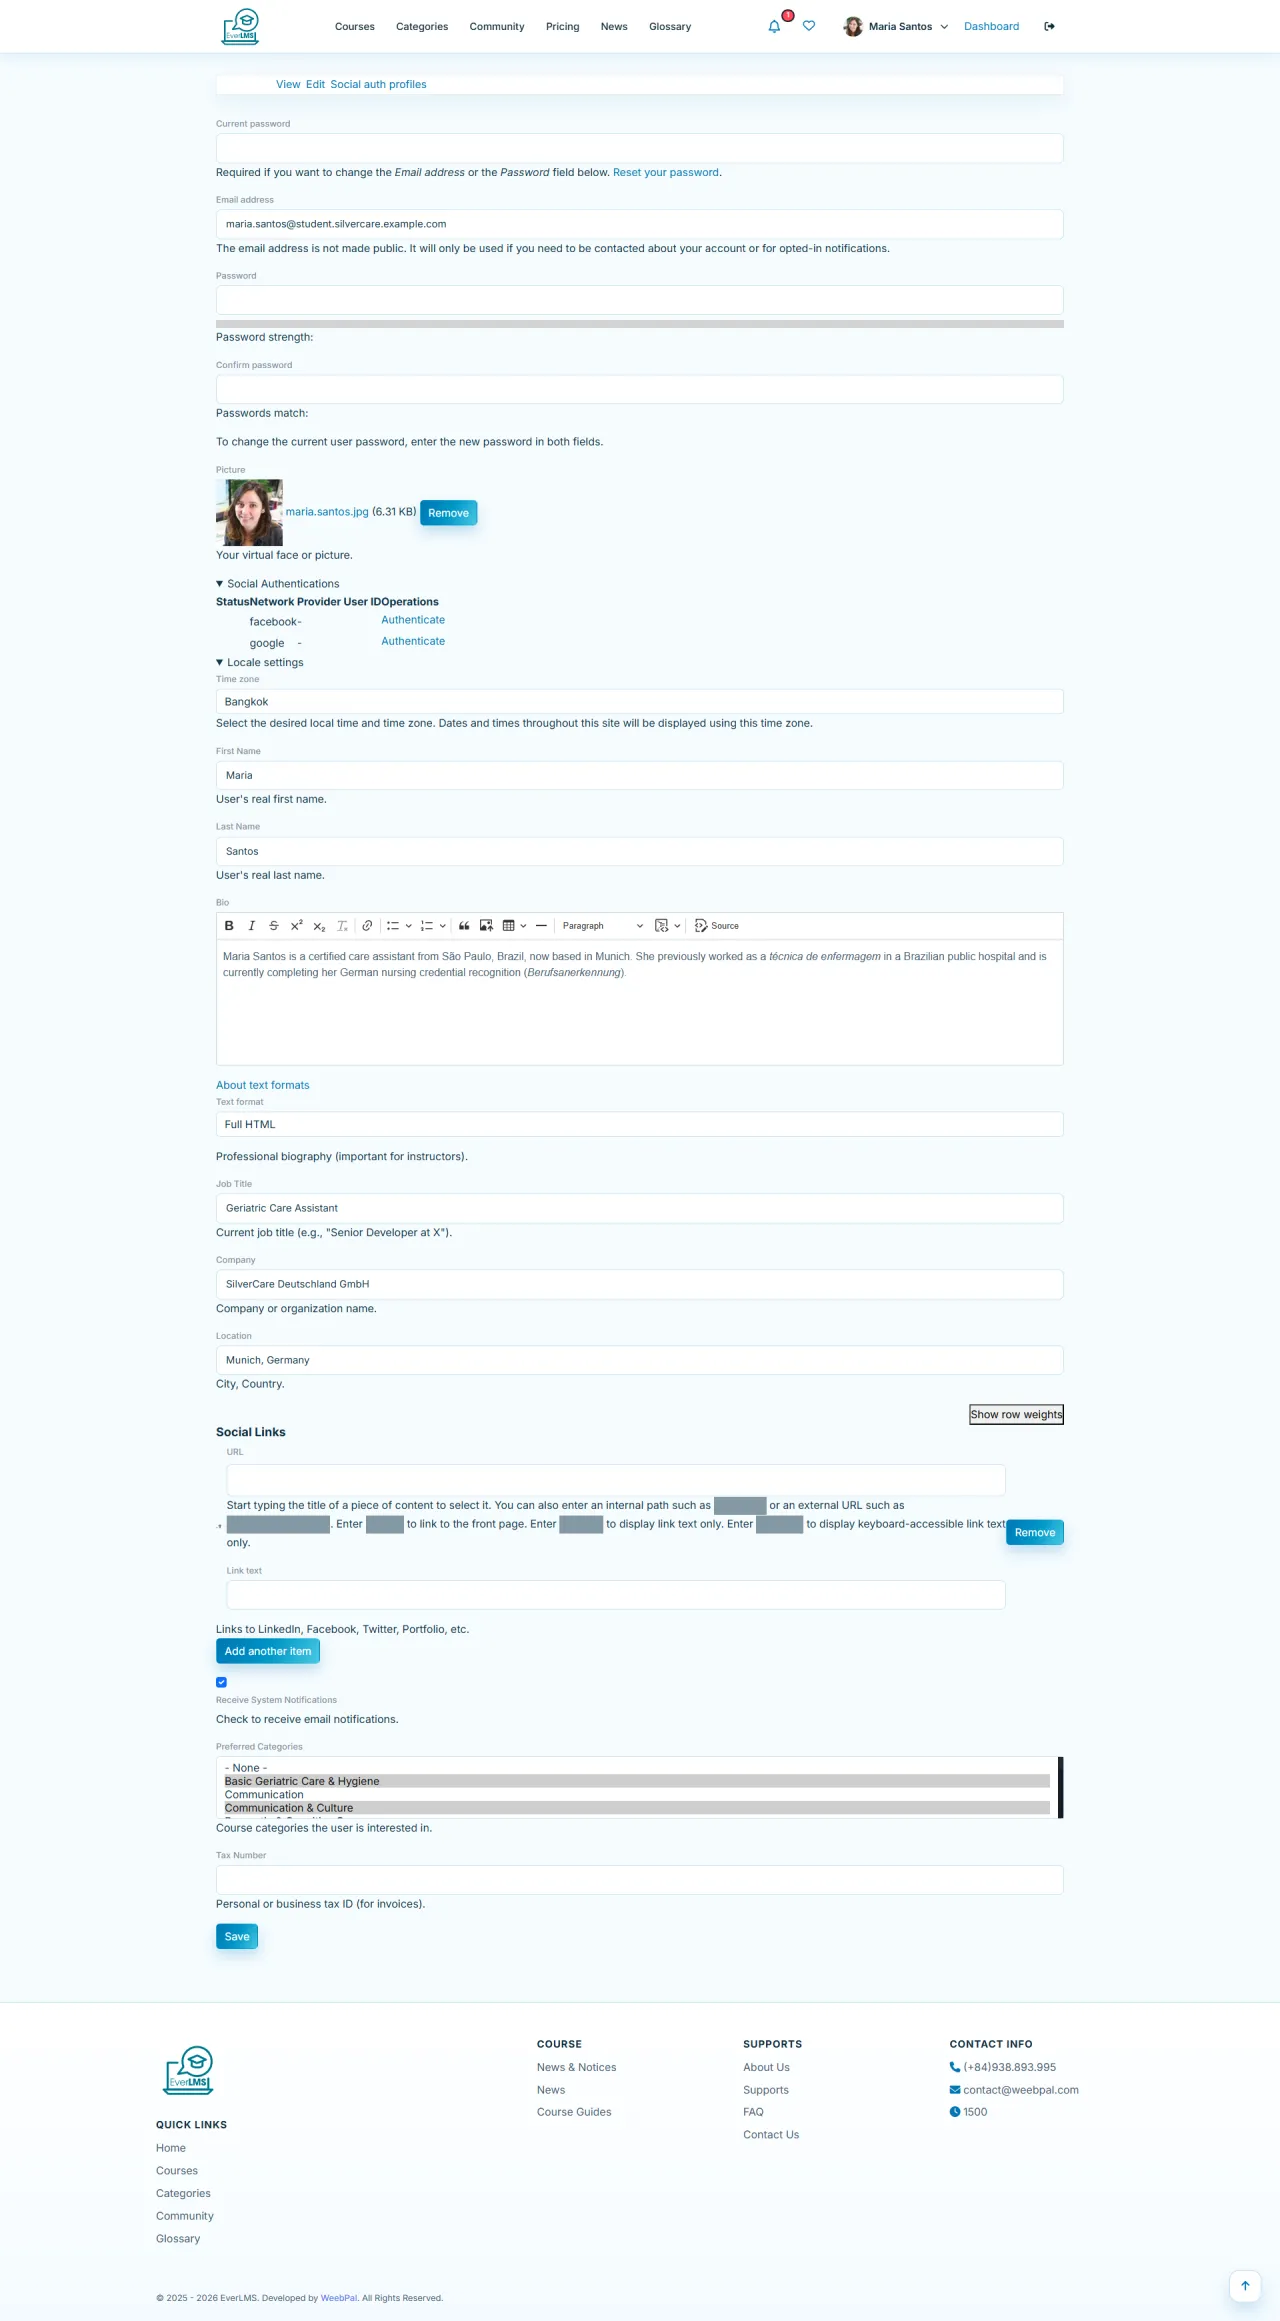
Edit Profile
About this screen: The Edit Profile page lets students update personal information, avatar, and account preferences.
Navigation: Account menu → Edit Profile
- Update display name, bio, and profile picture (avatar)
- Change email address and contact details
- Set language preference and timezone
- Update password for account security
Running EverLMS in your own organisation
Names, prices and plans on these screens are set up differently for each deployment. We deploy EverLMS on your domain and adapt it to how you work, and you receive the running system and its source code.