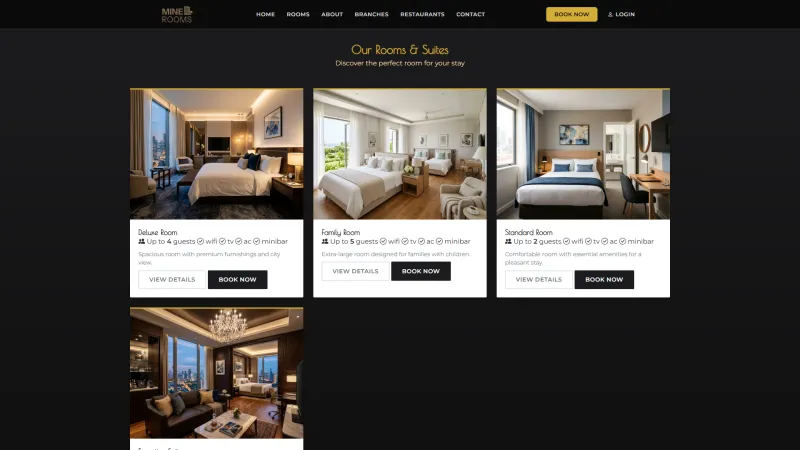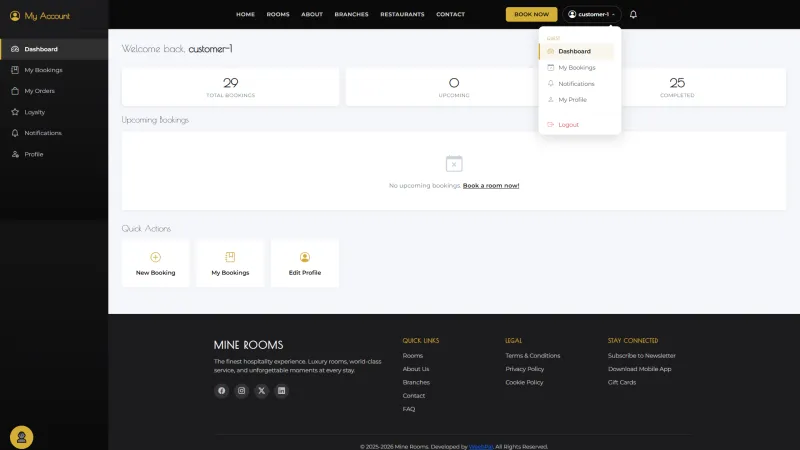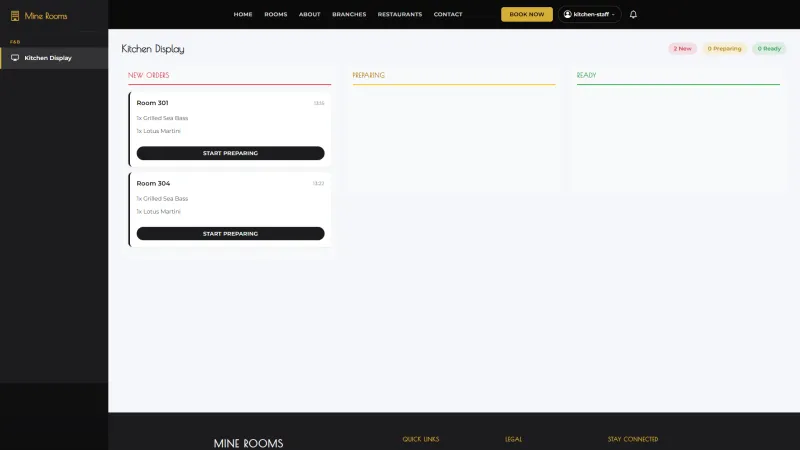

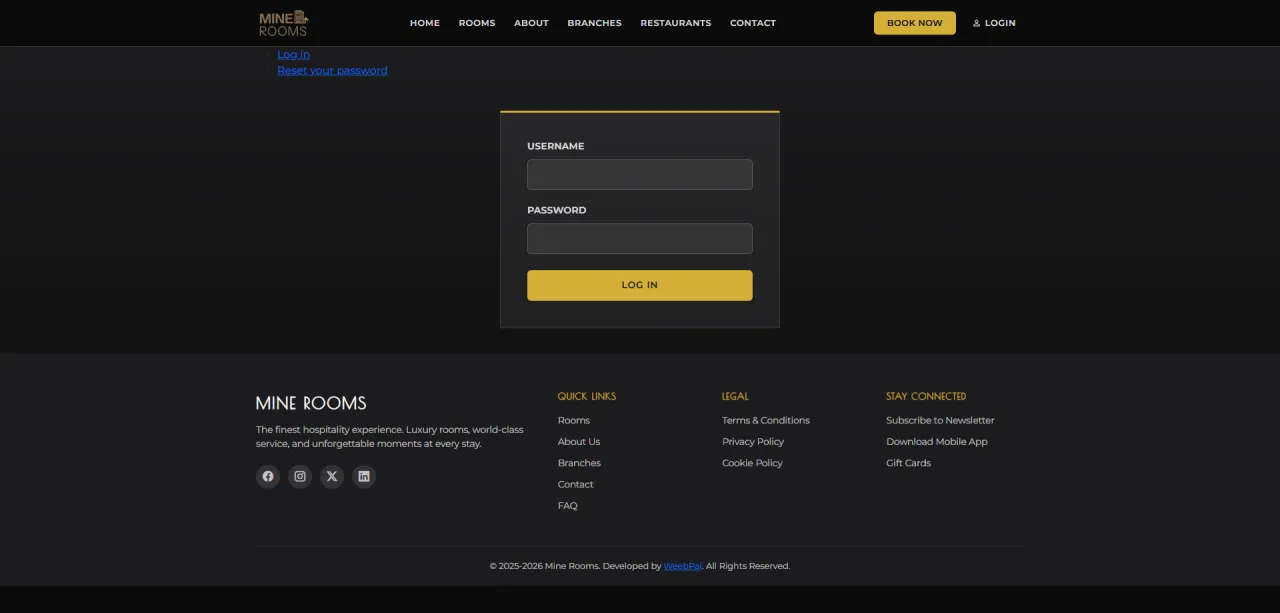
System Login
Who it’s for: Receptionist
Demo access: sandbox accounts are issued on request: request a guided demo.
Navigation: Go to the management portal login
- Enter your Username and Password, then click Log In
- After login you are redirected to
manage/bookings, the booking management dashboard - Use the top navigation bar to switch between modules
Room Board Overview
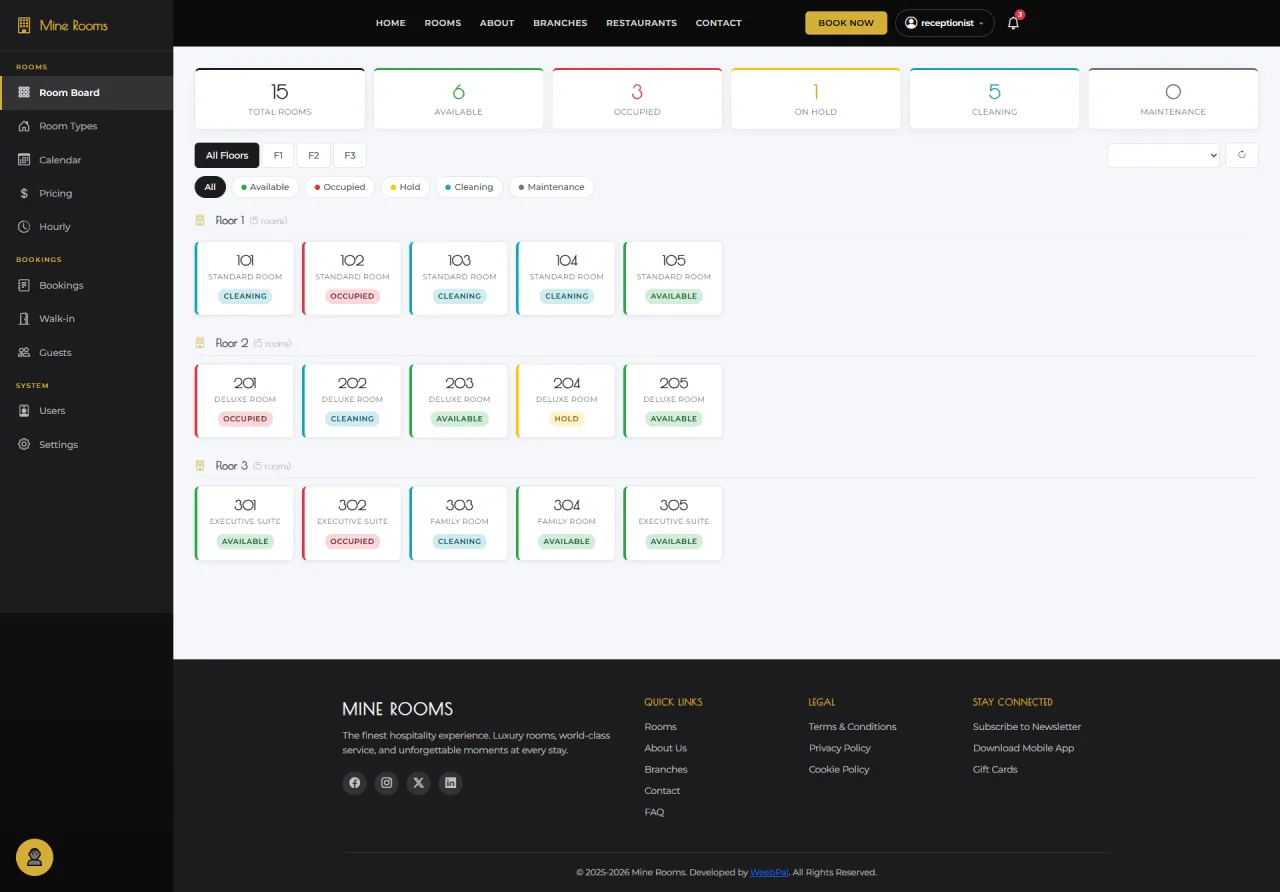
About this screen: A visual grid of all hotel rooms, with each card showing the current status by color.
Navigation: Left sidebar → Room Board
- Status: Available (green) · Occupied (orange) · Cleaning (yellow) · Maintenance (grey).
- Filter by Floor, Room Type, or Branch. The Occupancy rate appears at the top.
- Click any room card to open its detail panel.
Room Board Detail
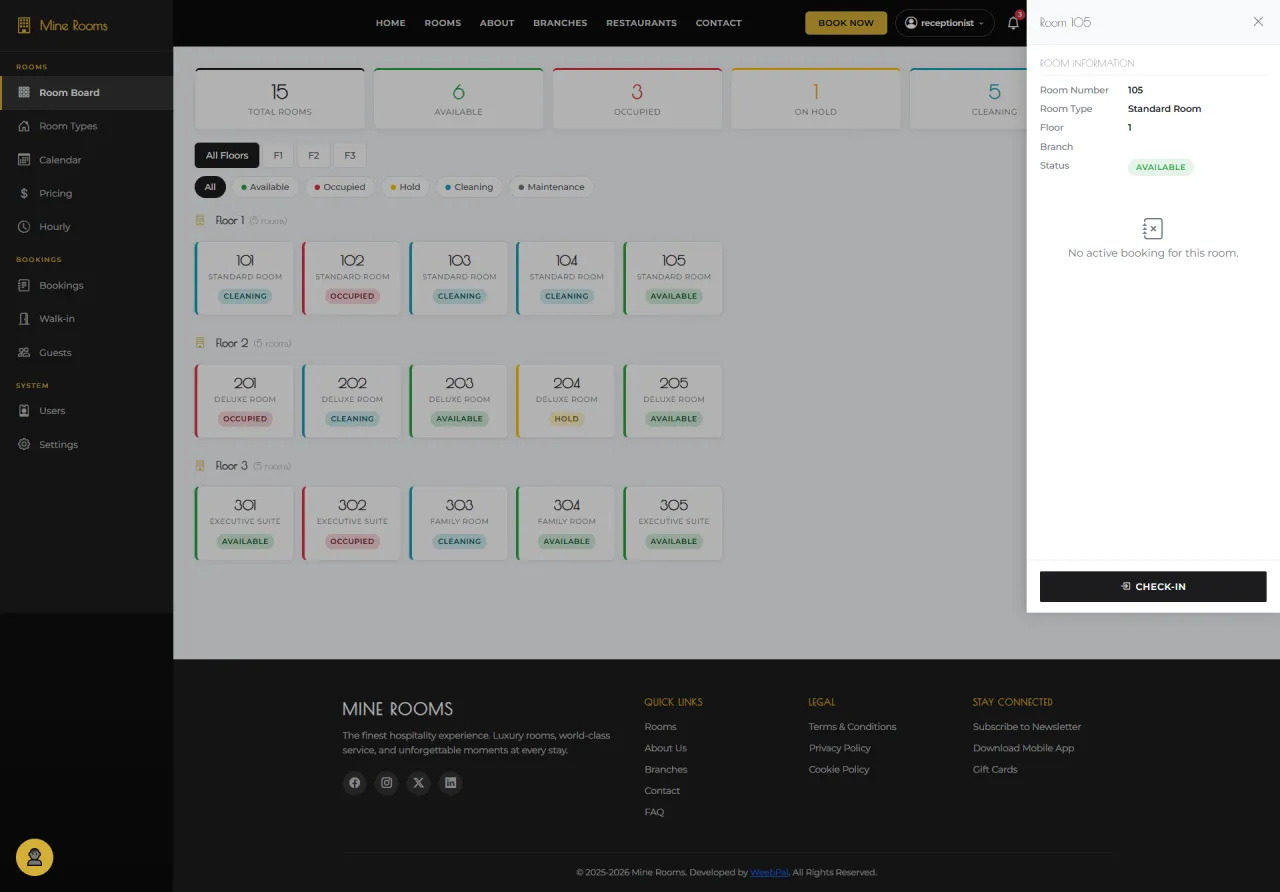
About this screen: The detail panel for a specific room, including guest info, booking details, and action buttons.
Navigation: Room Board → click a room card
- View the Room number, Room type, Current guest, Booking dates, and Status.
- Use the quick action buttons: Check-in · Checkout · Change Status.
- Open the full Booking Detail from the booking reference link.
Room Board: Check-in
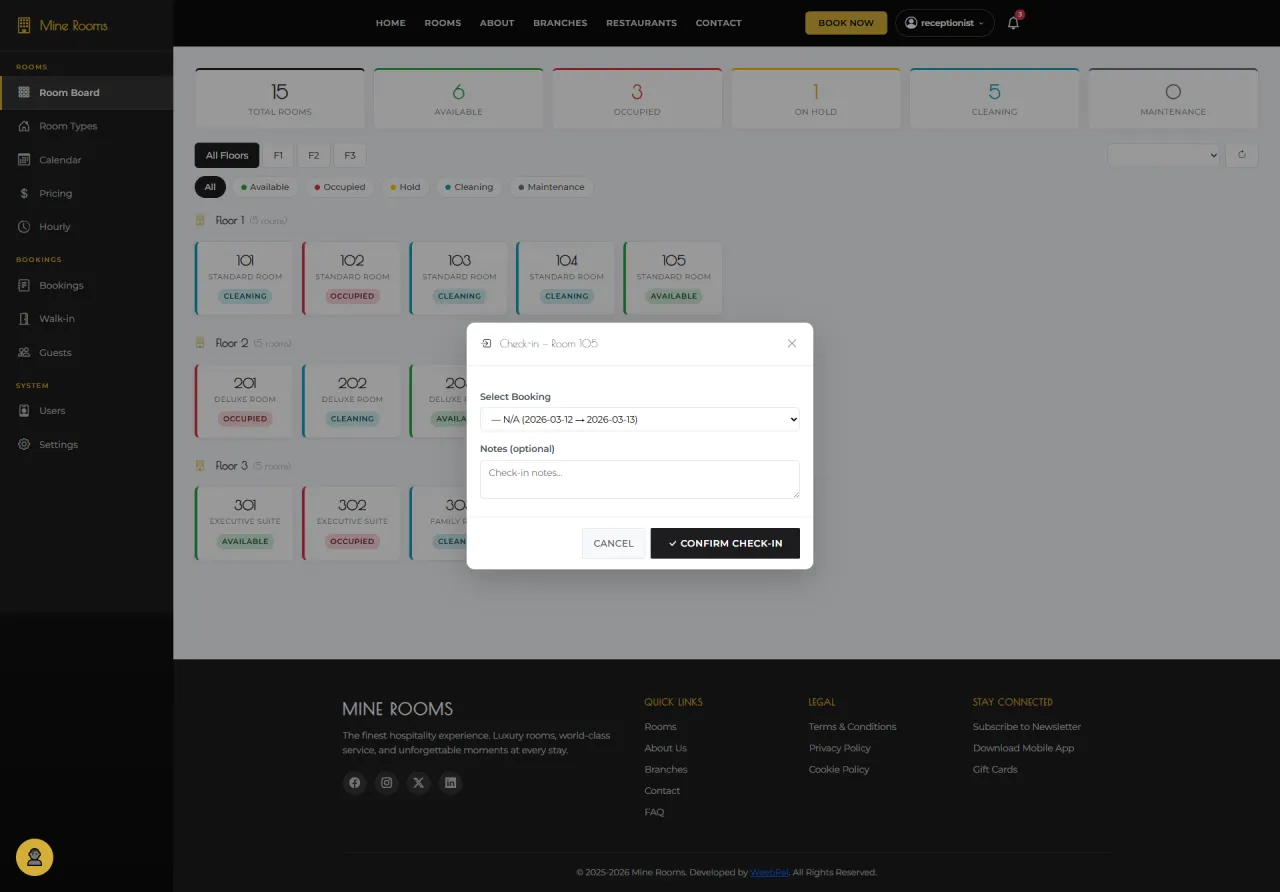
About this screen: Initiate the check-in process for a guest directly from the Room Board.
Navigation: Room Board → click room card → Check-in
- Verify booking is Confirmed status before proceeding
- Click Check-in on room detail panel → review guest details
- Confirm to proceed to the Confirm Check-in step
Room Board: Confirm Check-in
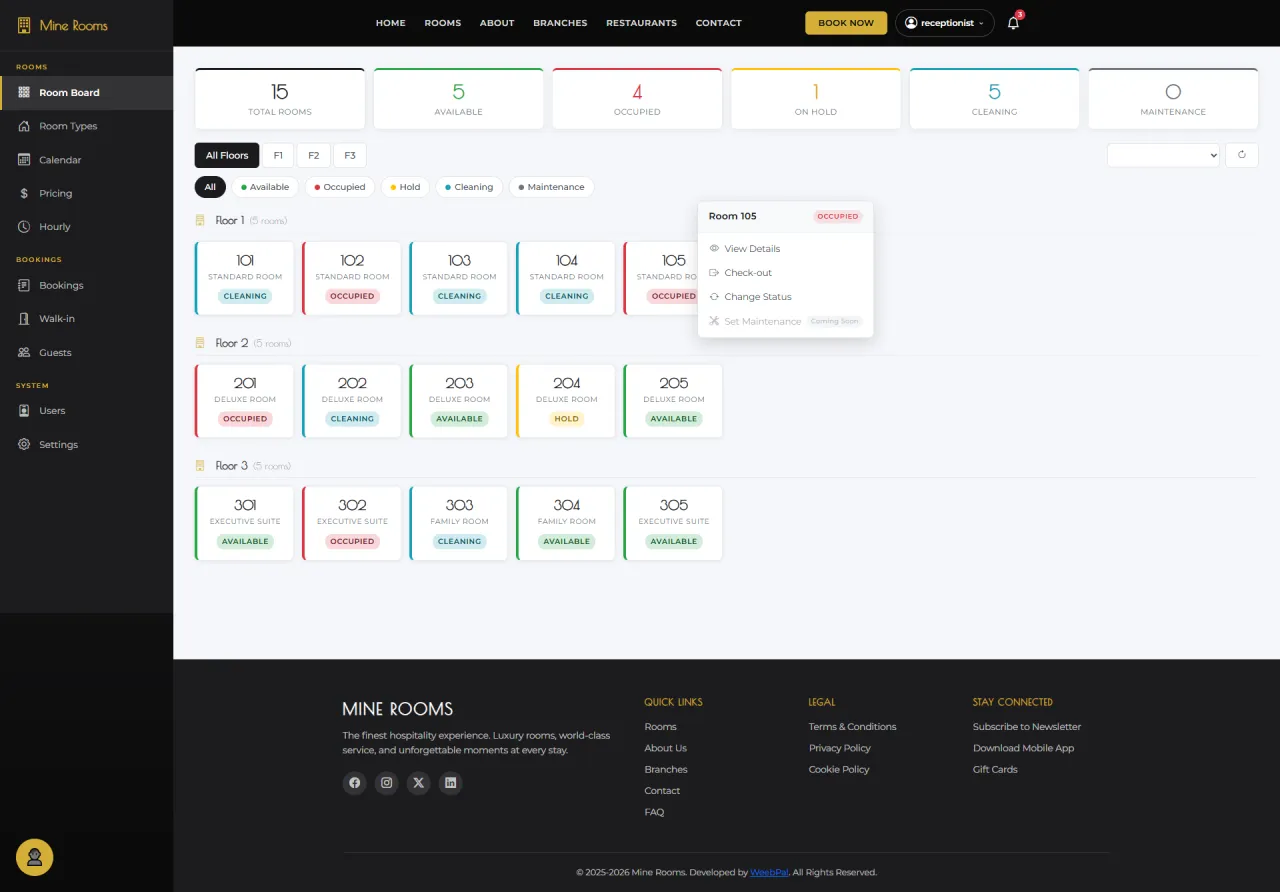
About this screen: Final confirmation step when checking a guest in via the Room Board.
Navigation: Room Board → room card → Check-in → Confirm Check-in
- Review summary: Guest name, Room number, Check-in time
- Click Confirm: room card updates to Occupied
- Guest receives check-in notification on their account
Room Board: Checkout
About this screen: Initiate the checkout process for a departing guest directly from the Room Board.
Navigation: Room Board → occupied room card → Checkout
- Click Checkout: system loads checkout form
- Review Bill Summary and select payment method (Cash/Card/MoMo)
- Proceed to Confirm Checkout to finalize departure
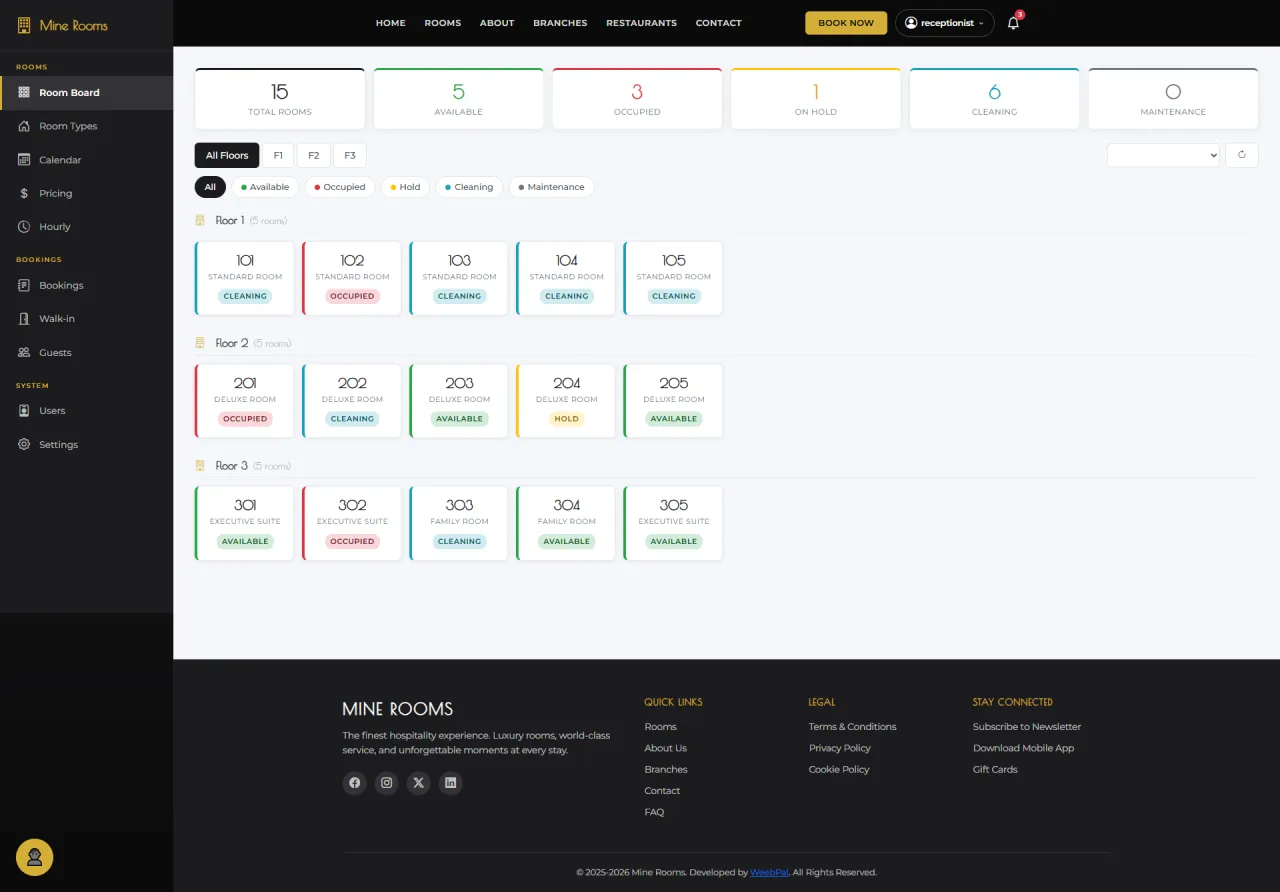
Room Board: Confirm Checkout
About this screen: Confirm the guest's departure, finalize billing and release the room for cleaning.
Navigation: Room Board → Checkout → Confirm Checkout
- Click Confirm Checkout: room updates to Cleaning Required
- Guest's booking moves to Completed status
- Housekeeping is notified automatically
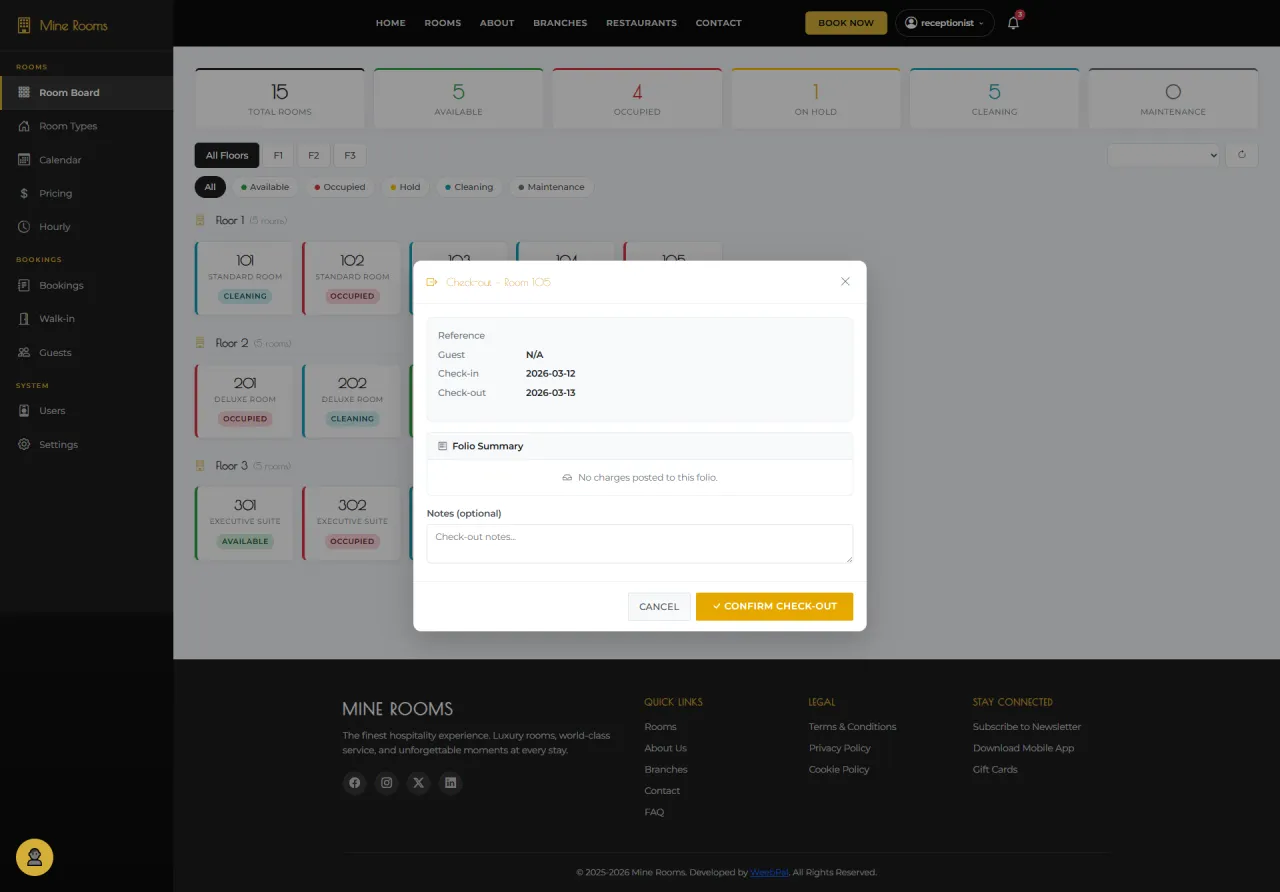
Change Room Status
About this screen: Update a room's status for maintenance, blocking, or admin use.
Navigation: Room Board → room card → Change Status
- Select status: Available · Occupied · Cleaning · Maintenance · Out of Order
- Add optional note → click Save to apply
- Room card updates immediately on board
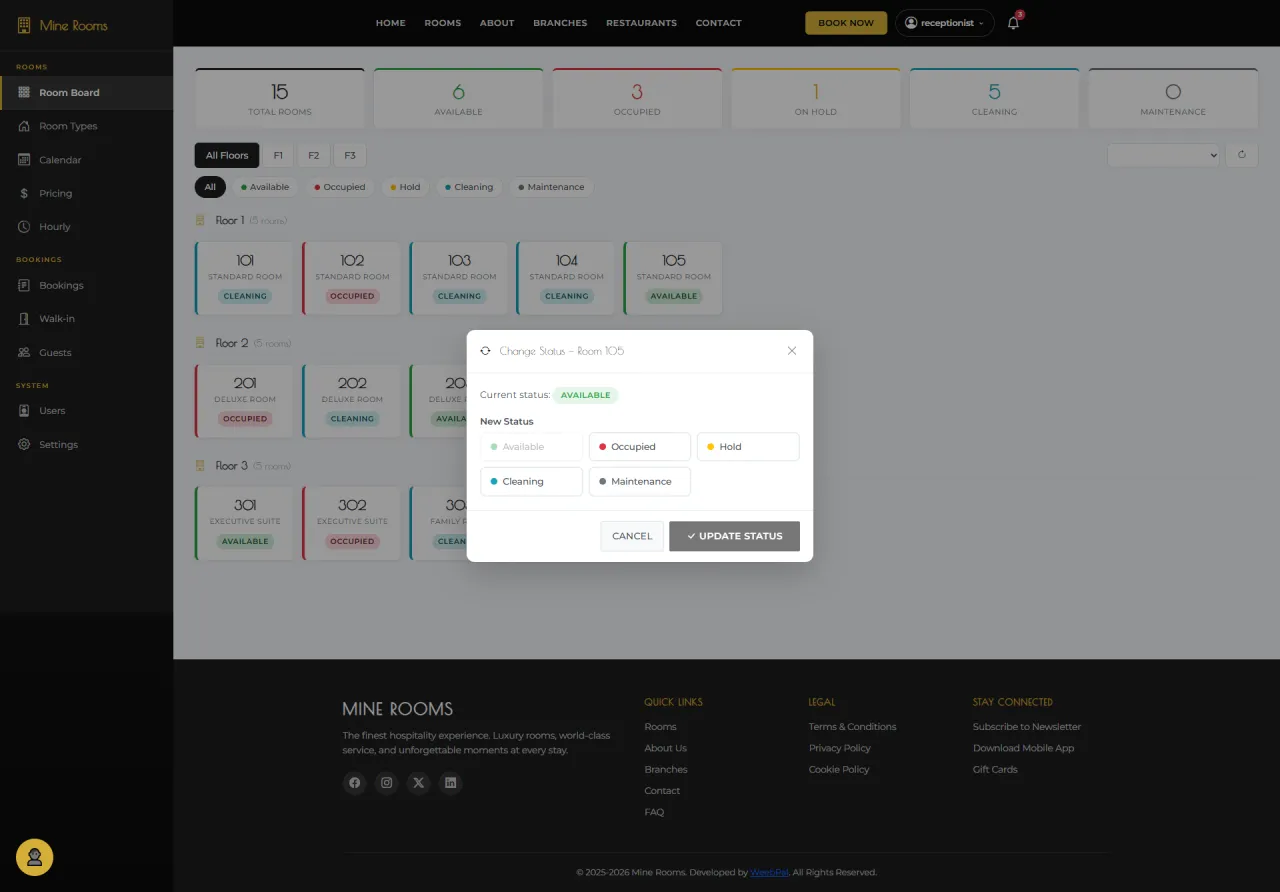
Room Types
About this screen: All room type categories configured in the system (e.g. Deluxe Room, Family Room, Executive Suite).
Navigation: Left sidebar → Room Types
- View: name, capacity, amenities, room count
- Click + Add Room Type or Edit to modify
- Room types shared across branches; pricing is branch-specific
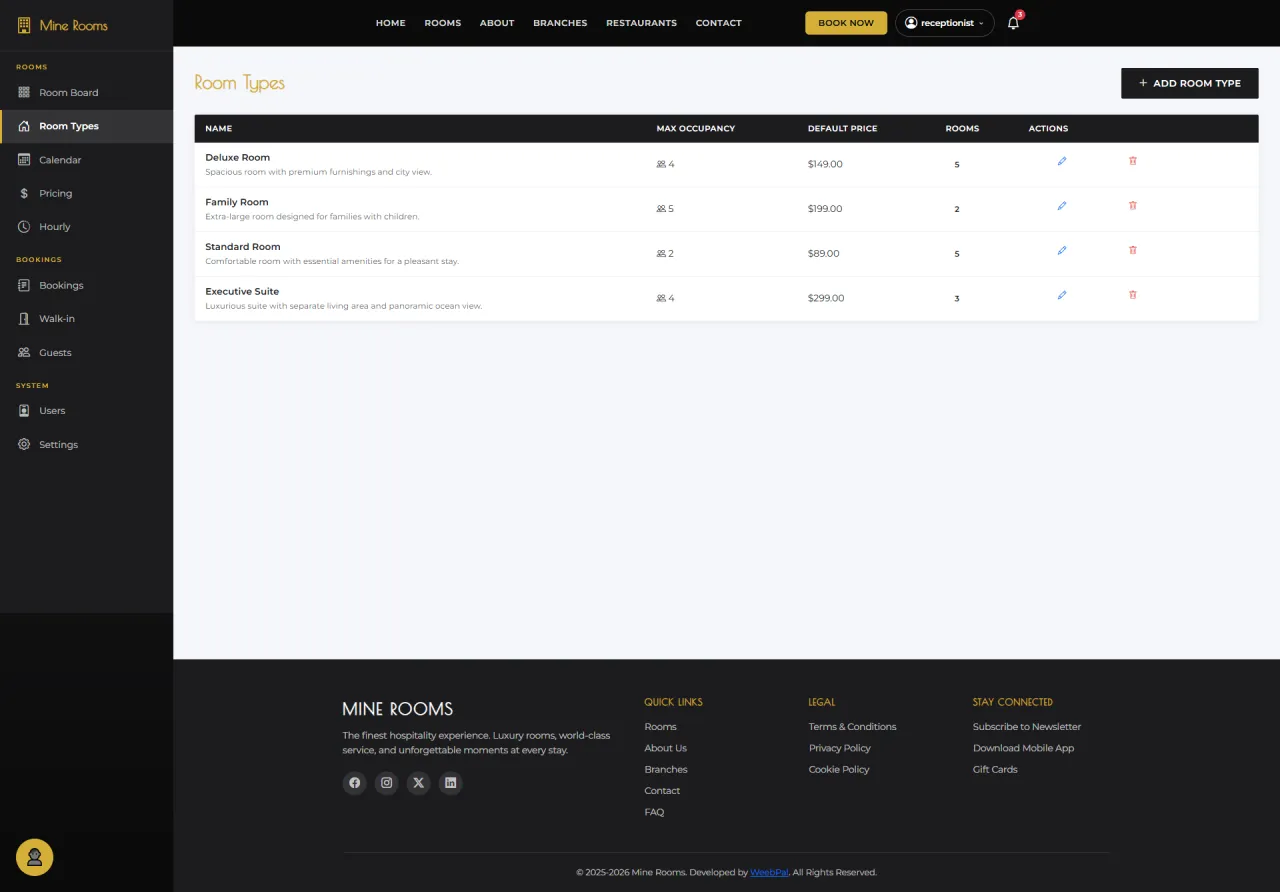
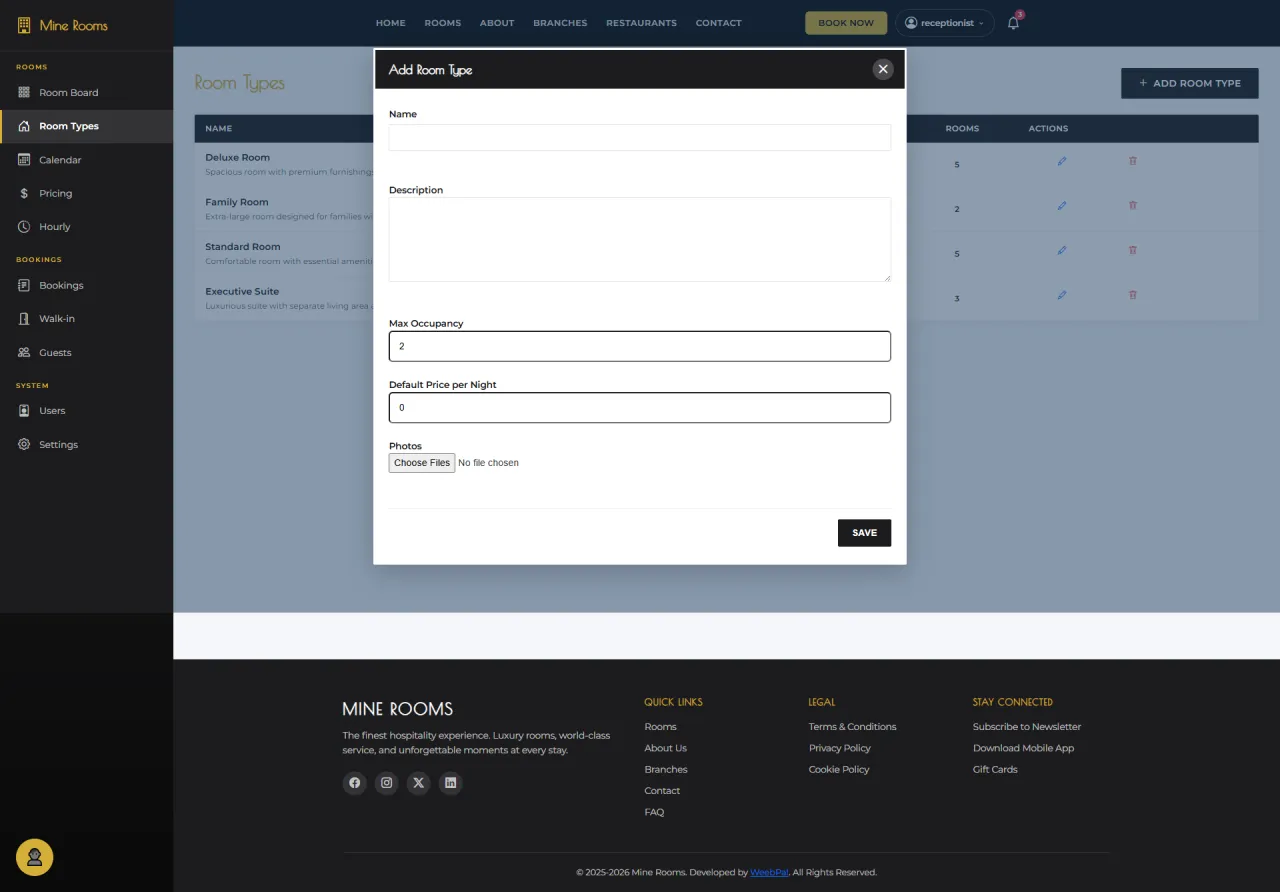
Add Room Type
About this screen: Create a new room type category that can be assigned to physical rooms across branches.
Navigation: Room Types → + Add Room Type
- Enter: Name, Description, Max Guests, Amenities
- Upload photos and set bed configuration (Single/Double/Twin/King)
- Click Save to add room type
Edit Room Type
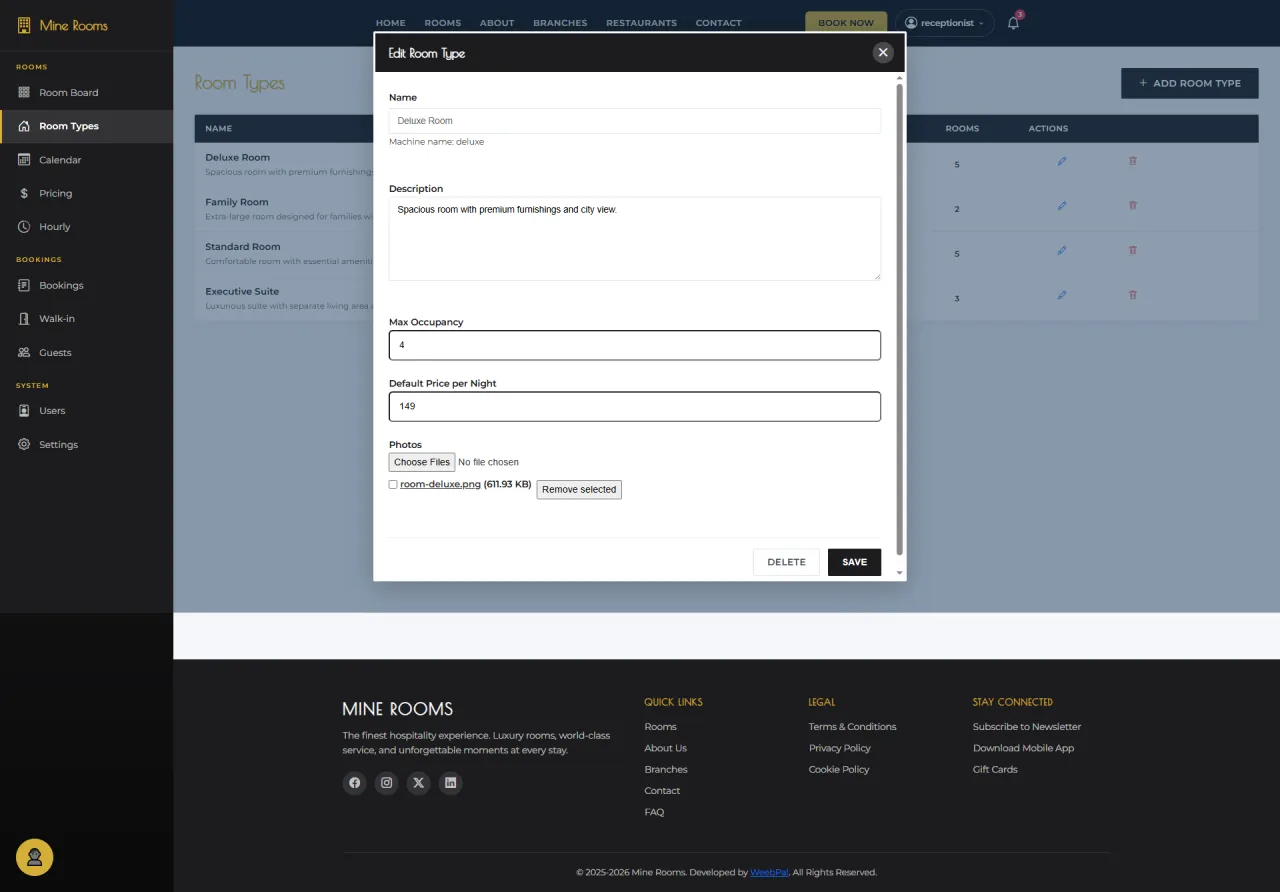
About this screen: Update an existing room type's details, amenities, or photos.
Navigation: Room Types → Edit on any room type
- Modify any field: name, description, capacity, amenities, photos
- Changes take effect immediately on the public website
- Click Save to apply all edits
Pricing
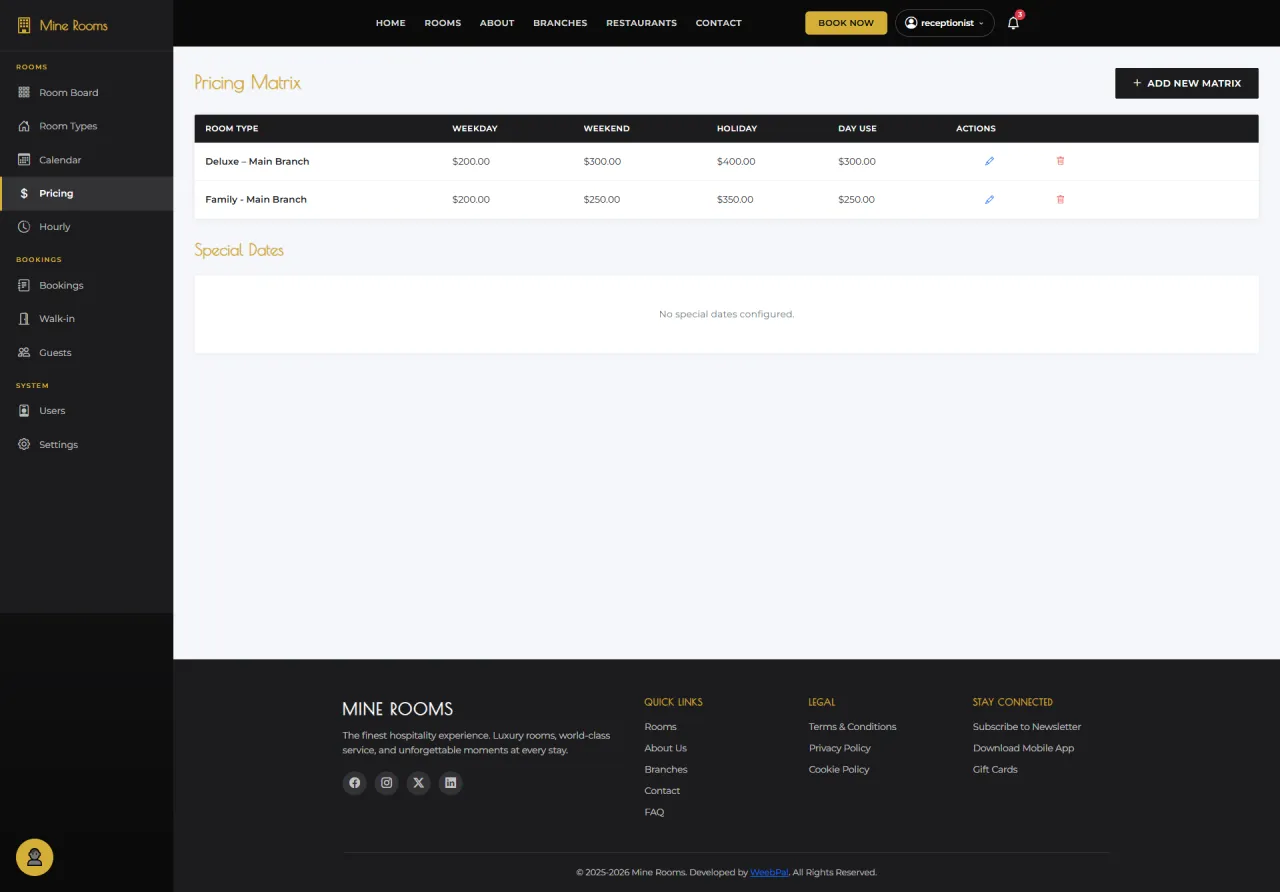
About this screen: All pricing configurations (nightly and hourly rates per room type per branch).
Navigation: Left sidebar → Pricing
- View: Room Type, Branch, Nightly Rate, Hourly Rate, Status
- Filter by Branch or Room Type to narrow results
- Click + Add Pricing or Edit to manage rates
Add Pricing
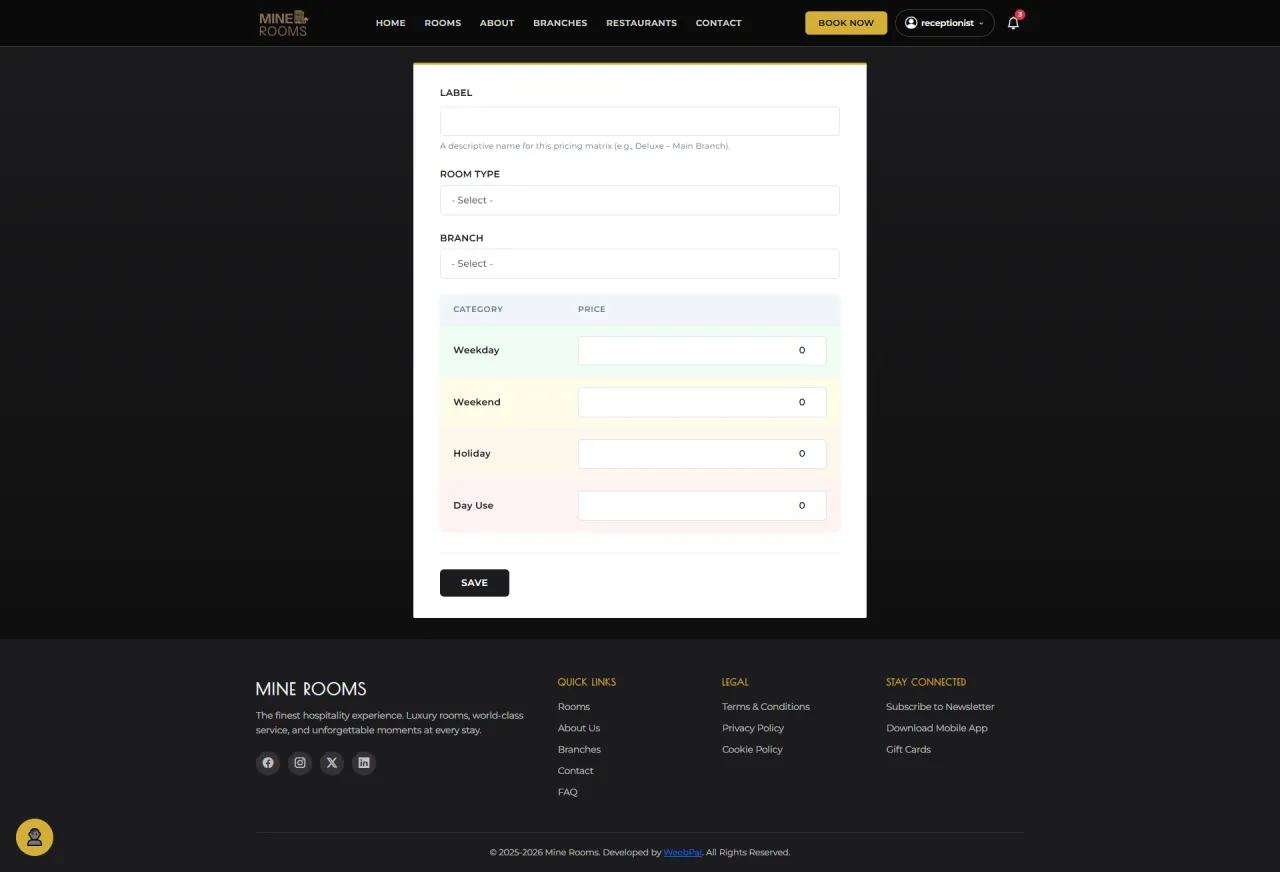
About this screen: Create a new pricing record for a room type at a specific branch.
Navigation: Pricing → + Add Pricing
- Select Room Type and Branch from dropdowns
- Enter Nightly Rate (USD) and optionally Hourly Rate
- Set date ranges or leave blank for indefinite pricing
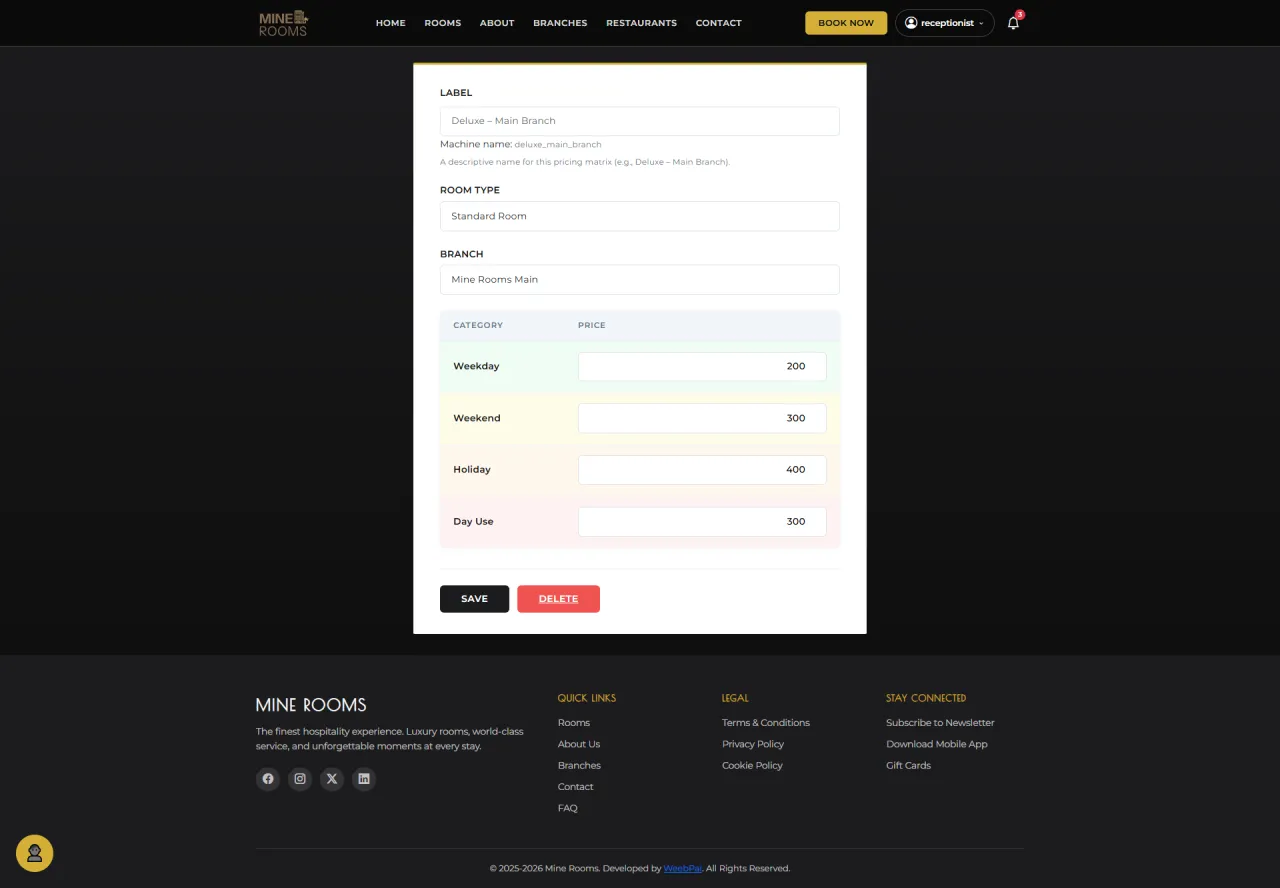
Edit Pricing
About this screen: Update the nightly or hourly rate for a specific room type and branch.
Navigation: Pricing → Edit on any pricing row
- Modify Nightly Rate, Hourly Rate, or Date Range
- Click Save to apply the updated pricing immediately
- Updated pricing applies to new bookings only: existing confirmed bookings keep the original rate
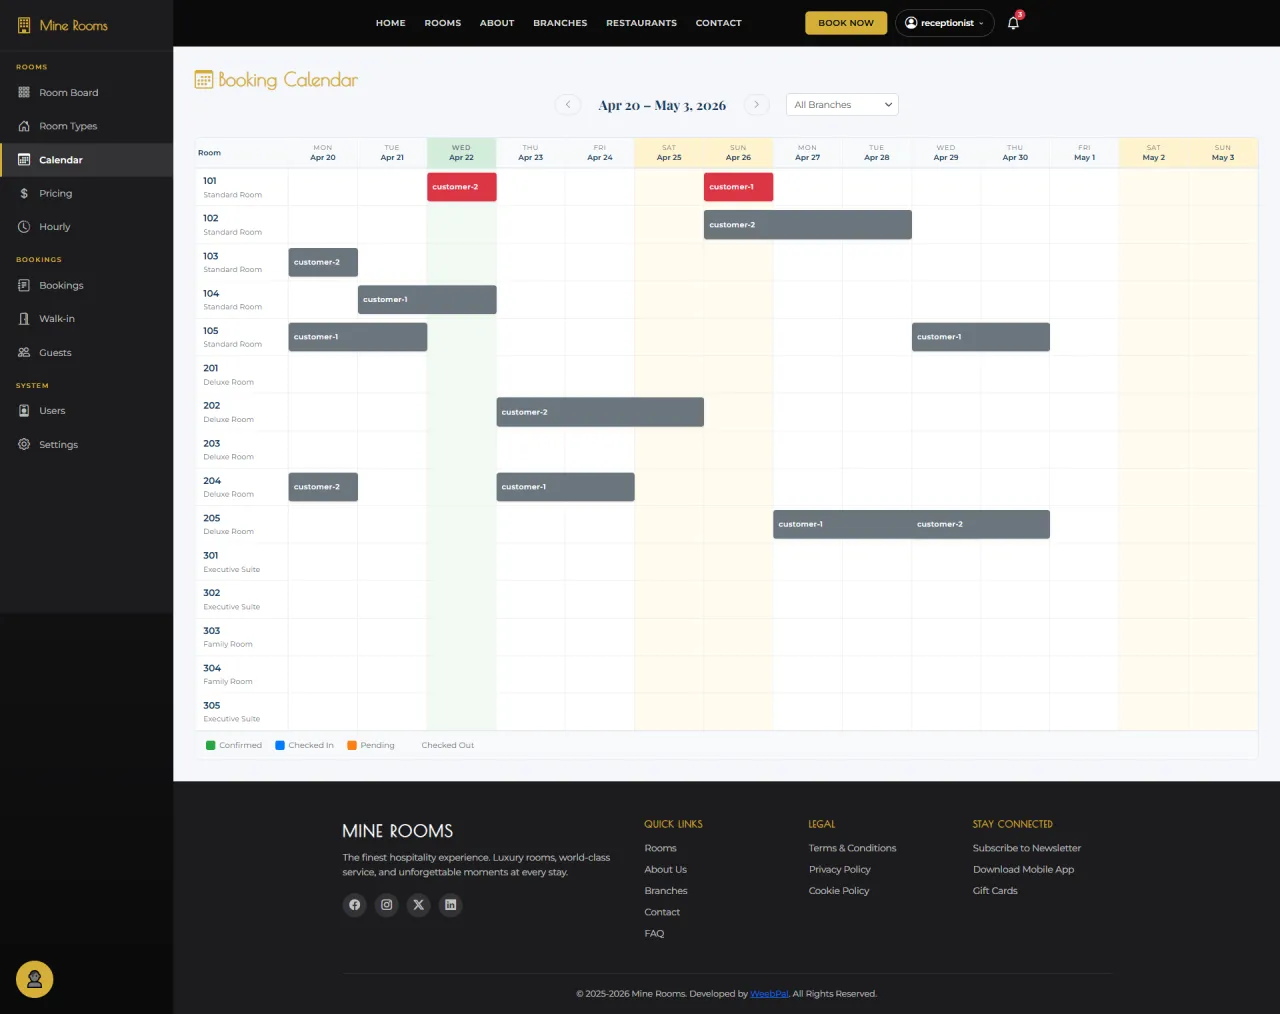
Booking Calendar
About this screen: A visual timeline of all bookings displayed as a calendar, to see room occupancy by date at a glance.
Navigation: Left sidebar → Calendar
- Switch between monthly, weekly, daily views
- Each block shows guest name and room type: hover for quick summary
- Click any block to open full Booking Detail
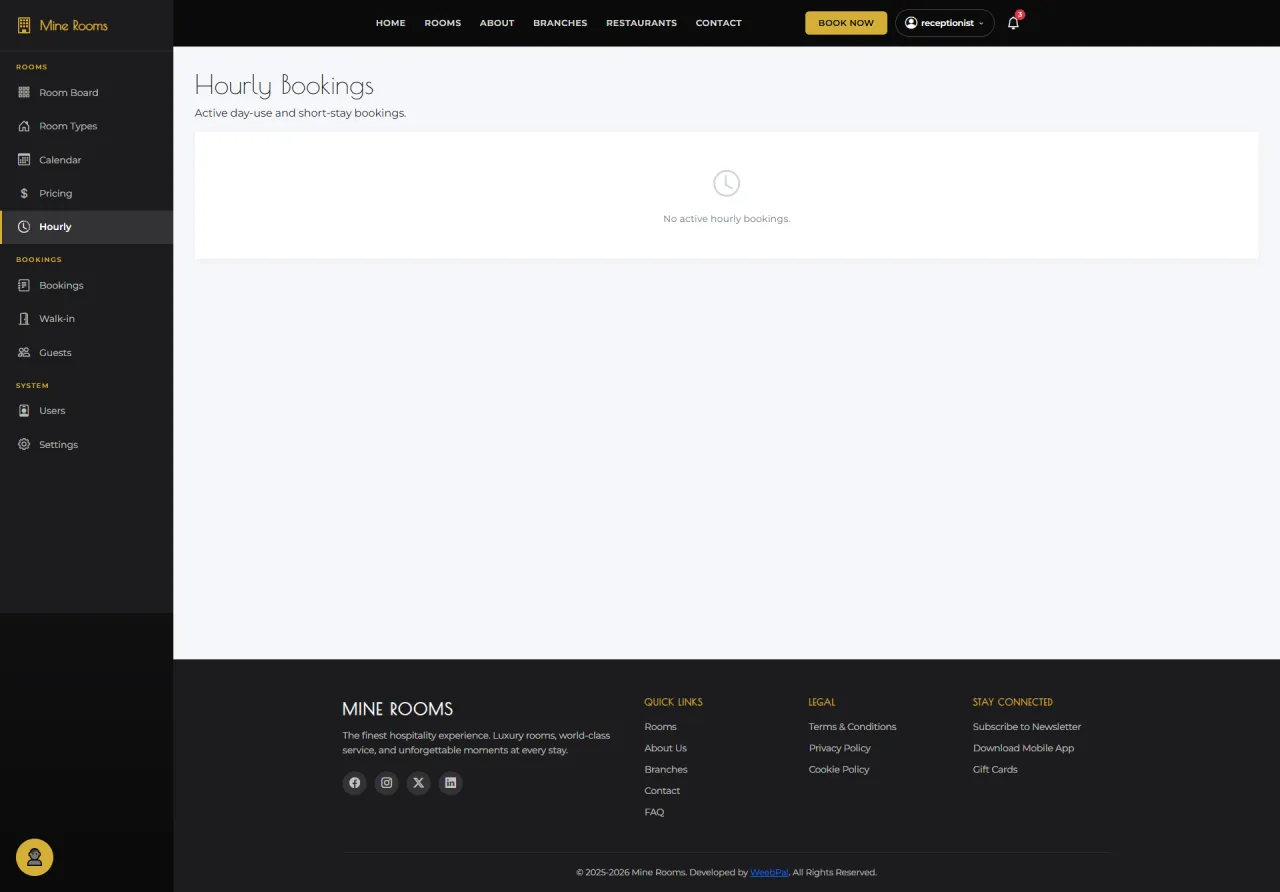
Hourly Booking
About this screen: Create a short-stay booking charged by the hour, ideal for day-use guests who don't need an overnight stay.
Navigation: Left sidebar → Hourly
- Select Room type, room, Start time, Number of hours
- Enter guest details and payment method
- Pricing auto-calculated based on hourly rate
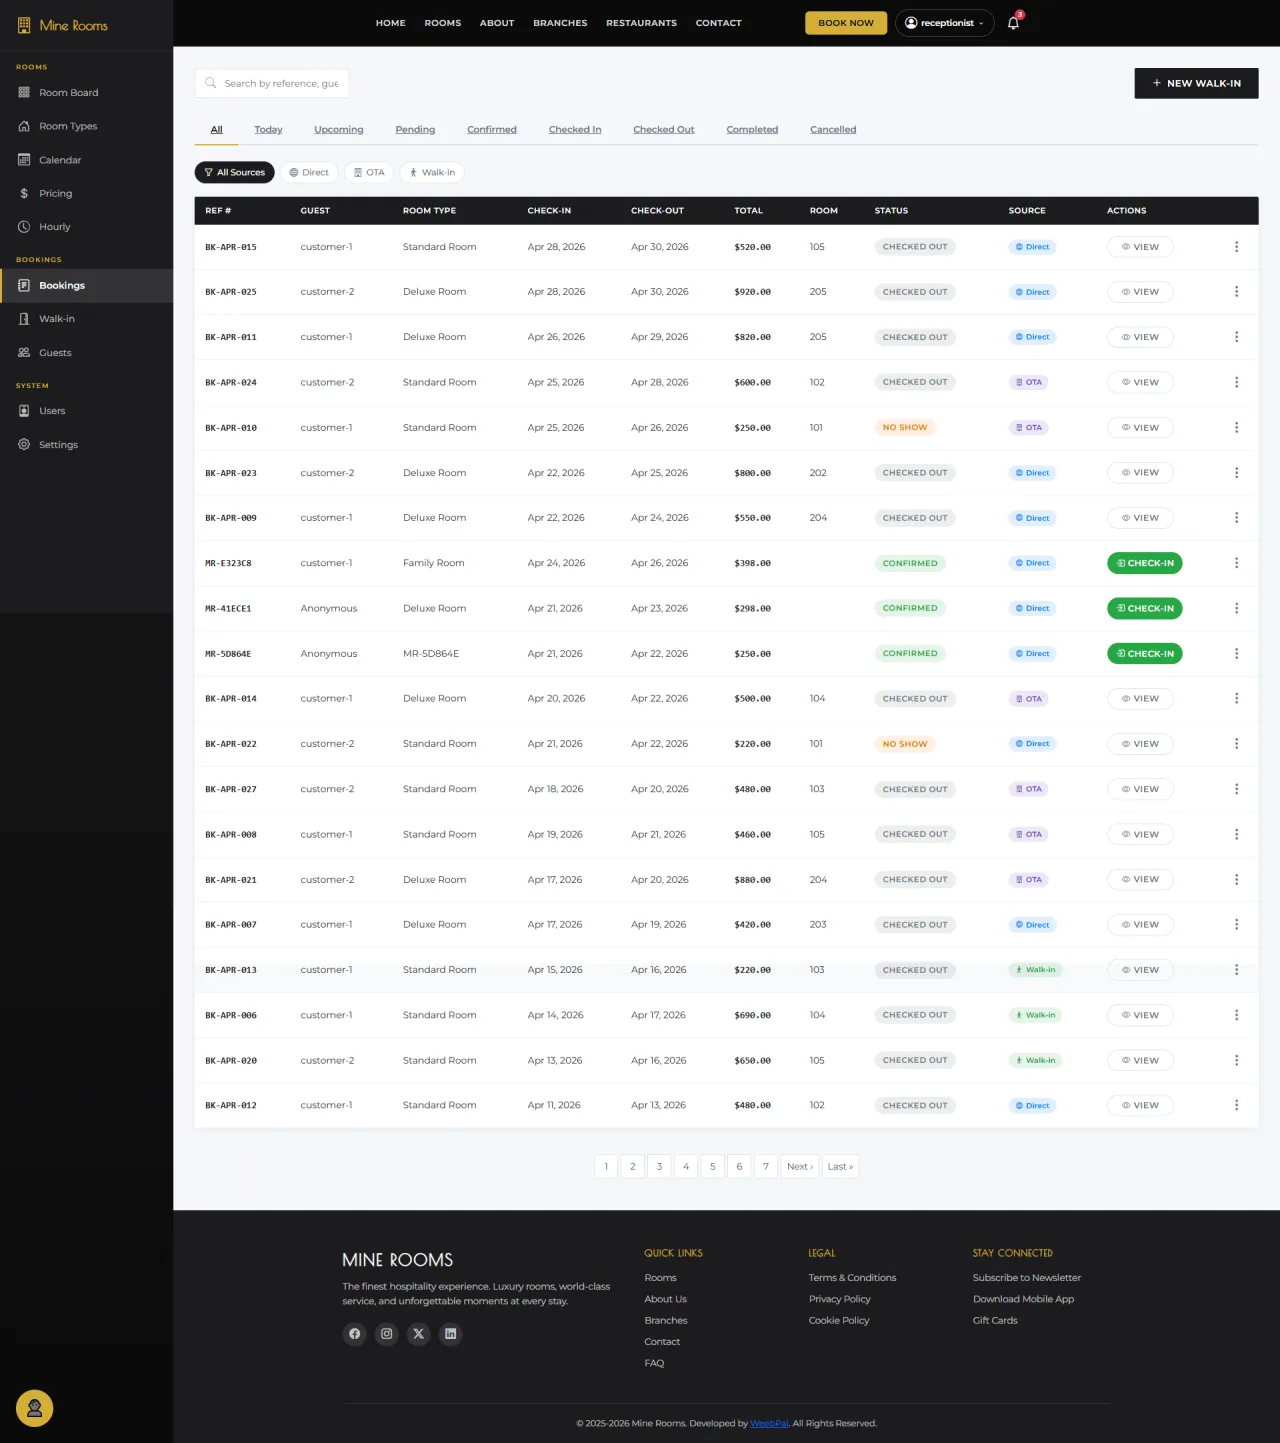
All Bookings
About this screen: The main booking management list, with all reservations across all statuses.
Navigation: Left sidebar → Bookings
- Lists all bookings with: Guest, Room Type, Dates, Total, Status, Source
- Use filter tabs to switch views or Search for booking ID/guest
- Click + NEW WALK-IN to create instant front-desk booking
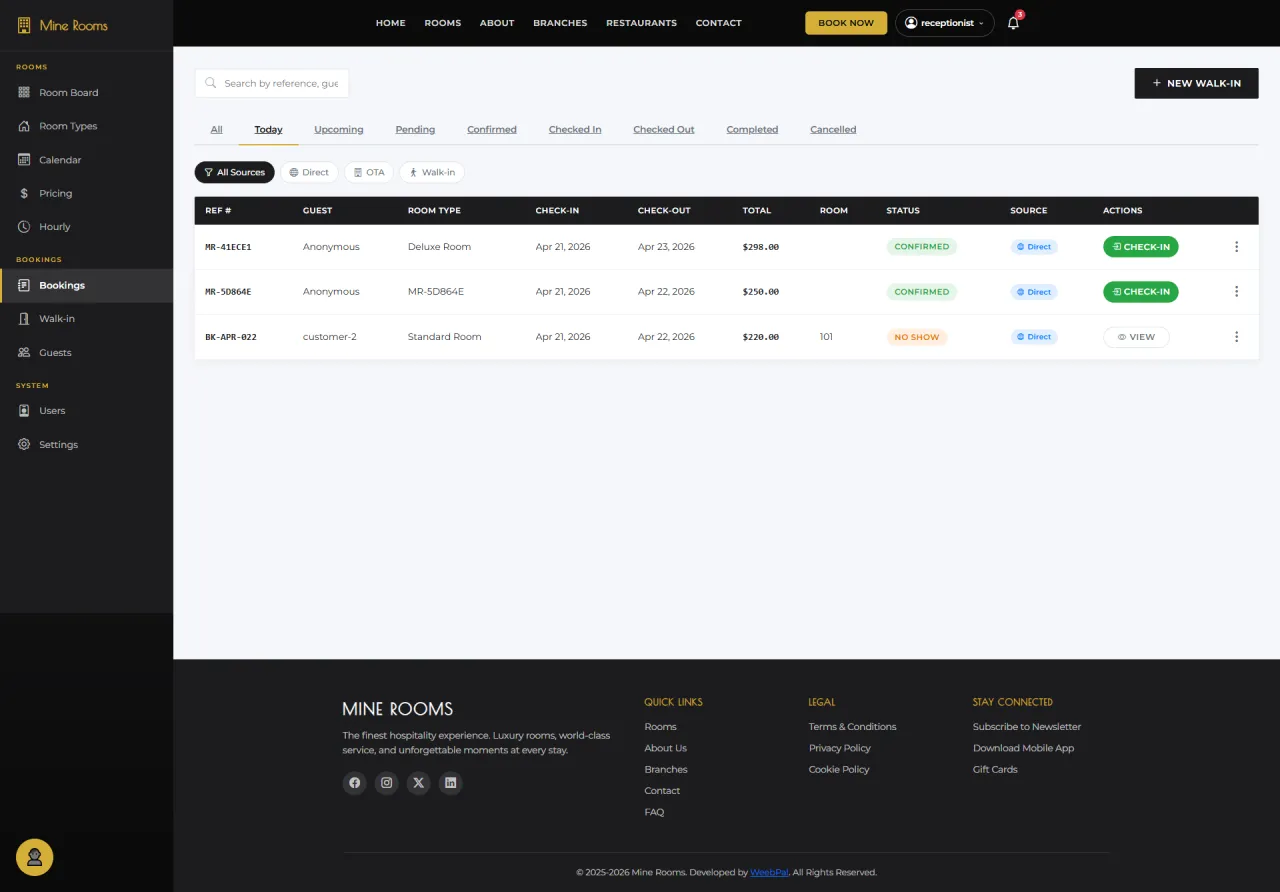
Today's Bookings
About this screen: Bookings with check-in or check-out activity happening today, the most critical tab for daily operations.
Navigation: Bookings → Today tab
- Shows bookings where check-in/out date falls today
- Green CHECK-IN buttons for arriving guests
- Flag NO SHOW directly from this tab
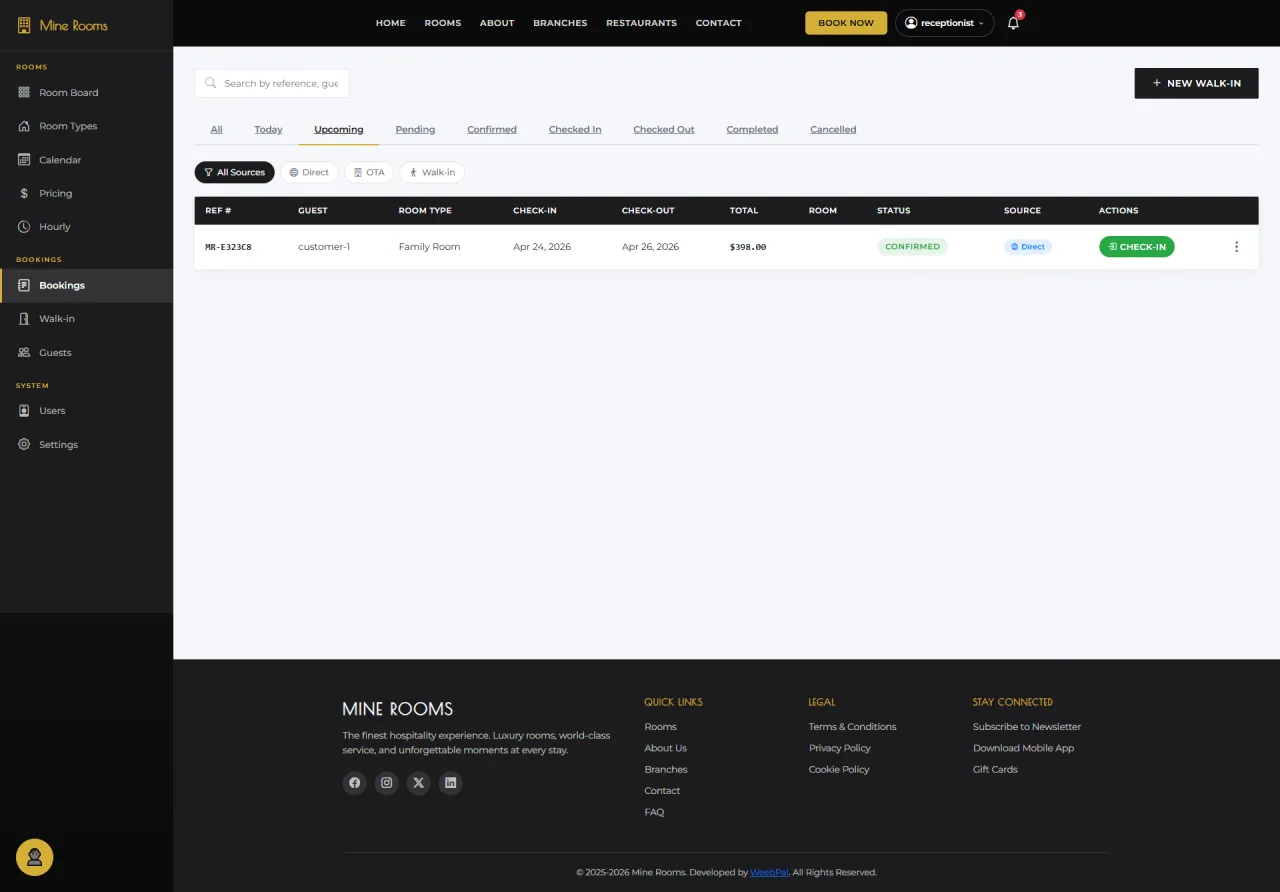
Upcoming Bookings
About this screen: Confirmed bookings with future check-in dates, your upcoming guest arrivals.
Navigation: Bookings → Upcoming tab
- Sorted by check-in date ascending, nearest arrivals first
- Click any booking to view guest preferences and special requests
- On arrival day, booking moves to Today tab
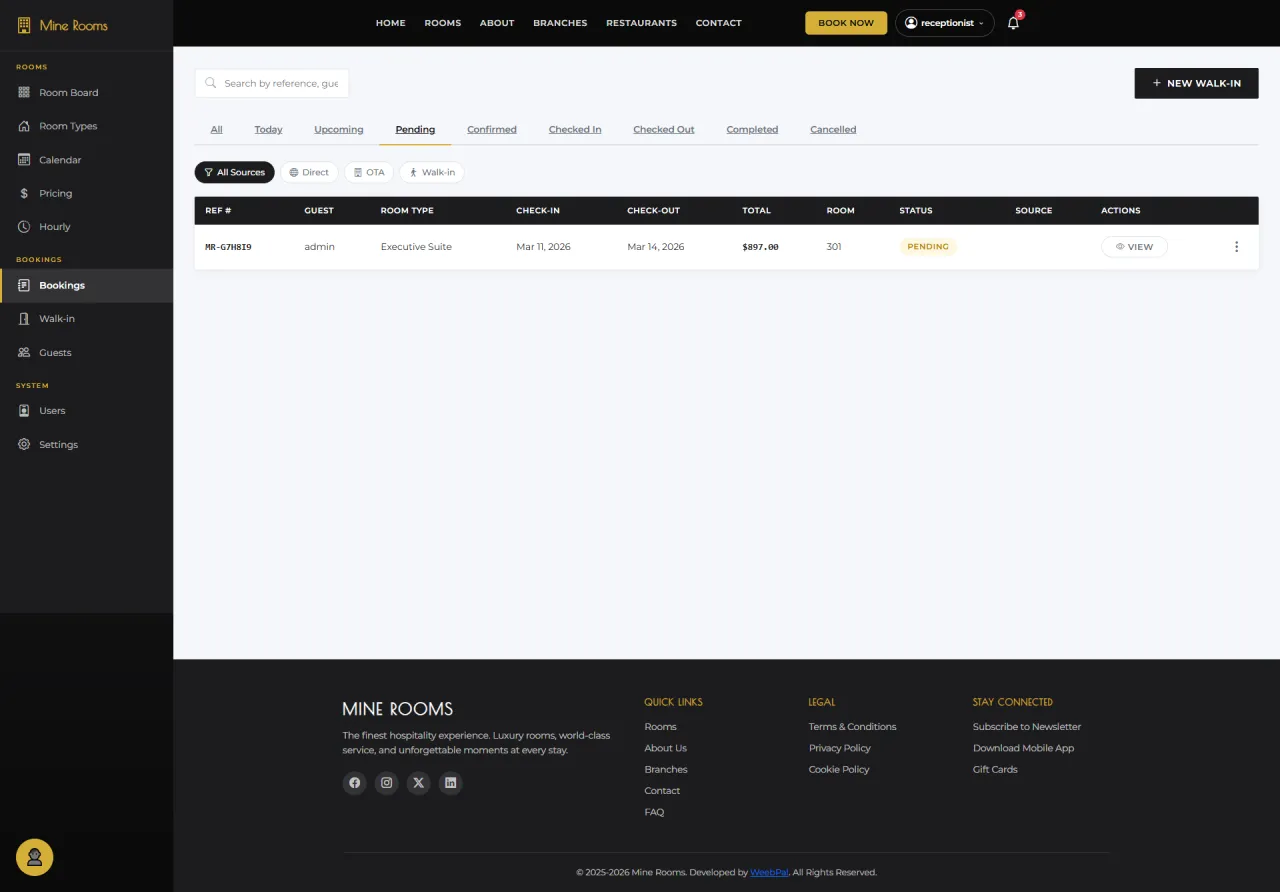
Pending Bookings
About this screen: Bookings submitted by guests that are waiting for receptionist review and confirmation.
Navigation: Bookings → Pending tab
- New online bookings appear here: review before confirming
- Click booking row to open Detail → Confirm or Cancel
- Guest receives notification once confirmed
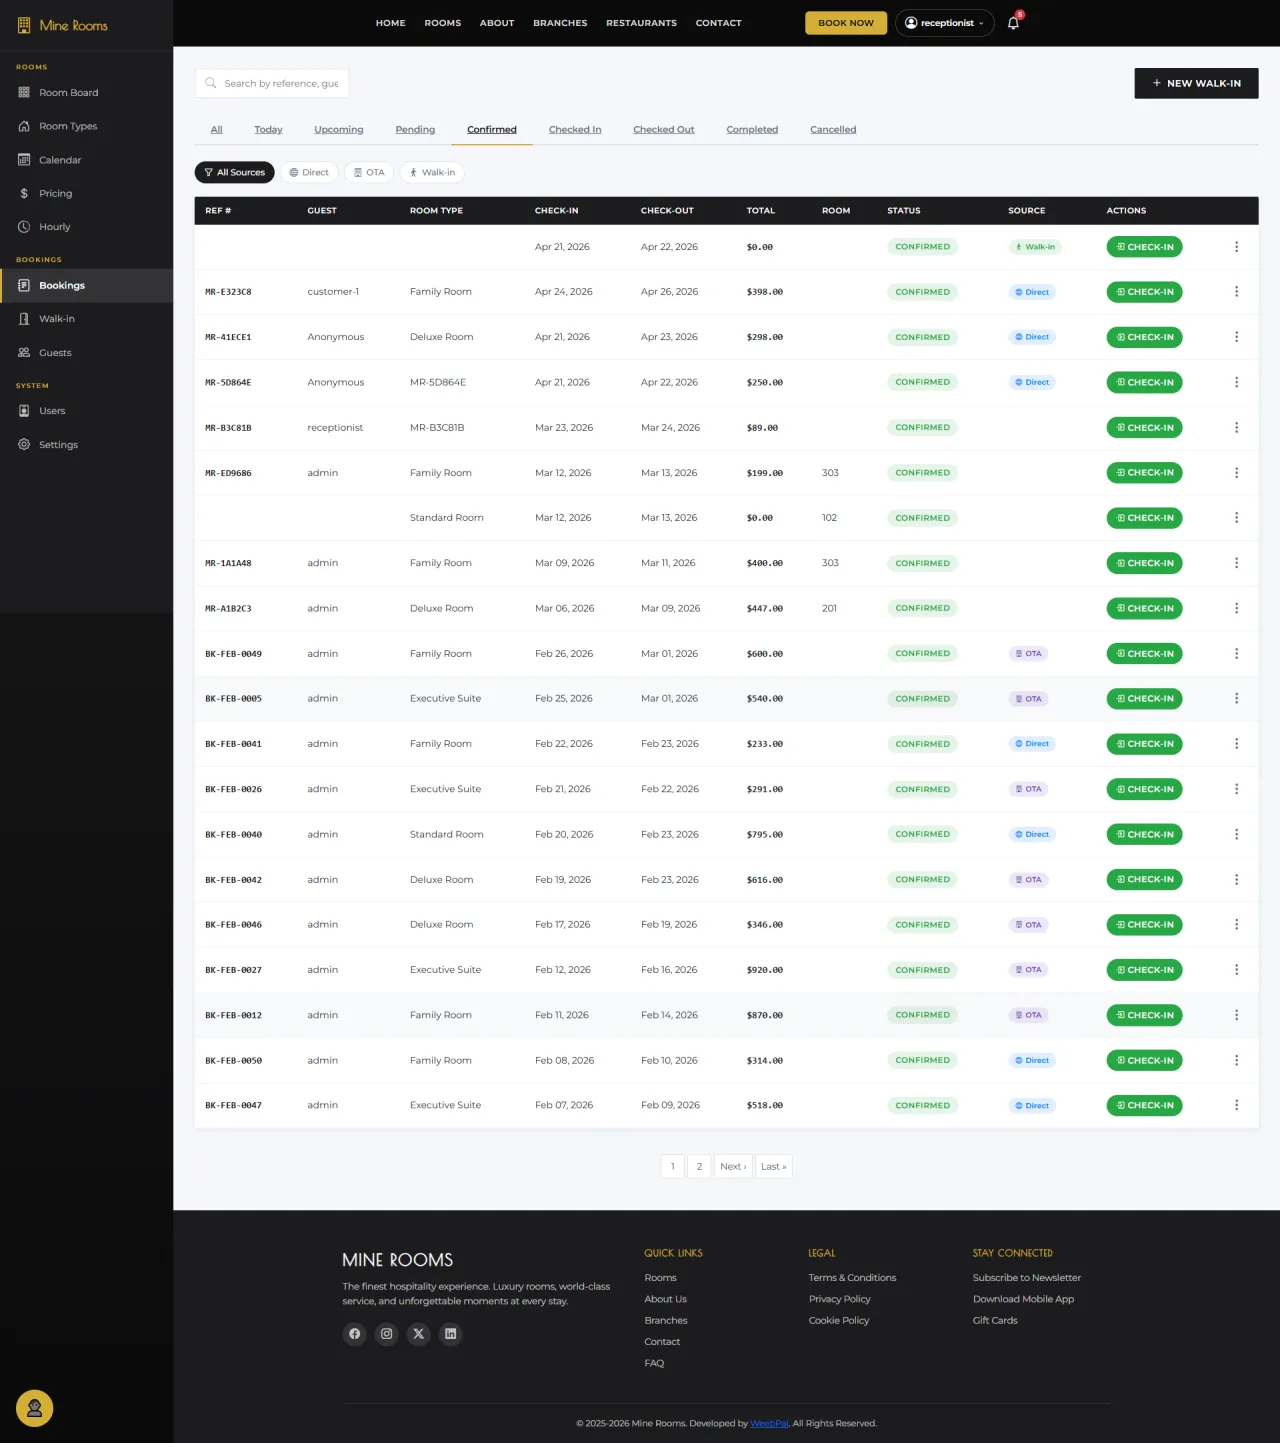
Confirmed Bookings
About this screen: Bookings that have been approved and are ready for check-in, across all booking sources.
Navigation: Bookings → Confirmed tab
- All confirmed bookings with green CHECK-IN action button
- Filter by Source: Direct, OTA, Walk-in
- Click row to view details and assign a specific room
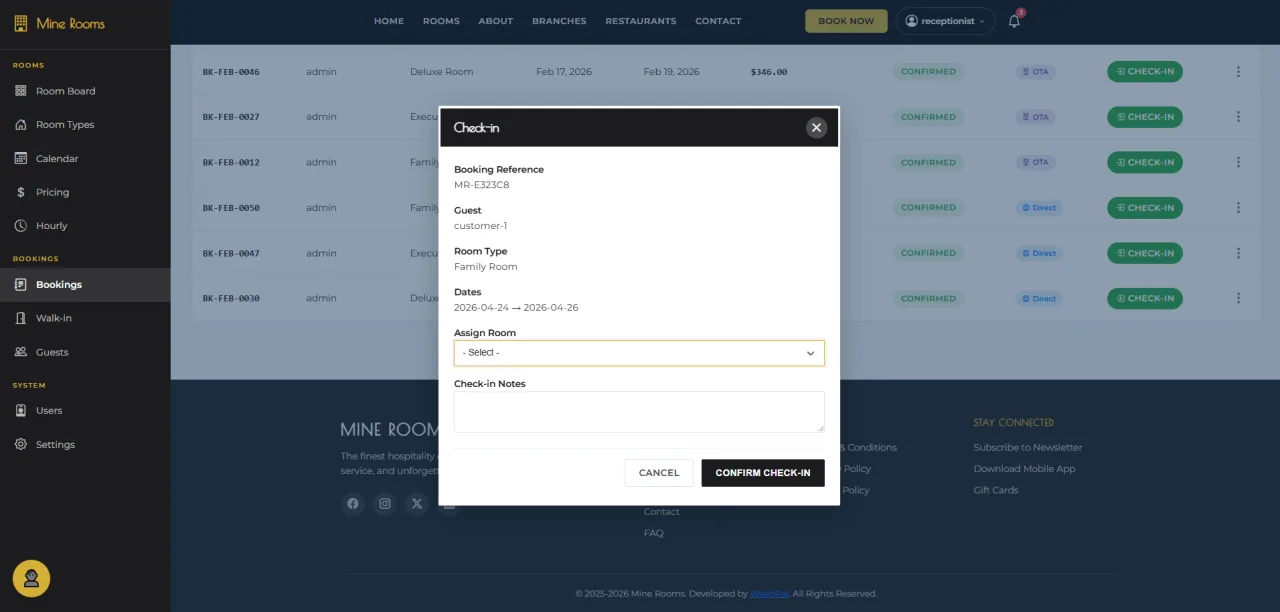
Confirm Check-in
About this screen: Process a guest's physical arrival (assign their room and officially check them in).
Navigation: Bookings → Confirmed tab → CHECK-IN button
- Verify guest ID and match with booking details
- Select room number from Assign Room dropdown
- Click CONFIRM CHECK-IN: status changes to Checked In
Checked-In Bookings
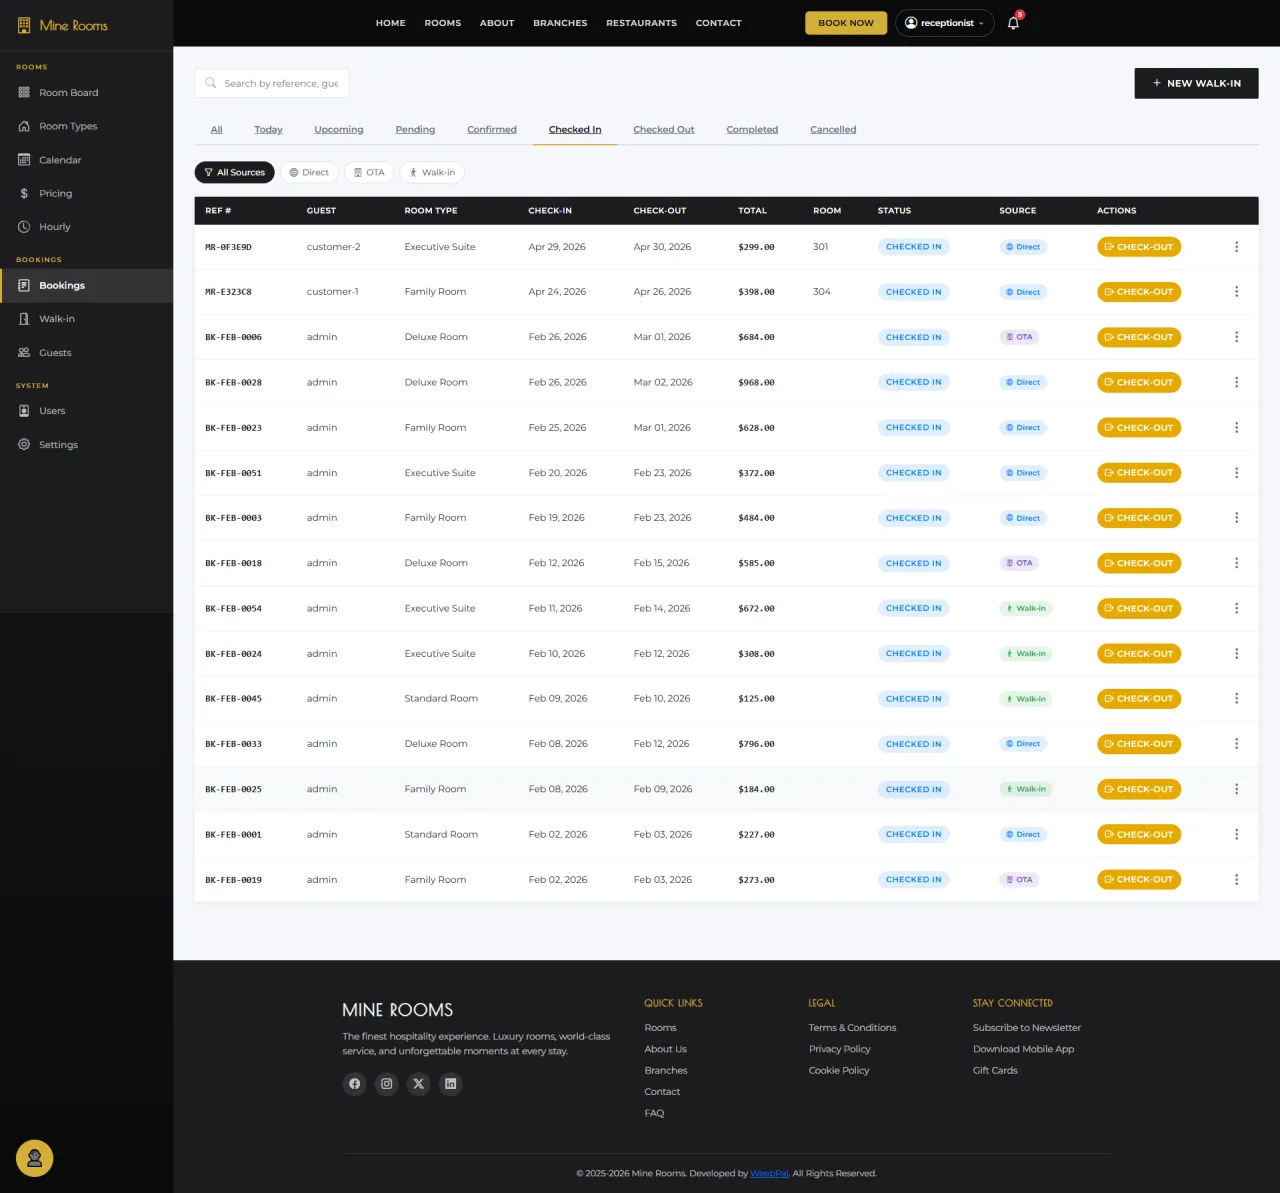
About this screen: All bookings currently in Checked-In state, with guests actively staying at the property.
Navigation: Bookings → Checked In tab
- Each booking shows yellow CHECK-OUT action button
- Monitor active room occupancy across all branches
- Click row to view full guest and room details
Confirm Checkout
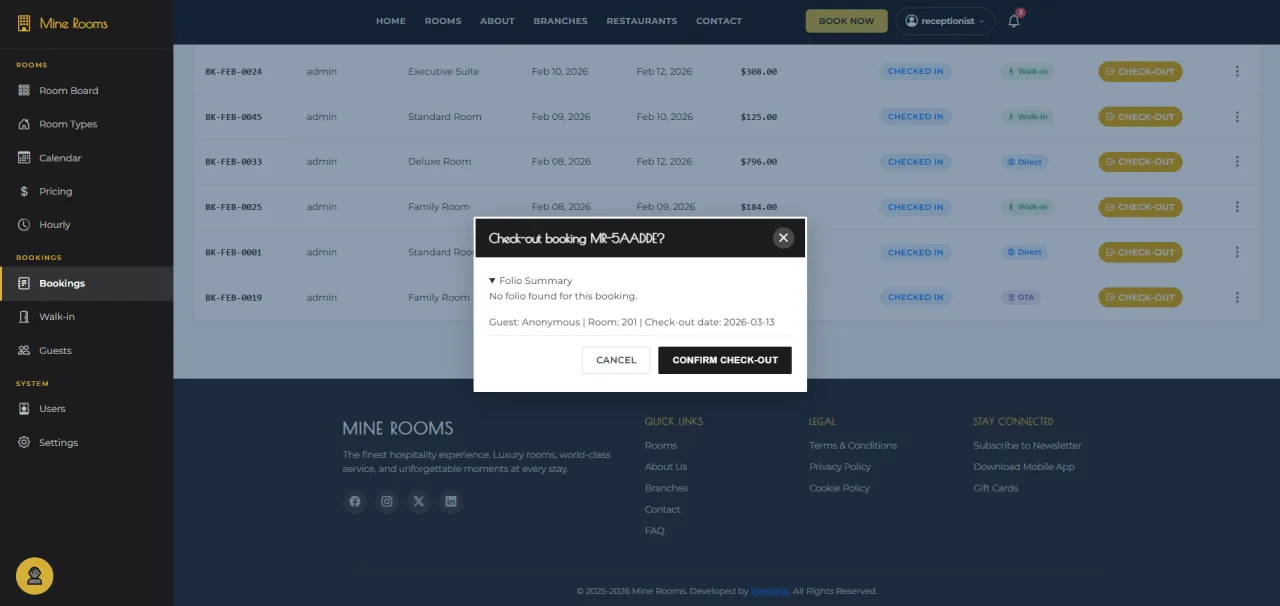
About this screen: Process a guest's departure (review the folio summary and confirm checkout).
Navigation: Bookings → Checked In tab → CHECK-OUT button
- Confirmation dialog shows: Booking Ref, Folio, Guest, Room
- Review Folio Summary to confirm all charges
- Click CONFIRM CHECK-OUT: room status changes to Dirty
Checked-Out Bookings
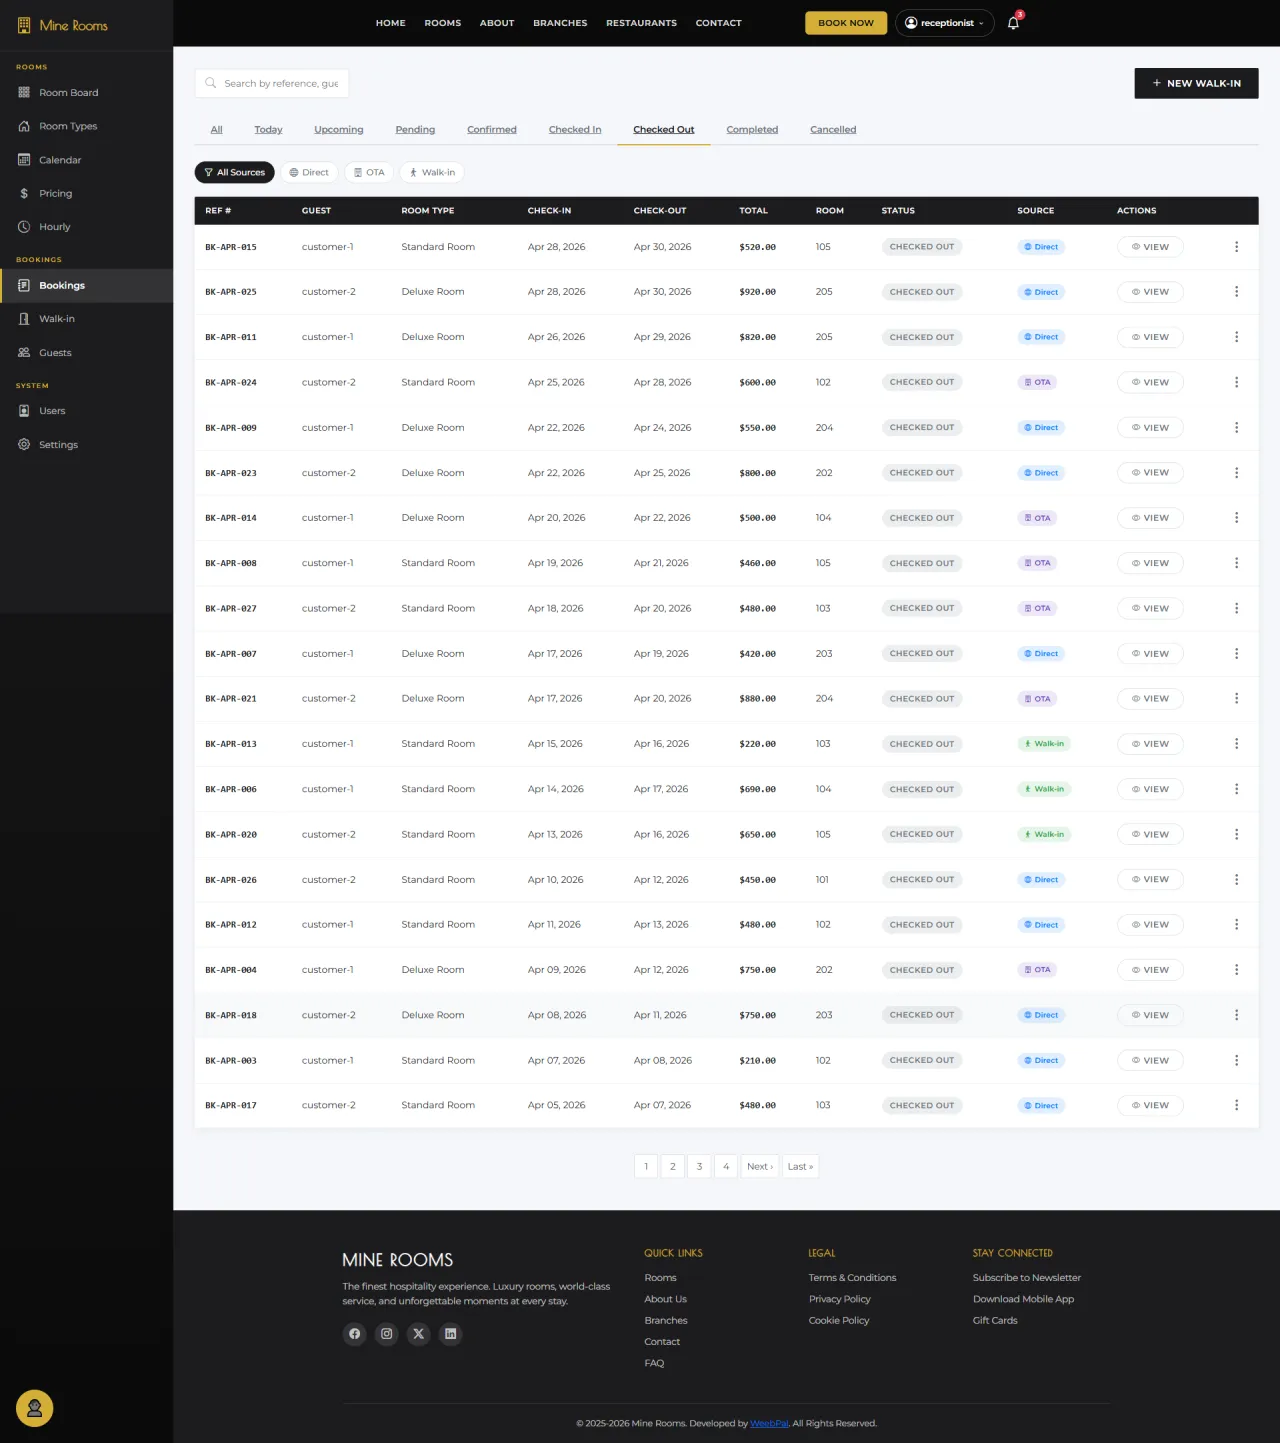
About this screen: Bookings where the guest has successfully checked out, so departure is complete.
Navigation: Bookings → Checked Out tab
- Lists completed departures: guest, room type, dates, total
- Only VIEW available, as bookings are read-only after checkout
- Confirm guest has departed before reassigning room
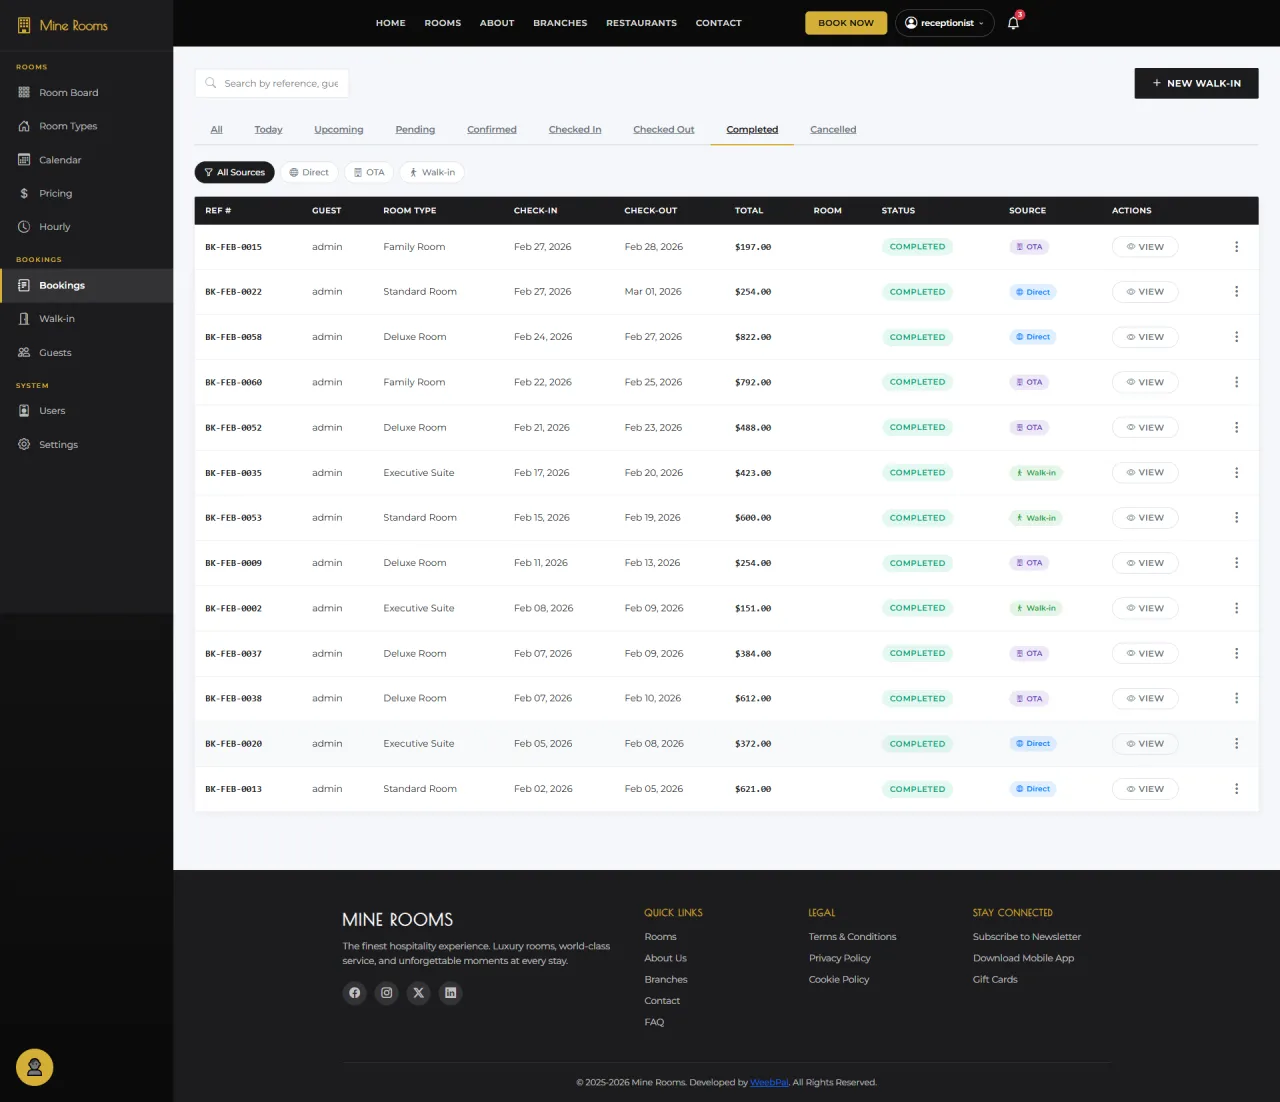
Completed Bookings
About this screen: Fully completed past stays, the historical record of all finished bookings.
Navigation: Bookings → Completed tab
- Full history of past stays with final booking details
- VIEW button to access detail and payment summary
- Filter by Source to analyze booking channel performance
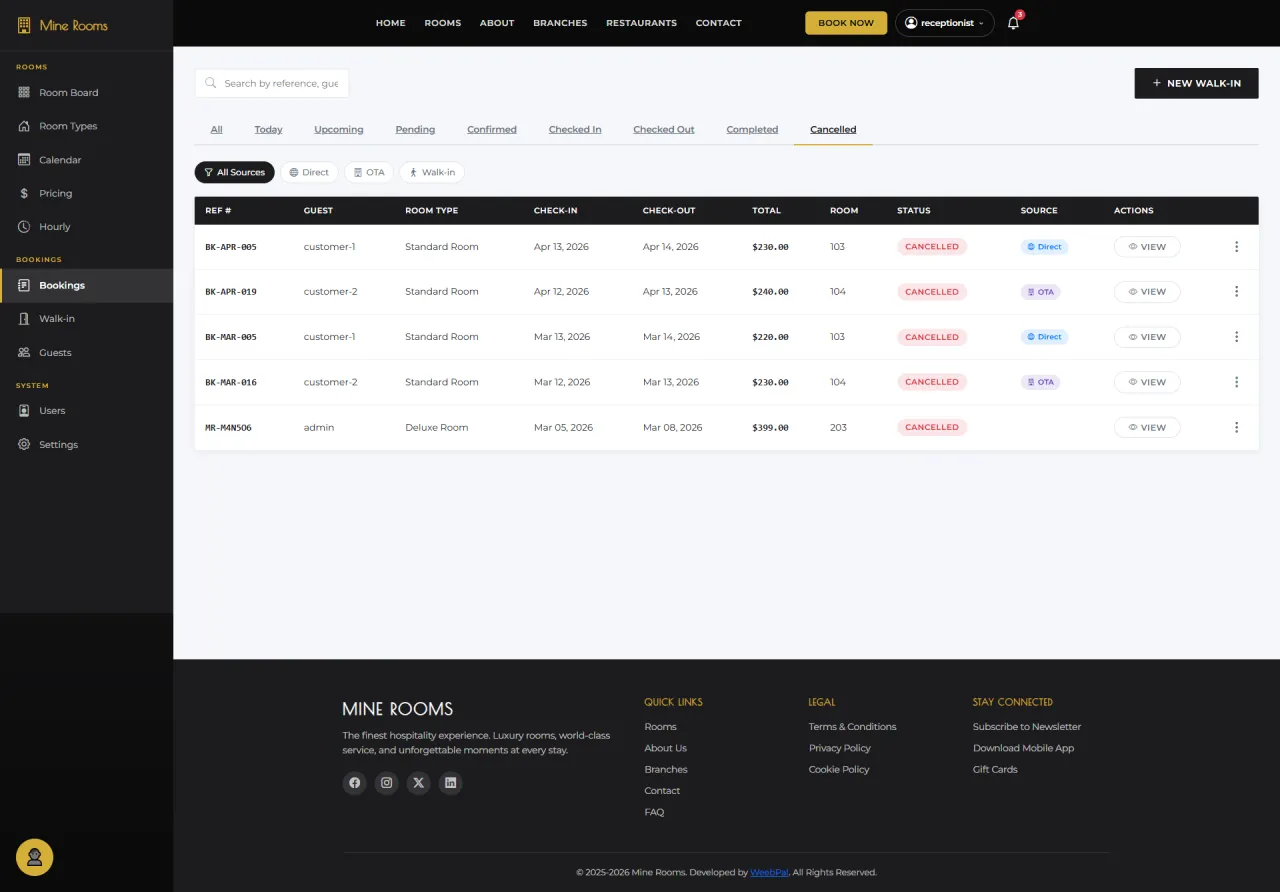
Cancelled Bookings
About this screen: All cancelled reservations (bookings rejected or cancelled before check-in).
Navigation: Bookings → Cancelled tab
- All cancellations with Ref#, Guest, Room Type, Dates, Total
- Click VIEW to review cancellation reason
- Cancellations from OTA partners reflected here automatically
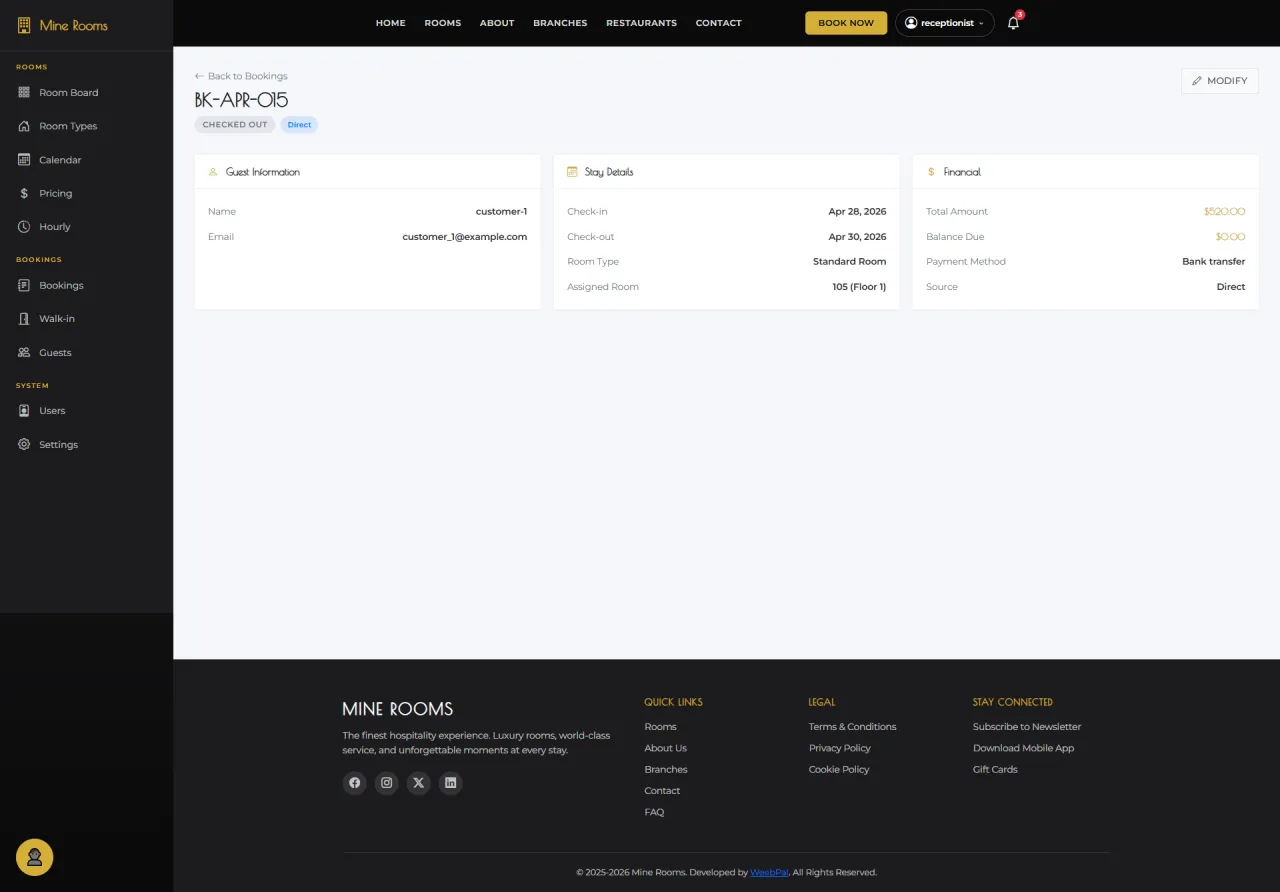
Booking Detail View
About this screen: Full information for a single booking (guest details, stay details, and payment summary).
Navigation: Bookings → click VIEW on any booking row
- Guest Information: Name and email
- Stay Details: Dates, Room Type, Assigned Room
- Financial: Total, Balance Due, Payment Method, Source
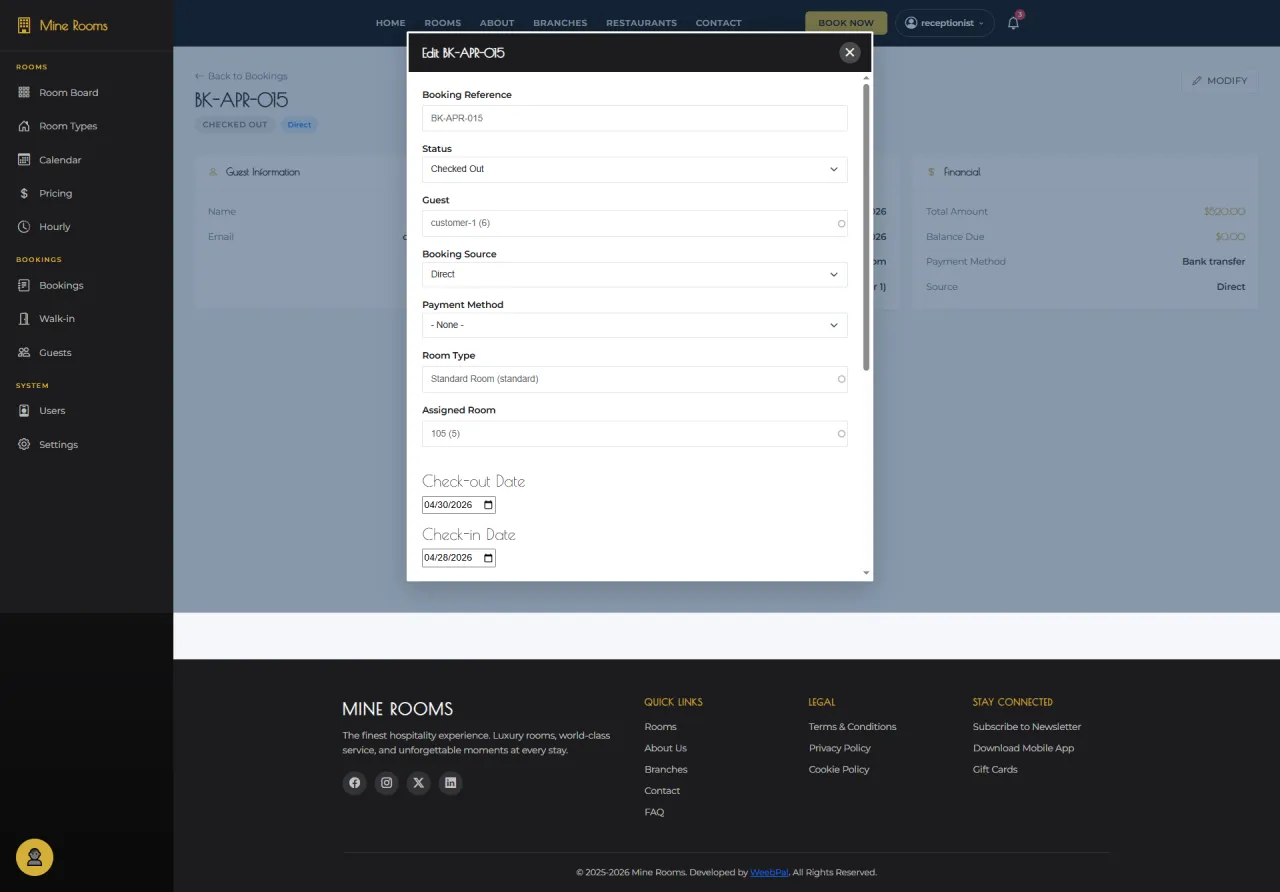
Modify Booking
About this screen: Edit an existing booking (update guest, dates, room type, or payment method).
Navigation: Bookings → open booking detail → MODIFY button
- Edit any field: Guest, Status, Source, Payment, Room Type, Room, Dates
- Changes take effect immediately after saving
- Click MODIFY button (top right) to access edit form
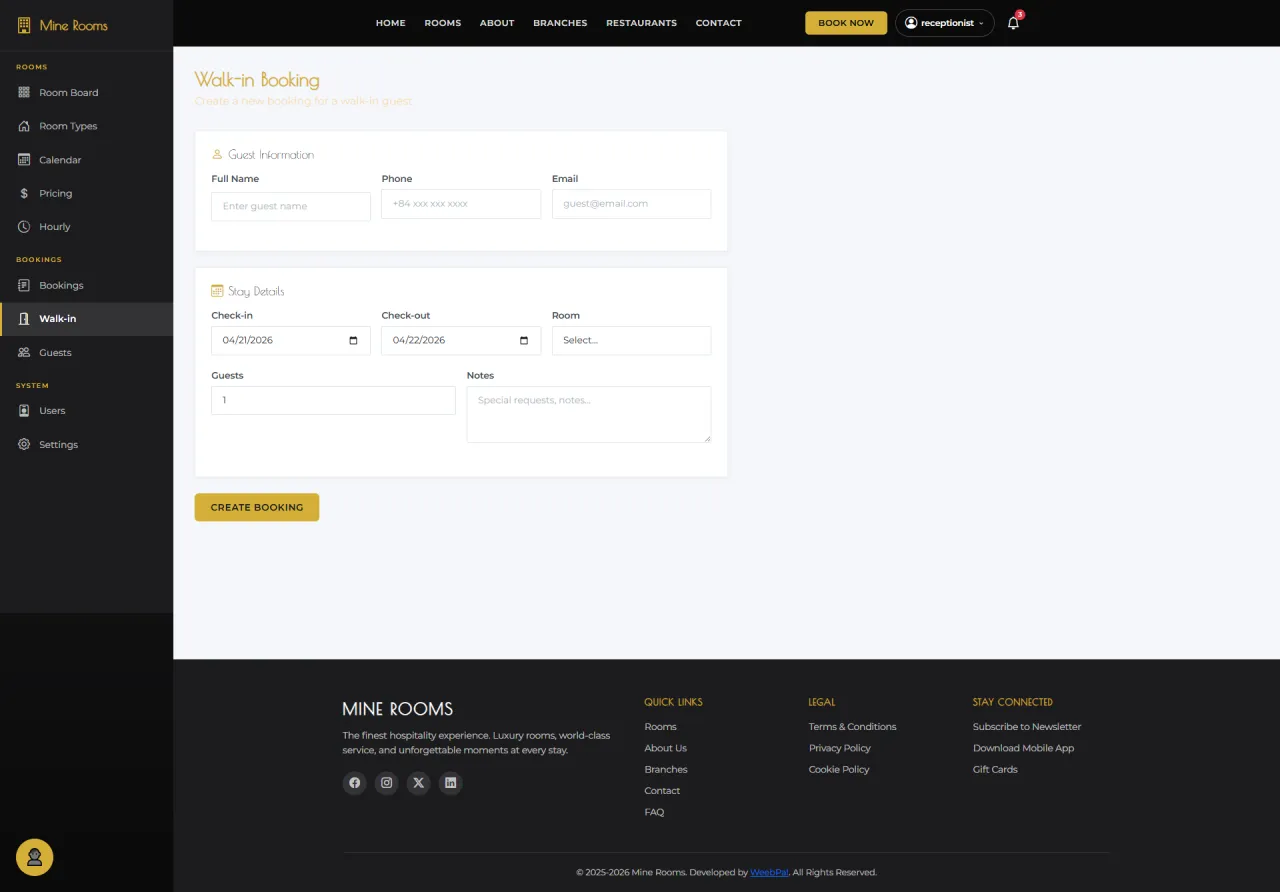
Walk-in Booking
About this screen: Create a new booking immediately for a guest who arrives at the front desk without a prior reservation.
Navigation: Bookings → + Walk-in button
- Select Branch, Room type, room number
- Enter: Full name, Email, Phone, ID
- Set dates and payment → click Create & Check-in
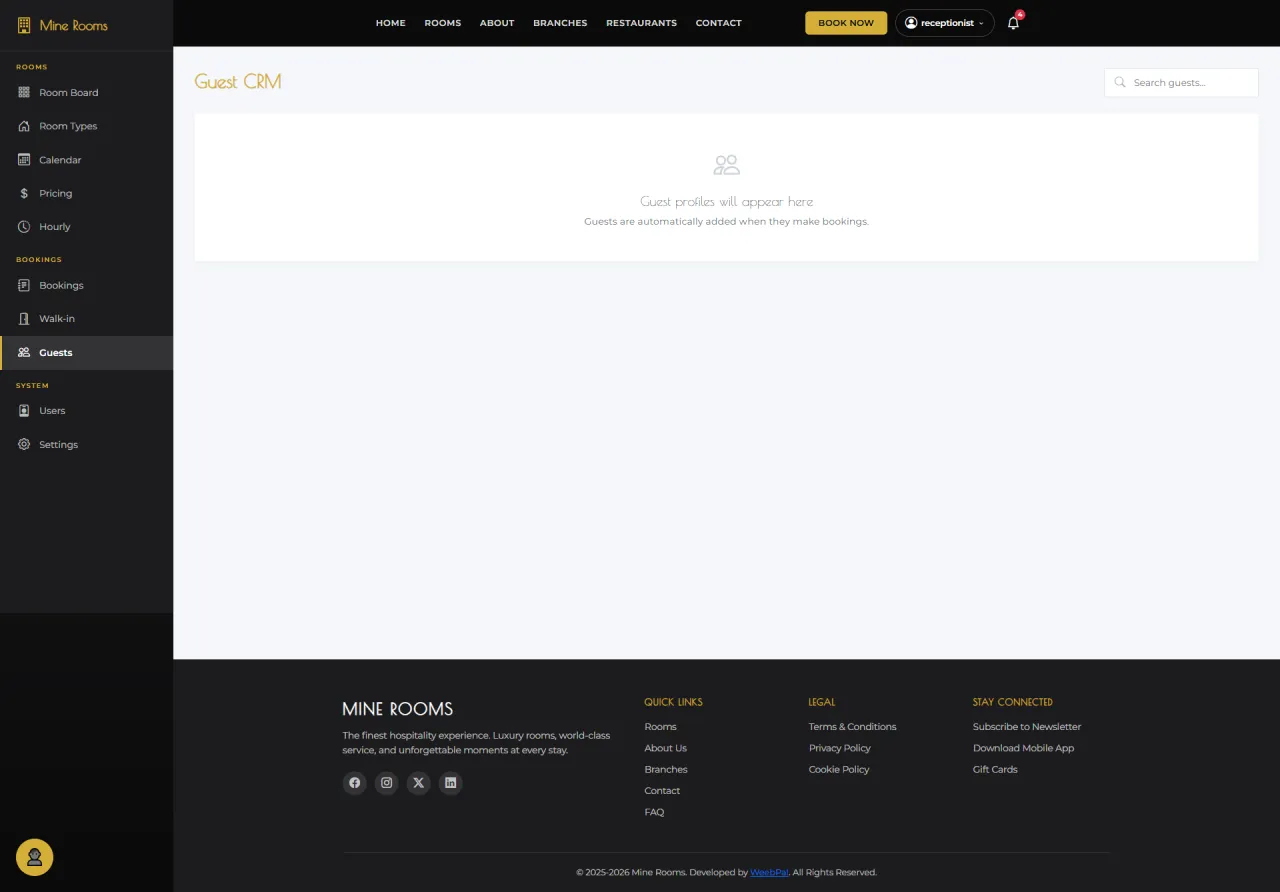
Guest List
About this screen: The complete guest database (all registered guests who have ever made a booking).
Navigation: Left sidebar → Guests
- Search guests by name, email, or phone number
- View each guest's booking history and loyalty points
- Click a guest to view their full profile and past stays
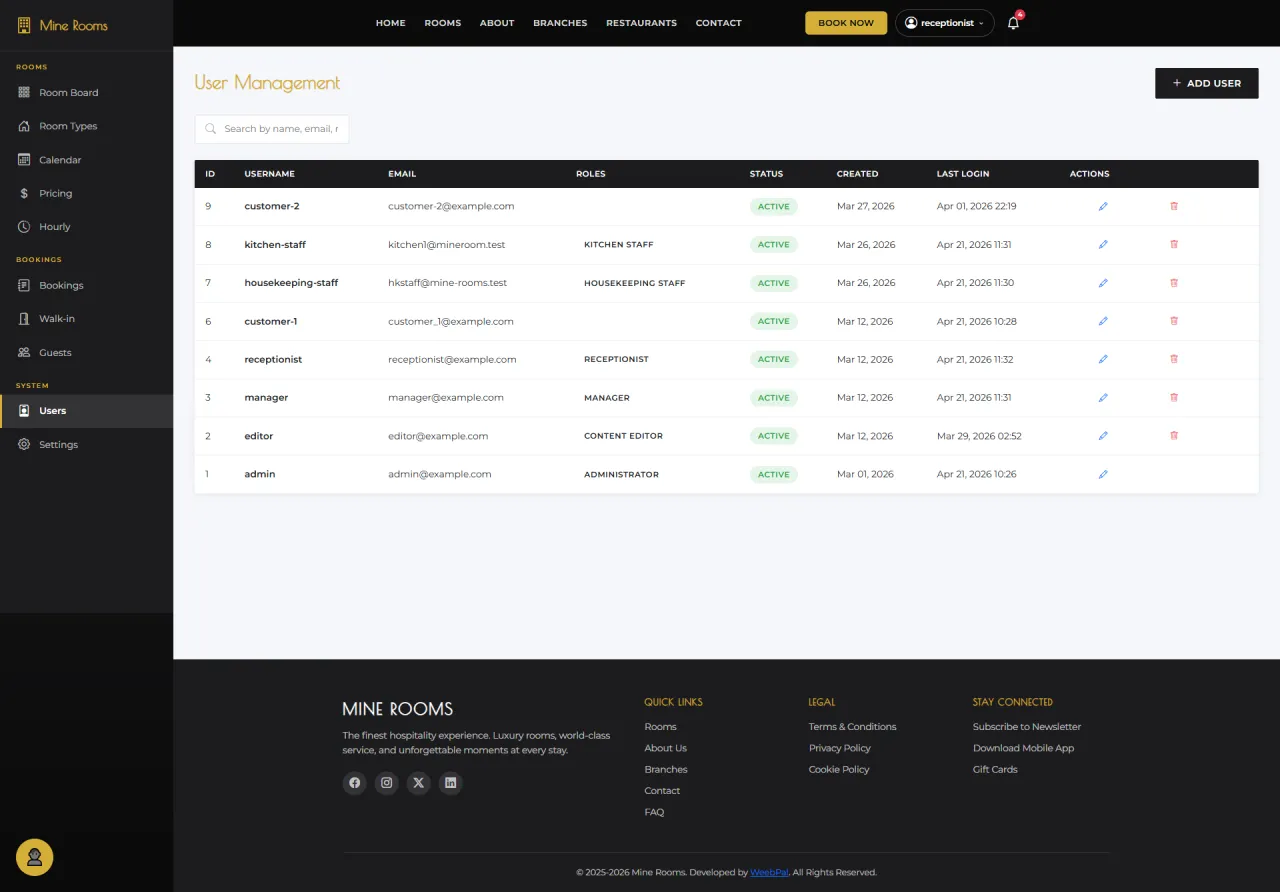
Users List
About this screen: All staff user accounts registered in the system, with their roles and status.
Navigation: Left sidebar → Users
- Each user shows: Name, Email, Role, Status, Last Login
- Roles: Admin · Receptionist · Kitchen · Housekeeping
- Click + Add User to create new staff account
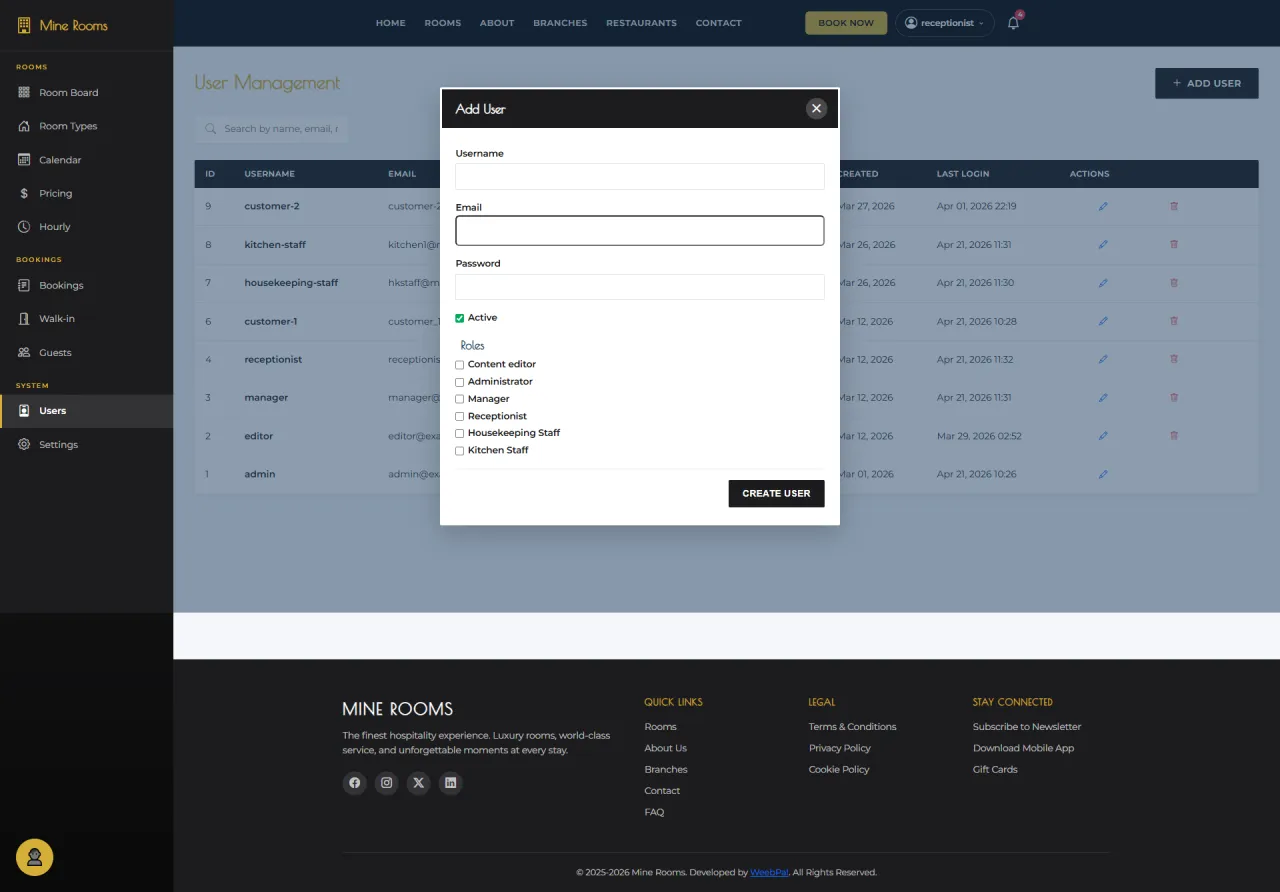
Add User
About this screen: Create a new staff account and assign their system role.
Navigation: Users → + Add User
- Enter: Full Name, Email, Username, Password
- Select Role and set Branch assignment
- Click Save: user can now log in
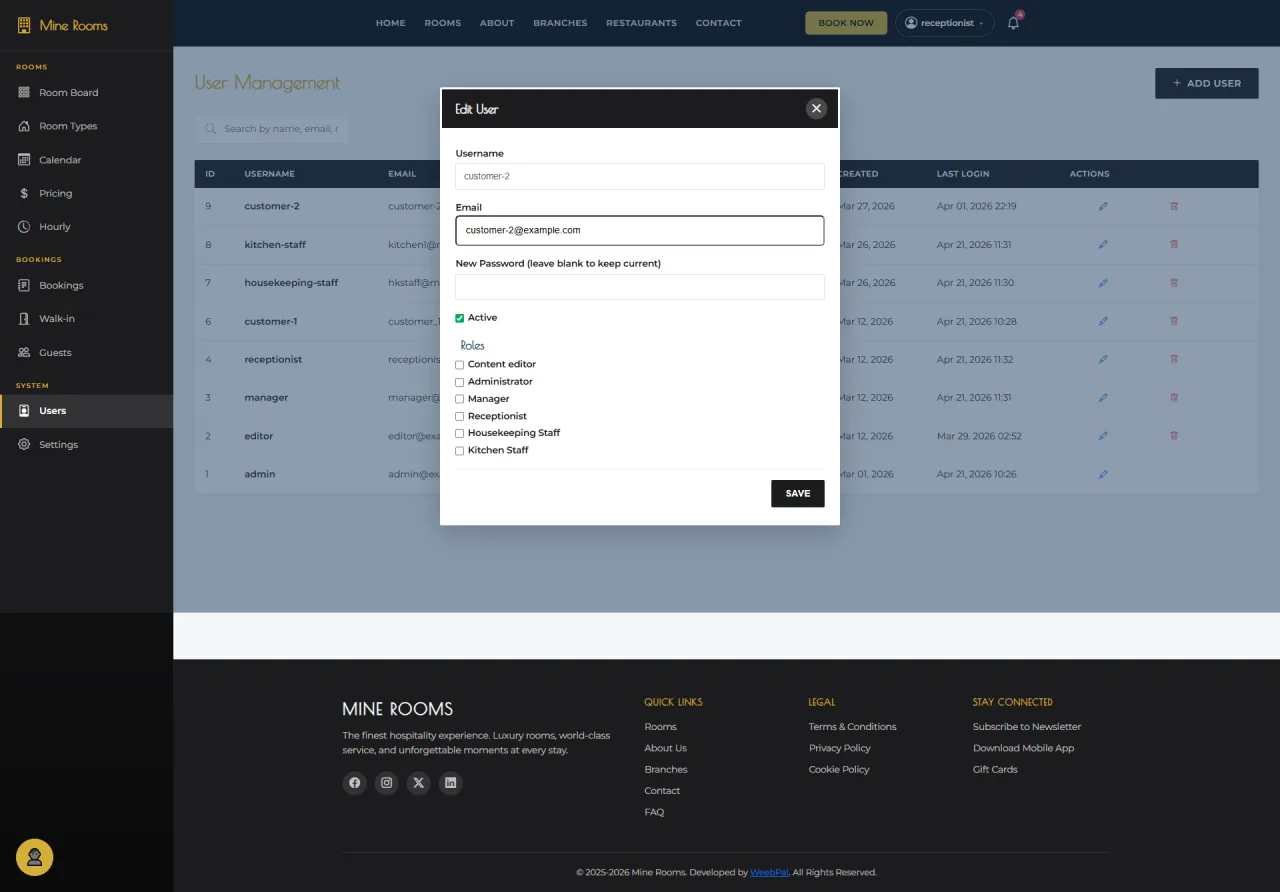
Edit User
About this screen: Update an existing staff member's details, role, or account status.
Navigation: Users → Edit on any user row
- Modify Name, Email, Role, or Branch
- Reset Password if staff is locked out
- Toggle Status to enable/disable access
Settings
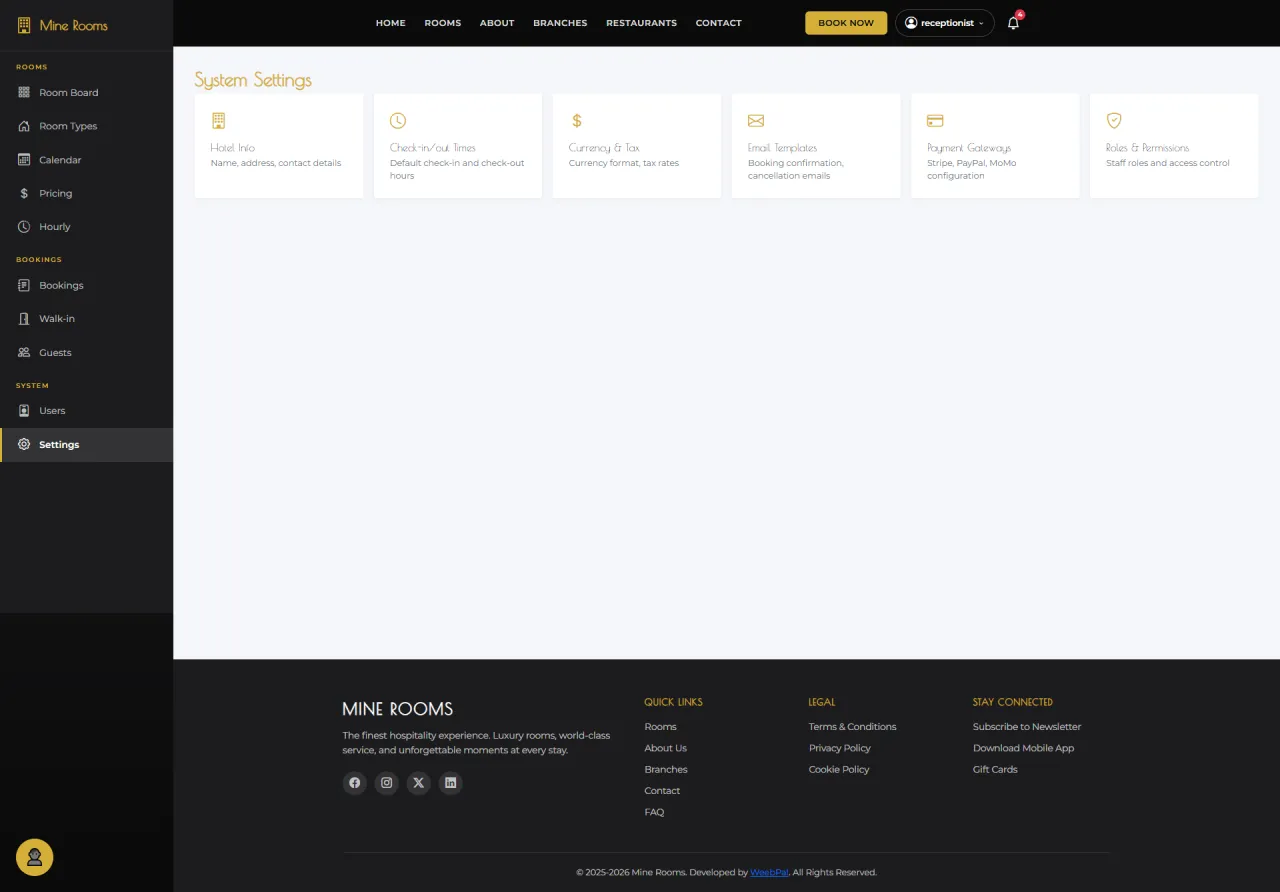
About this screen: System-wide hotel configuration settings (property details, check-in/out times, tax settings, and more).
Navigation: Left sidebar → Settings
- Configure: Hotel name, Address, Contact info, Logo
- Set Check-in/out times, Tax rates, Currency
- Click Save after changes
Running MineRooms in your own organisation
Names, prices and plans on these screens are set up differently for each deployment. We deploy MineRooms on your domain and adapt it to how you work, and you receive the running system and its source code.