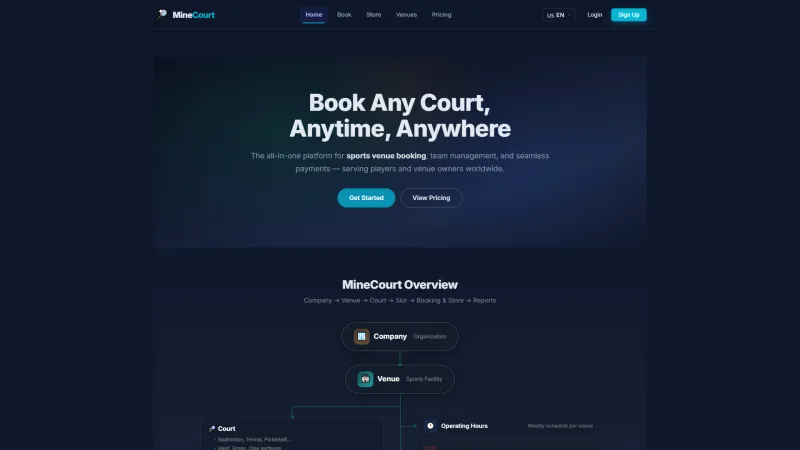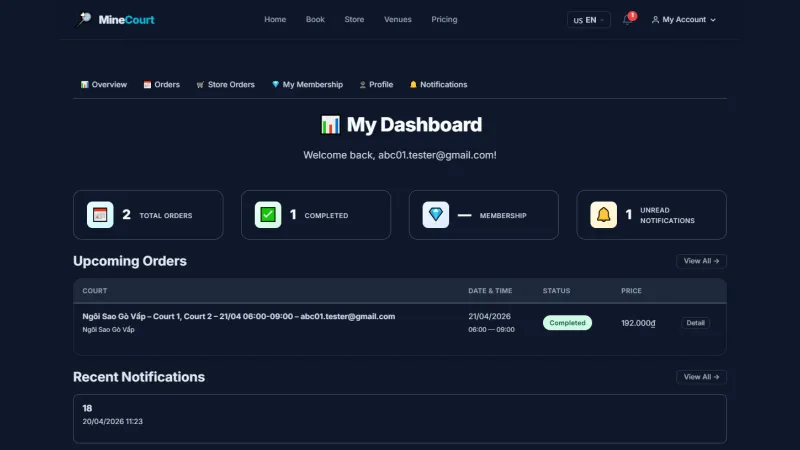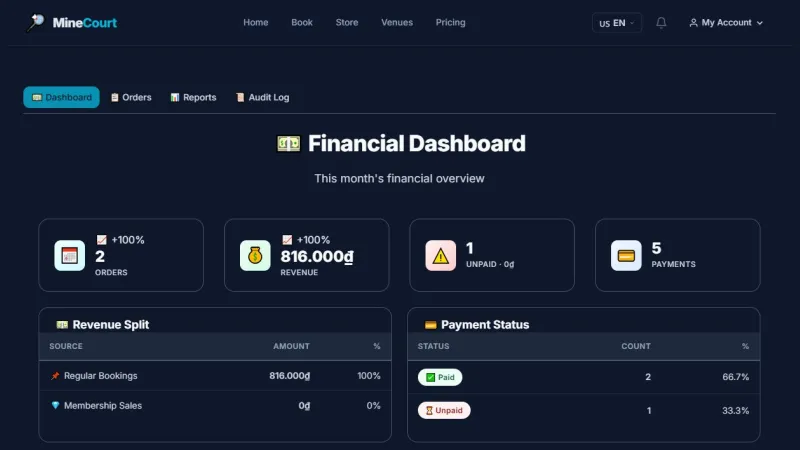

System Login
About this screen: Access Venue Manager privilege level.
Navigation: Menu → Login
- Demo access: sandbox accounts are issued on request: request a guided demo.
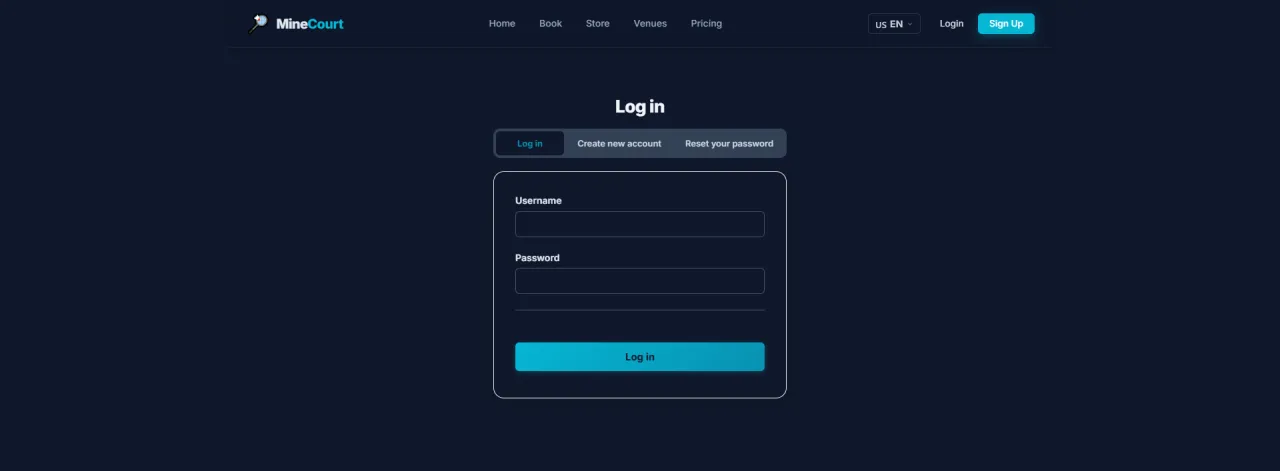
Venue Manager Menu
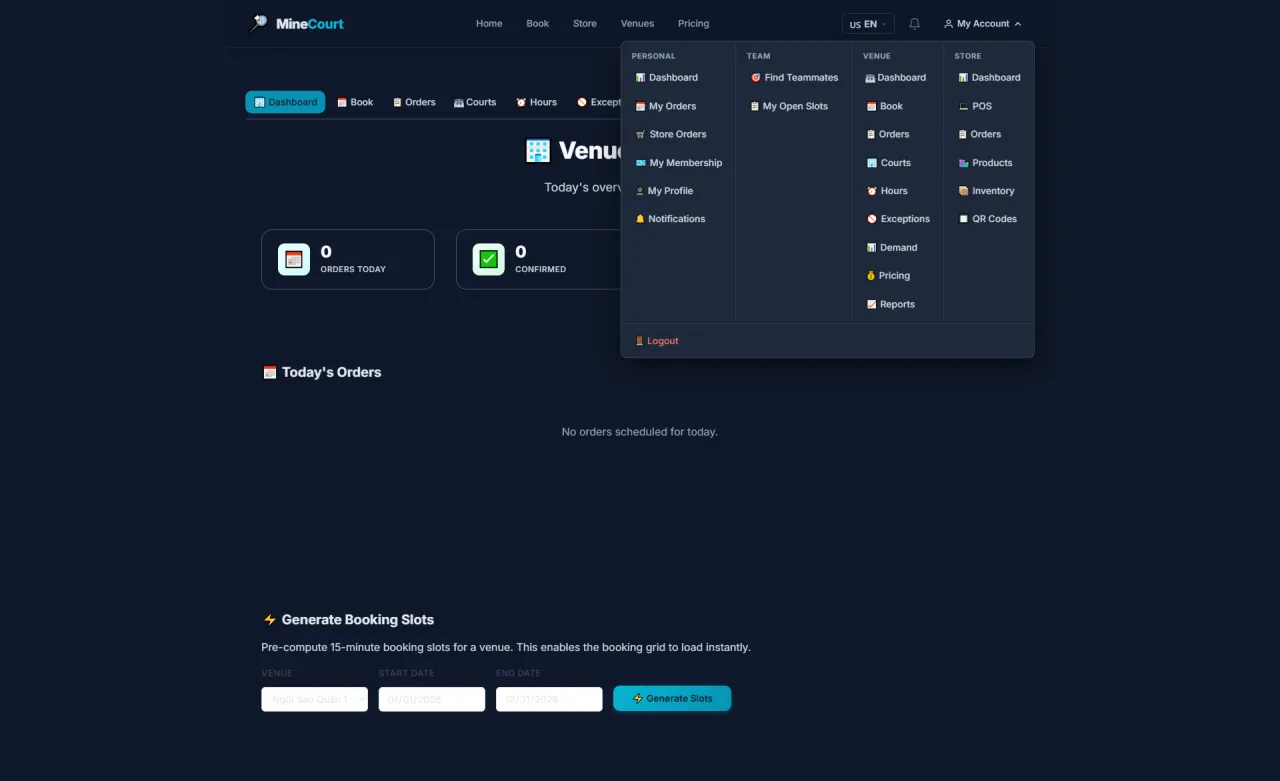
About this screen: Navigation interface with module selector for Venue and Store sections, plus expandable sidebar showing context-specific sub-menus.
Navigation: Click My Account in the top-right navigation bar.
- Venue Module: Court scheduling, pricing grid, operating hours, and all booking orders
- Store Module: POS interface, inventory management, and add-on service sales
- Smart Submenu: Sidebar expands dynamically based on which module you're in
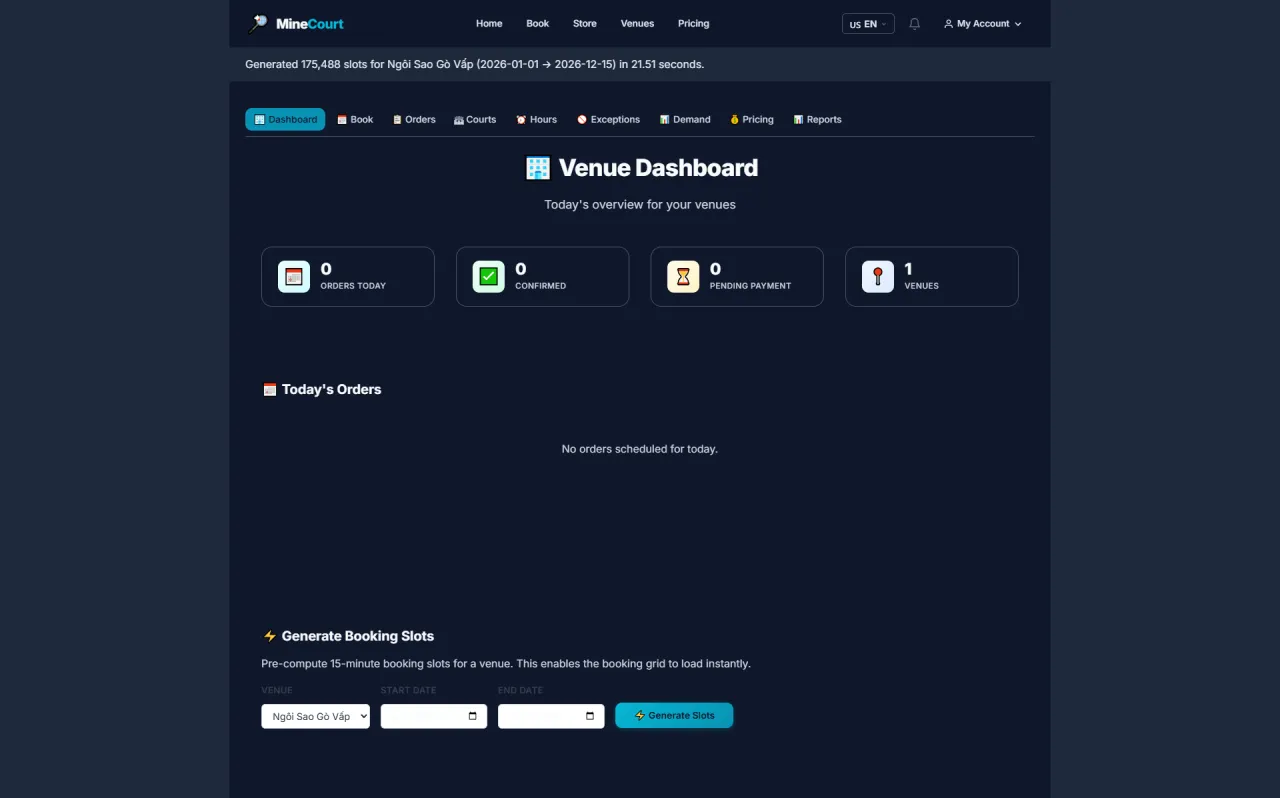
Venue Dashboard
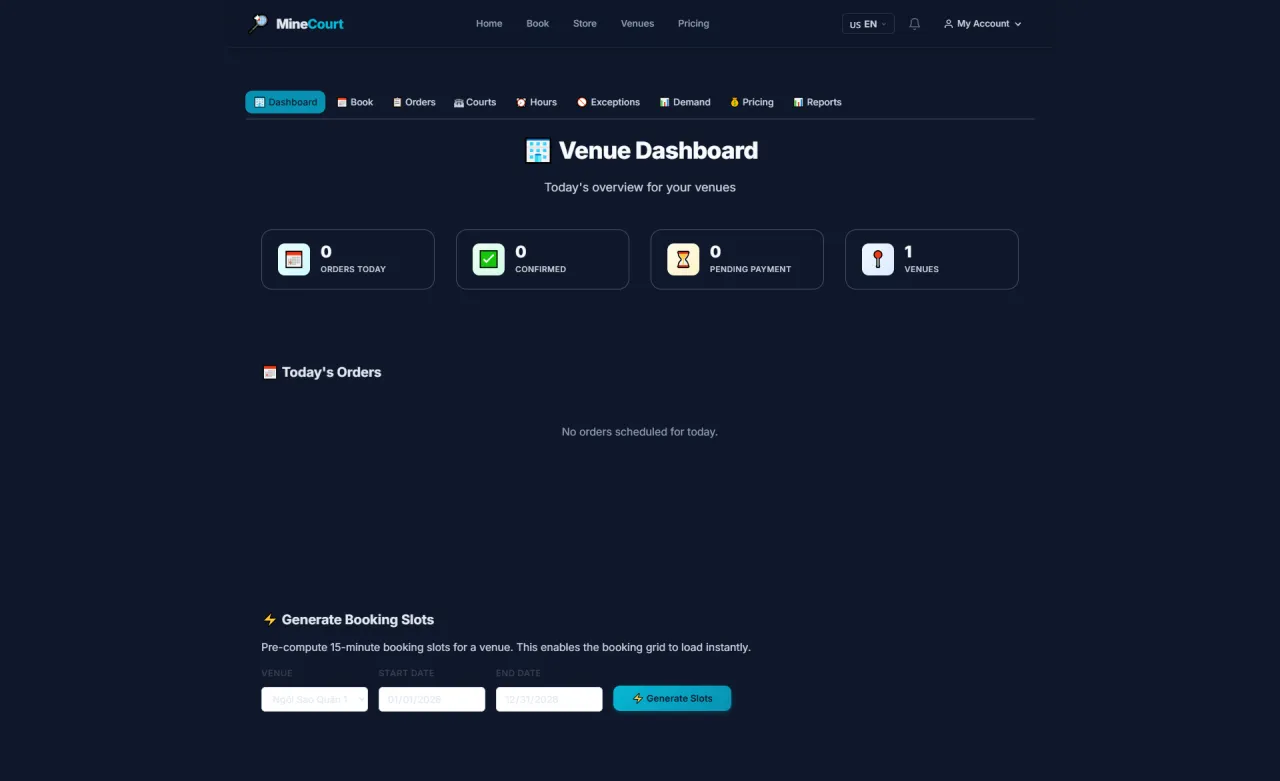
About this screen: Real-time operational overview of the venue for the day.
Navigation: Venue Dashboard (default view after login)
- Live Metrics: Instant stats on total bookings, pending payments, and venue-wide utilization
- Today's Orders Grid: Tracks all players scheduled today so reception can prepare proactively
- Generate Booking Slots: Core engine that publishes available slots to the mobile app, up to 2 years ahead
Manage Courts
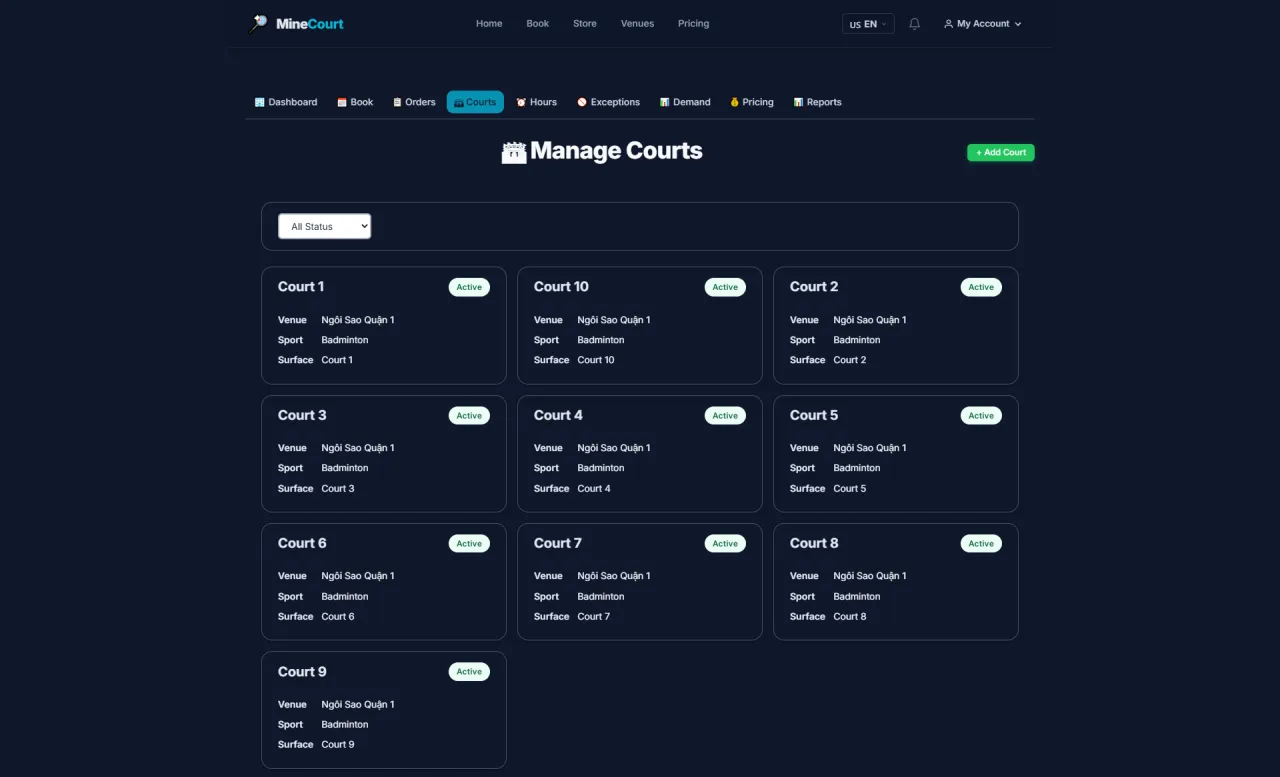
About this screen: View and manage all physical courts within the venue.
Navigation: Venue module → Courts tab
- Court List: Overview of court name, ID, and surface type
- Active/Inactive Toggle: Instantly hide or show a specific court from the booking app
- Maintenance: Use Update to refresh court specifications and keep records current
Add Court
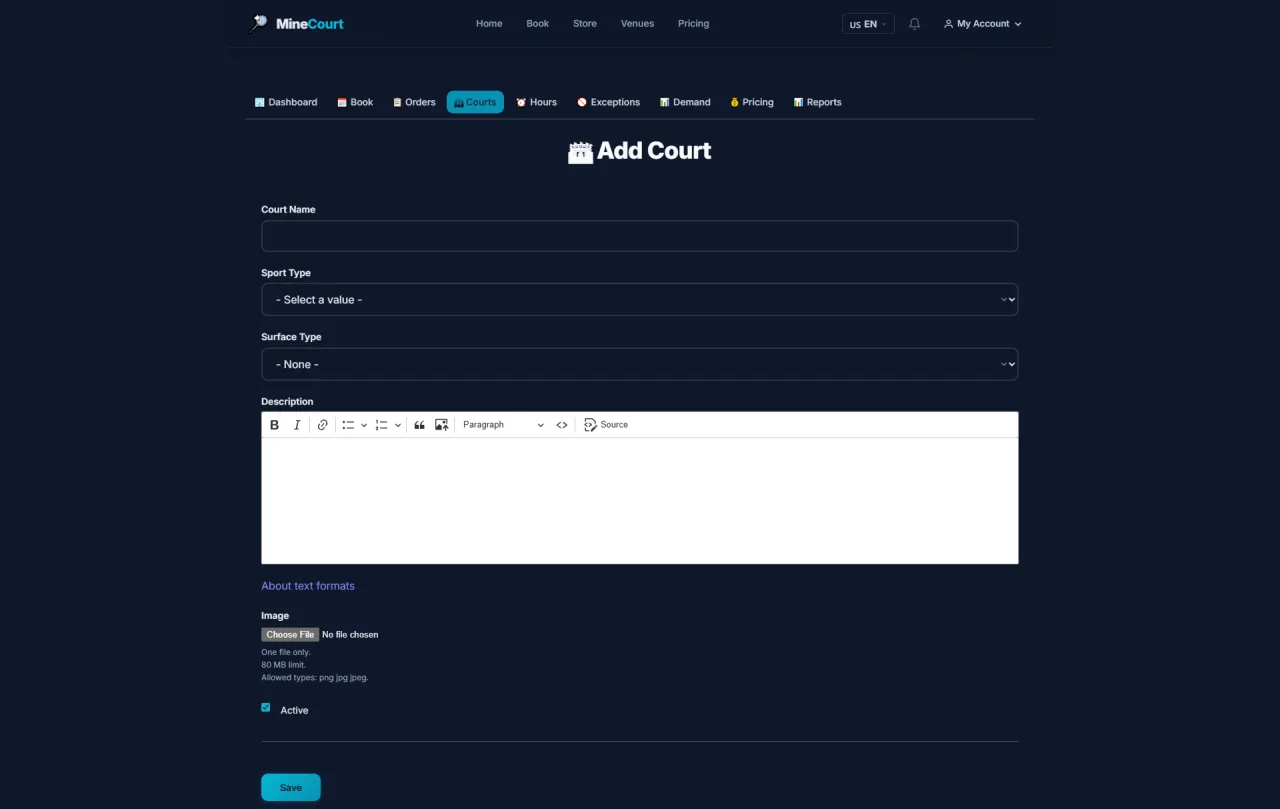
About this screen: Register a new physical court into the venue's management system.
Navigation: Manage Courts page → Add Court
- Surface Type: Assign the correct floor material (Wood, Rubber) for proper footwear compatibility
- Venue Link: Attach the new court to the correct parent Venue
- Activate: Toggling Active immediately syncs the court with the pricing and scheduling engine
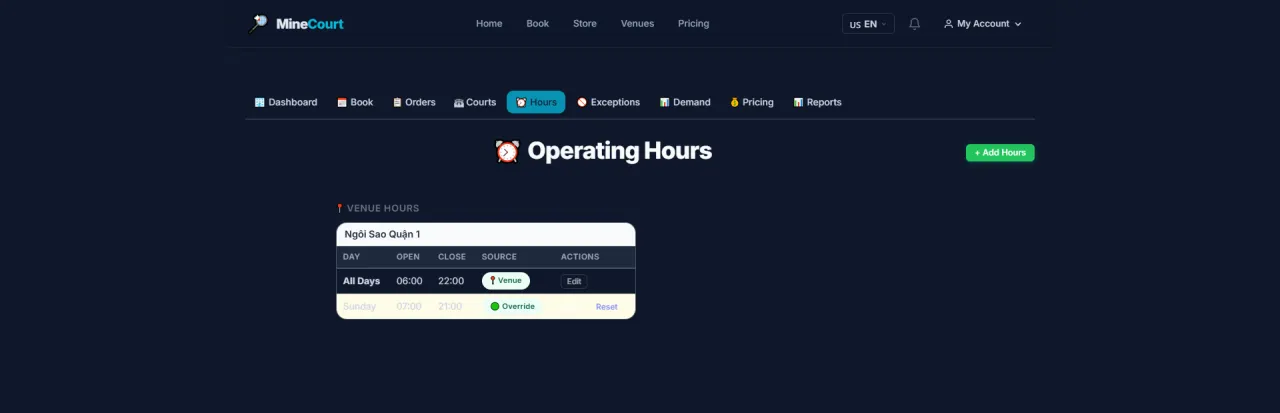
Operating Hours
About this screen: View the venue's configured open and close hours.
Navigation: Venue module → Operating Hours tab
- Displays open/close times for each day of the week
- Distinguishes Weekday and Weekend schedules
- Click Add to create new operating hours
- Click Edit to modify existing schedules
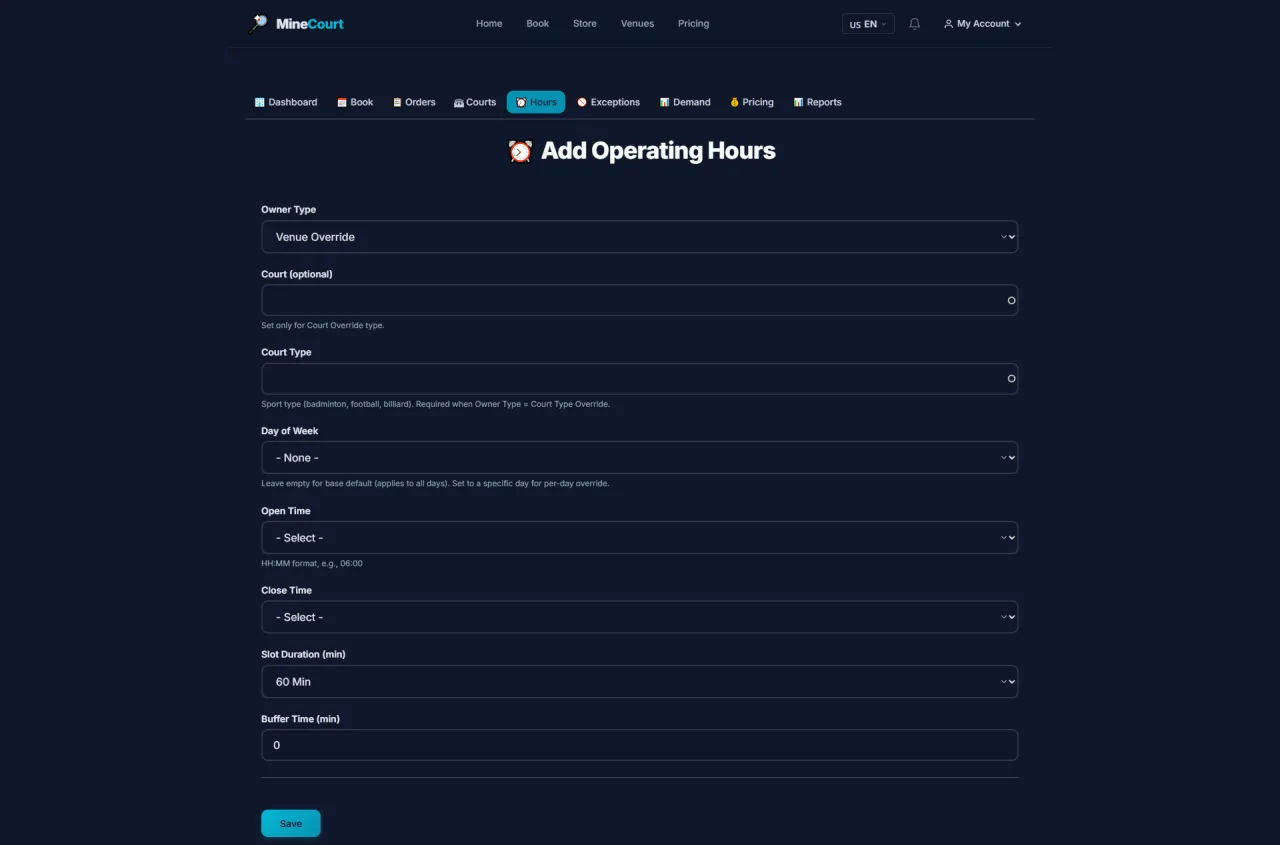
Add Operating Hours
About this screen: Configure opening hours for specific days or grouped days.
Navigation: Hours tab → Add
- Select the Venue to apply
- Select days of the week (Mon to Sun)
- Enter Open Time and Close Time
- Click Save
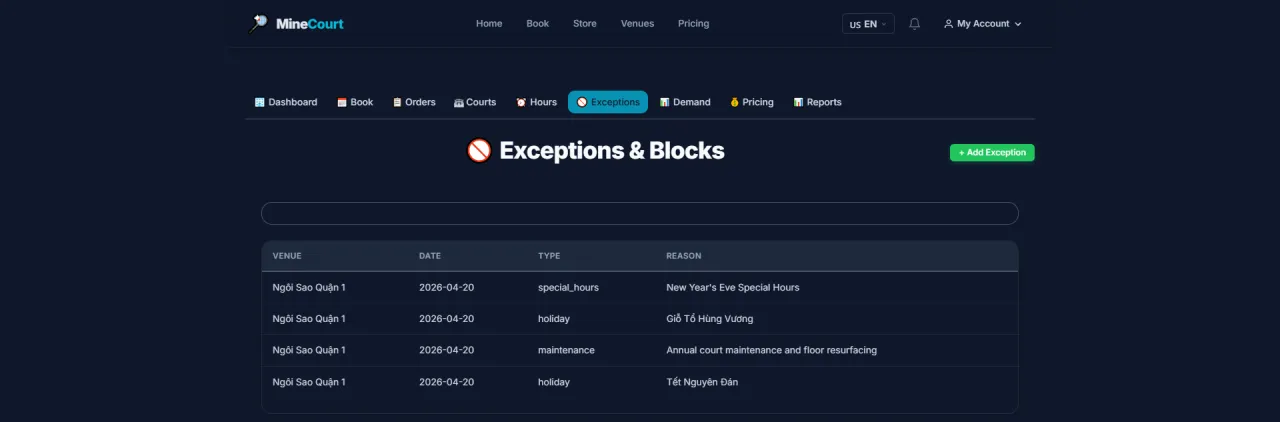
Exceptions & Blocks
About this screen: View the list of exception days (holidays, maintenance closures...).
Navigation: Dashboard → Exceptions tab
- Exception list: name, date range, exception type
- Day Off status means the venue is fully closed on that date
- Click Add Exception to create a new entry
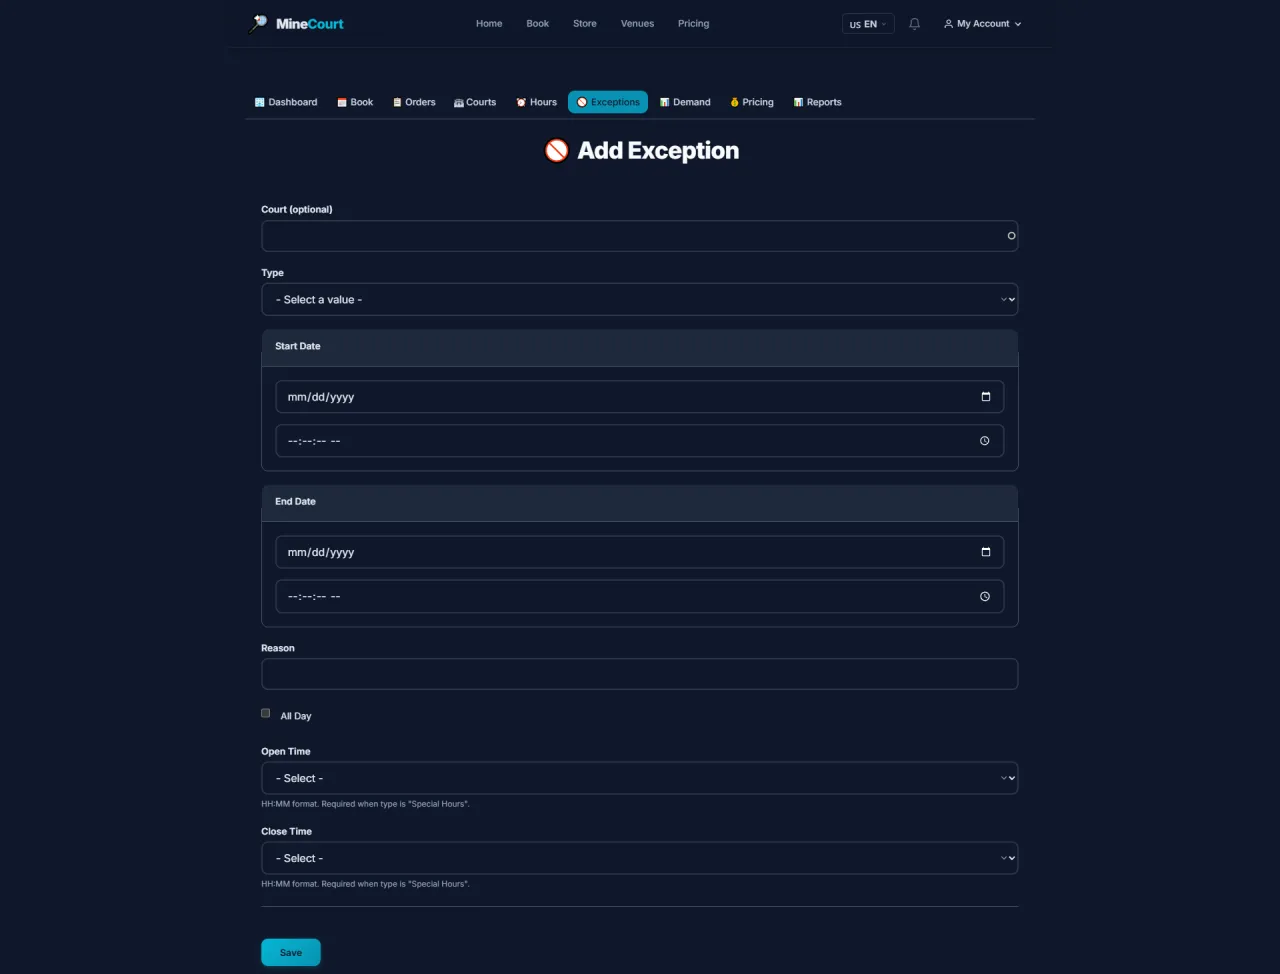
Add Exception
About this screen: Configure a closure or special-pricing override for a specific date range.
Navigation: Exceptions tab → Add Exception
- Enter exception Name (e.g., Maintenance, National Holiday)
- Select date range: Start Date → End Date
- Check Day Off for a full closure on those dates
- Or enter override hours if only changing opening time
- Click Save
Generate Booking Slots
About this screen: Pre-generate available time slots so customers can book by date.
Navigation: Venue Dashboard → Generate Booking Slots section
- Select the Venue to generate for
- Select Start Date and End Date (up to 2 years ahead)
- Click Generate Slots: system auto-creates slots based on Operating Hours
- Slots that conflict with existing bookings will not be deleted, only flagged with a warning
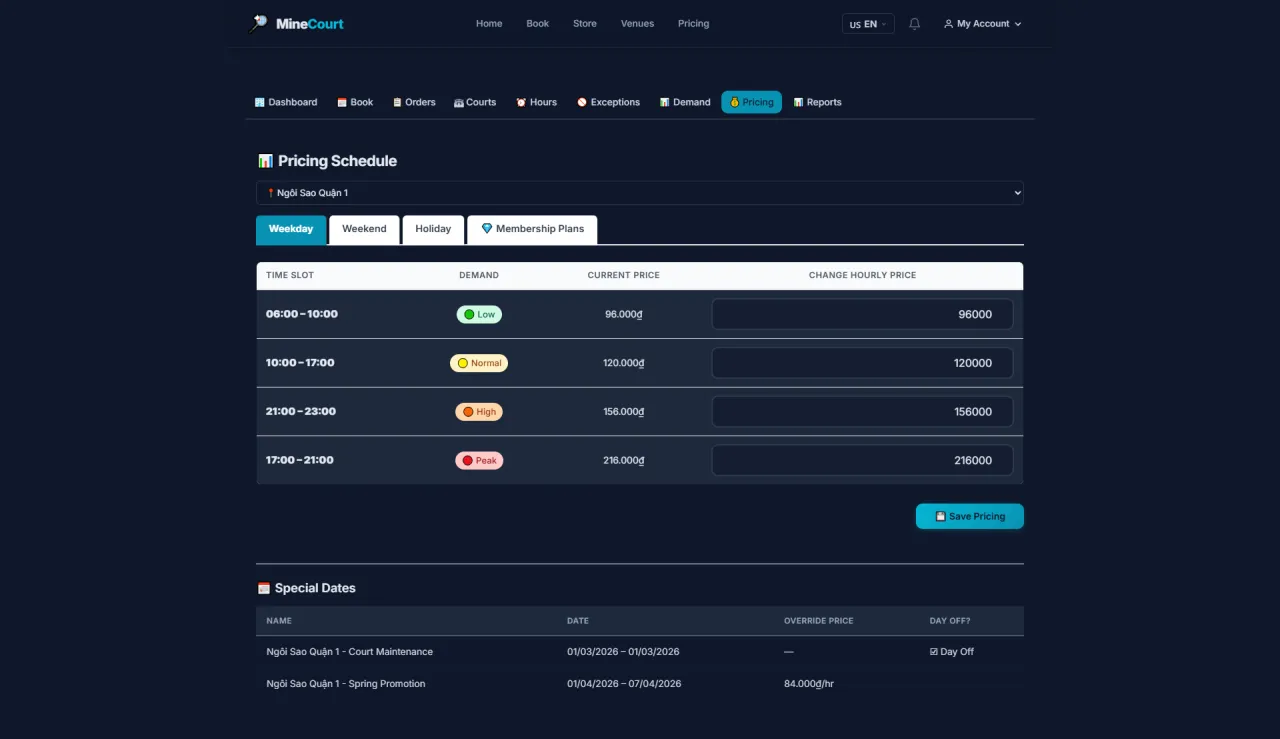
Weekday Pricing
About this screen: Configure hourly court rates for weekdays.
Navigation: Venue module → Pricing → Weekday tab
- 4 demand tiers: Low, Normal, High, Peak
- Enter new prices in the Change Hourly Price fields
- View and manage Special Dates below the pricing grid
- Click Save Pricing to apply changes
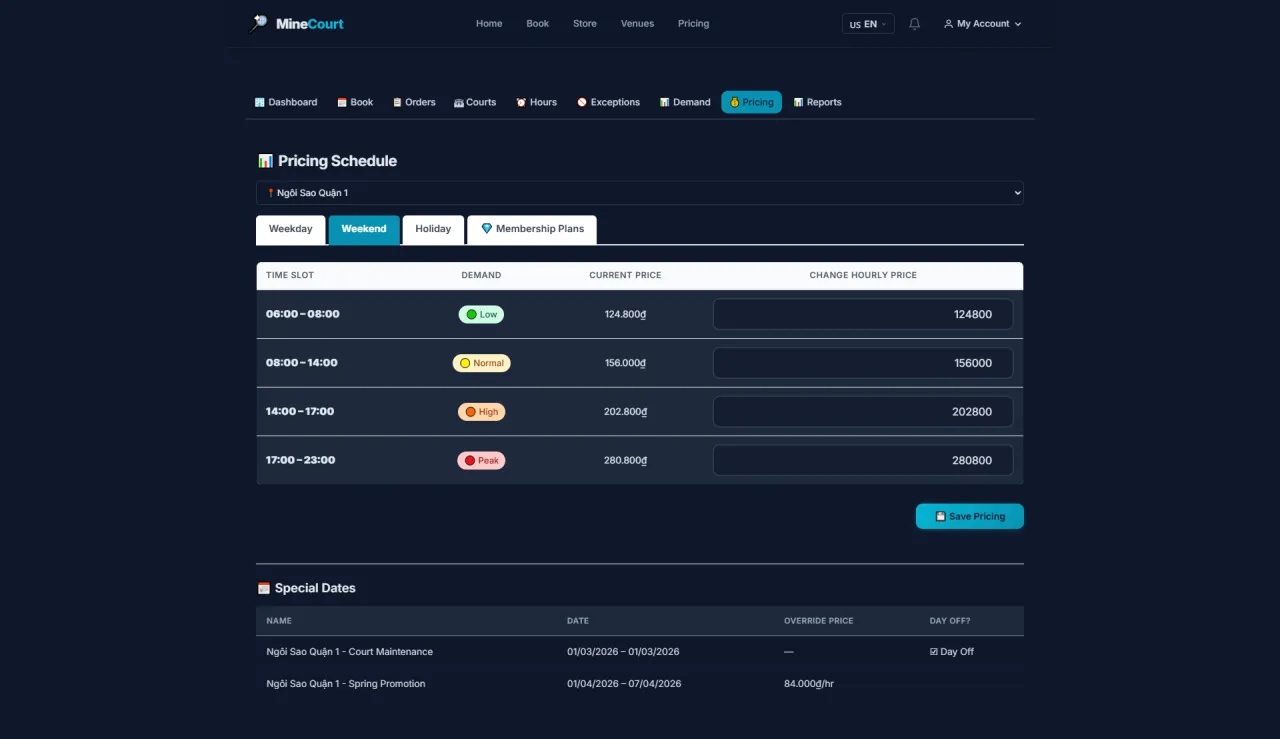
Weekend Pricing
About this screen: Set separate pricing for Saturdays and Sundays.
Navigation: Venue module → Pricing → Weekend tab
- Same structure as Weekday pricing
- Typically set higher due to elevated weekend demand
- Click Save Pricing after adjusting
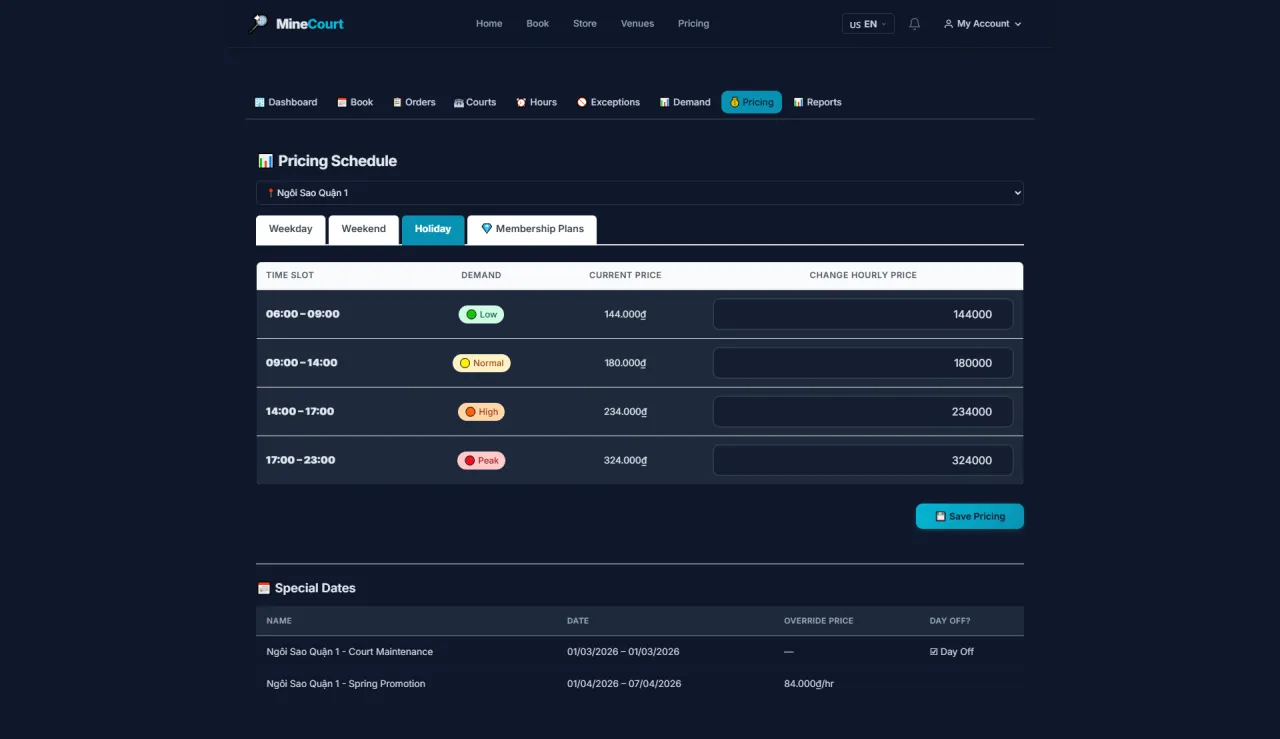
Holiday Pricing
About this screen: Set special pricing for designated holiday dates.
Navigation: Venue module → Pricing → Holiday tab
- Applies to dates flagged as Holiday in the system
- Can be set higher or lower depending on venue policy
- Click Save Pricing to save
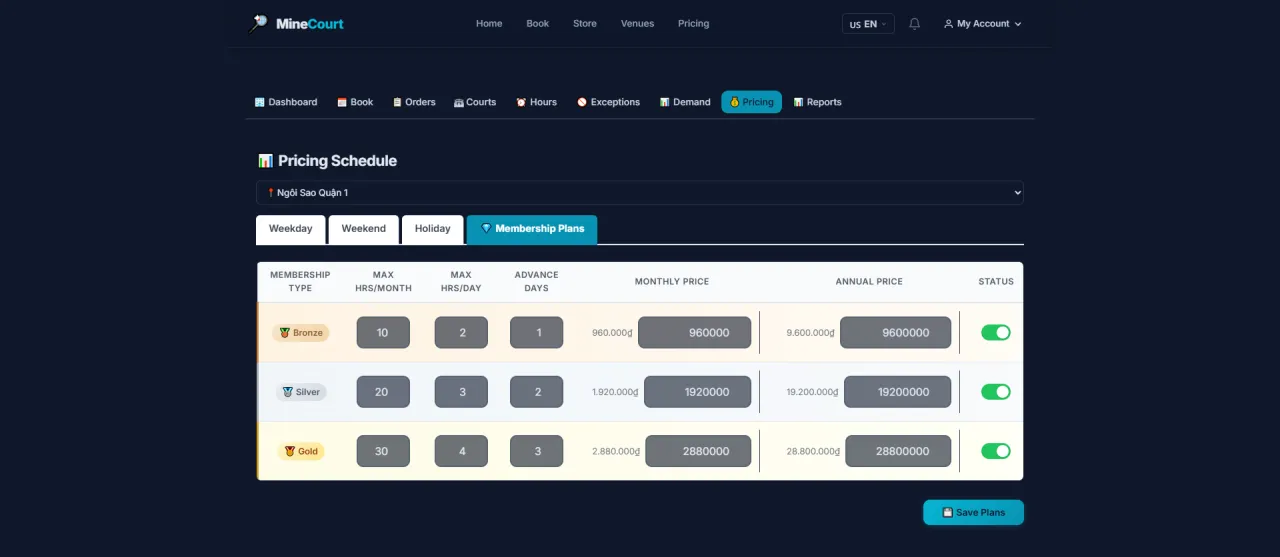
Membership Pricing
About this screen: View and configure discounted rates for Membership holders.
Navigation: Venue module → Pricing → Membership Plans tab
- List of Membership plans with their respective rates
- Each plan shows: name, monthly price, session quota, booking priority
- Click Edit to adjust terms of any plan
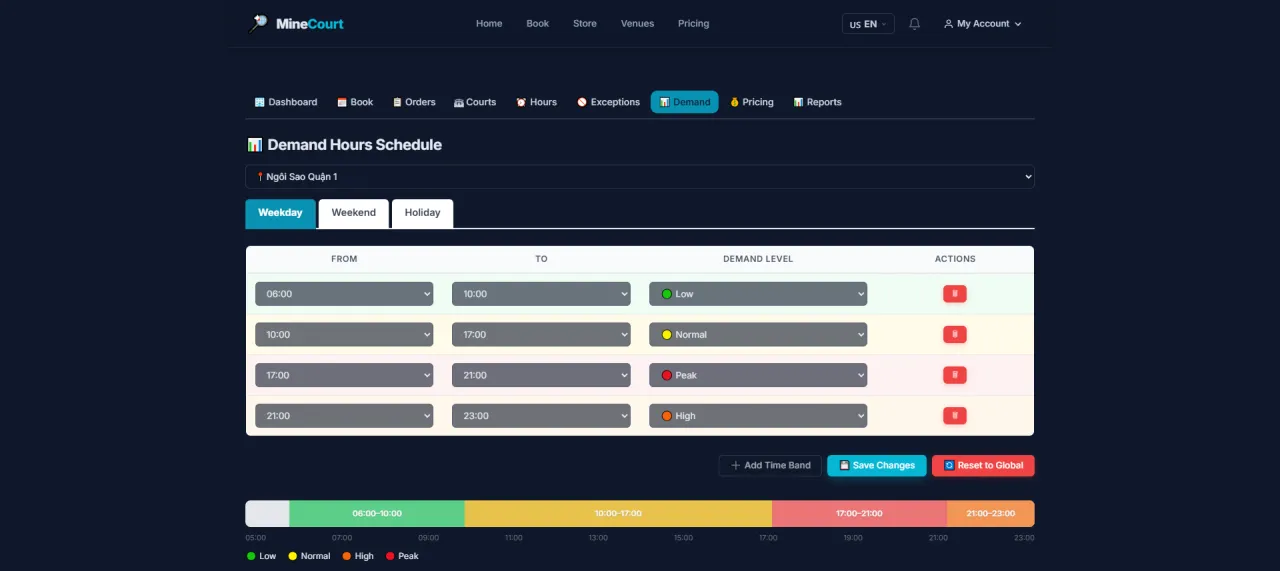
Demand Hours: Weekday
About this screen: Configure demand level by time block for weekdays.
Navigation: Venue module → Demand Hours → Weekday tab
- Assign each time block to one of 4 demand levels: Low, Normal, High, Peak
- Demand level directly determines which price tier is shown on the booking grid
- Drag handles or enter times to adjust zone boundaries
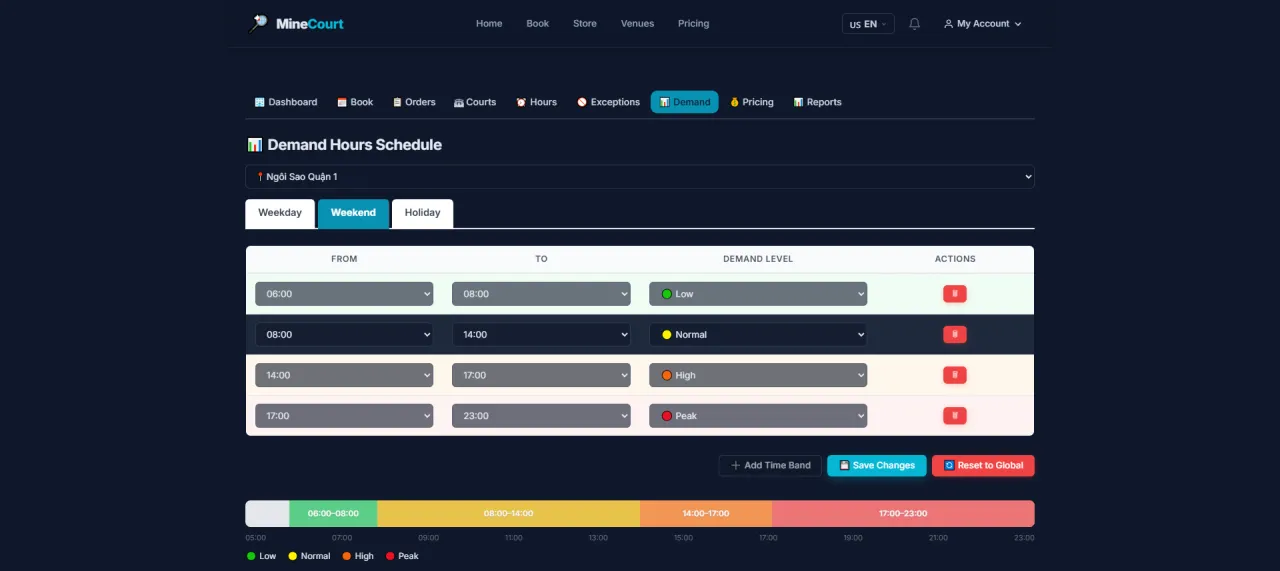
Demand Hours: Weekend
About this screen: Configure demand level by time block for weekends.
Navigation: Venue module → Demand Hours → Weekend tab
- Same structure as Weekday demand configuration
- Weekends typically have earlier Peak windows (morning and early evening)
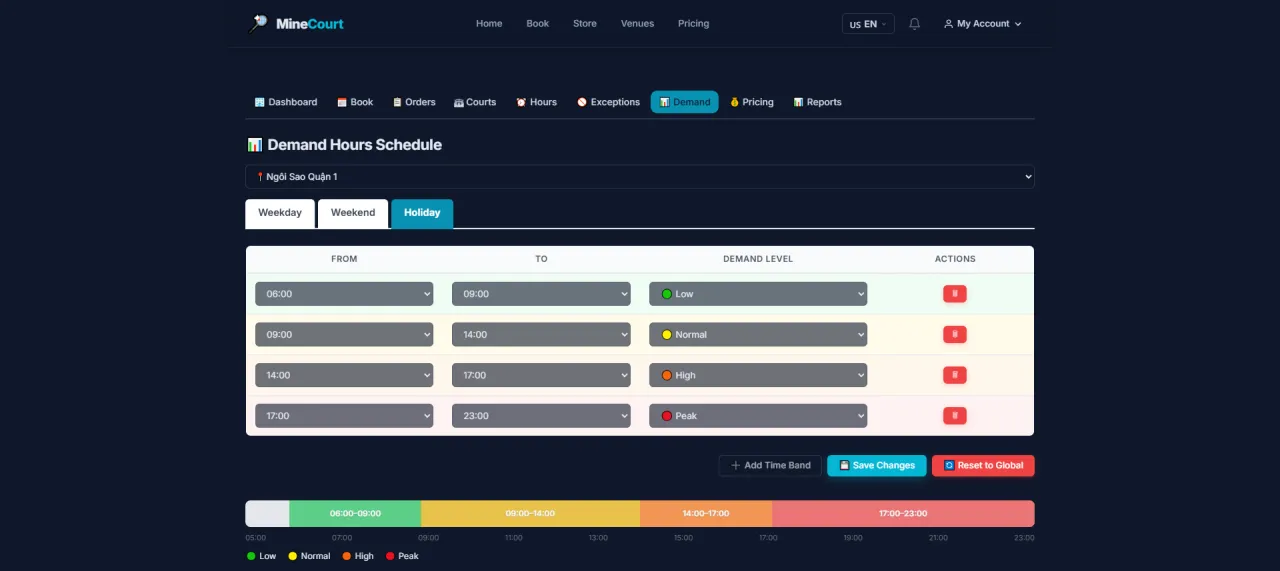
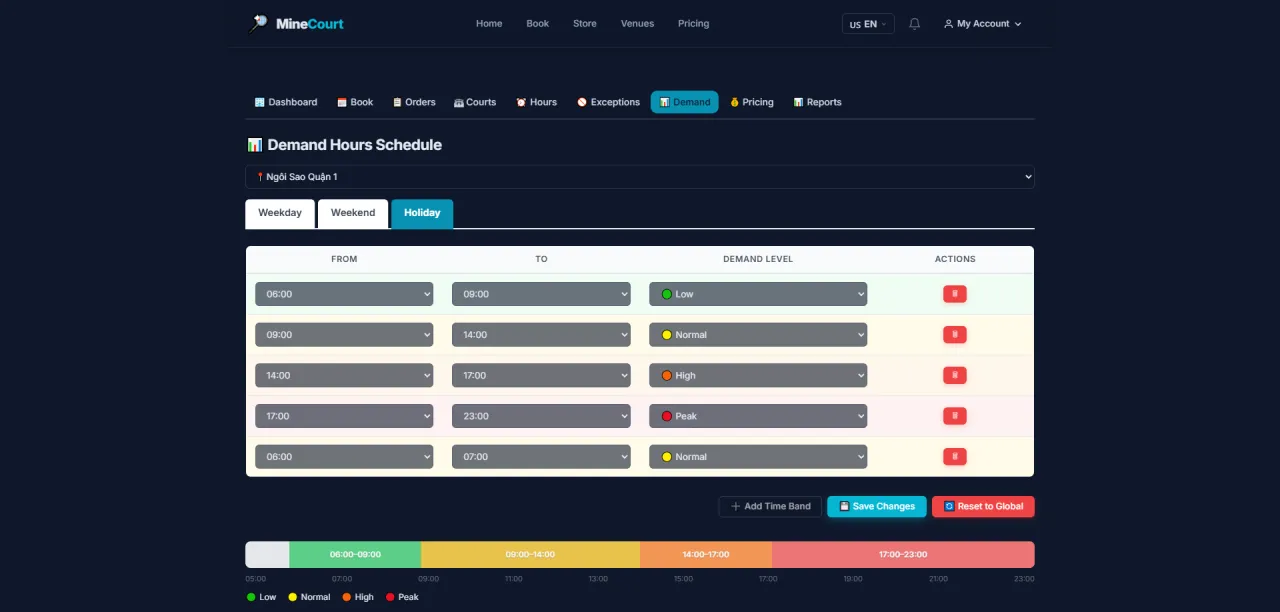
Demand Hours: Holiday
About this screen: Configure demand level per time block for holiday dates.
Navigation: Venue module → Demand Hours → Holiday tab
- Applies when booking date falls on a configured Holiday
- Holidays typically require a Full-Day Peak configuration
Add Time Range
About this screen: Add a custom time range entry to the demand hours schedule.
Navigation: Pricing → Demand Hours tab → Add Time Range button
- Set the Start Time and End Time for the new range
- Assign a demand level: Low, Normal, High, or Peak
- Applied to the currently selected day type (Weekday / Weekend / Holiday)
- Click Save to add the range to the schedule
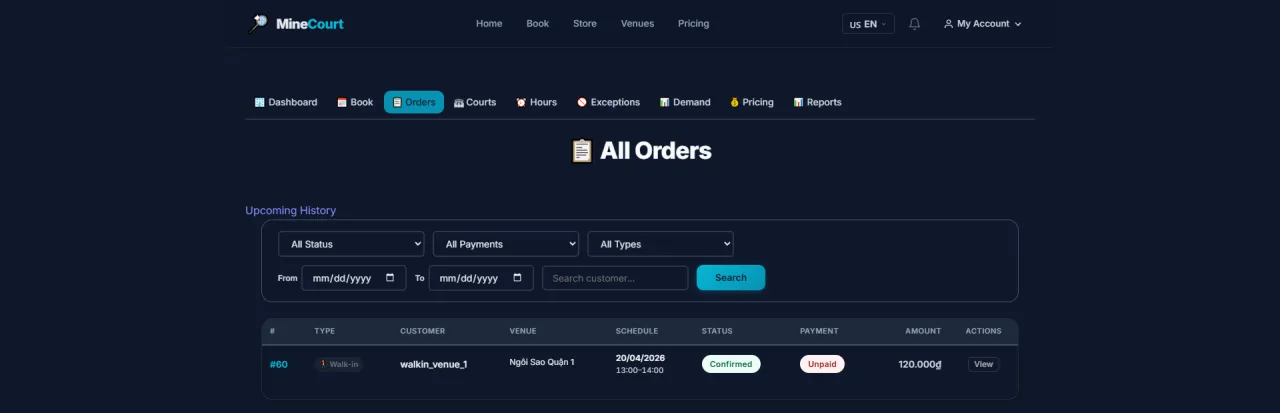
All Orders
About this screen: View all court booking orders for the venue.
Navigation: Venue module → Bookings tab
- Filter by: date, status, specific court
- Each order shows: customer, court, time slot, price, status
- Statuses: Confirmed, Completed, Cancelled, Pending
- Click any order to view full details
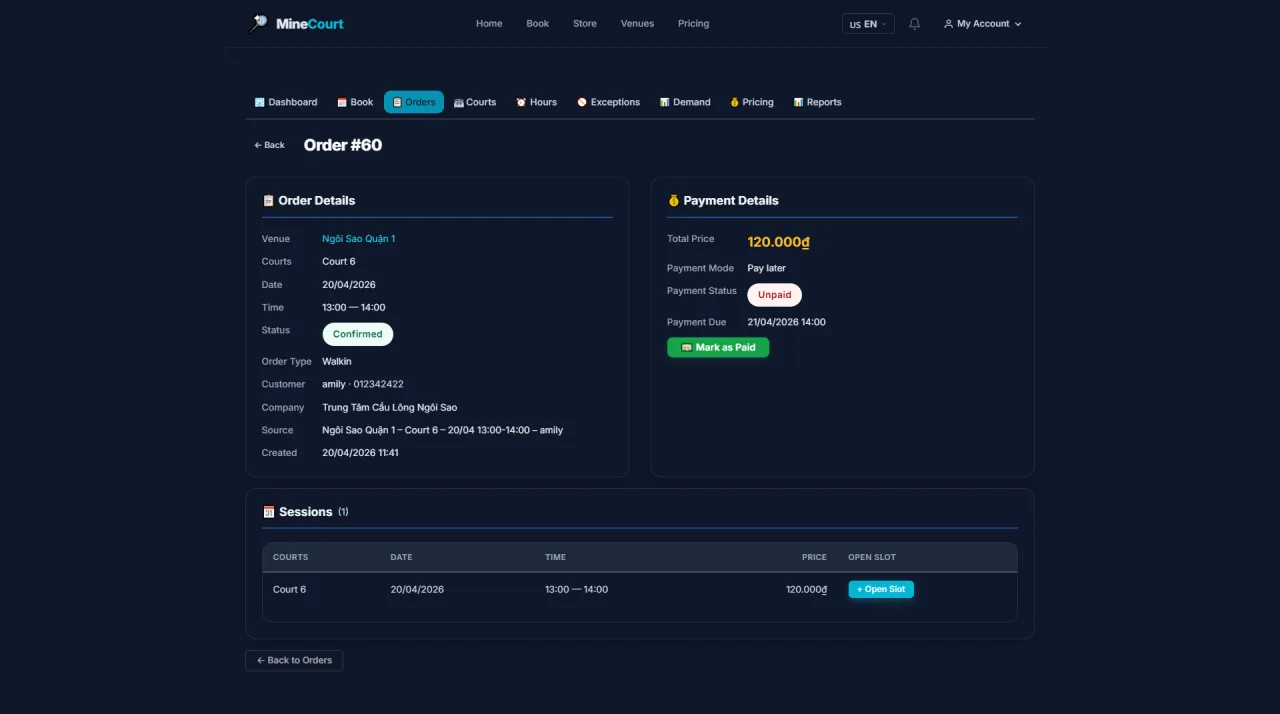
Order Detail
About this screen: View complete information for a specific booking order.
Navigation: Click any order in the Orders list
- Full details: customer, court, date/time, price, status
- Payment history and confirmation status
- Actions: Confirm, Cancel, Print Receipt
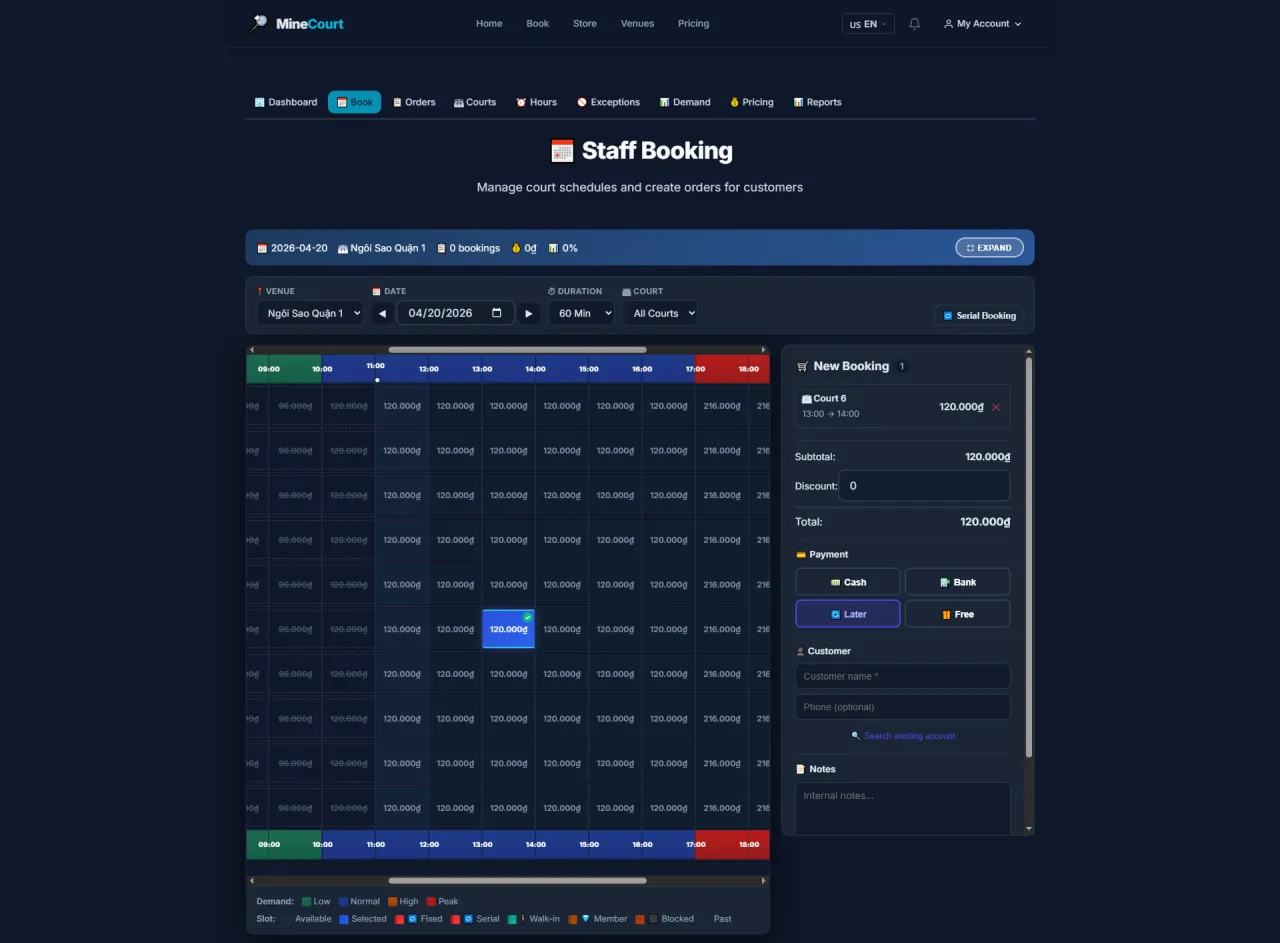
Staff Booking
About this screen: Staff creates a booking on behalf of a walk-in customer.
Navigation: Book tab in the Venue menu
- Select court, date, and available time slot from the grid
- Enter customer info (name, phone number)
- Choose payment method: Cash, Transfer, or Membership
- Click Confirm Booking to finalize
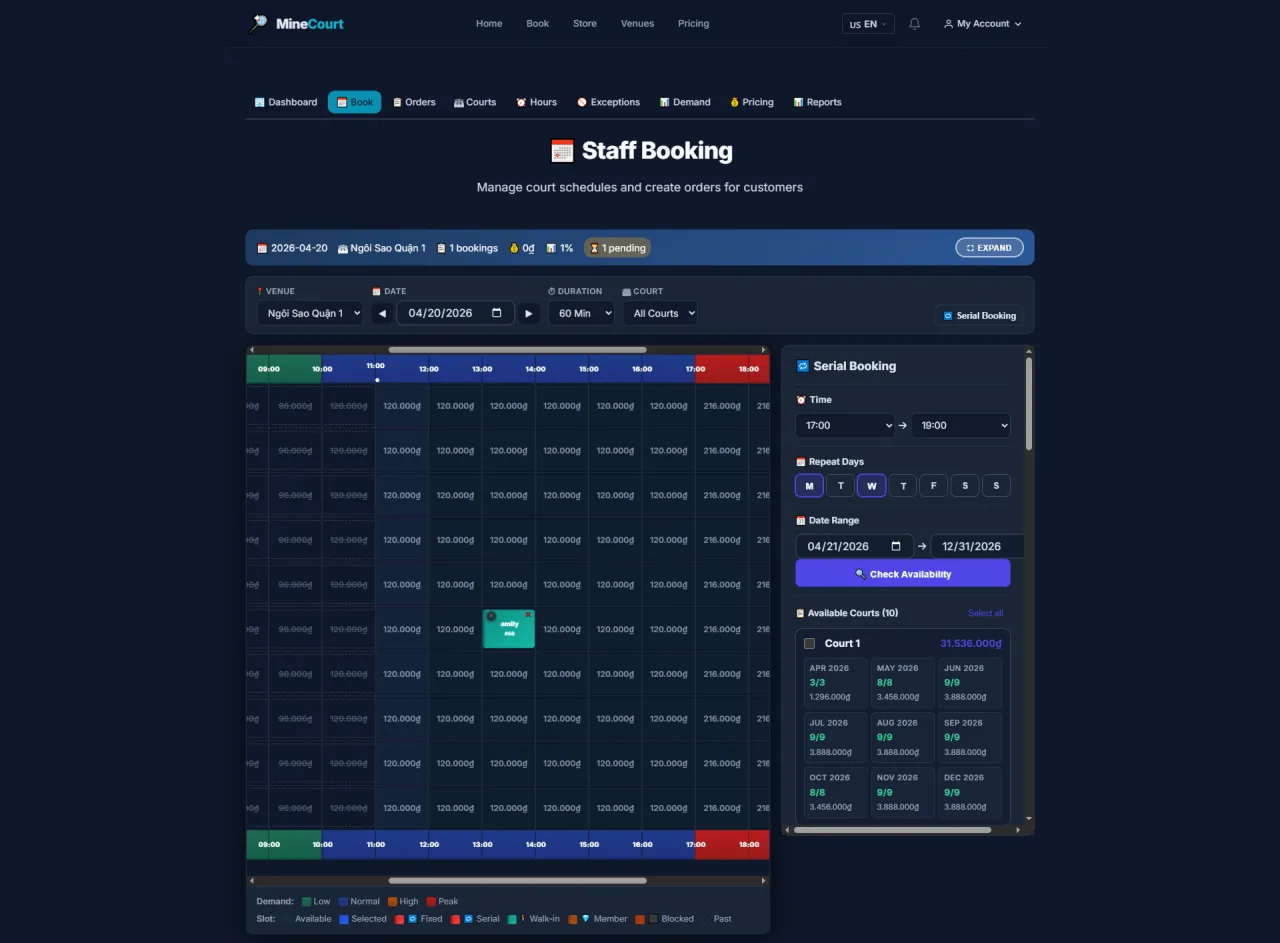
Staff: Serial Booking
About this screen: Staff creates a recurring (serial) booking on behalf of a customer.
Navigation: Book tab → Switch to Serial mode
- Set the Start Date, End Date, and recurring Day of Week
- System auto-fills all matching available slots
- Enter customer info and select payment method
- Click Confirm to lock in the entire series
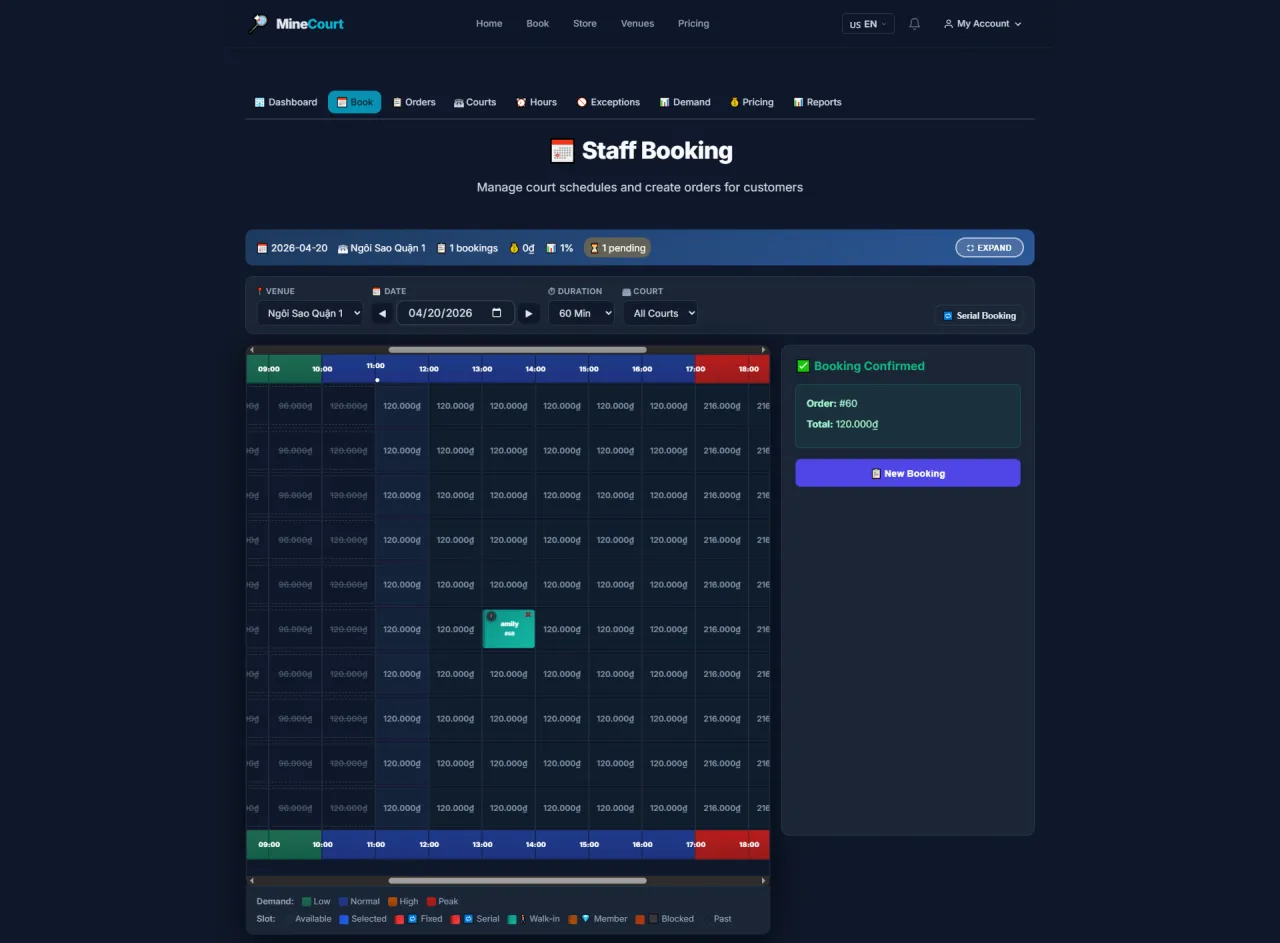
Staff: Confirm Booking
About this screen: Review and confirm booking details before finalizing the reservation.
Navigation: Staff Booking → Confirm step
- Summary shows court, customer, date/time, total price, and payment method
- Verify all details are correct before confirming
- Click Confirm Booking to create the order and deduct inventory
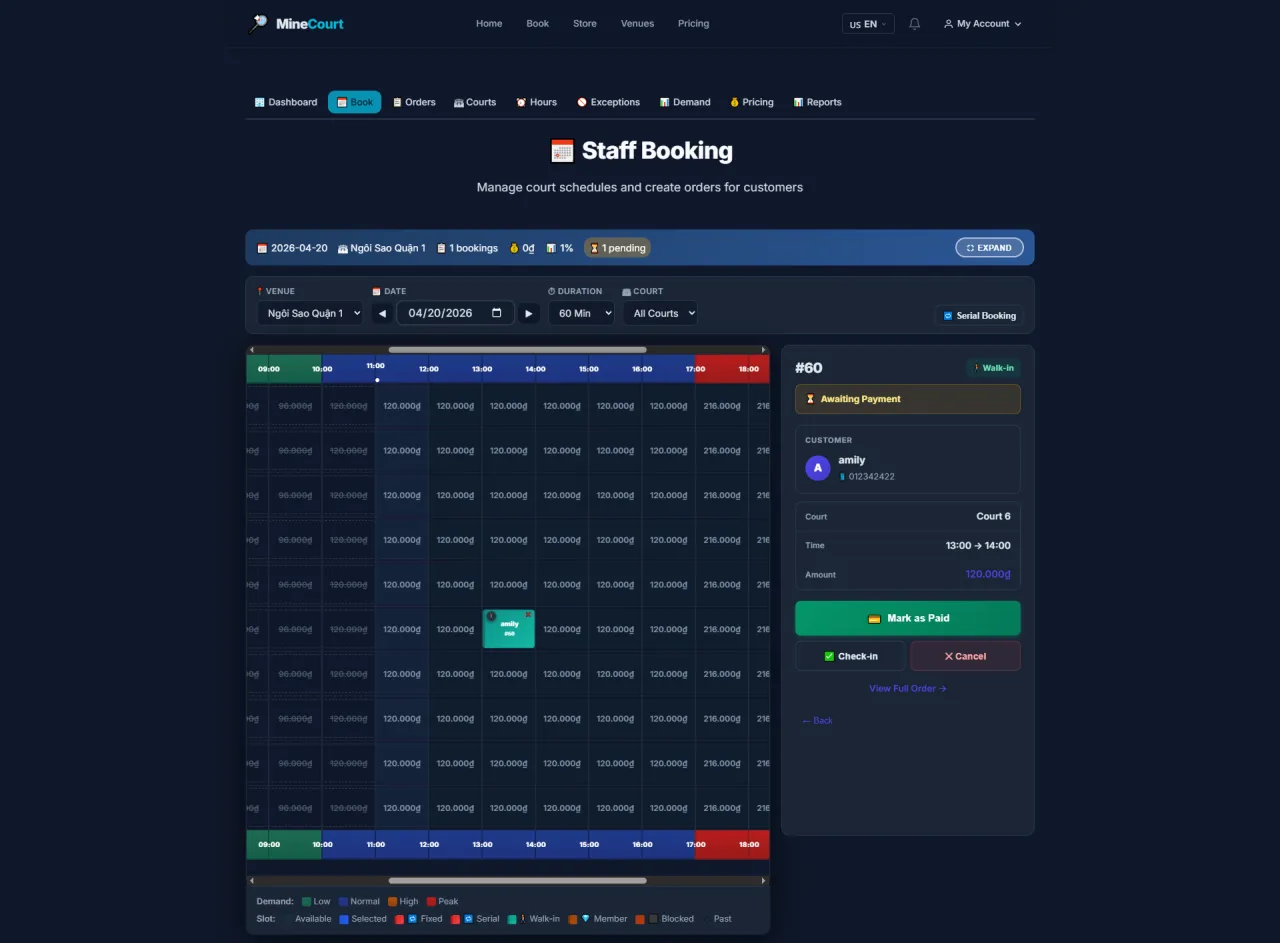
Staff: View Booking Detail
About this screen: View the full detail of a specific booking from the staff perspective.
Navigation: Orders list → Click booking order
- Shows complete customer info, court, date/time, and amount paid
- Displays payment status and booking confirmation token
- Staff can Print Receipt or Verify QR from this screen
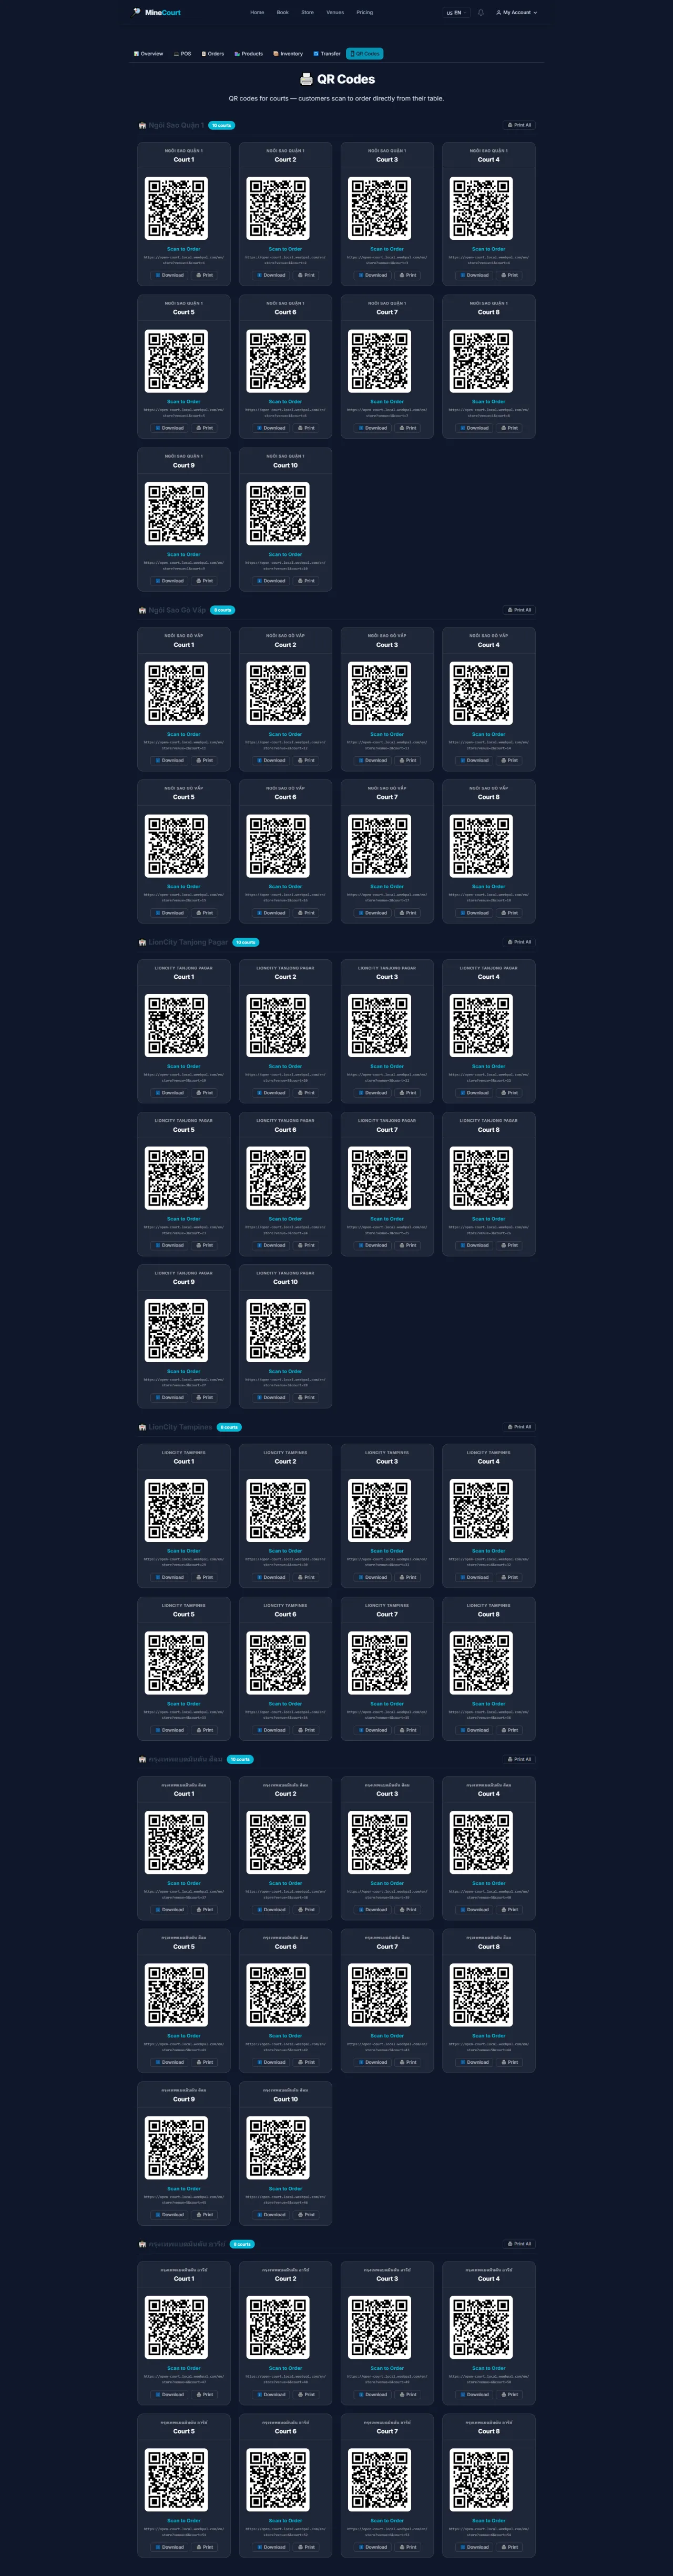
QR Codes
About this screen: View and print unique QR codes for each court for customer table-side ordering.
Navigation: Store menu → QR Codes tab
- Customers scan → browse drink menu → order delivered to their court
- Click Print All to print every court's QR code for lamination and posting
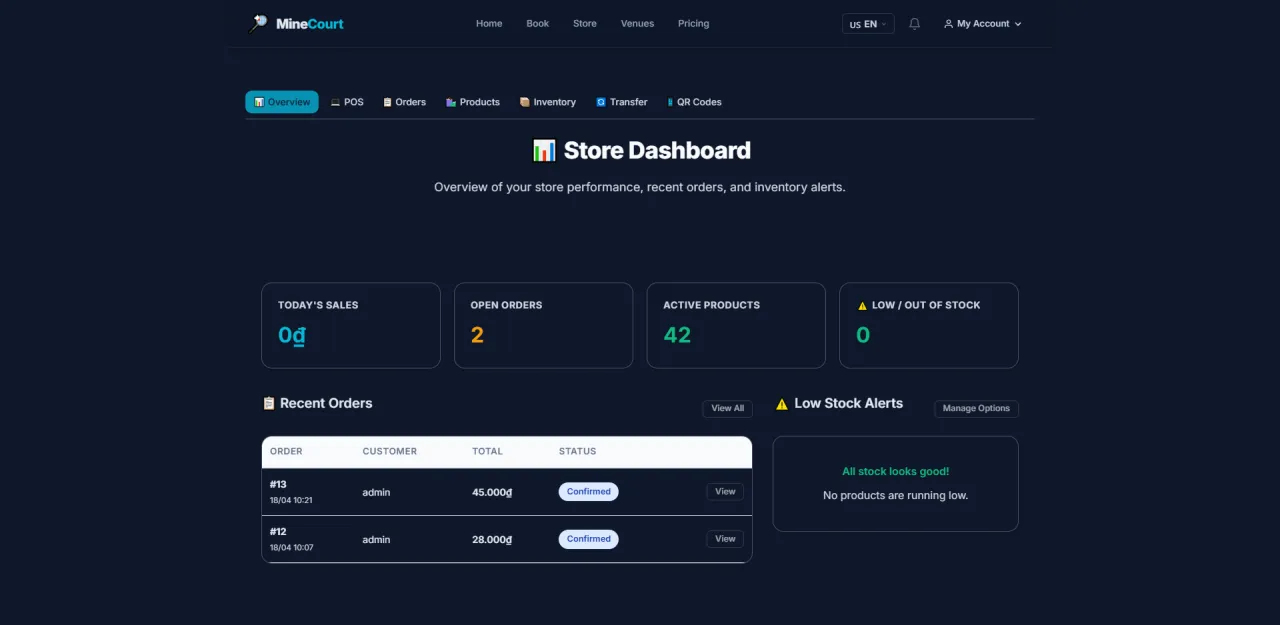
Store Dashboard
About this screen: Revenue summary and activity overview for the venue store.
Navigation: Store module (default view)
- Stats: today's revenue, order count, top-selling products
- Quick access: POS, Orders, Products, Inventory
- Daily/weekly revenue chart
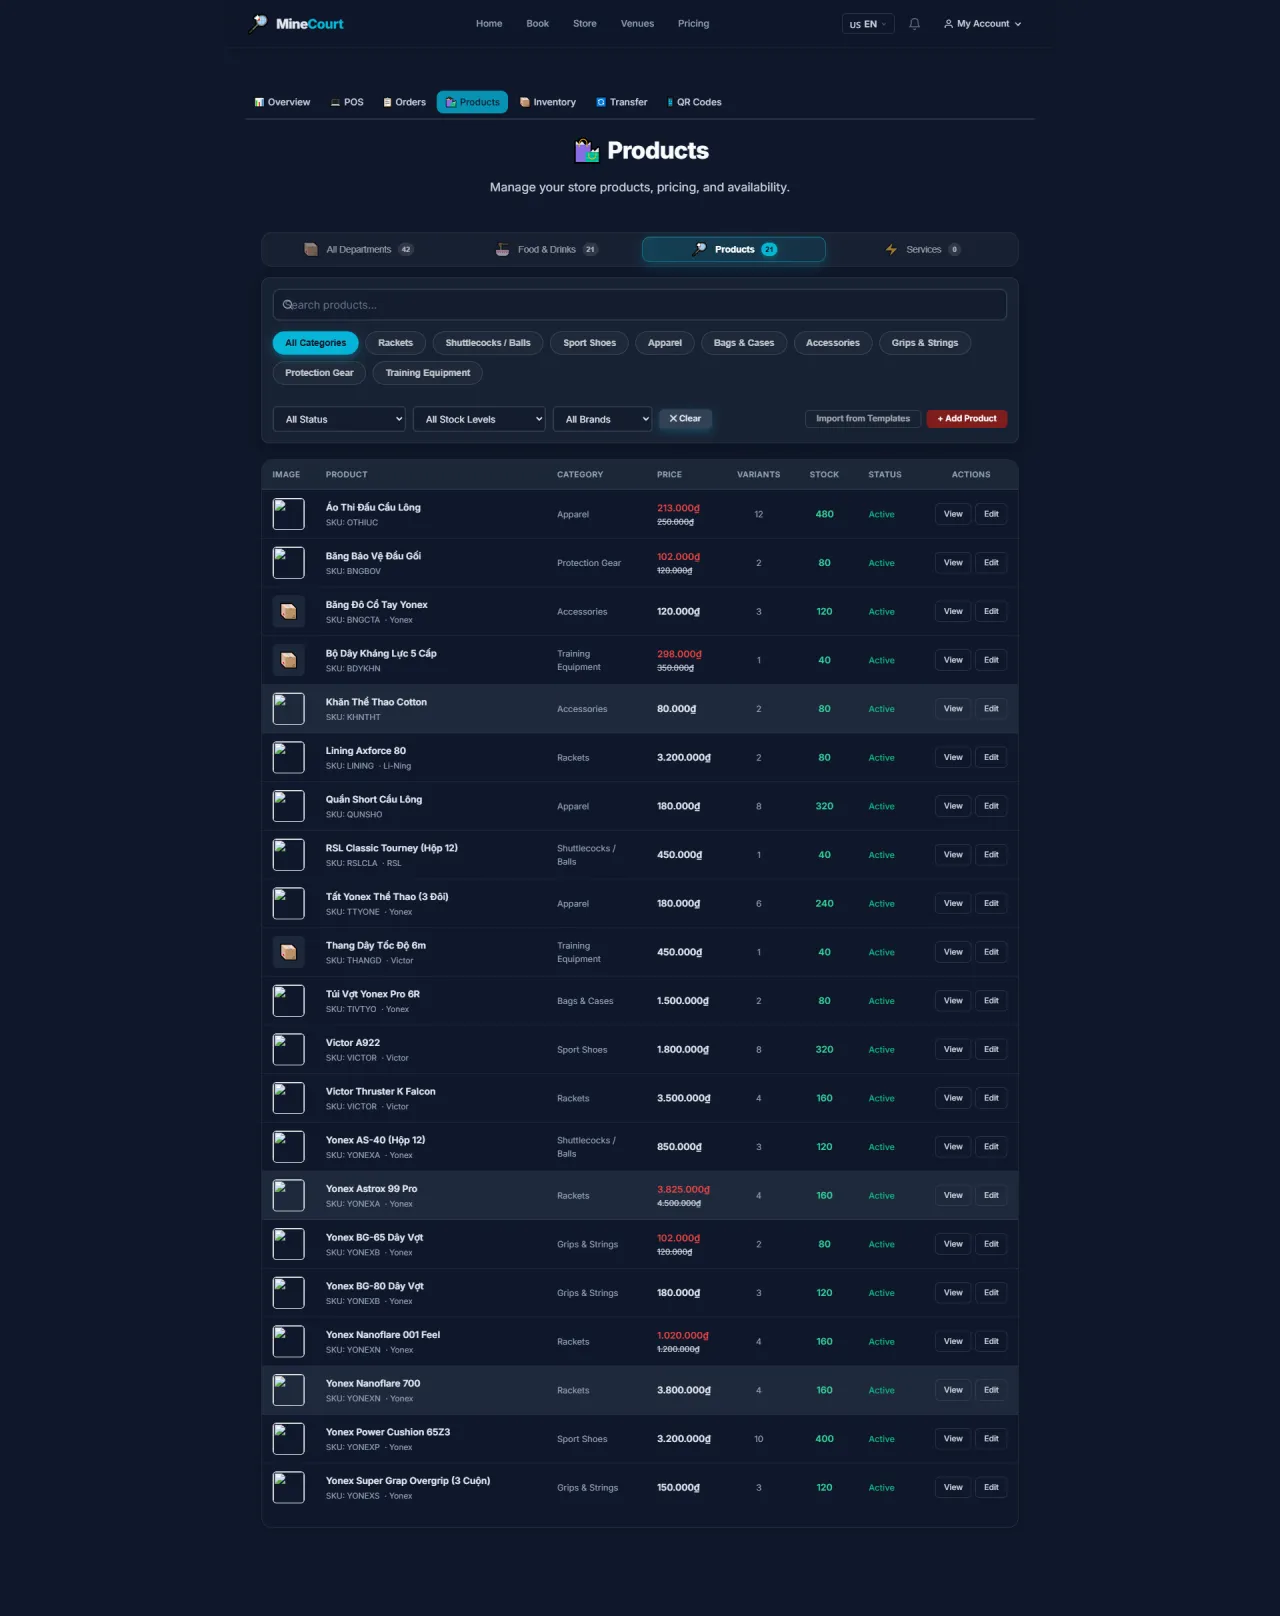
All Products
About this screen: Browse the full product catalog in the venue store.
Navigation: Store module → Products tab
- Product list across all categories
- Filter by: category, active/inactive status
- View name, price, and stock count
- Click Add Product to create a new listing
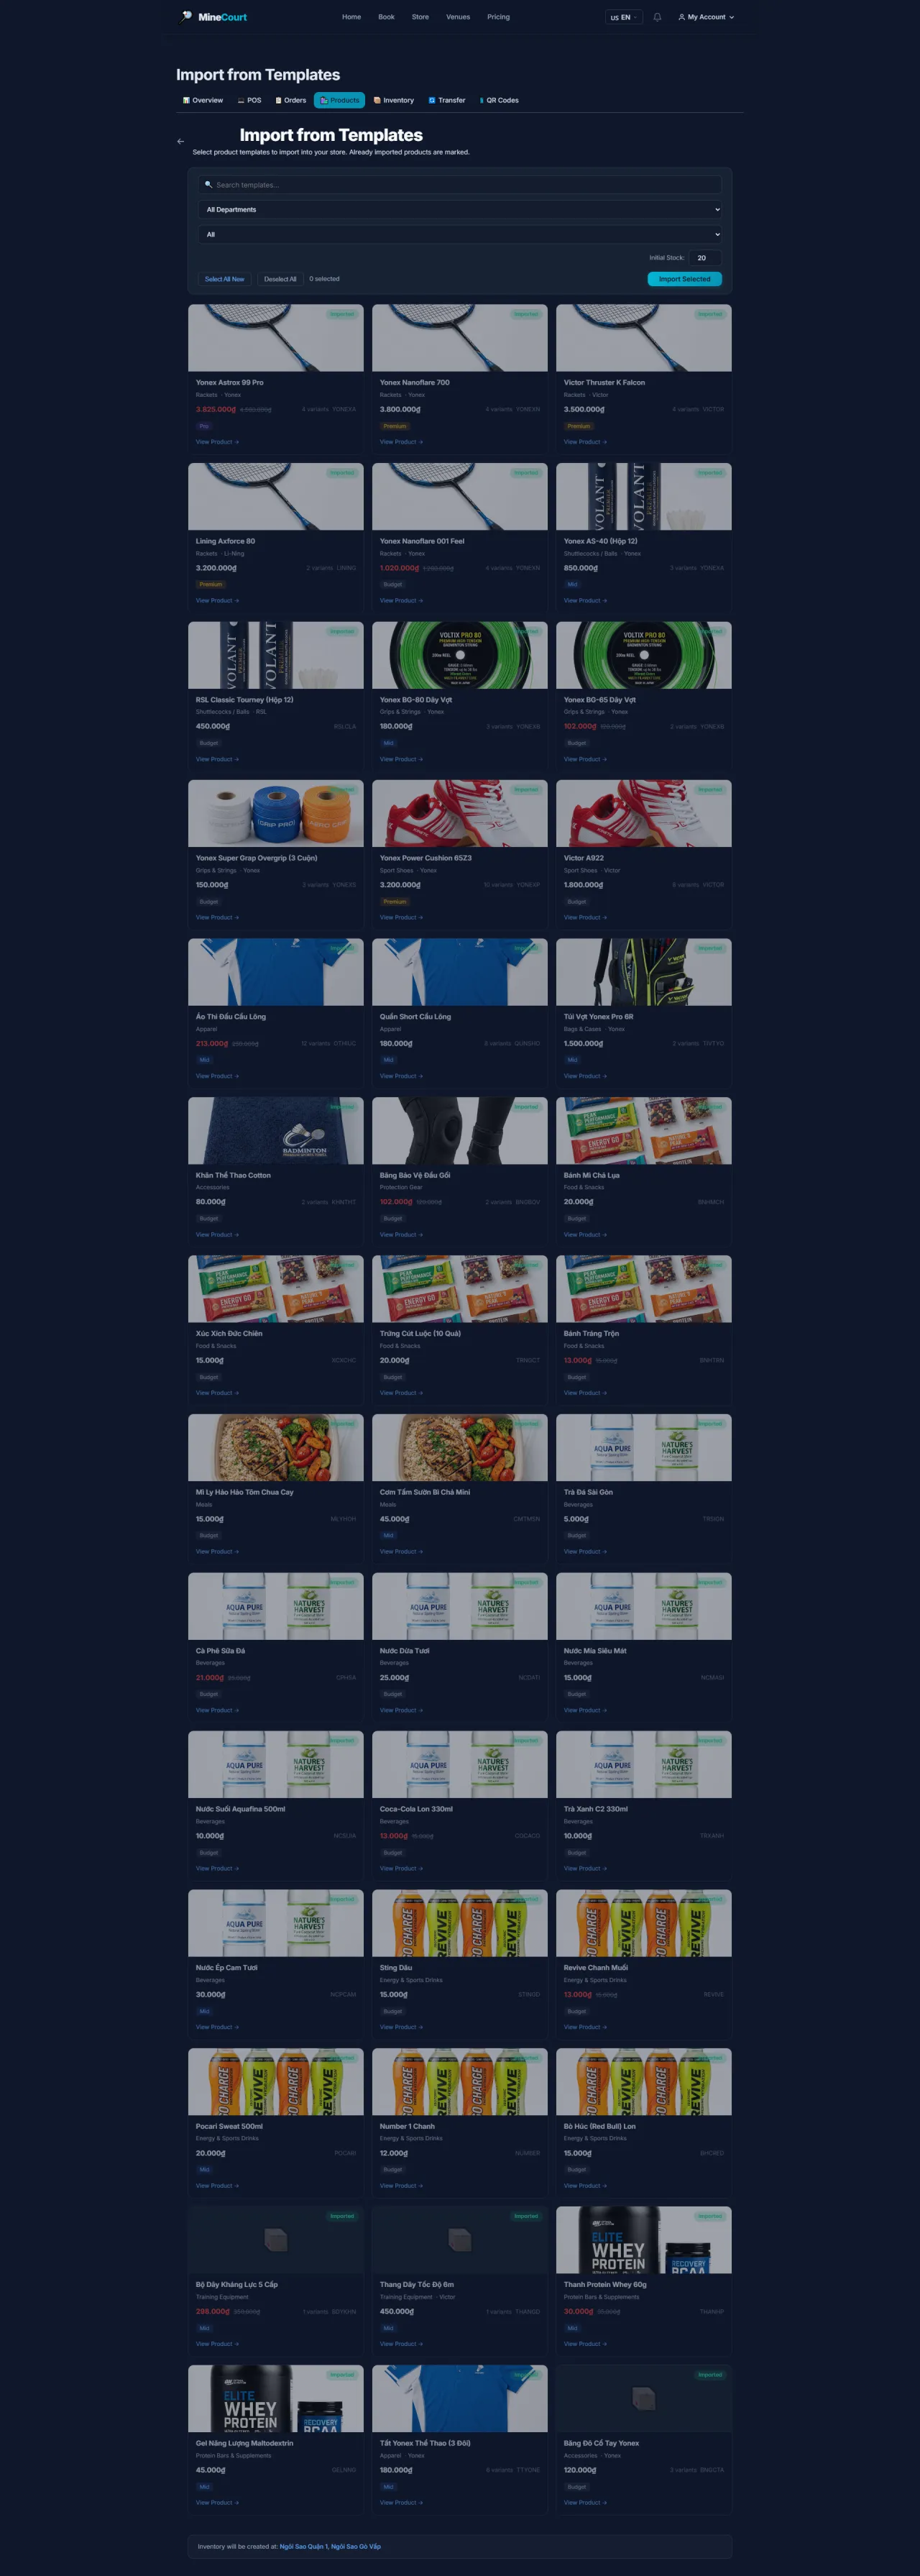
Import Products
About this screen: Bulk-import multiple products into the store catalog via a spreadsheet file.
Navigation: Store → Products → Import button
- Download the provided CSV template
- Fill in: product name, category, unit price, stock quantity, status
- Upload the completed file: system validates each row before saving
- Preview the import data; errors are flagged row-by-row for correction
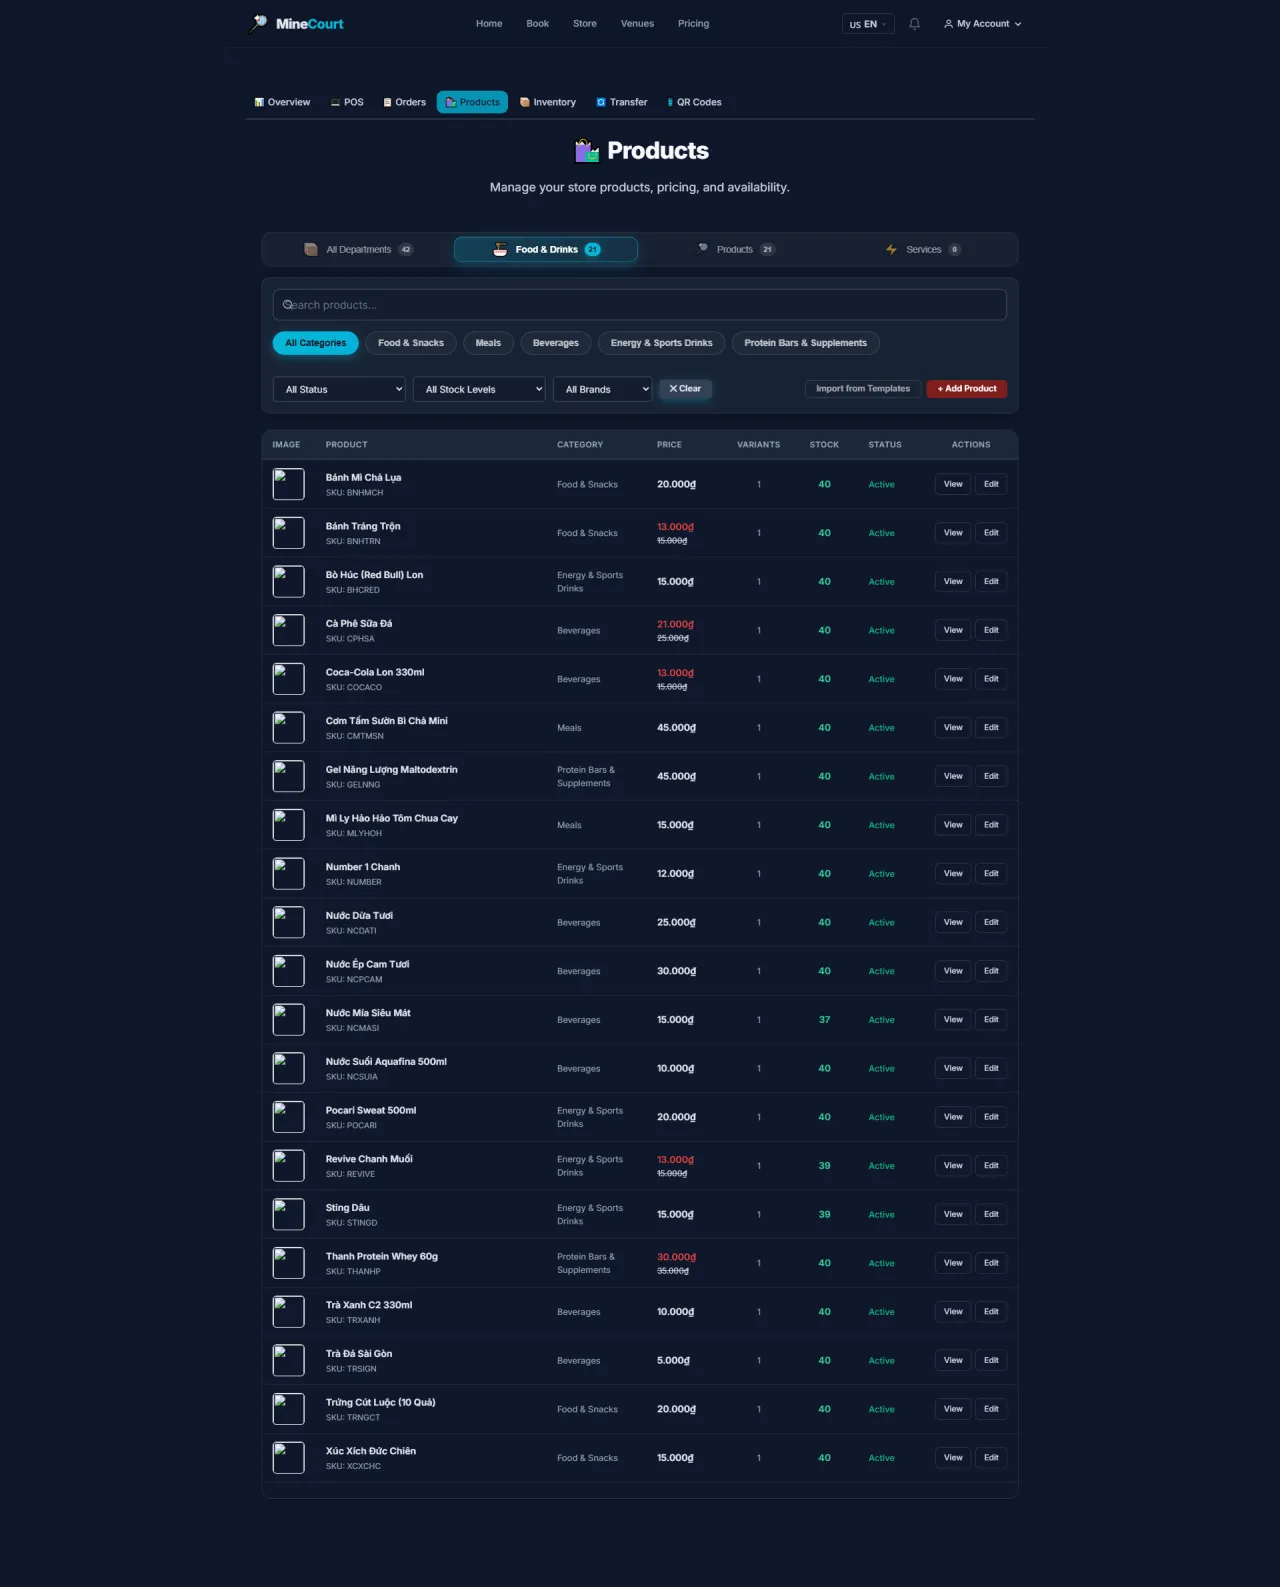
Food & Drinks (F&B)
About this screen: Manage food and beverage products at the venue.
Navigation: Store Inventory → filter by Food & Drinks
- Snacks, beverages, sports supplements
- View retail price and stock level
- Update price or status quickly from the list
Services
About this screen: Manage the service catalog sold at the venue.
Navigation: Store Inventory → filter by Services
- Services include: racket rental, coaching, technical support
- Services have no inventory: only price and status are managed
- Click Edit to modify
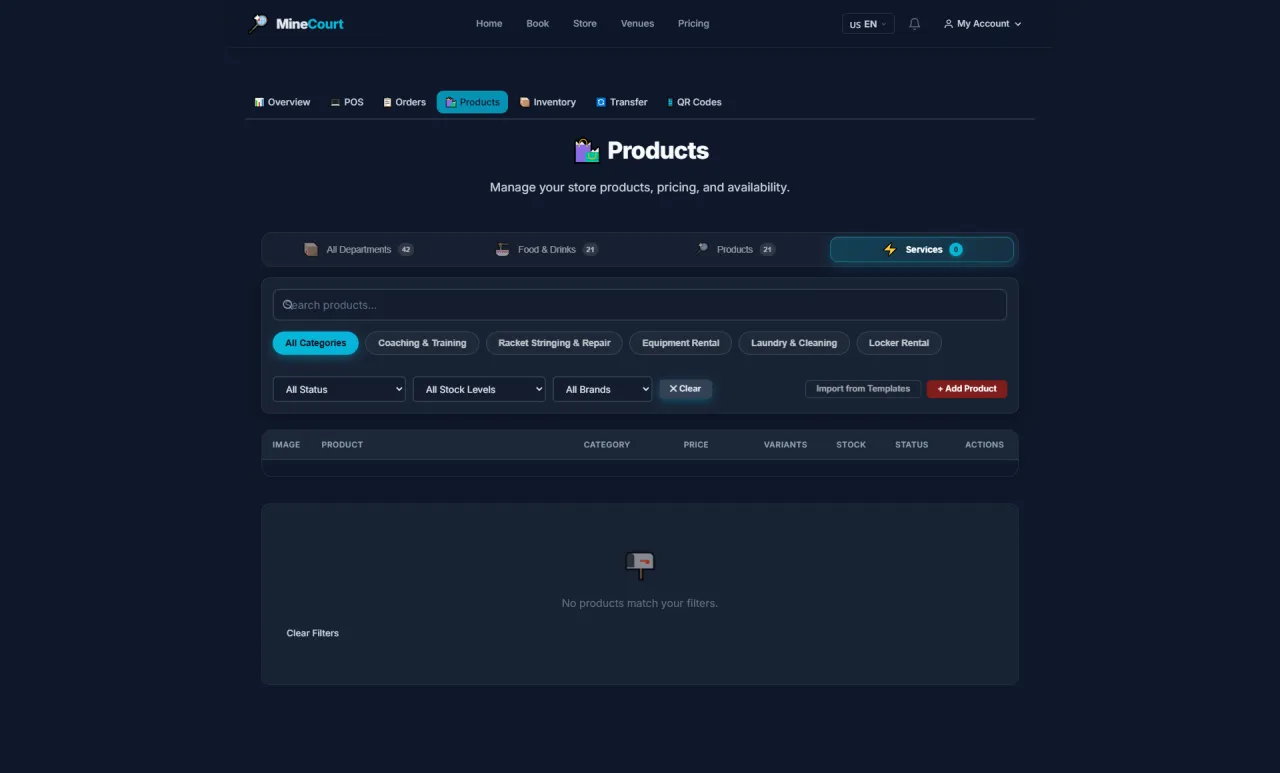
Add Product
About this screen: Create a new product or service listing in the store.
Navigation: Store Inventory → Add Product
- Enter: Product Name, Category, Retail Price
- Upload product image
- Select the applicable Venue
- Check Active to publish immediately
- Click Save
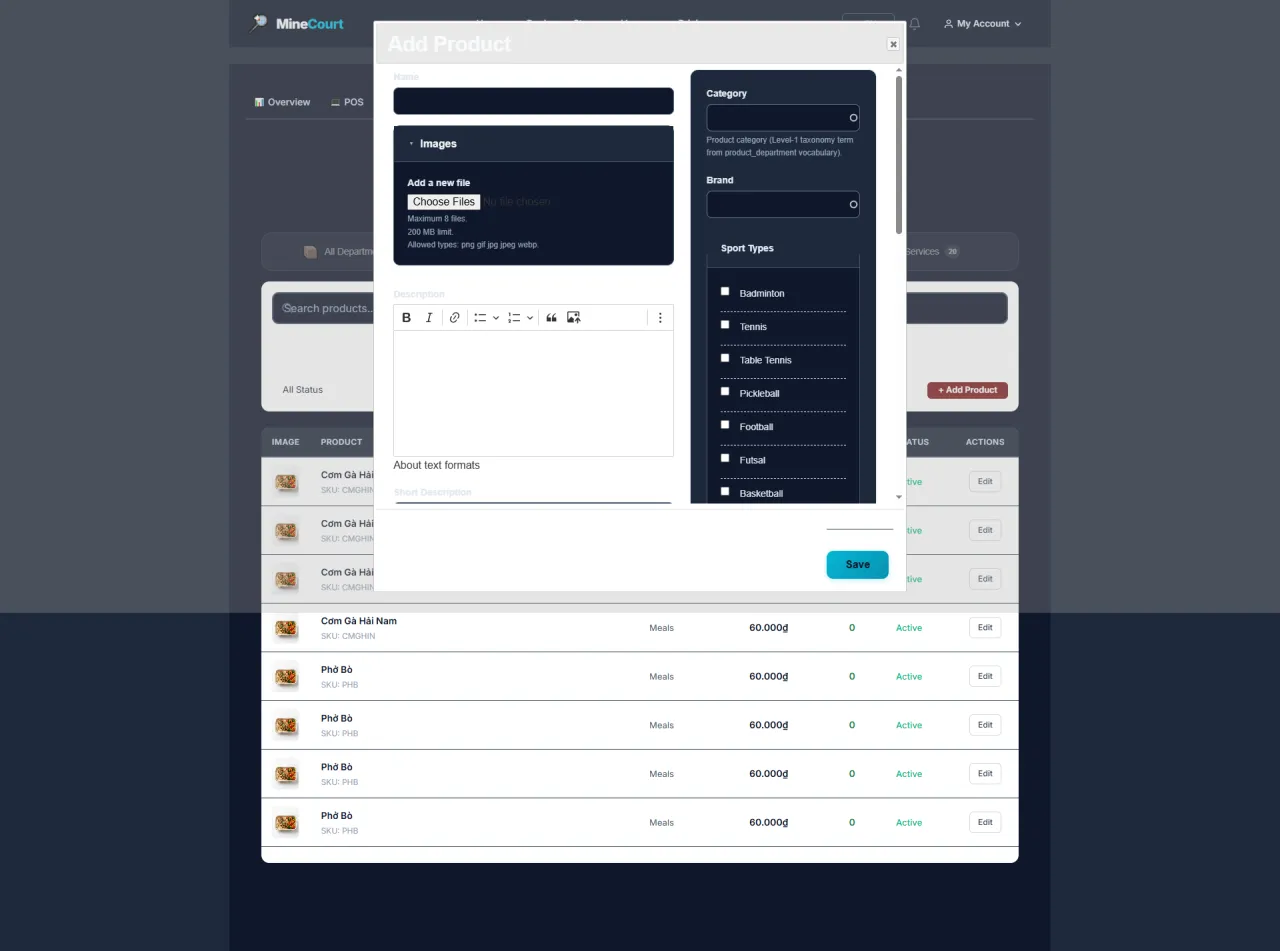
Inventory Management
About this screen: Track and update product stock levels.
Navigation: Store module → Inventory tab
- Product list with current stock quantity
- Enter new quantity when restocking
- Full inventory change history
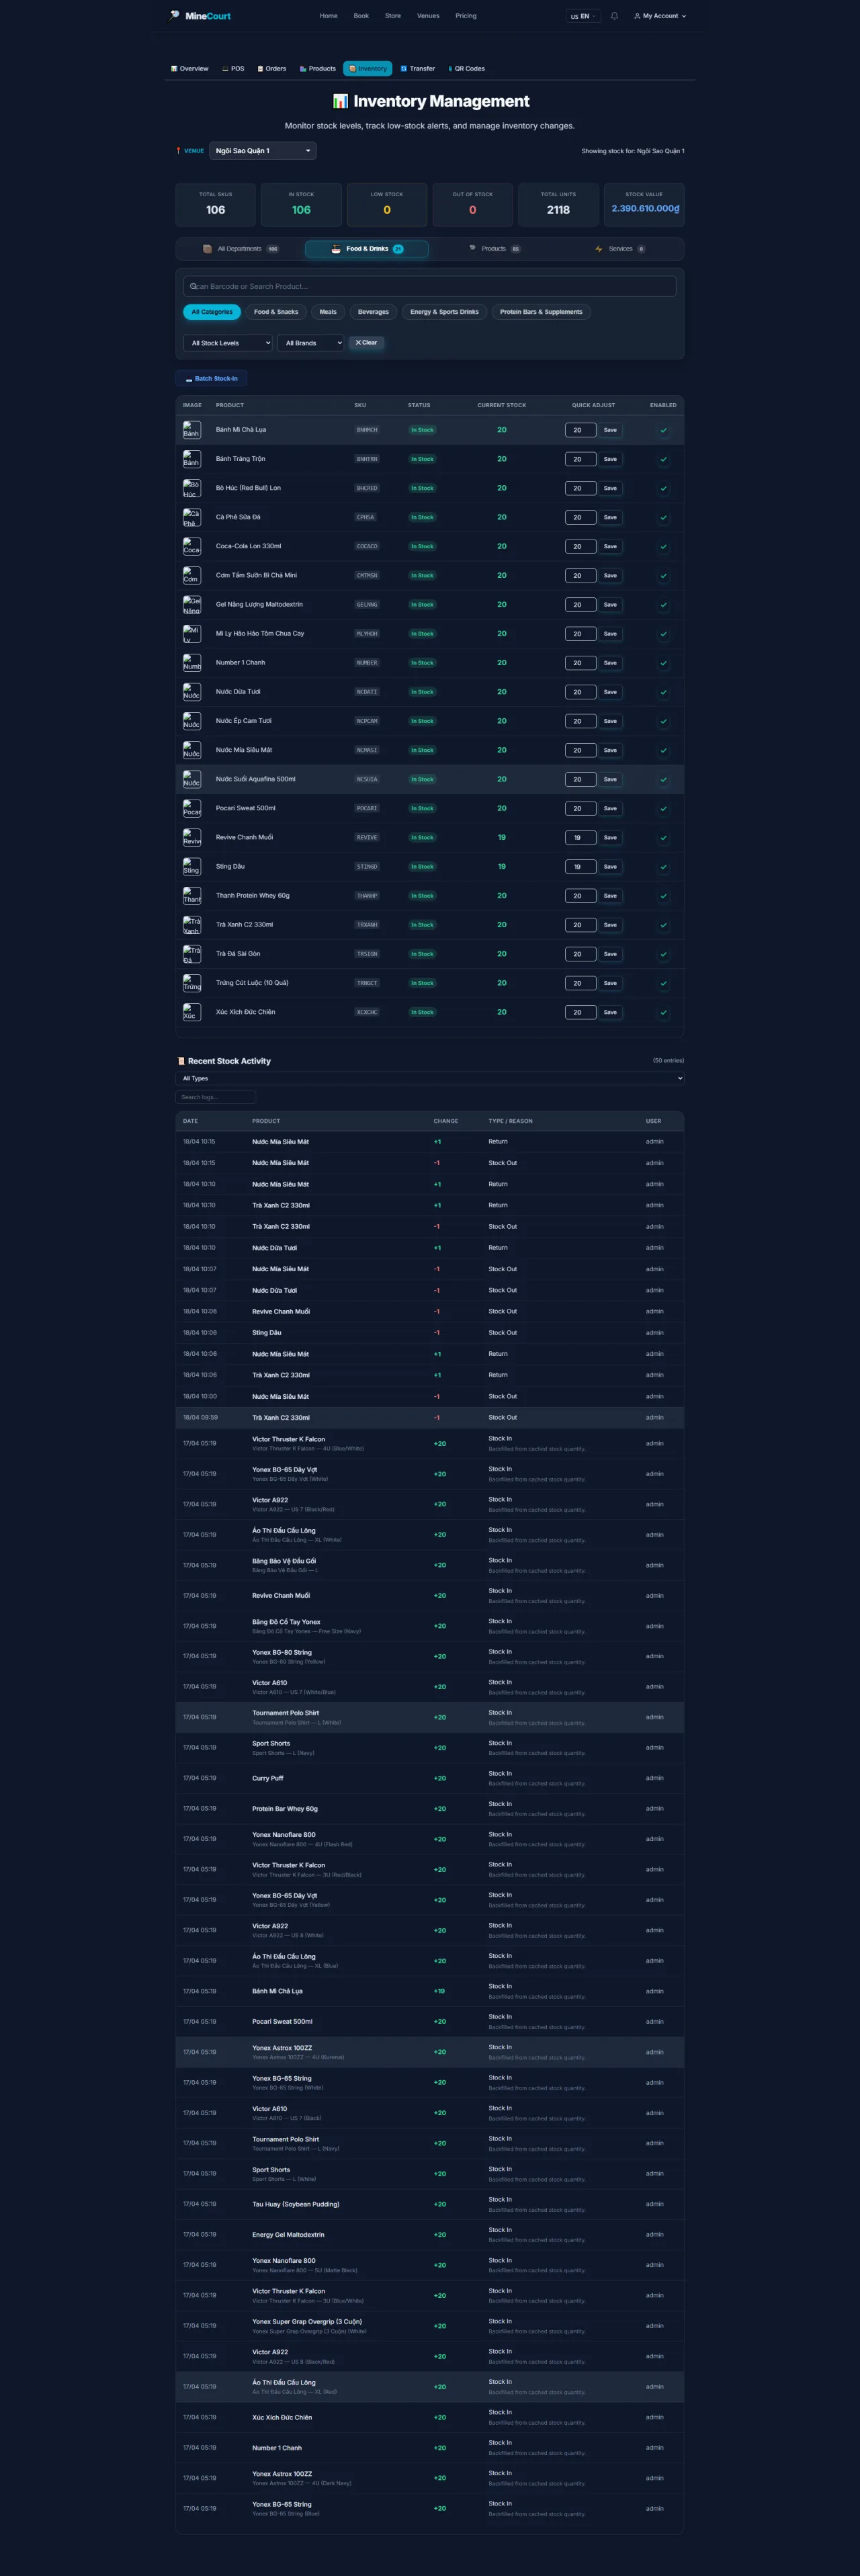
Batch Stock In
About this screen: Add stock to multiple products at once via a single batch update.
Navigation: Store → Inventory → Batch Stock In button
- Select all products that received new stock
- Enter the received quantity for each product
- System adds the new quantity to the existing stock
- Submit the batch form: changes apply immediately
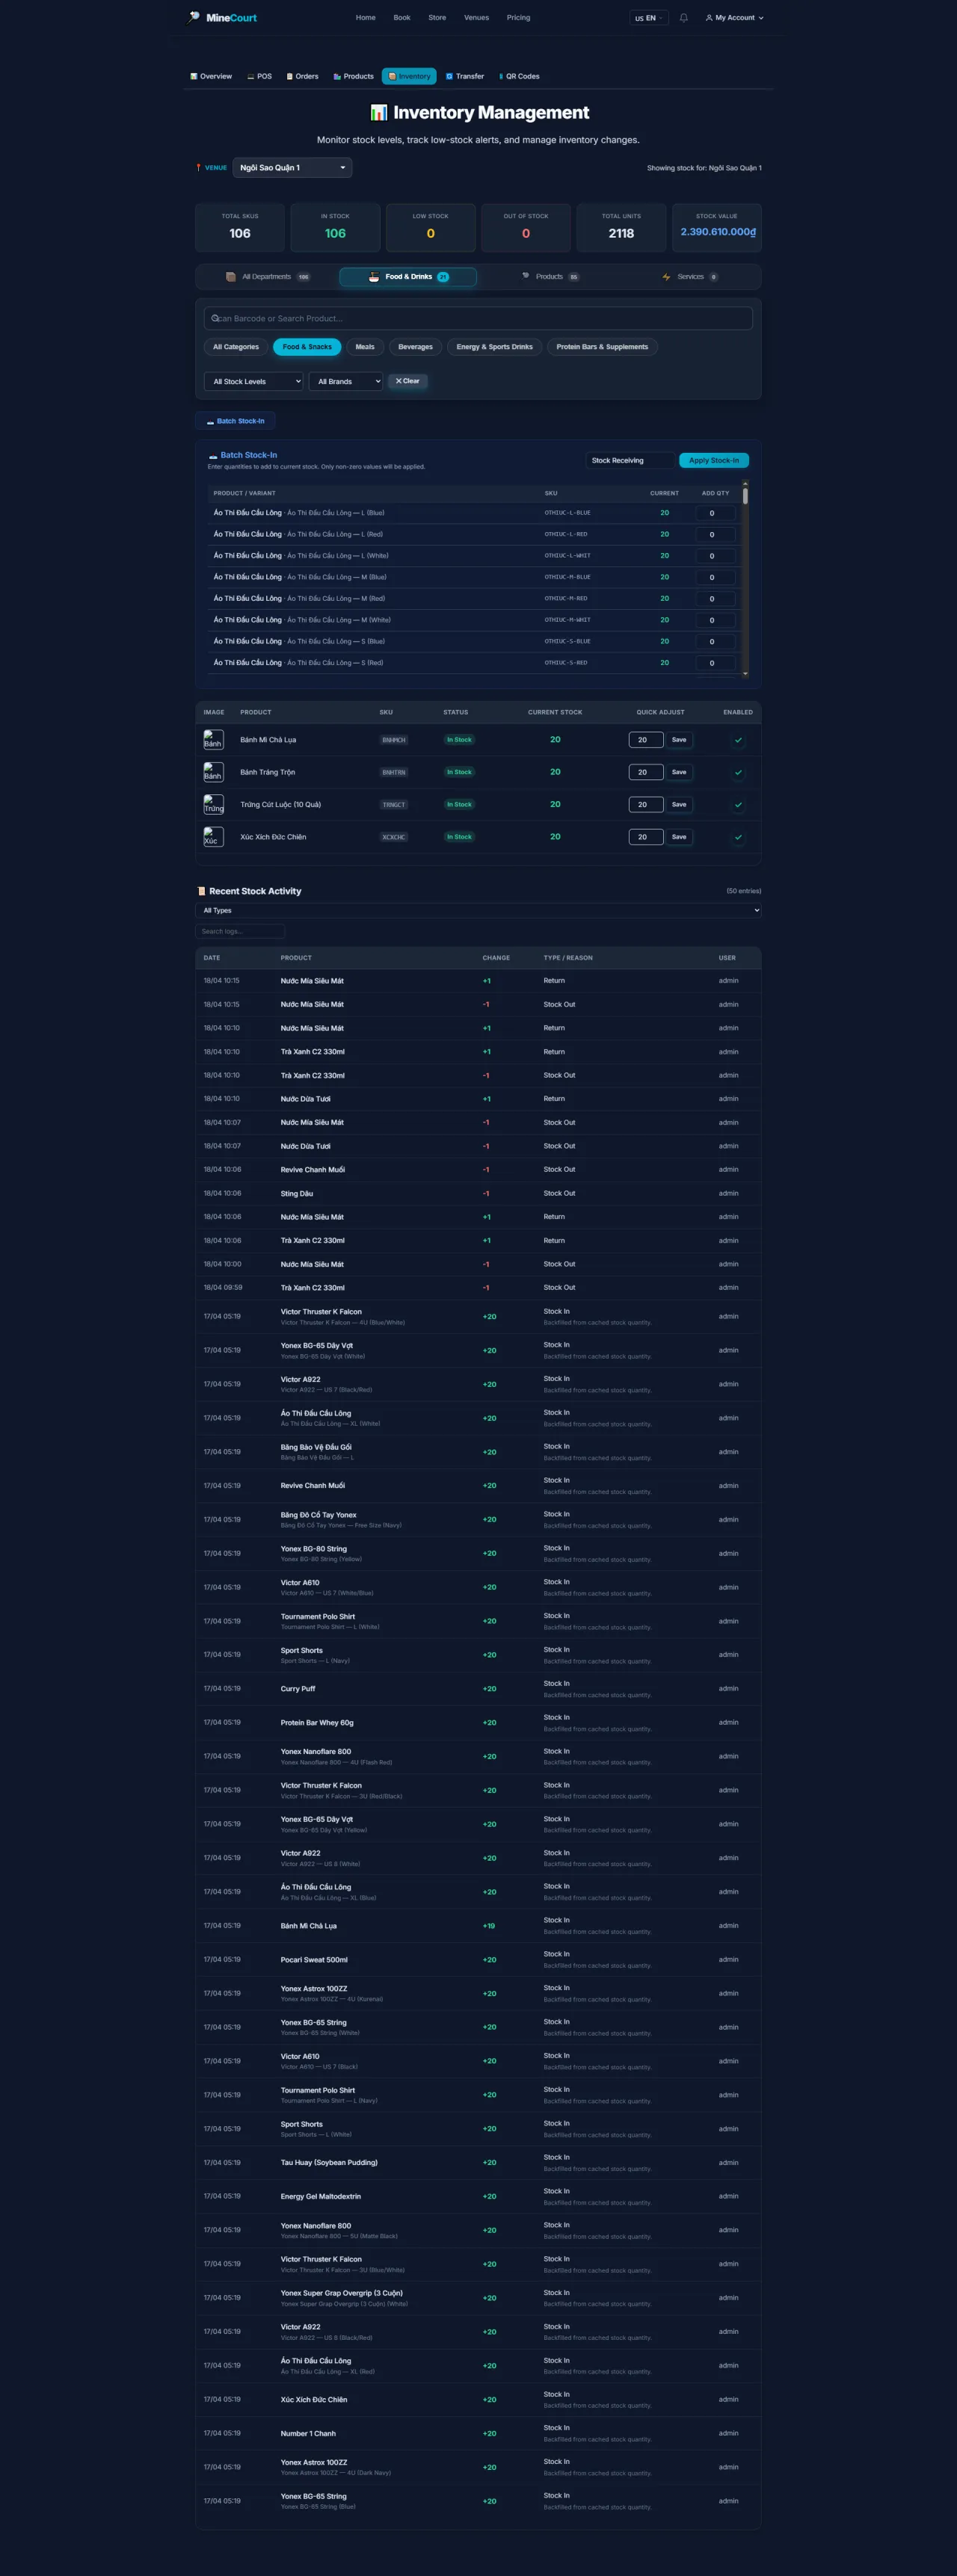
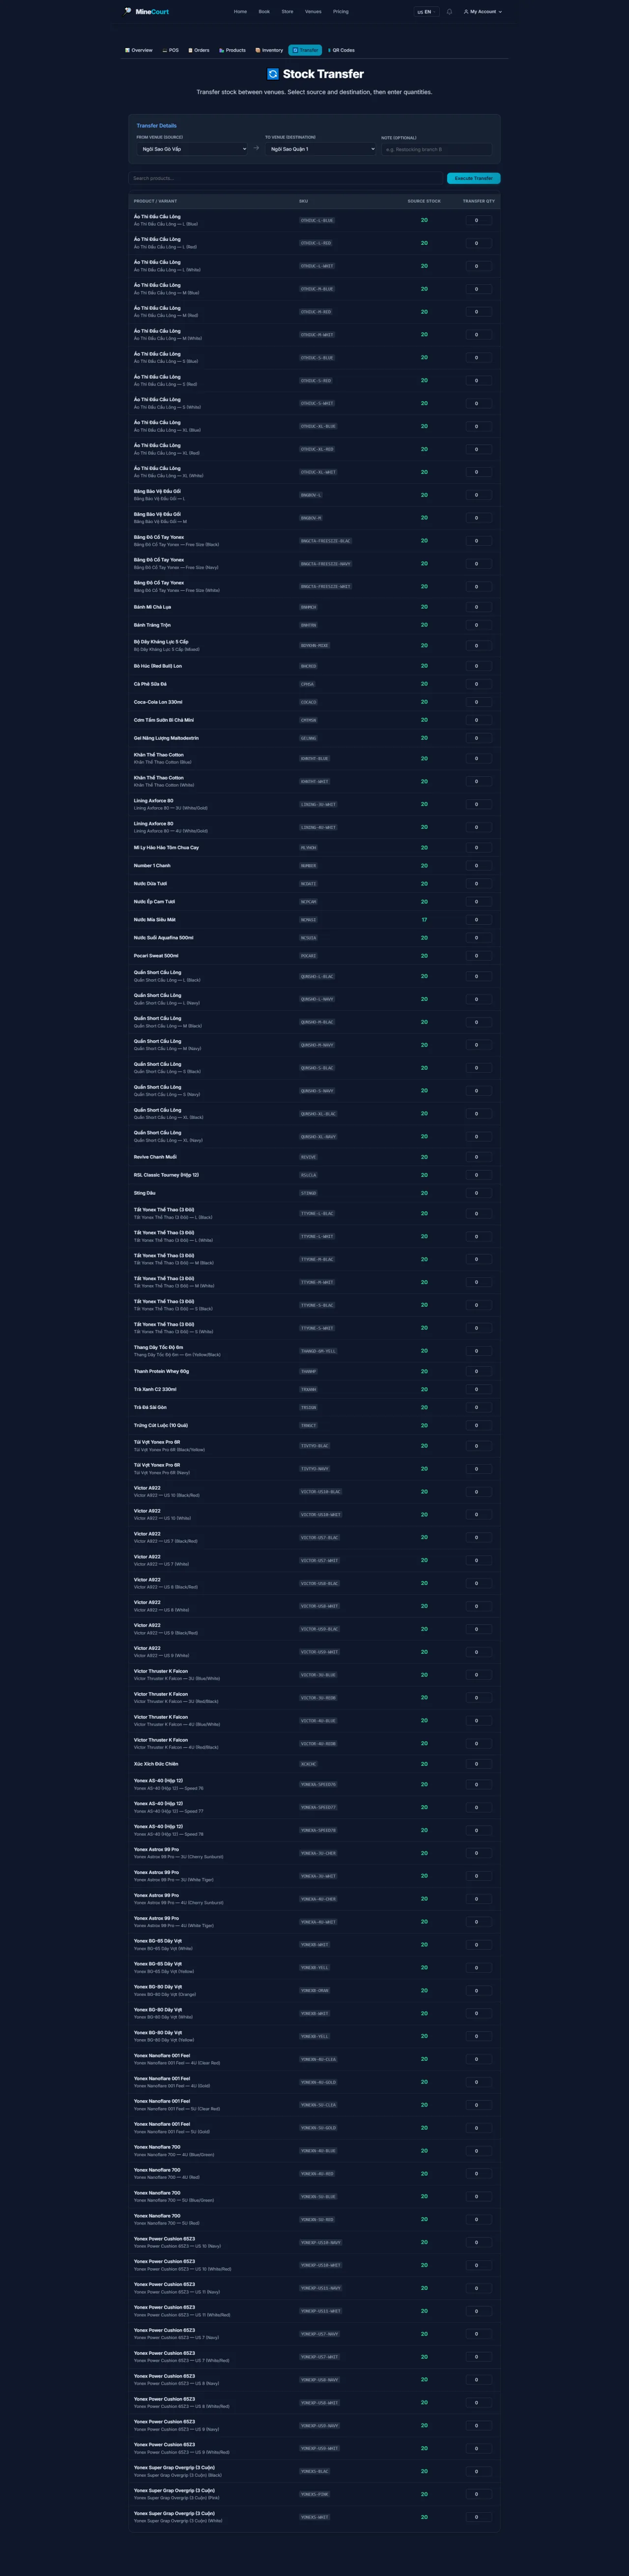
Inventory Transfer
About this screen: Move stock from one venue/store location to another.
Navigation: Store → Inventory → Transfer tab
- Select the Source venue/store and Destination venue/store
- Choose the product and quantity to transfer
- Add a Note for the transfer reason (optional)
- Submit: stock is deducted from source and added to destination instantly
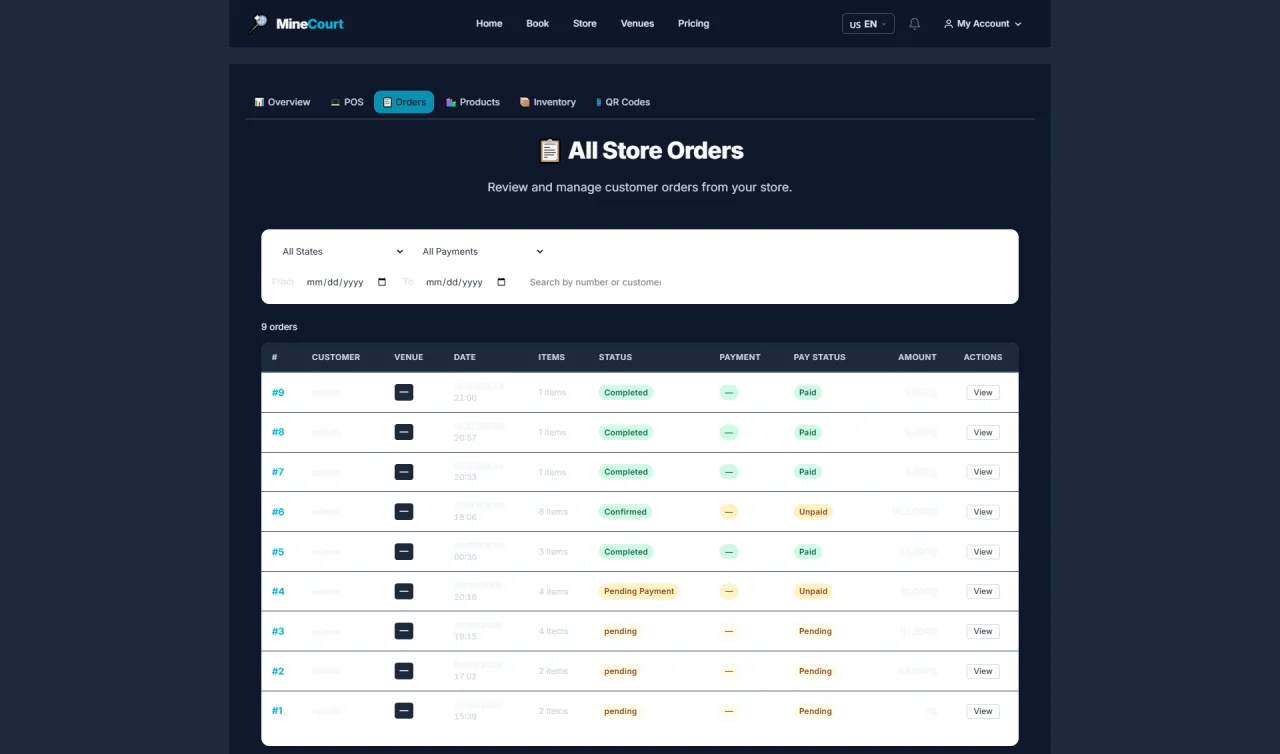
Store Orders
About this screen: View all purchase orders from the venue store (online + POS).
Navigation: Store module → Orders tab
- List of online and POS orders
- Filter by: date, status, payment method
- Statuses: Pending, Completed, Cancelled
- Click any order to view product details
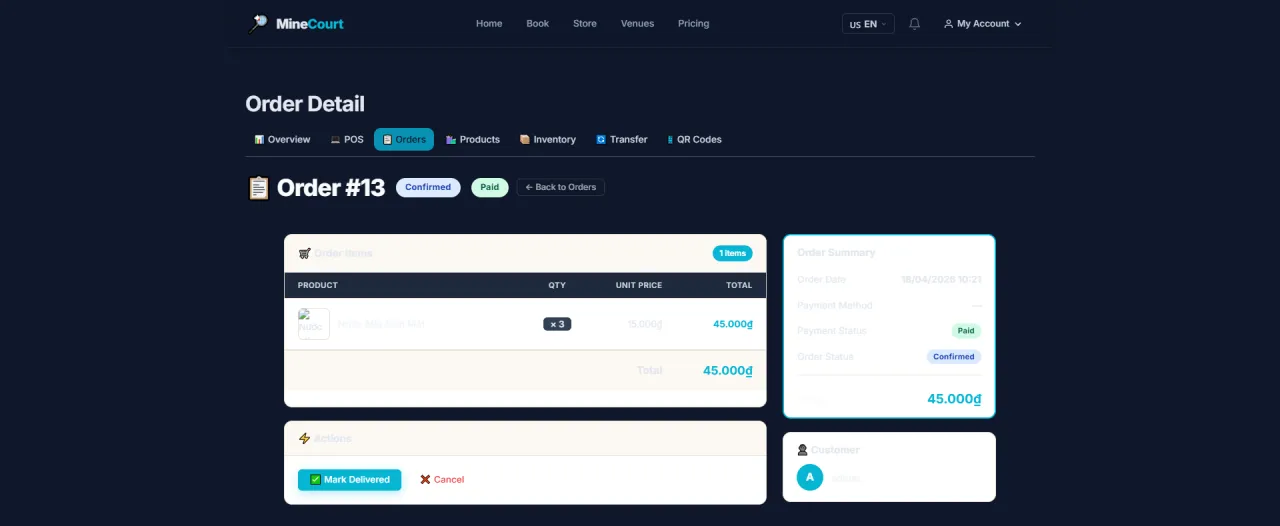
Store Order Detail
About this screen: View the full details of a specific store (product/F&B/service) order.
Navigation: Store Orders list → Click any order
- Shows: items ordered, quantities, unit prices, subtotals, and total
- Displays the payment method used (Cash, Transfer, or Card)
- Order status and timestamp for each stage (Created → Paid → Completed)
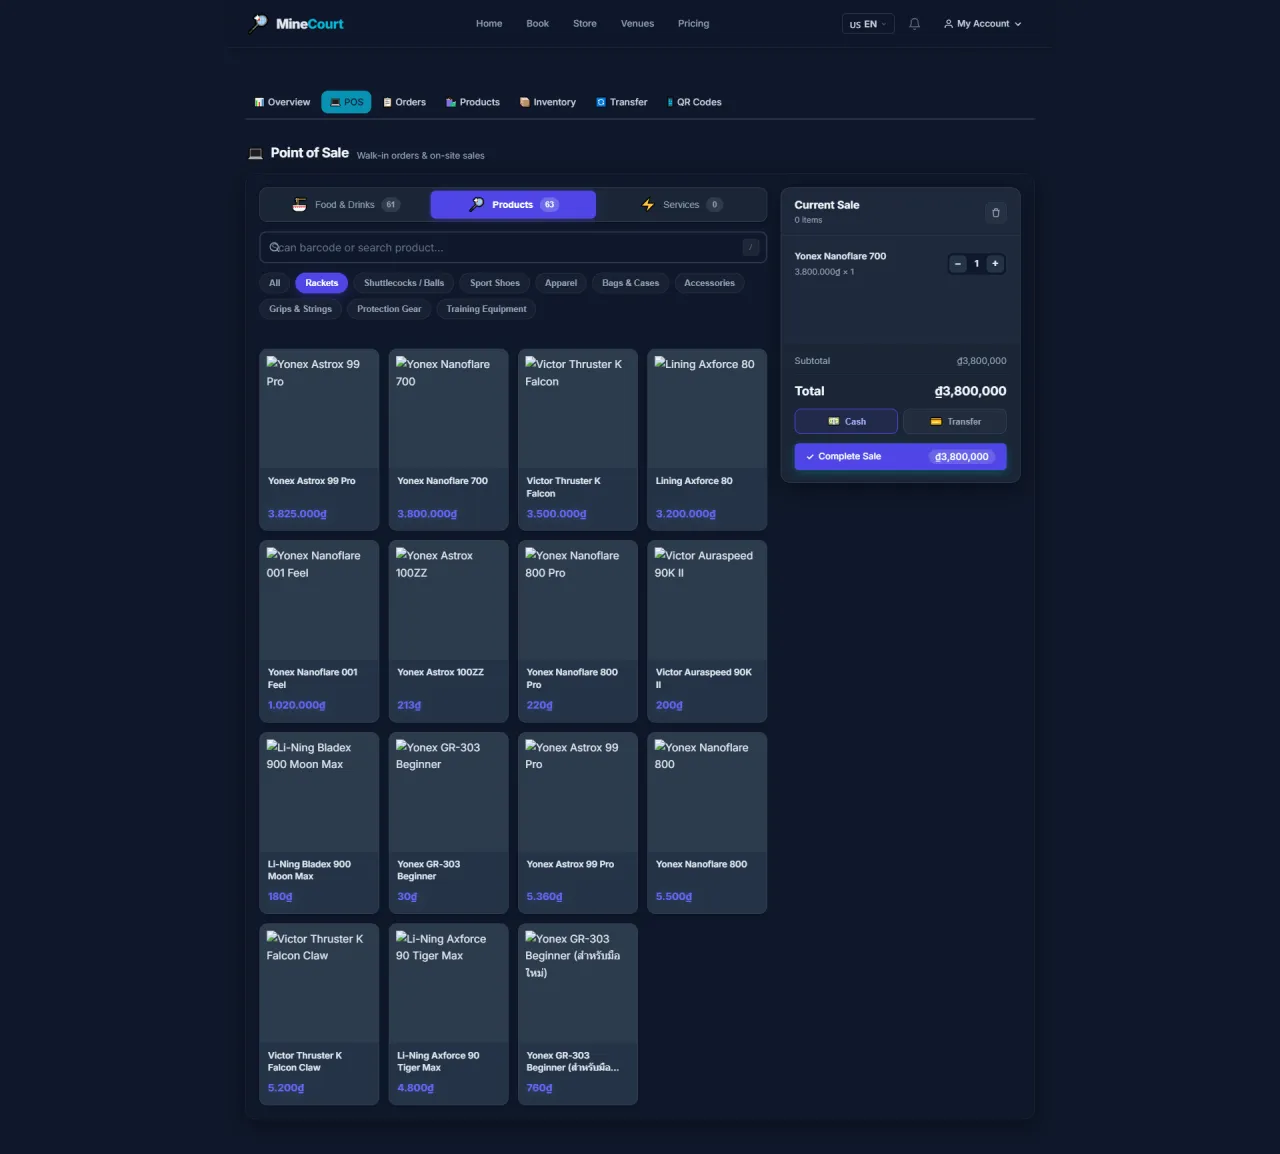
POS: Sell Products
About this screen: Counter-side POS interface for selling sports equipment.
Navigation: Store Inventory → Products tab
- Search product by name or scan barcode
- Click item to add to Current Sale cart
- Adjust quantity with
+/-controls - Select payment method: Cash or Transfer
- Click Complete Sale
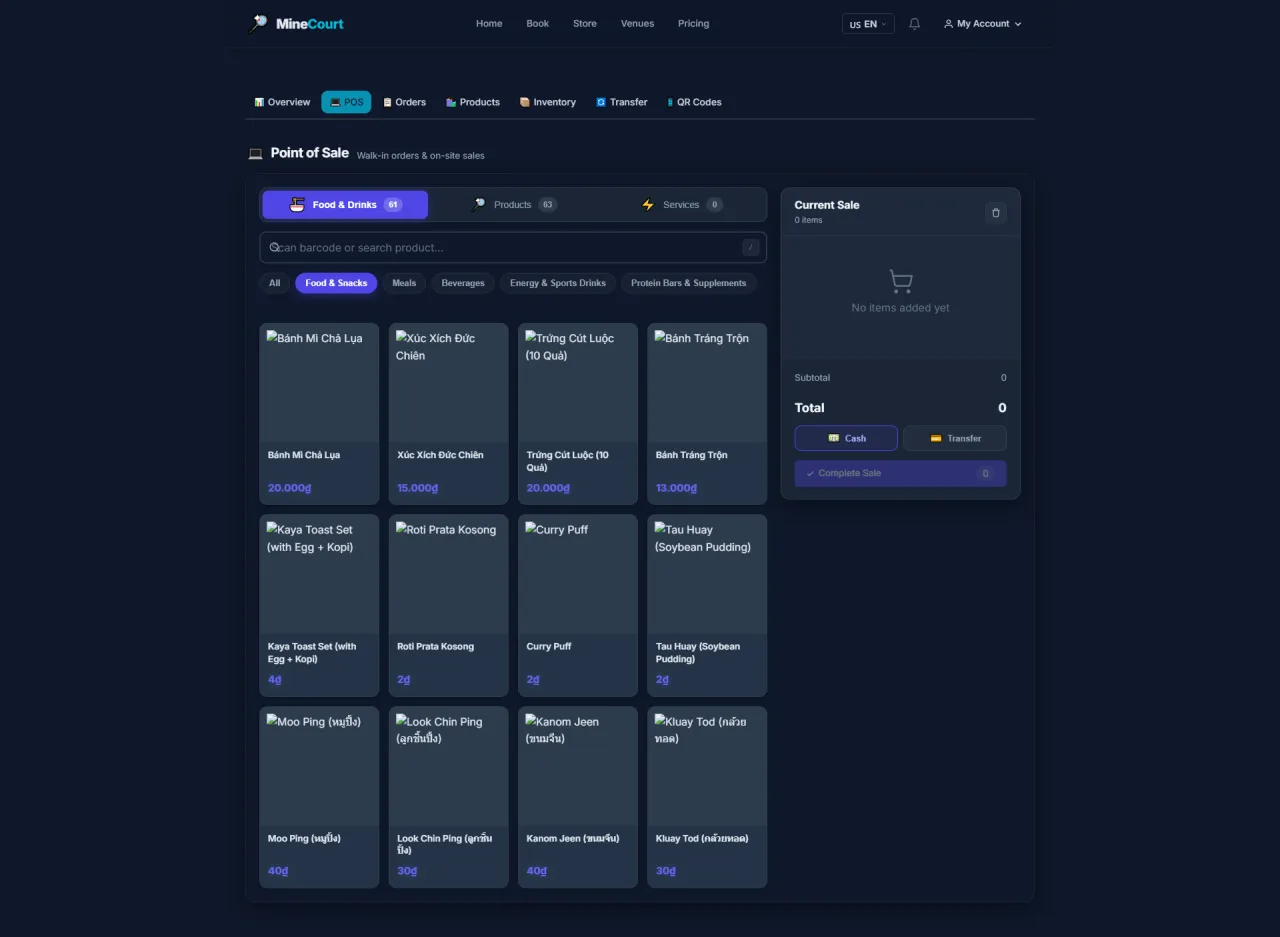
POS: Sell F&B
About this screen: POS interface for selling food and beverages at the court.
Navigation: Store Inventory → Food & Drinks tab
- Category view: Snacks, Meals, Beverages, Supplements...
- Filter by food type for fast lookup
- Add to cart and checkout same as the Products tab
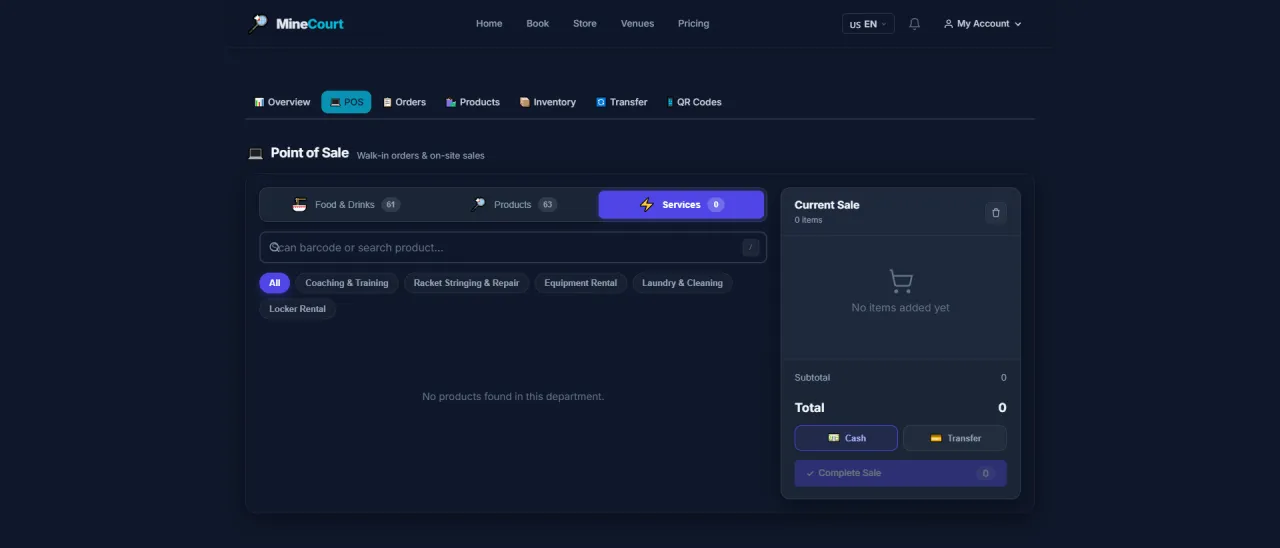
POS: Sell Services
About this screen: POS interface for selling court-side services.
Navigation: Store Inventory → Services tab
- Service list: racket rental, coaching, technical support
- Click to add to the current sale cart
- Combine services and products in a single transaction
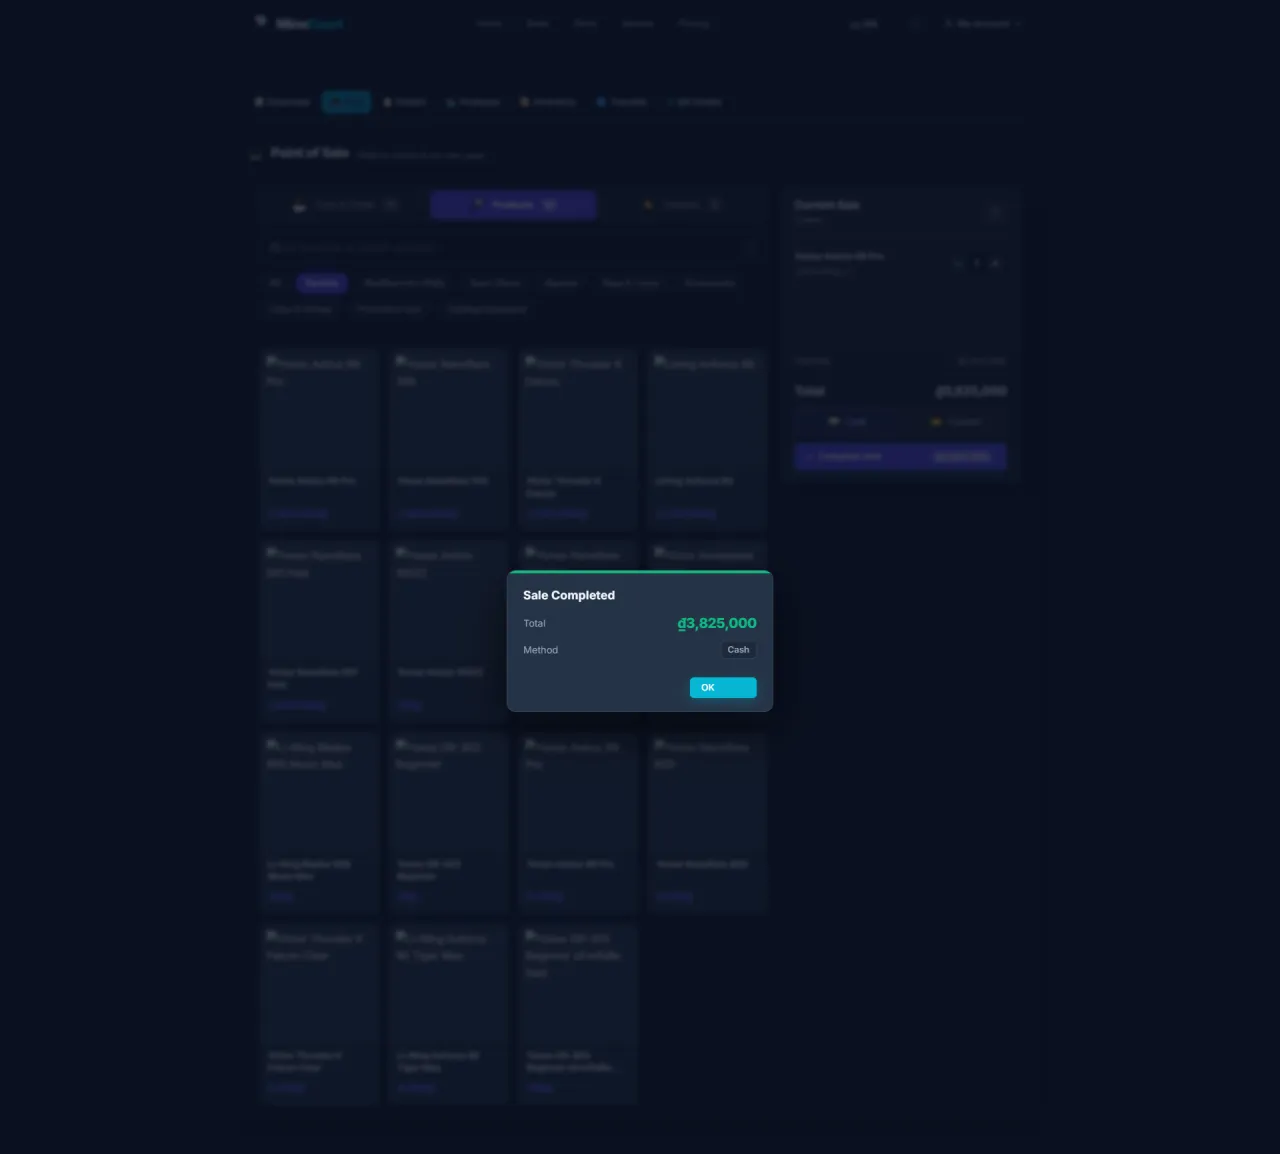
POS: Complete Sale (Cash)
About this screen: Process a cash payment and complete the POS transaction.
Navigation: POS → After adding items → Complete Sale → Cash
- Enter the Cash Received amount from the customer
- System calculates and displays the Change automatically
- Click Confirm to finalize the transaction
- A receipt is generated and can be printed or emailed
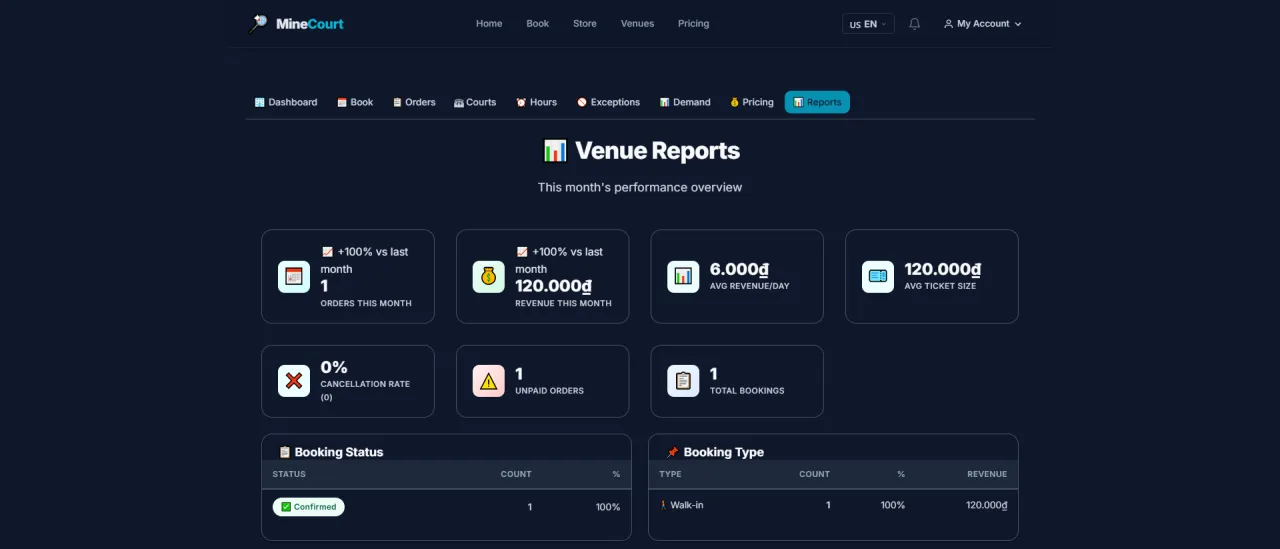
Venue Reports
About this screen: View venue performance and revenue reports.
Navigation: Reports tab in the Venue menu
- Reports by time period: day, week, month
- Stats: total orders, revenue, court occupancy rate
- Export report for detailed offline analysis
Running MineCourt in your own organisation
Names, prices and plans on these screens are set up differently for each deployment. We deploy MineCourt on your domain and adapt it to how you work, and you receive the running system and its source code.