

- Doc Navigation
- Taxonomy Configurations
- Media configuration
The basics - Before you start
Starting with a new theme, it's sometimes takes a lot of time for first time users to really understand how it works. You may want to know how to customize layouts, typography, block styles and make it look the way you want.
In most cases you won't need to know PHP or database queries, but basic knowledge would be very helpful to get great results.
If you're an experienced Drupal developer or if you want to build the theme from zero with only the basic appearance of your theme, find this guide in handy. This guide will give you the detailed step by step installation guide to help you start building the content for Pinteros to look exactly like the demo site.
1. Pinteros Package
Included content:
- README.txt
- Pinteros theme: pinteros-7.x-1.0.zip
- Demo Profile for Pinteros: pinteros-profile-7.x-1.0.zip
2. System Requirements
Database
- MySQL 5.0.15 or higher with PDO
- PostgreSQL 8.3 or higher with PDO
- SQLite 3.3.7 or higher
PHP
- PHP 5.2.5 or higher (5.3 recommended)
- PHP5 GD library installed
- Disabled error_reporting flag on production server
- Enabled mod_rewrite in Apache for clean URLs
- Memory limit set up at least 128MB
If you are new to Drupal, please take a reference to System requirements on drupal.org.
3. Screenshots
Let's glance through the theme's design & some features:
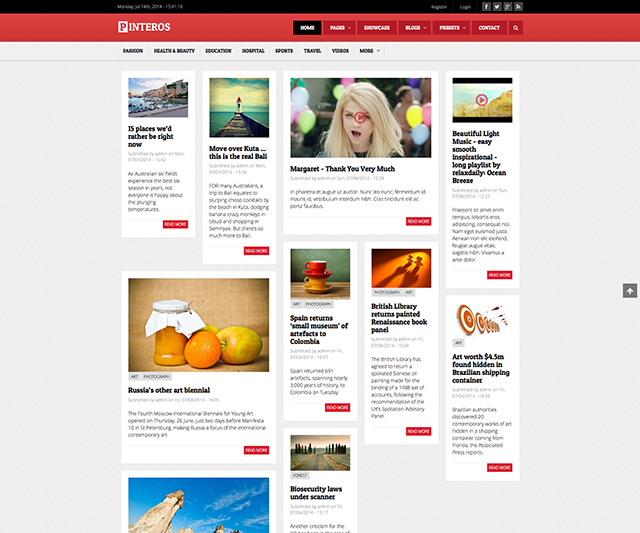
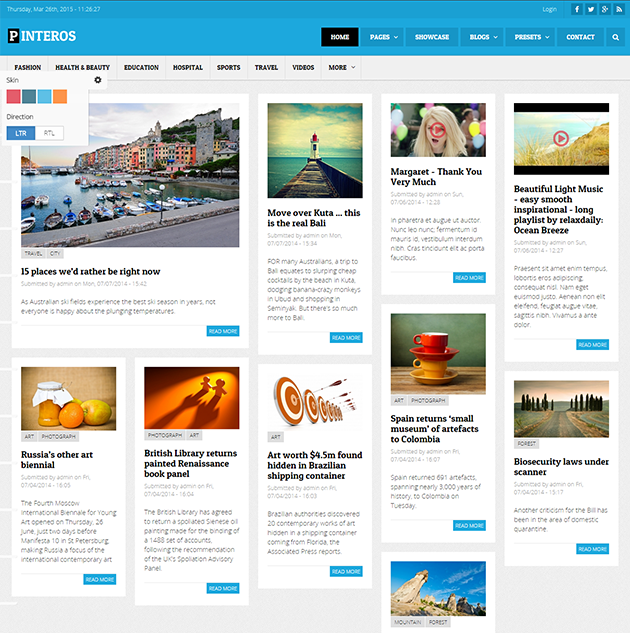
Home
Home Full Width

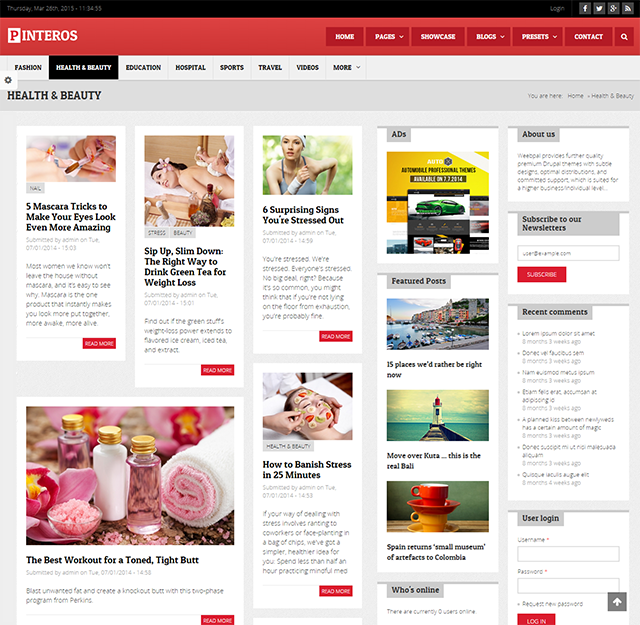
Categories List

Category
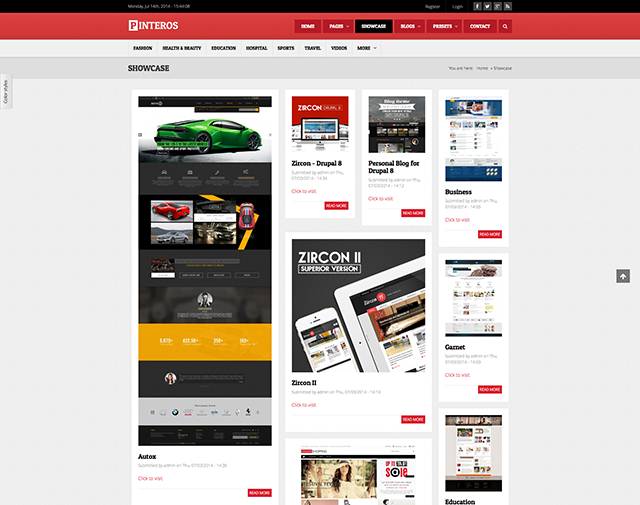
Showcase
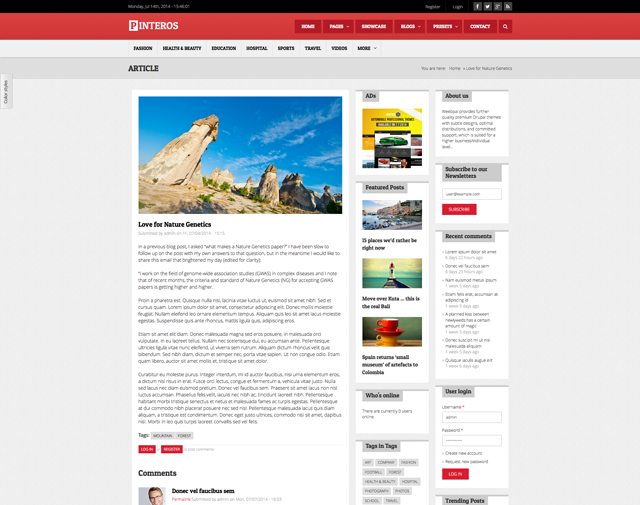
Article Details
Contact

Multi colors
4. Module requirements
Core Modules
- Blog
- Contact
- Poll
- Forum
Third-party Modules
- Address Field
- Bean
- Better Exposed Filters
- Block Class
- Clock
- Colorbox
- Contact Forms
- Context
- Chaos tools
- Date
- Devel
- Entity
- Entity Reference
- Exclude Node Title
- Frequently Asked Questions
- Field Group
- Field Slideshow
- Fivestar
- Font Awesome Icons
- Gallery Formatter
- Google Analytics
- Internationalization
- Jcarousel
- Jquery Update
- Javascript Timer
- Language Icons
- Libraries
- Link
- Manage Multiple Terms
- Memcache API and Integration
- Menu block
- Menu Breadcrumb
- Meta tags quick
- Modal forms (with ctools)
- Module Filter
- Newsletter
- Node Class
- Page Title
- Path Auto
- Pinteros_tools
- Quicktabs
- ShareThis
- Site map
- Tag Clouds
- Taxonomy Menu
- TB Megamenu
- Token
- Variable
- Video
- Video Embed Field
- Views
- Views Bulk Operations (VBO)
- Views Field View
- Views Fieldsets
- Views Infinite Scroll
- Views Slideshow
- Voting API
- Webform
- Weight
- Wysiwyg
Required libraries by the modules
- Autopager
- Ckeditor
- Colorbox
- Fontawesome
- Jquery Cycle
- Jquery Jcarousel
Download Drupal core files, and extend your site with modules at here.
Installation
Quick Installation Demo Profile
We created an installation profile with demo content for each of our theme, so that you can quickly download and reproduce the whole site content as presented on our live demo. This way you will get a quicker overview of the features. If it's convenient you may also use the given demo content as a starting point to build your custom sites.
Quick Installation
1. Pinteros package included:
- Pinteros theme: pinteros-7.x-1.0.zip
- Demo Profile for Pinteros: pinteros-profile-7.x-1.0.zip
The below steps will give you the installation guide so that you can build your website to look exactly like the Pinteros Full Demo.
- Demo Profile for Pinteros: pinteros-profile-7.x-1.0.zip
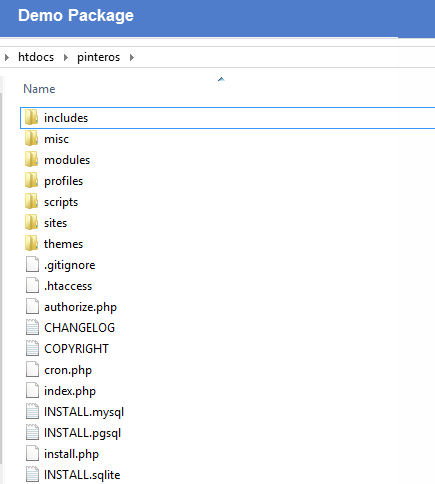
2. Extract pinteros-profile-7.x-1.0.zip above and copy it into your host, and rename the directory
3. Access your MySQL database and create a new DB (e.g. pinteros) and user account. Don't forget to add correct permissions to new user to access the database
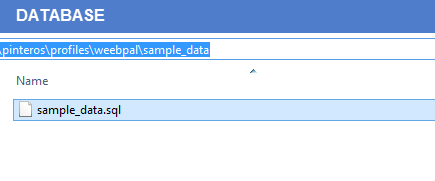
4. In the demo directory database/ (latest version of package) or profiles/weebpal/ (old version), you can find database dump named sample_data.sql. Import this file into new database.
5. Now, you need to modify sites/default/default.settings.php file. Clone default.settings.php file, then rename it "settings.php"
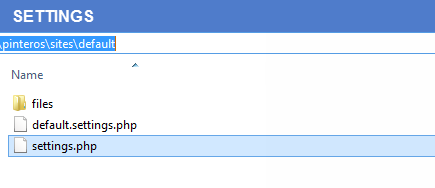
6. Open settings.php, then locate the $database array and set proper credentials.
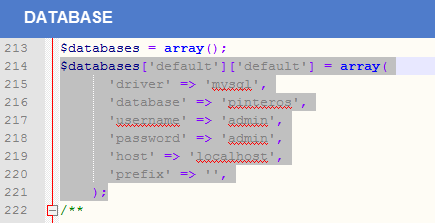
                        $databases['default']['default'] = array(
                            'driver' => 'mysql',
                            'database' => 'databasename',
                            'username' => 'username',
                            'password' => 'password',
                            'host' => 'localhost',
                            'prefix' => '',
                        );
When using this installation, you are installing everything from our preview server. So don't forget to set proper values to access to your database: db name, db admin username, db admin password, host, etc.
7. Open the browser and visit your website with the prepopulated content & layout exactly like our Pinteros Demo
Now, you can visit administrator site with the admin account admin/admin to delete the unnecessary contents and add the new ones.
Installation Pinteros Theme for Drupal developers
If you're an experienced Drupal user or if you want to build the theme from zero with only the basic appearance of Pinteros Theme, find this guide in handy.
1. Install Drupal
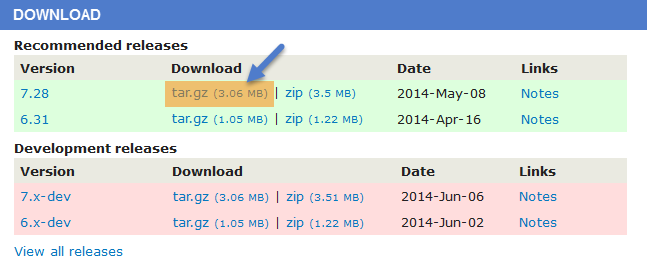
-
Go to Drupal download page and download the latest version of Drupal 7.
- Extract and copy Drupal folder to your host and rename the directory.
- Follow this tutorial to install Drupal with the standard profile.
2. Install Pinteros Theme
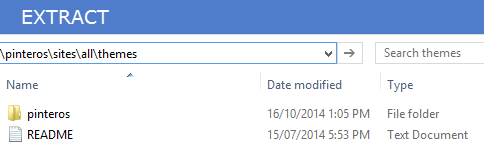
- Extract Pinteros theme .ZIP file:
- pinteros-7.x-1.0.zip
-
Move this theme into your Drupal folder: sites/all/themes
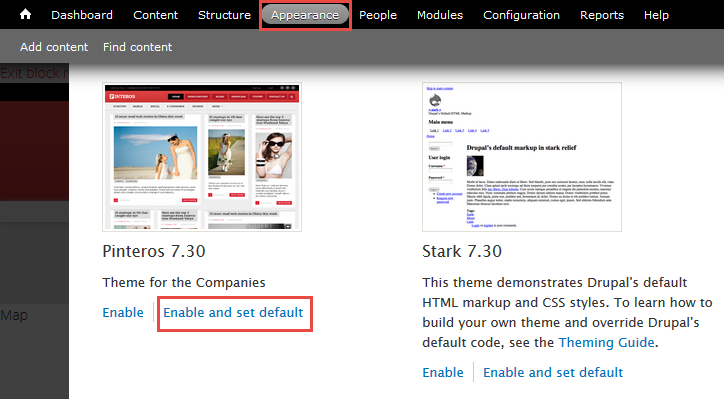
-
Navigate to Appearance > Choose Enable and set default Pinteros theme
3. Install Required Modules
Now that you've enabled Pinteros theme, you will install and enable the required modules (listed in the Module Requirements section) to customize and use them.
If you don't know how to install the contributed modules, this tutorial is an essential guide.
Cheat to install modules & theme:
- Extract pinteros-profile-7.x-1.0.zip
- Open extracted folder, go to sites/all and copy all folders inside (modules, themes, libraries)
- Paste them to your host, folder sites/all
Note: See this guide to get more details about installation
Taxonomy configuration
Quick Information
- Taxonomy: Taxonomy can be simply understood as category management using organizational keywords known in other systems as categories, tags or metadata. It allows you to connect, relate and classify your website's content. In Drupal, these terms are gathered within "vocabularies". The Taxonomy module allows you to create, manage and apply those vocabularies.
- Vocabulary: for example product category, tag, provider name, ...
- Term: the items in each vocabulary. For example: vocabulary product category has some terms: laptop, pc, mobile, tablet, camera, headphone, ...
- For more information about taxonomy, please see: Organizing content with taxonomies
Navigate to Structure > Taxonomy to create vocabularies as the following:
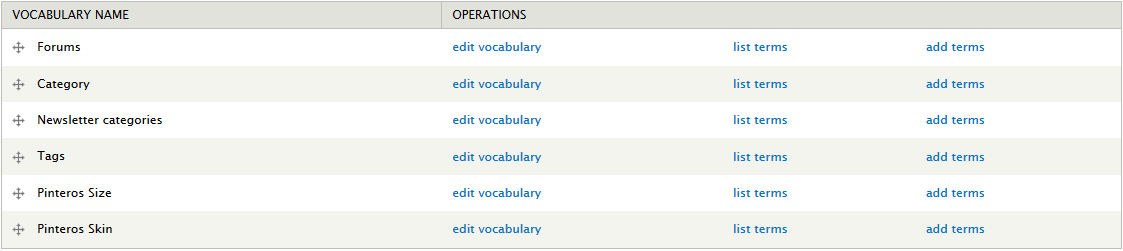
Add terms for each vocabulary:
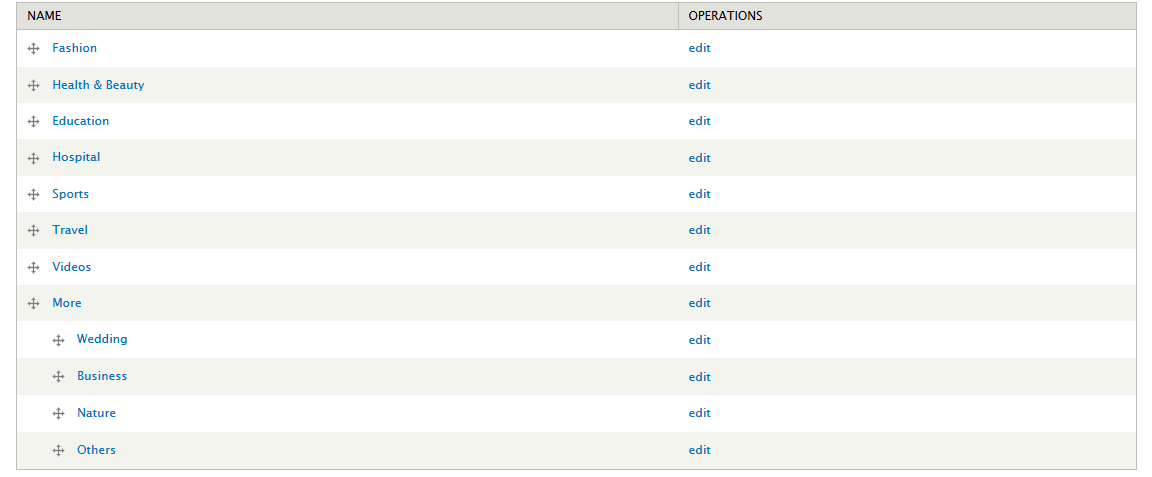
Terms of Category:
Terms of Pinteros Size:

Terms of Pinteros Skin:

Note: See this guide to get more details about taxonomy configuration
Media configuration
Image Style Configuration
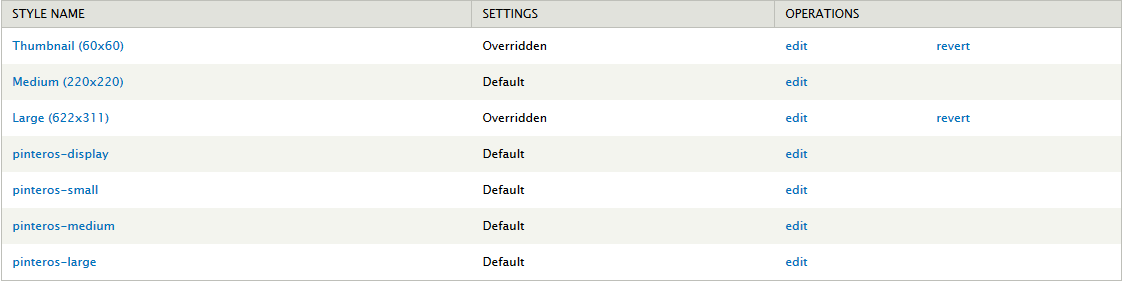
Image styles are the presets of image settings. Image styles are used to define how the images are shown.
Navigate to Configuration, In MEDIA area, click Image styles, then create image styles as the following:
Content type configuration
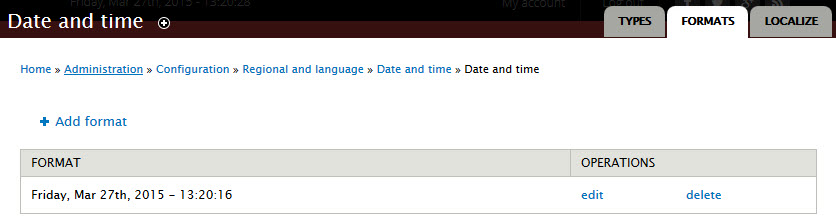
Configure Date and time
Step 1: Navigate to Configuration > Regional and language > Date and time. Then click Format tab and add format following:
Step 2: Go to Types tab and set following properties:
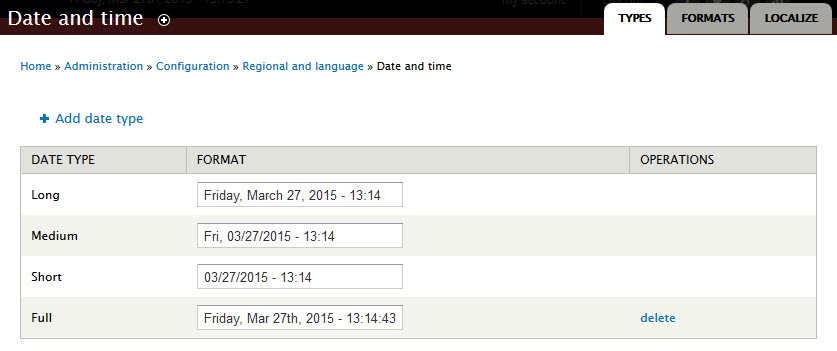
Step 3: Click Save button
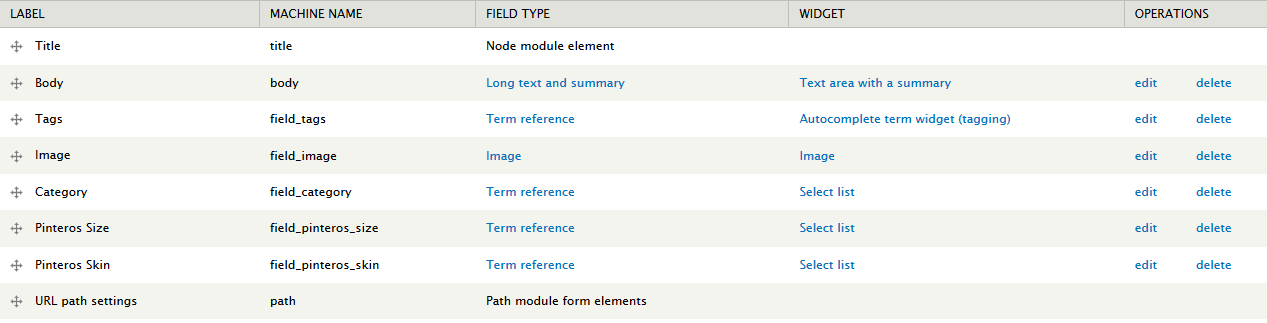
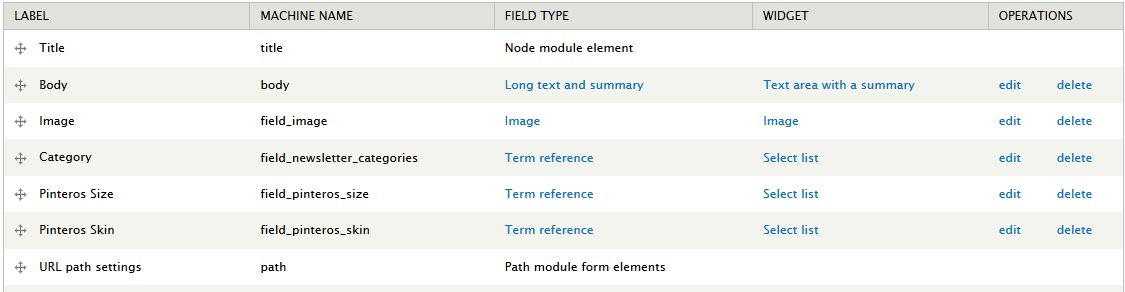
Modify Article type
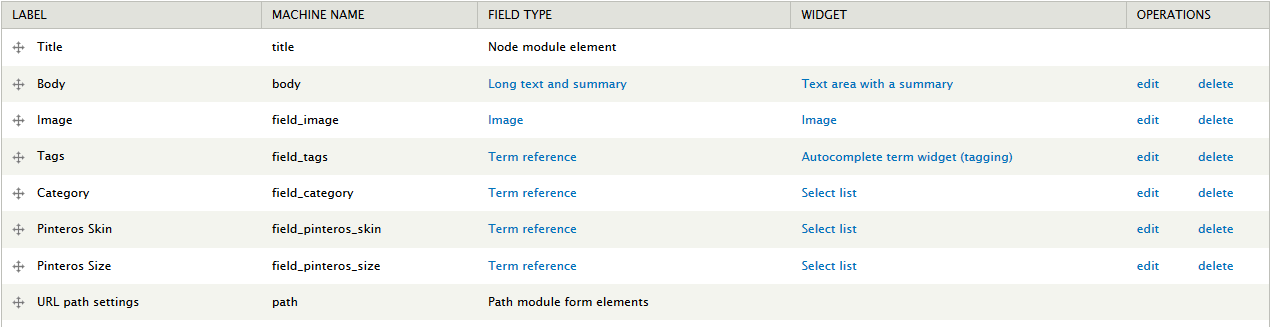
1. Navigate to Structure > Content Type
2. In Article row, click "manage fields" link.
3. To add new field, you can fill in "Add new field" row
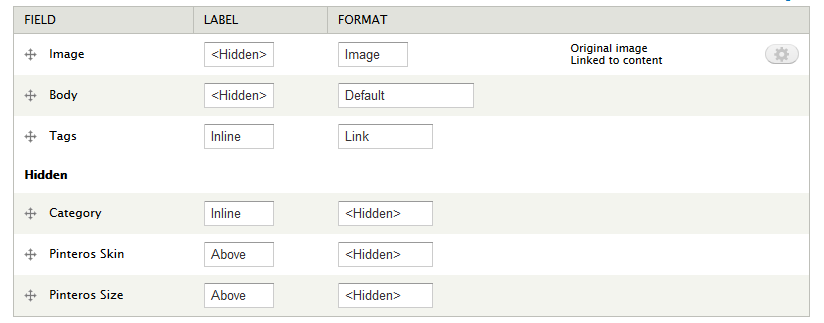
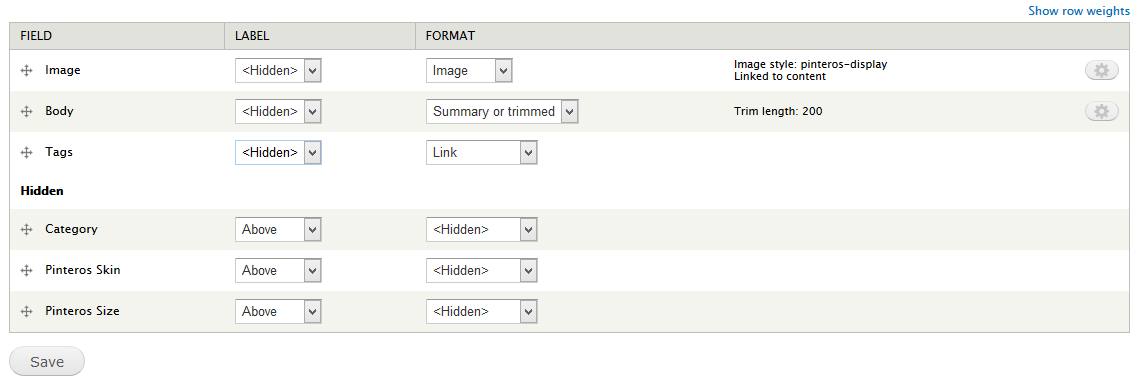
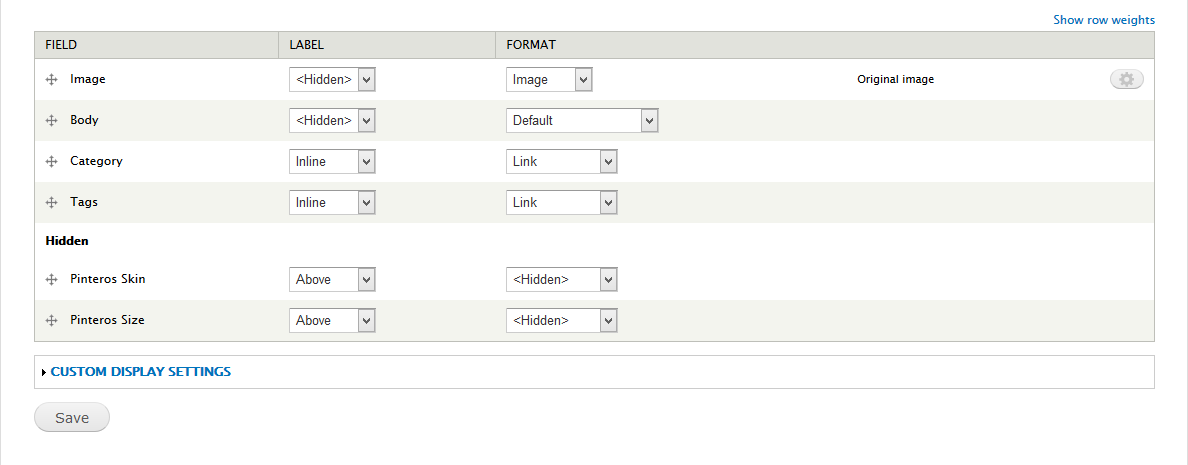
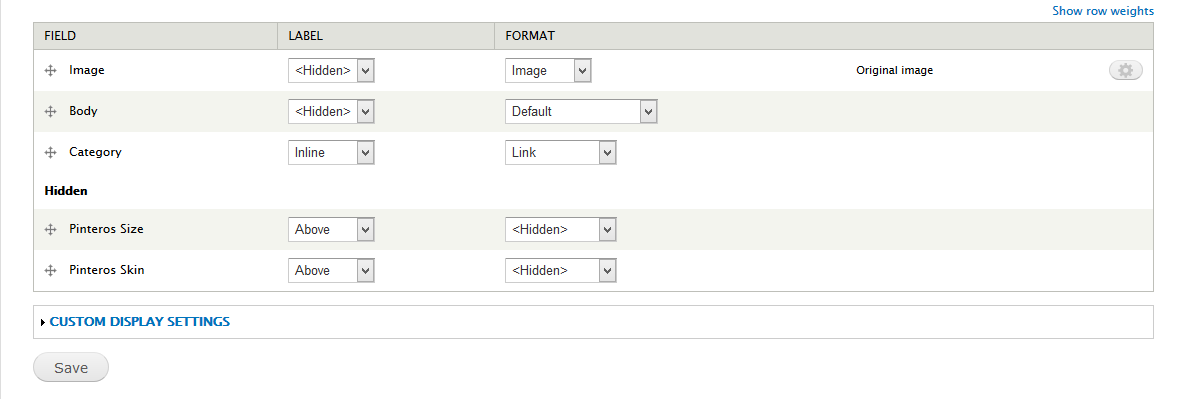
4. Go to Manage display tab > Default set following properties:
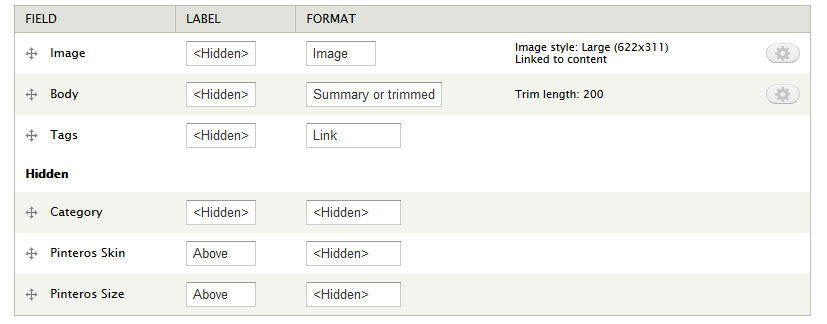
5. Go to Manage display tab > Teaser set following properties:
Modify Blog entry type
Note: Required Modules: Blog
1. Navigate to Structure > Content Type
2. In Blog entry row, click "manage fields" link.
3. To add an existing field, you can take action on "Add existing field" row
4. Go to Manage display tab > Default set following properties:
5. Go to Manage display tab > Teaser set following properties:
Modify Forum topic type
Note: Required Modules: Forum
1. Navigate to Structure > Content Type
2. In Forum row, click "manage fields" link.
3. To add an existing field, you can take action on "Add existing field" row
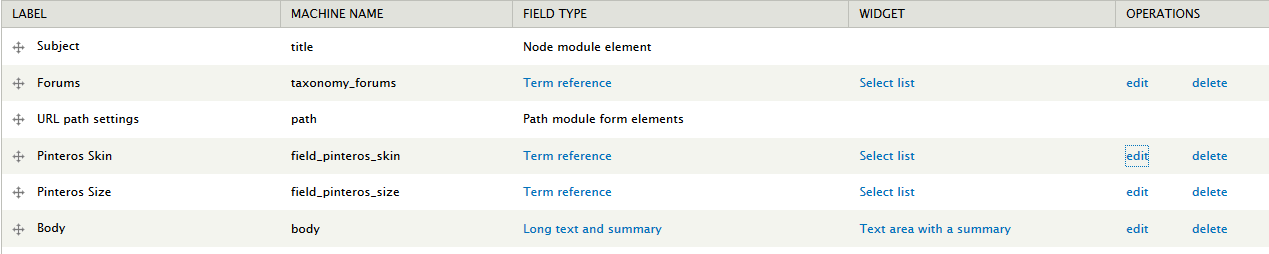
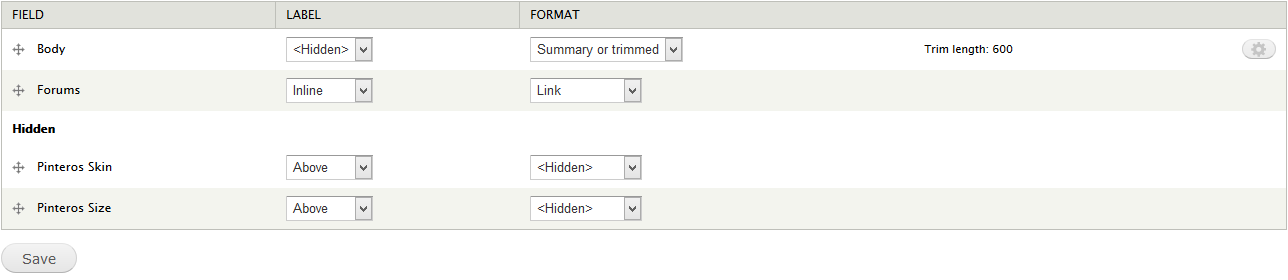
4. Go to Manage display tab > Default set following properties:

5. Go to Manage display tab > Teaser set following properties:
Create Showcase type
1. Navigate to Structure > Content Type. Click Add Content Type link to create content type Showcase
2. Go to Manage Fields and add following fields:
3. Go to Manage display tab > Default set following properties:
4. Go to Manage display tab > Teaser set following properties:
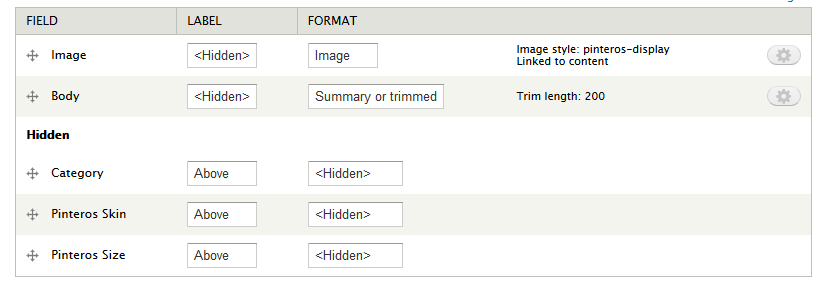
Create Weebpal Presets type
1. Navigate to Structure > Content Type. Click Add Content Type link to create content type Weebpal Presets
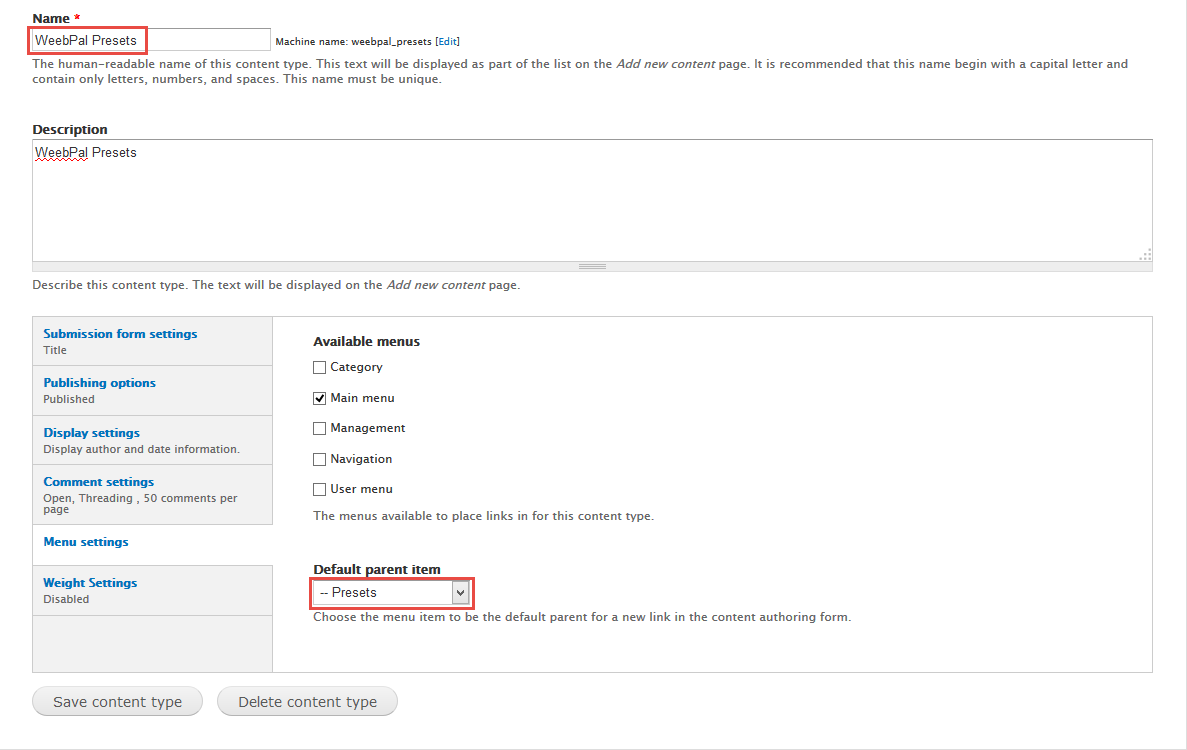
2. Click Save and add fields button, then add fields and set properties for them.
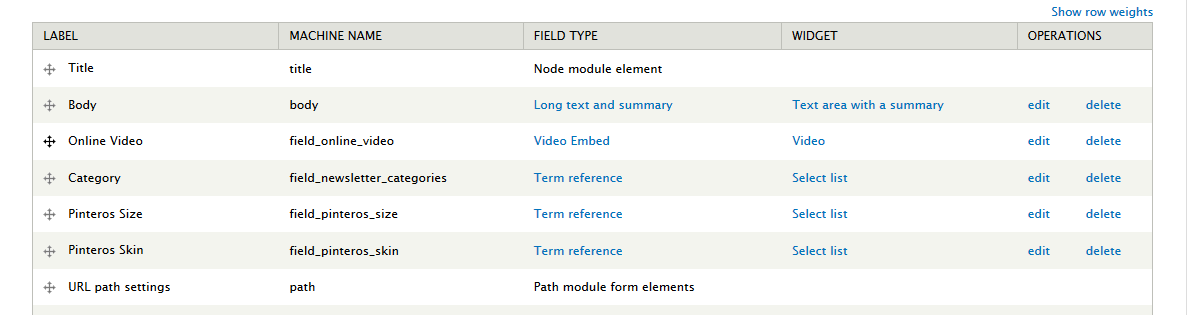
Create Online Video type
1. Navigate to Structure > Content Type. Click Add Content Type link to create content type Online Video
2. Go to Manage Fields and add following fields:
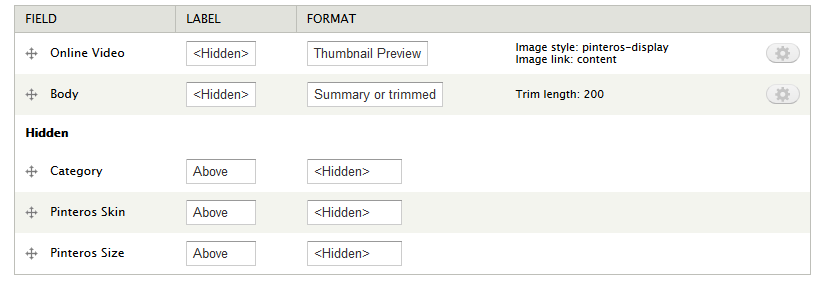
3. Go to Manage display tab > Default set following properties:

4. Go to Manage display tab > Teaser set following properties:
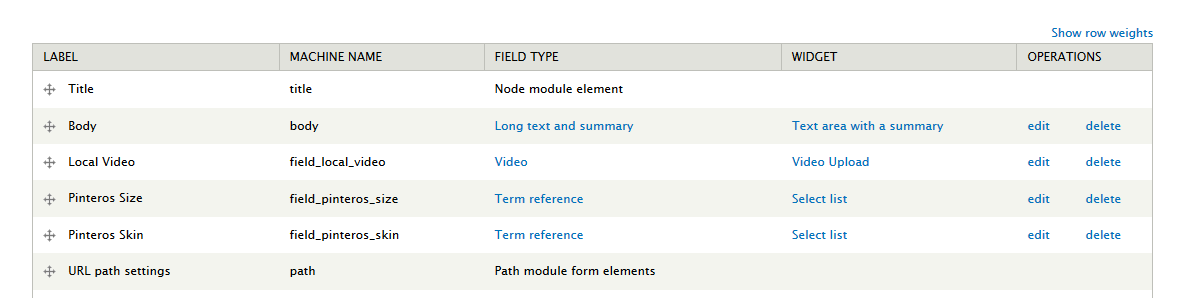
Create Local Video type
1. Navigate to Structure > Content Type. Click Add Content Type link to create content type Local Video
2. Go to Manage Fields and add following fields:
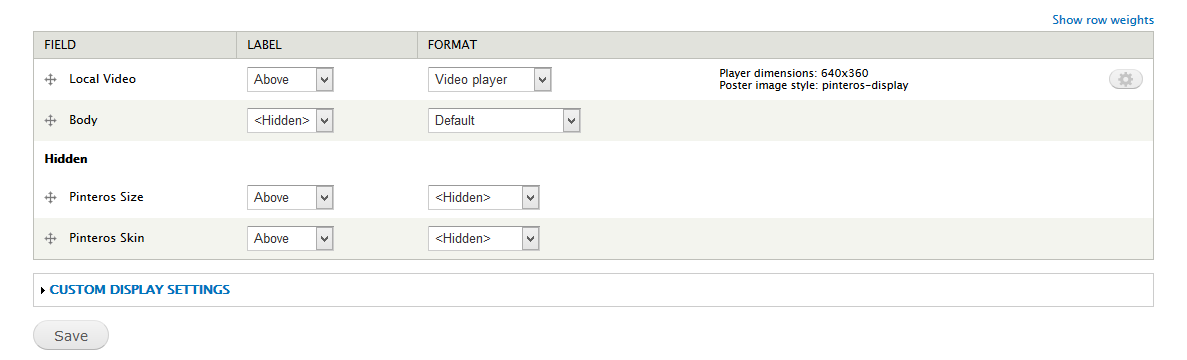
3. Go to Manage display tab > Default set following properties:
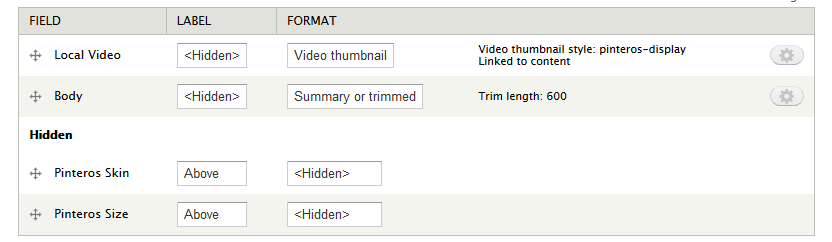
4. Go to Manage display tab > Teaser set following properties:
5. Click Save button
Modify Users Profile structure
Navigate to Configuration > People section > Account settings > Manage Fields to view fields

Home Page
Clock block
Front end Display

Create Clock block
Note: Required Modules: Clock
1. Navigate to Structure > Blocks , find Clock block, click configure and set properties for them.
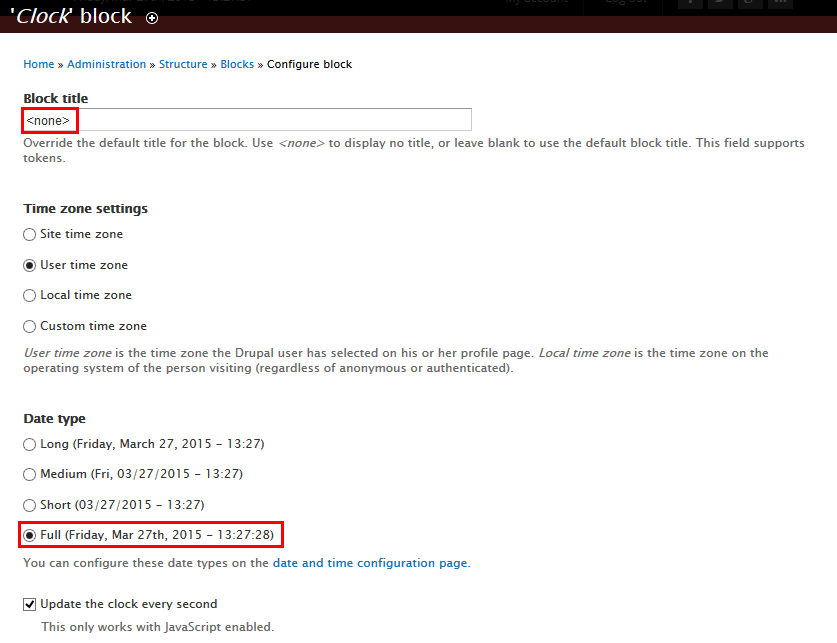

2. Click Save button
Socials block
Front end Display
1. Create Socials block
1. Navigate to Structure > Blocks
2. Click Add block link to create block, for example: Socials block and set properties for them.
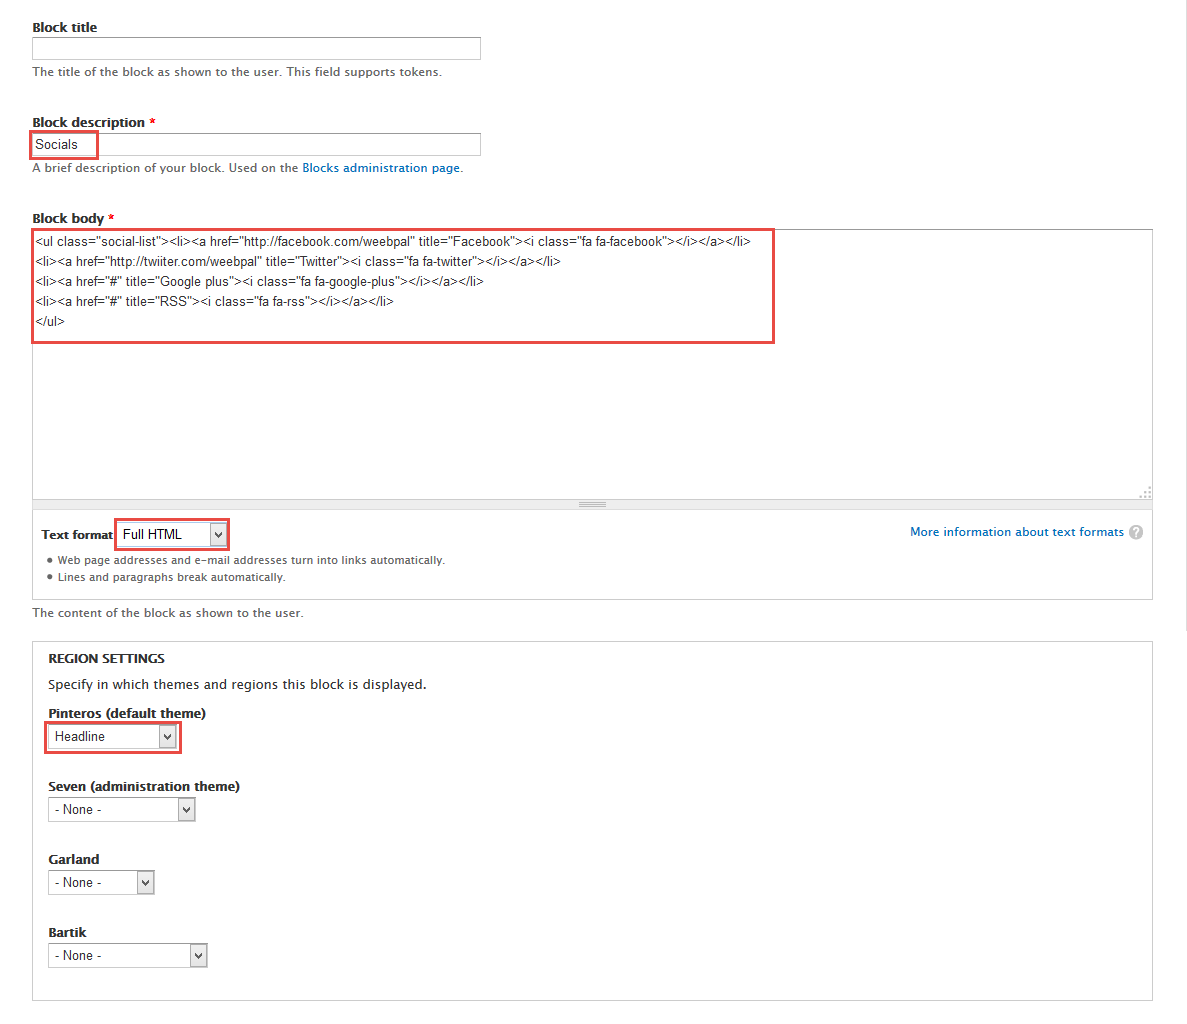
3. Click Save block button.
Refer to following HTML code:
<ul class="social-list"><li><a href="http://facebook.com/weebpal" title="Facebook"><i class="fa fa-facebook"></i></a></li> <li><a href="http://twiiter.com/weebpal" title="Twitter"><i class="fa fa-twitter"></i></a></li> <li><a href="#" title="Google plus"><i class="fa fa-google-plus"></i></a></li> <li><a href="#" title="RSS"><i class="fa fa-rss"></i></a></li> </ul>
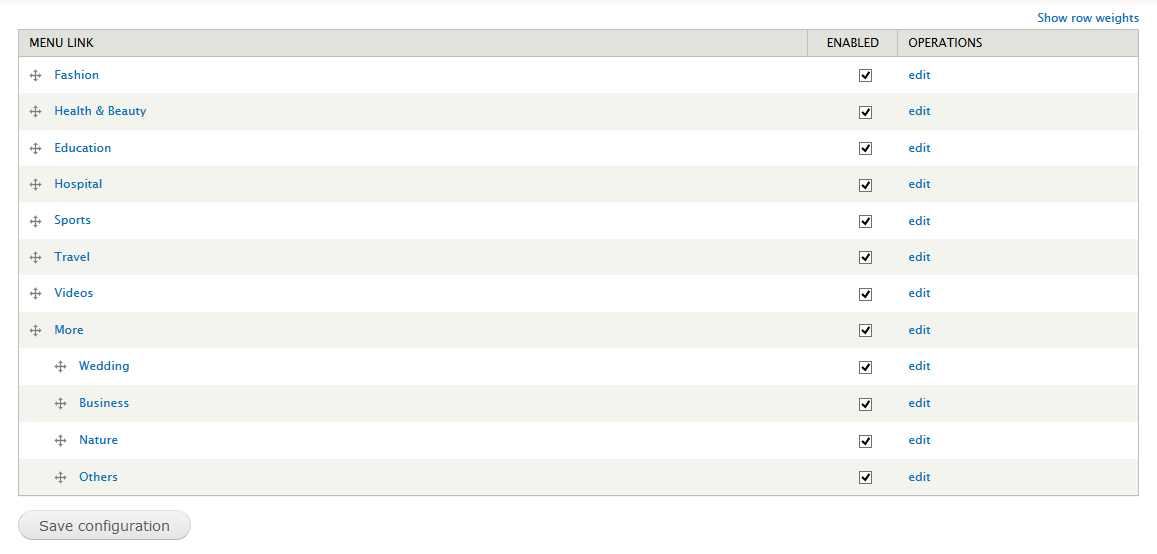
Category menu
Front end Display

1. Configure Category block
1. Navigate to Structure > Menus
2. Click Add menu link to create menu, for example: Category menu and set properties for them.
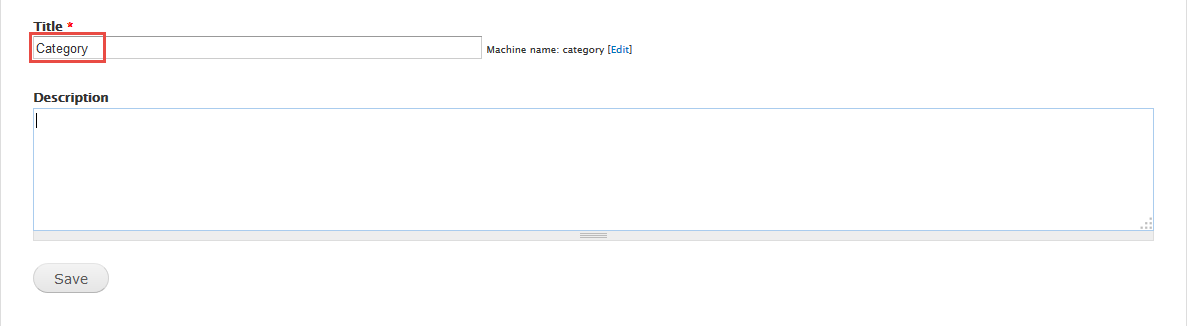
3. Click Save button, then click Add link for category menu and set properties for them.
4. Navigate to Structure > Blocks, find Category block, click configure.
5. Click Save block button.
2. Create sidebar_menu context
1. Navigate to Structure > Context
2. Click Add link to create sidebar_menu context with following properties:
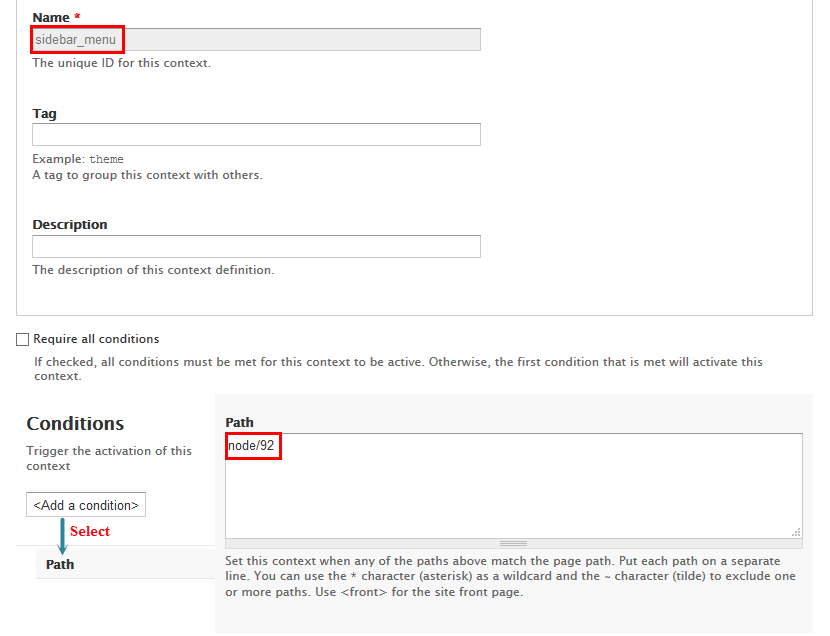
3. Click Save block button.
User menu block
Front end Display

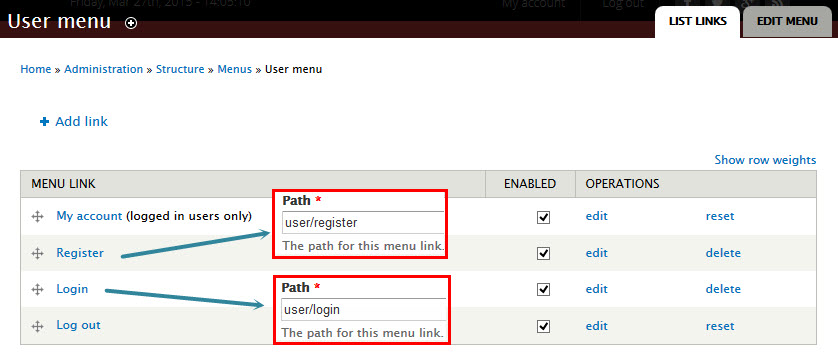
Configure User menu block
1. Navigate to Structure > Menus find User menu.Click Add link with following properties them:
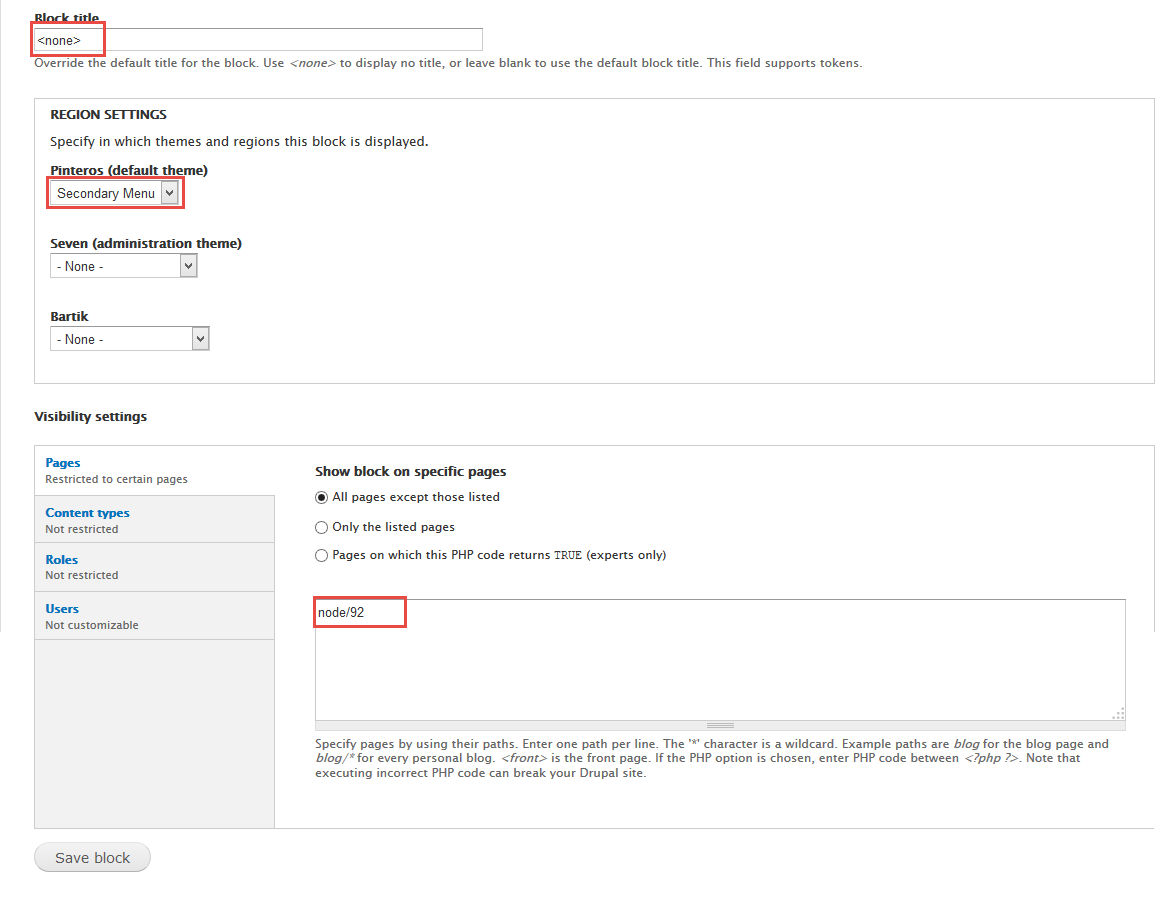
2. Navigate to Structure > Blocks, find User menu block, click configure.
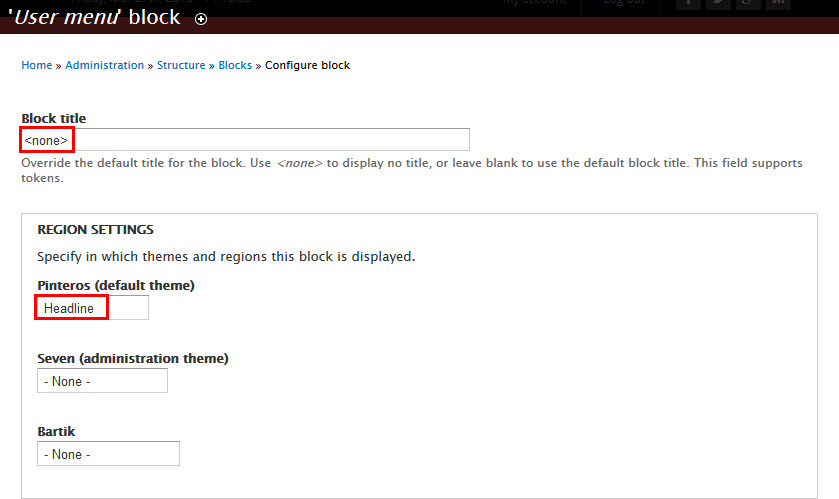
3. Click Save block button.
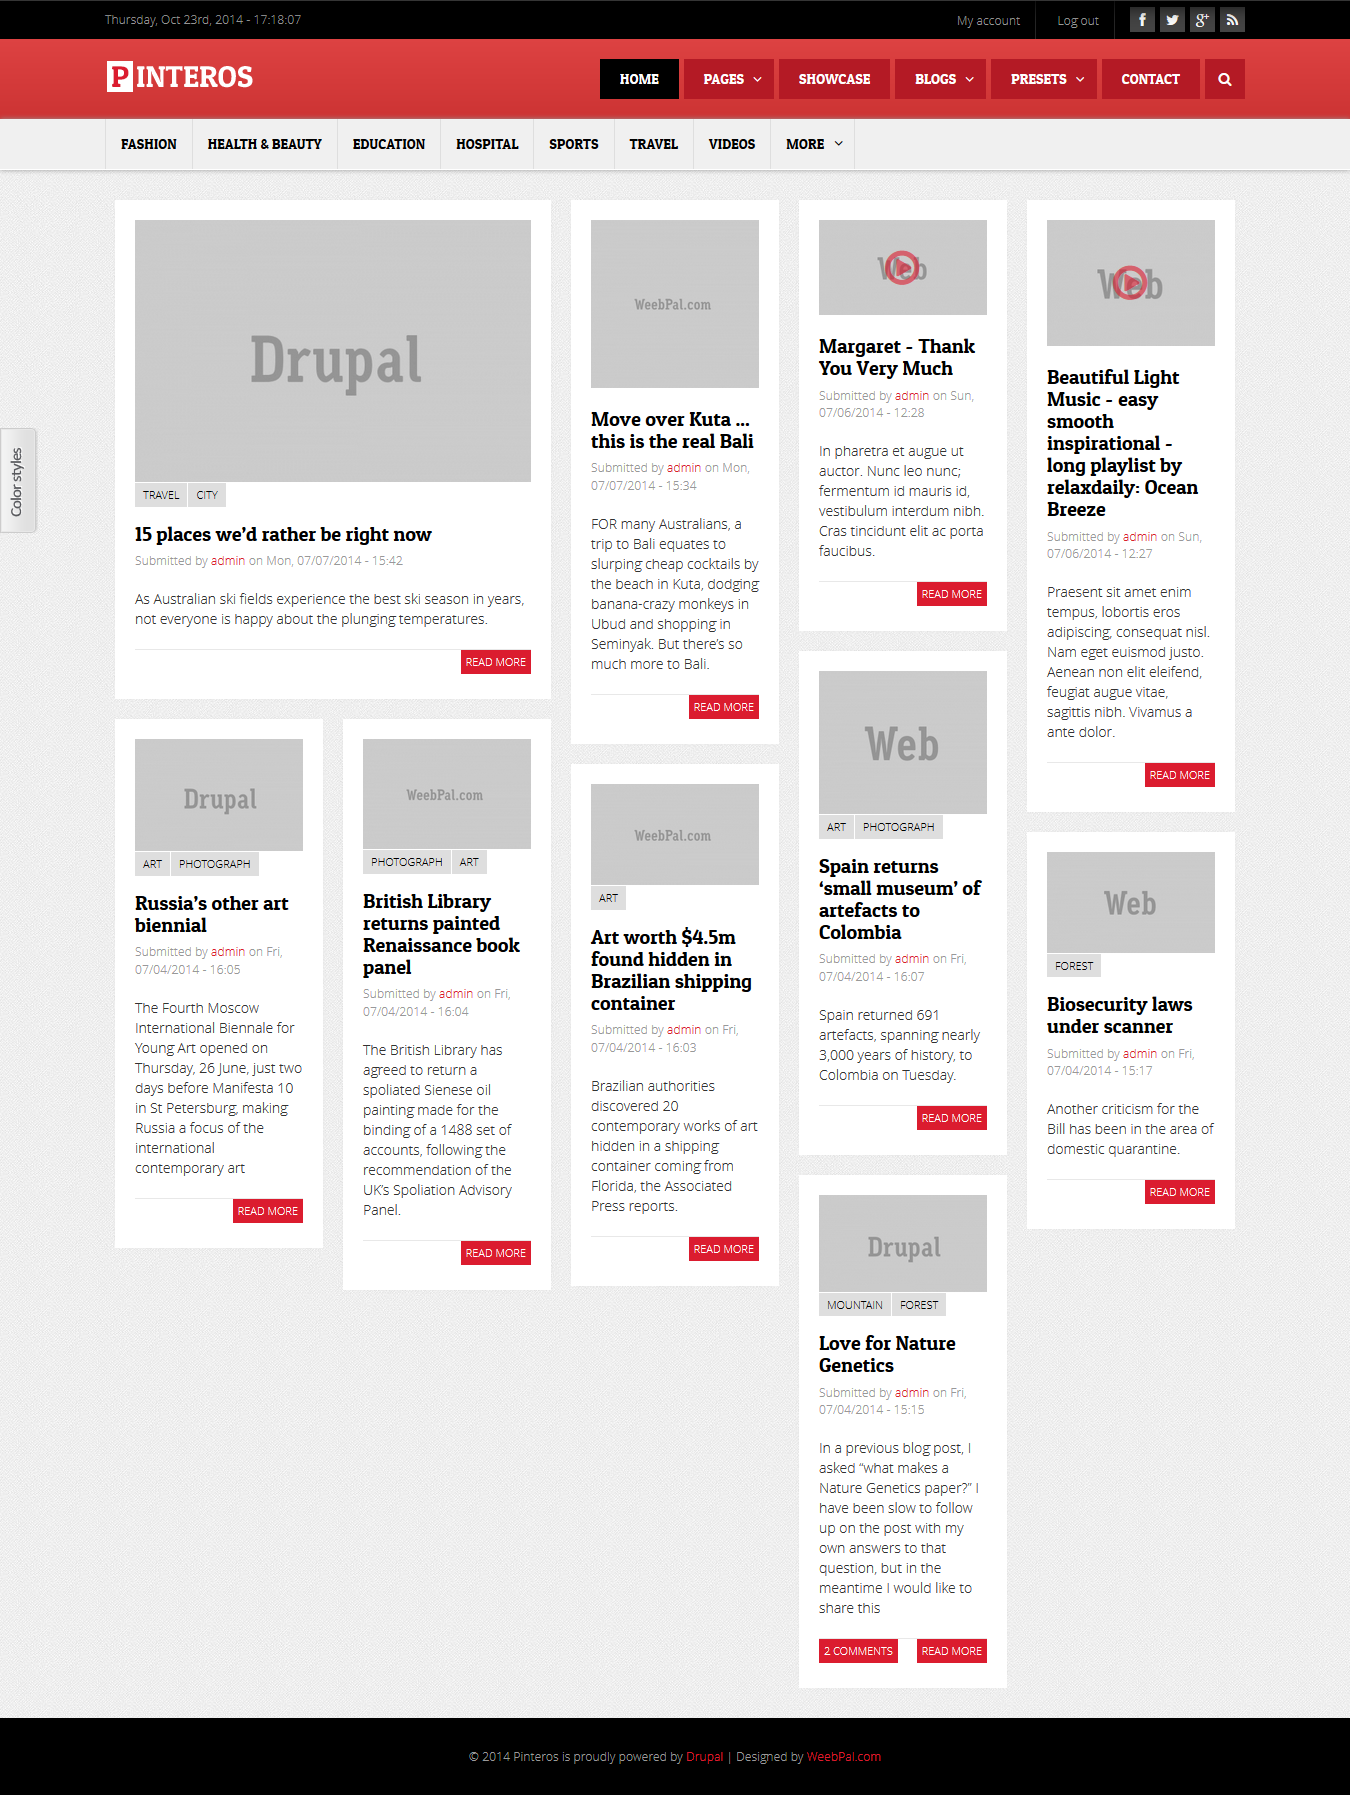
Front page
Required Modules: TB Wall layout.
Front end Display
A. Front page view setting
1. Go to Structure > Views. Enable "Front page" view.
2. Click "Edit" button inline "Front page" view, new window is opened with following properties:
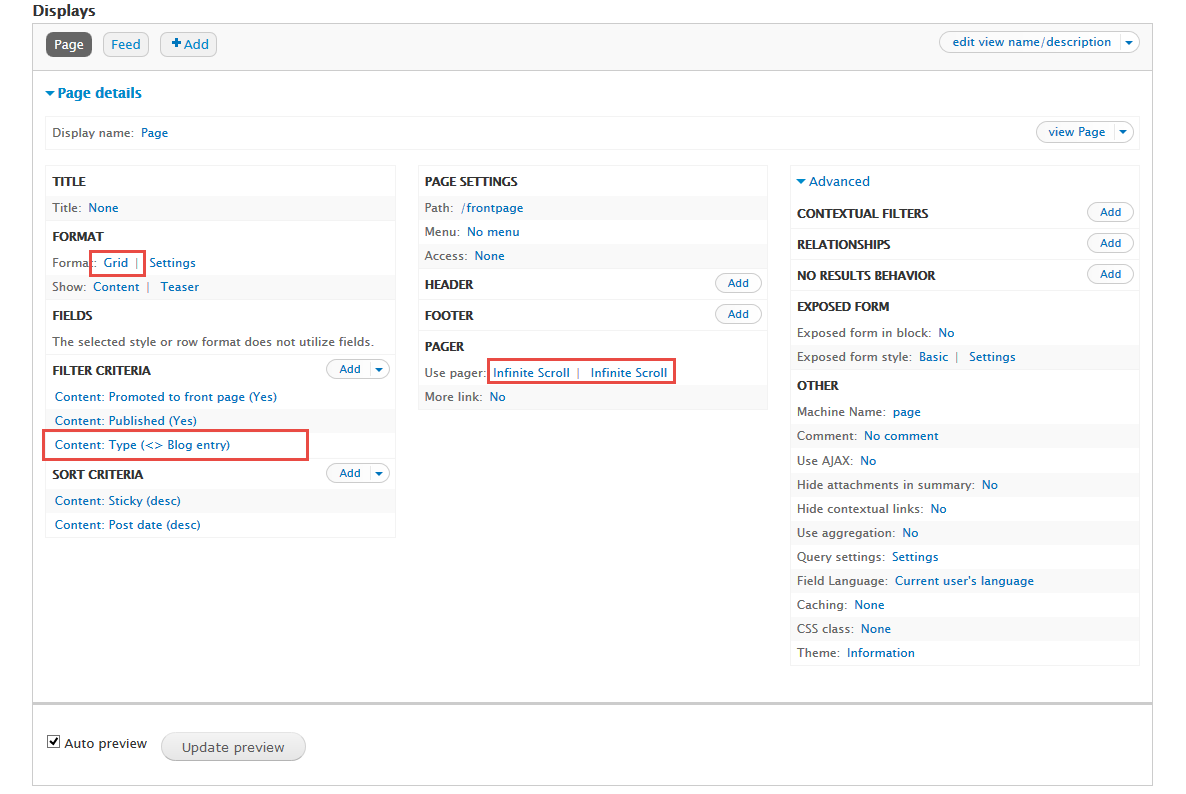
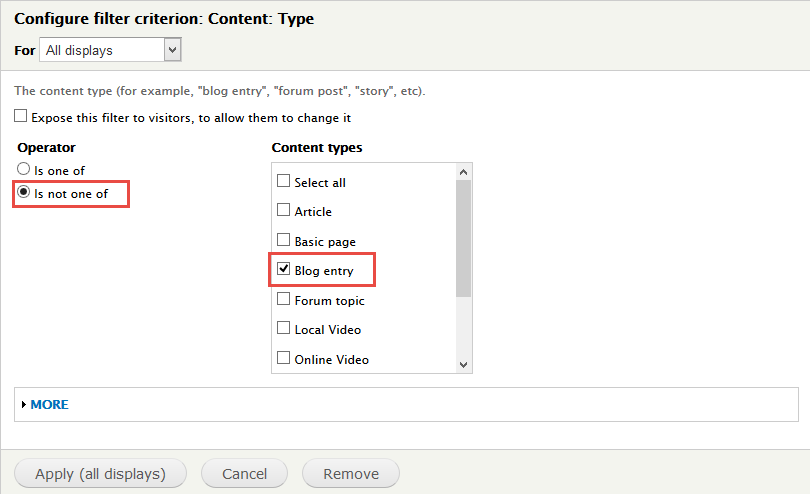
3. In Filter criteria area, click Add button to add Content: Type and set following properties:
4. In Format area, click Unformatted list link and choose Grid Option > click Apply > Apply All
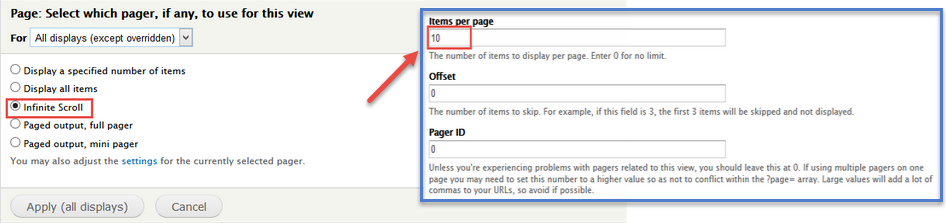
5. In Page area, click Full link and set following properties:
6. New window is opened > Click Appy all
7. Save view
B. Configure Site information
1. Go to Configuration > Site information
2. Find a "Default front page " field. Input "frontpage" into textbox.
3. Click "Save configuration" button.
Copyright: Custom block
Front end Display

Create & configure Copyright block
1. Navigate to Structure > Blocks
2. Click Add block link to create block, for example: Copyright block and set properties for them.
3. Click Save block button.
Refer to following HTML code:
<p class="copyright">© 2014 Pinteros is proudly powered by <a href="http://drupal.org" target="_blank">Drupal</a> | Designed by <a href="http://weebpal.com" target="_blank">WeebPal.com</a></p>
Main Menu: main-menu block or TB Mega Menu
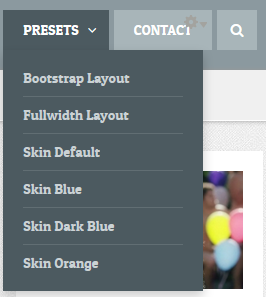
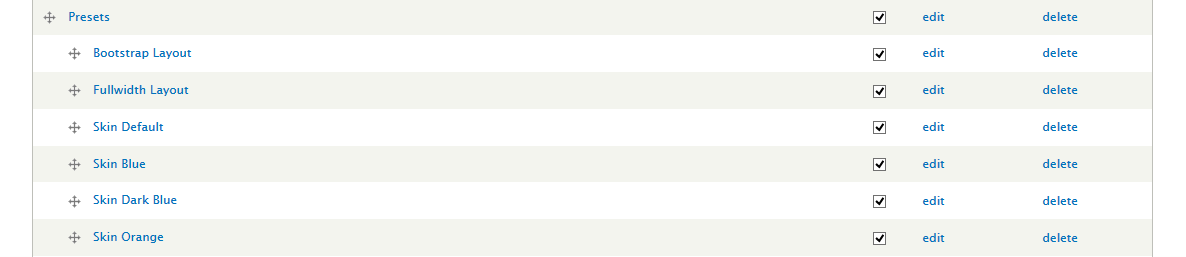
Presets menu page
Front end Display
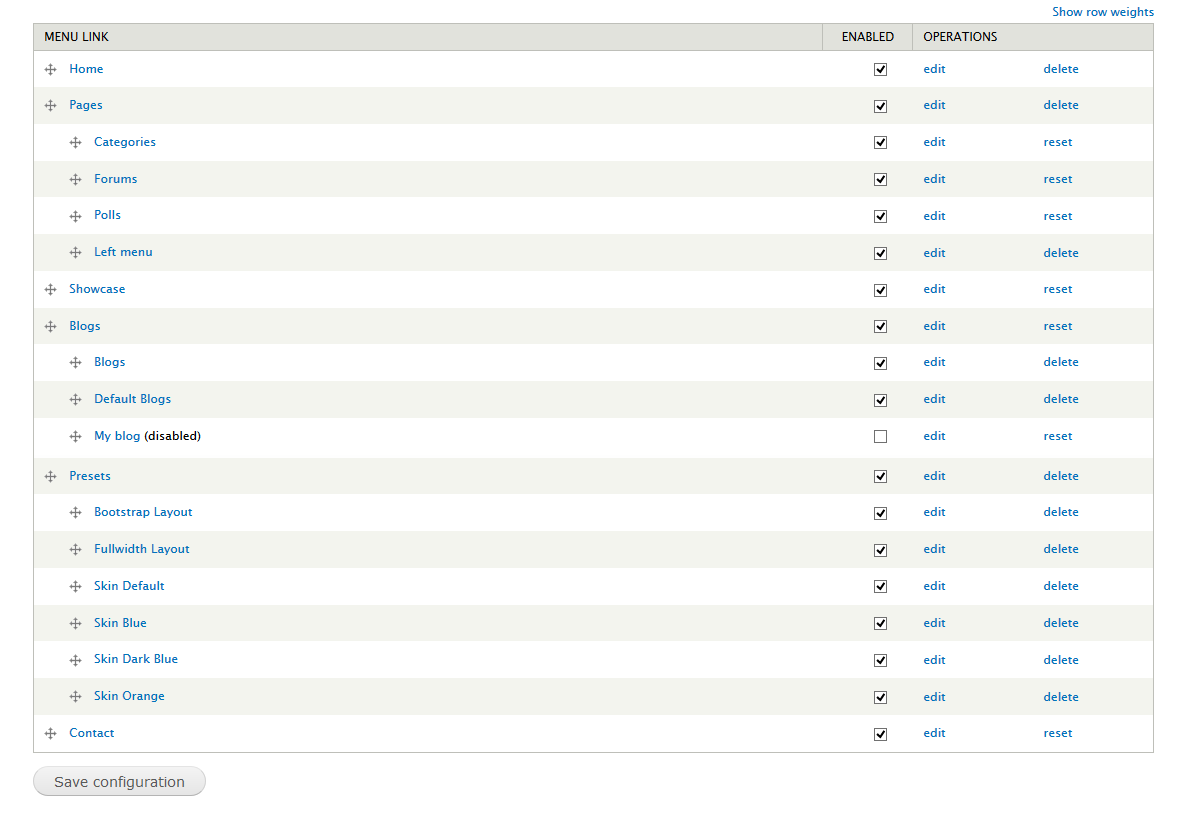
1. Create Content Presets menu
1. Go to Content, click Add content, then create Presets menu content with following properties:

2. Click Save button
1. Create Content Bootstrap Layout menu
1. Go to Content, click Add content, then create Bootstrap Layout content with following properties:
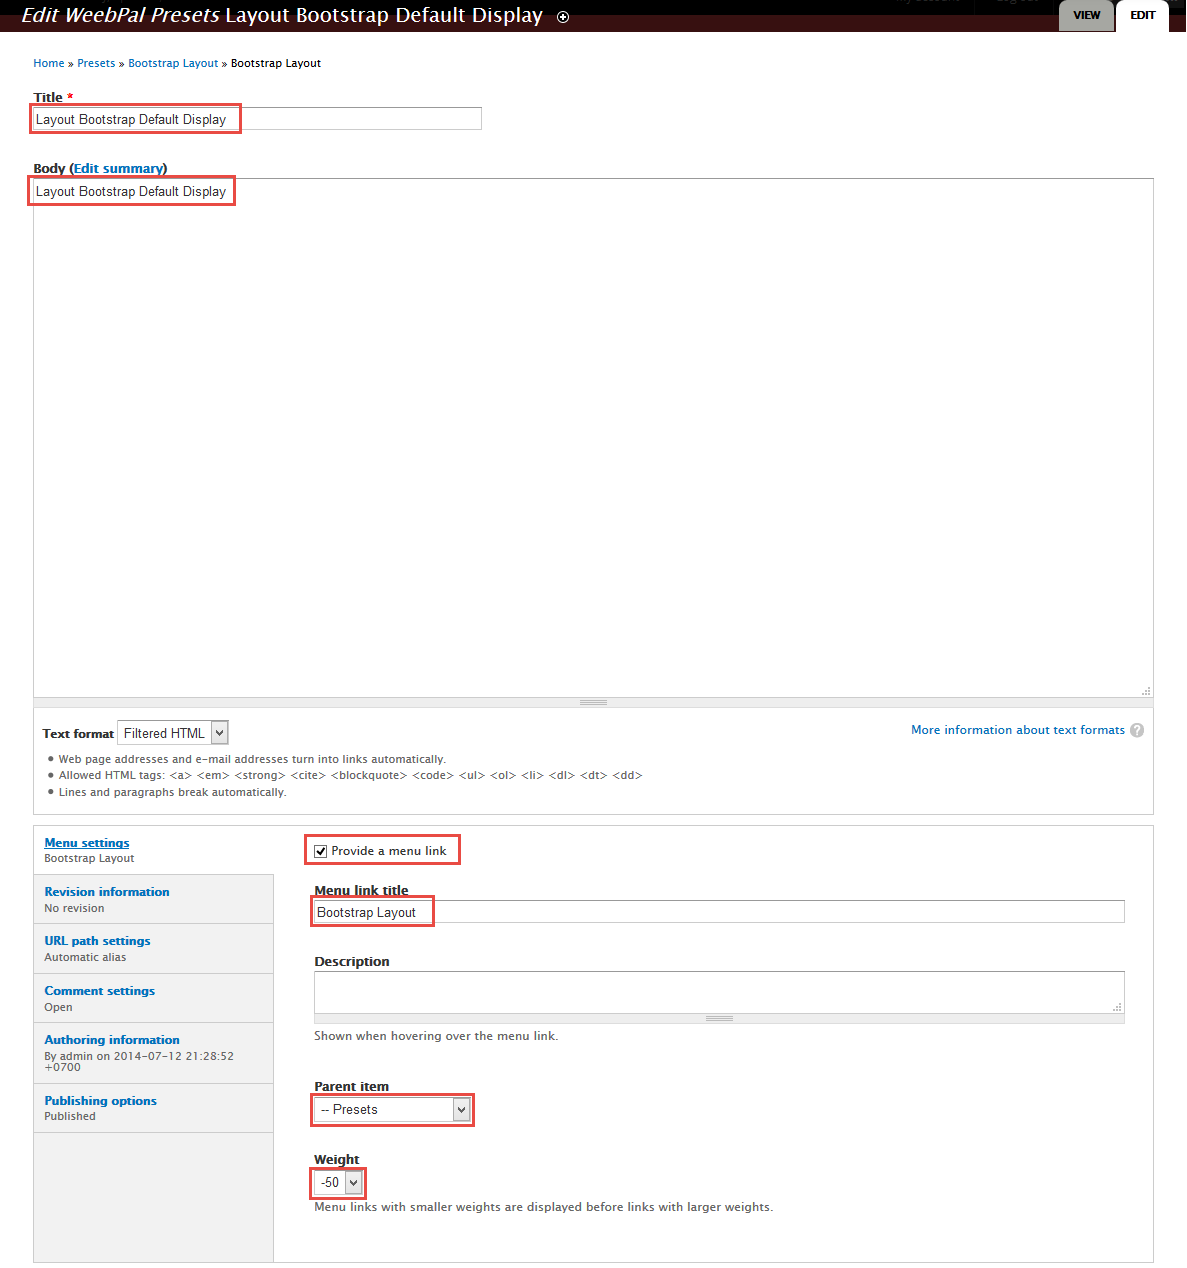
2. Click Save button
2. Create Presets menu
1. Navigate to Structure > Menu click Add menu click, then create Presets menu with following properties:
Drupal Main Menu block

TB Mega Menu
Create Subpages
Sidebar first: ADs block
Front end Display
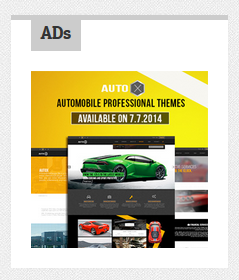
1. Navigate to Structure > Blocks. Click Add block link.
2. Create ADs block with following properties:
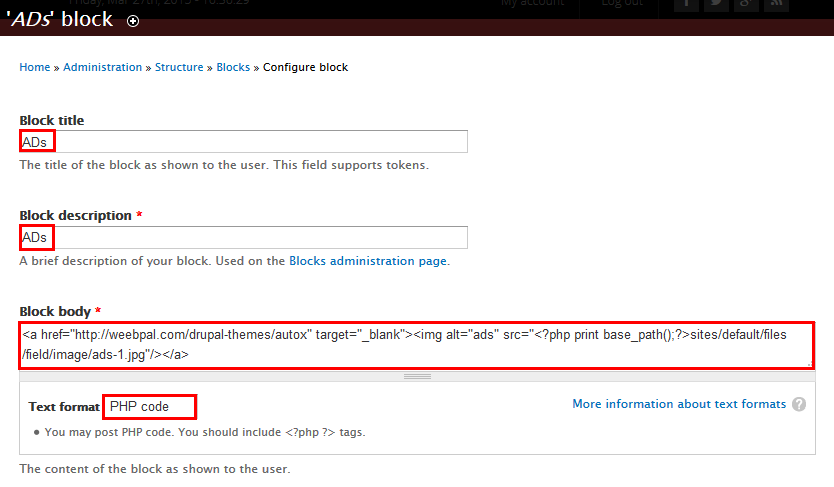
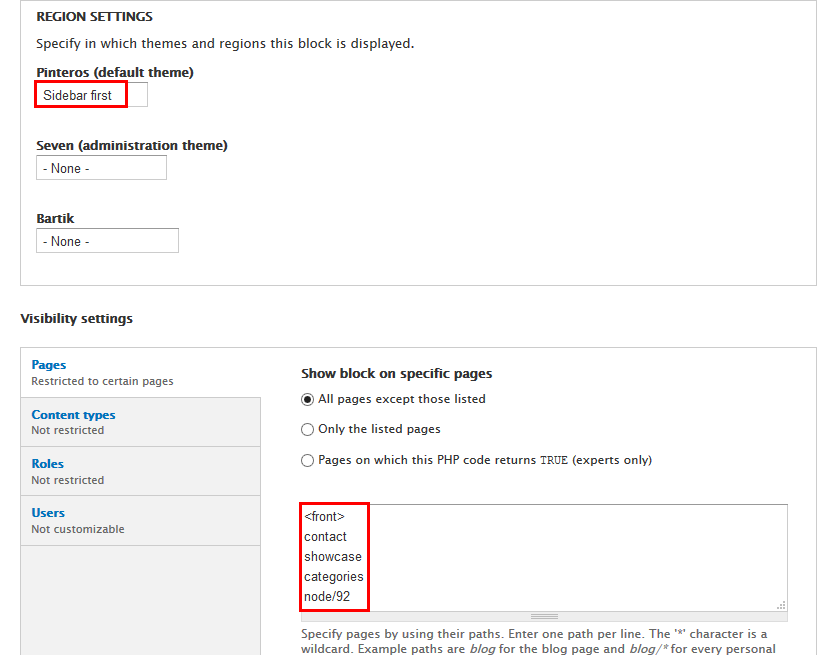
3. Click Save block button.
Refer to following PHP code:
;?>sites/default/files/field/image/ads-1.jpg)
Sidebar first: About us block
Front end Display
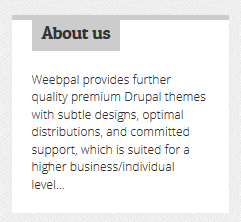
1. Navigate to Structure > Blocks. Click Add block link.
2. Create About us block with following properties:
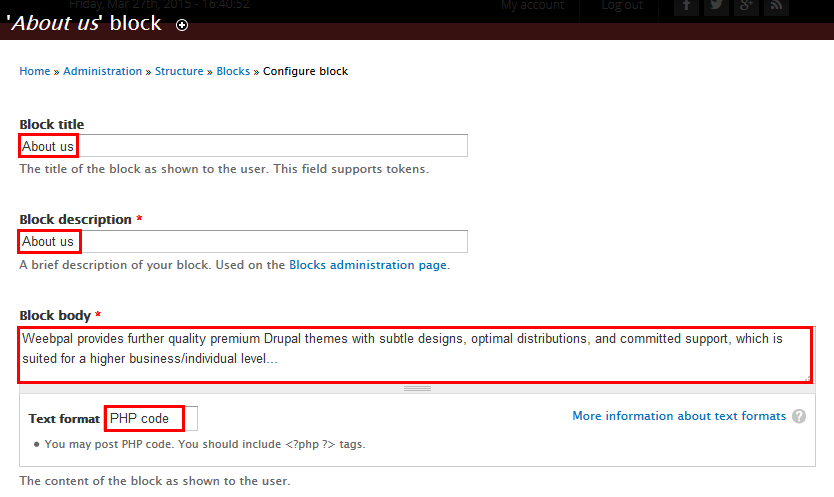
3. Click Save block button.
Refer to following PHP code:
Weebpal provides further quality premium Drupal themes with subtle designs, optimal distributions, and committed support, which is suited for a higher business/individual level...
Sidebar first: Recent comments block
Front end Display
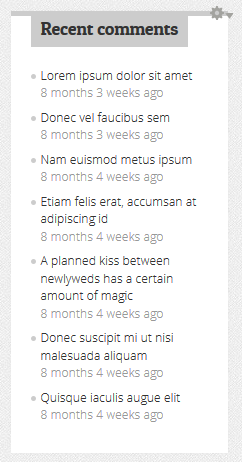
1. Navigate to Structure > Blocks
2. Find Recent comments block , click configure link, set following properties
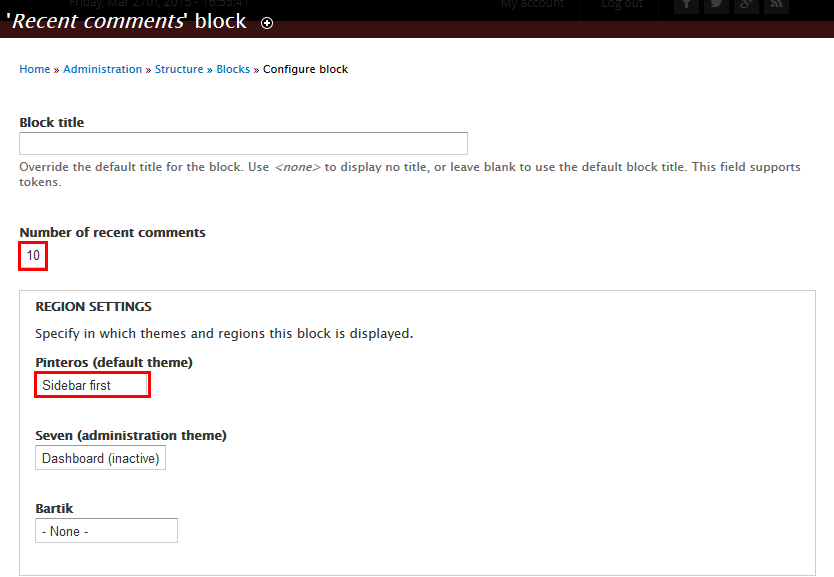

3. Click Save block button.
Sidebar first: Subscribe to our Newsletters block
Front end Display
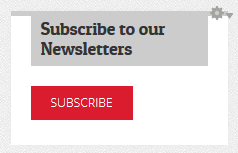
1. Navigate to Structure > Blocks
2. Find Newsletter: Subscribe block, click configure link, set following properties
3. Click Save block button.
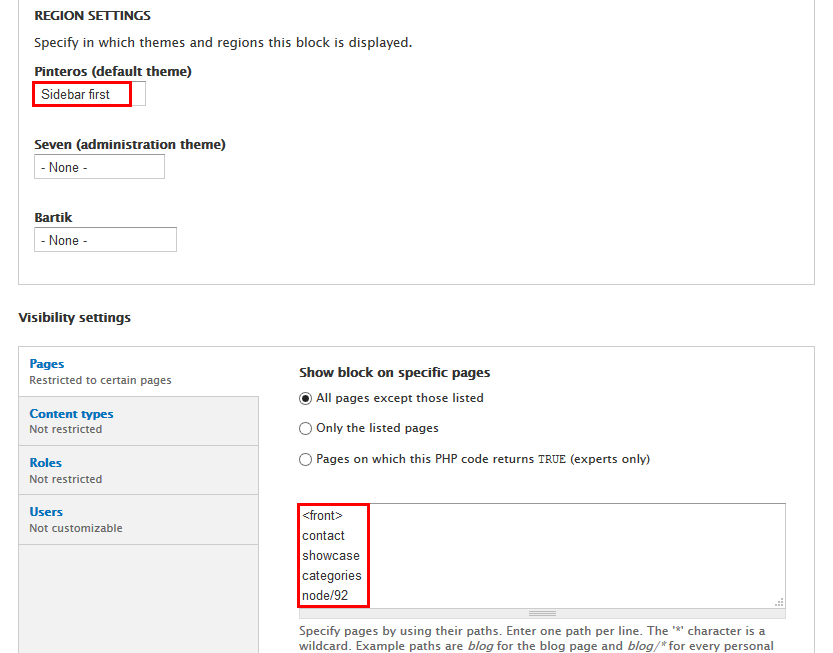
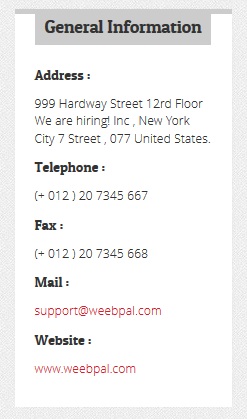
Sidebar first: General Information block
Front end Display
1. Navigate to Structure > Blocks. Click Add block link.
2. Create General Information block with following properties:
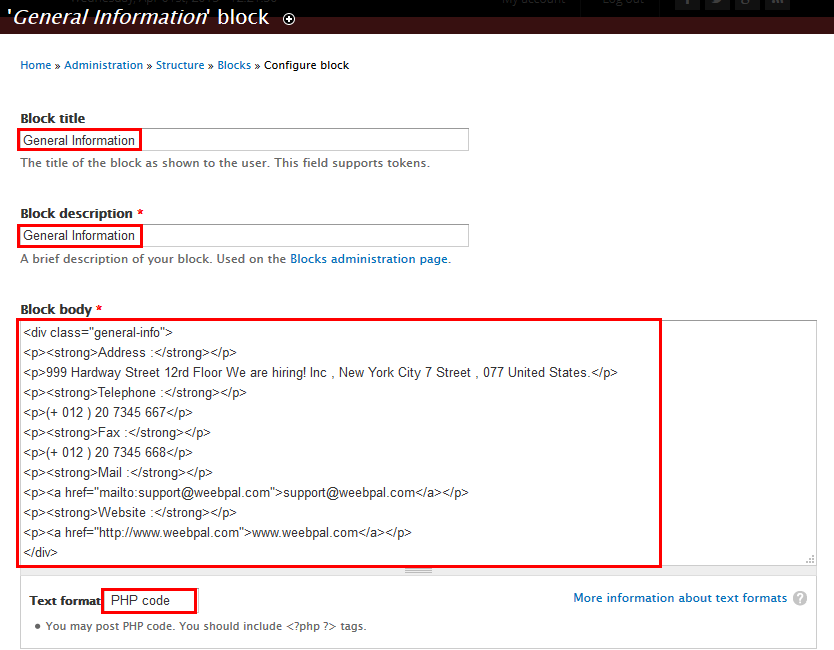
3. Click Save block button.
Refer to following PHP code:
Address :
999 Hardway Street 12rd Floor We are hiring! Inc , New York City 7 Street , 077 United States.
Telephone :
(+ 012 ) 20 7345 667
Fax :
(+ 012 ) 20 7345 668
Mail :
Website :
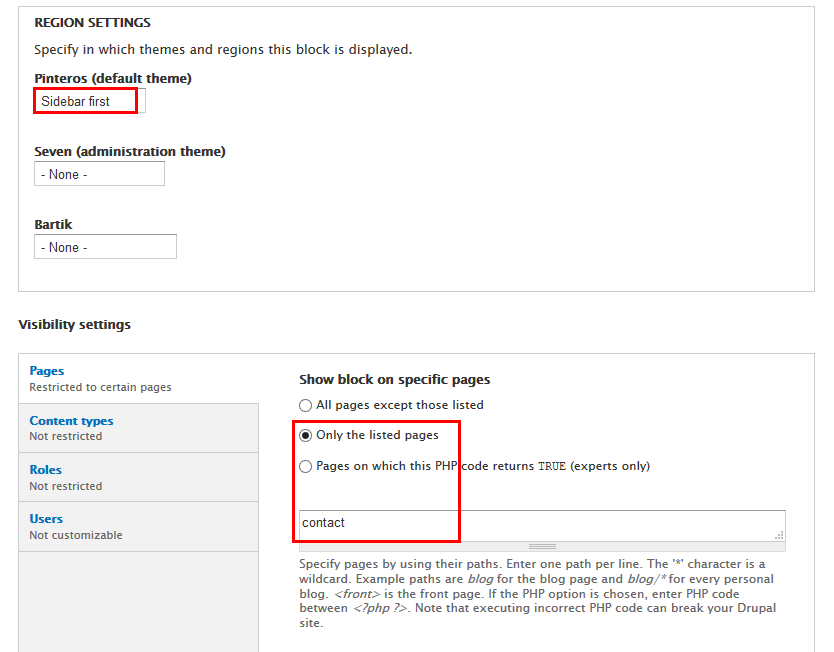
Sidebar first: Tags in Tags block
Front end Display
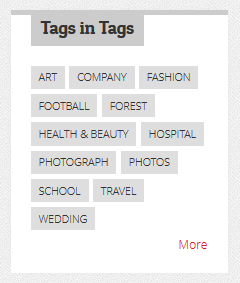
1. Navigate to Structure > Blocks
2. Find Tags in Tags block, click configure link, set following properties
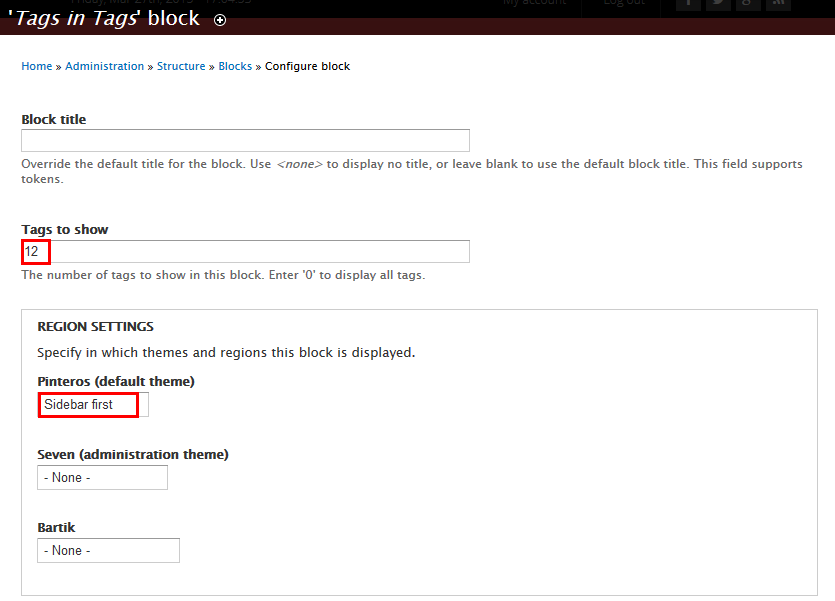
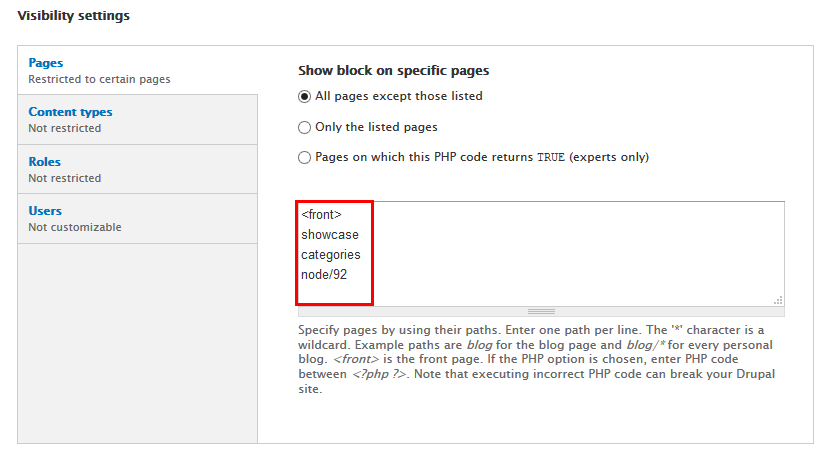
3. Click Save block button.
Sidebar first: Who's online block
Front end Display
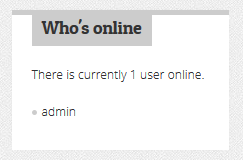
1. Navigate to Structure > Blocks
2. Find Who's online block, click configure link, set following properties
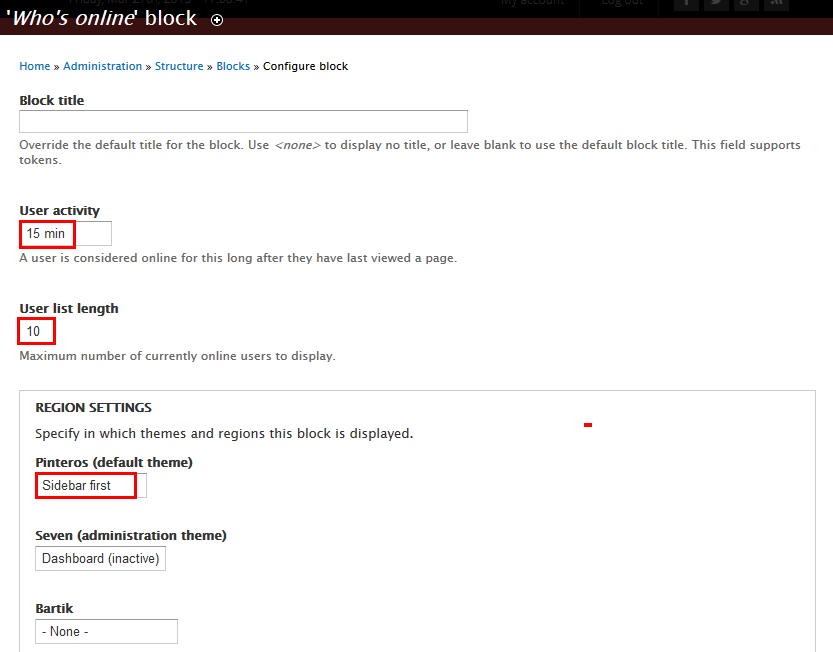
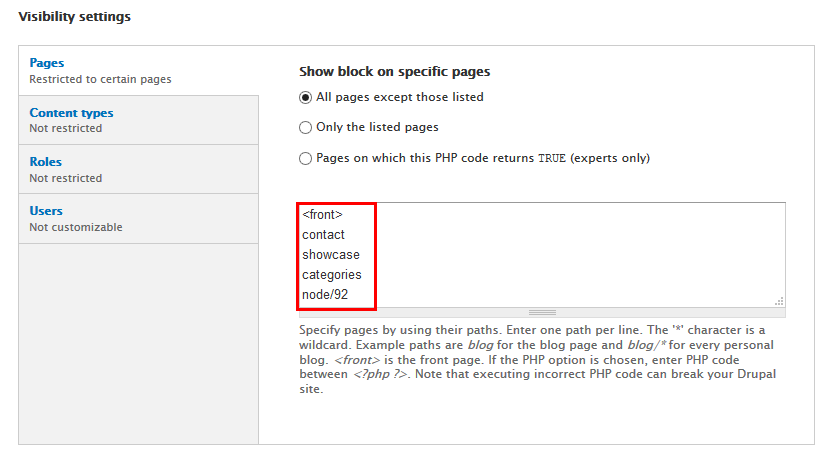
3. Click Save block button.
Sidebar first: Trending Posts block
Front end Display
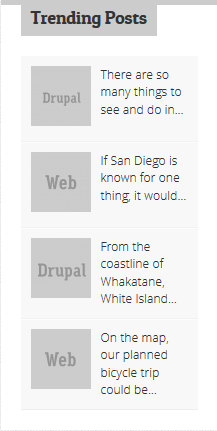
1. Create Trending Posts block view
1. Navigate to Structure > Views, click Add block link, Create Trending Posts block with following properties:
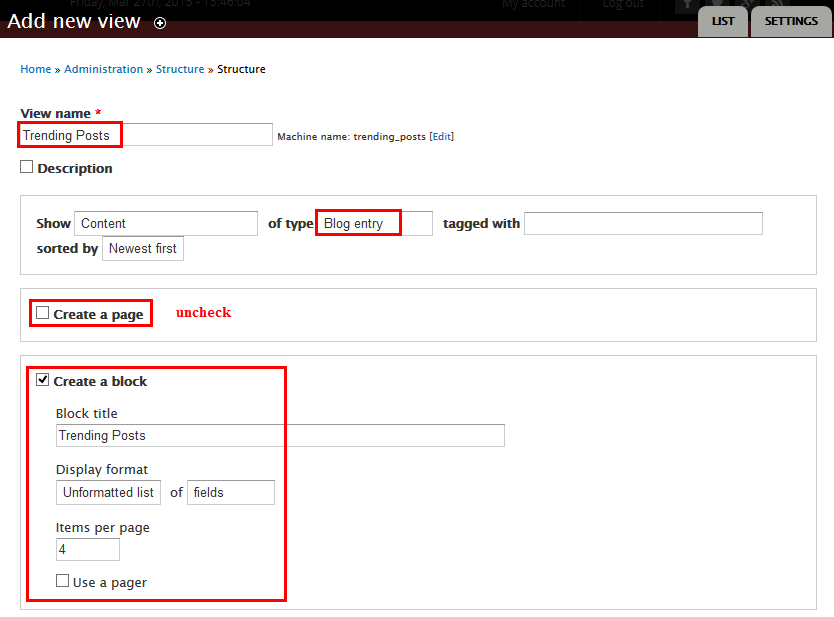
2. Click "Continue and edit" button. A new popup is opened with following properties:
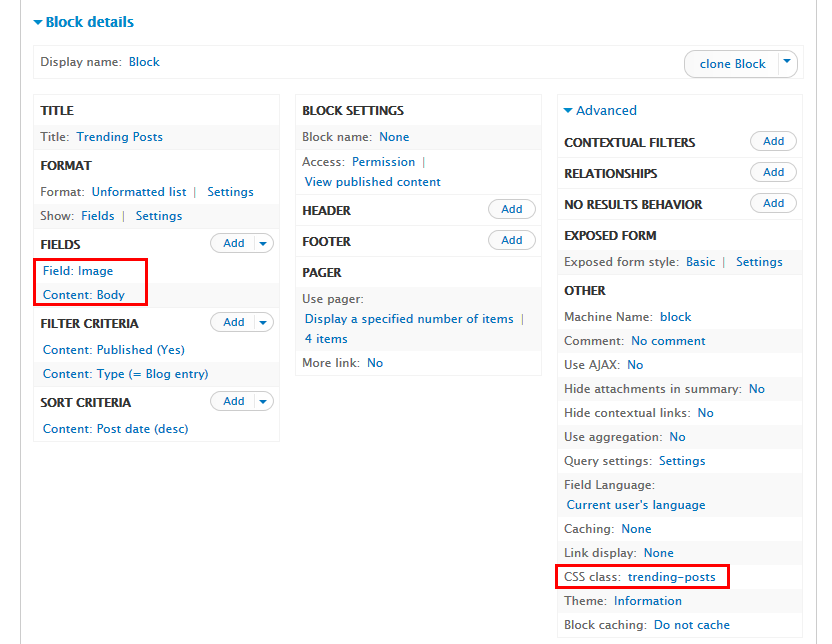
3. At FIELDS area, click Add button to add fields: Field: Image, Content: Body
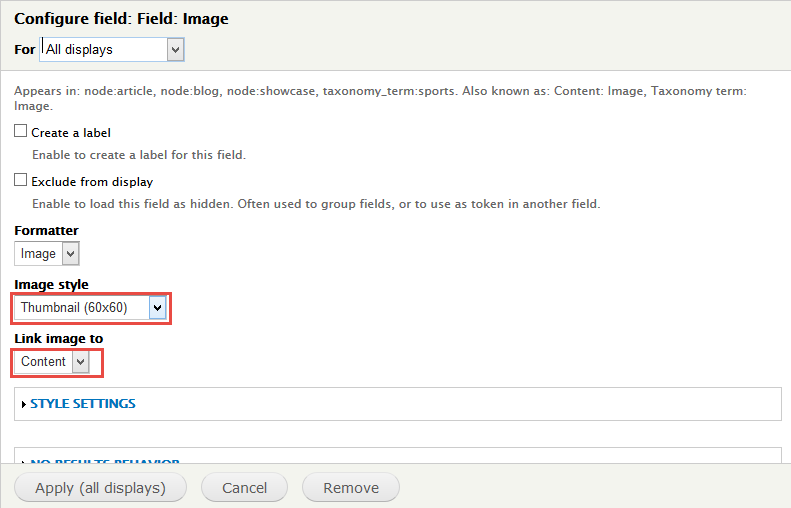
4. Set properties forField: Image field:
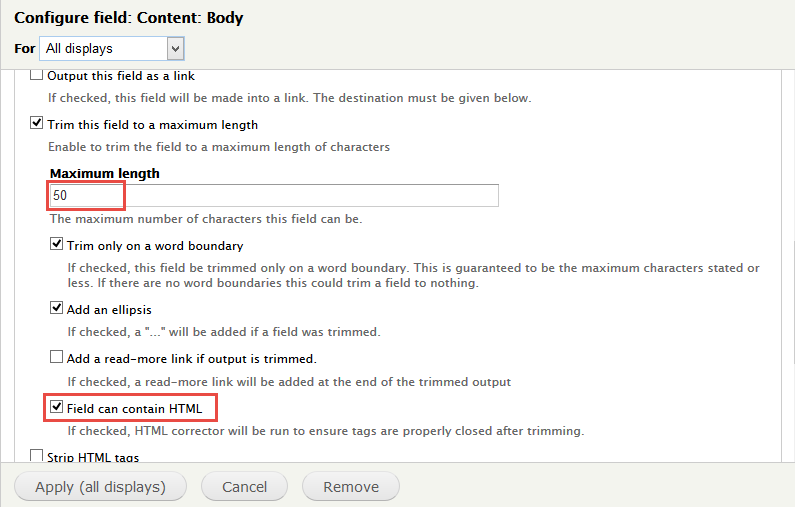
5. Set properties for Content: Body field:
6. At FIELDS area, click Remove Field: Title field.
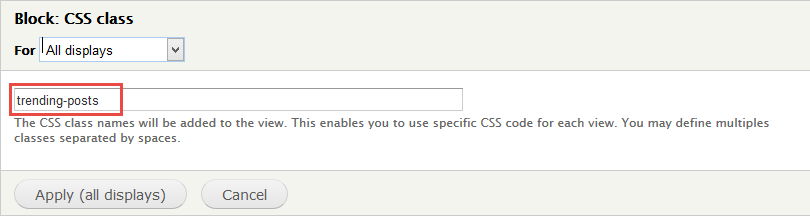
7. At Advanced > OTHER area, add CSS class:
8. Click Save to save view
2. Configure Trending Posts block
1. Navigate to Structure > Blocks
2. Find View: Trending Posts, click configure link, set following properties
3. Click Save block button.
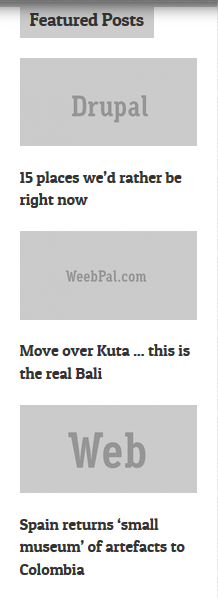
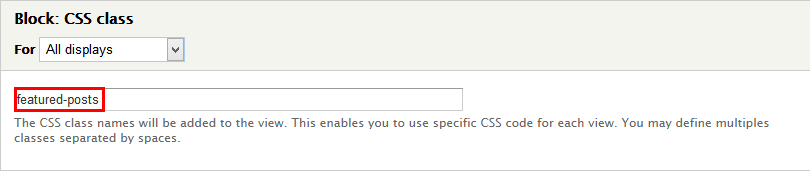
Sidebar first: Featured Posts block
Front end Display
A. Create Featured Posts block view
1. Navigate to Structure > Views, click Add block link, Create Trending Posts block with following properties:
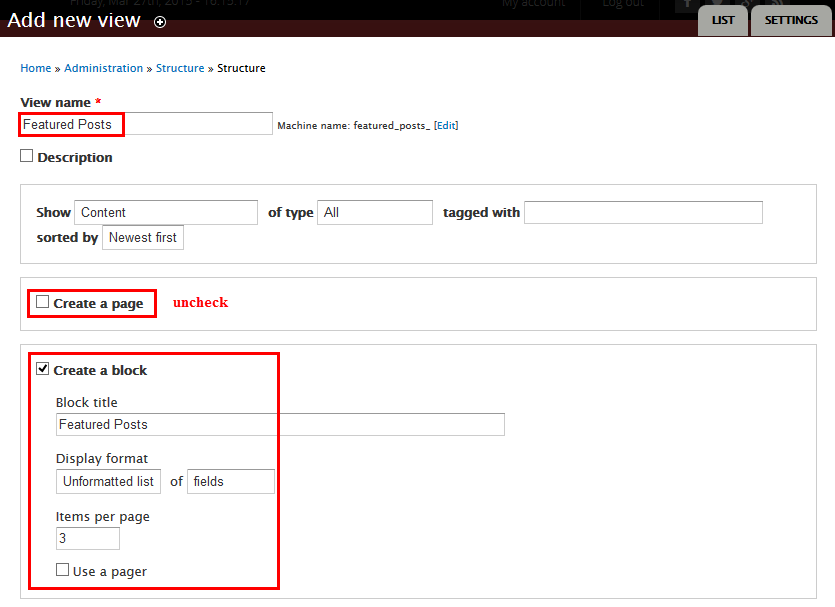
2. Click "Continue and edit" button. A new popup is opened with following properties:
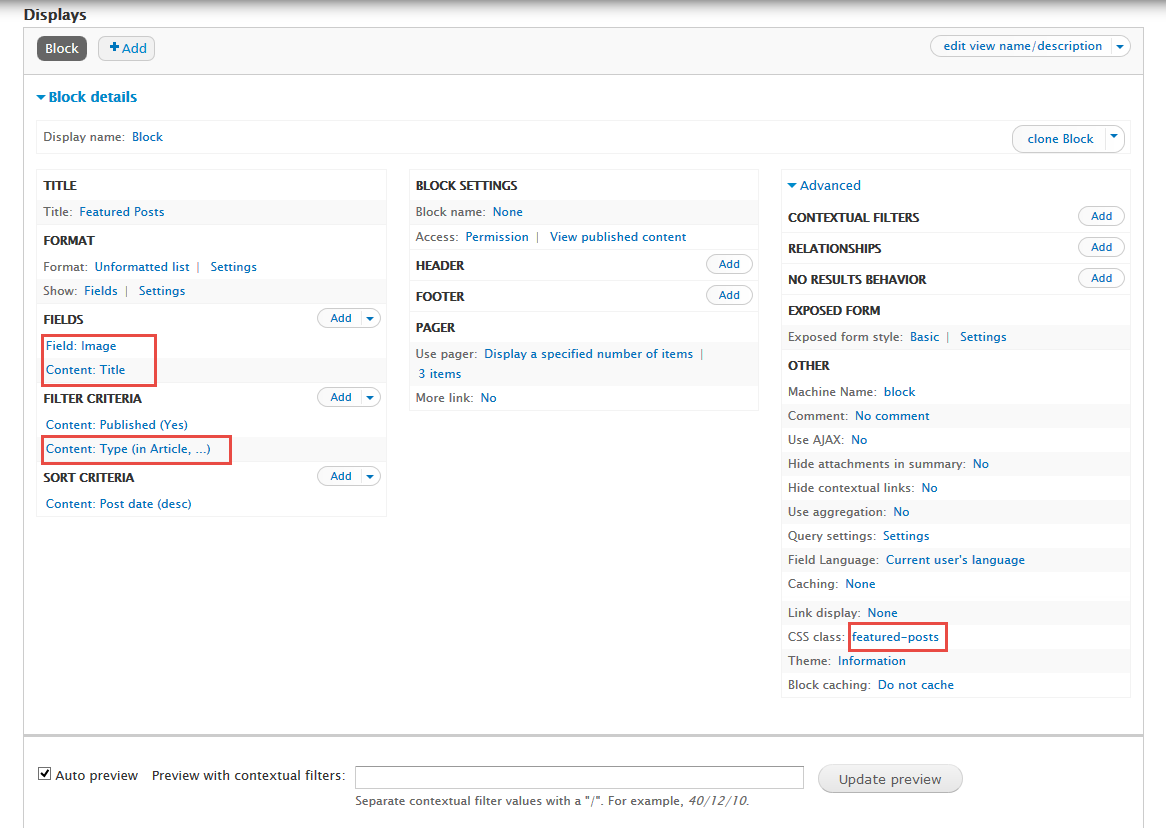
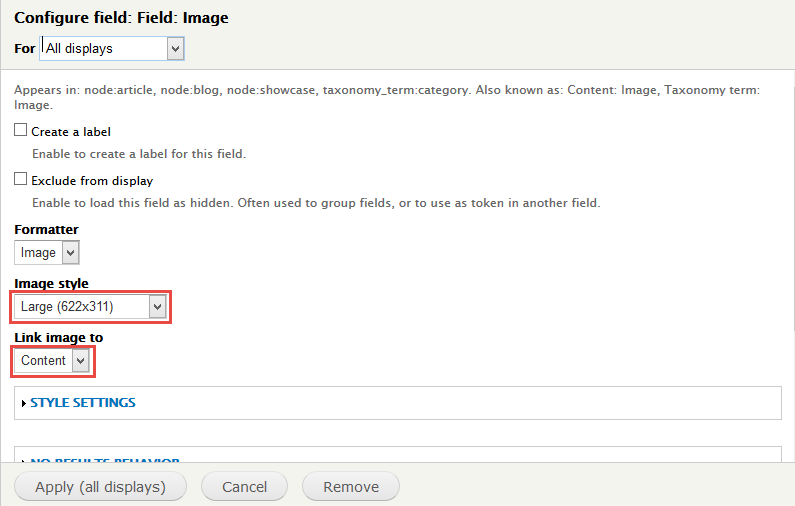
3. At FIELDS area, click Add button to add fields: Field: Image
4. Set properties for Field: Image field
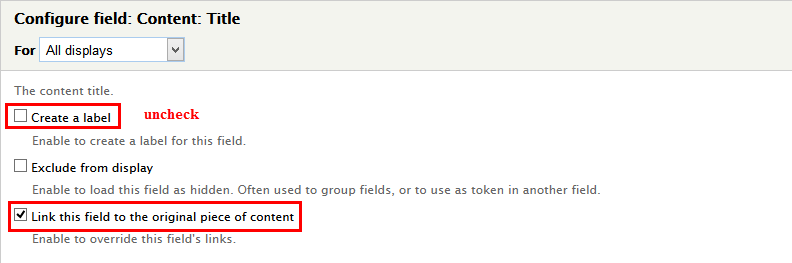
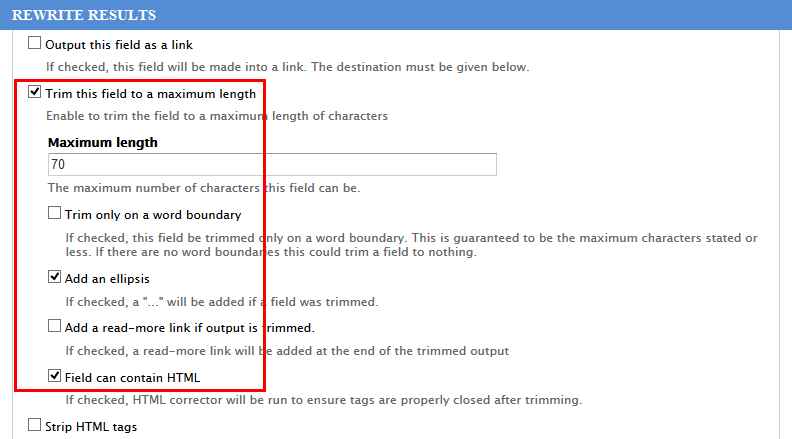
5. Set properties for Content: Title field
6. At FILTER CRITERIA area, click Add button to add field Content: Type with following properties:
7. At Advanced > OTHER area, add CSS class change following properties:
8. Click Save button to save settings.
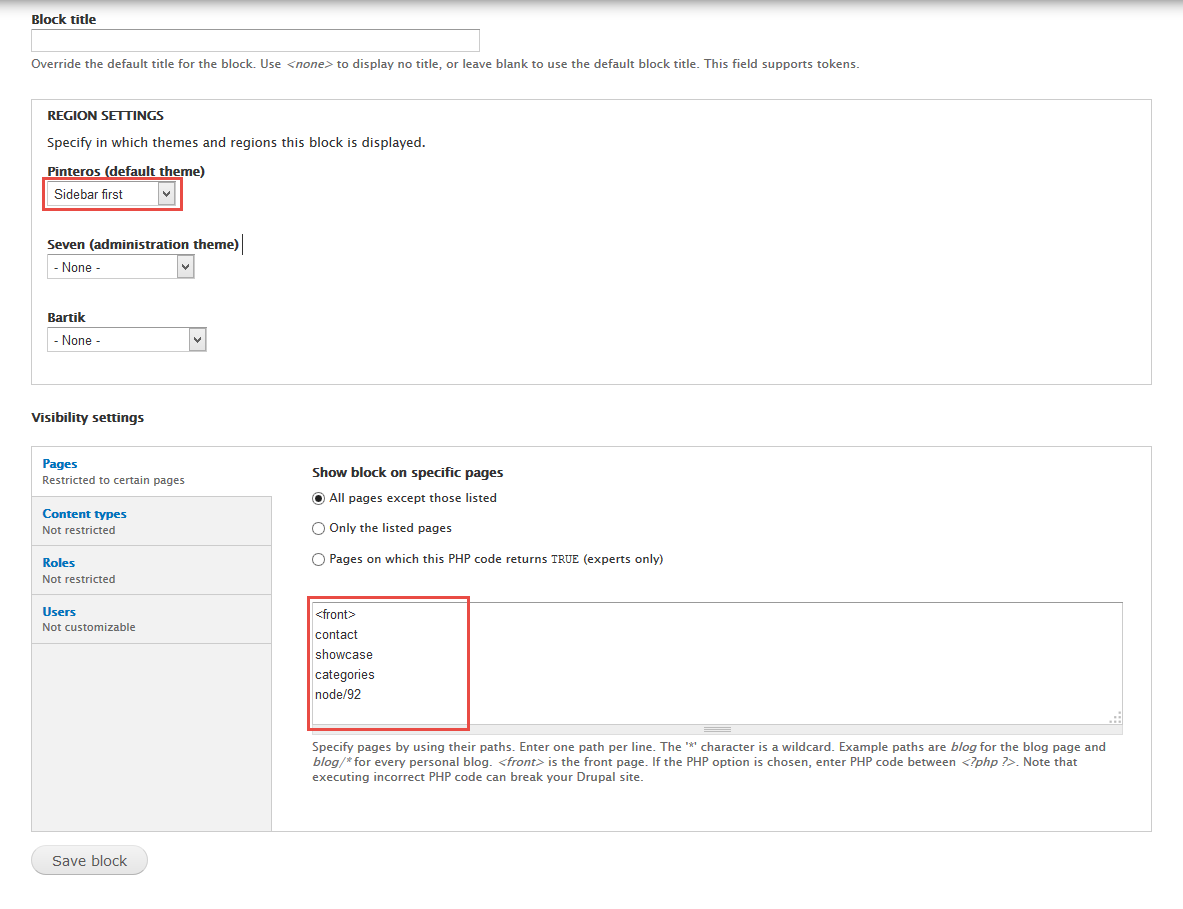
B. Configure Featured Posts block
1. Navigate to Structure > Blocks
2. Find View: Featured Posts, click configure link, set following properties
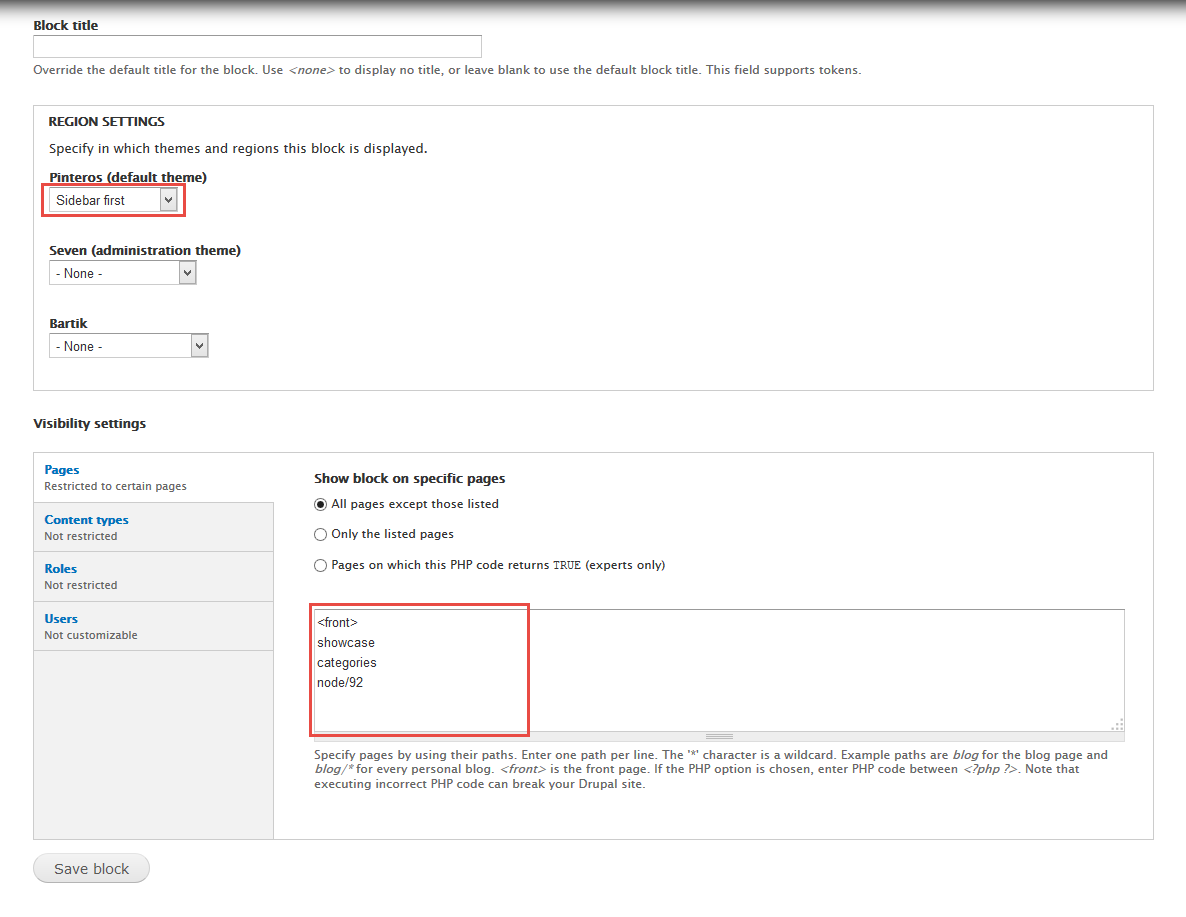
3.Click Save block button.
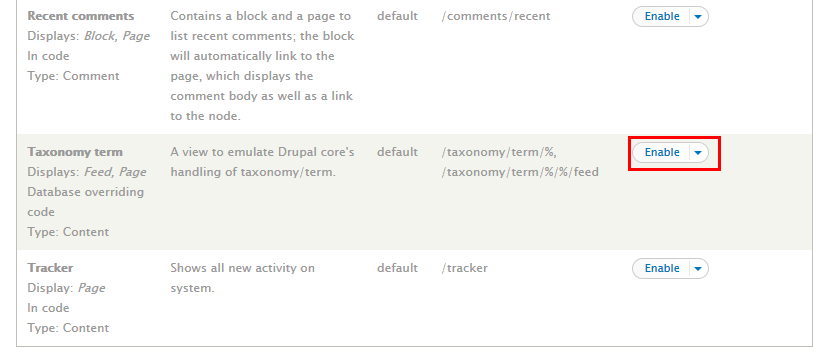
Taxonomy term view
1. Navigate to Structure > Views.
2. Find Taxonomy term, click Enable button.
Categories page
Front end Display
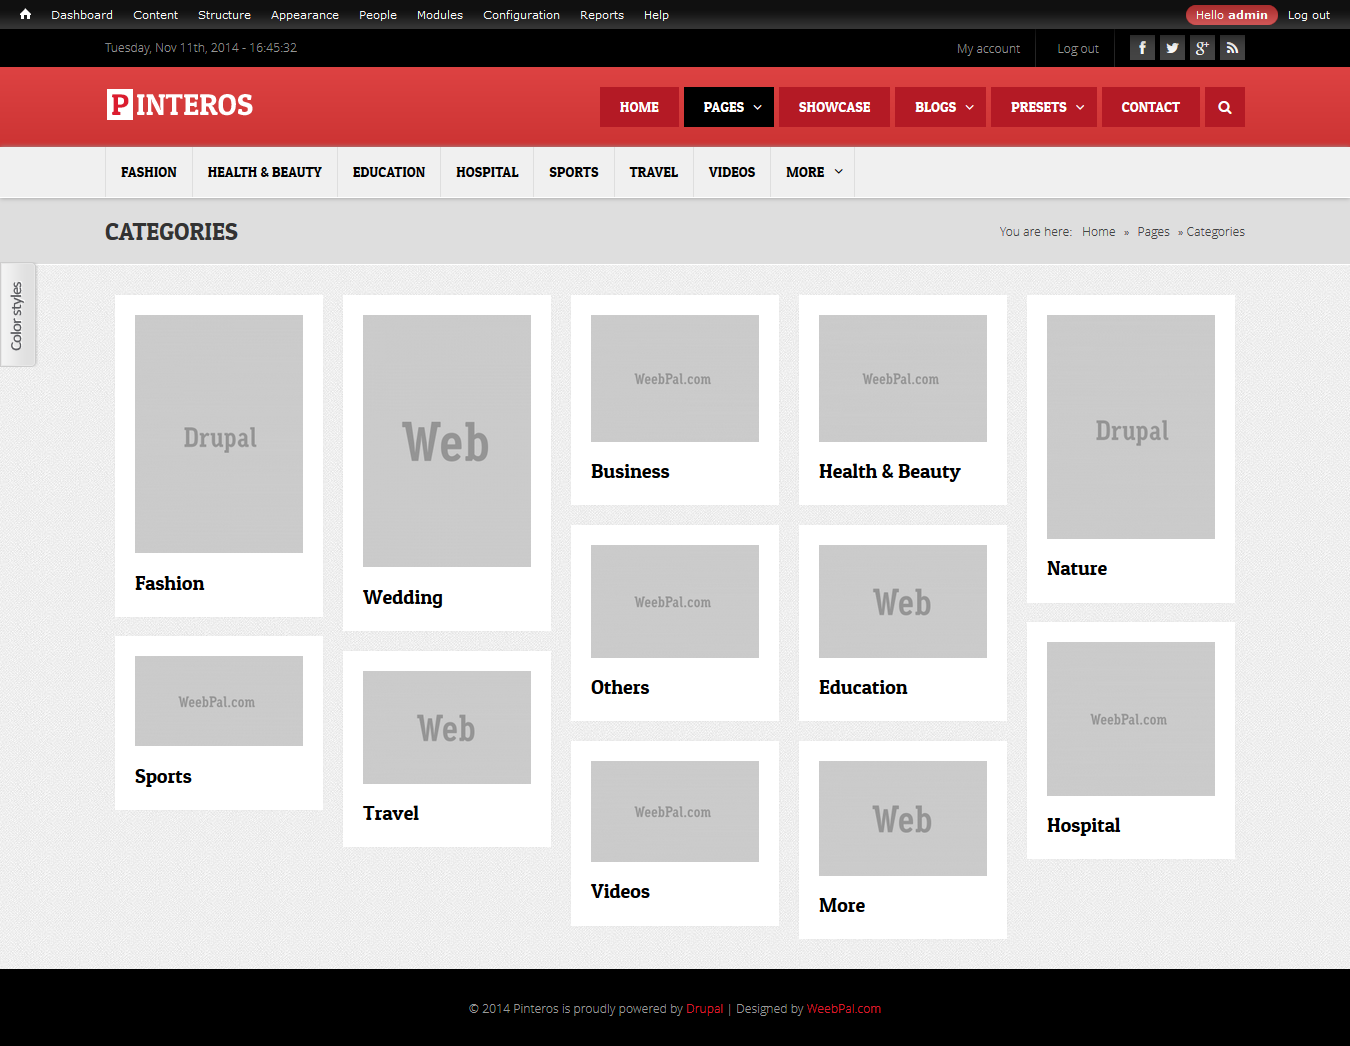
Create Categories page view
1. Navigate to Structure > Views
2. Click Add new view, then create Categories view page and set following properties:
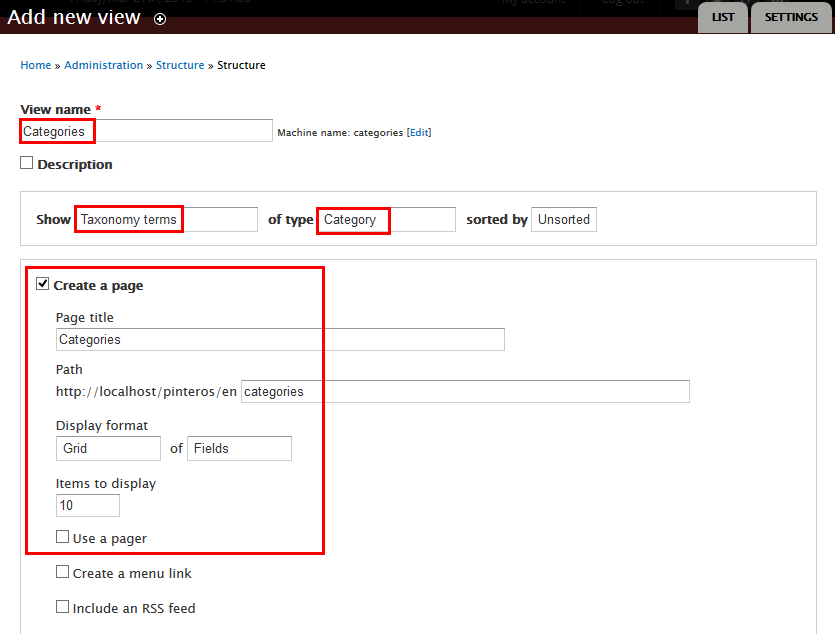
3. Click Continue & Edit button and set following properties:
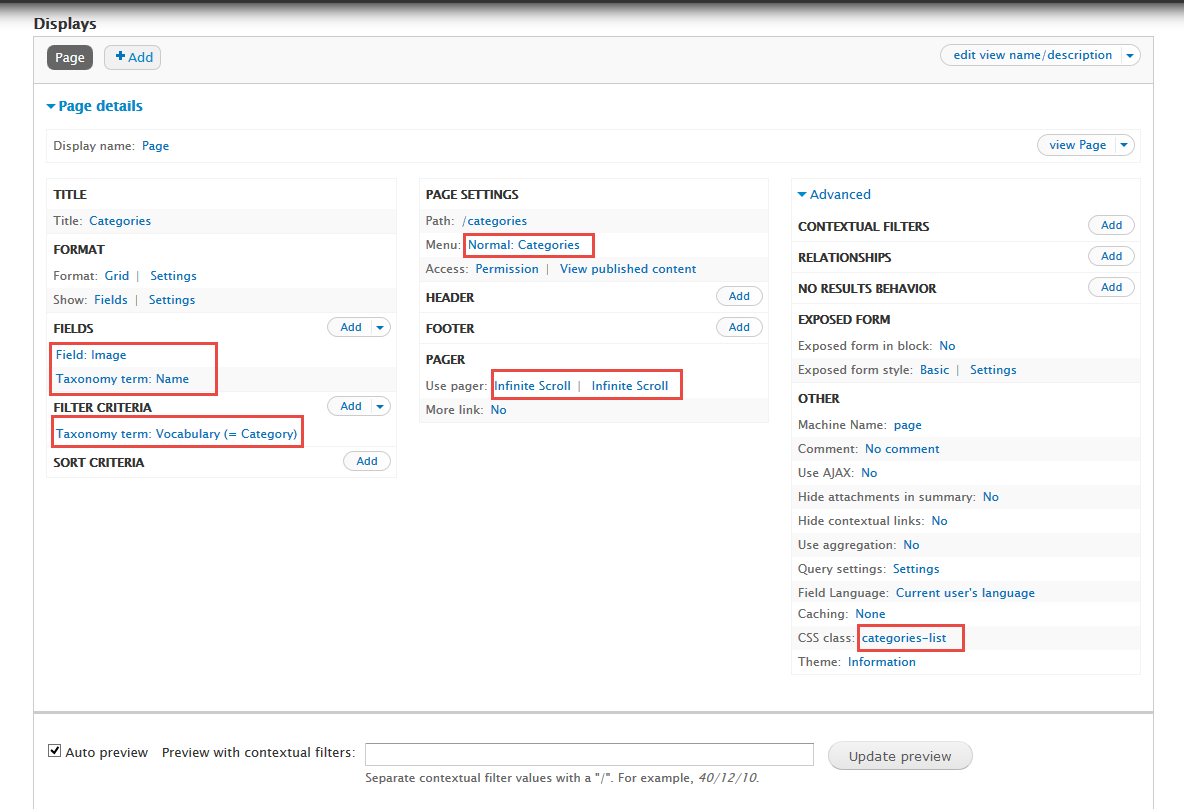
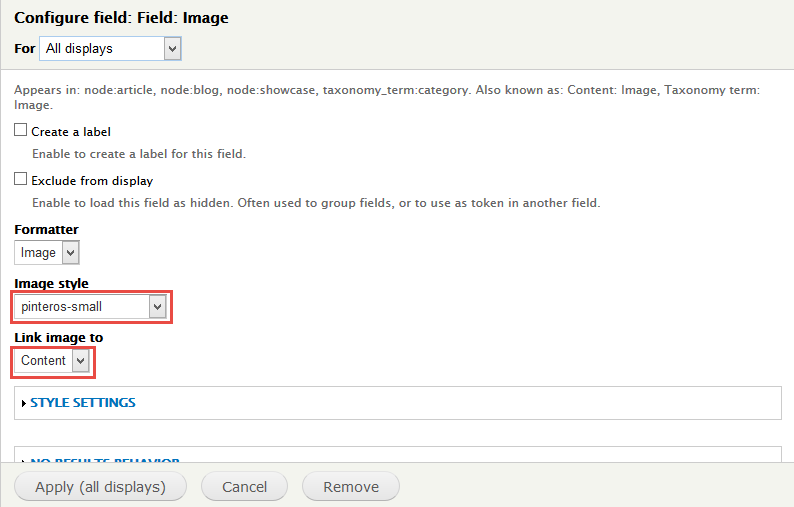
4. In FIELDS area, click Add button to add fields: Field: Image, Taxonomy term: Name
5. Set properties for Field: Image field
6. Set properties for Taxonomy term: Name field

7. In PAGE SETTINGS area, set Menu following properties:

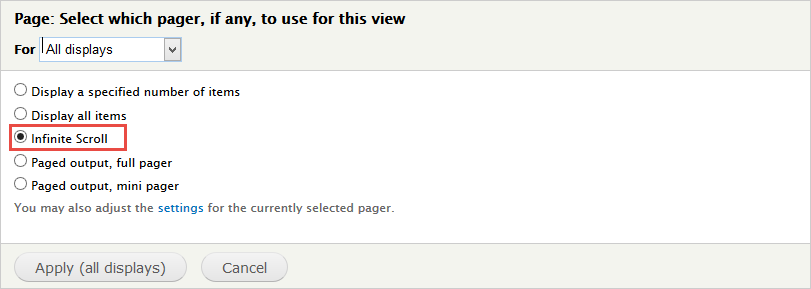
8. In PAGER change User page option with following properties:
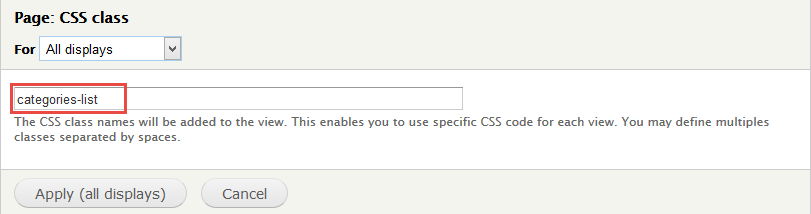
9. In Advanced > OTHER area, add CSS class
10. Click Save to save all settings
Blog page
Required Modules: Blog.
Front end Display
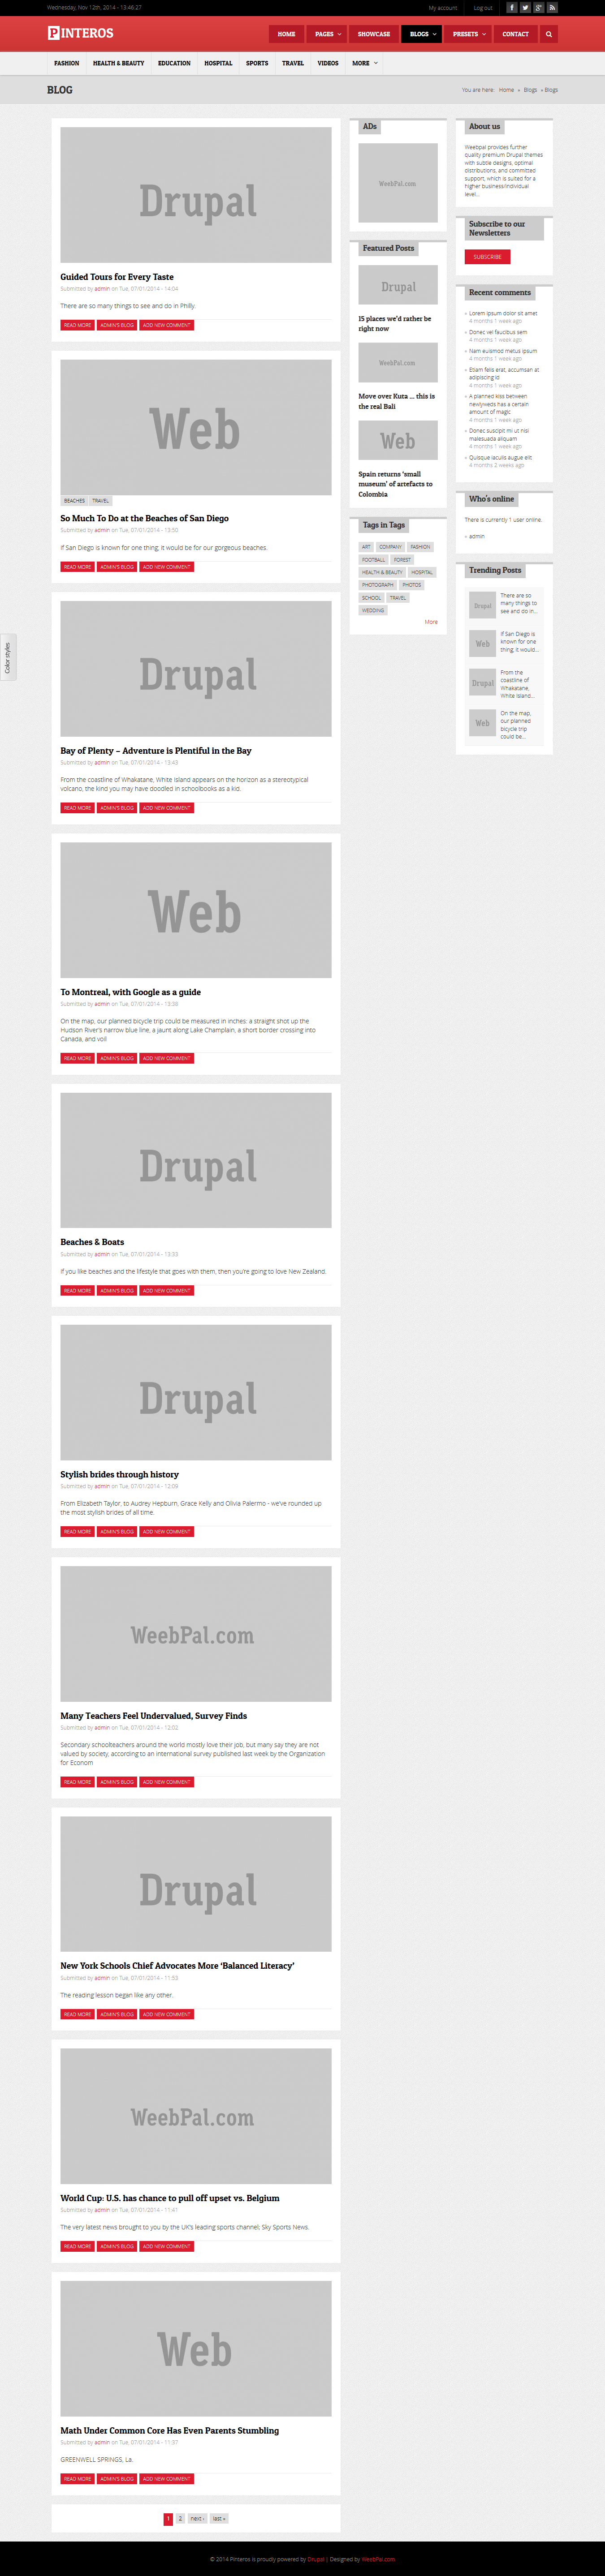
Create Blog page view
1. Navigate to Structure > Views
2. Click Add new view, then create Blog view page and set following properties:
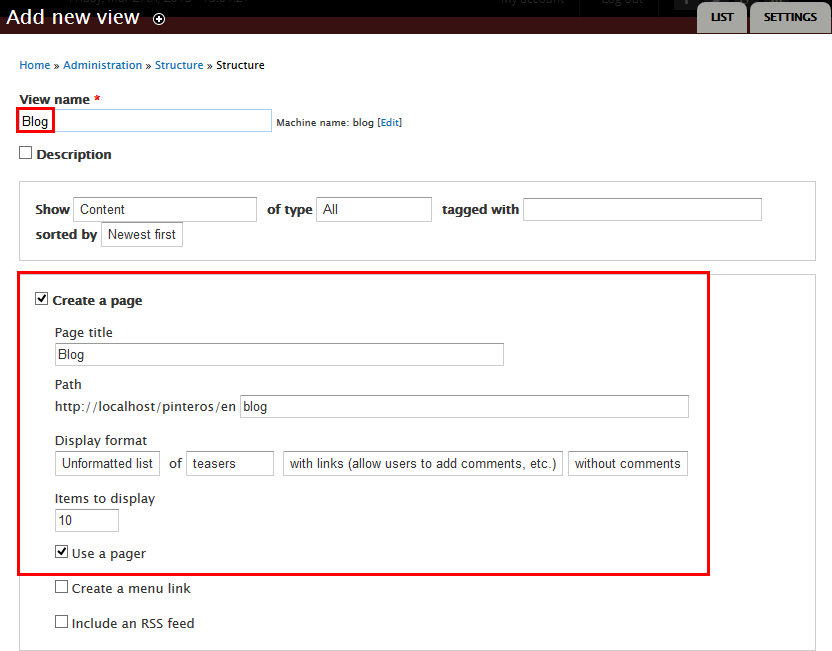
3. Click Continue & Edit button and set following properties:
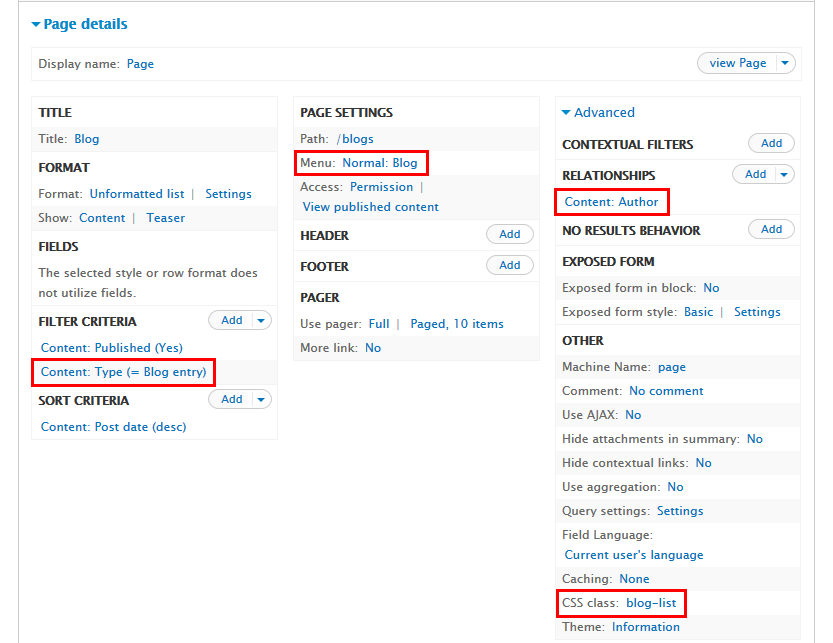
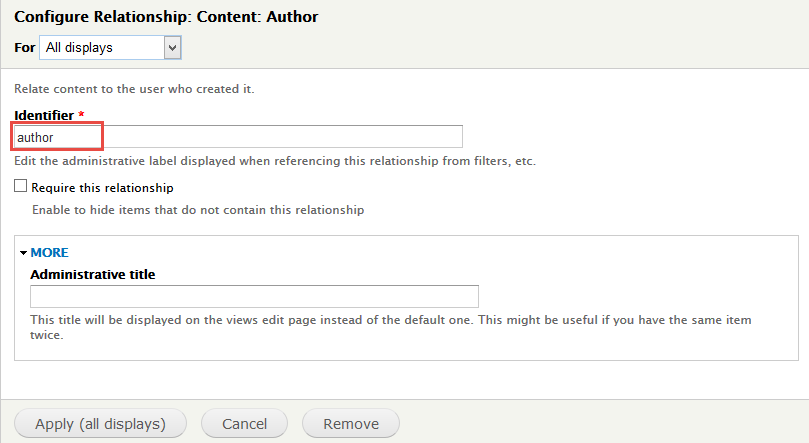
4. In Advanced > REALATIONSHIPS area, click Add button to add fields: Content: Author
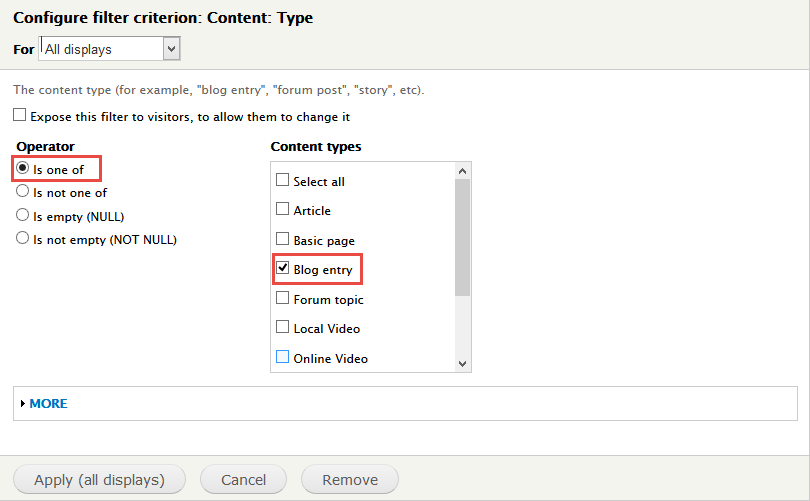
5. In FILTER CRITERIA area, click Add button to add Content: Type field and set following properties:
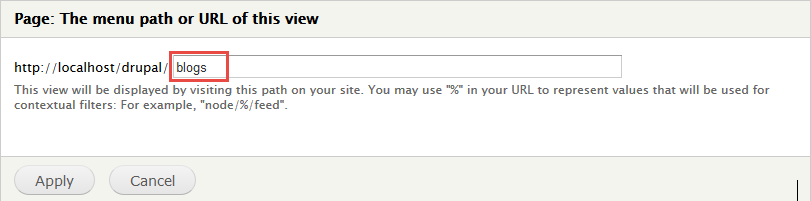
6. In PAGE SETTINGS area, set Path:
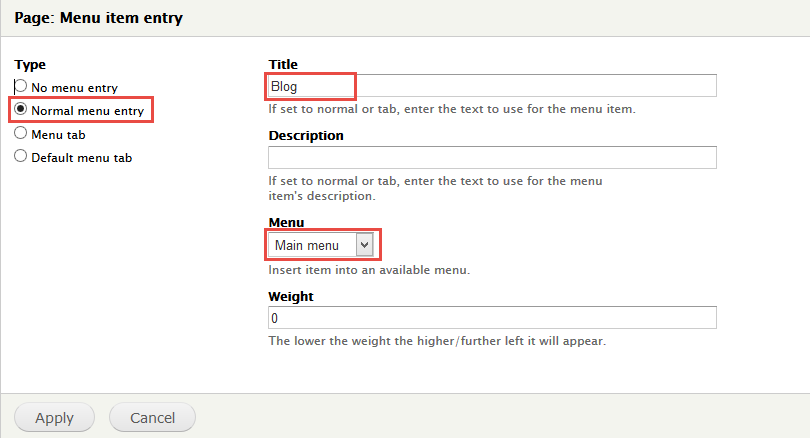
7. In PAGE SETTINGS area, set Menu following properties:
8. In Advanced > OTHER area, add CSS class change following properties:
9. Click Save to save all settings
Showcase page
Required Modules:View, View UI
Front end Display

Create Showcase page view
1. Go to Structure > Views, click Add new view, then create Showcase view page and set following properties:
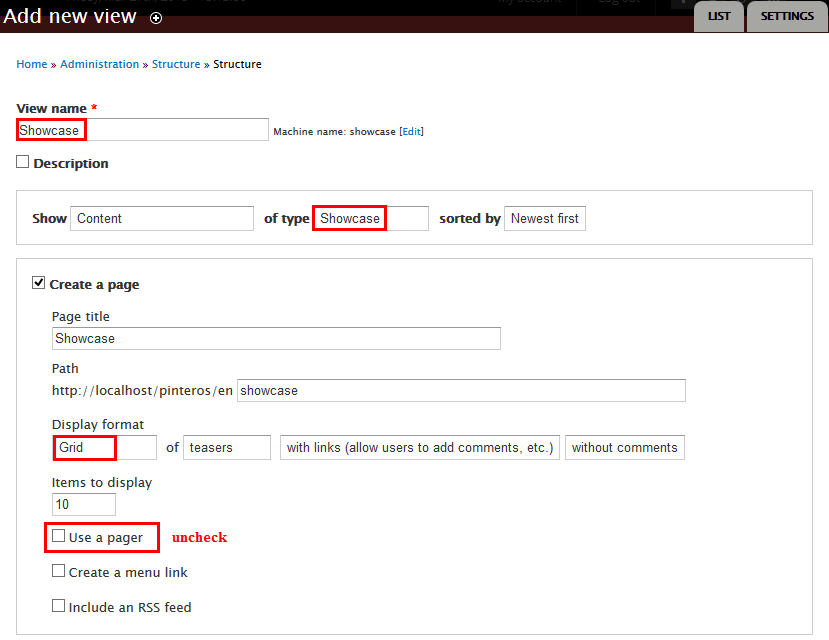
2. Click "Continue and edit" button. A new popup is opened with following properties:
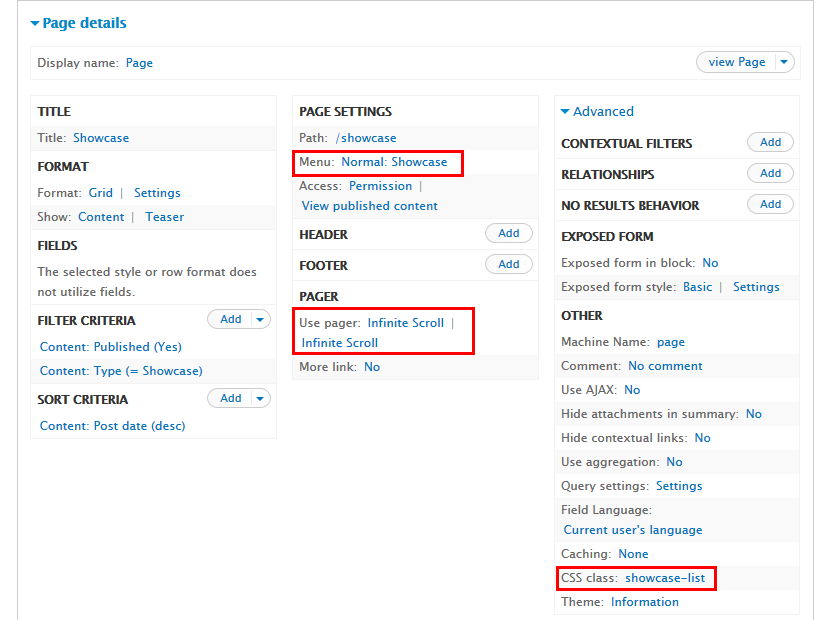
3. In PAGE SETTINGS area, set Menu following properties:

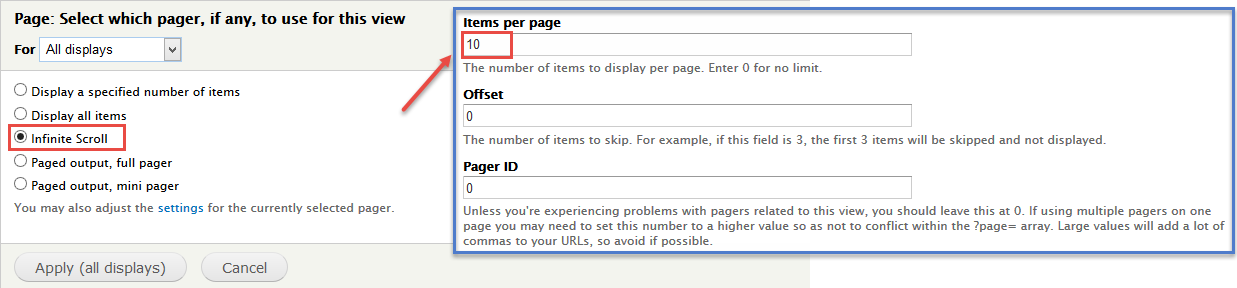
4. In PAGER change User page option with following properties:
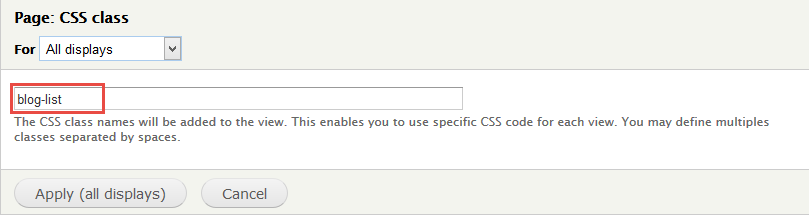
5. In Advanced > OTHER area, add CSS class change following properties:
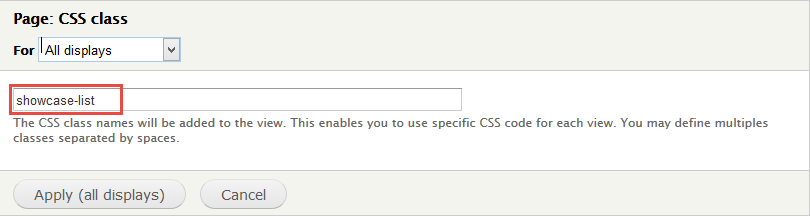
6. Click Save to save all settings
PAGE page
Front end Display
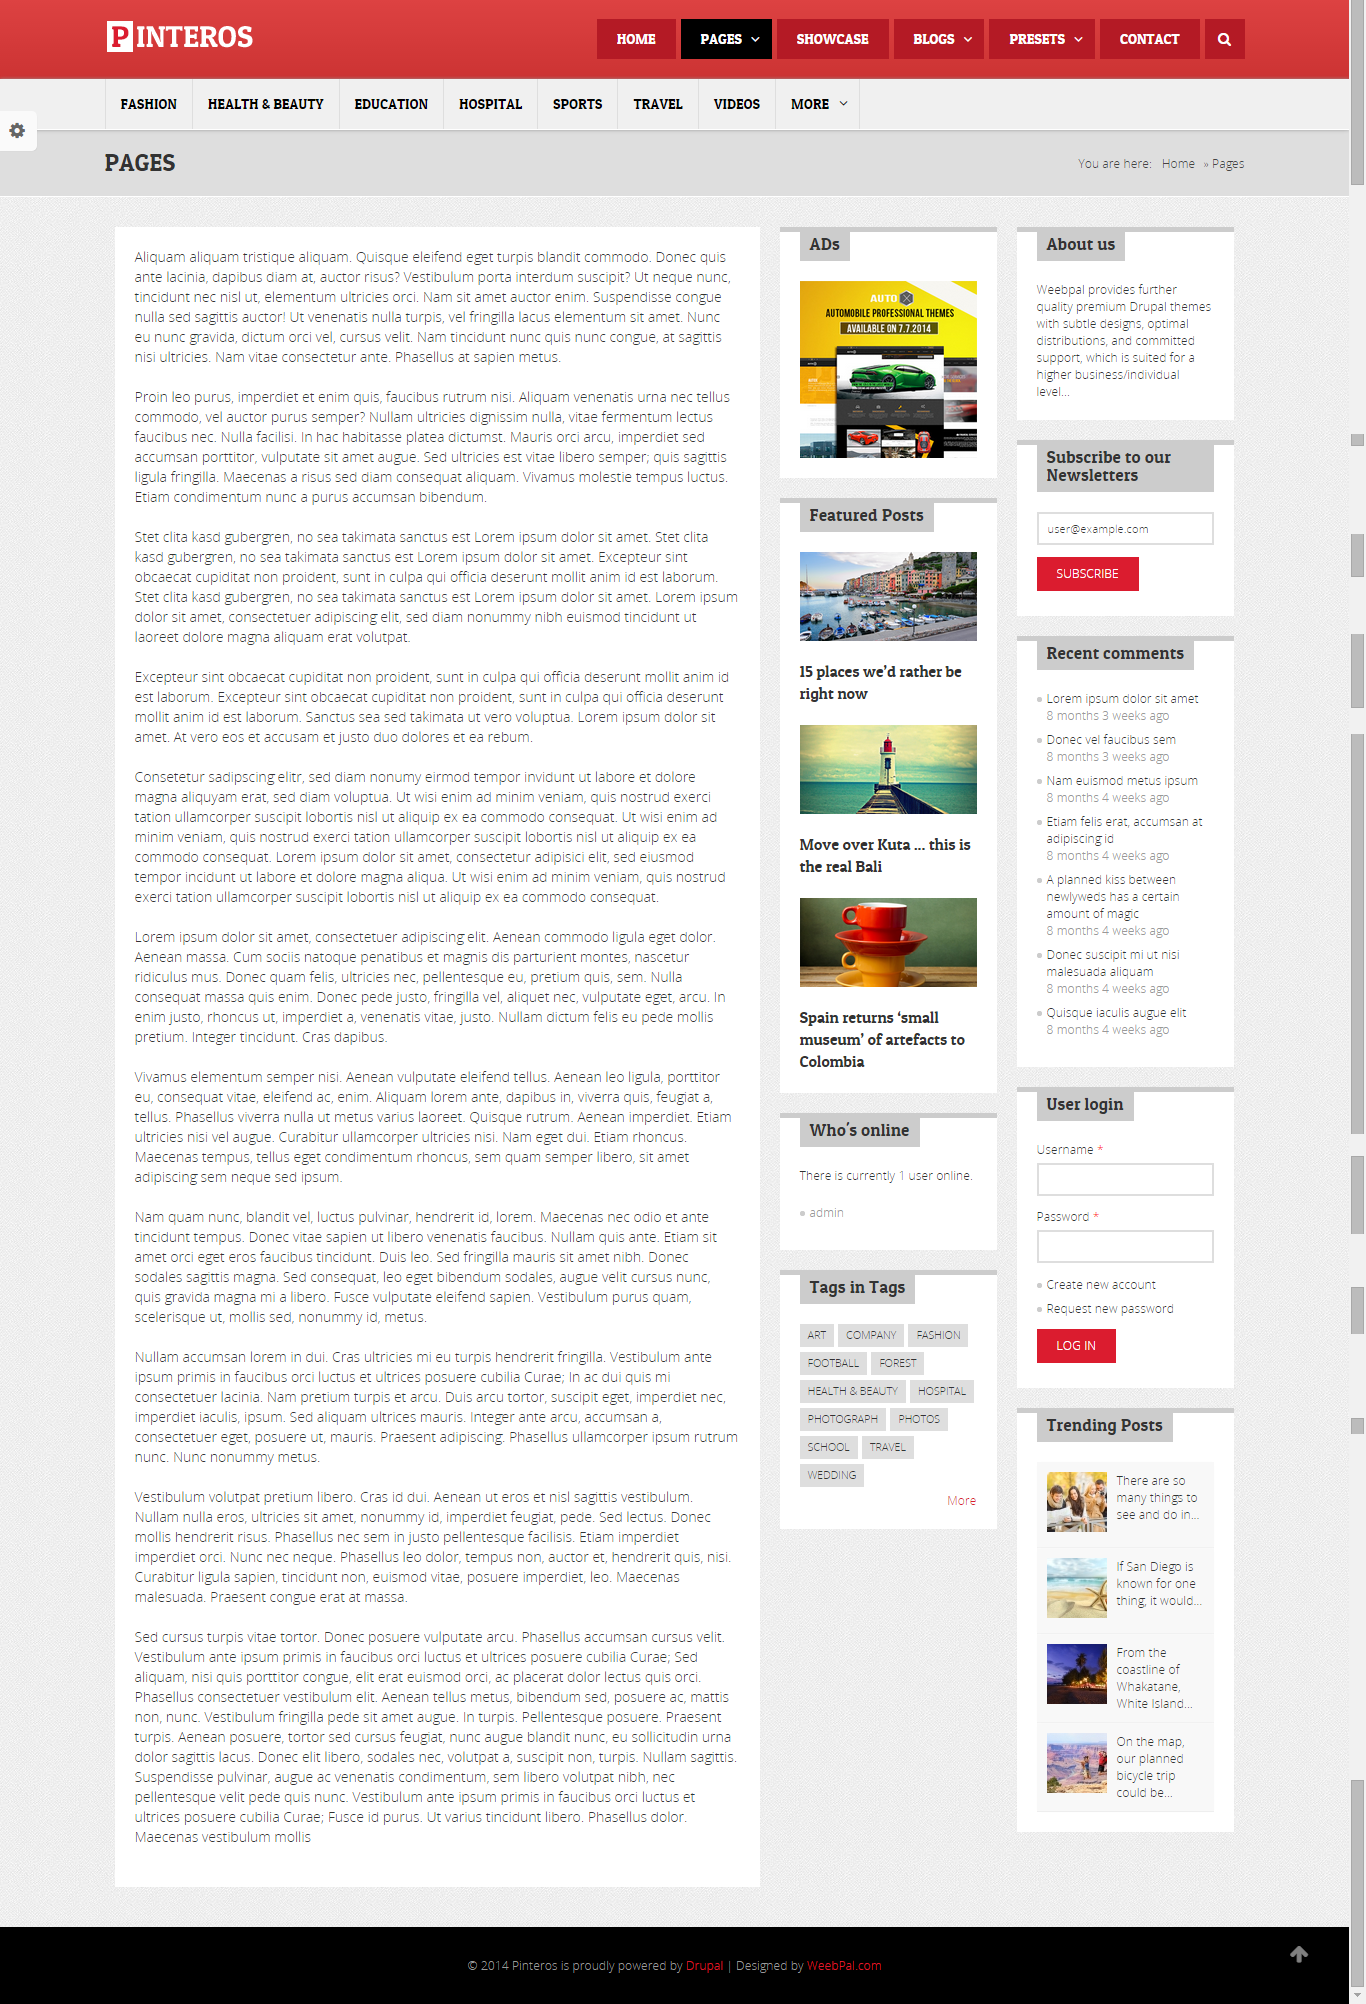
Create Content Page
1. Go to Content, click Add content, then create Page content with following properties:
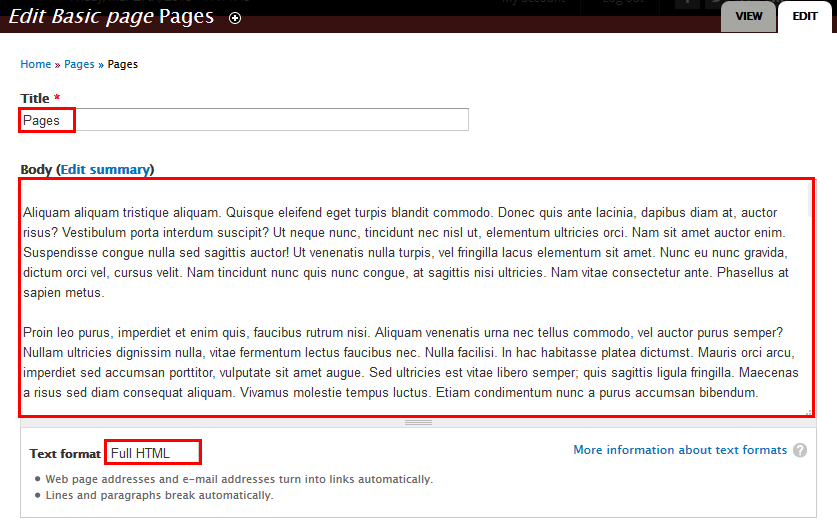
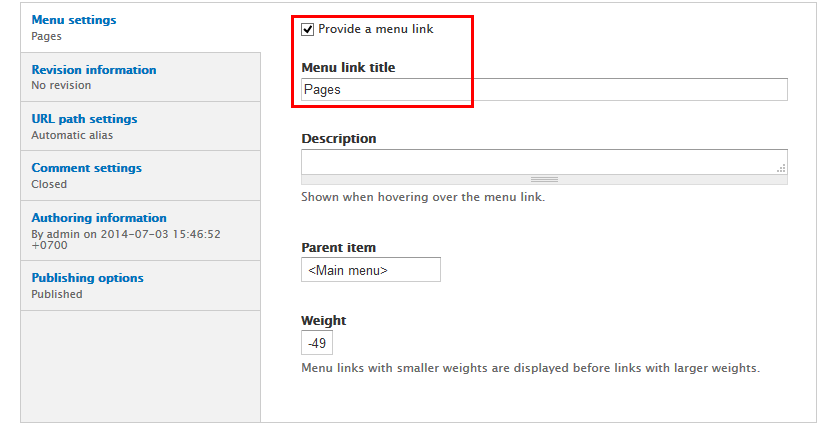
2. Click Save to save all settings
Polls page
A. Polls page
Front end Display
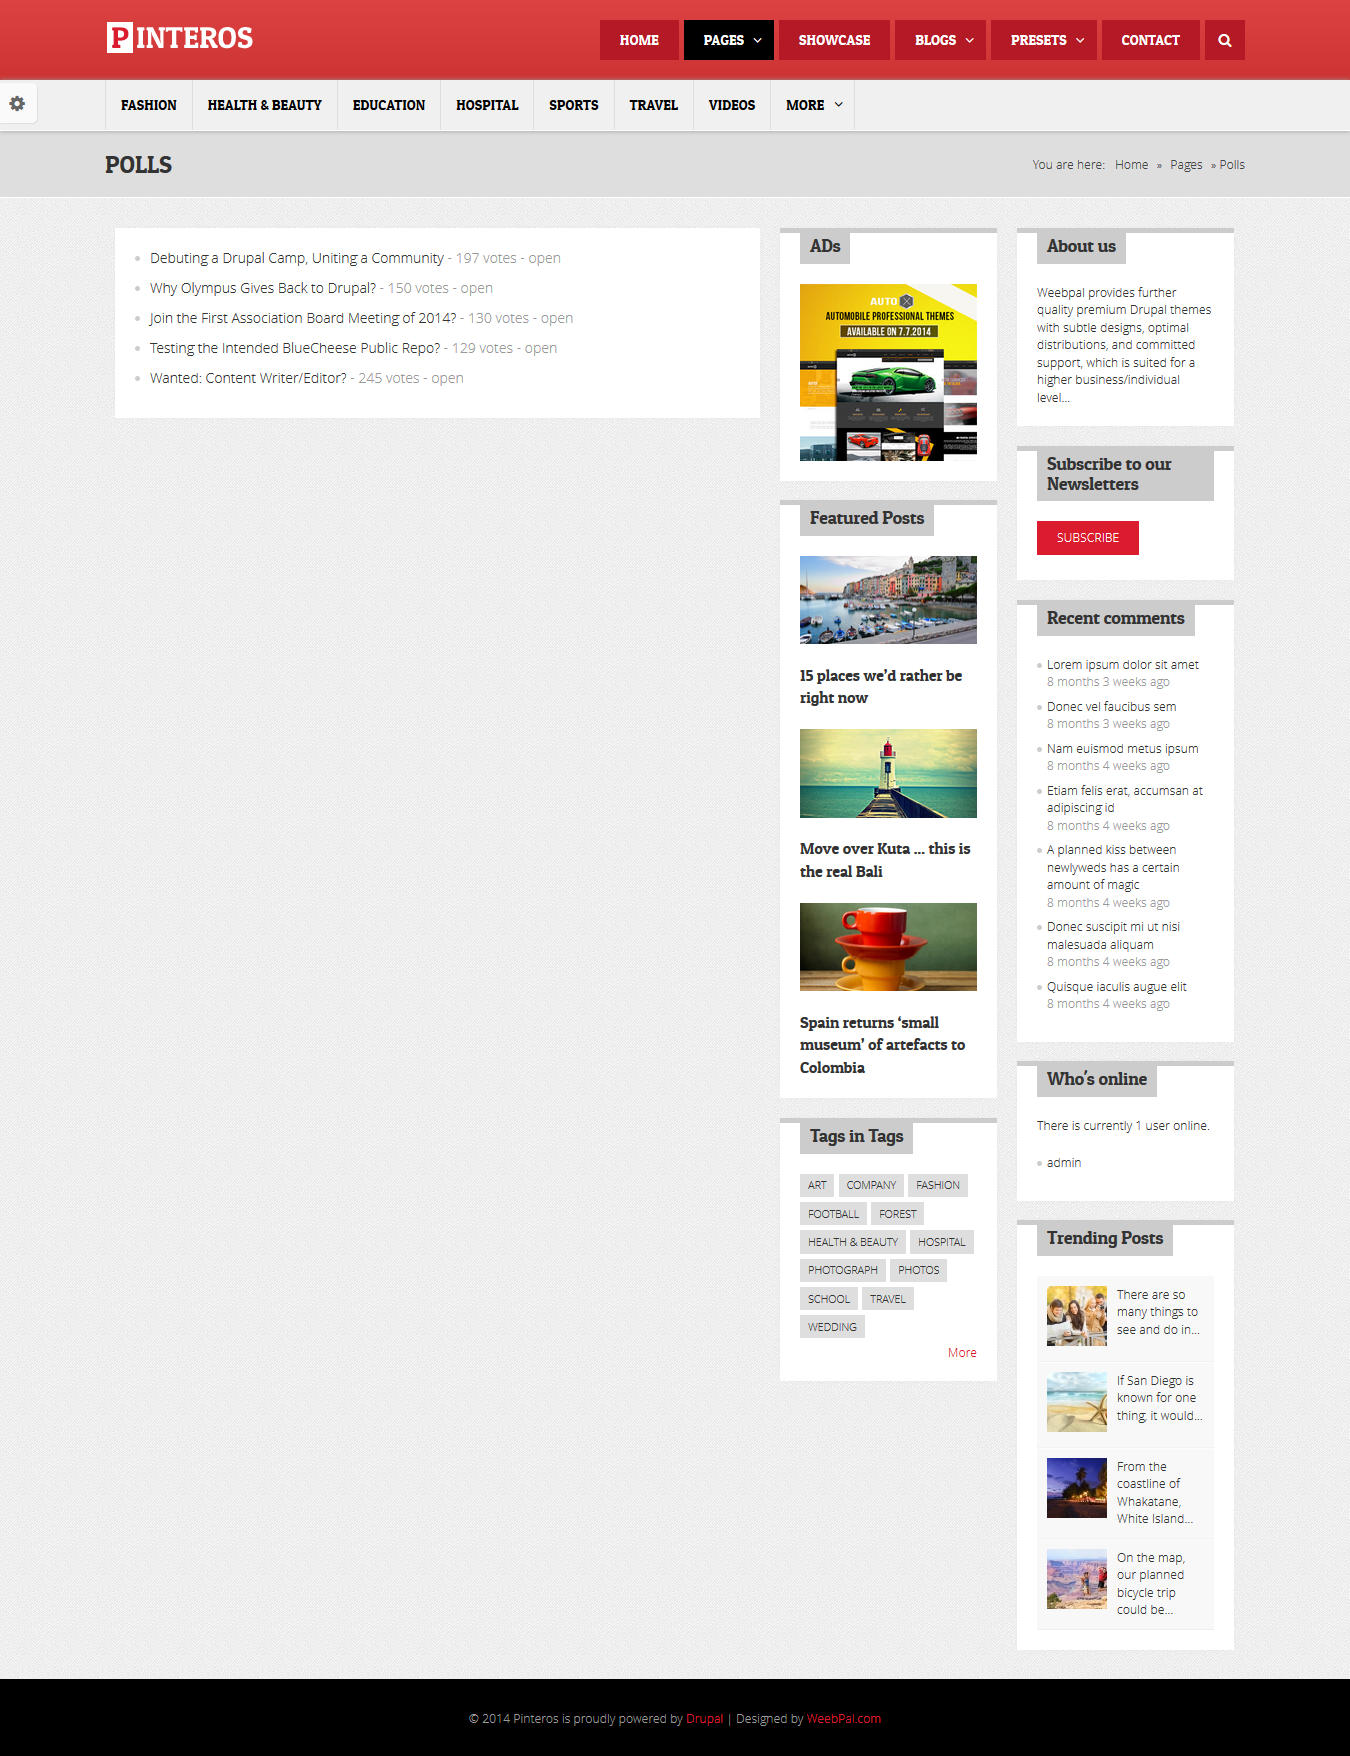
Create Content Page
1. Go to Content, click Add content, then turn creates the following:
2. Click Save button
B. Polls Detail page
Front end Display
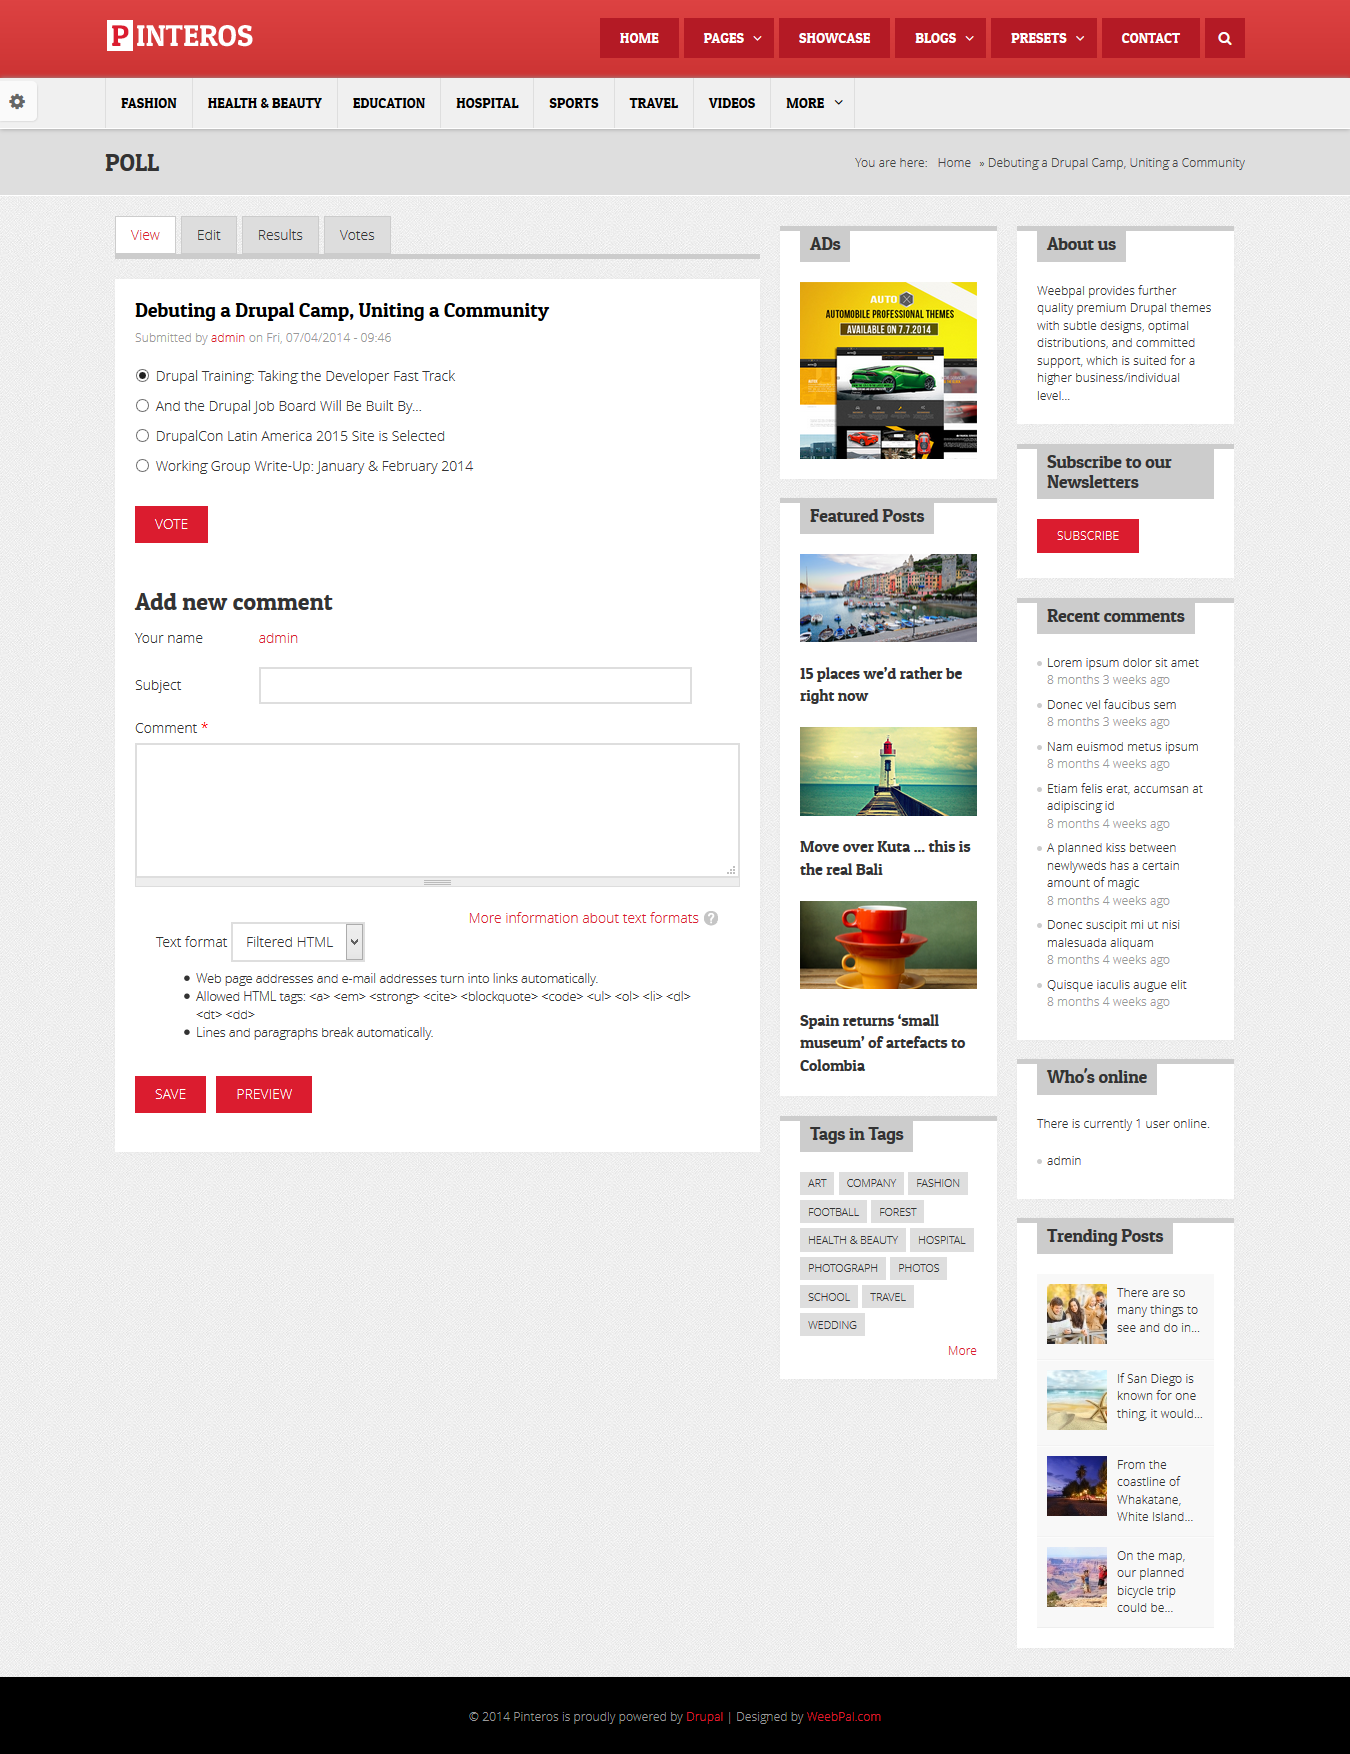
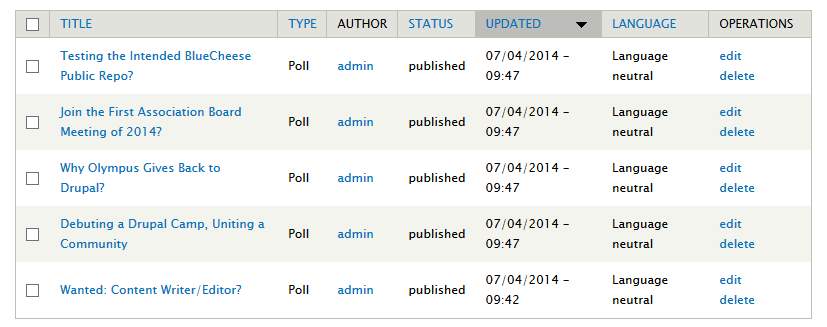
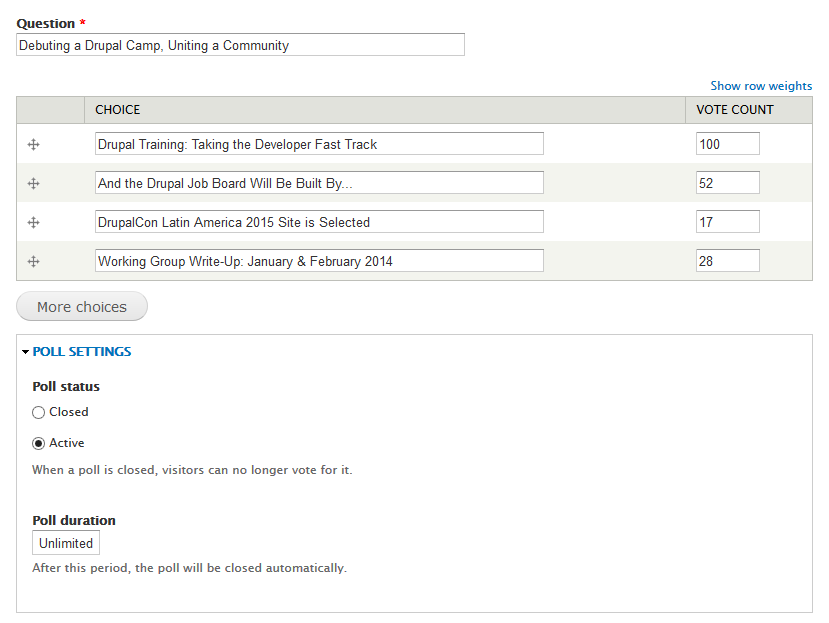
Set properties content
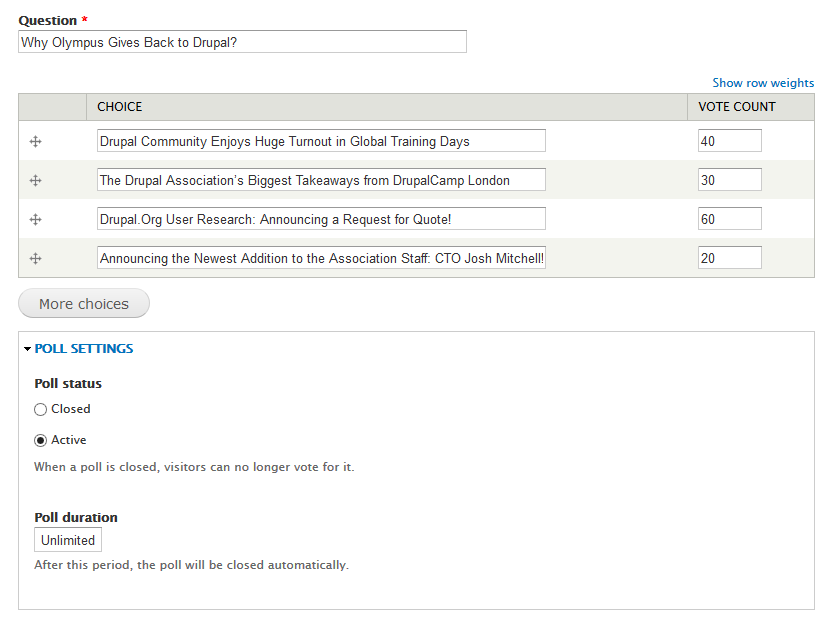
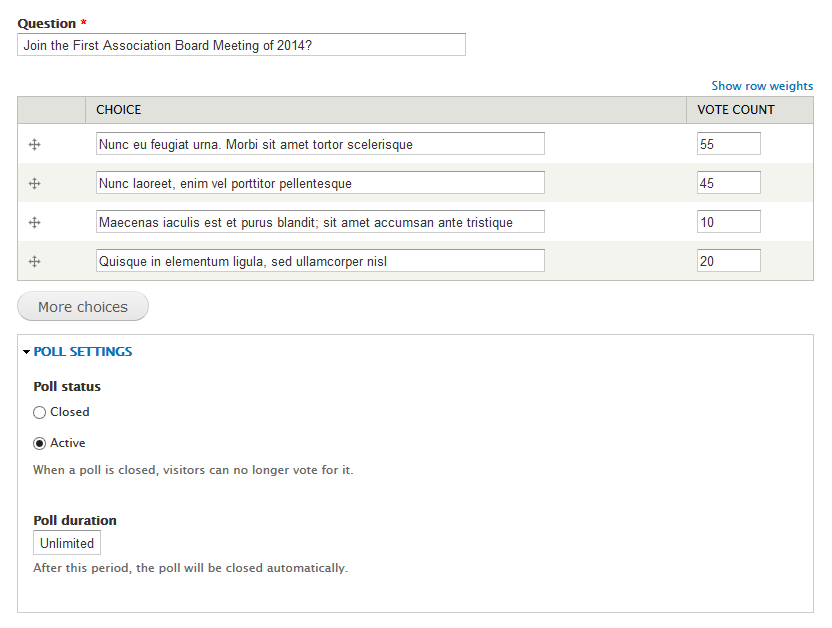
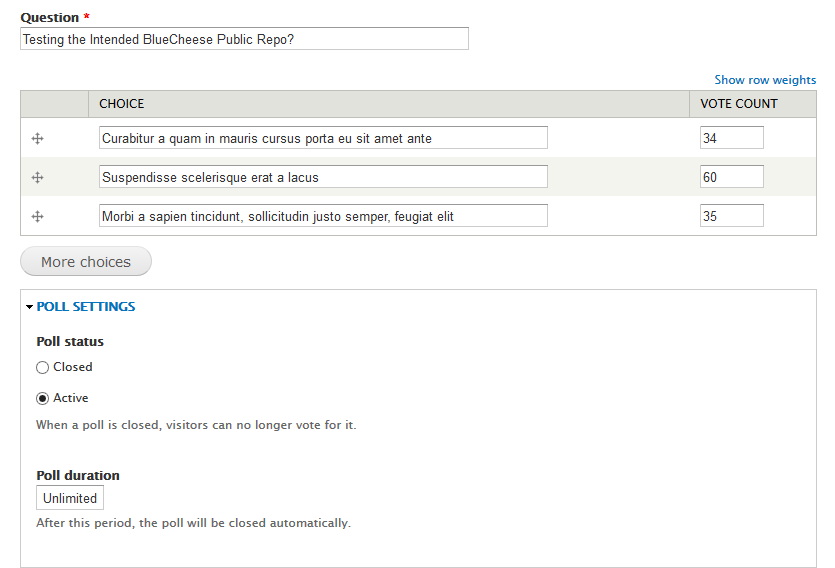
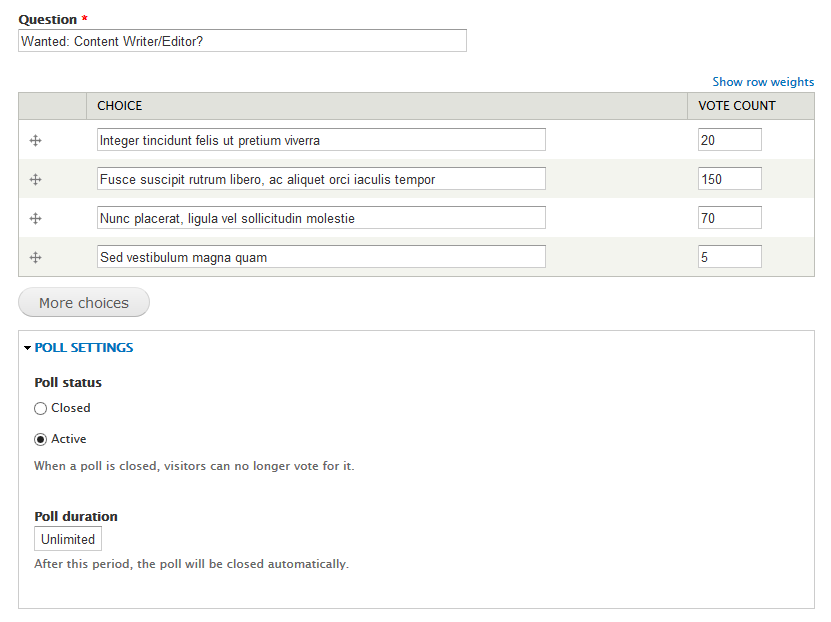
Navigate to Content, find content ofType: Poll, then turn set following properties:
2. Set properties for Debuting a Drupal Camp, Uniting a Community content
3. Set properties for Why Olympus Gives Back to Drupal? content
4. Set properties for Join the First Association Board Meeting of 2014? content
5. Set properties for Testing the Intended BlueCheese Public Repo? content
6. Set properties for Wanted: Content Writer/Editor? content
Left menu page
Front end Display
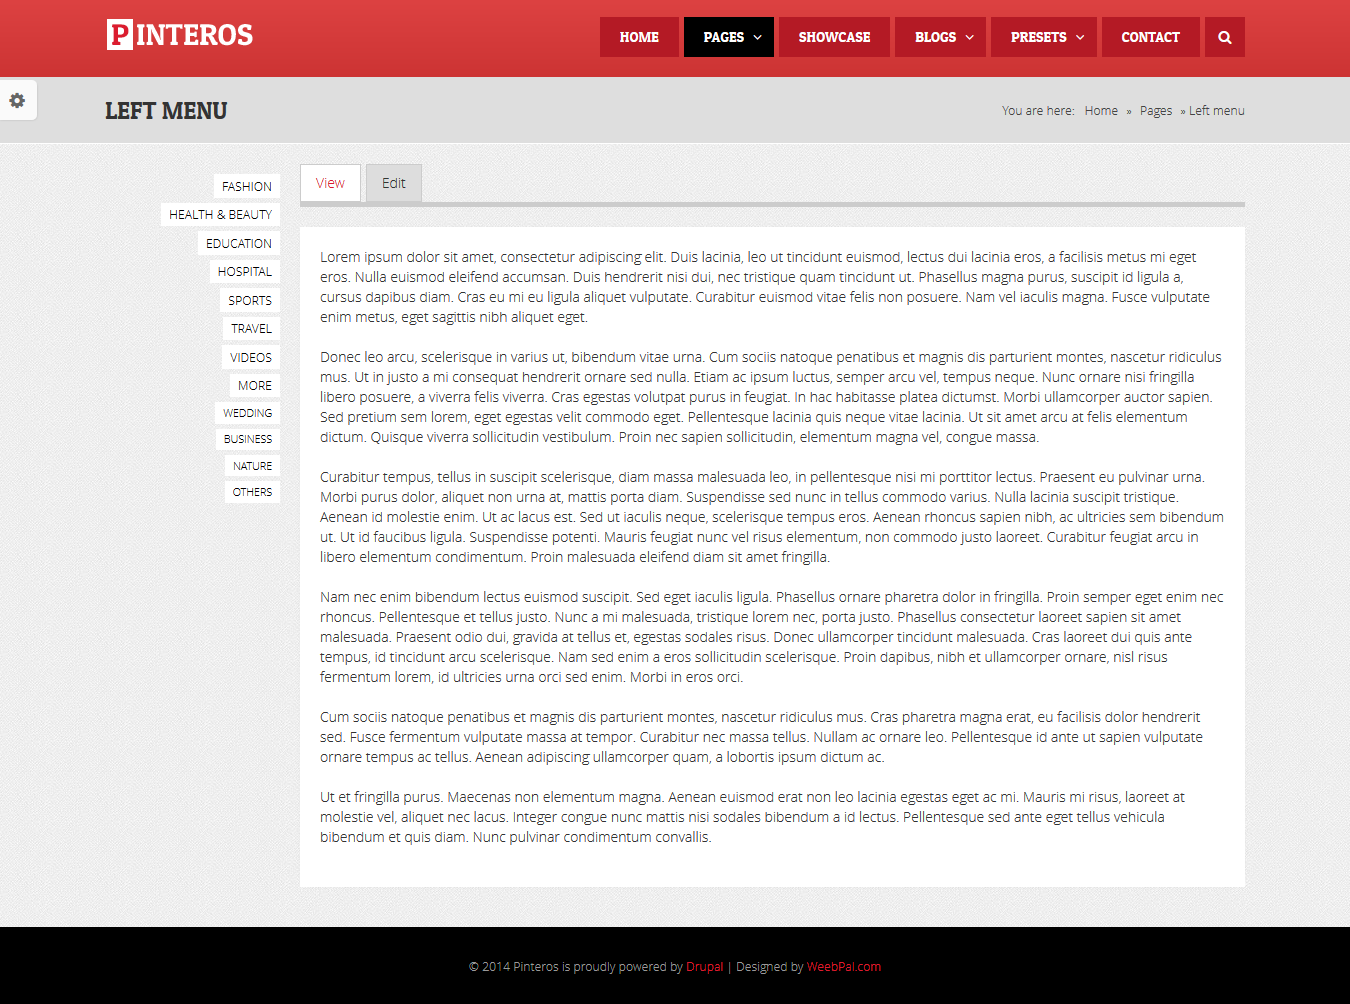
1. Create Content Left menu
1. Go to Content, click Add content, then create Left menu content with following properties:

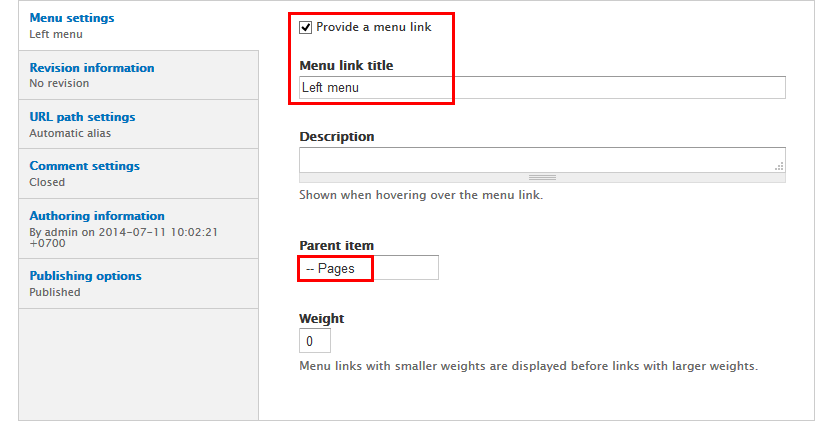
2. Click Save button
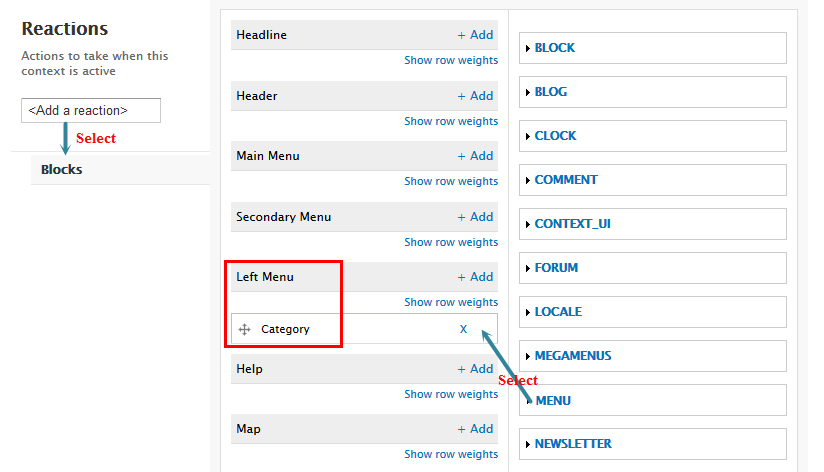
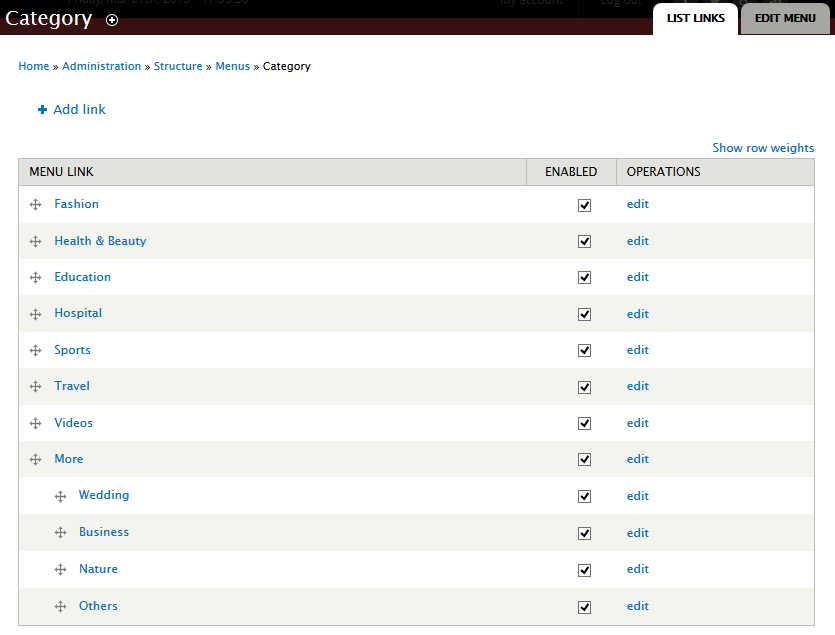
2. Create Category menu
1. Navigate to Structure > Menu click Add menu click, then create Category menu with following properties:
2. Navigate to Structure > Blocks find Category menu block and set following properties:
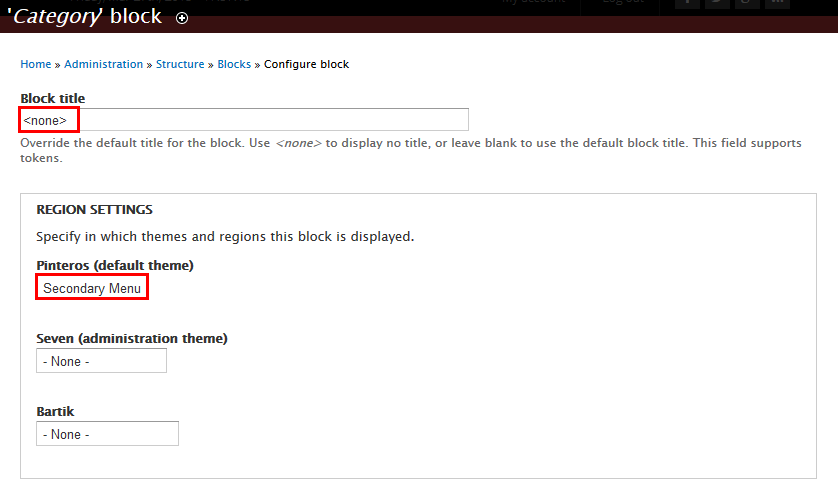
3. Click Save button
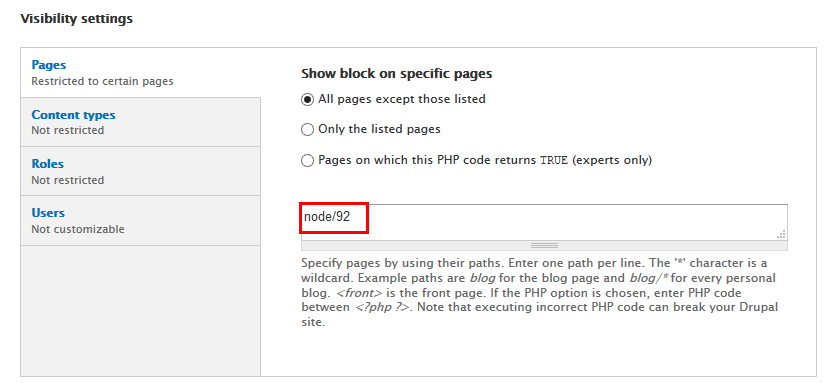
Forums page
Front end Display
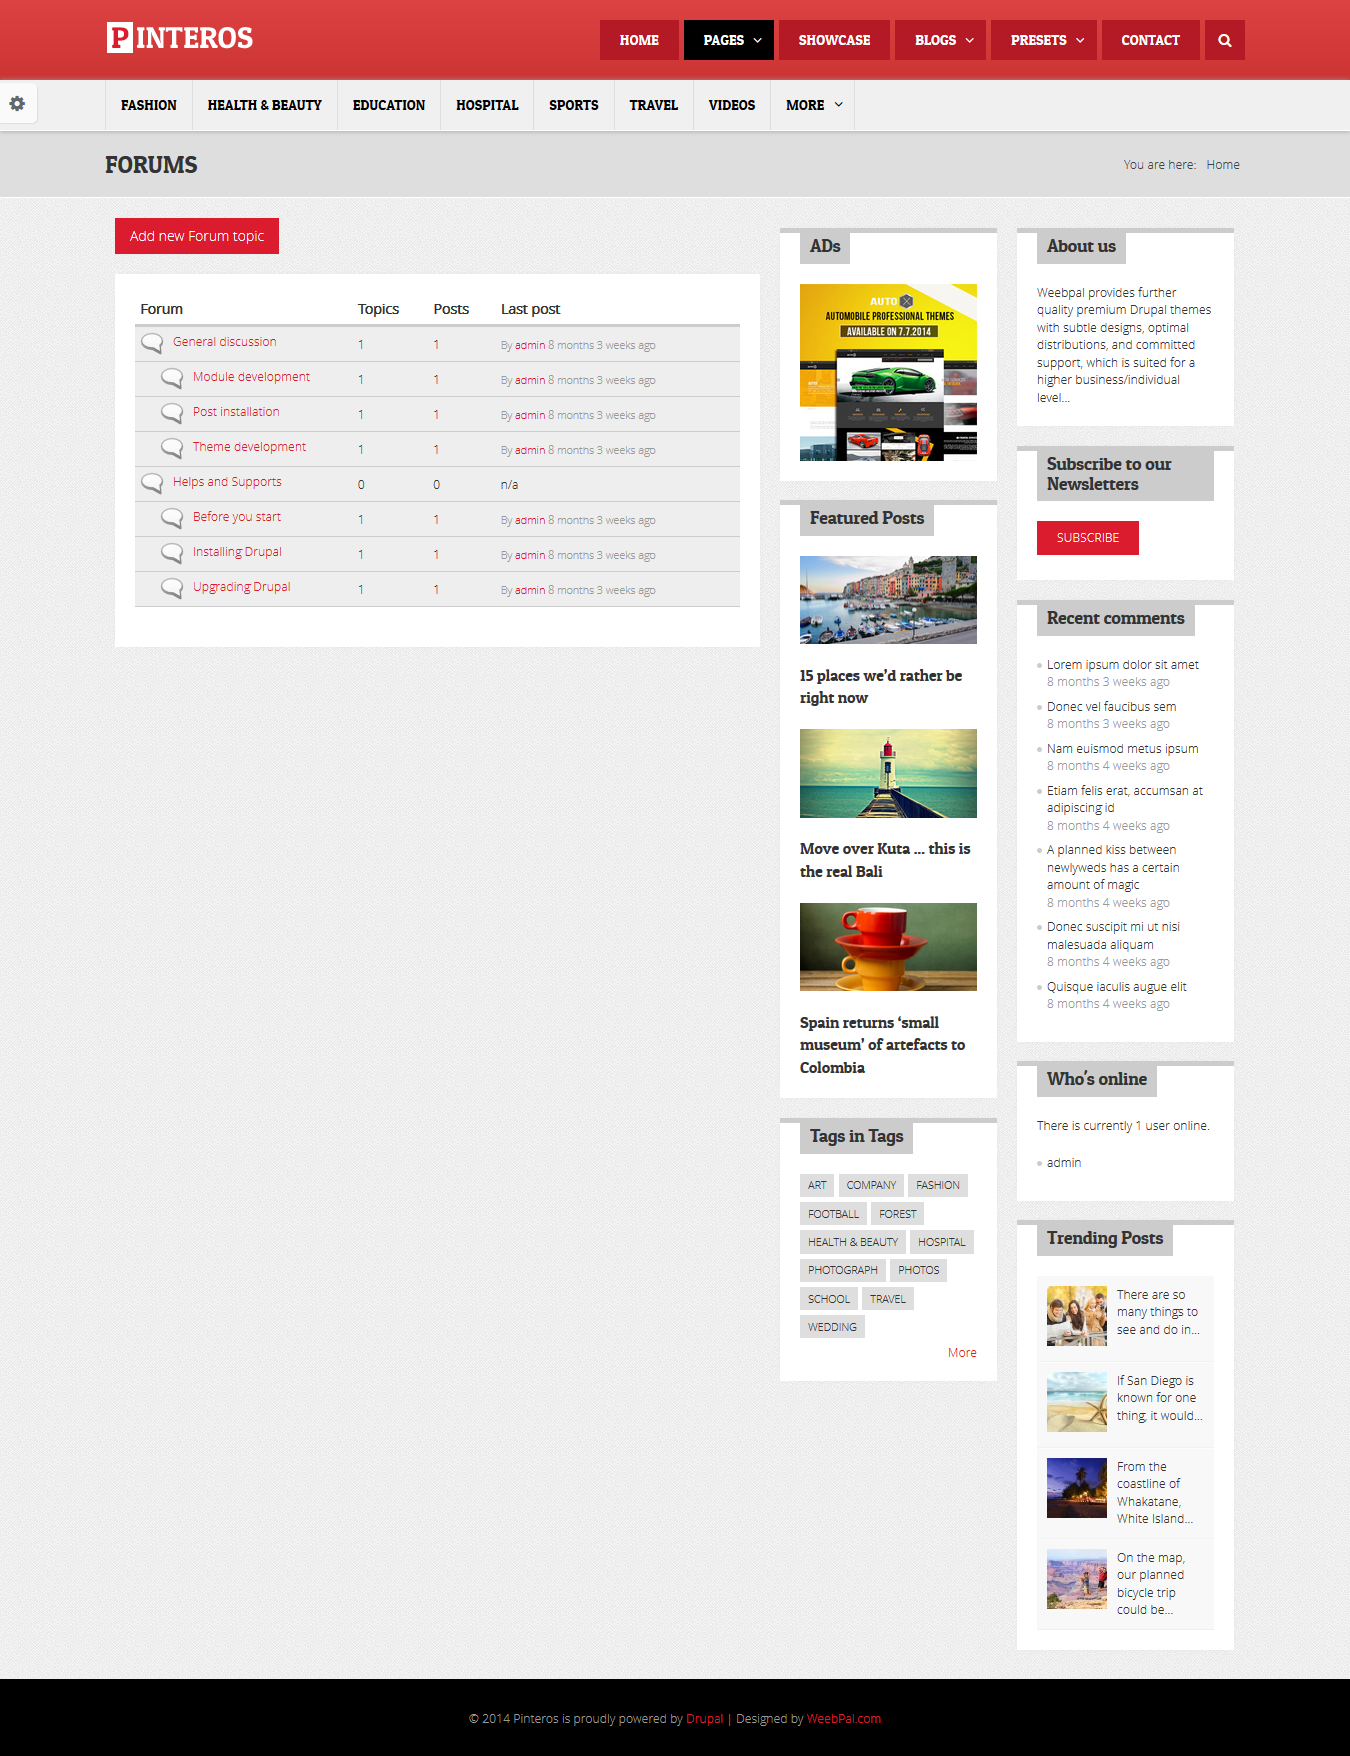
1. Create Content for type: Forums
1. Go to Content, click Add content, then create list the following content:
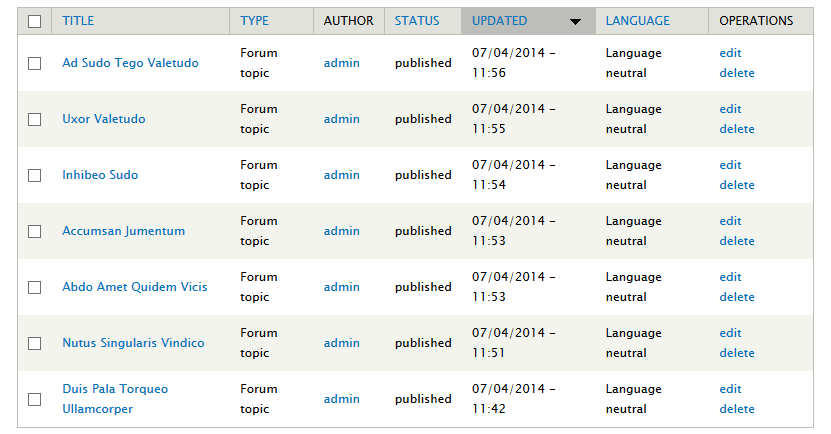
2. Click Save button
2. Configure Taxonomy: Forums
1. Navigate to Structure > Taxonomy find Forums taxonomy with following properties:
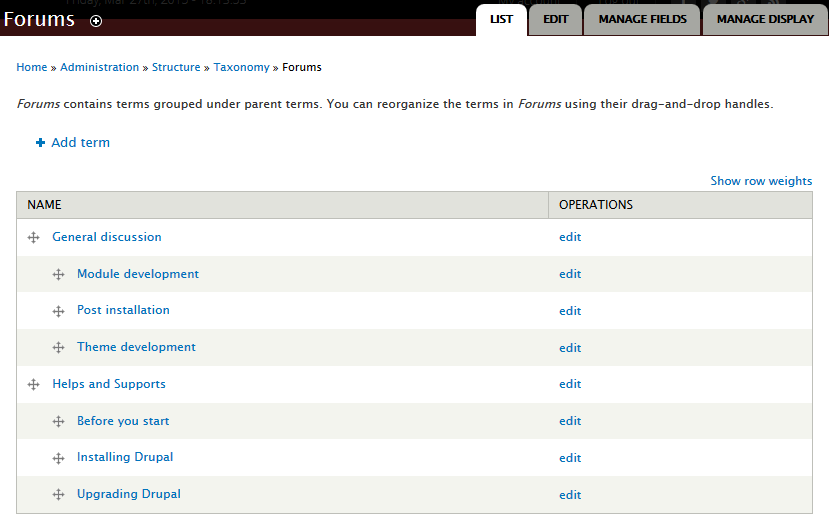
2. Click Save button
More Configurations
Site Information
In this section, you can change basic settings, such as the site name, slogan, e-mail address.
1. Log in to Administration site page by administrator account
2. Navigate to the Site Information page Configuration > System: Site information
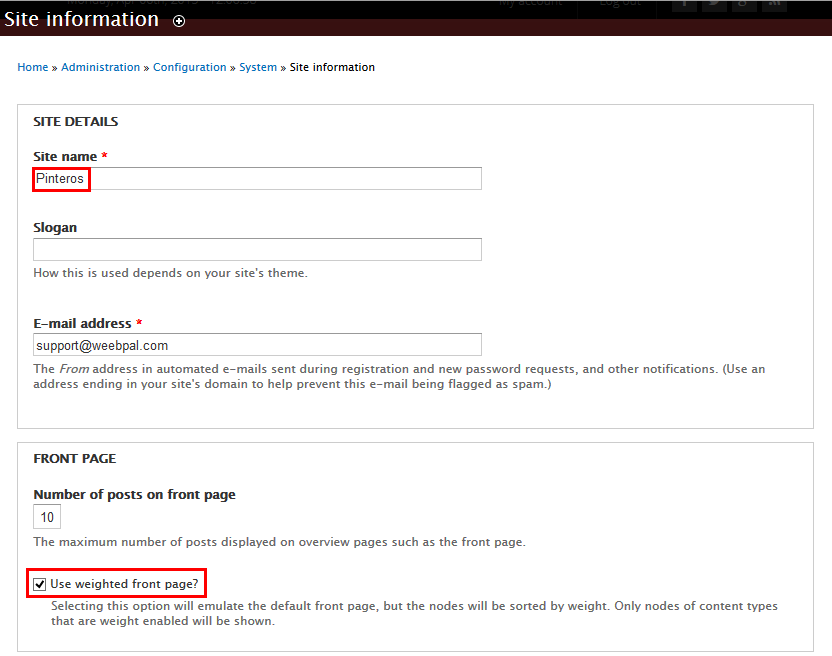
3. Change site details from the view:
- Site name
- Slogan
- E-mail address
- Set Default Front page
4. Click on Save configuration to finish editing.
Appearance Settings
1. Create a new color.
Step 1: Navigate to the directory: pinteros/sites/all/themes/pinteros, you can find file pinteros.info, open this file.

Step 2: Locate the skins[ ] arrays and add new code row:

Step 3: Save file.
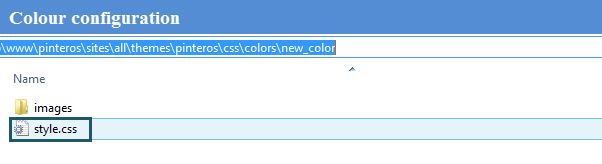
Step 4: Navigate to the directory: pinteros/sites/all/themes/pinteros/css/colors, clone a folder, then rename it "new_color"
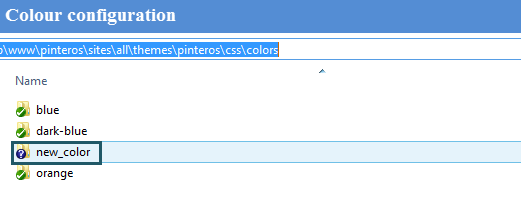
Step 5: new_color folder includes images folder and style.css file.
Now, you can style new color for theme by modifying style.css file.
2. Configuration.
Step 1: Log into website by administrator account.
Step 2: Go to Appearance find pinteros 7.34, click on Settings
Step 3: At CONFIGS area, select one of options for Layout, Skin, Background to set default, (e.g: New Color), and at TOGGLE DISPLAY area, check Show Skins Menu option if you want to display Skins menu on front-end pages.

Language Configuration
This section guides you how to have multiple languages for your site. New Shopping Theme supports both Left to Right and Right to Left languages.
Step 1: Navigate to Configuration > Regional and Language > Languages then add new language.

Step 2: Check to enable and set default language
Step 3: Save configuration