
-

- Doc Navigation
- Taxonomy Configurations
- Media Configurations
-
- Doc Navigation
- Taxonomy Configurations
- Media Configurations
Overview
Drupal can build a strong ZetraZ D8 website, and this theme proves the point.
1. ZetraZ D8 Package
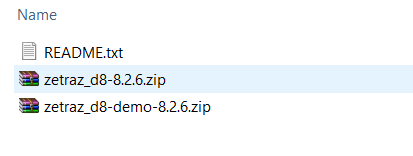
Included content:
- README.txt
- ZetraZ D8 theme: zetraz_d8-8.2.6.zip
- Demo Profile for ZetraZ D8: zetraz_d8-demo-8.2.6.zip
2. Features
- Documentation included.
- Browser compatibility
- Web Technology (Html5/Css3, Twitter Bootstrap 3.1.1, Font Awesome 4.0.3,…)
- Fully responsive.
- Megamenu
- Color variations.
- Easy customization.
- High usability
- Support both Left to Right and Right to Left Languages
3. Screenshots
Let's glance through the theme's design & some features:
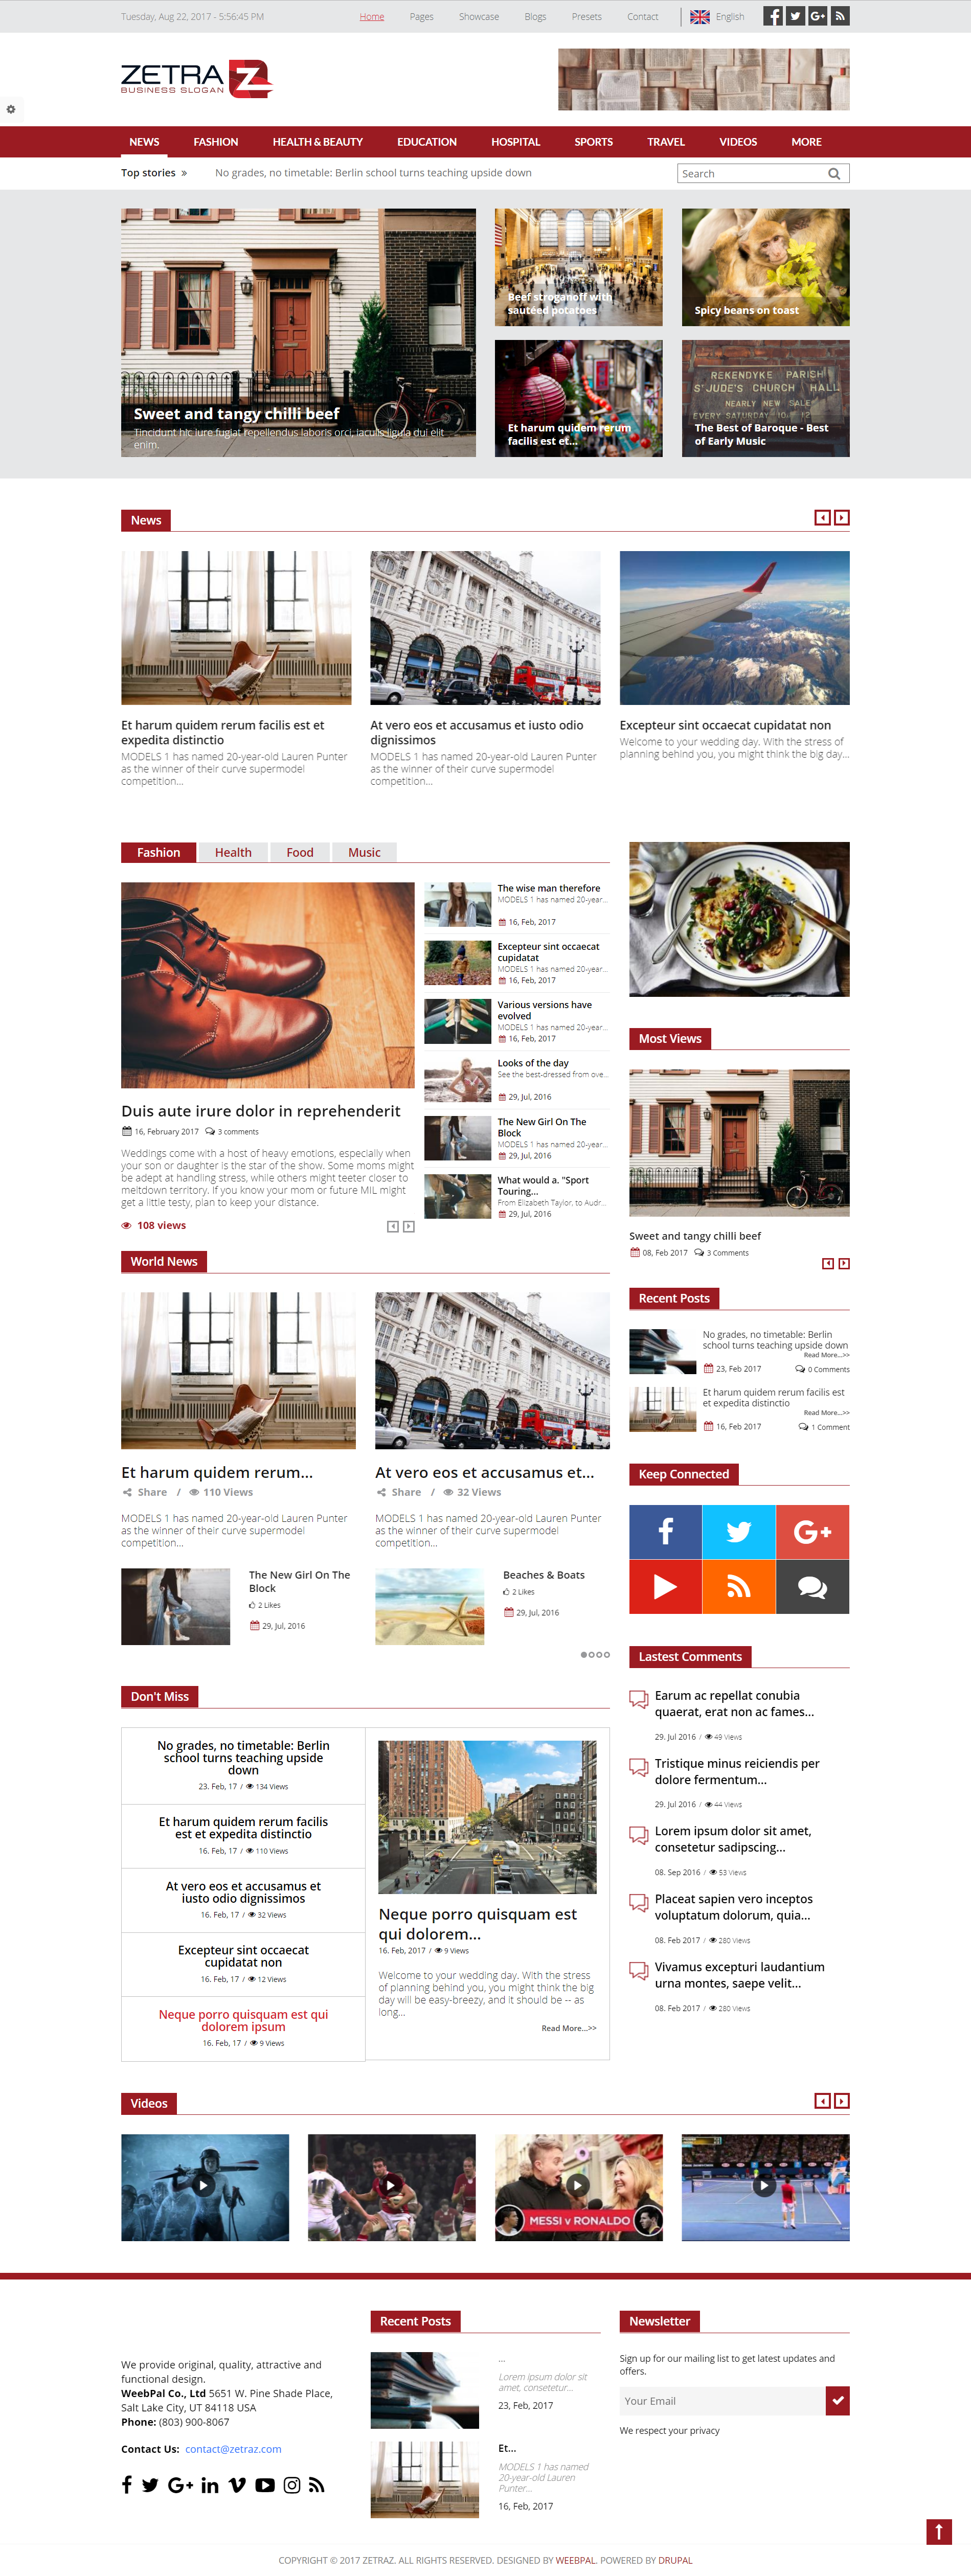
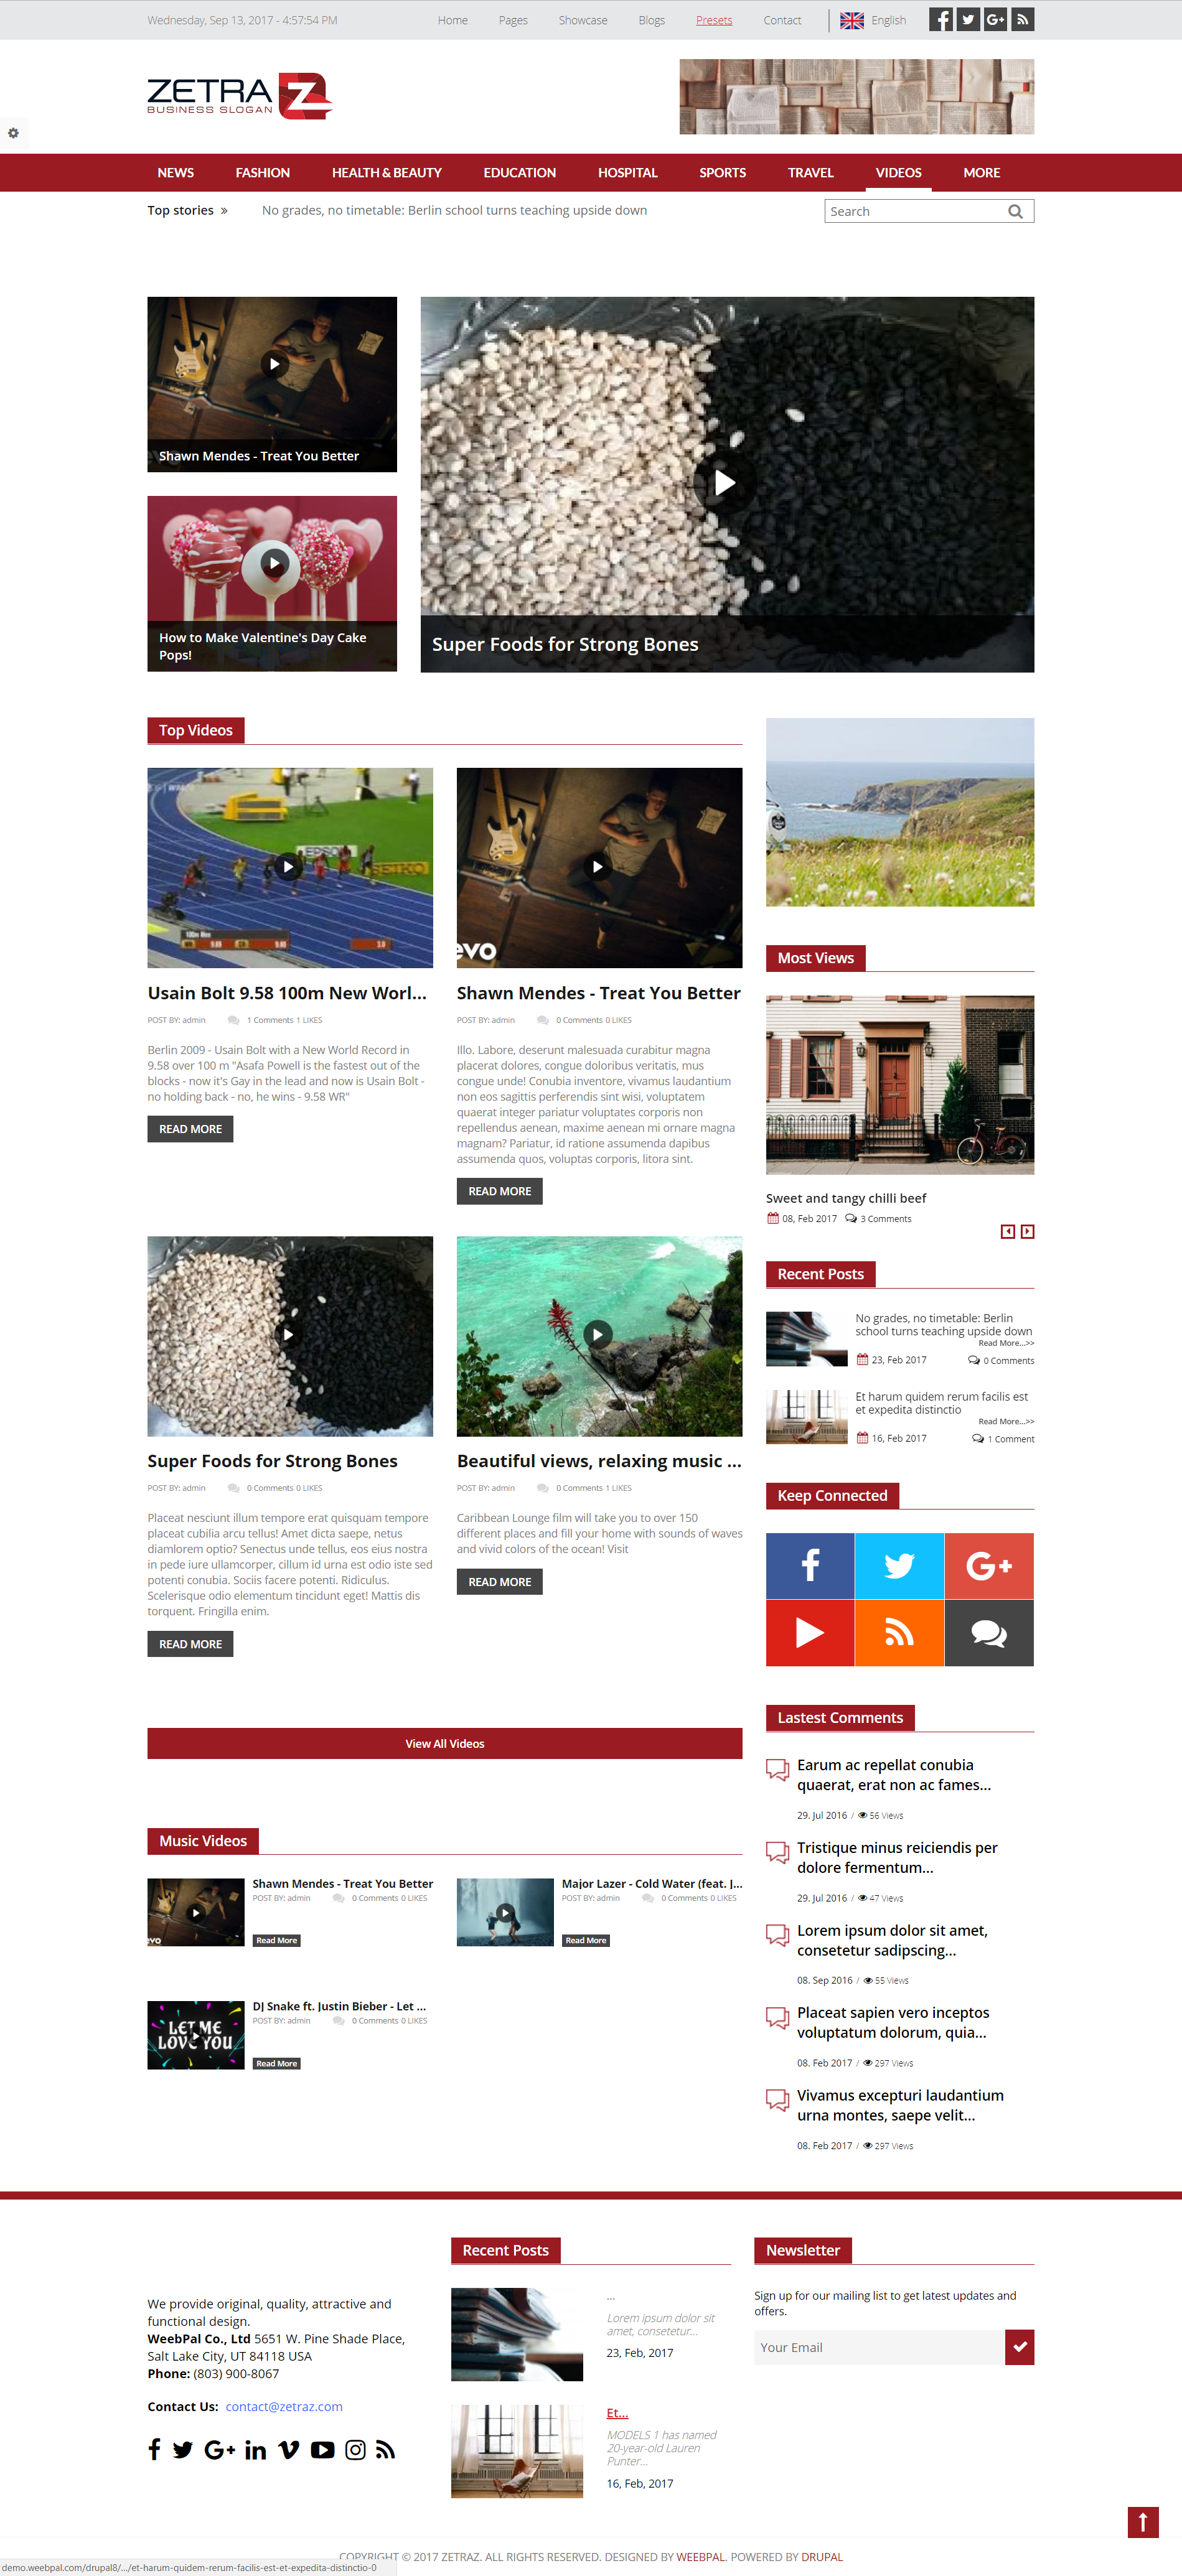
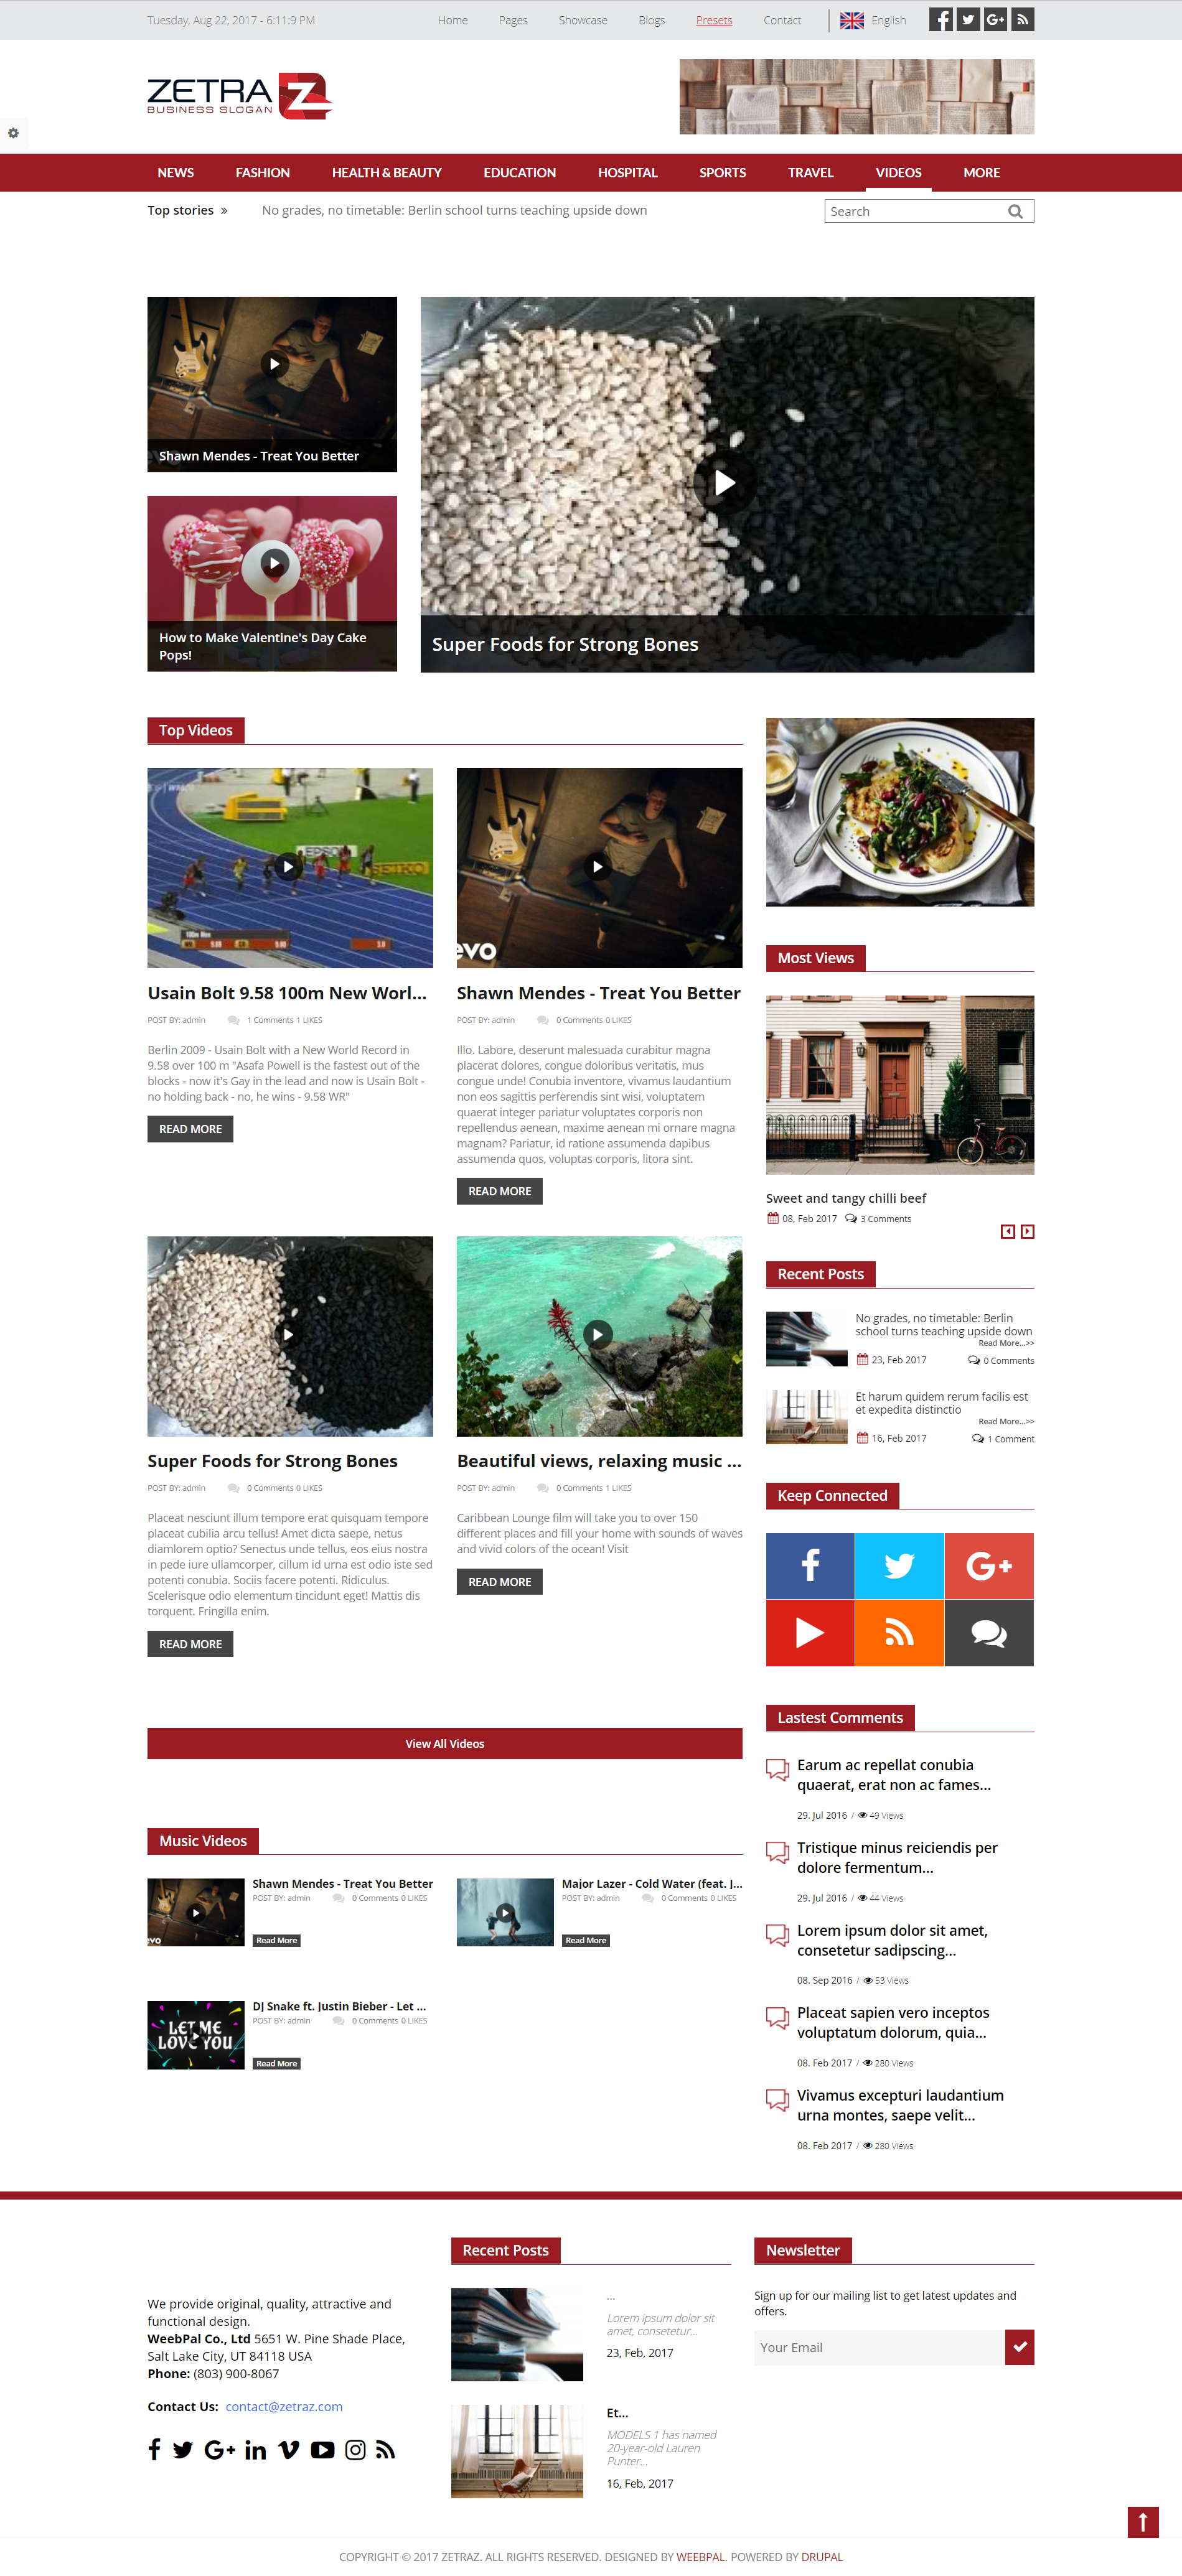
Homepage
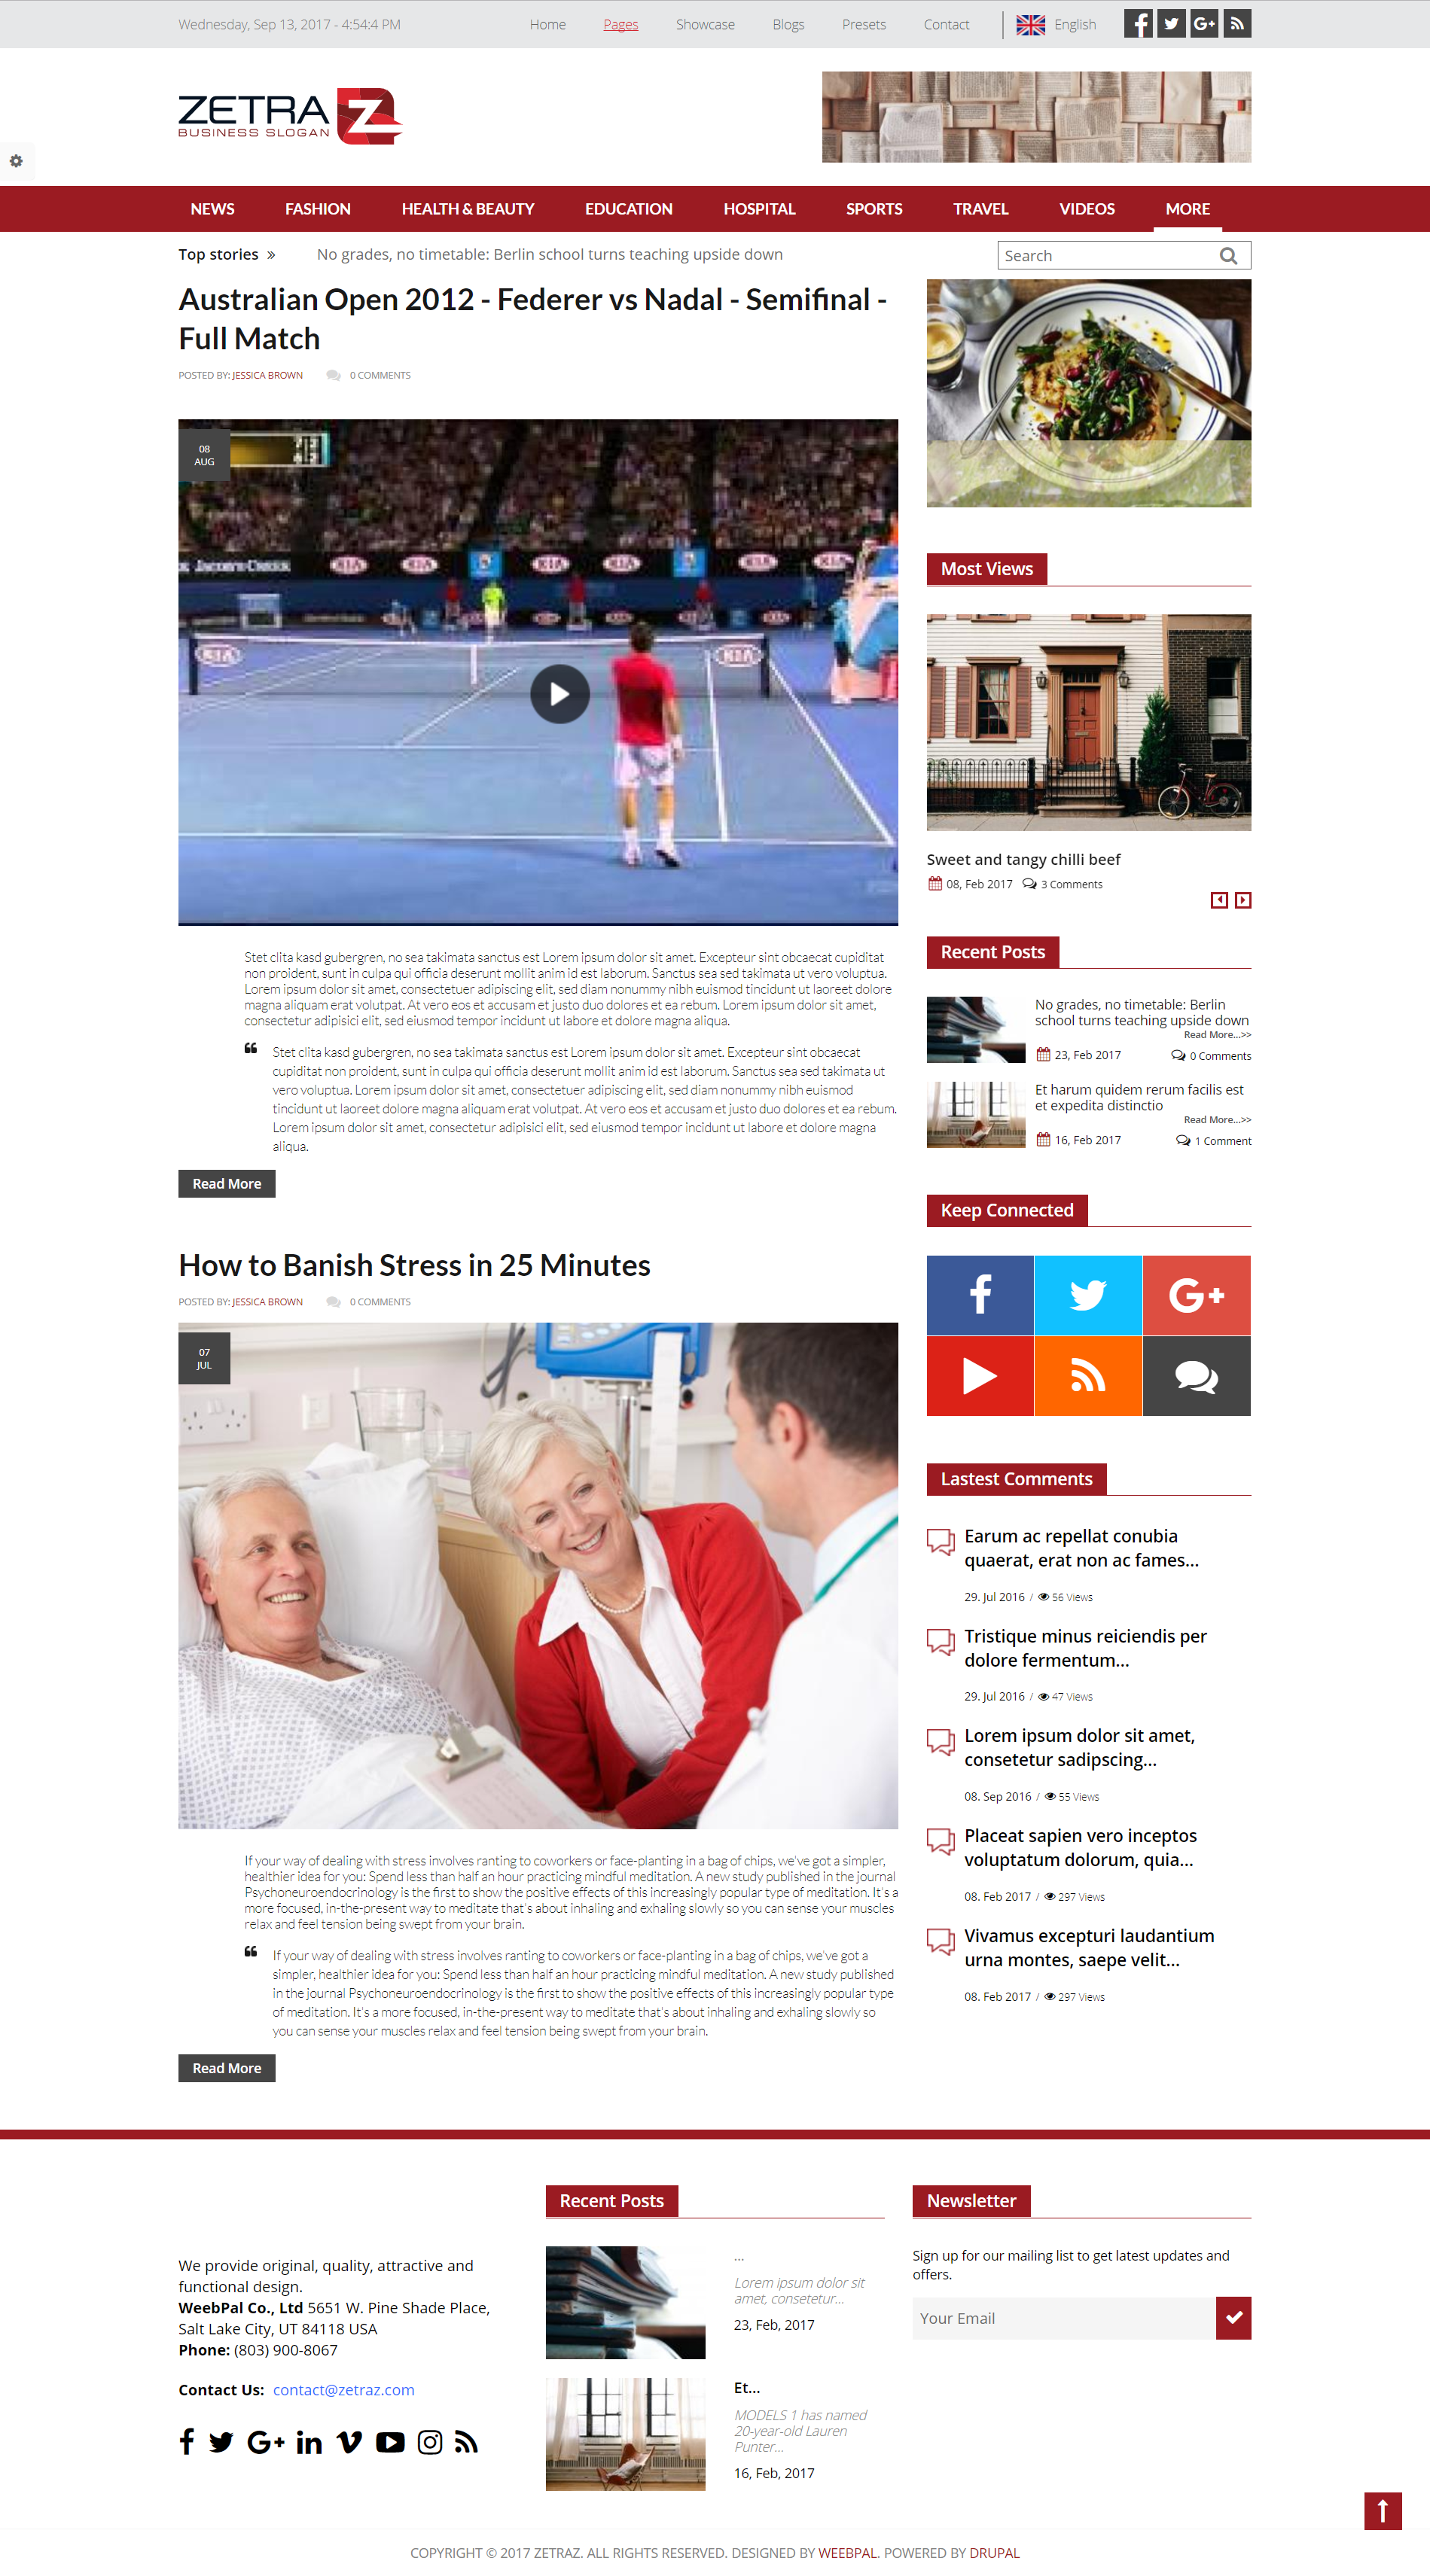
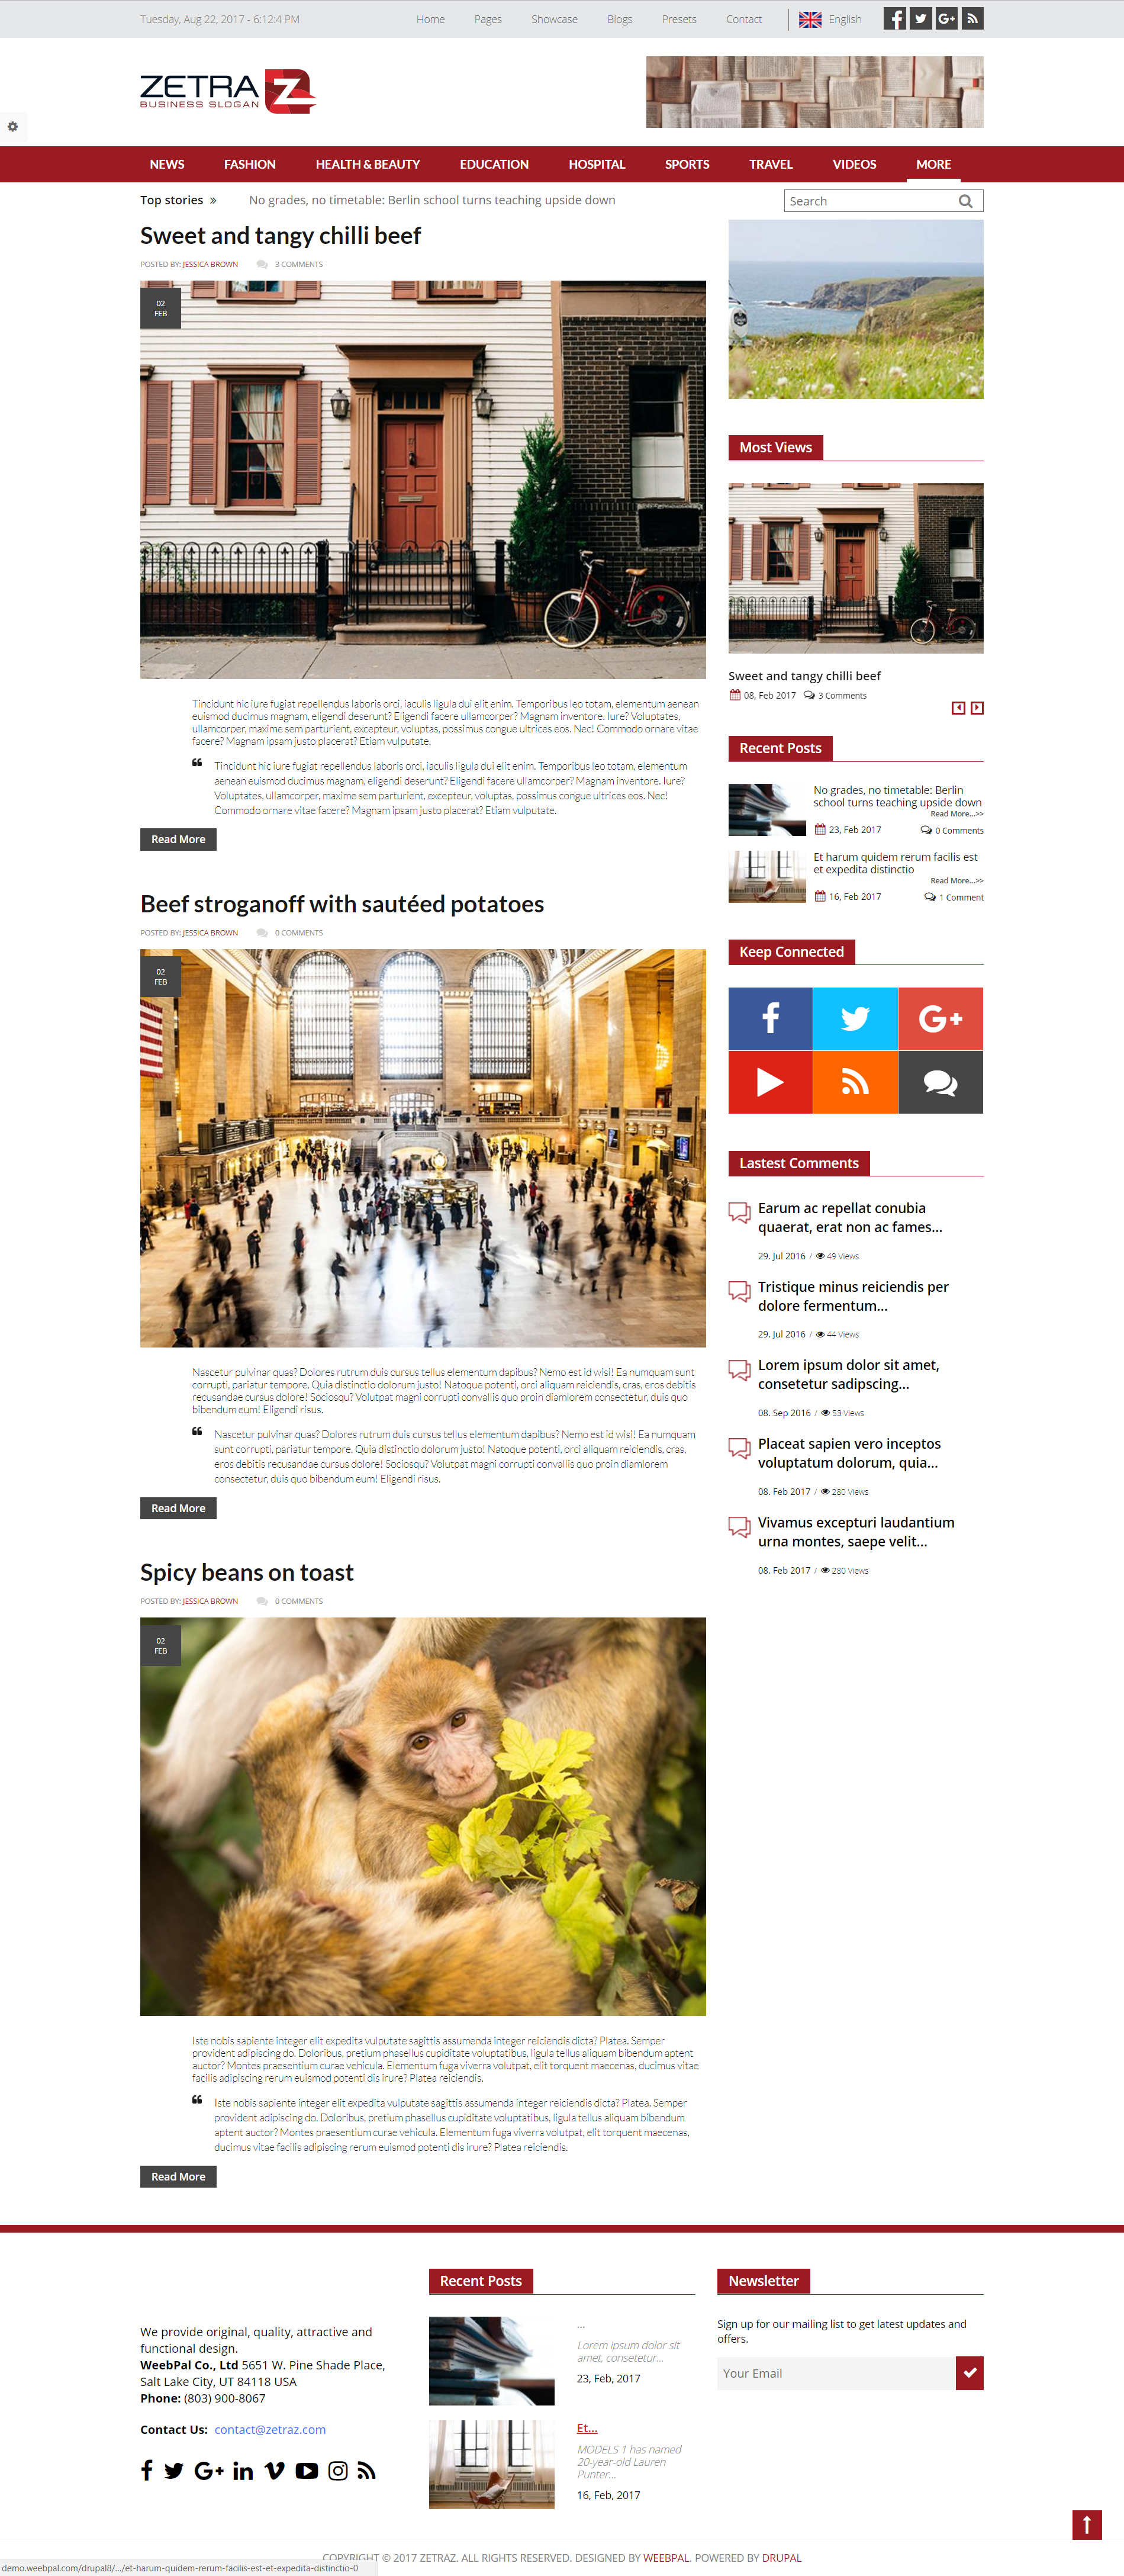
Pages
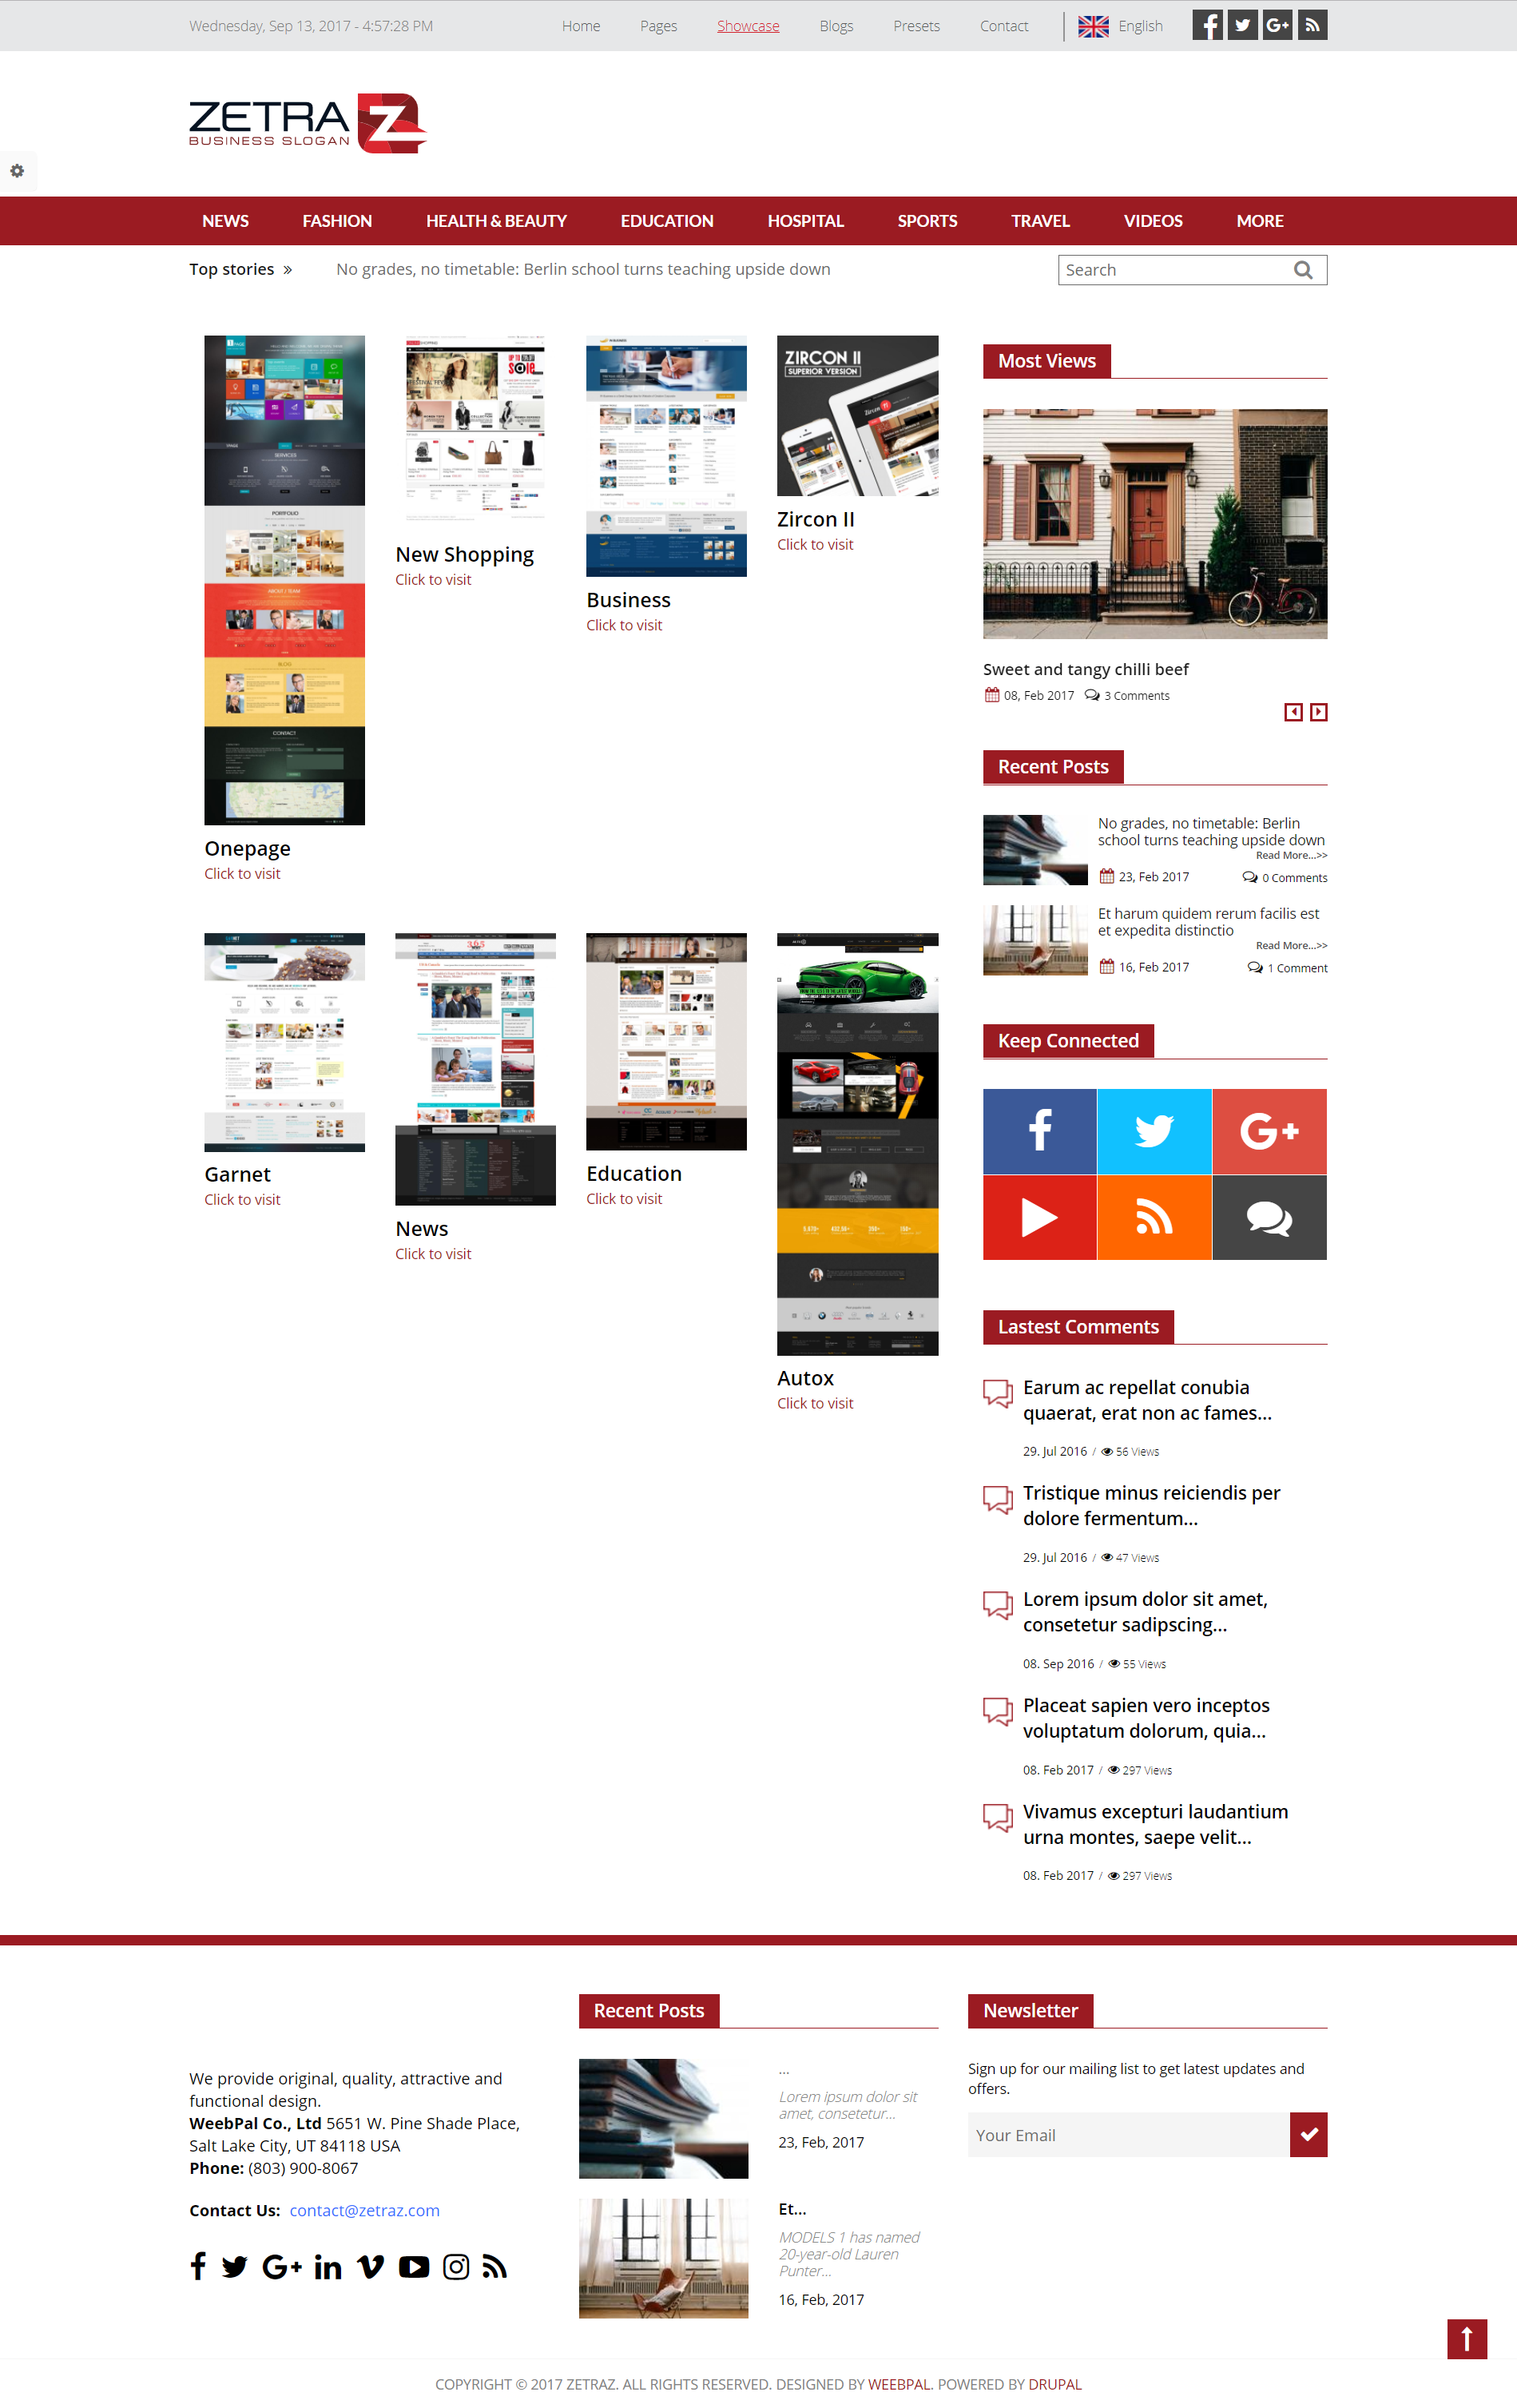
Showcase
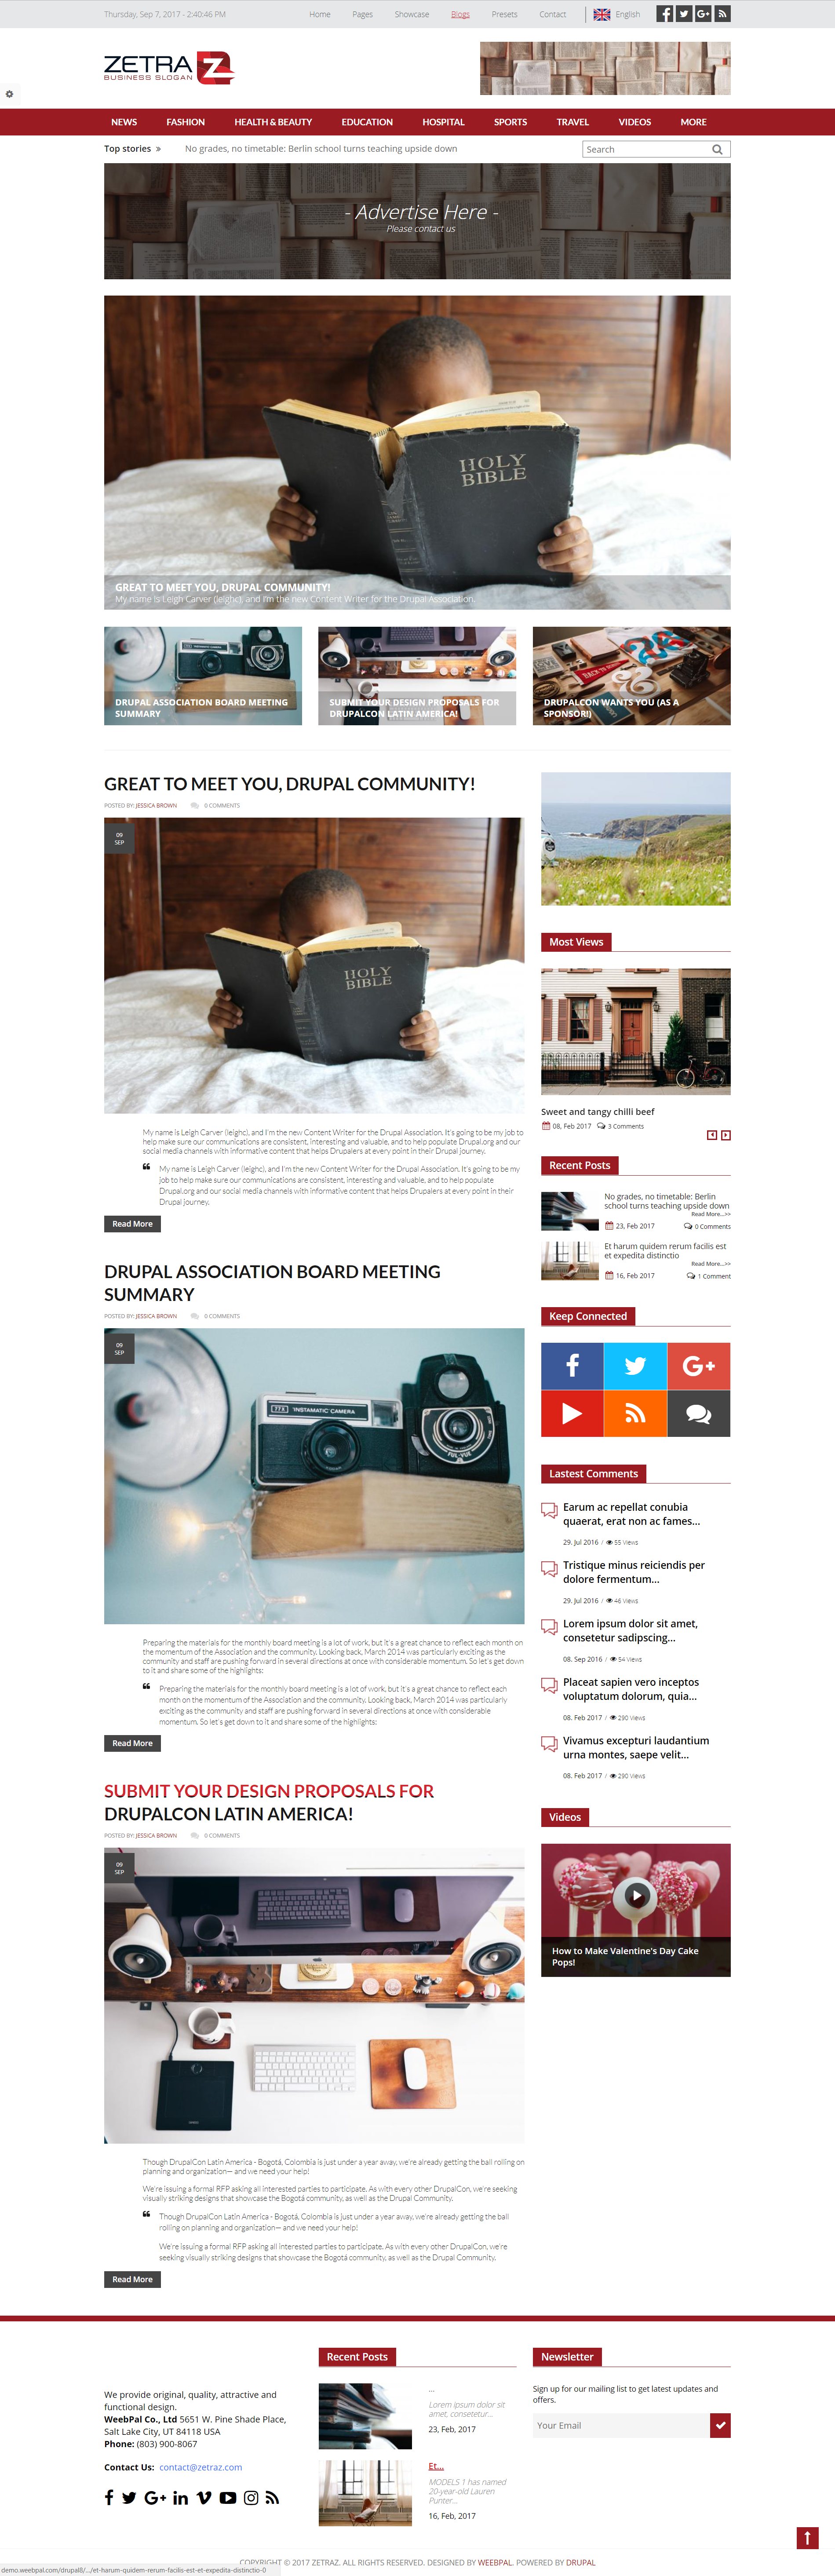
Blogs
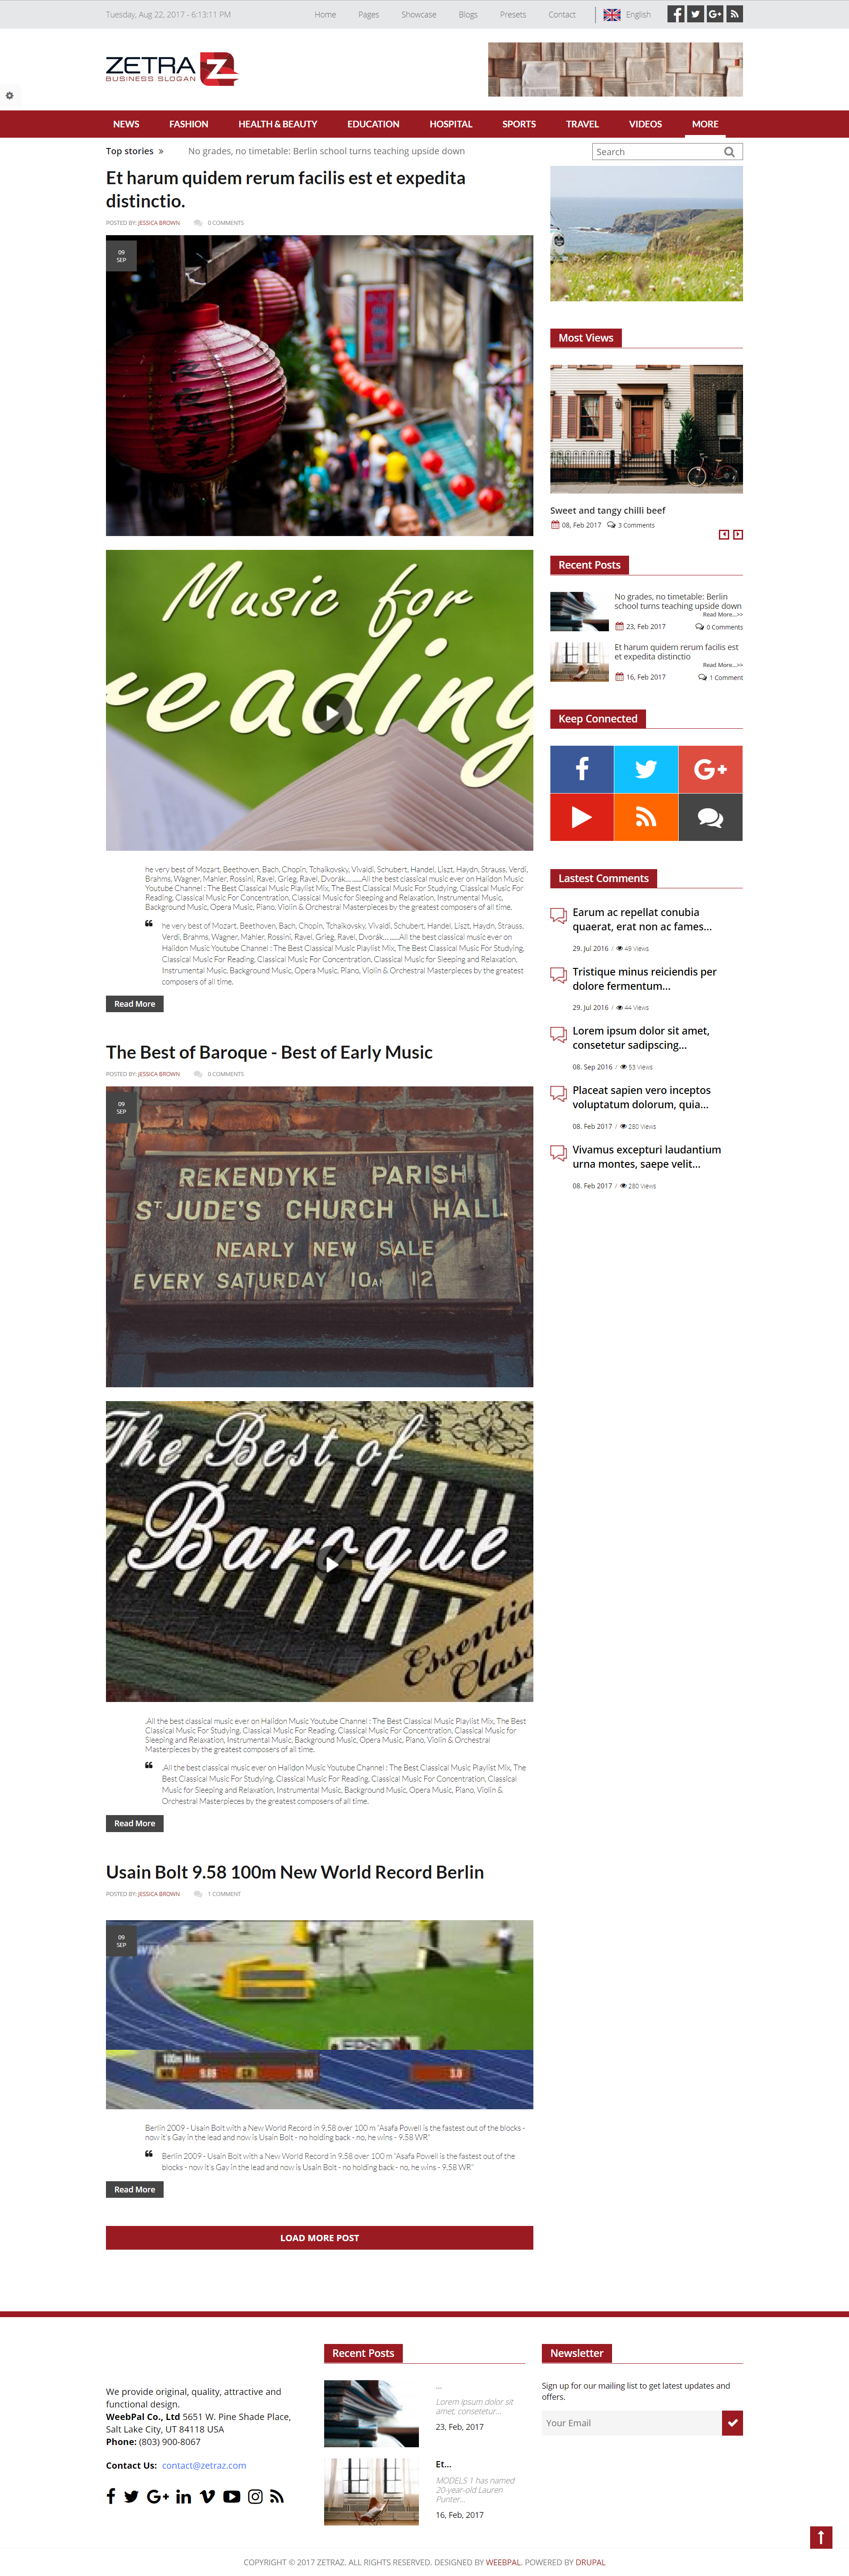
Presets
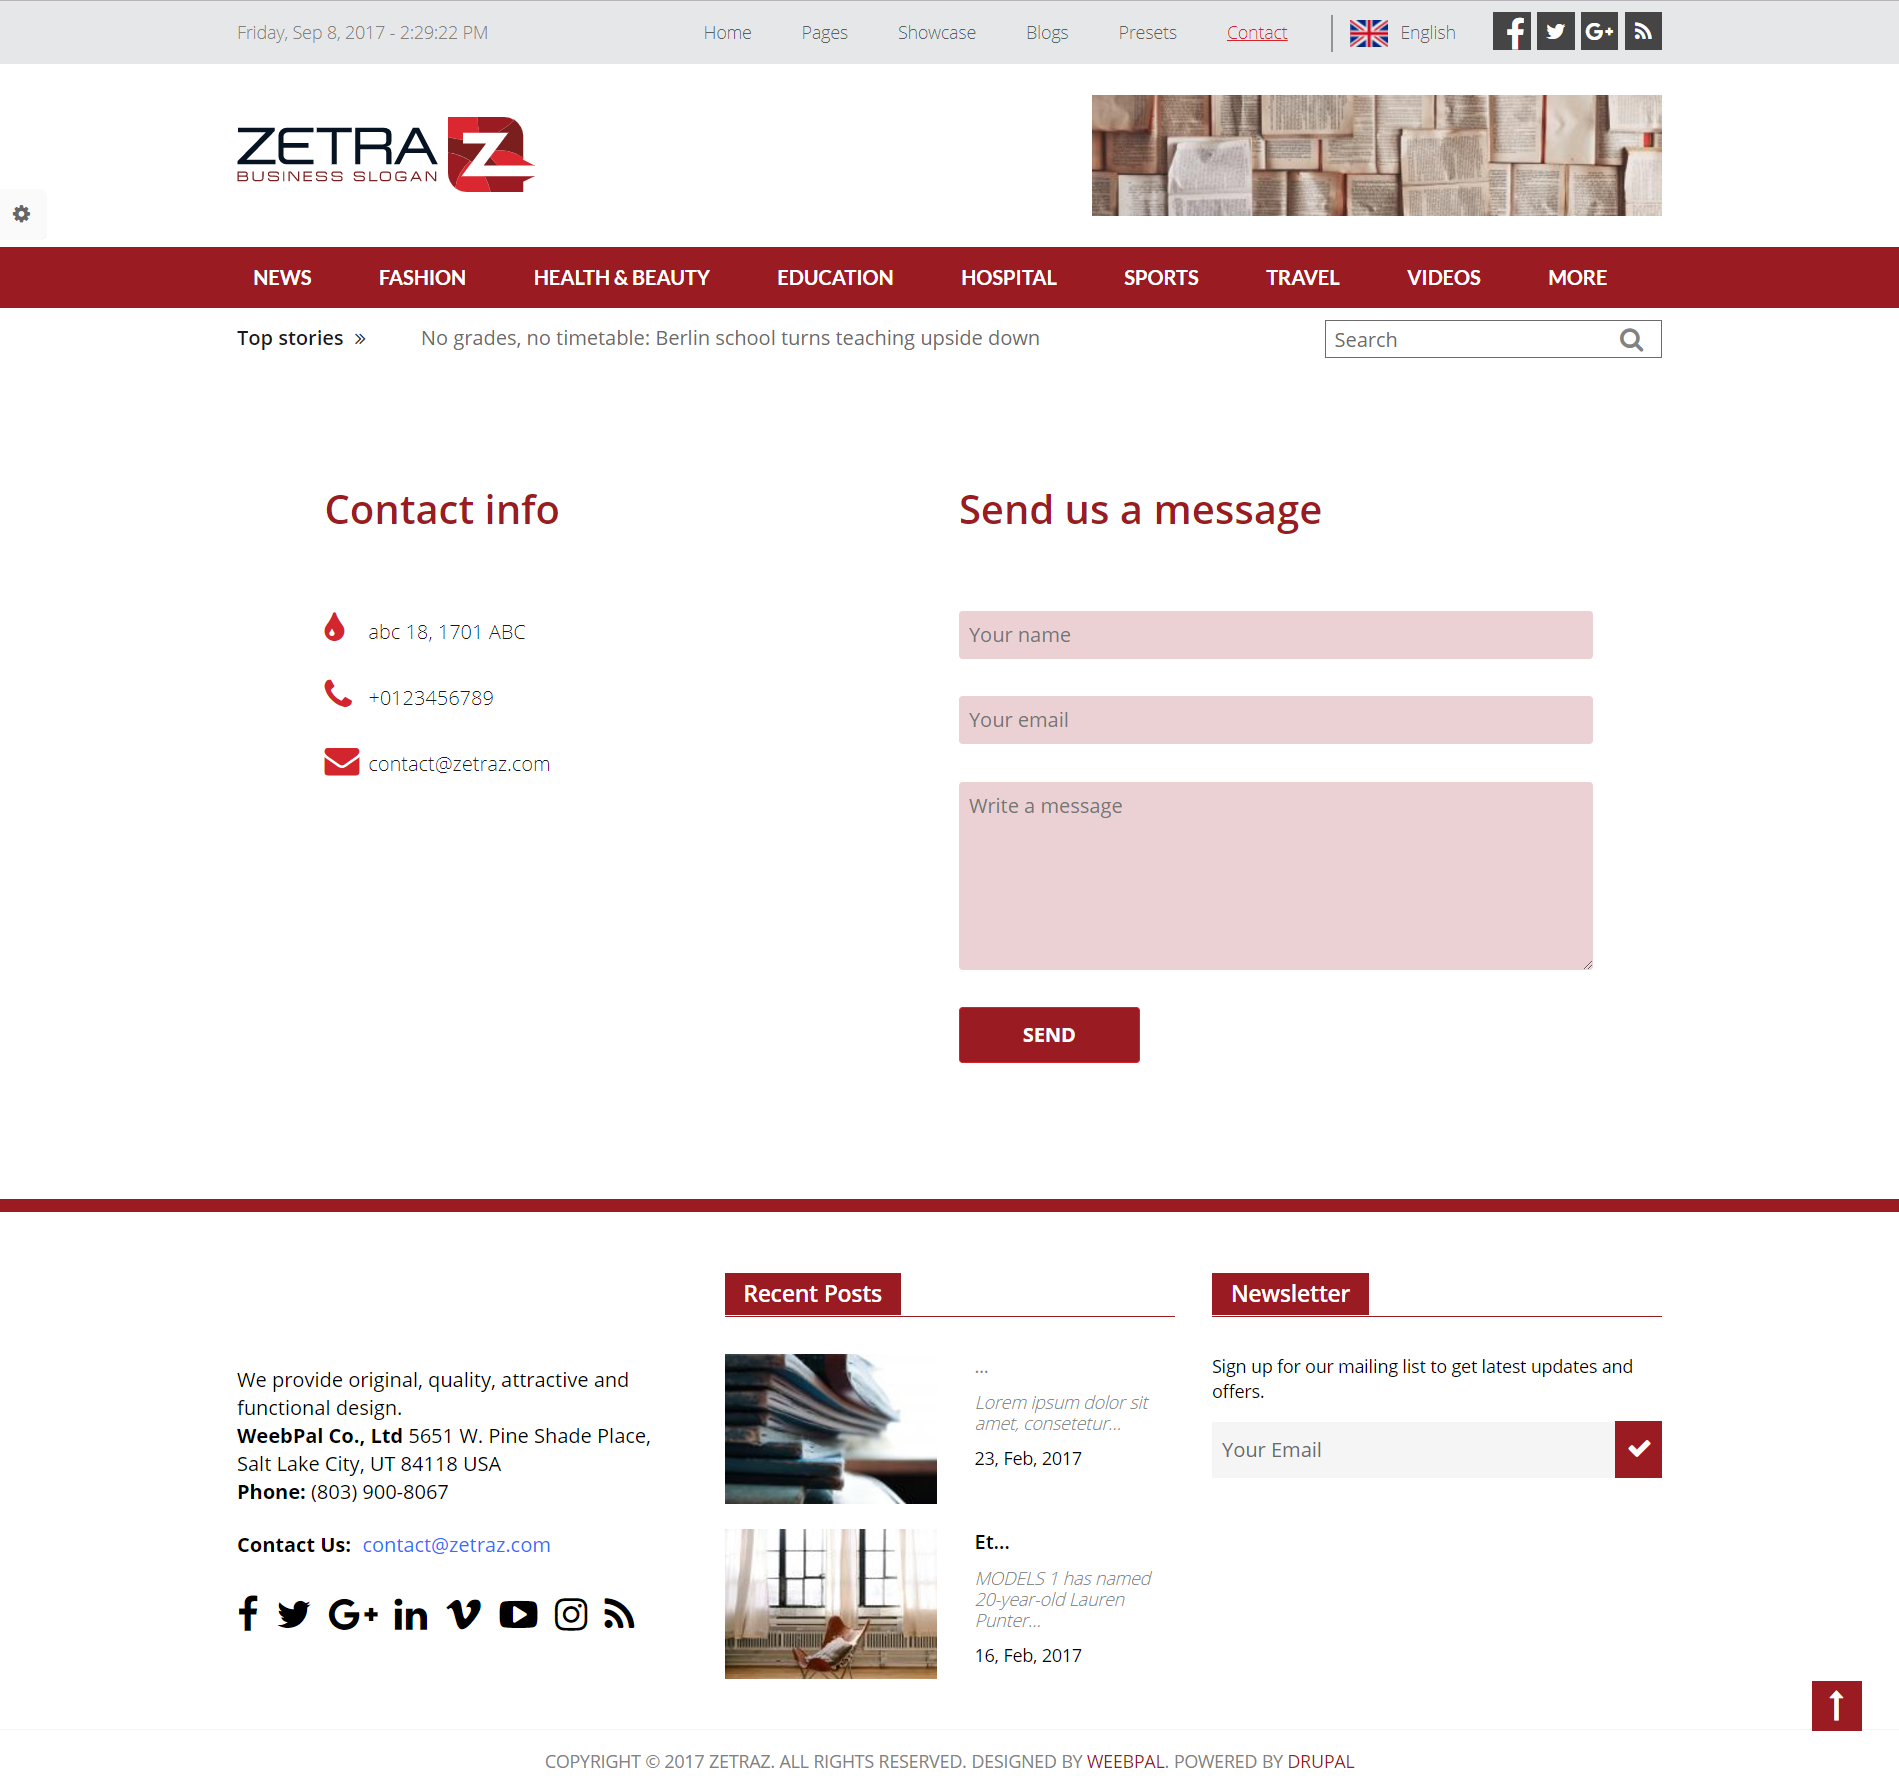
Contact
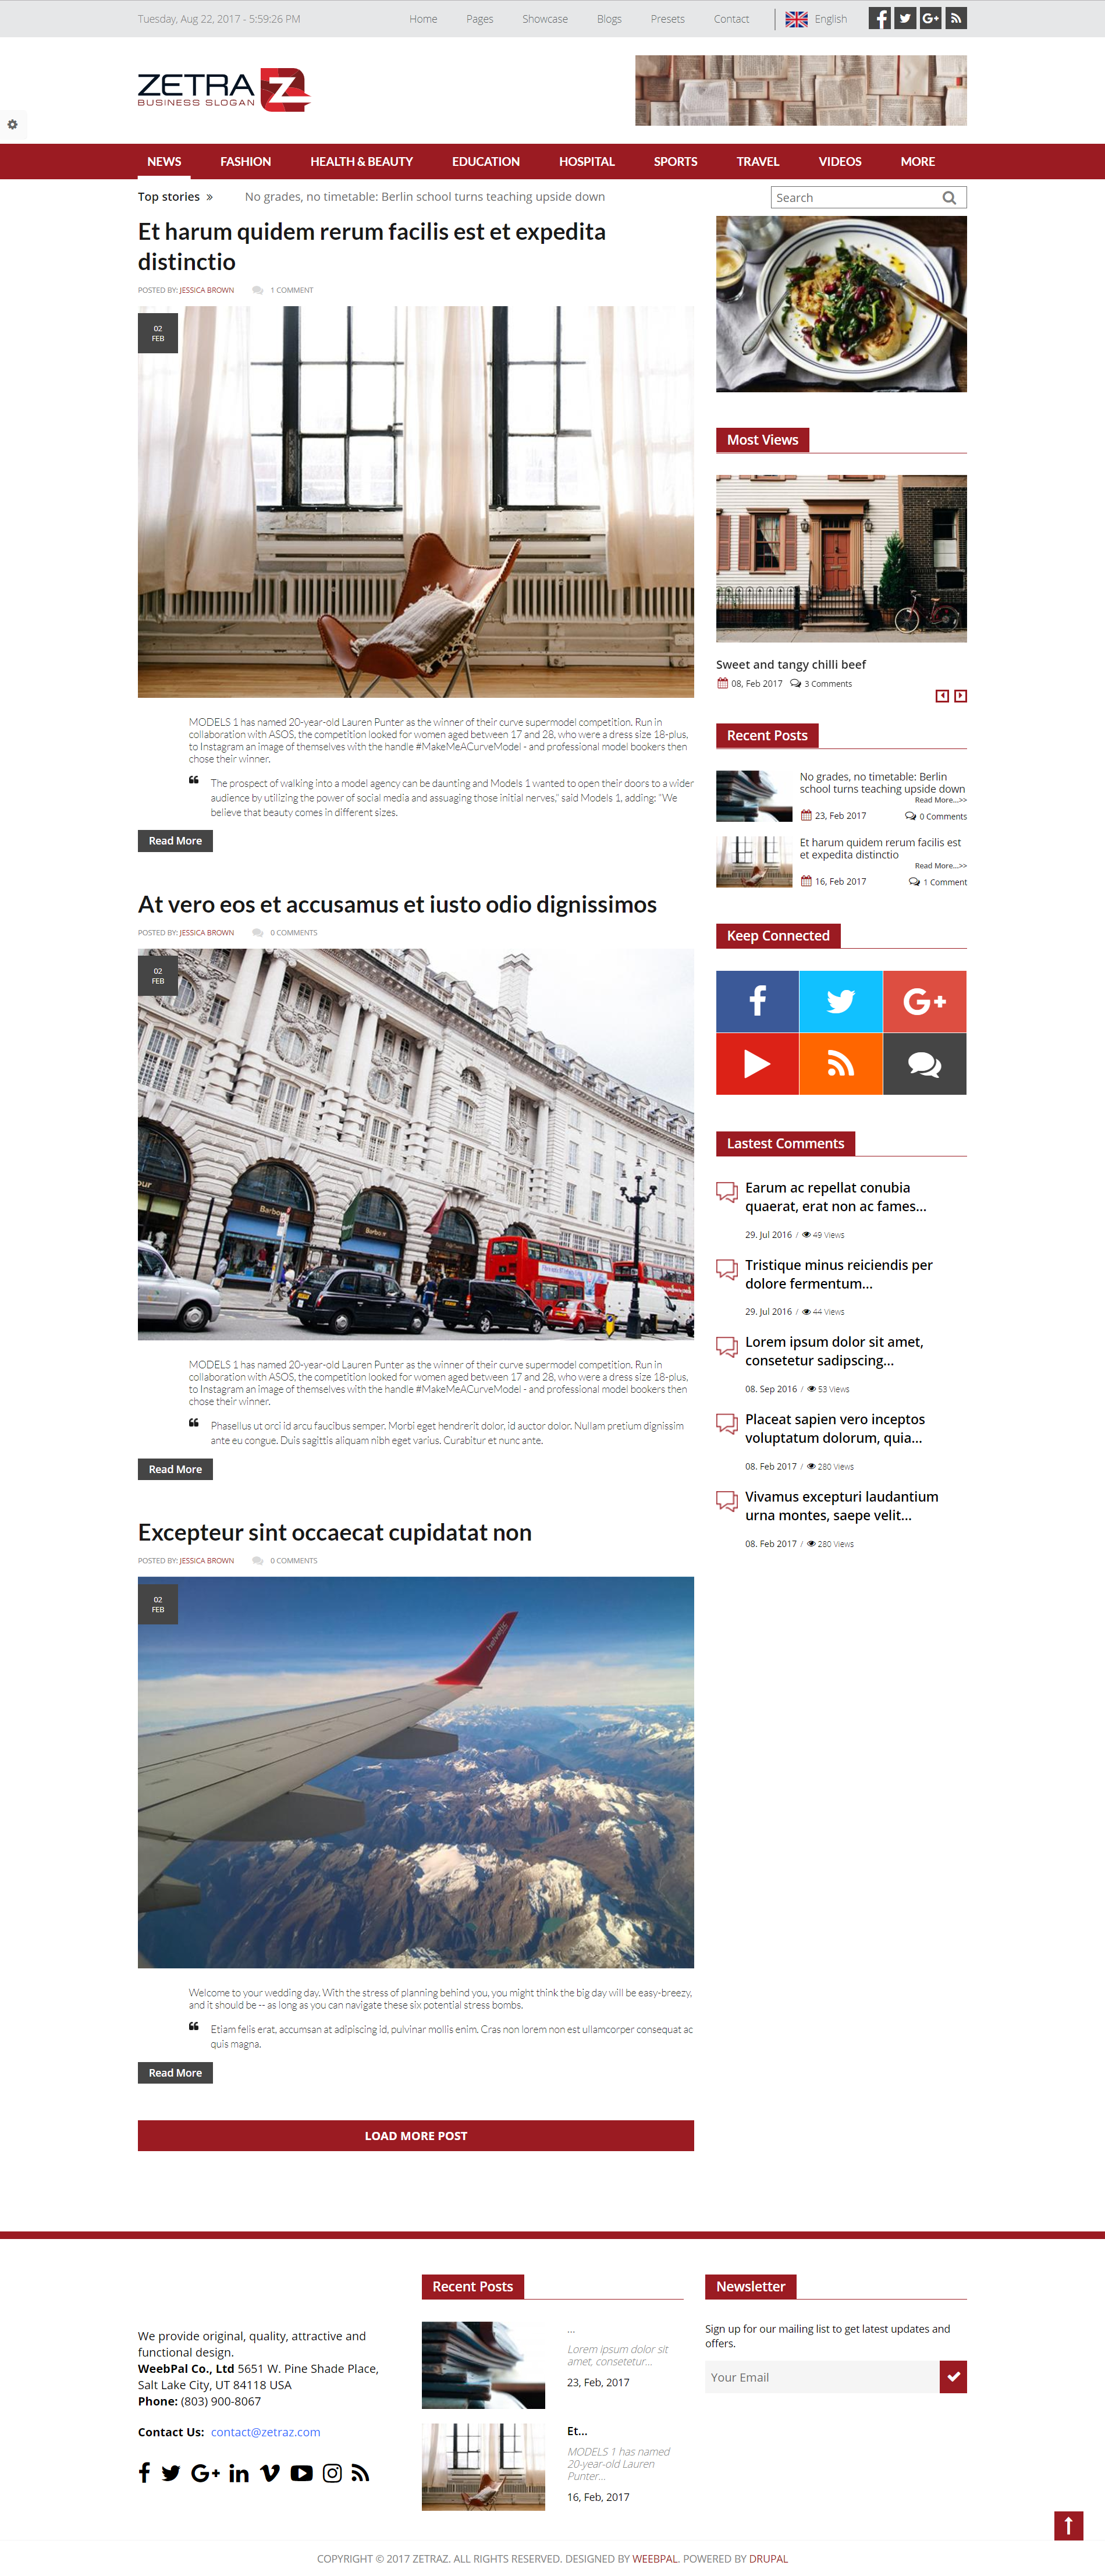
World news
Fashion

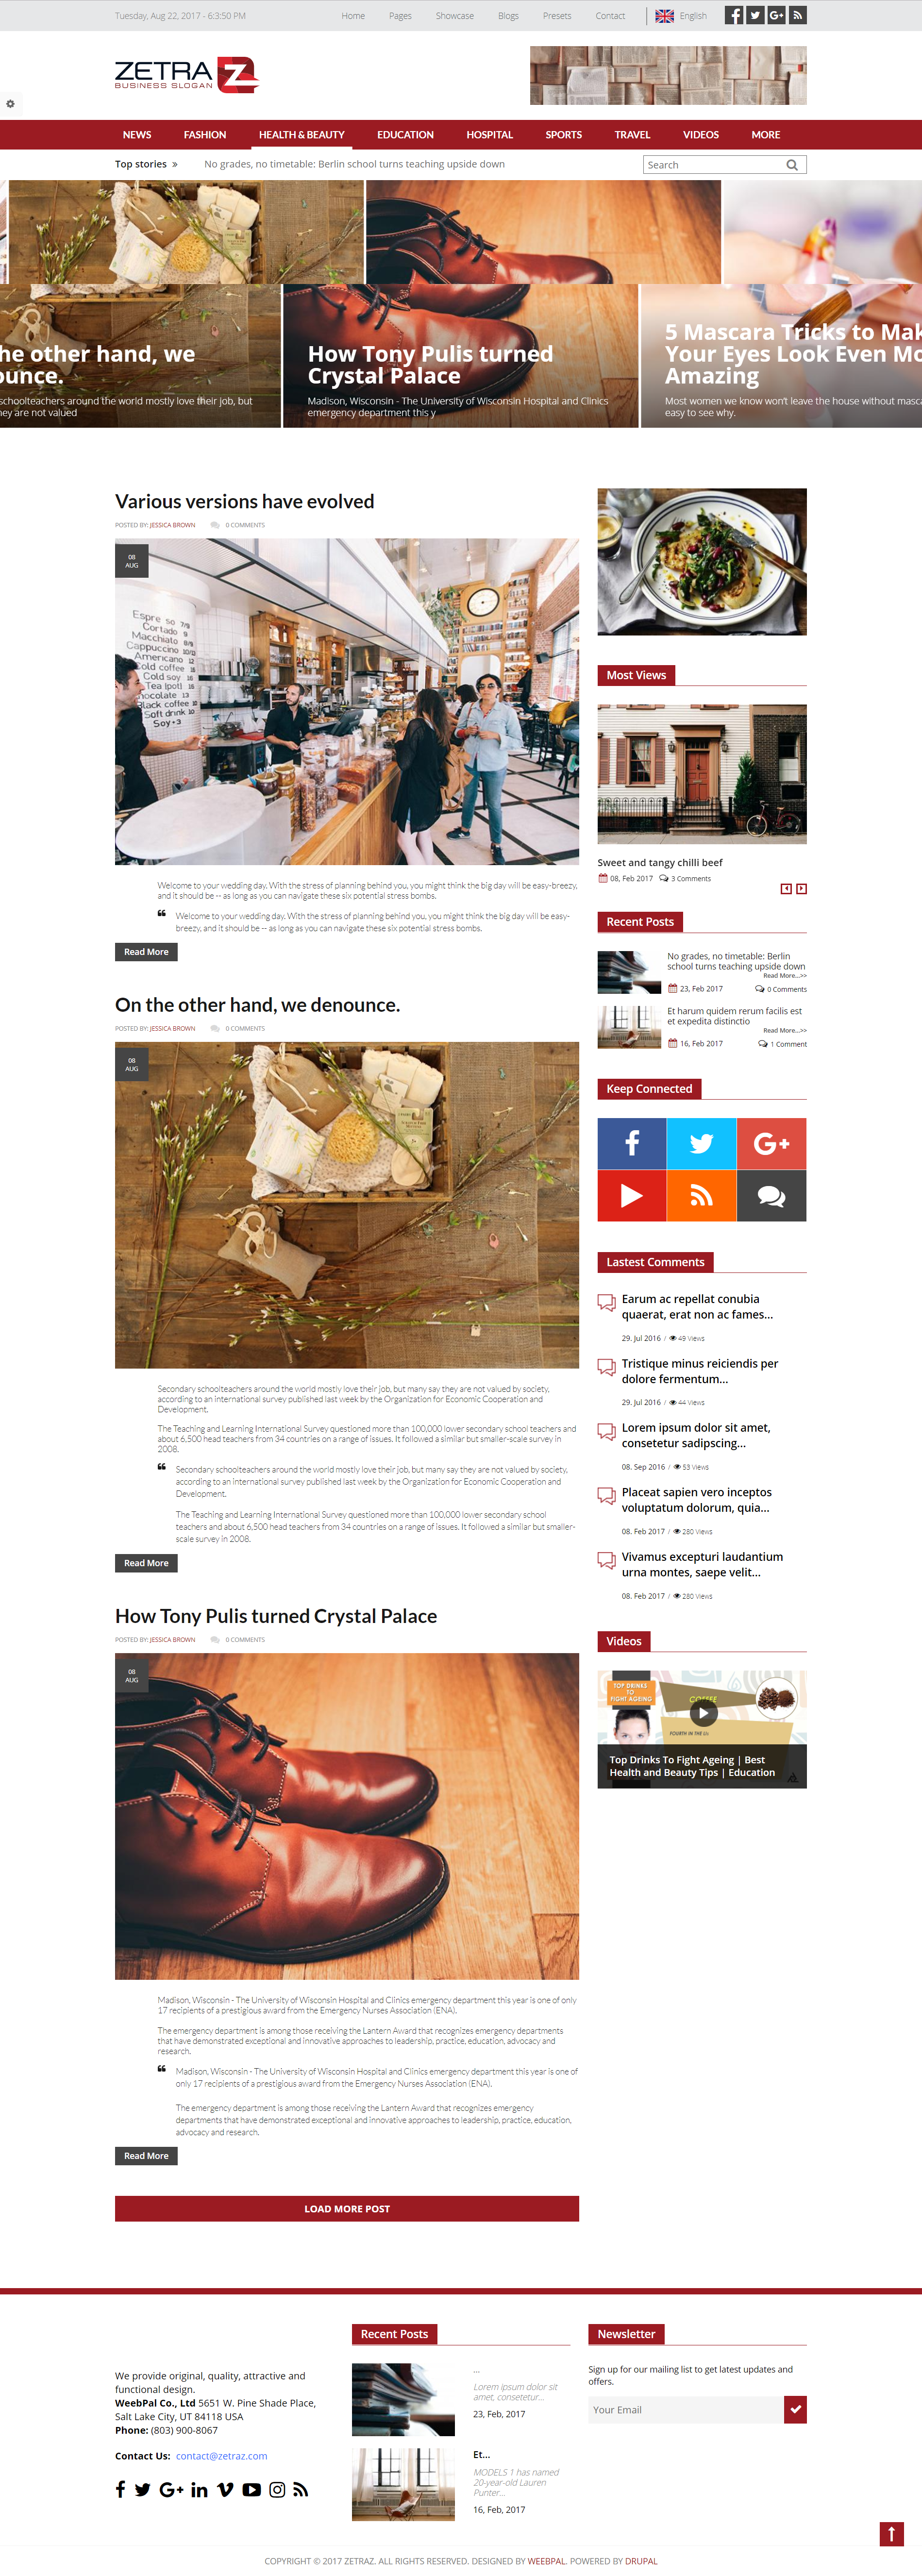
Health & Beauty
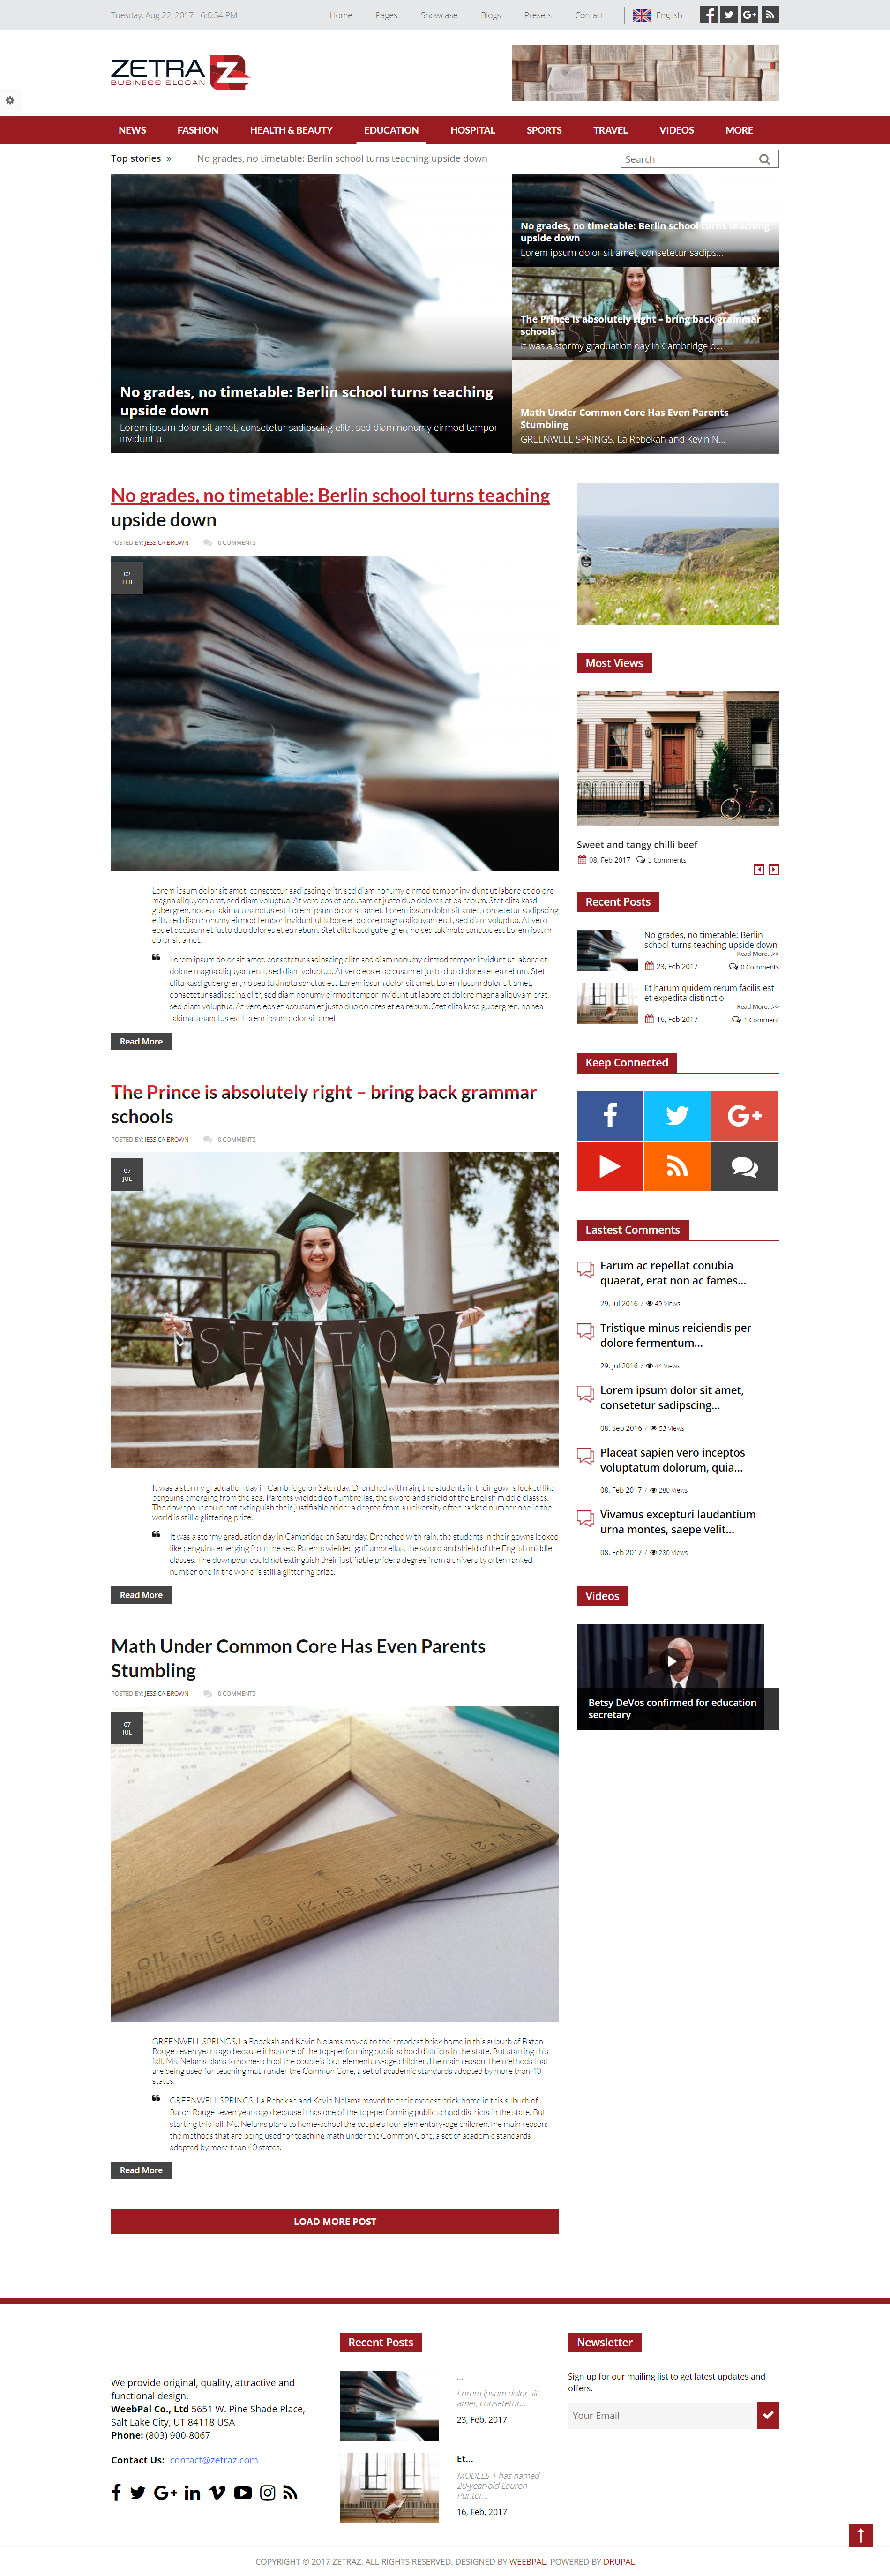
Education
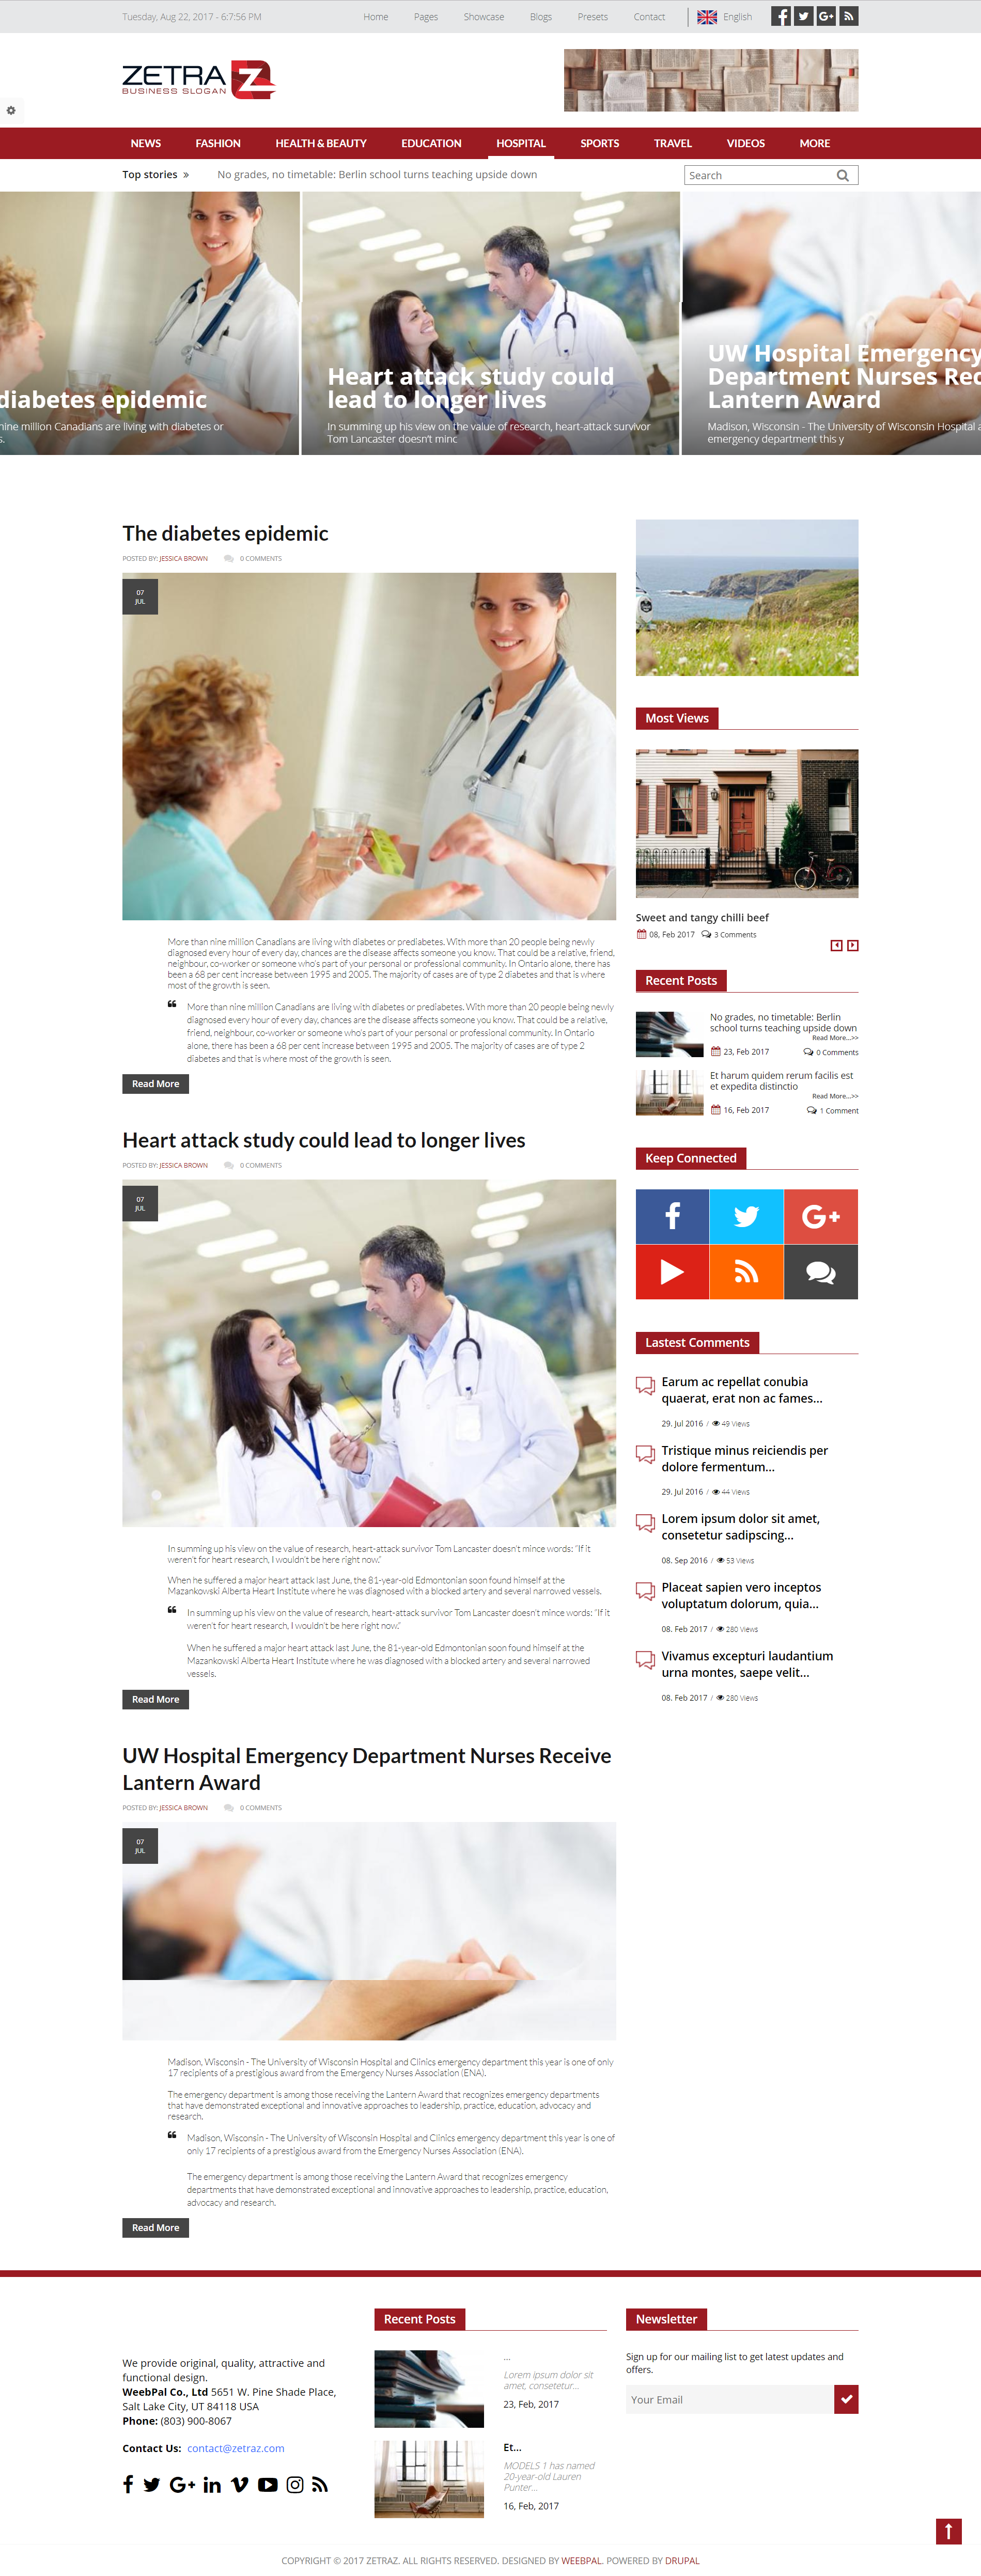
Hospital
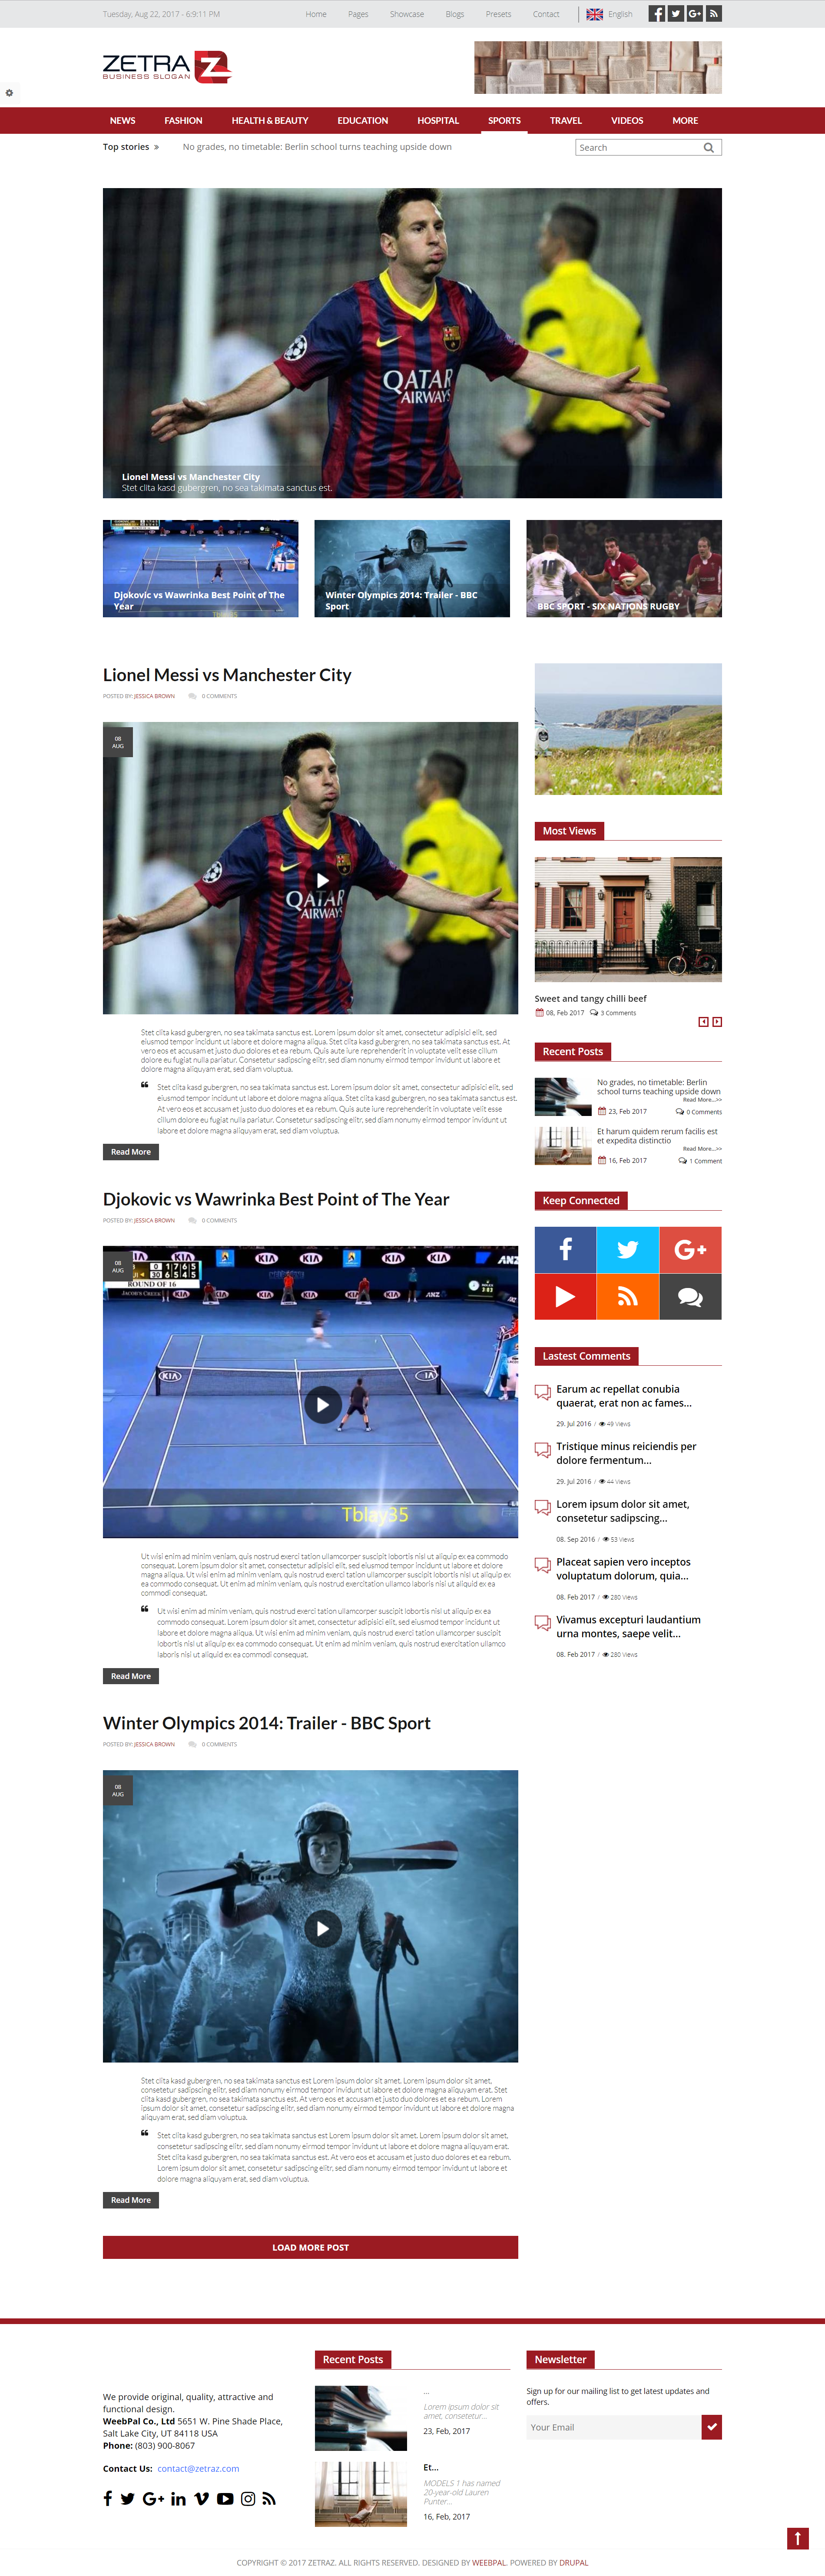
Sports
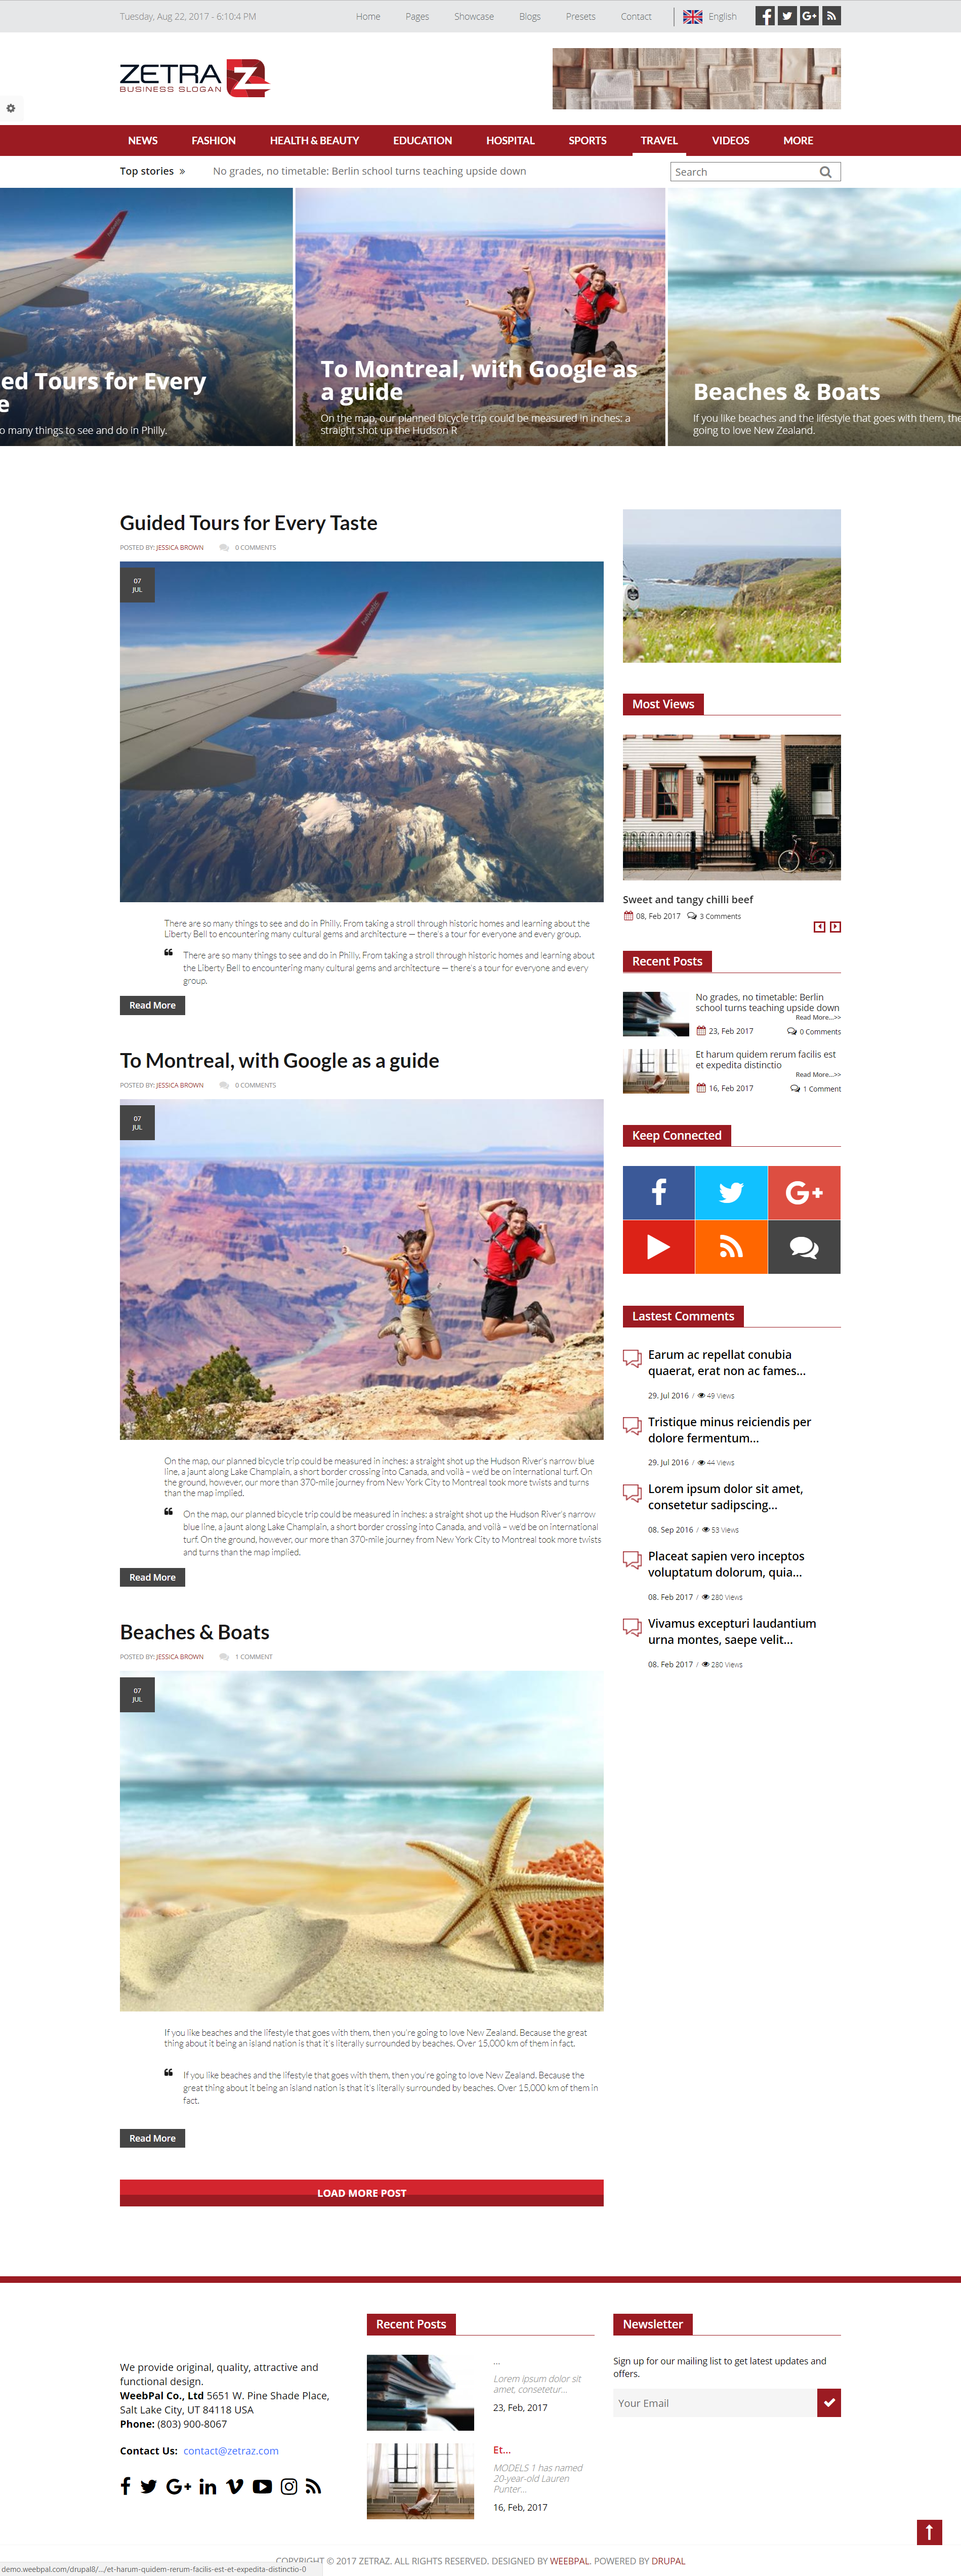
Travel
Video
Food
Music
4. System Configuration
Database
- MySQL 5.5.3/MariaDB 5.5.20/Percona Server 5.5.8 or higher with PDO and an InnoDB-compatible primary storage engine,
- PostgreSQL 9.1.2 or higher with PDO,
- SQLite 3.6.8 or higher
PHP
- PHP 5.5.9 or higher
- PHP 5GD library installed
- Disabled error_reporting flag on production server
- Enabled mod_rewrite in Apache for clean URLs
- Memory limit set up at least 128MB
If you are new to Drupal, please take a reference to System requirements on drupal.org.
5. Module requirements
Core Modules
- Action
- Aggregator
- Automated Cron
- Ban
- Basic Auth
- Big Pipe
- Block
- Block Content
- Book
- Breakpoint
- Locale
- Update manager
Third-party Modules
- Addtoany
- Admin Toolbar
- Block Class
- Blocktabs
- Ctools
- Devel
- Fivestar
- Flexslider
- Flag
- Flippy
- Lang Dropdown
- Libraries
- Like And Dislike
- Memcache
- Pathauto
- Quicktabs
- Sharethis
- Simplenews
- Social Counters
- Taxonomy Menu
- Title
- Token
- Video Embed Field
- Votingapi
Download Drupal core files, and extend your site with modules at here.
Installation
How to install a WeebPal demo package
1. Download one theme package of your choice (e.g: Zetraz D8)
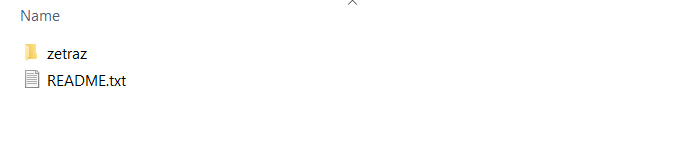
Files included:
- README.txt
- ZetraZ D8 theme: zetraz_d8-8.2.6.zip
- Demo Profile for ZetraZ D8: zetraz_d8-demo-8.2.6.zip This demo package includes all source codes and content, including sample images. This package will be used to build a site like our demo for the theme easily.
The below steps will give you the installation guide so that you can build your website to look exactly like the ZetraZ D8 Demo
- zetraz_d8-demo-8.2.6.zip
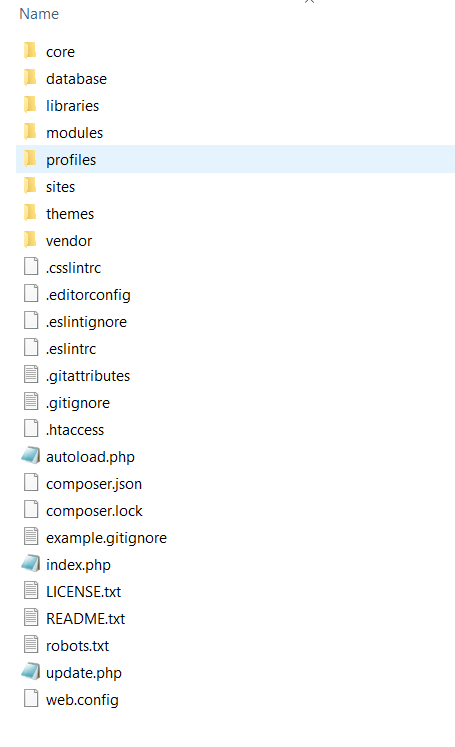
2. Extract zetraz_d8-demo-8.2.6.zip above and copy it into your host, and rename the directory
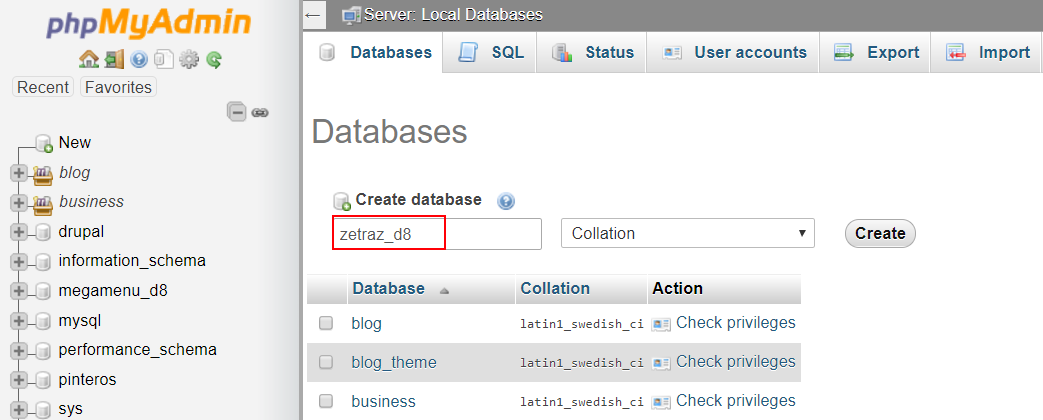
3. Access your MySQL database and create a new database (e.g: zetraz_d8) and user account. Don't forget to add correct permissions to new user to access the database
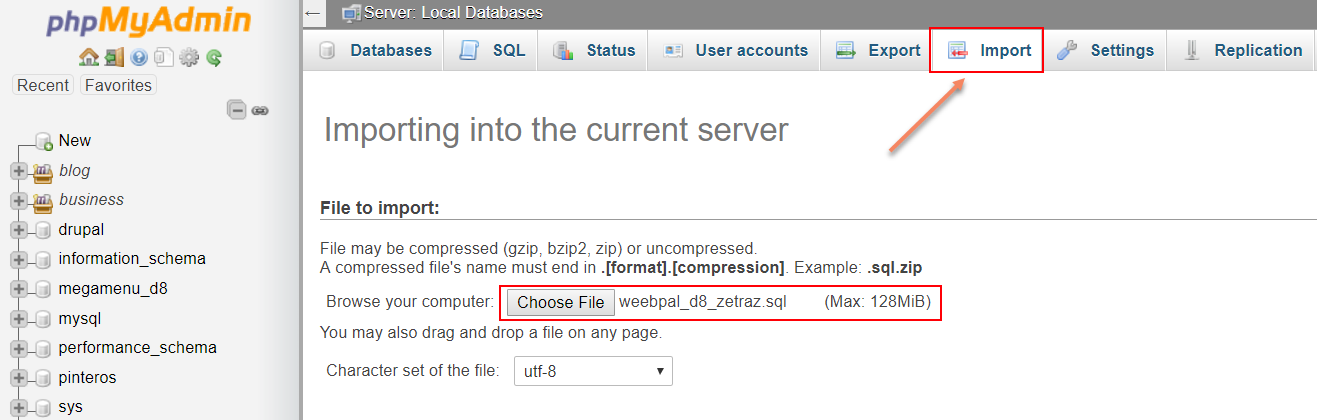
4. In the demo directory database/ (or profile/weebpal), you can find database dump named weebpal_d8_zetraz.sql.
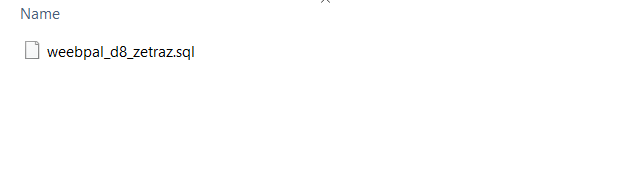
Import this file into new database.
5. Now, you need to modify sites/default/default.settings.php file. Clone default.settings.php file, then rename it "settings.php"
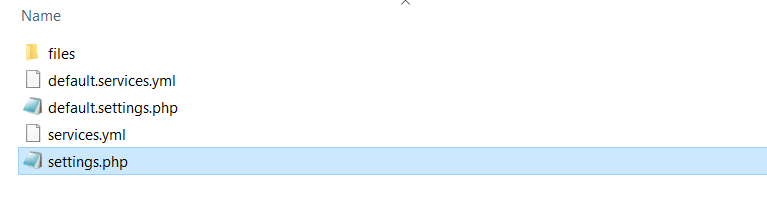
6. Open settings.php, then locate the $database array and set proper credentials.

                $databases['default']['default'] = array (
                    'database' => 'zetraz_d8',
                    'username' => 'root',
                    'password' => '',
                    'host' => 'localhost',
                    'port' => '3306',
                    'driver' => 'mysql',
                    'prefix' => '',
                    'collation' => 'utf8mb4_general_ci',
                );
When using this installation, you are installing everything from our preview server. So don't forget to set proper values for settings: email address, admin password, etc.
7. Open the browser and visit your website with the prepopulated content & layout exactly like our Zetraz D8 Demo
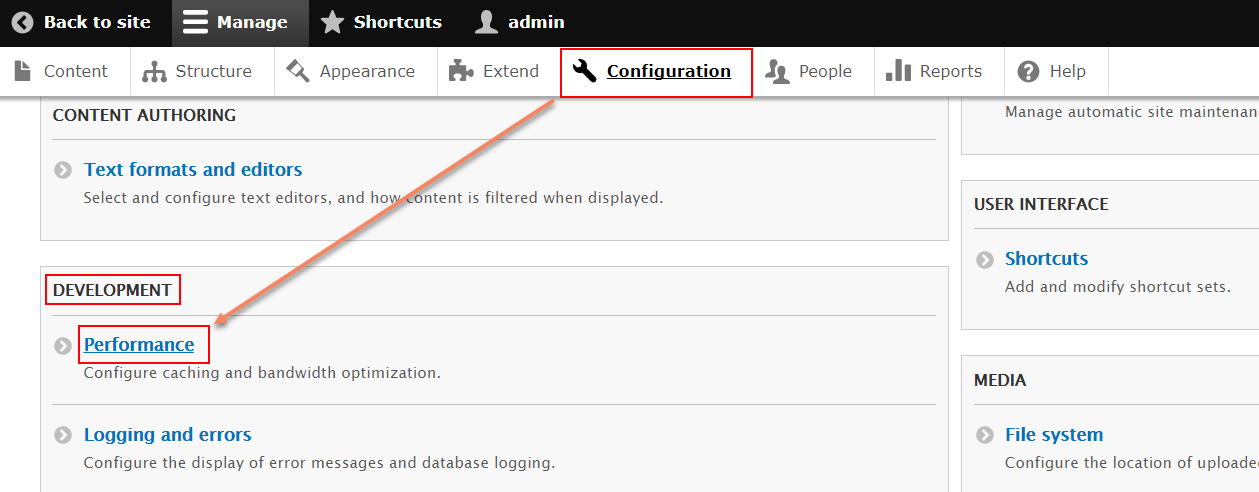
8. In site, navigate to Configuration > Development click Performance
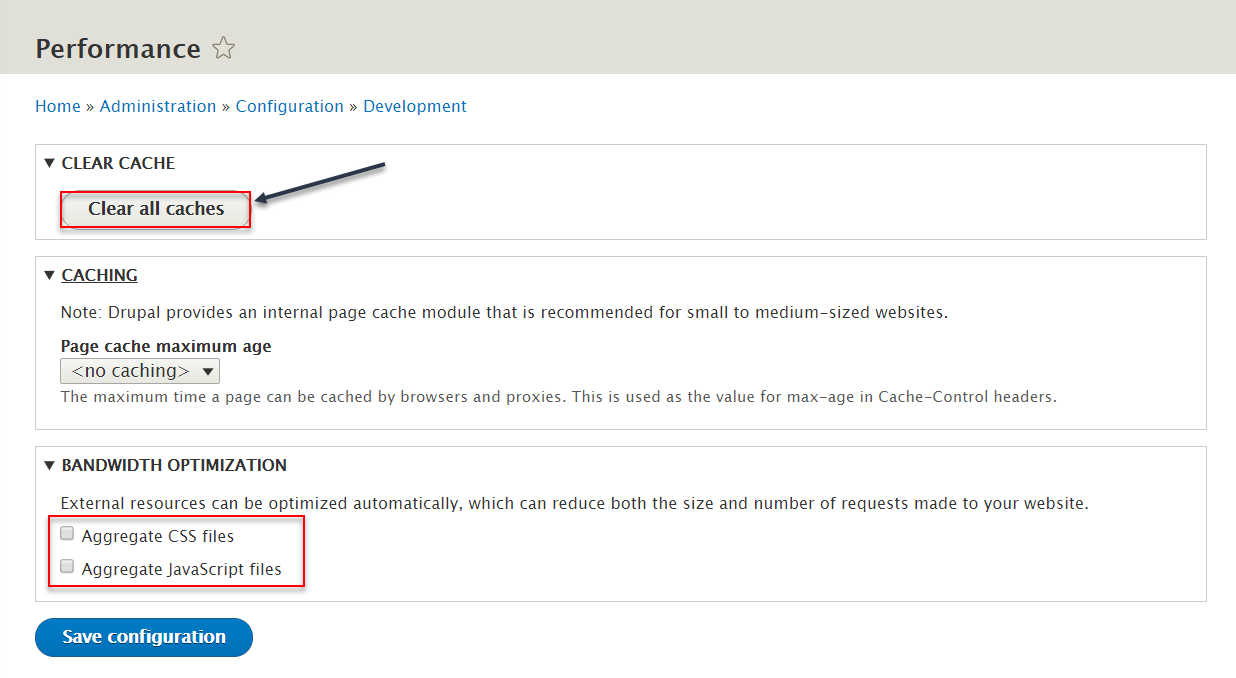
9. At Configuration Performance page, click Clear all cache button
Now, you can visit administrator site with the admin account to delete the unnecessary contents and add the new ones.
How to install a WeebPal theme for Drupal developers
If you're an experienced Drupal user or if you want to build the theme from zero with only the basic appearance of ZetraZ D8 Theme, find this guide in handy.
1. Install Drupal
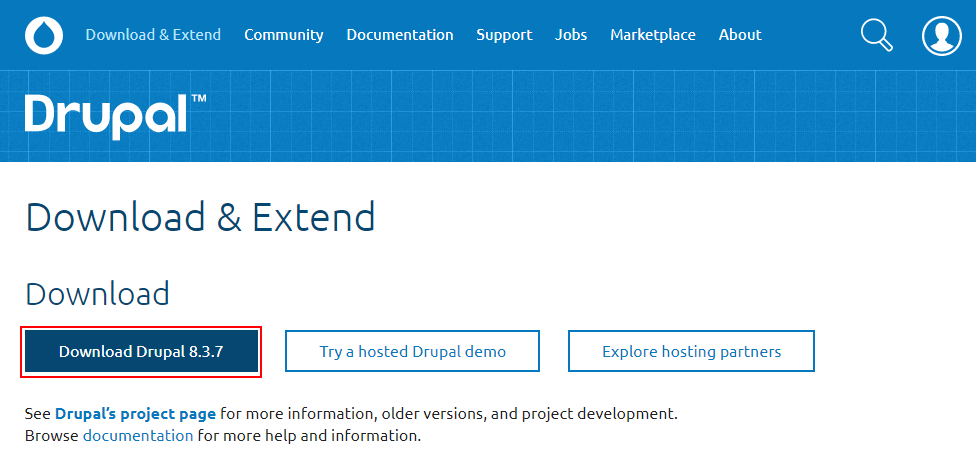
1. Go to Drupal download page and download the latest version of Drupal 8
2. Extract and copy Drupal folder to your host and rename the directory (e.g: zetraz_d8)
Follow steps below to install a Drupal site only:3. Access to database and create a new database with a name such as zetraz d8.
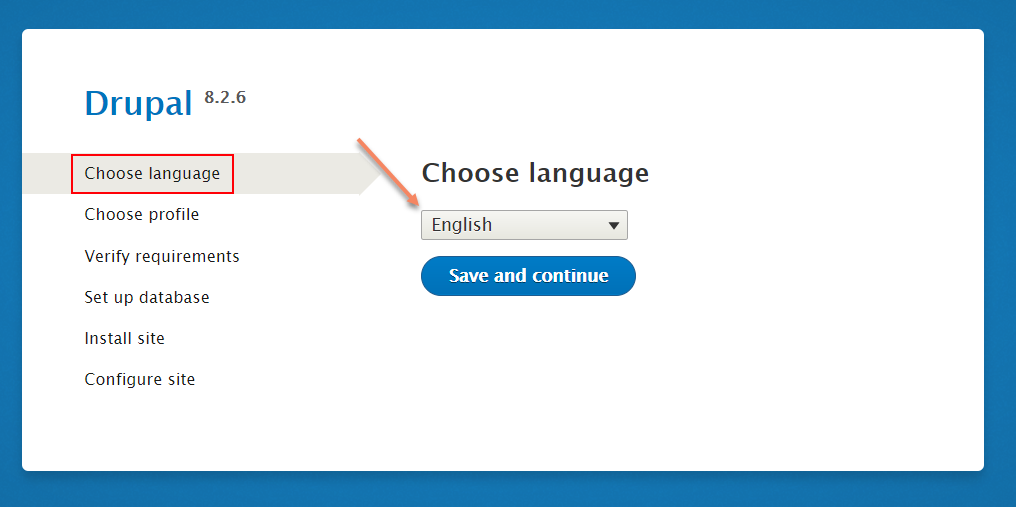
4. Open browser and navigate to your website.
5. Choose language => click Save and continue button.
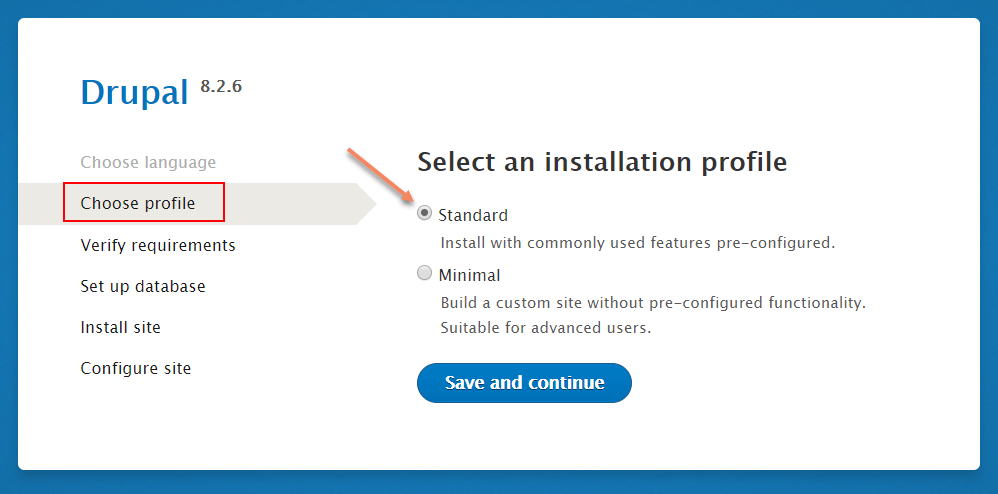
6. Select Standard => click Save and continue button.
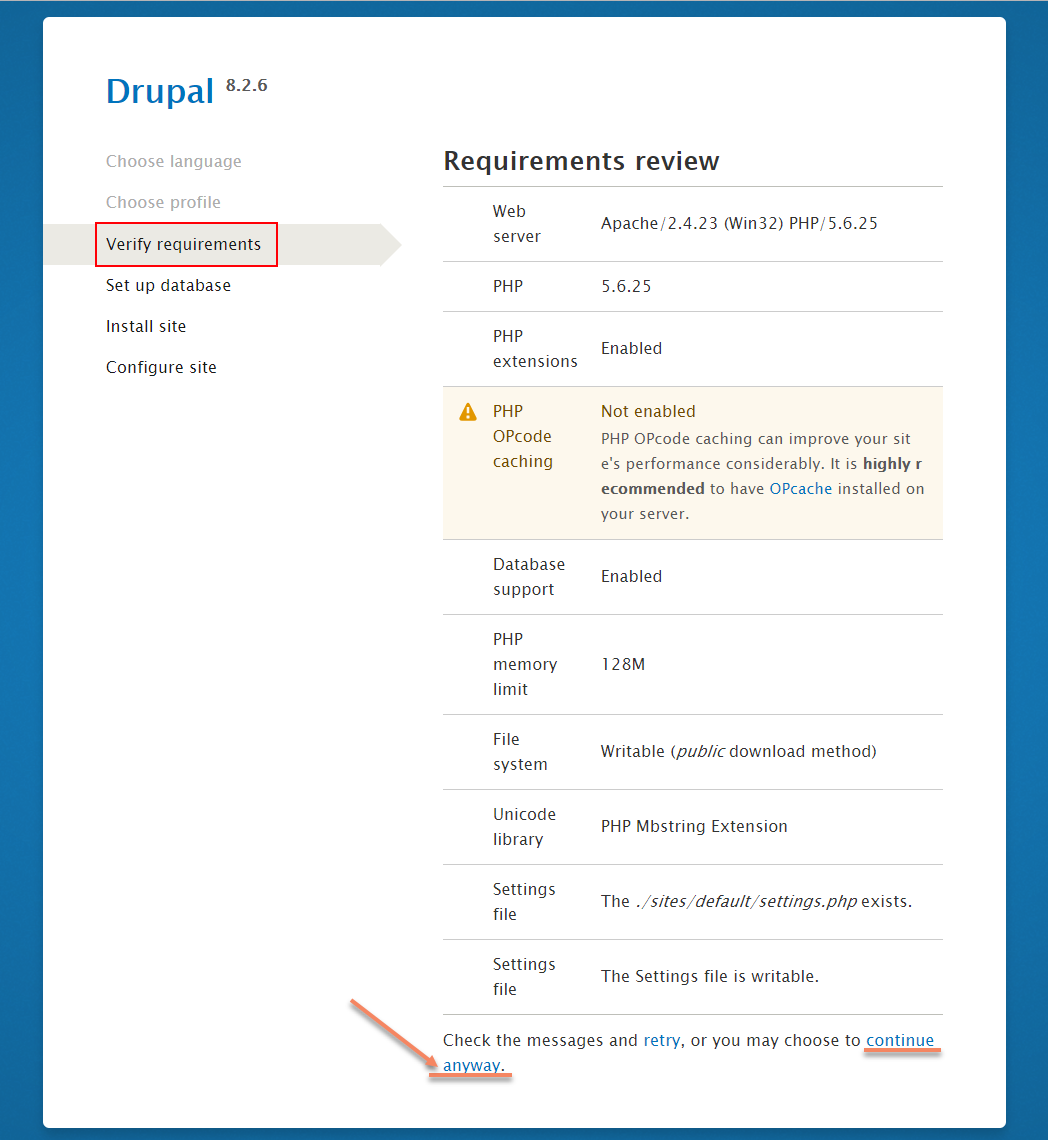
7. Verify requirements => click continue anyway link.
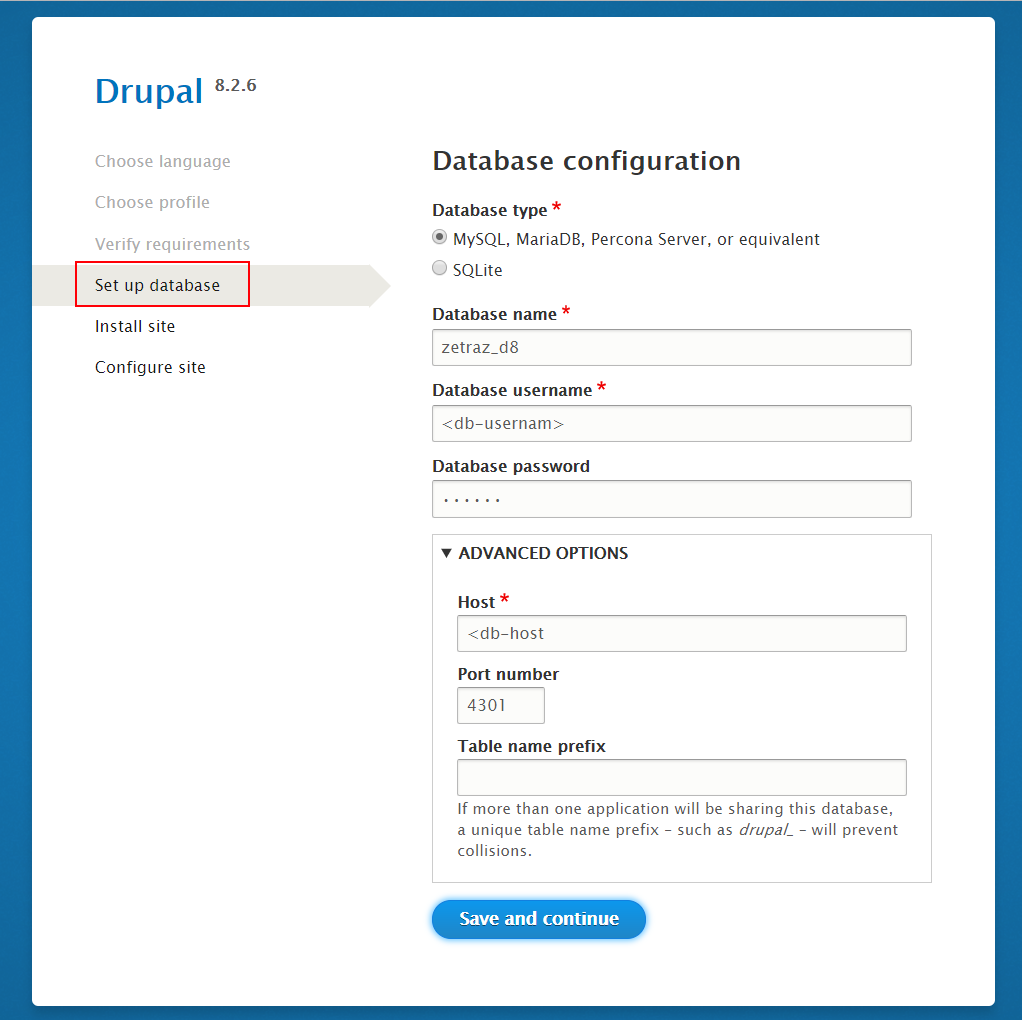
8. Enter database parameters => click Save and continue button.
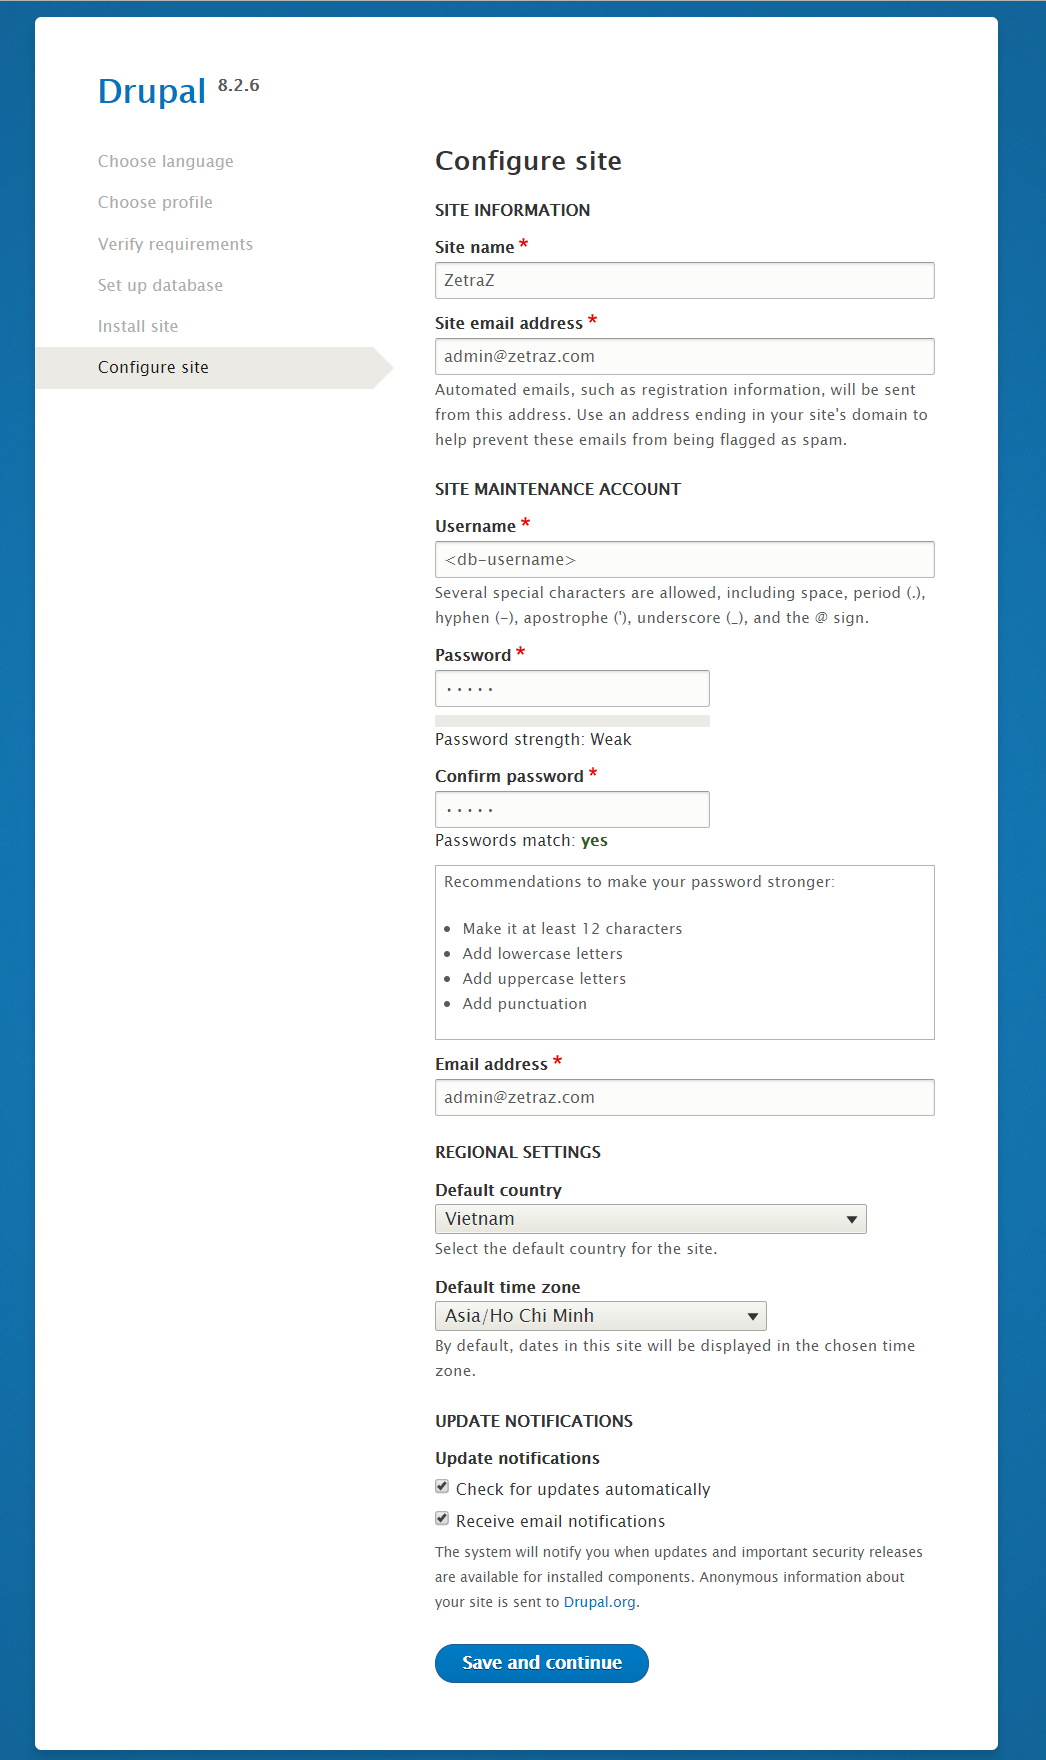
9. Enter site information => click Save and continue button.
10. Click Visit your new site and you will have a new site.
You can refer the guide from drupal.org to delve more details about drupal installation.
2. Install ZetraZ D8 Theme
- Extract ZetraZ theme .ZIP file:
- zetraz_d8-8.2.6.zip
-
Move this theme into your Drupal folder: sites/all/themes
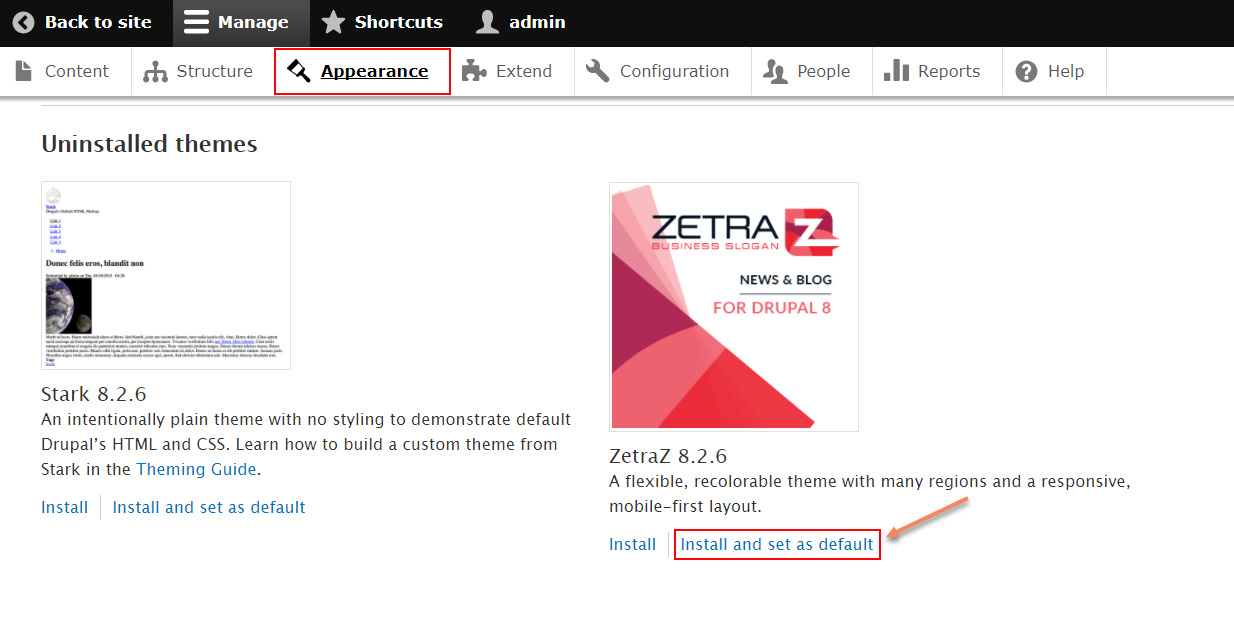
-
Navigate to Appearance > Choose Install and set default Onepage theme
3. Install Required Modules
Now that you've enabled Onepage theme, you will install and enable the required modules (listed in the Module Requirements section) to customize and use them.
If you don't know how to install the contributed modules, this tutorial is an essential guide.
Cheat to install modules & theme:
- Extract zetraz_d8-8.2.6.zip
- Open extracted folder, go to sites/all and copy all folders inside (modules, themes, libraries)
- Paste them to your host, folder sites/all
Note: See this guide to get more details about installation
Taxonomy configuration
Quick Information
- Taxonomy: Taxonomy can be simply understood as category management using organizational keywords known in other systems as categories, tags or metadata. It allows you to connect, relate and classify your website's content. In Drupal, these terms are gathered within "vocabularies". The Taxonomy module allows you to create, manage and apply those vocabularies.
- Vocabulary: for example product category, tag, provider name, ...
- Term: the items in each vocabulary. For example: vocabulary product category has some terms: laptop, pc, mobile, tablet, camera, headphone, ...
- For more information about taxonomy, please see: Organizing content with taxonomies
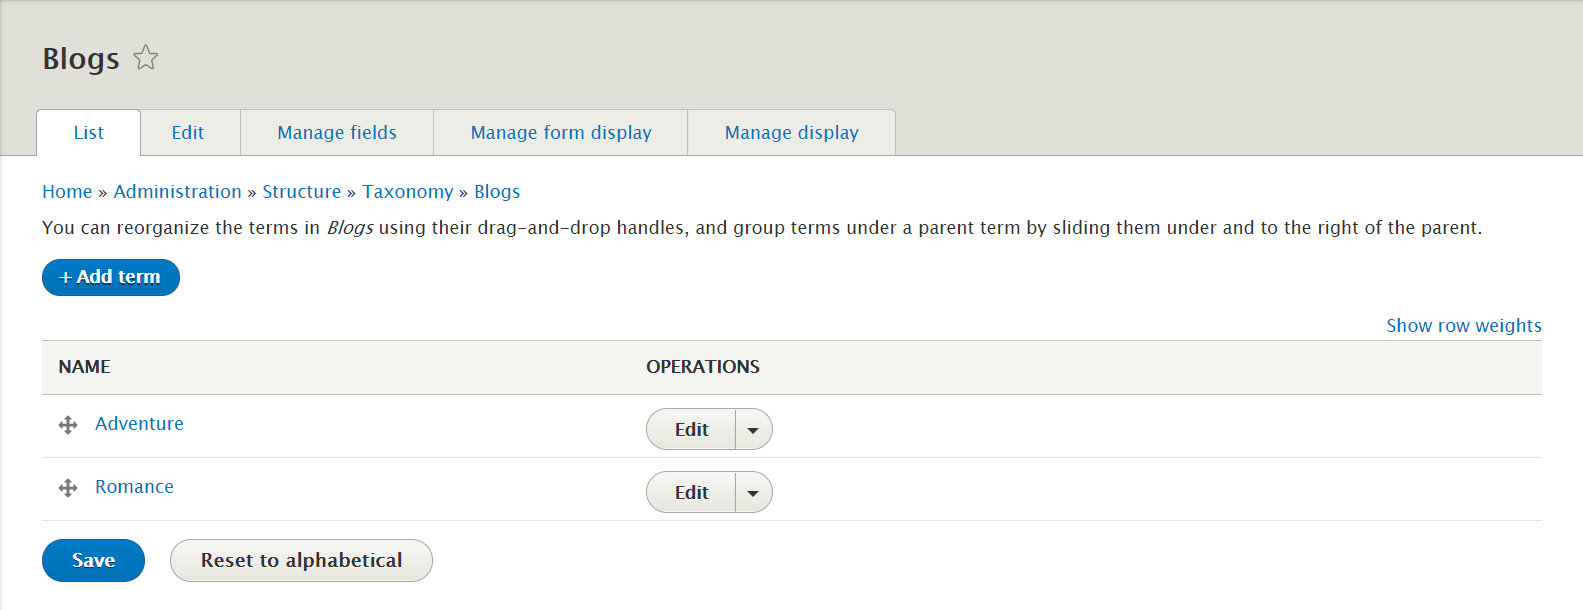
Step 1: Navigate to Structure > Taxonomy to create vocabularies as the following:

Then, add terms for each vocabulary
Step 2: Terms of Blogs:
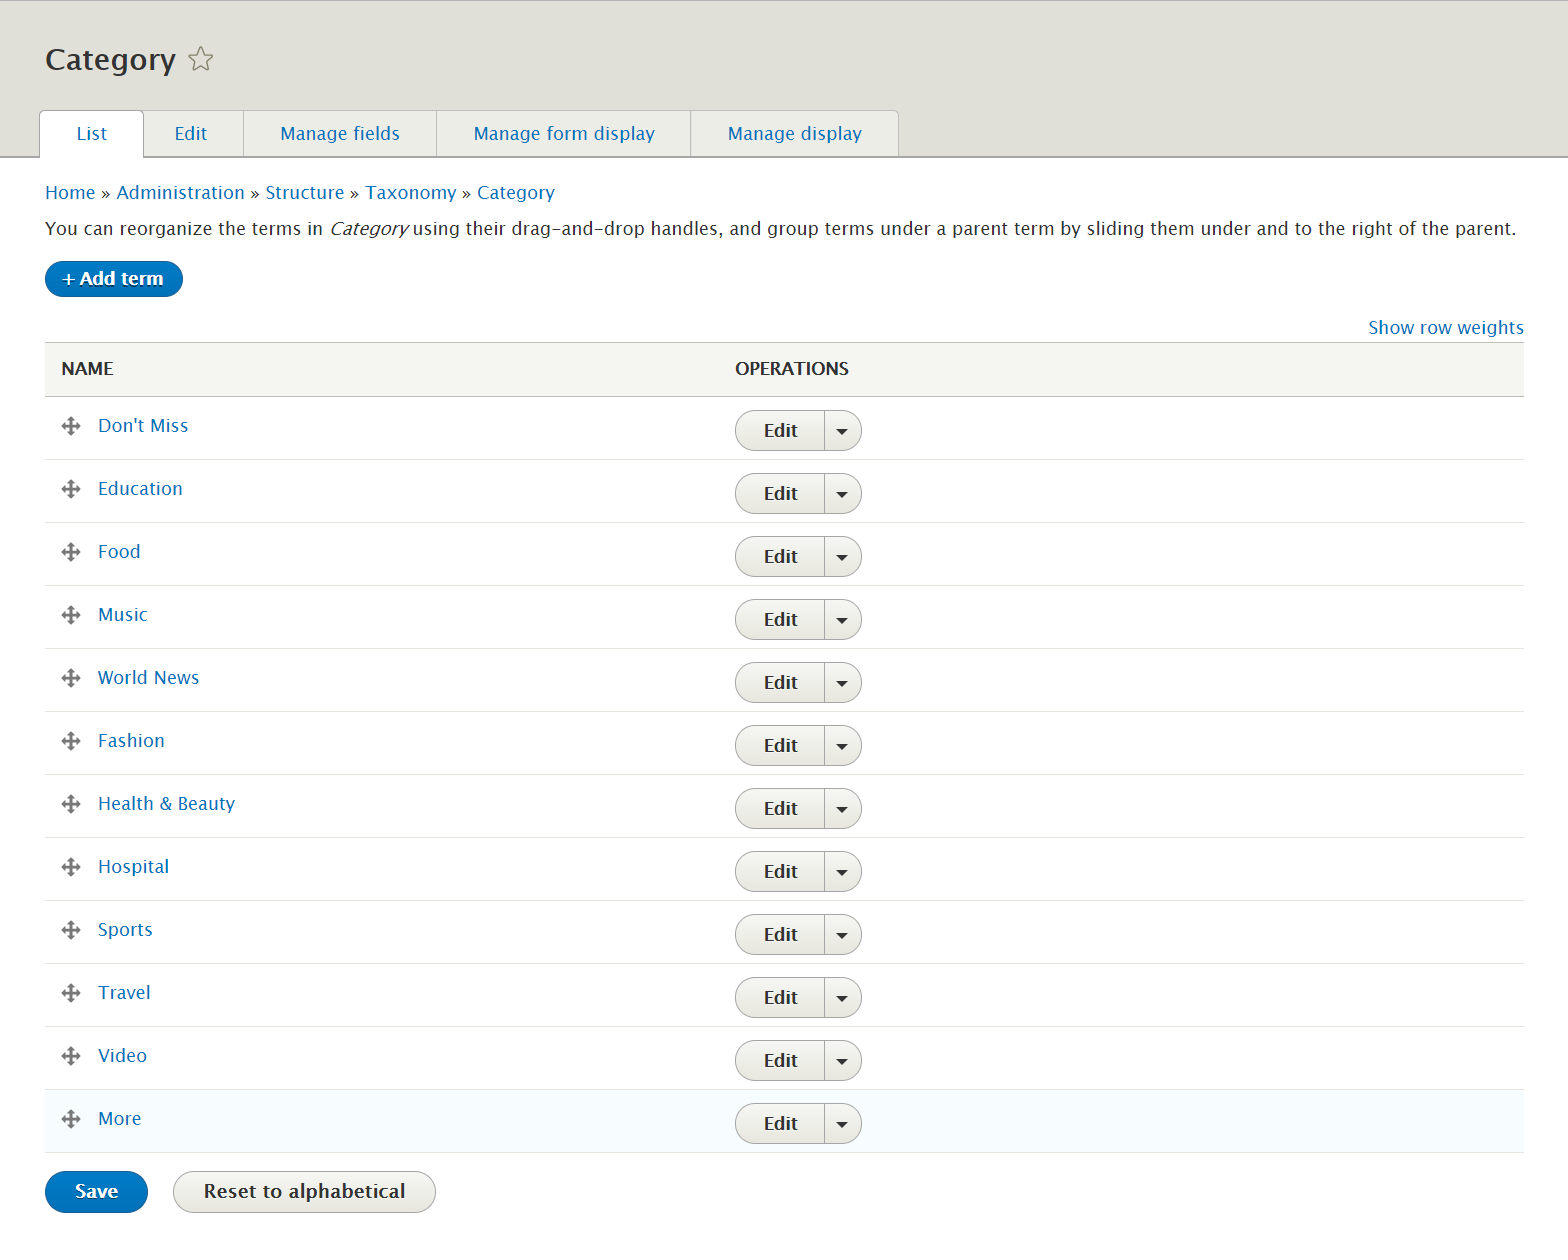
Step 3: Terms of Category:
Step 4: Terms of Tags:

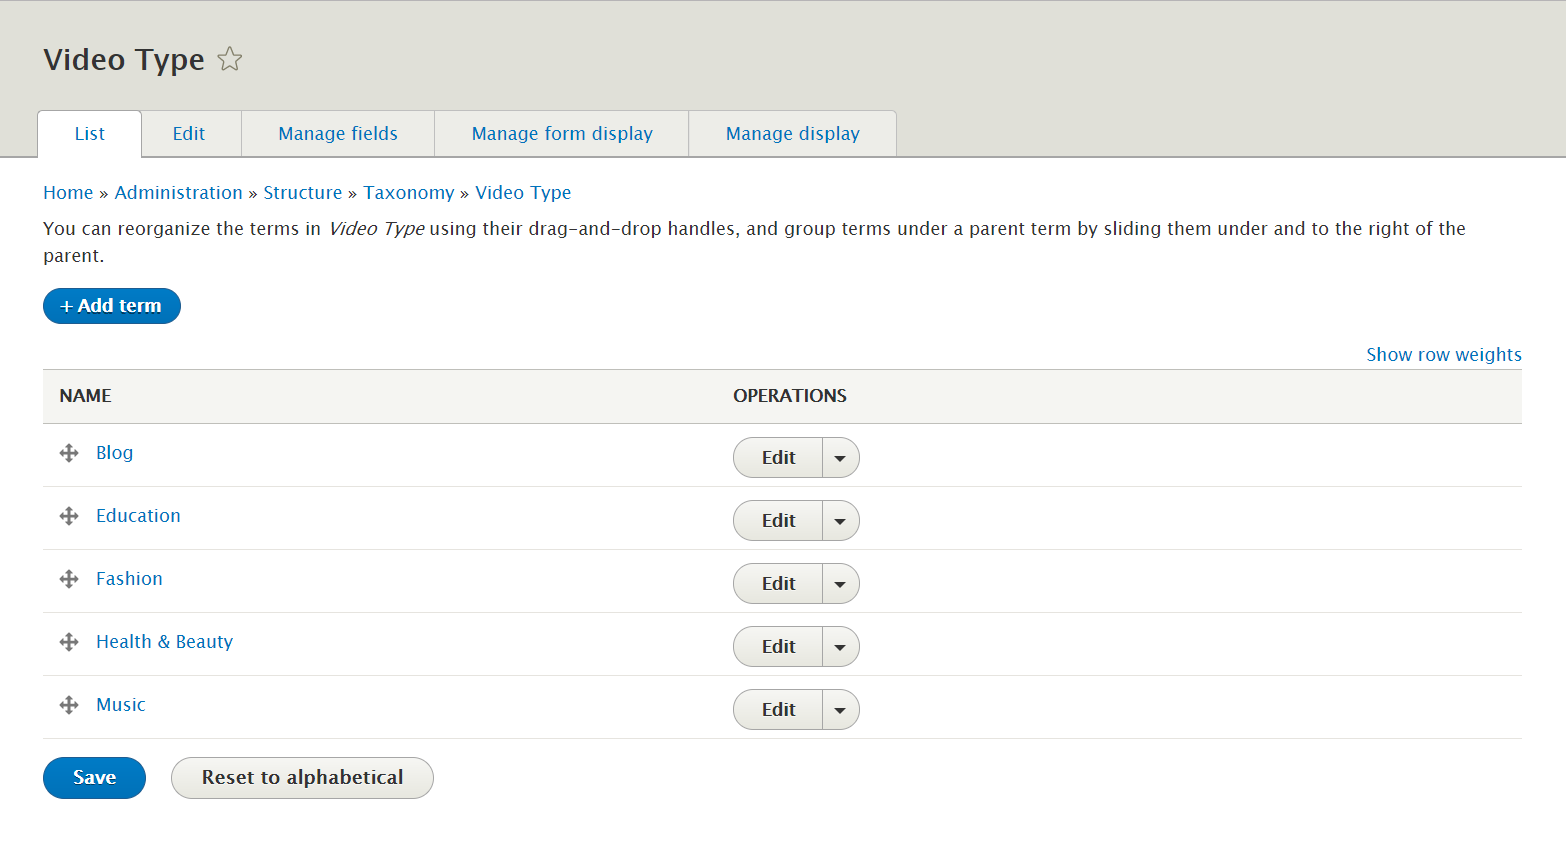
Step 5: Terms of Video Type:
Note: See this guide to get more details about taxonomy configuration
Media configuration
Image Style Configuration
Image styles are the presets of image settings. Image styles are used to define how the images are shown.
Navigate to Configuration, In MEDIA area, click Image styles, then create image styles as the following:

Content Type Configurations
Modify Article type
Step 1: Navigate to Structure > Content Type > Article. In Article, go to Manage fields tab, add following fields:

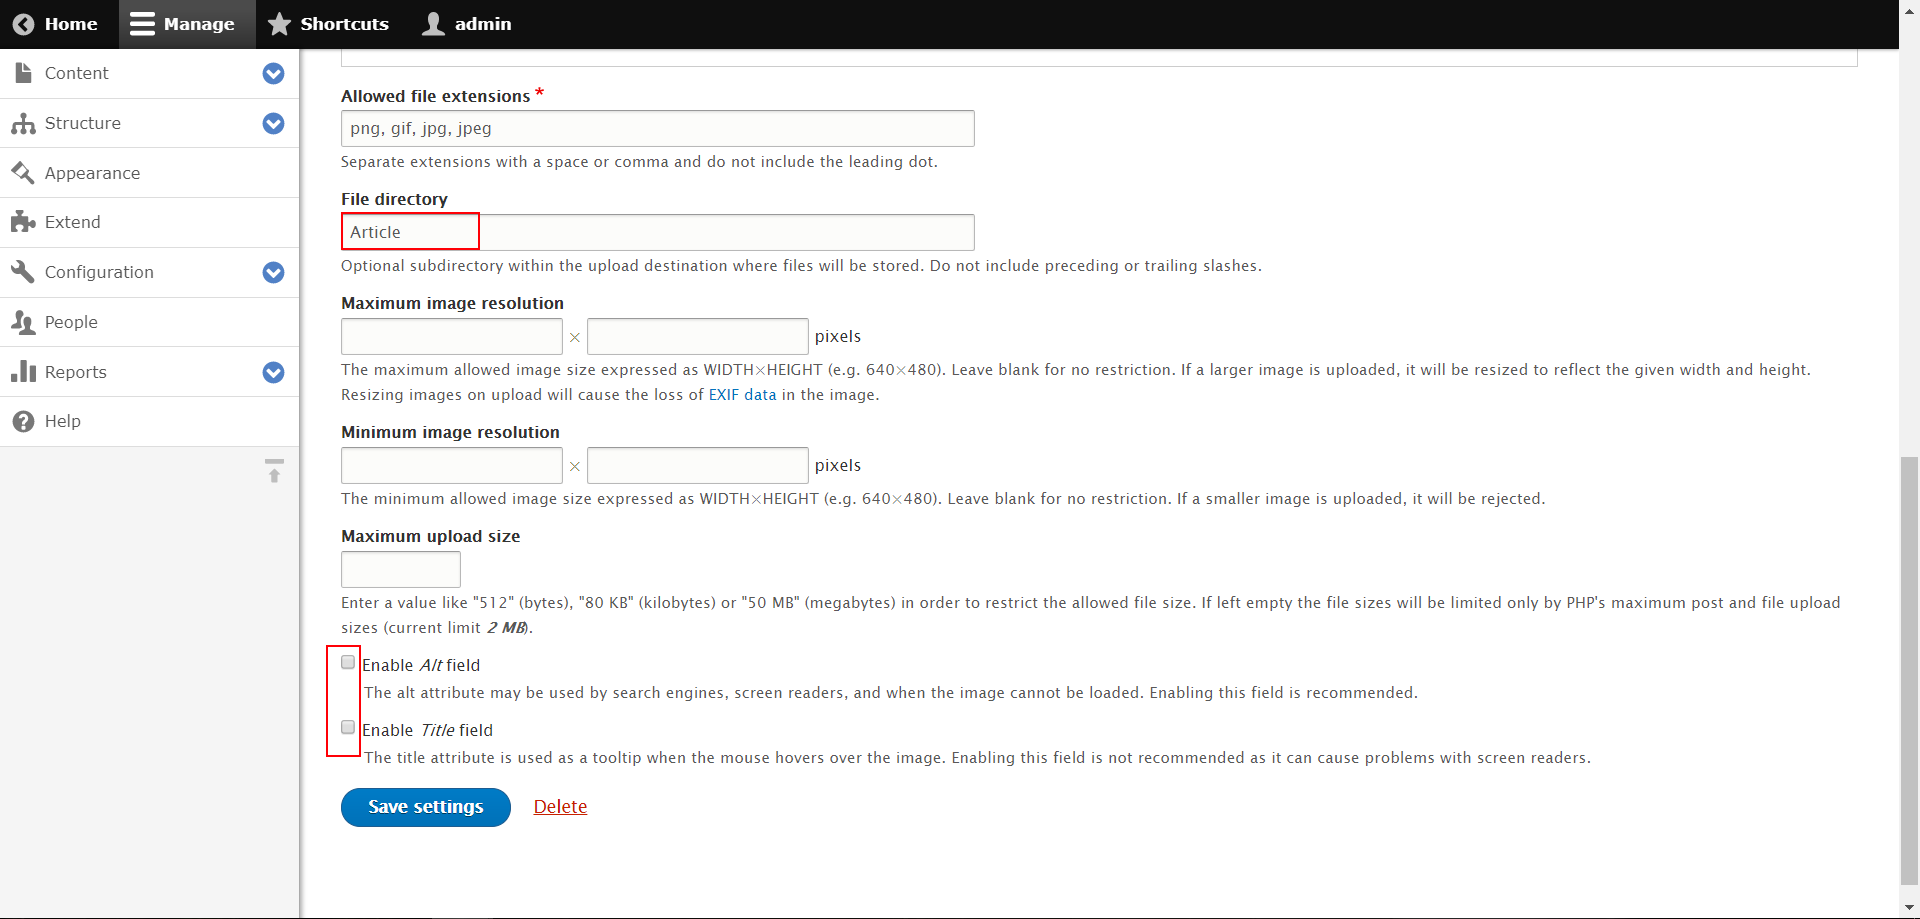
Step 2: Set properties for Image field
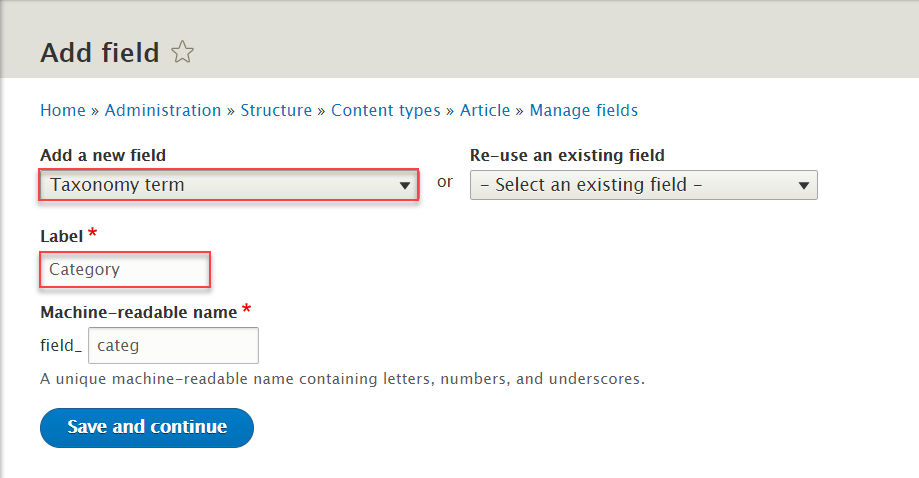
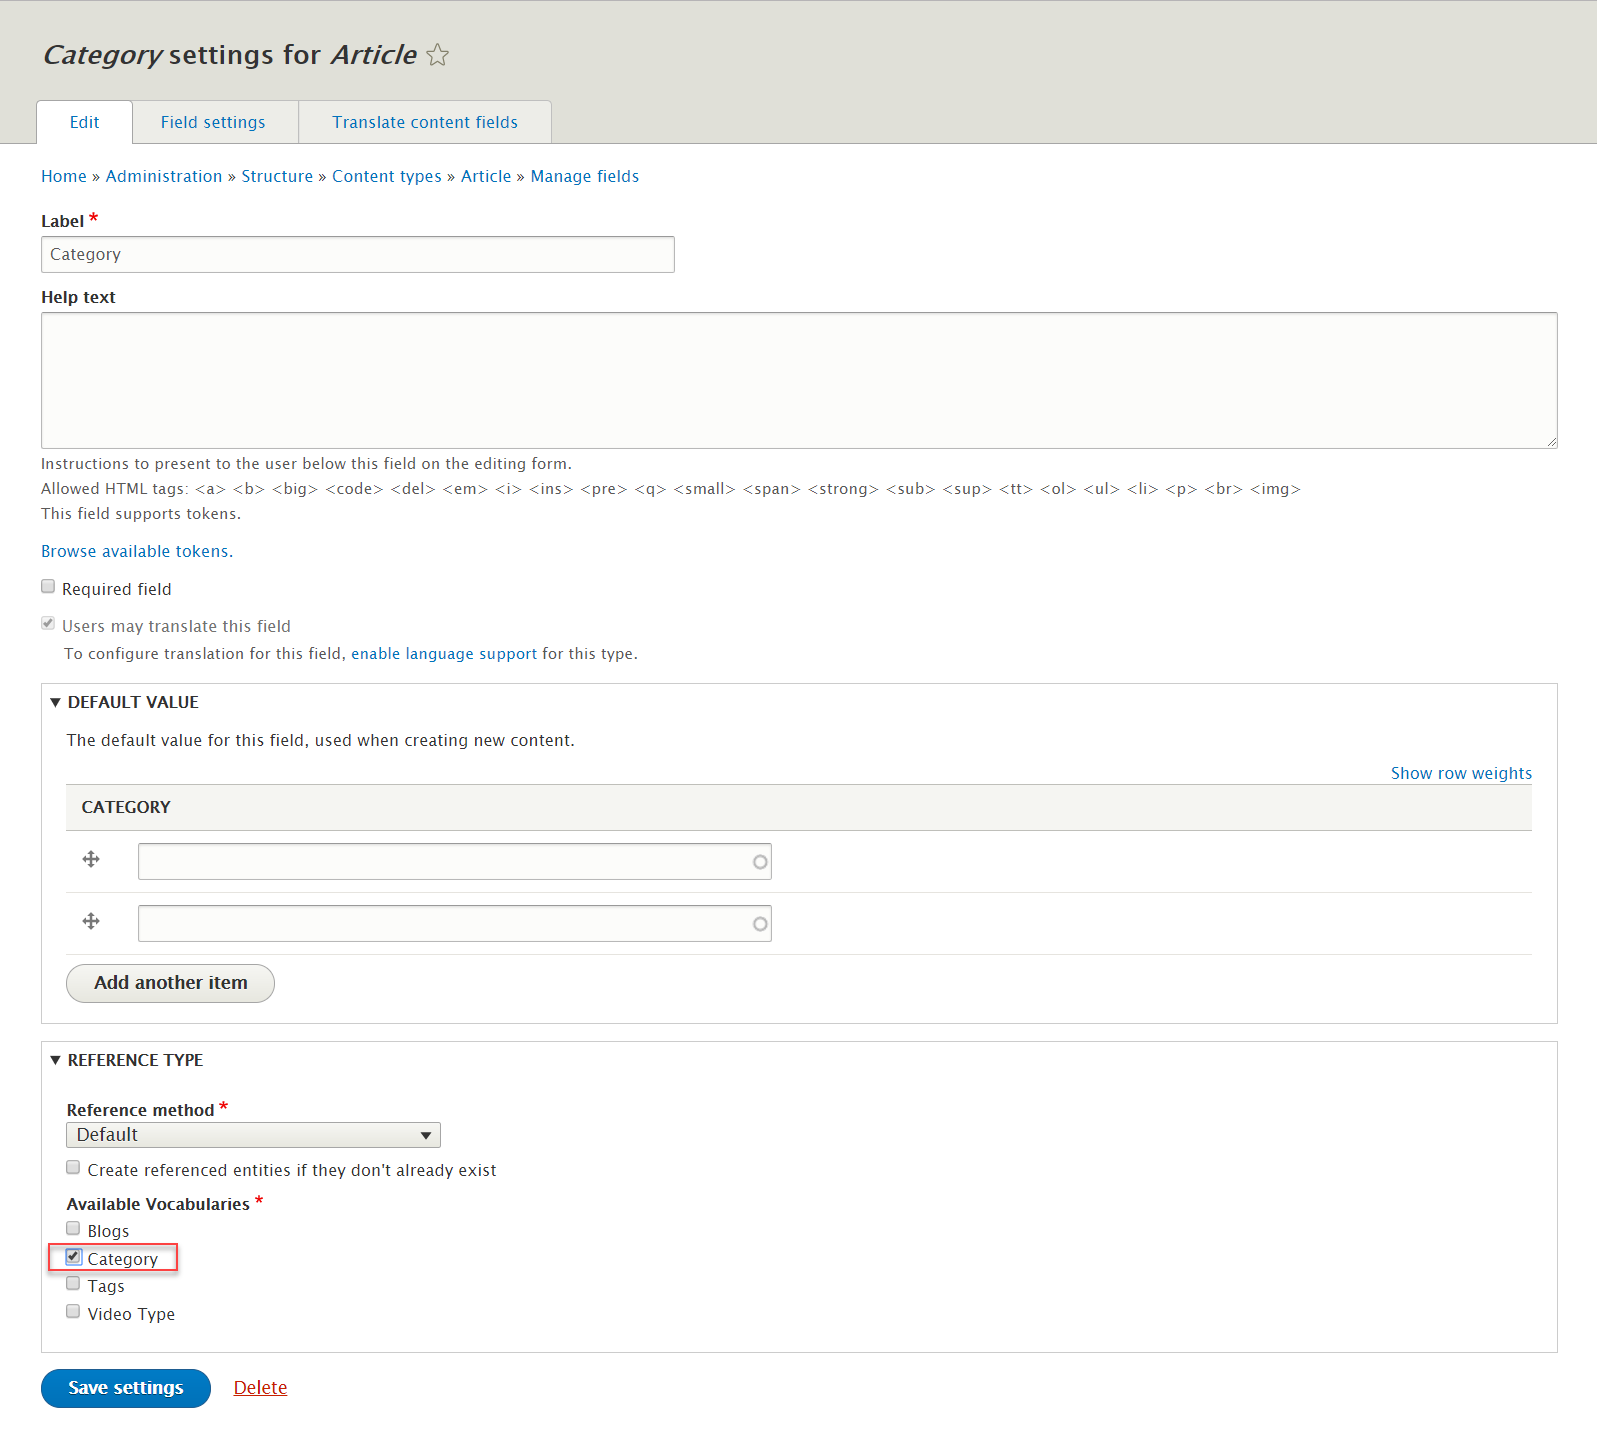
Step 3: Click Add field button, then create Category field with following settings:
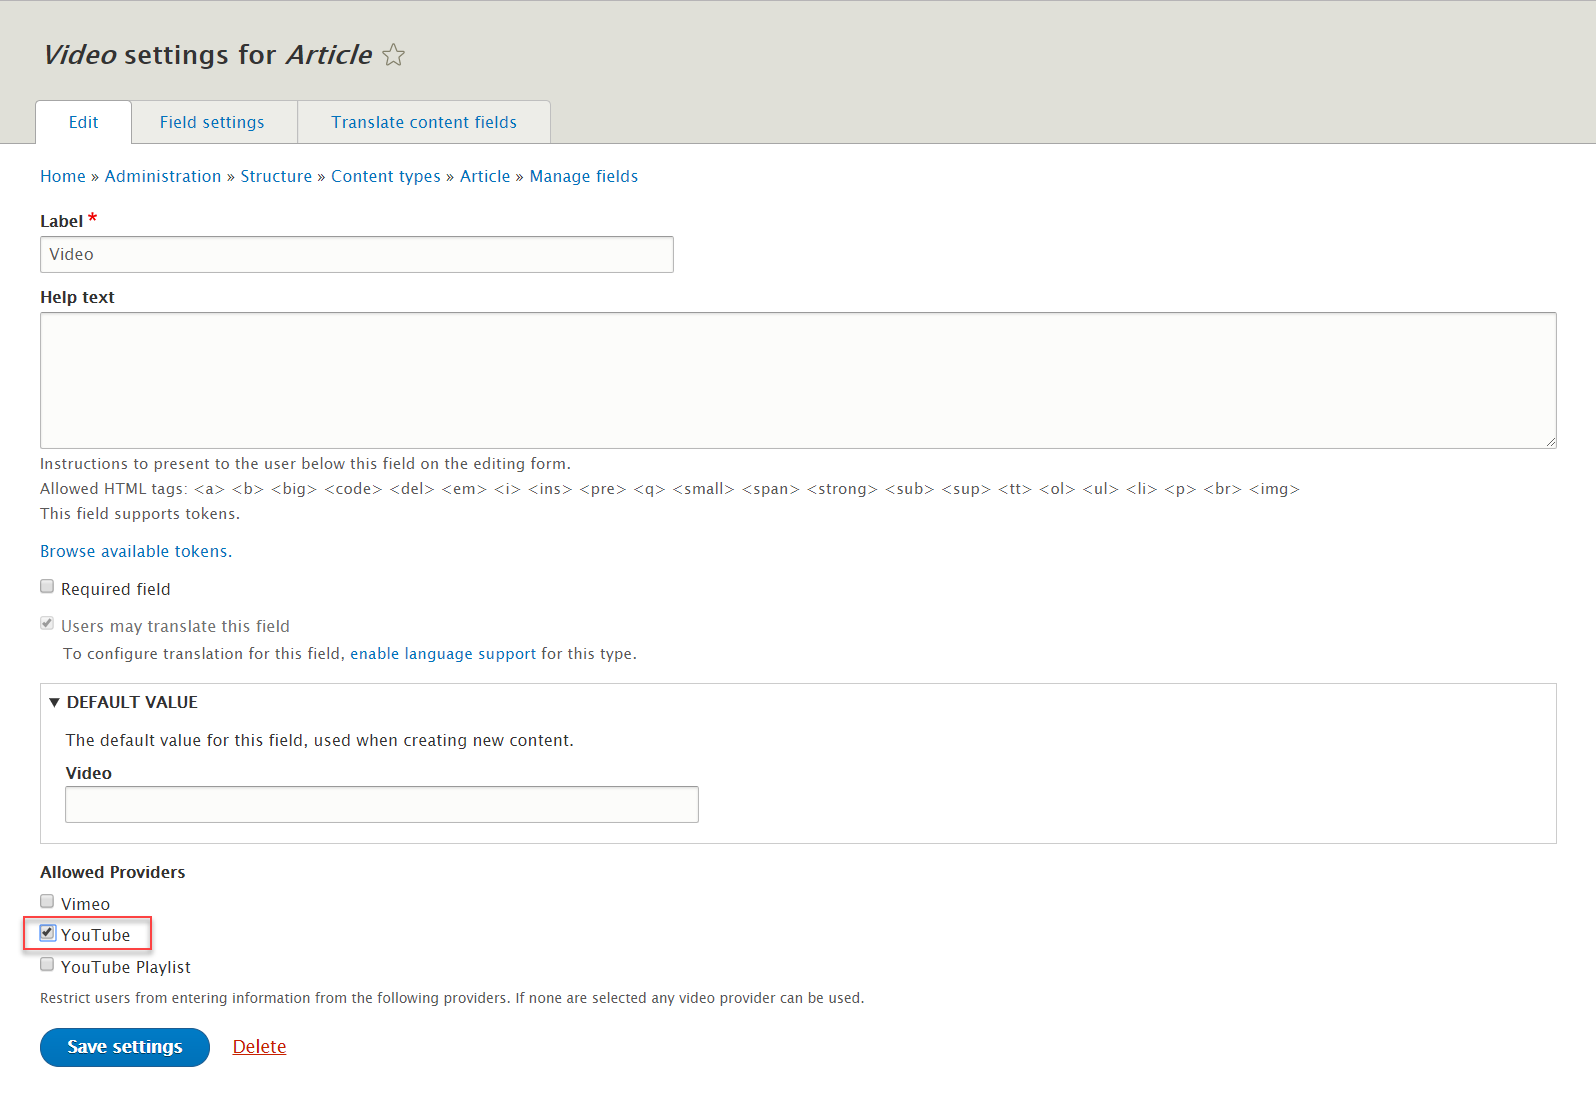
Step 3: Click Add field button, then create Video field with following settings:

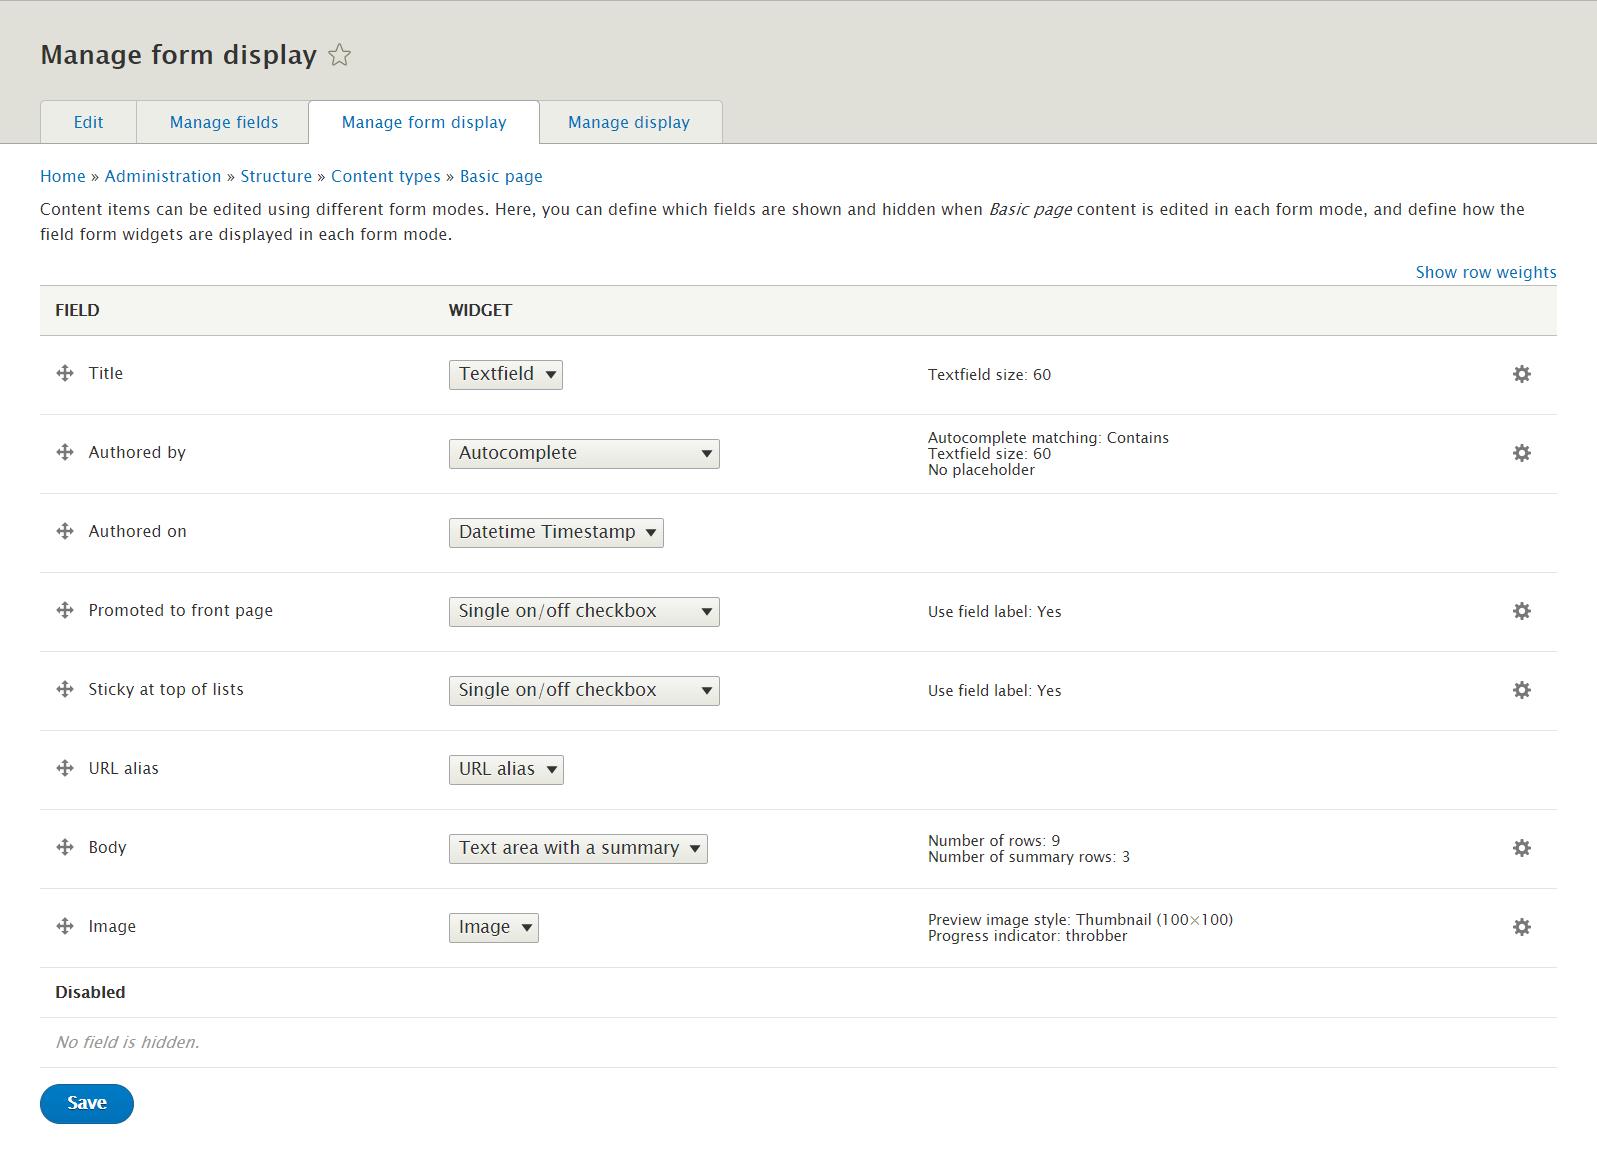
Step 3: Go to Manage form display tab, set following properties:

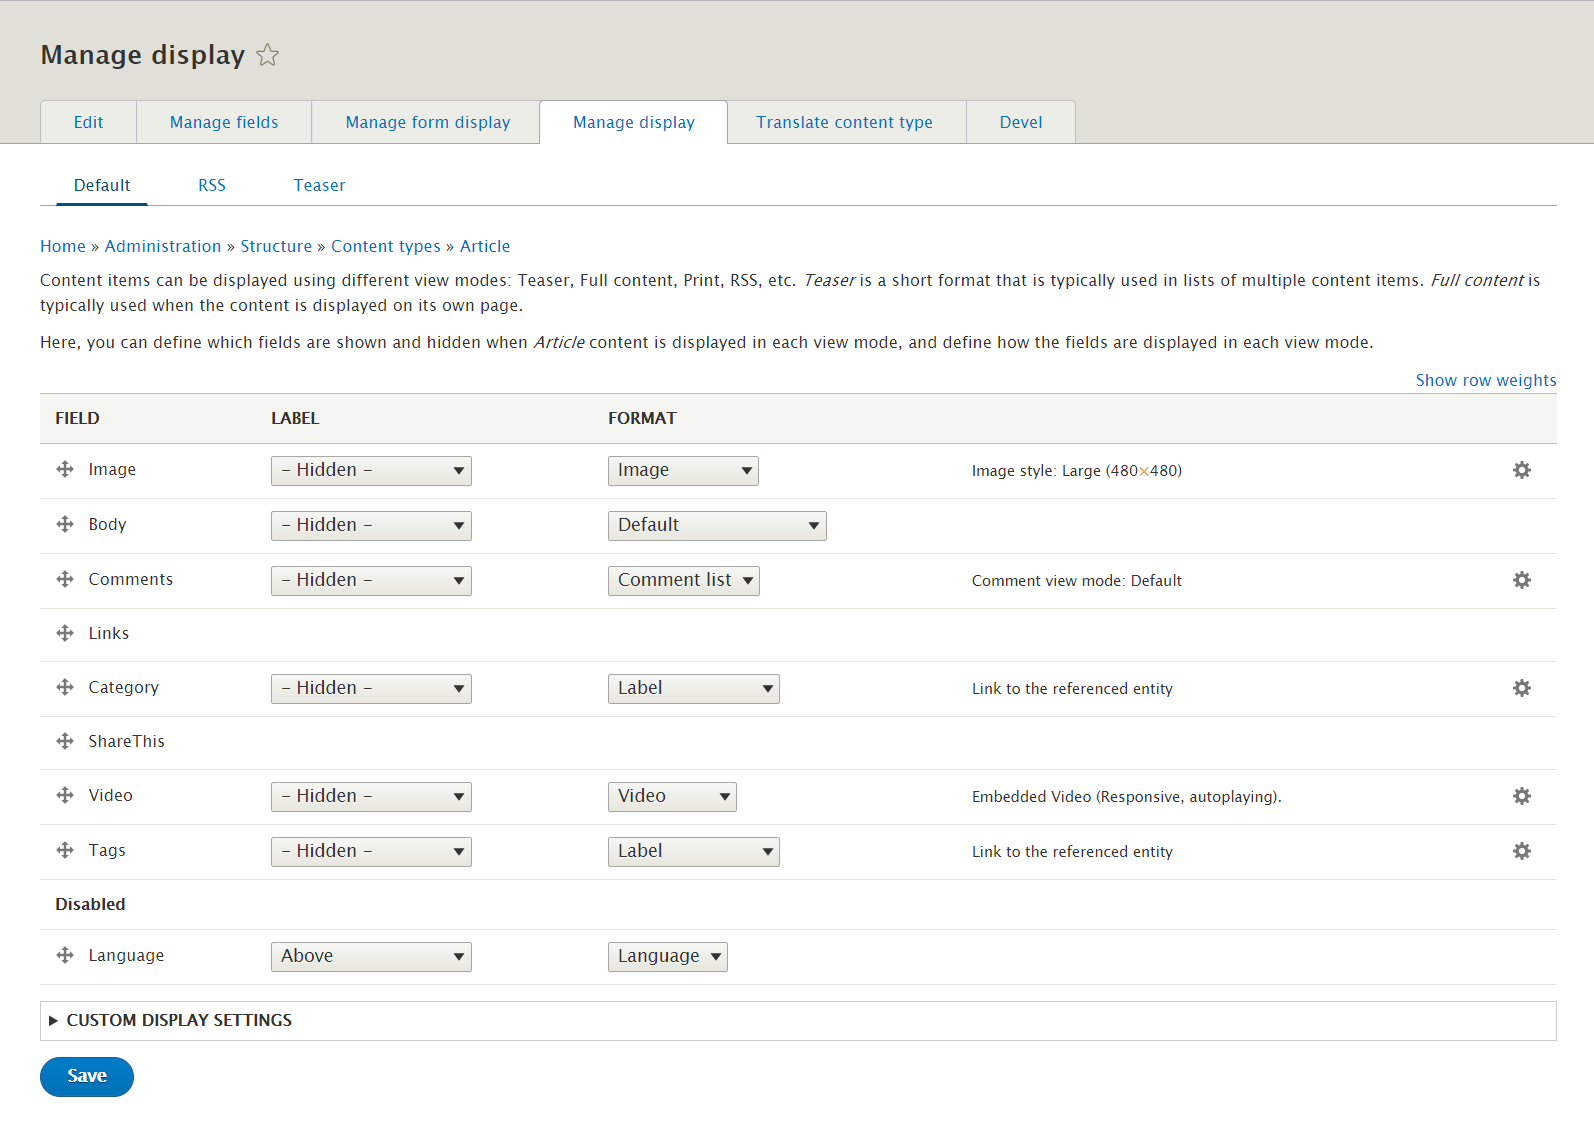
Step 4: Go to Manage display tab > Default tab, set following properties:
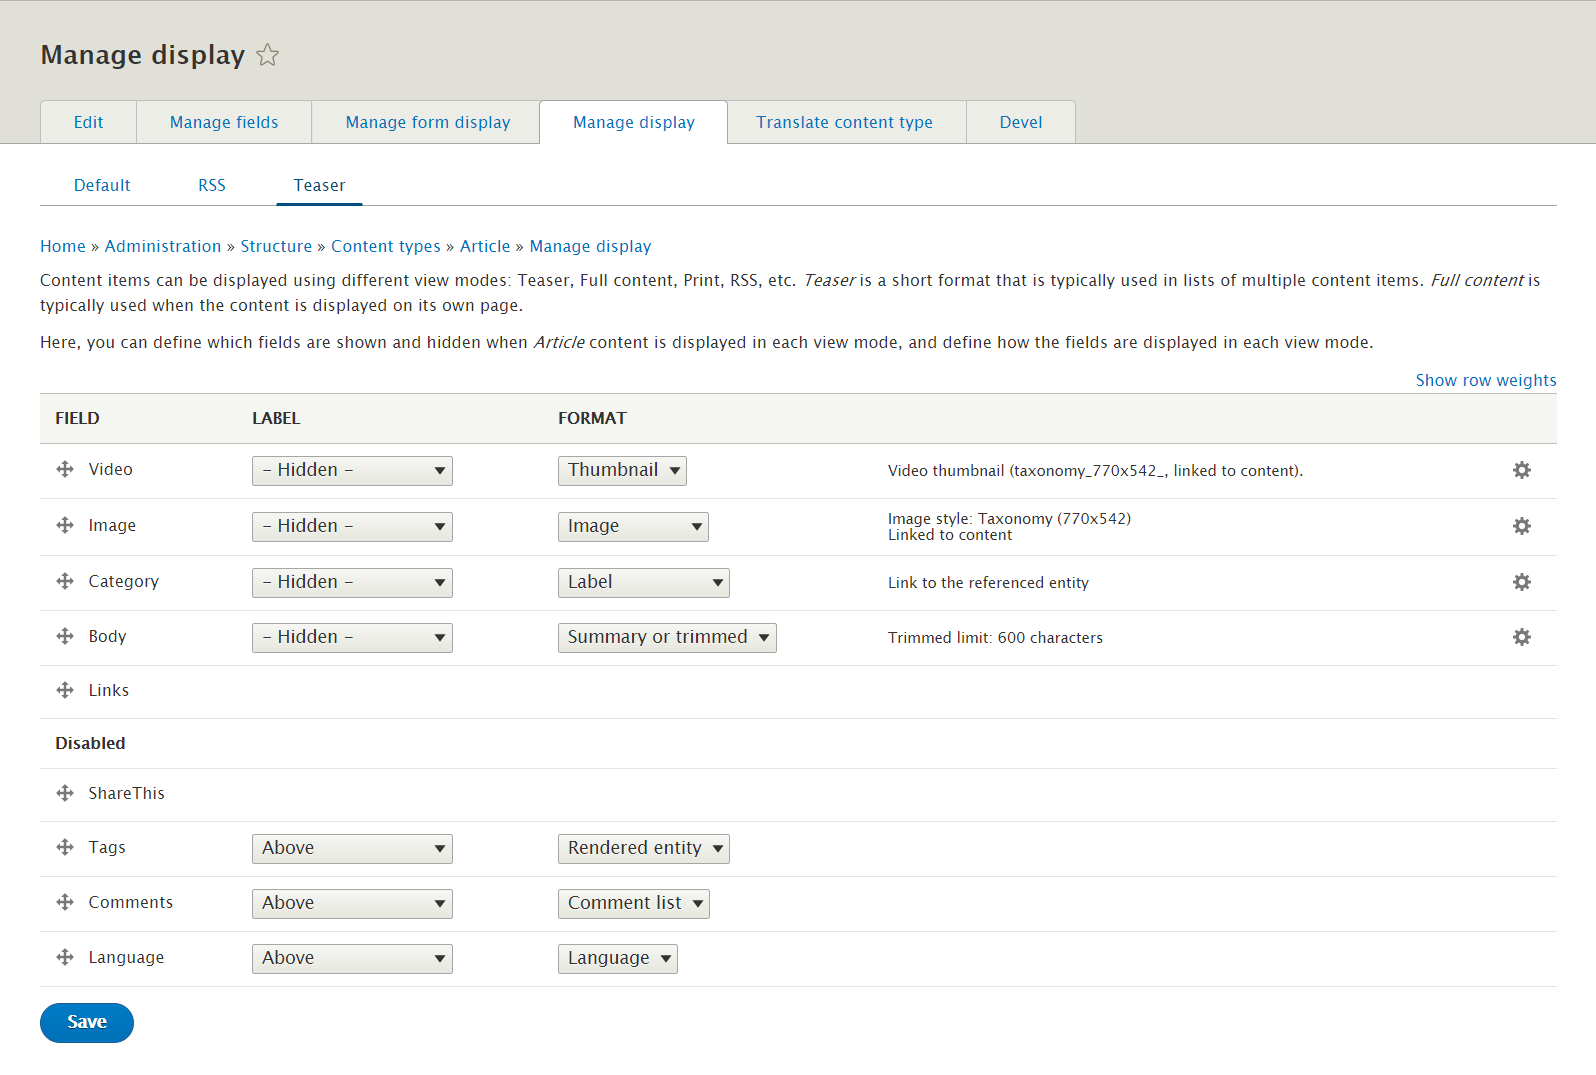
Step 5: Go to Manage display tab > Teaser tab, set following properties:
Step 6: Click Save button
Modify Basic page type
Step 1: Navigate to Structure > Content Type > Basic page.

Step 2: Click Add field button, set following properties:

Step 3: Click Save and continue button, set following properties:

Step 3: Go to Manage form display tab, set following properties:
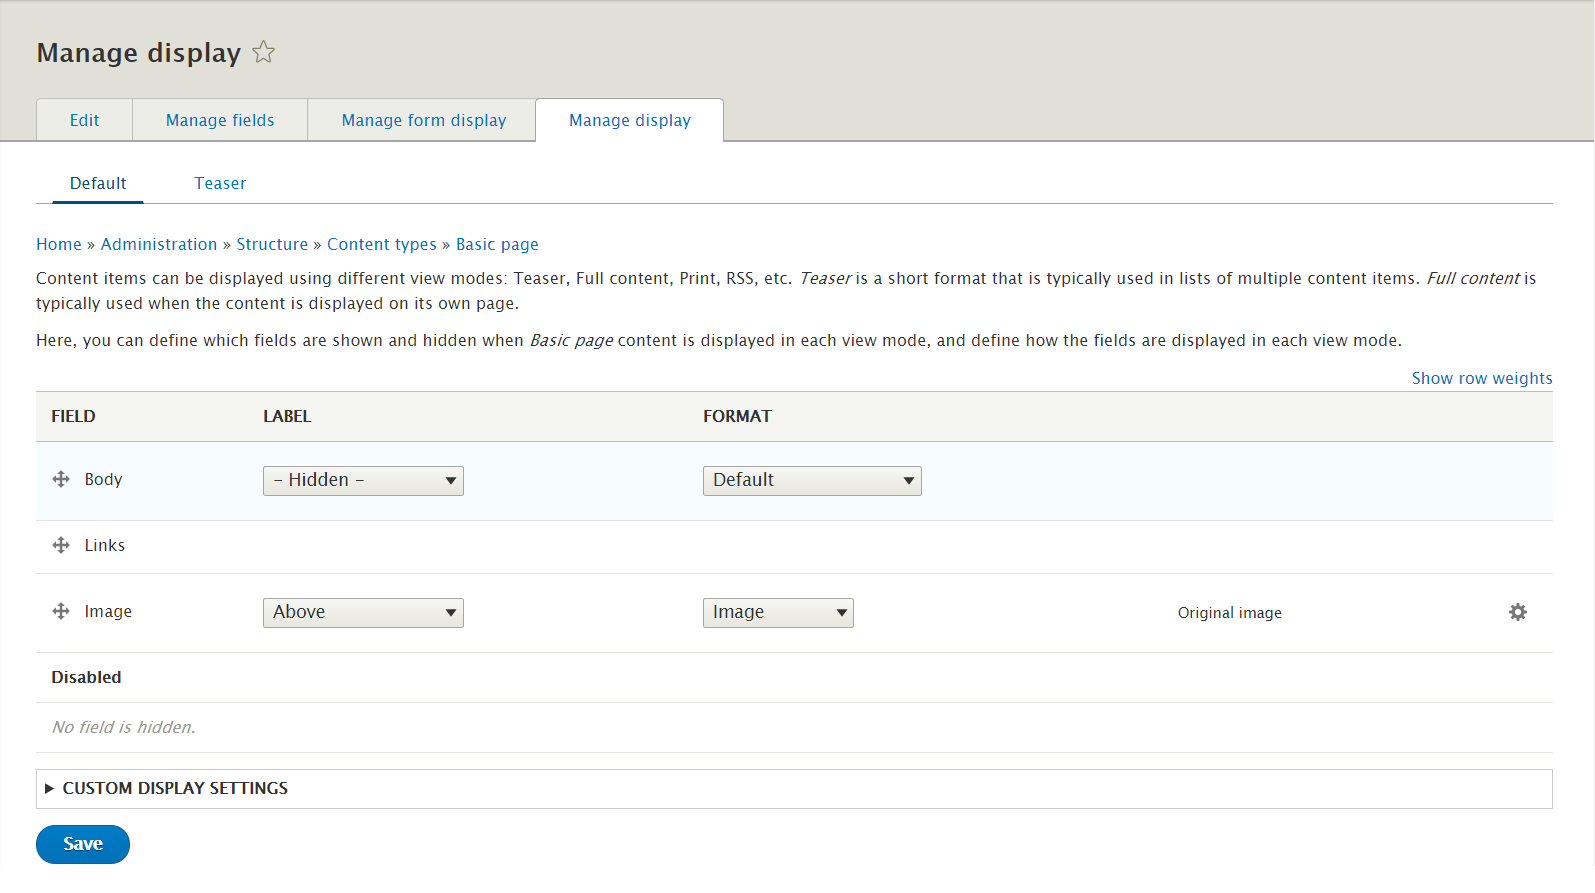
Step 4: Go to Manage display tab > Default tab, set following properties:
Step 5: Click Save button
Create Ad type
Step 1: Navigate to Structure > Content Type
Step 2: Click Add Content Type link to create Ad type
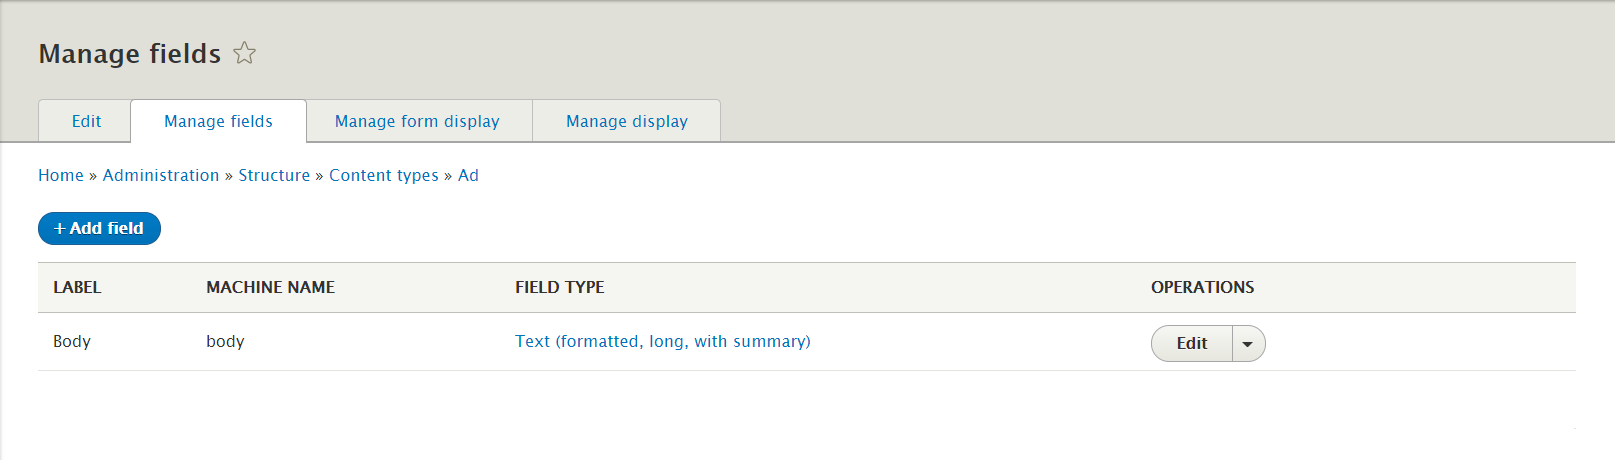
Step 3: Click Save and manage fields button, then add following fields:
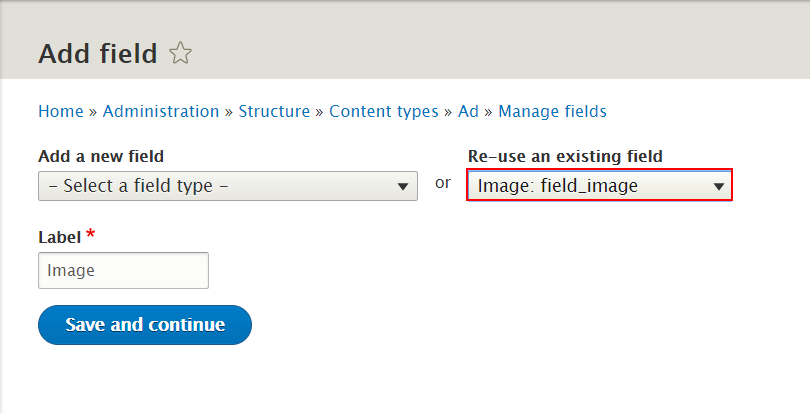
Step 4: Click Add field button, set properties for Ad images field
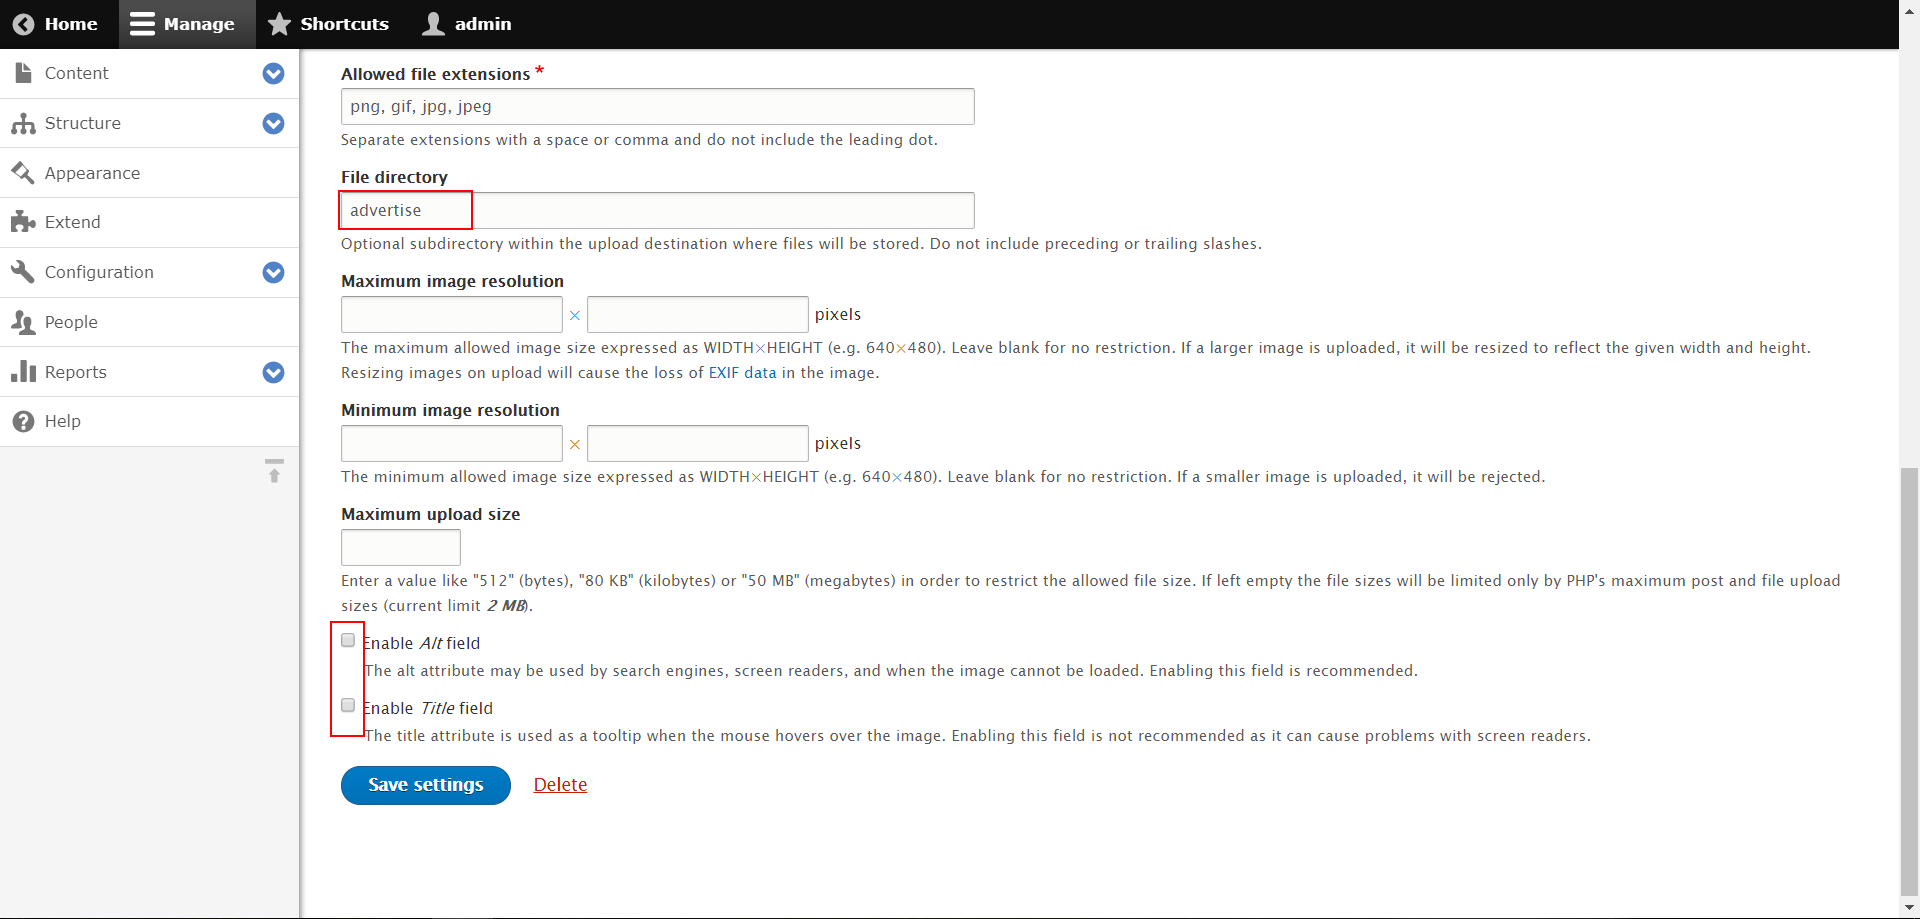
Step 5: Click Save setting button
Create Blogs type
Step 1: Navigate to Structure > Content Type
Step 2: Click Add Content Type link to create Blogs type
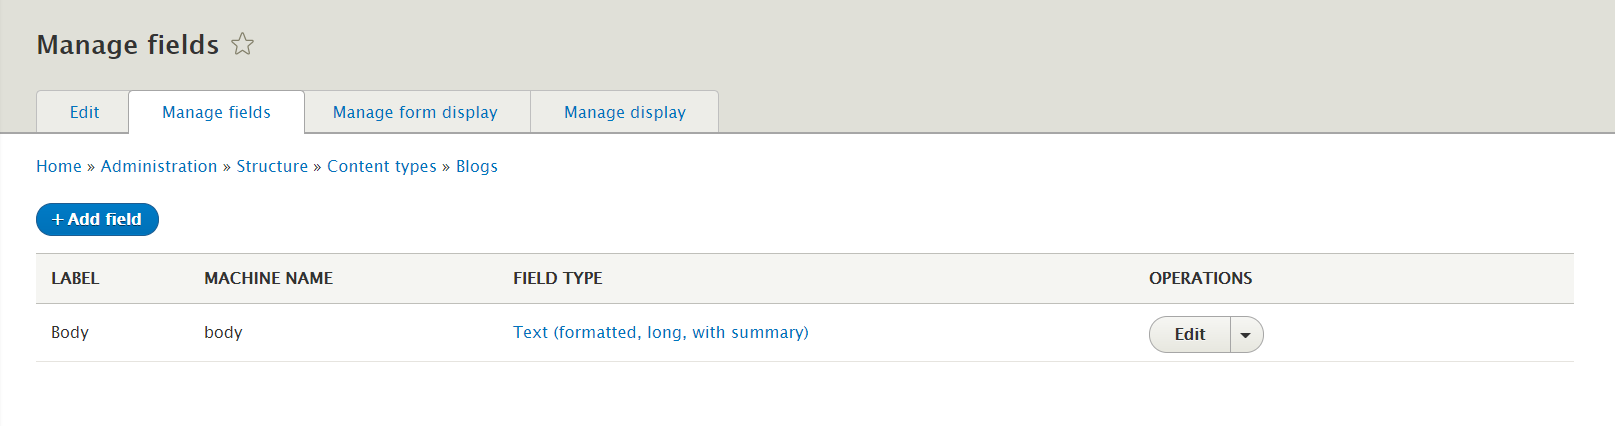
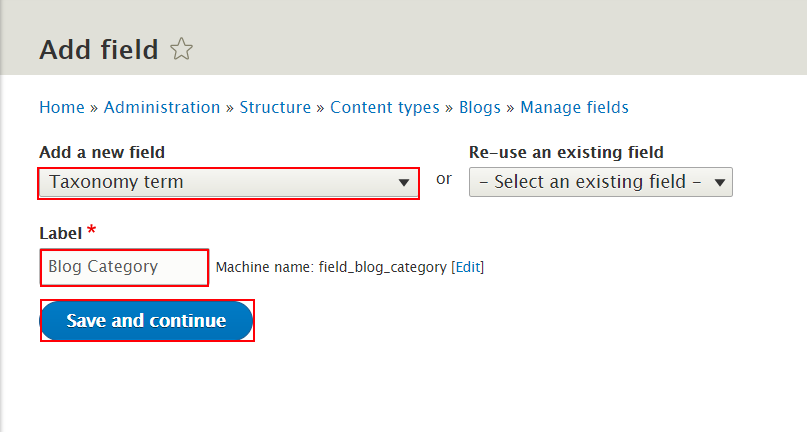
Step 3: Click Save and manage fields button, then add following fields:
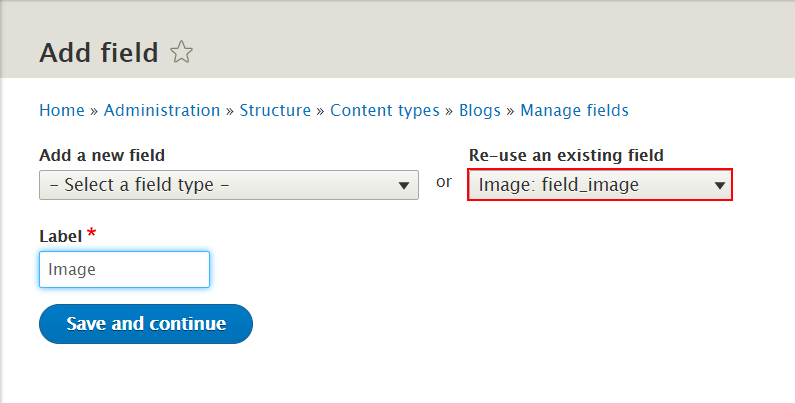
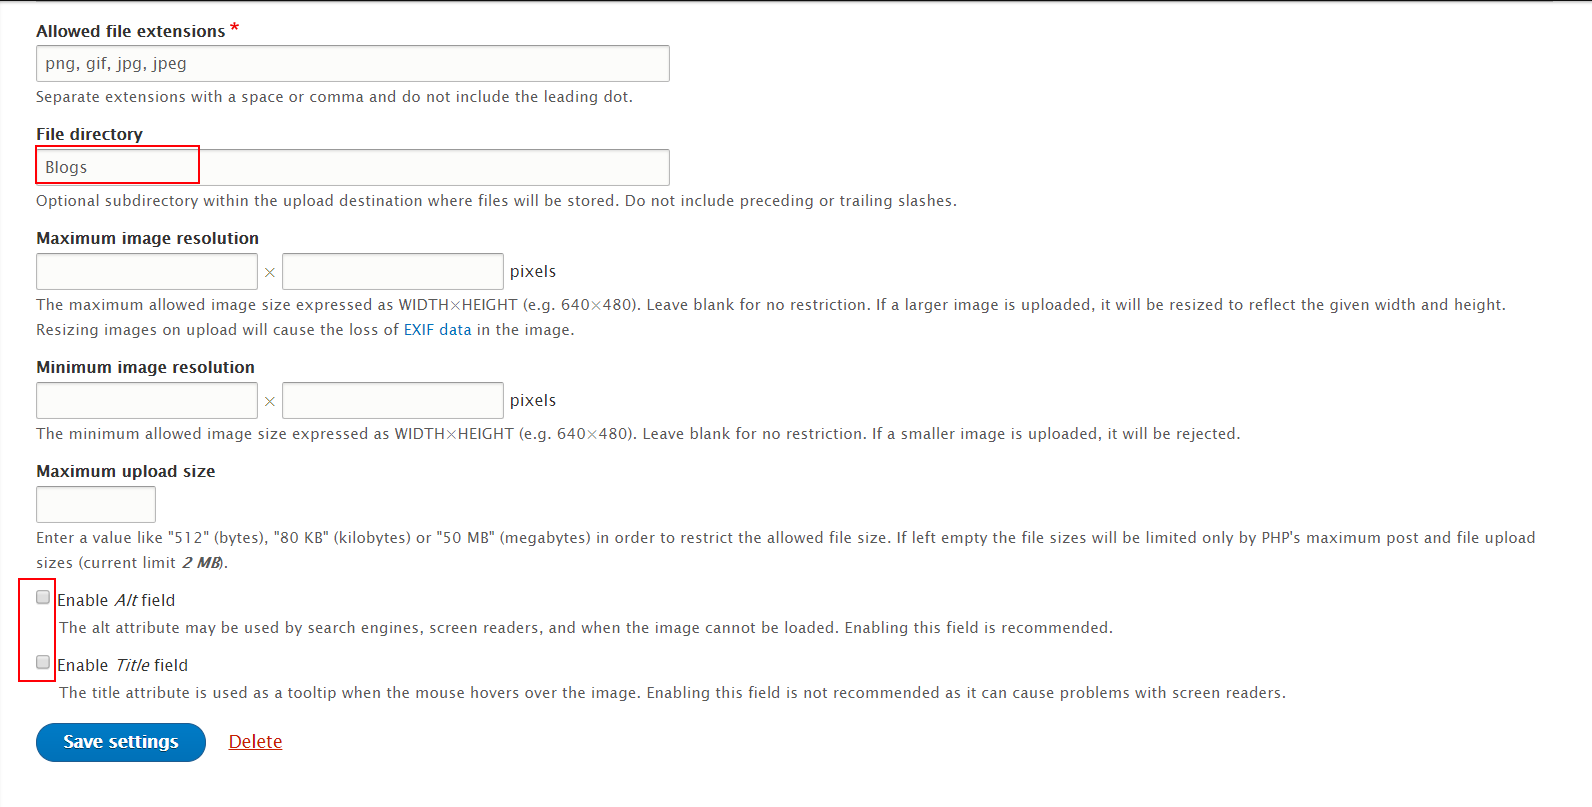
Step 4: Click Add field button, set properties for Image field
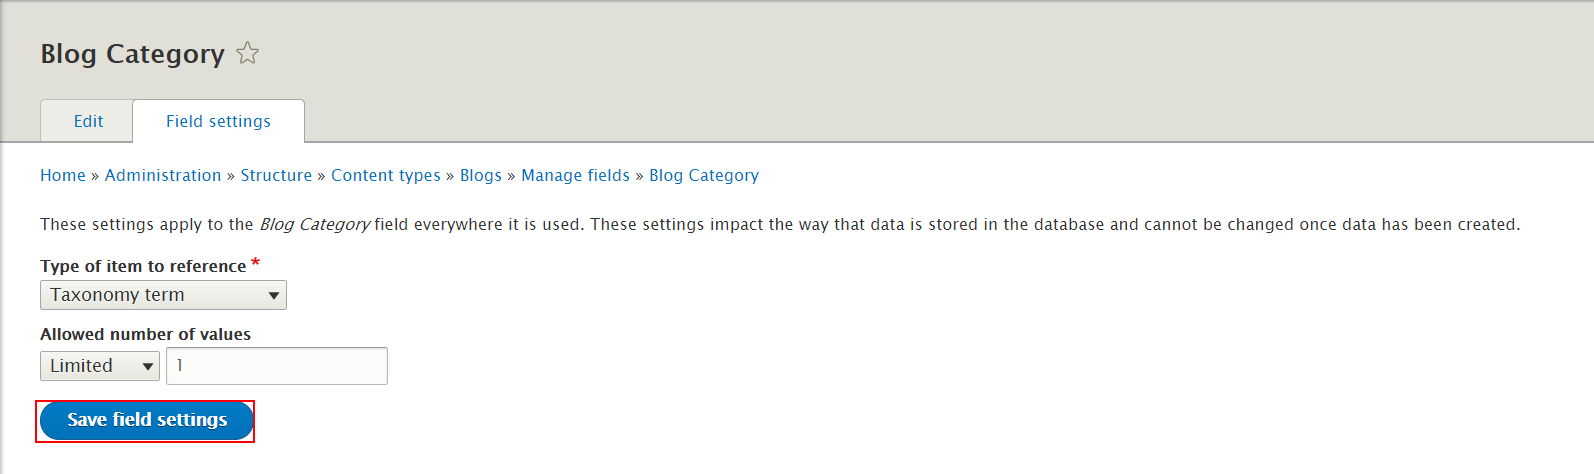
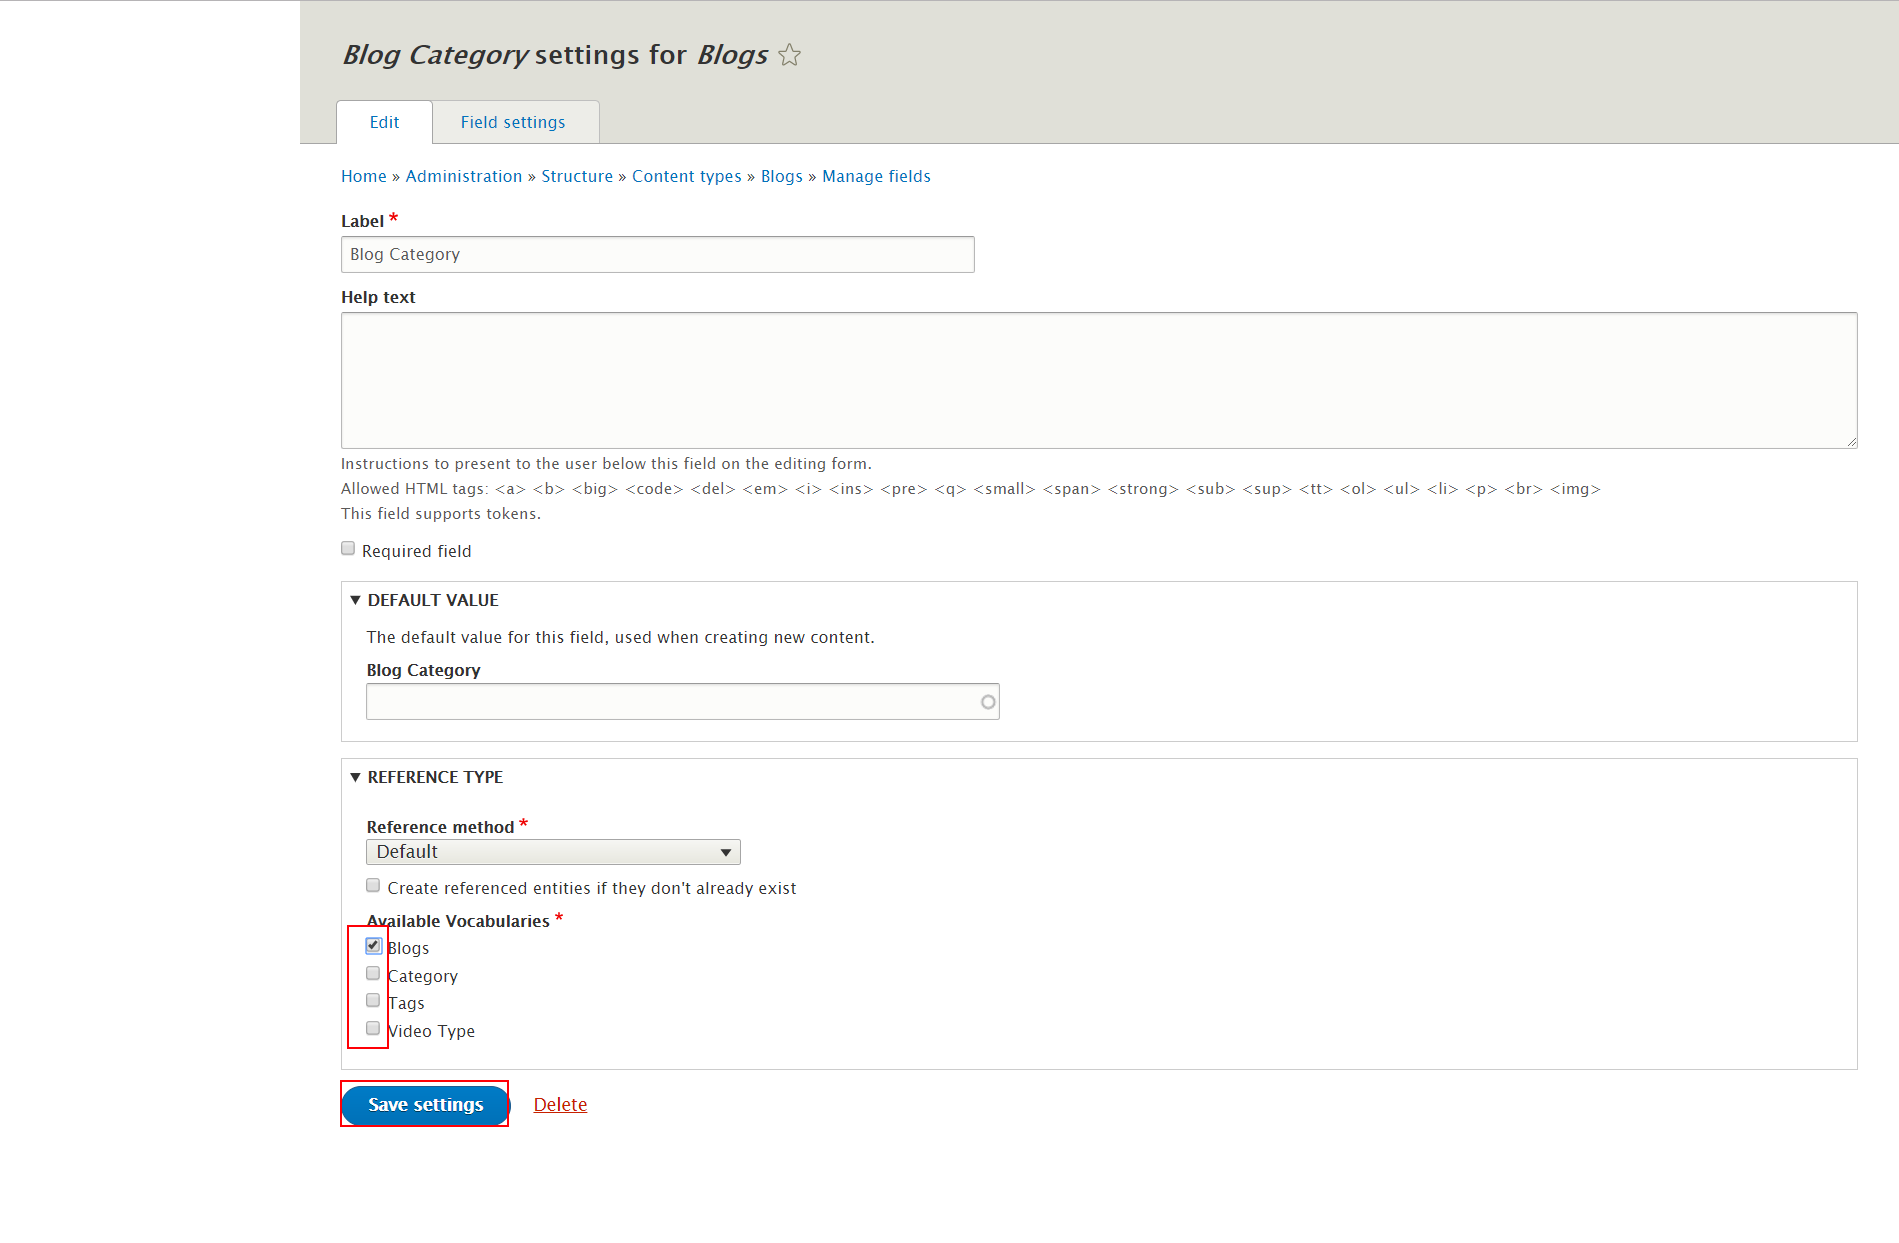
Step 5: Click Add field button, set properties for Blog Category field
Step 6: Click Add field button, set properties for Comments field


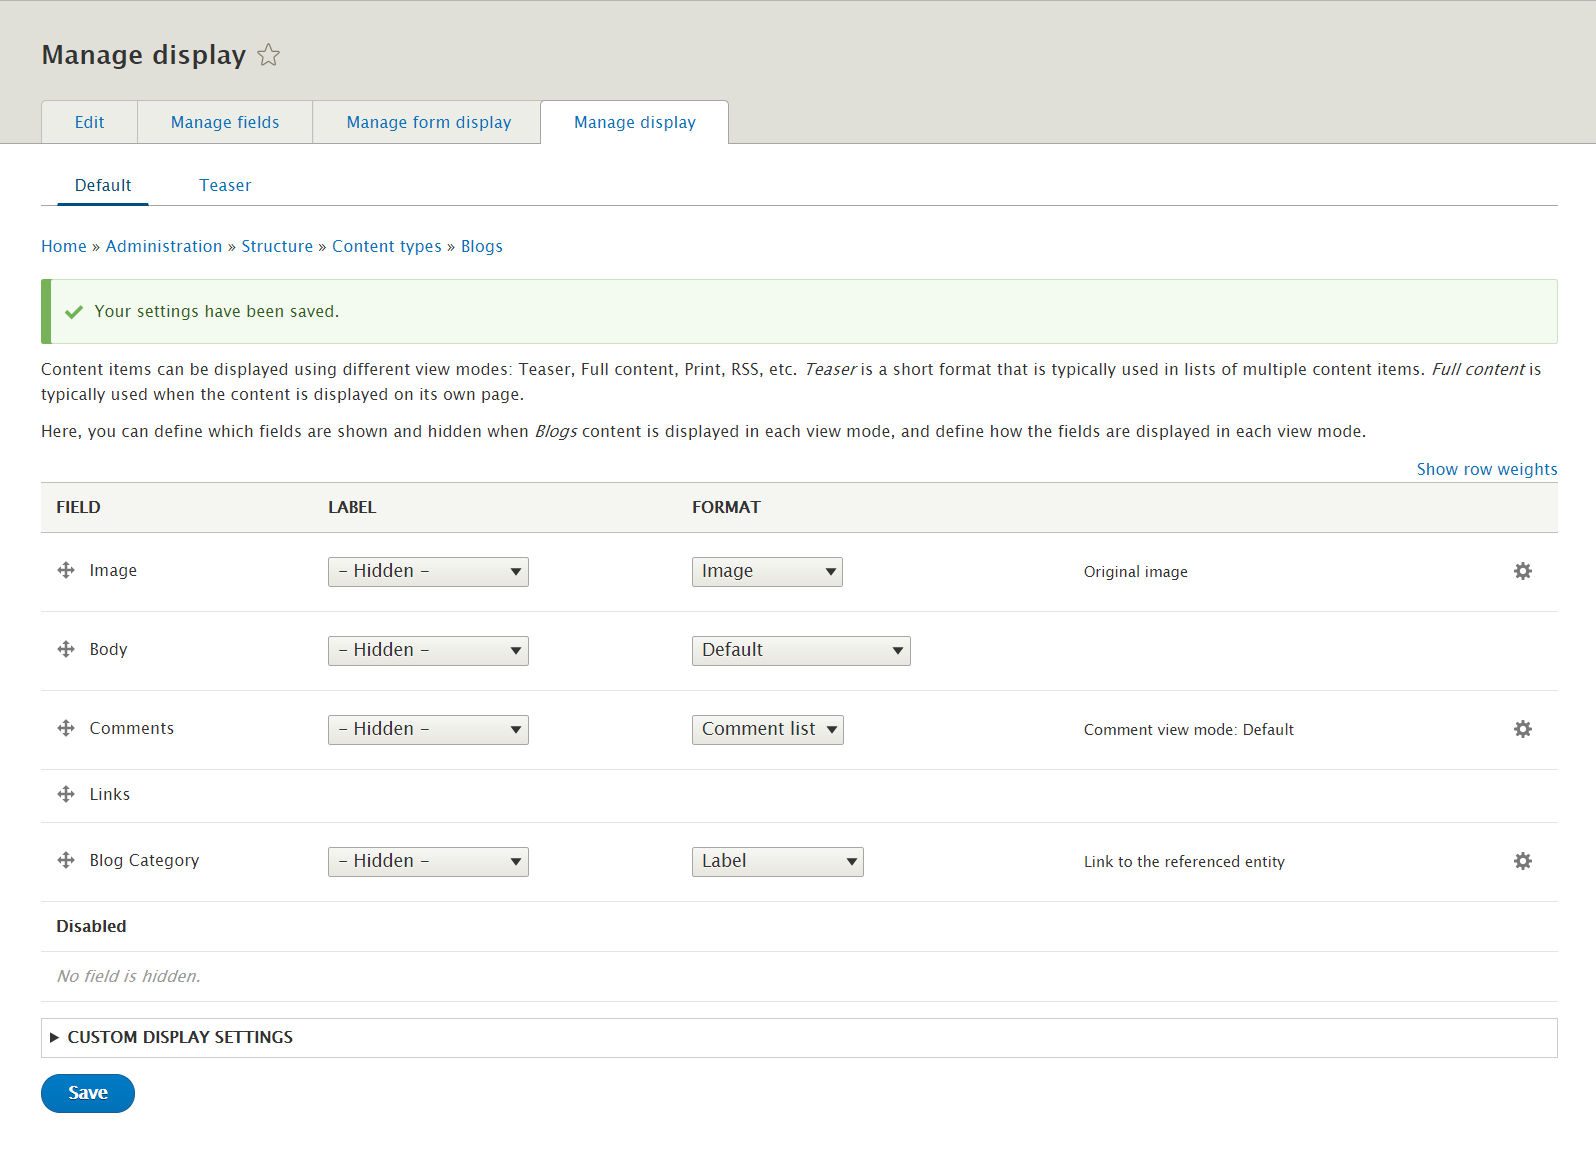
Step 7: Go to Manage display tab > Default tab, set following properties:
Step 8: Go to Manage display tab > Teaser tab, set following properties:

Step 9: Click Save button
Modify Simplenews issue type
Step 1: Navigate to Structure > Content Type > Simplenews.
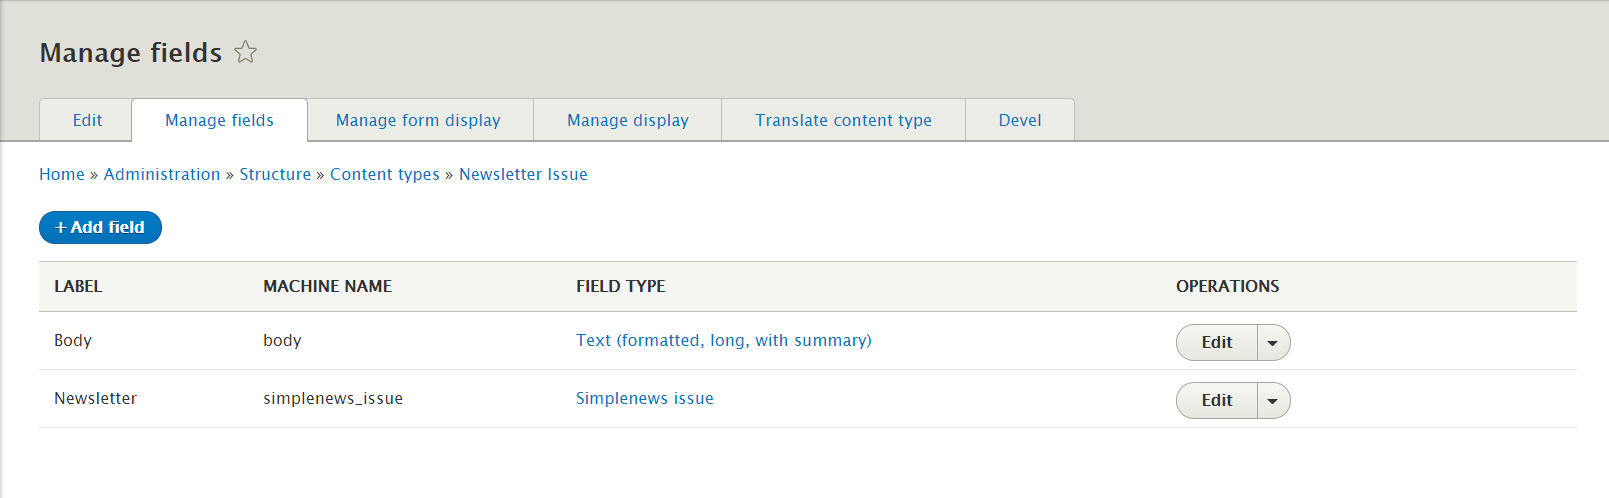
Step 2: At Body field, click Edit button, set following properties:

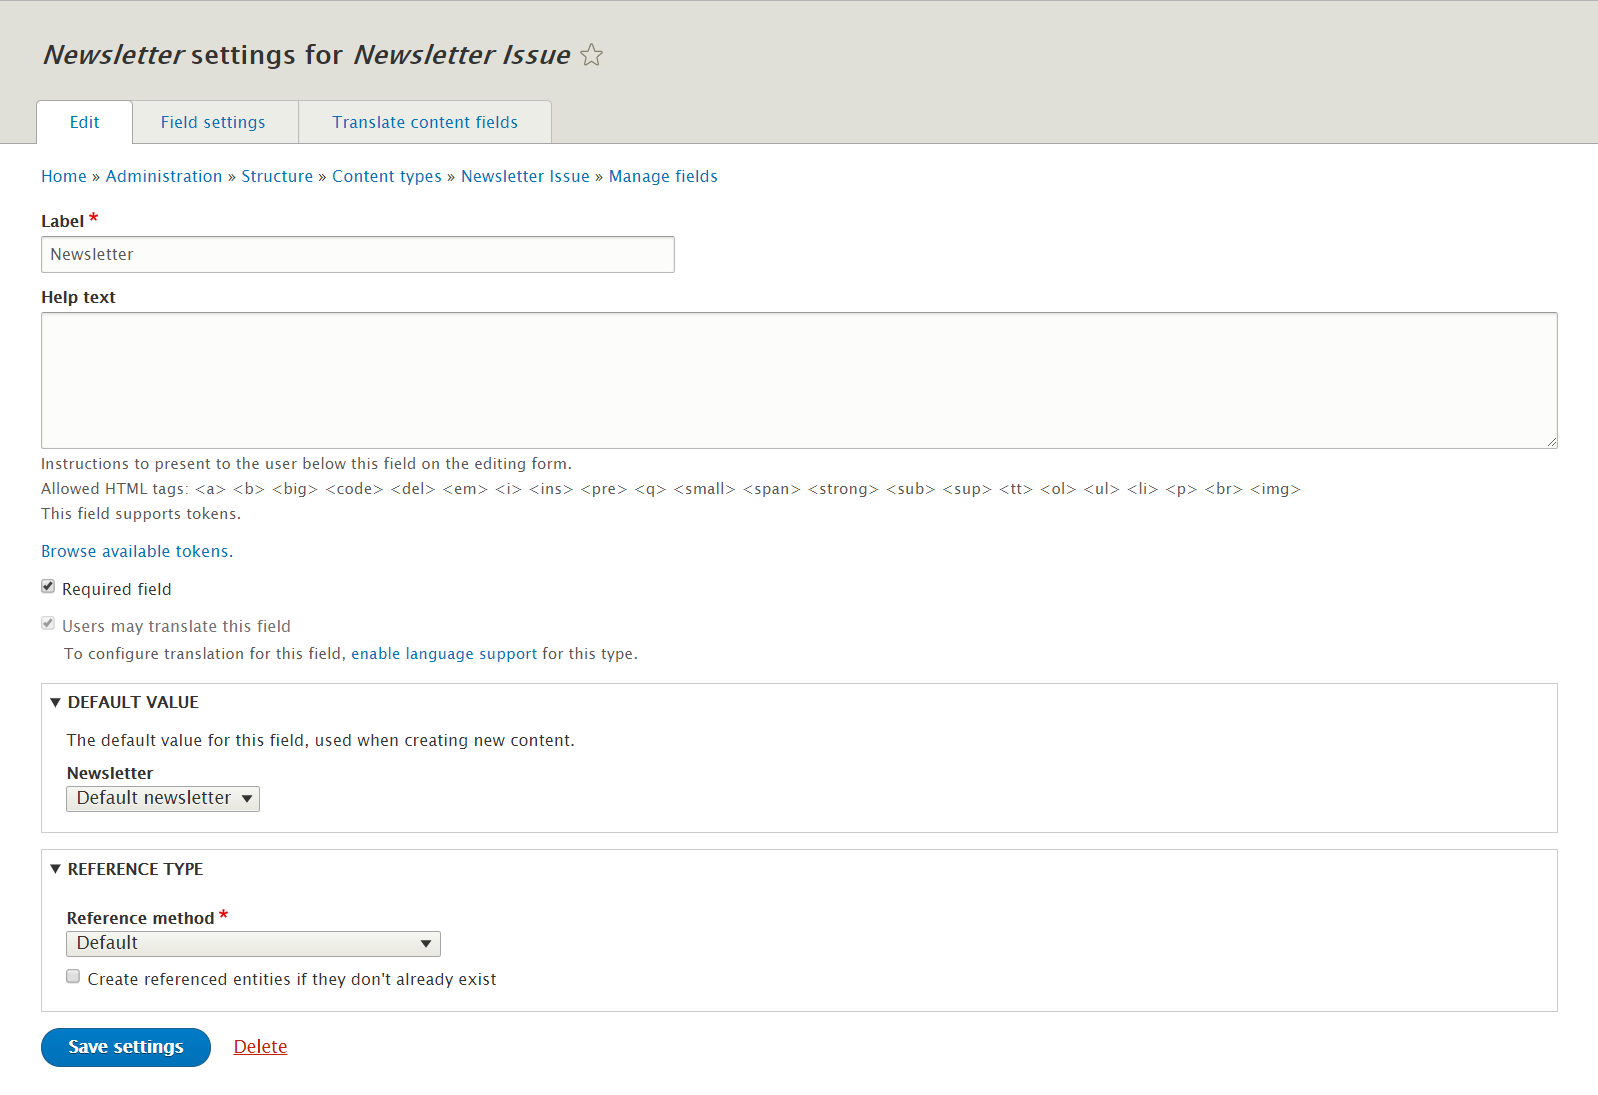
Step 3: At Newletter field, click Edit button, set following properties:
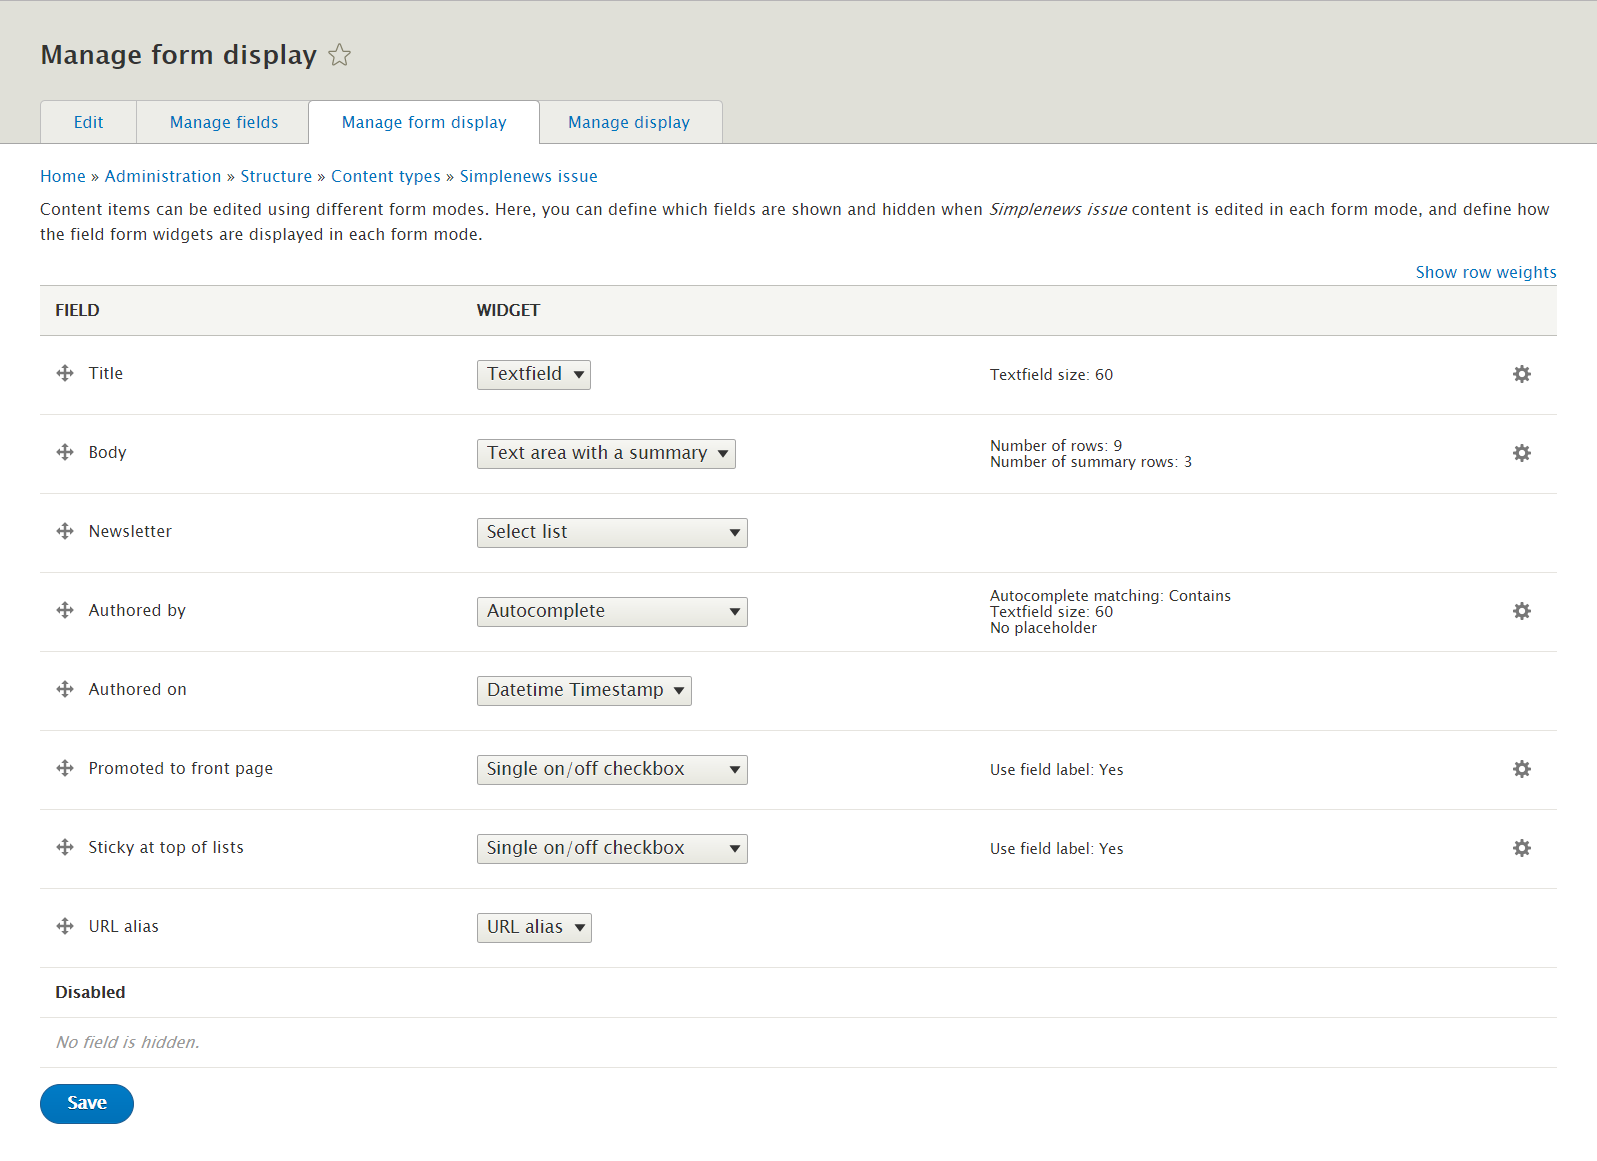
Step 4: Go to Manage form display tab, set following properties:
Step 5: Go to Manage display tab > Default tab, set following properties:
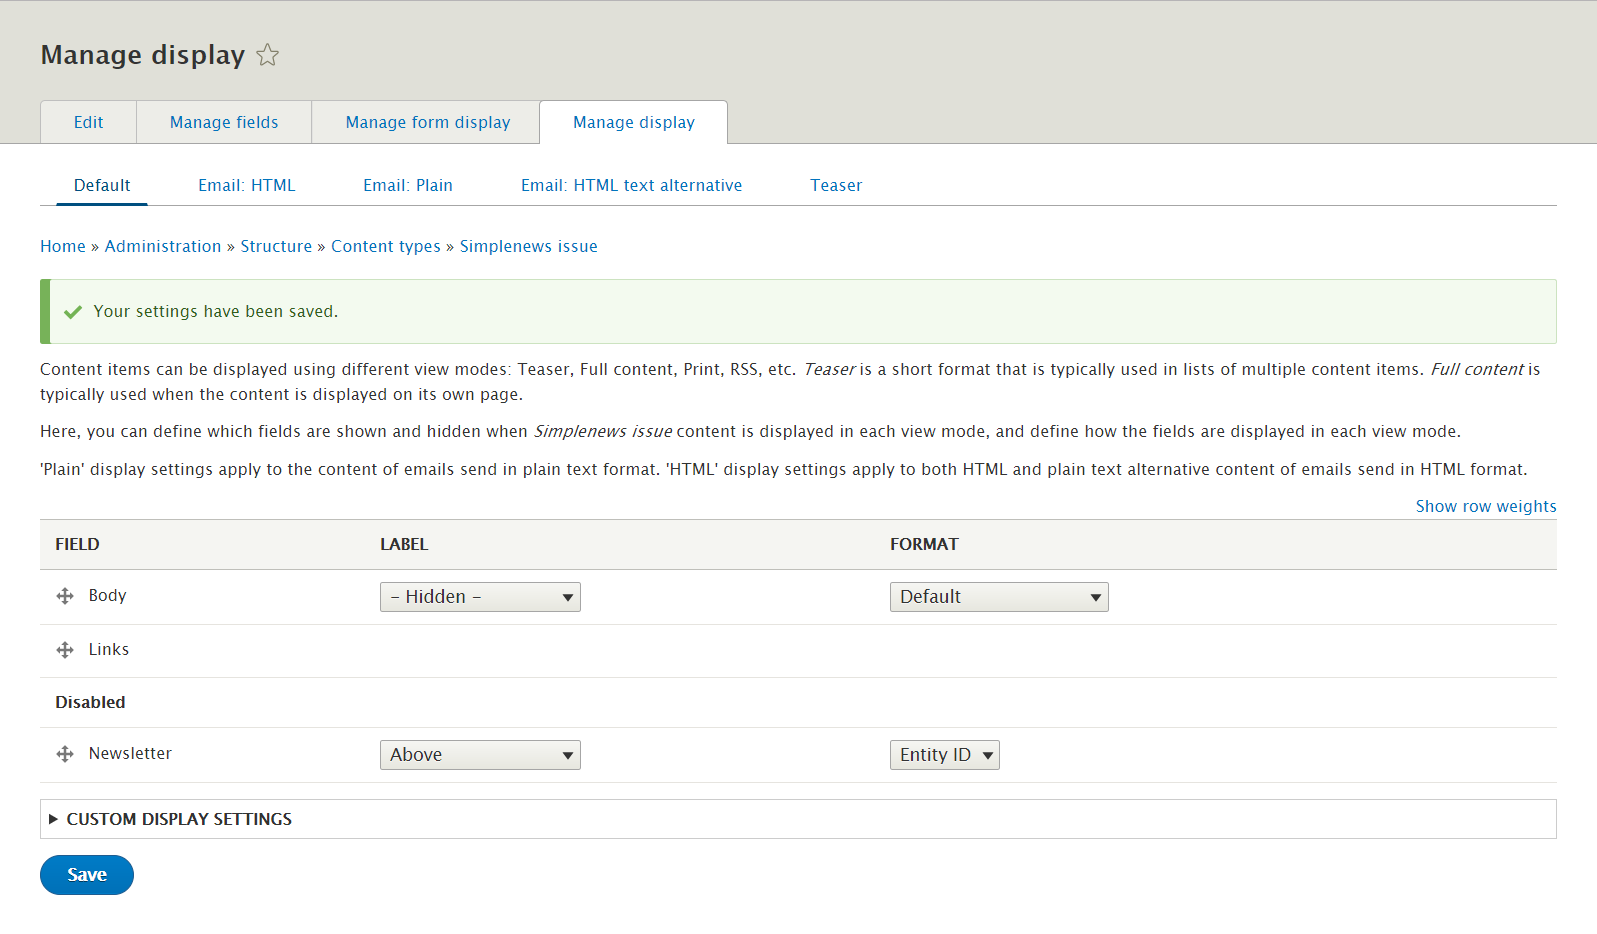
Step 6: Click Save button
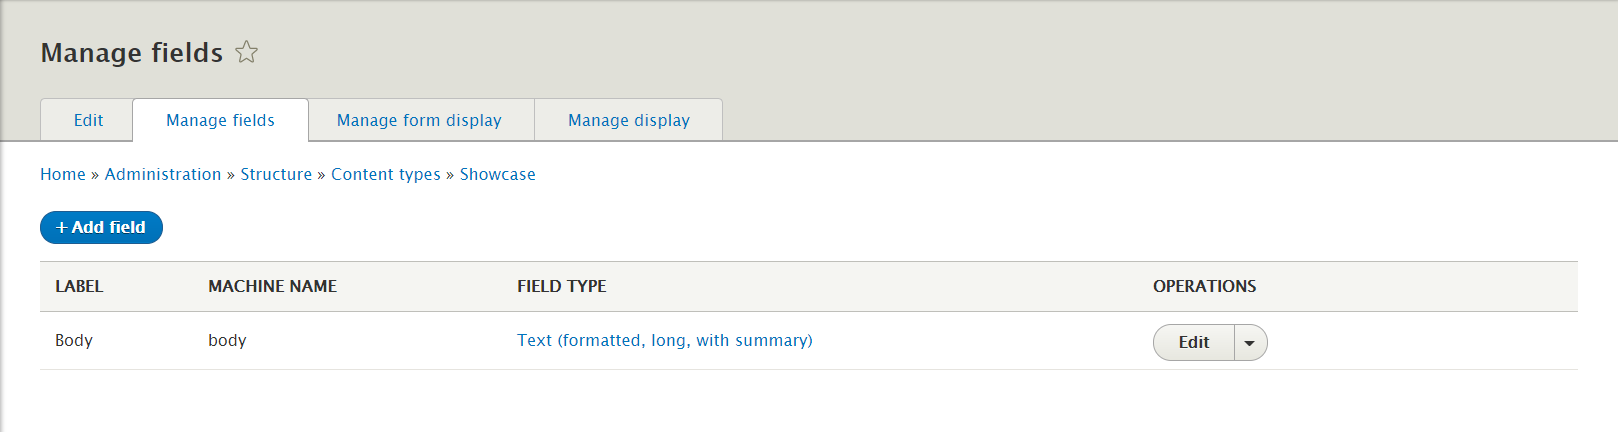
Create Showcase type
Step 1: Navigate to Structure > Content Type
Step 2: Click Add Content Type link to create Showcase type
Step 3: Click Save and manage fields button, then add following fields:
Step 4: Click Add field button, set properties for image field


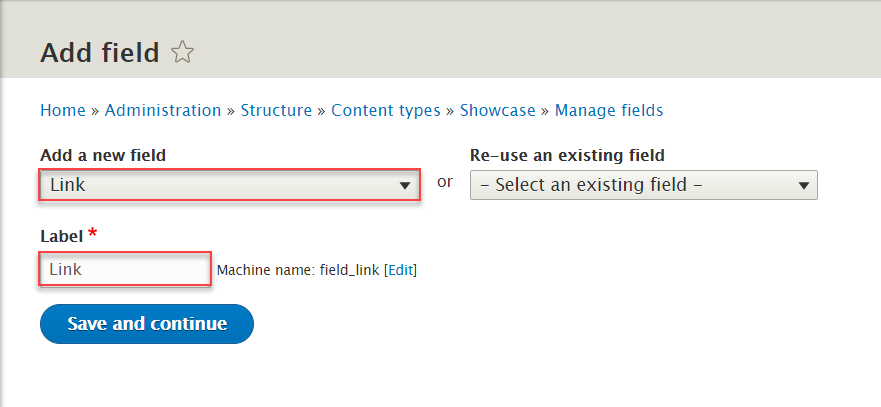
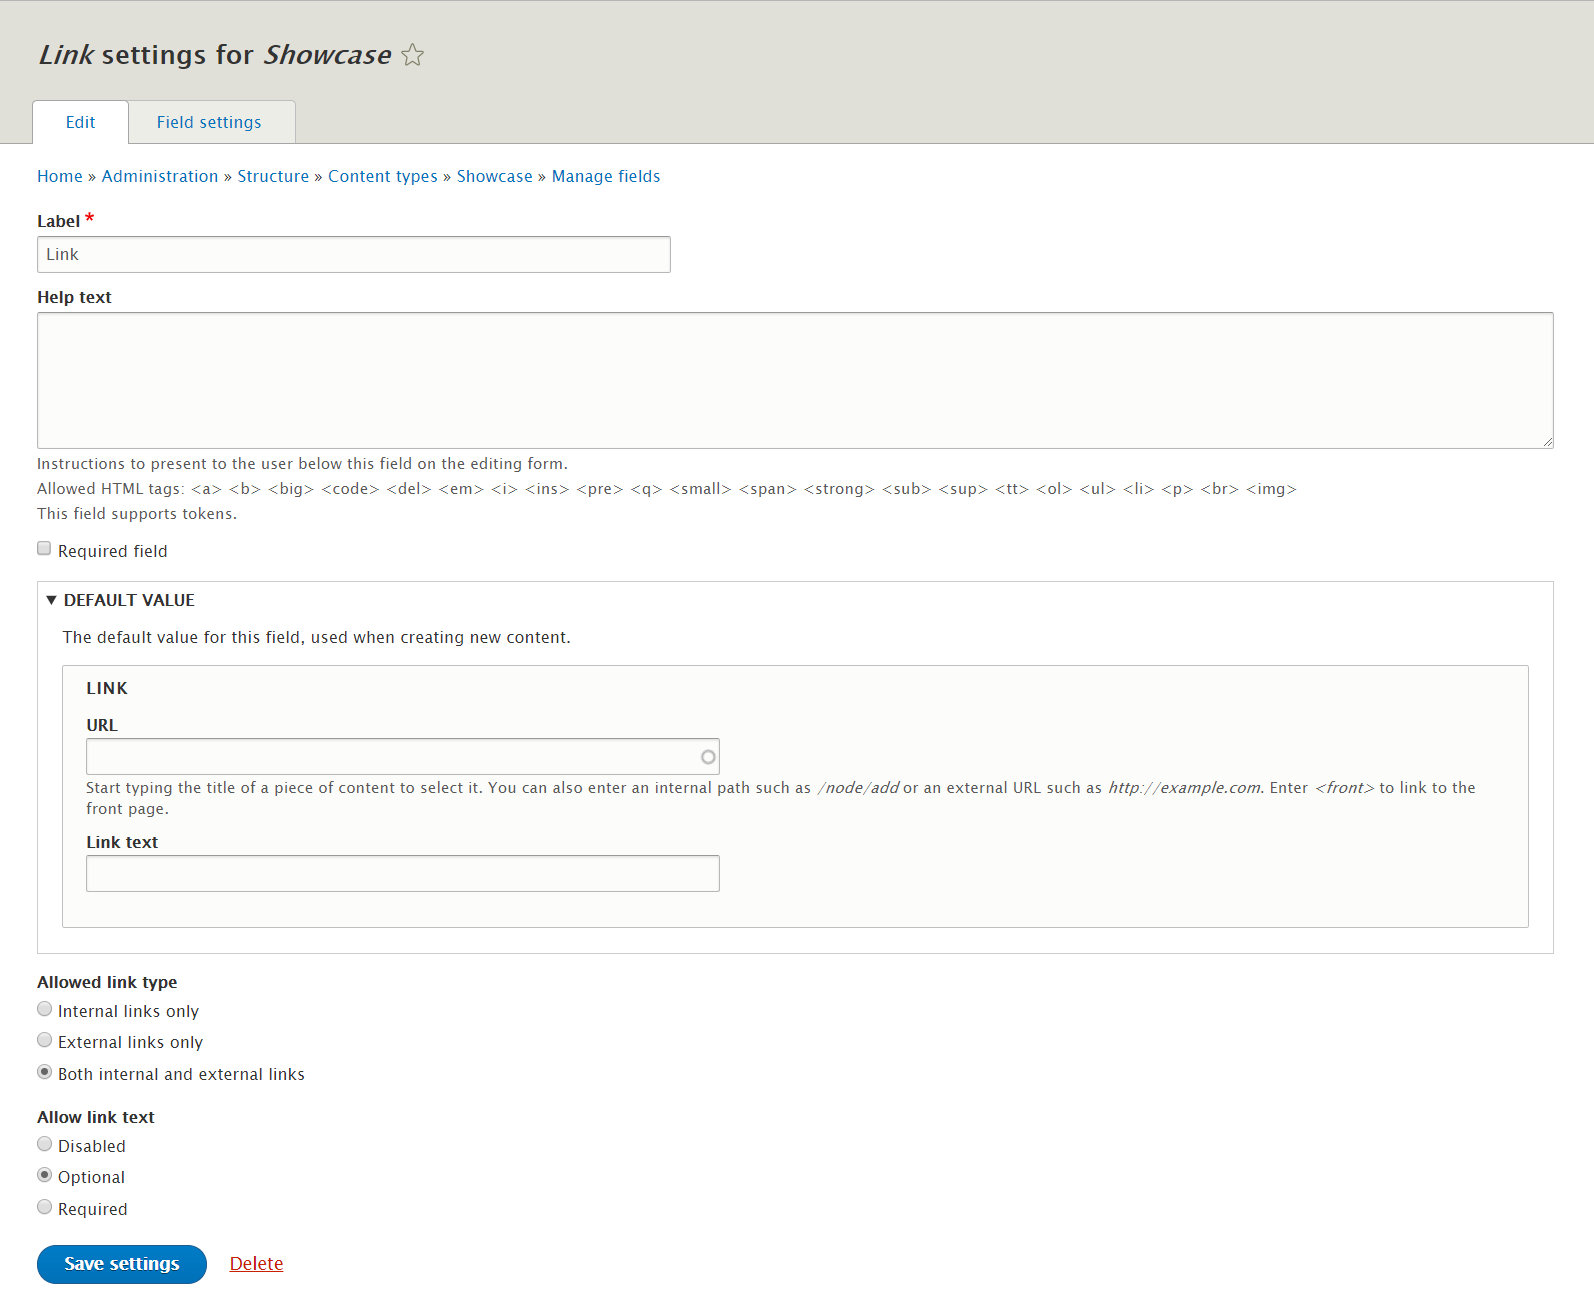
Step 5: Click Add field button, set properties for link field
Step 6: Go to Manage form display tab, set following properties:

Step 7: Go to Manage display tab > Default tab. Set following properties:

Step 7: Go to Manage display tab > Teaser tab. Set following properties:
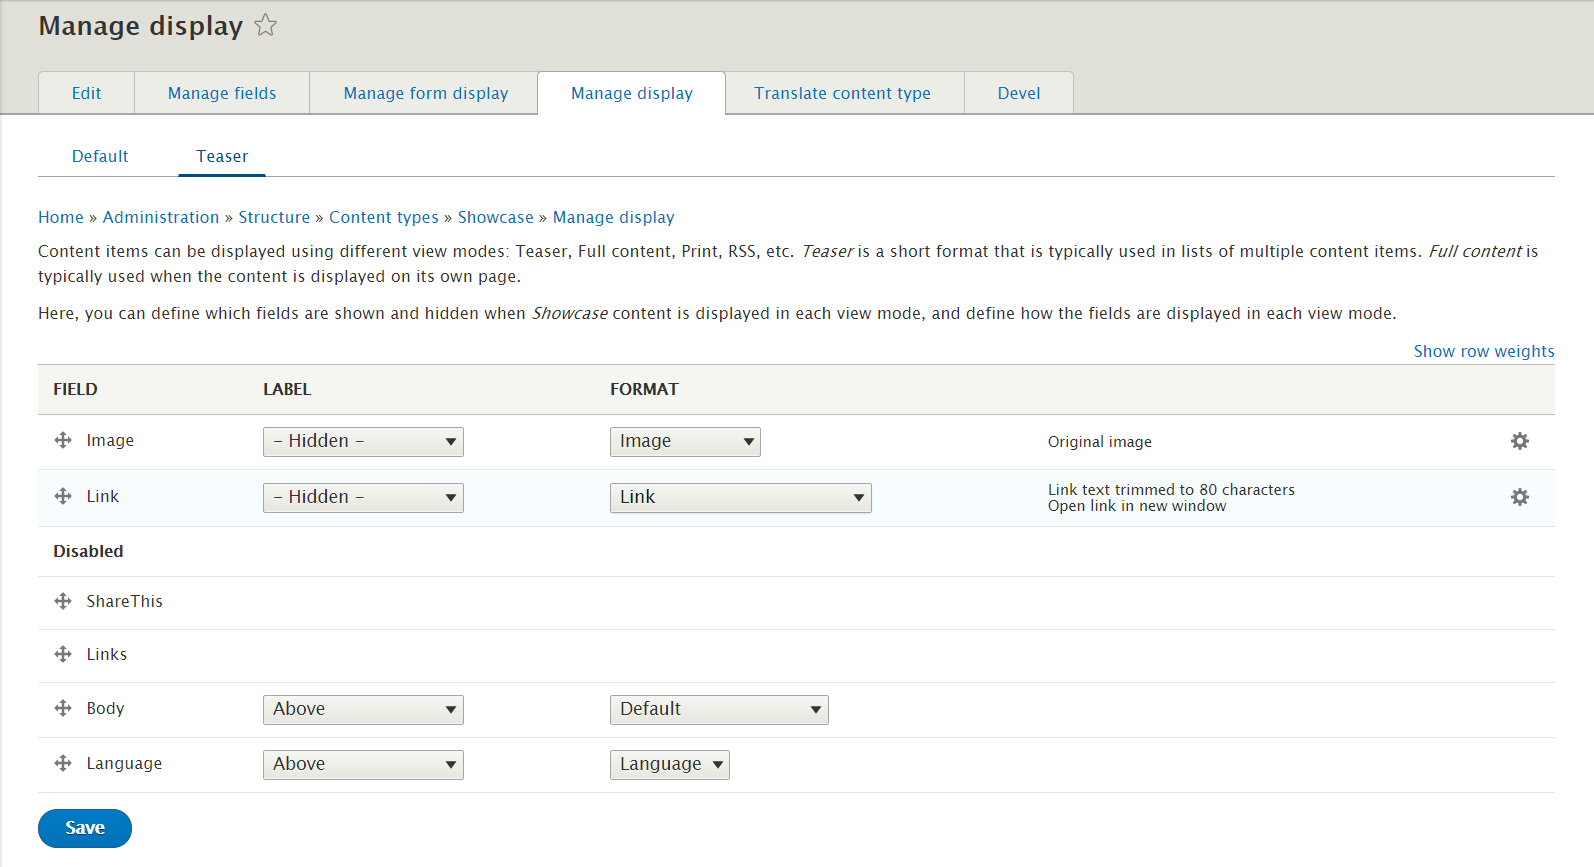
Step 8: Click Save button
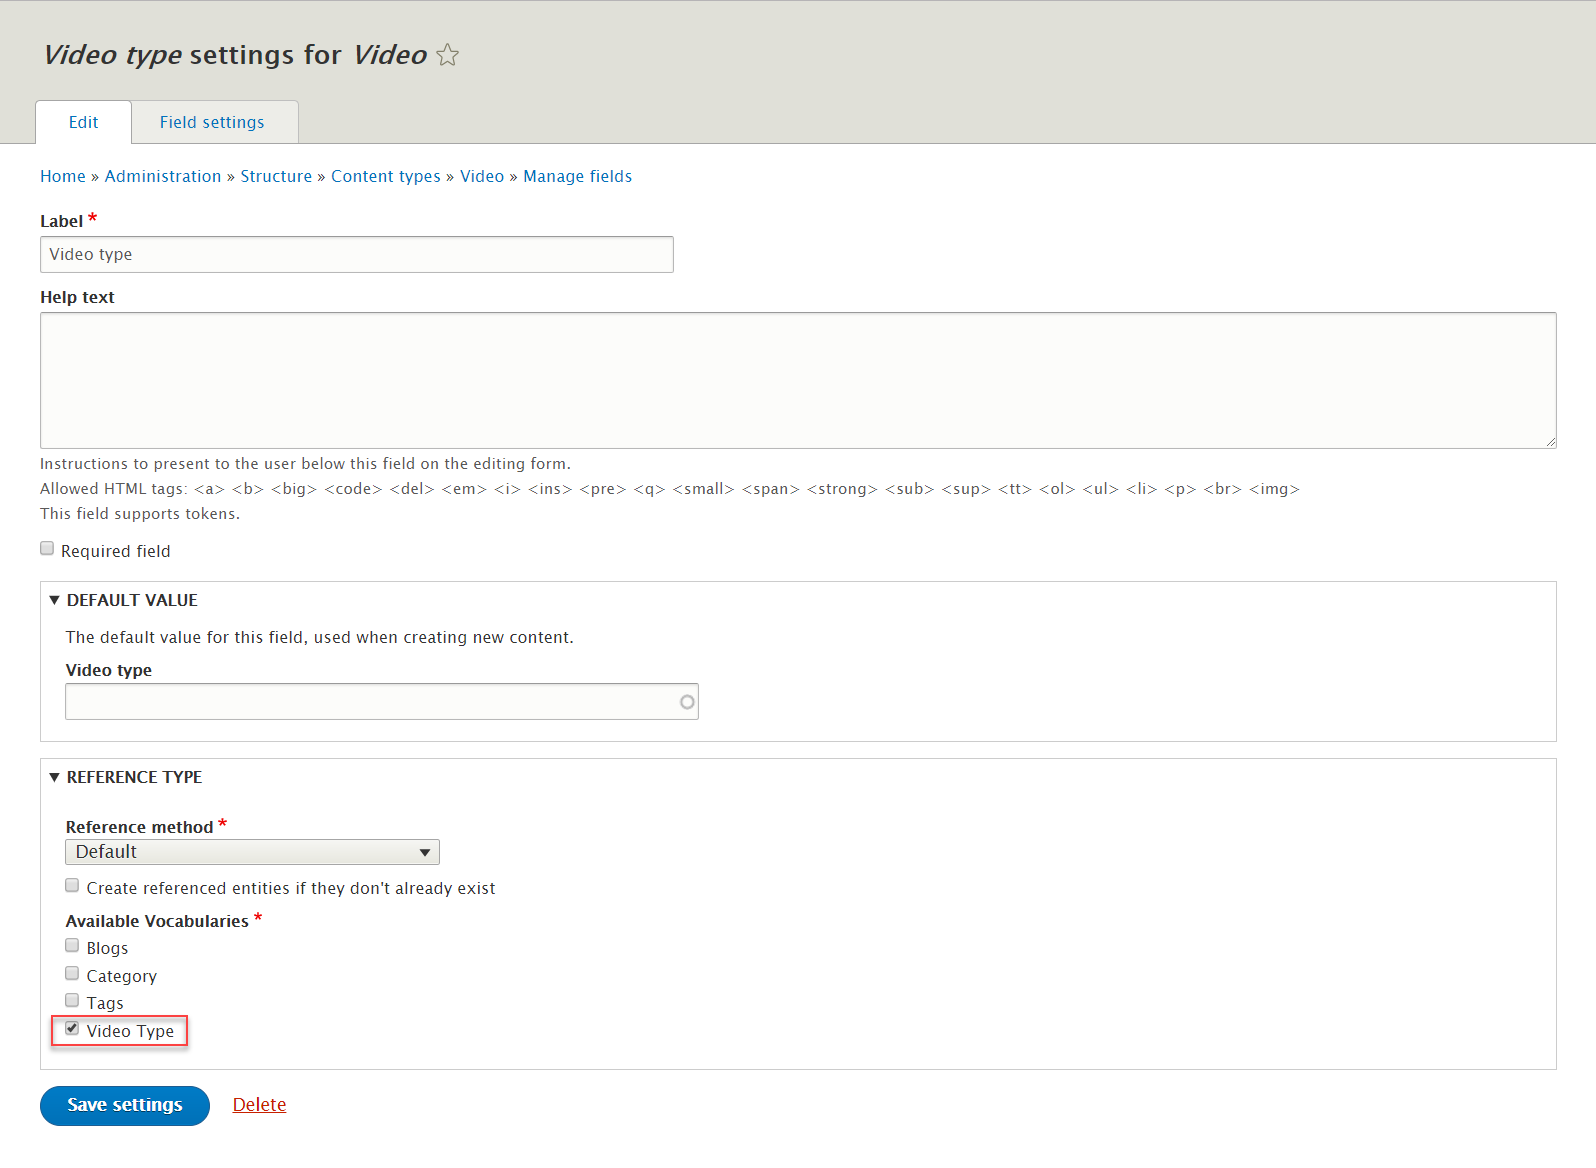
Create Video type
Step 1: Navigate to Structure > Content Type
Step 2: Click Add Content Type link to create Video type
Step 3: Click Save and manage fields button, then add following fields:
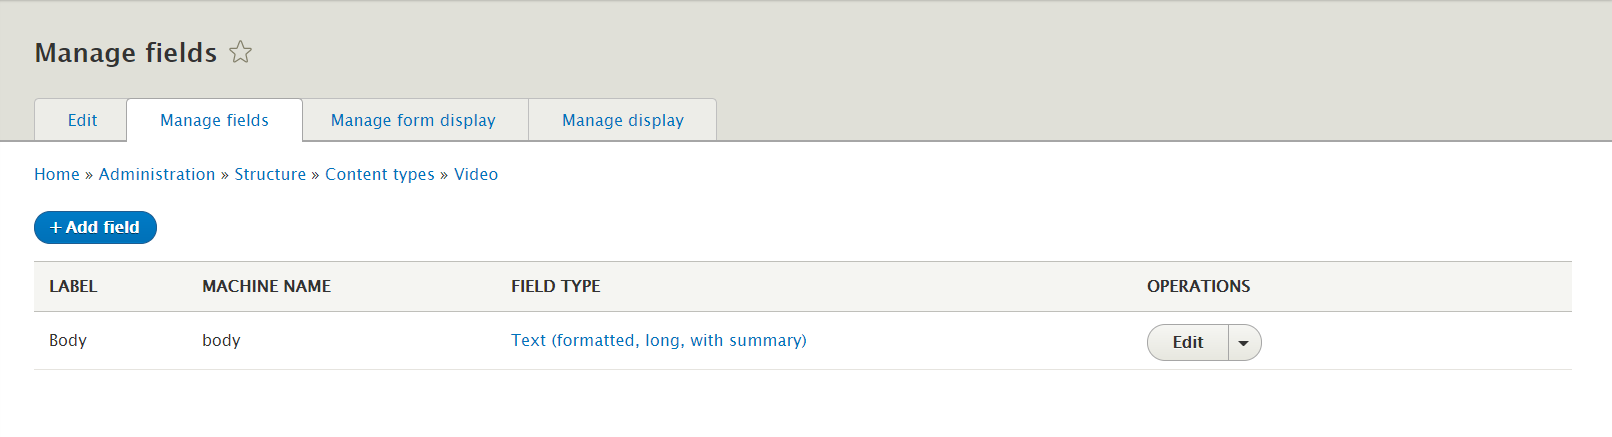
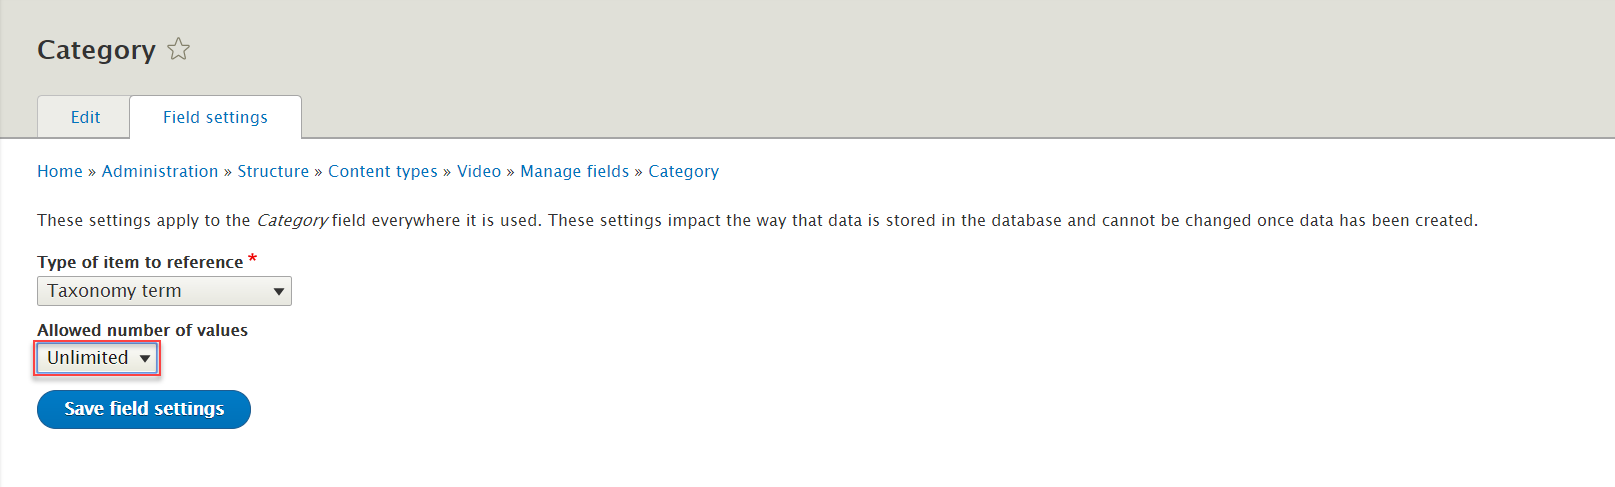
Step 4: Click Add field button, set properties for Category field


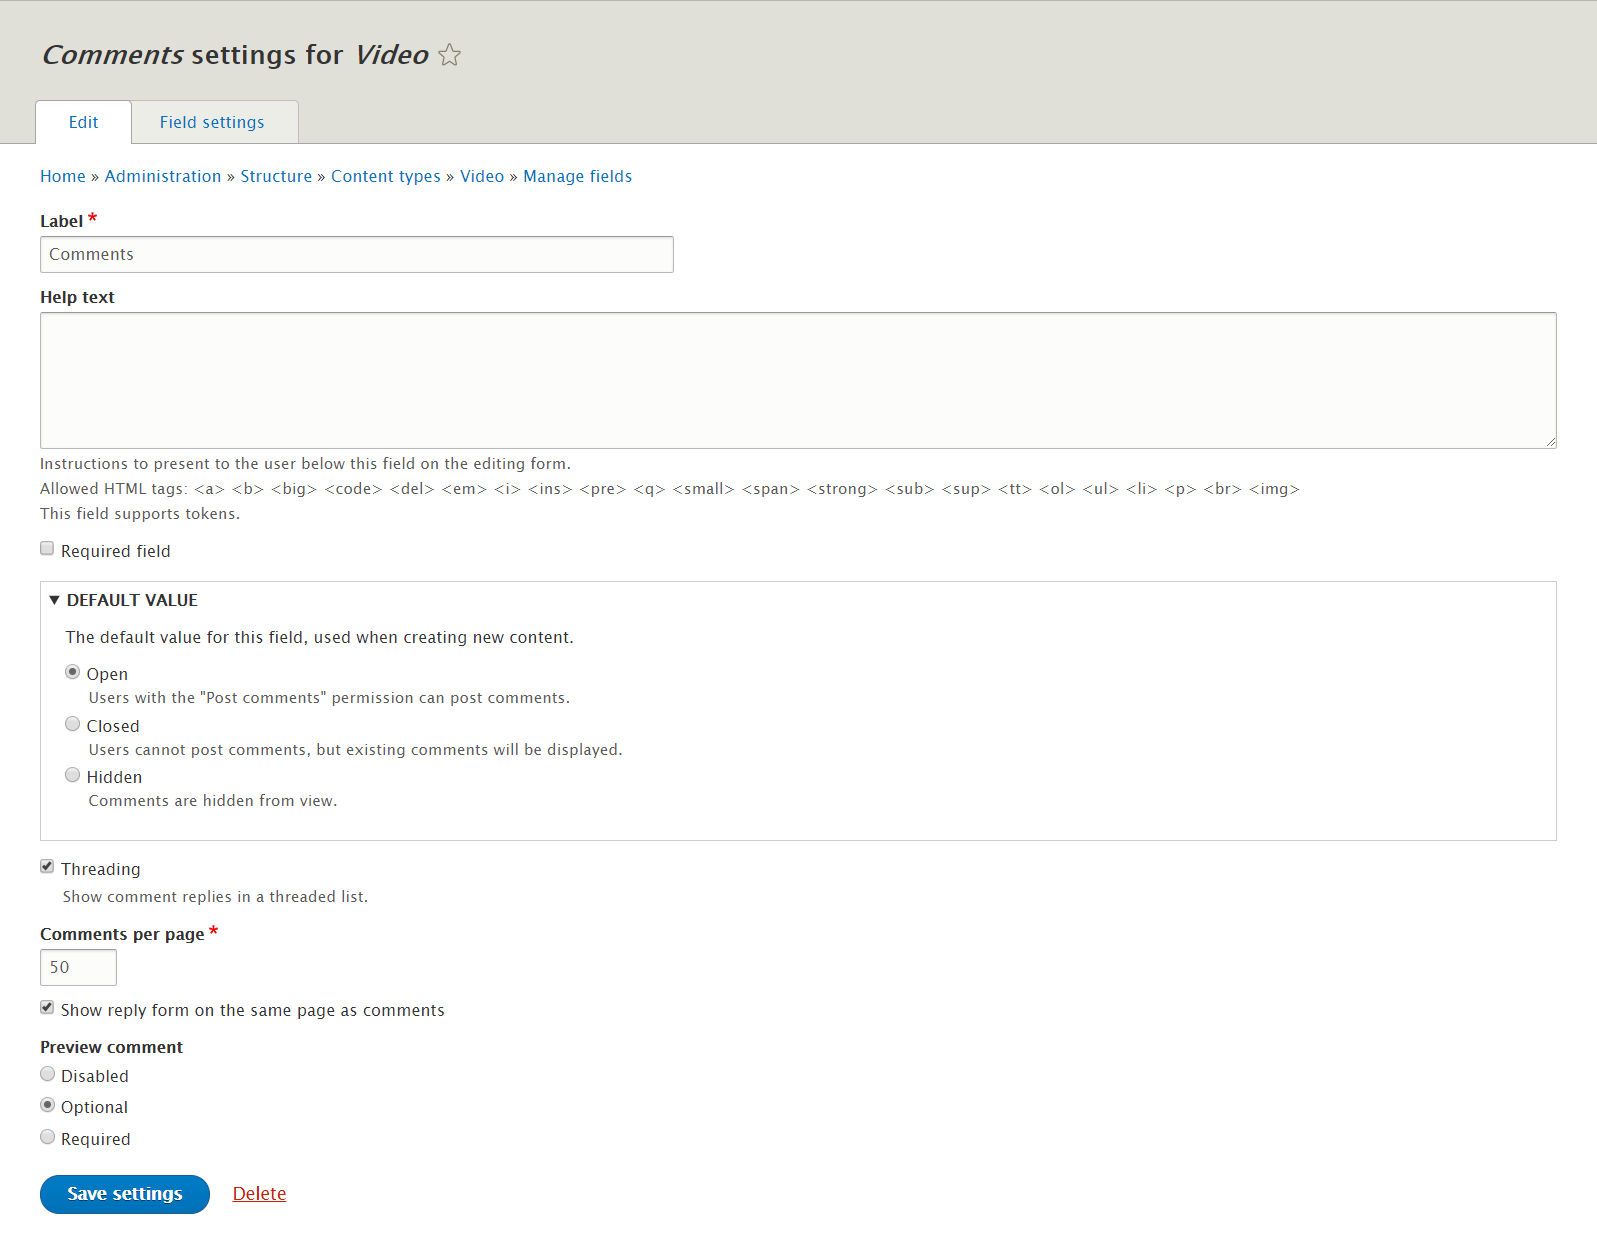
Step 5: Click Add field button, set properties for Comments field

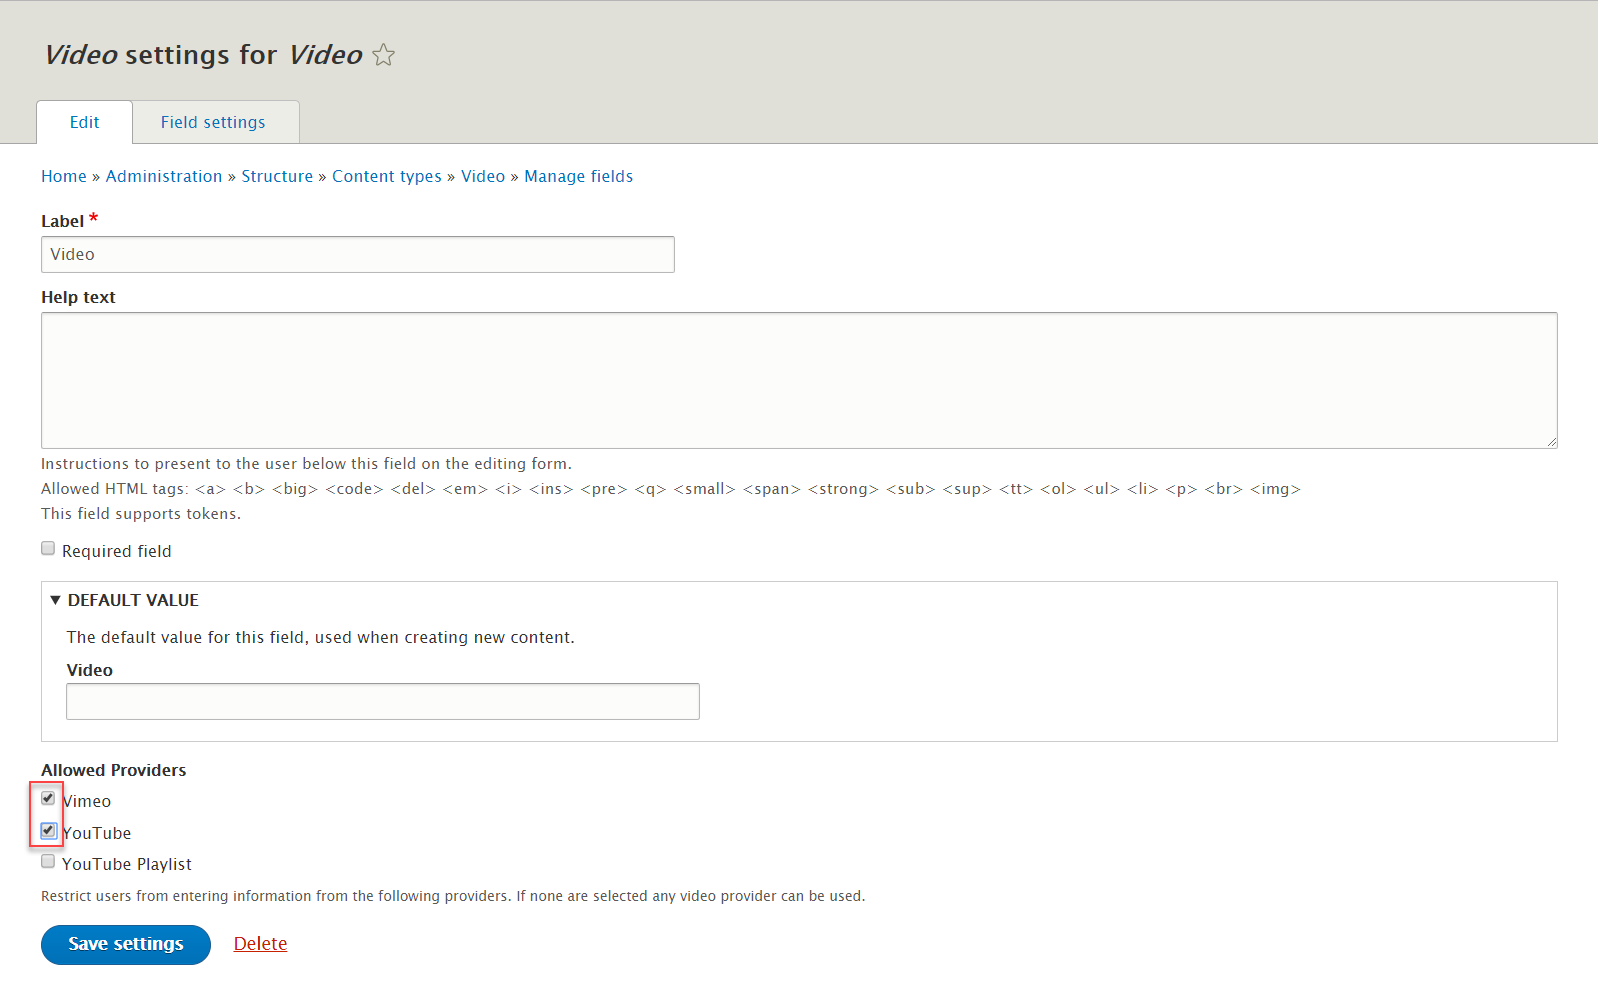
Step 6: Click Add field button, set properties for Video field

Step 7: Click Add field button, set properties for Video type field

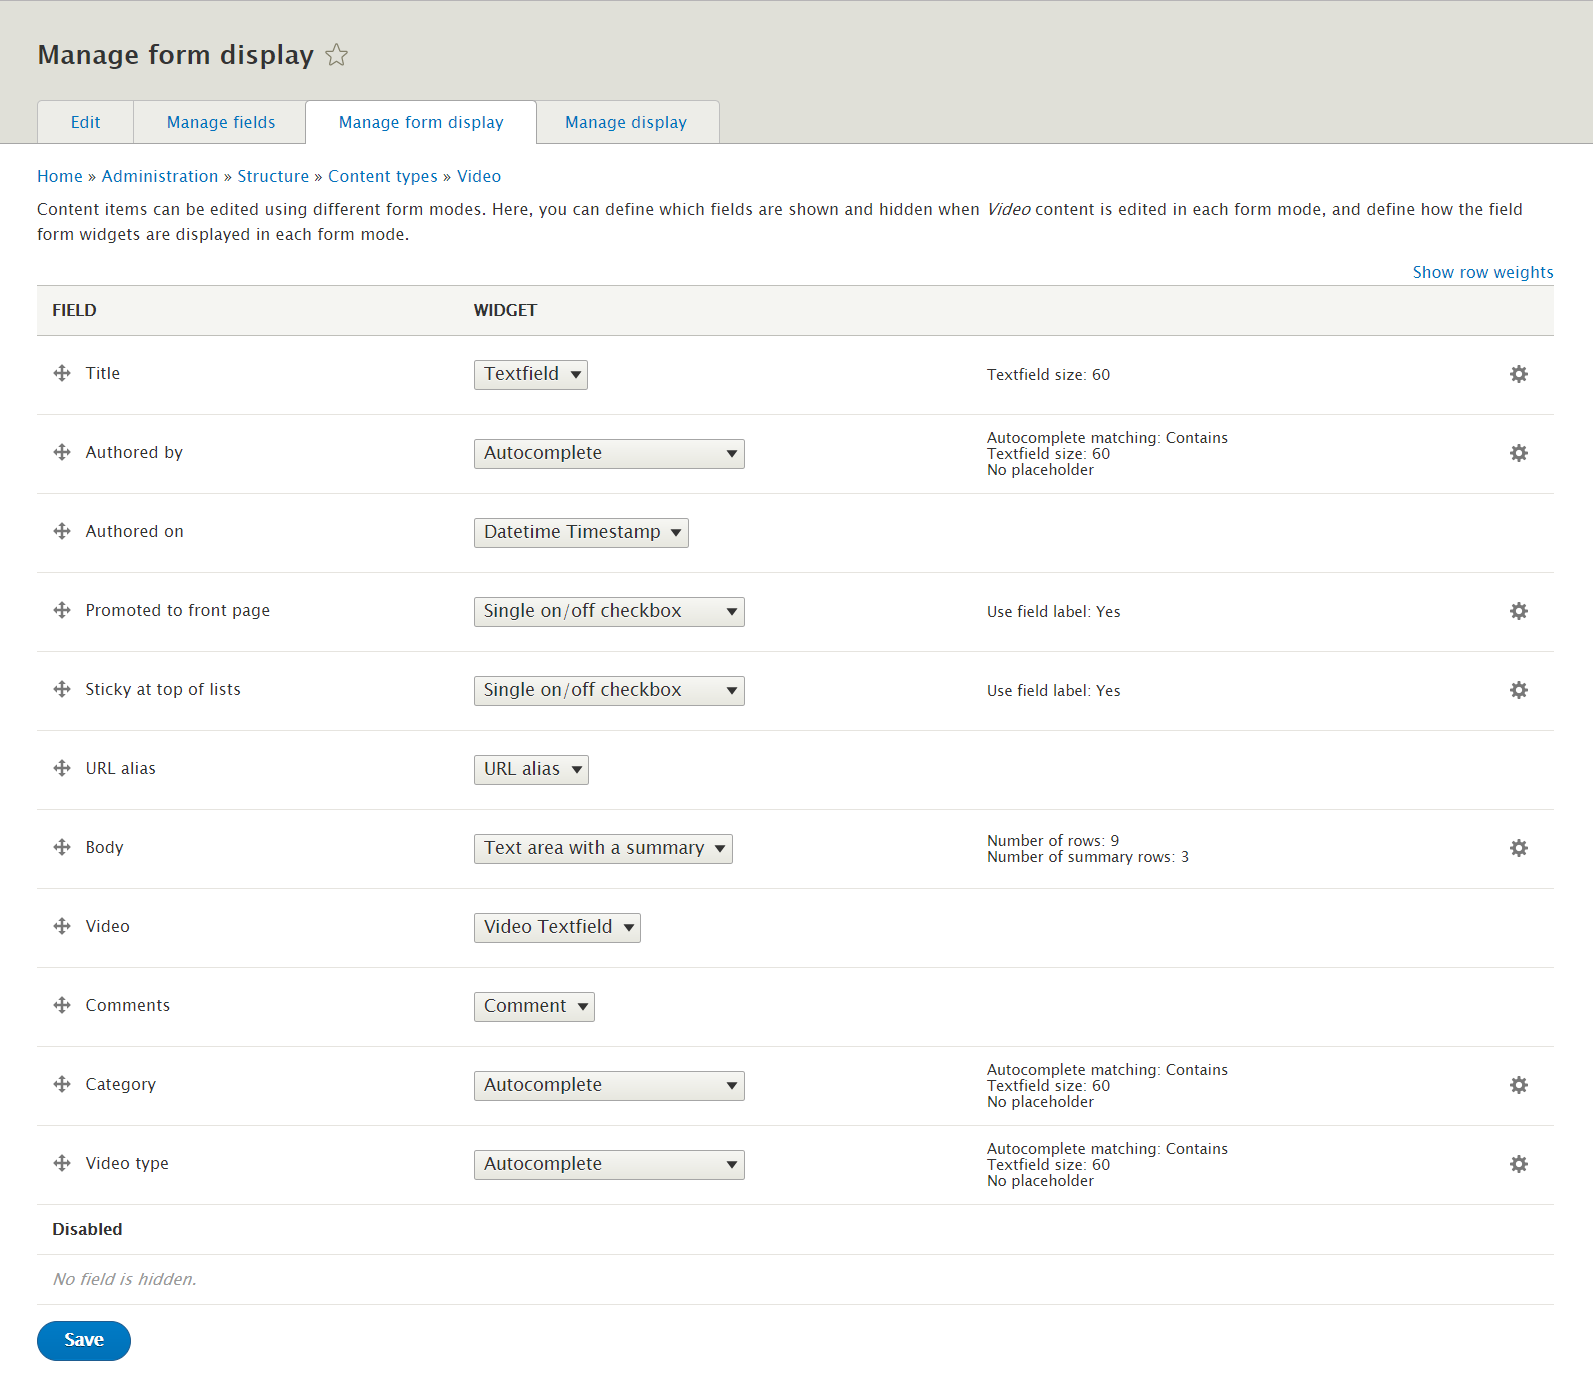
Step 9: Go to Manage form display tab, set following properties:
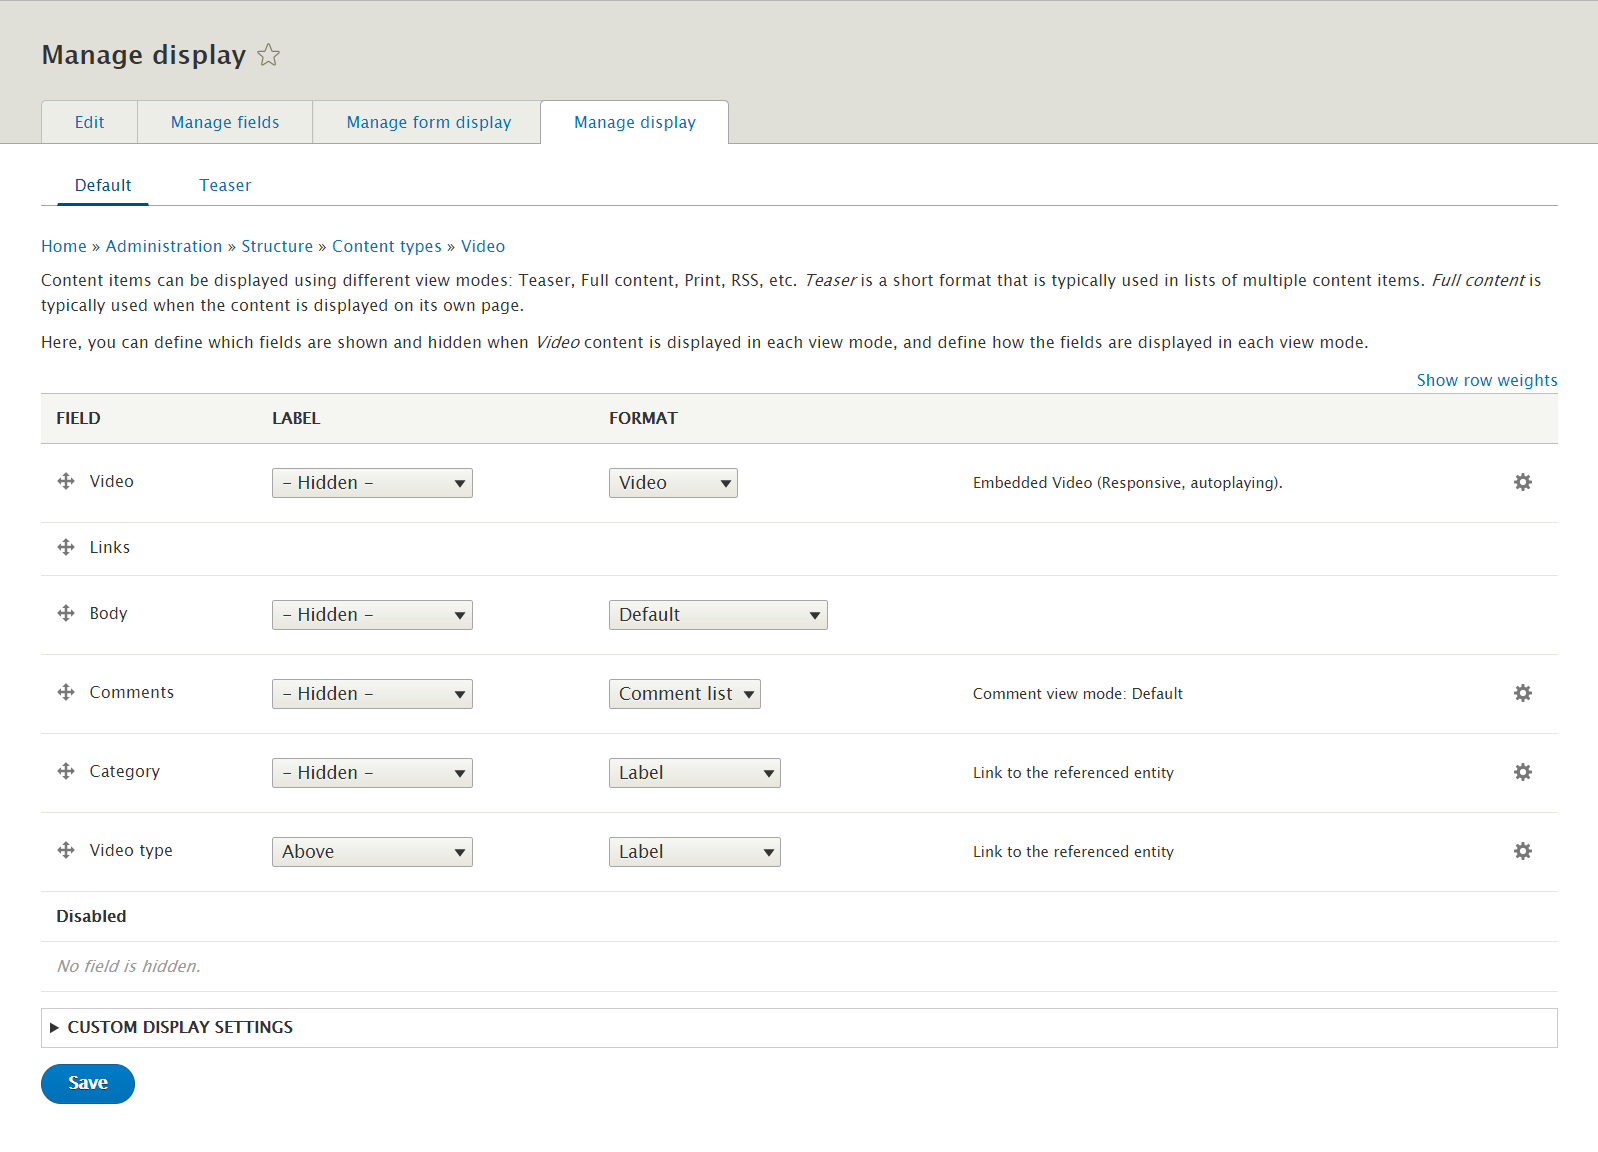
Step 10: Go to Manage display tab > Default tab. Set following properties:
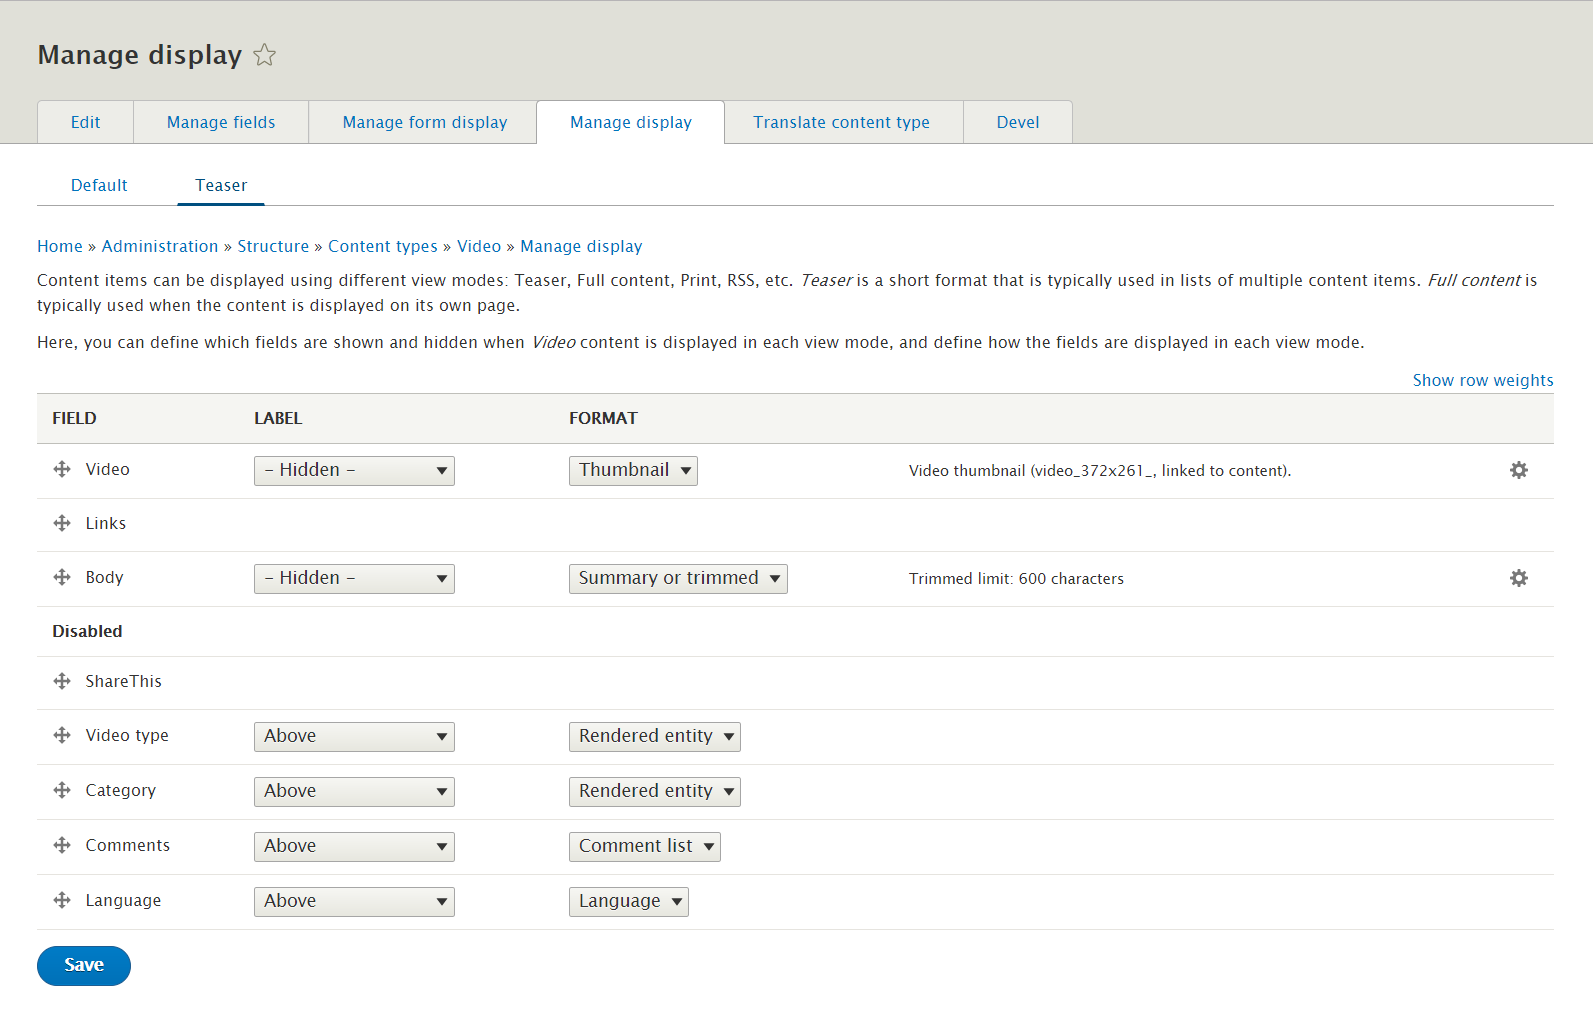
Step 10: Go to Manage display tab > Teaser tab. Set following properties:
Step 11: Click Save button
More Configurations
Site Information
In this section, you can change basic settings, such as the site name, slogan, e-mail address.
1. Log in to Administration site page by administrator account
2. Navigate to the Site Information page Configuration > System > Basic site settings

3. Change site details from the view:
- Site name
- Slogan
- E-mail address
- Set Default Front page
4. Click on Save configuration to finish editing.
Appearance Settings
Step 1: Log into website by administrator account.
Step 2: Go to Appearance > Settings find ZetraZ tab click and set following properites:
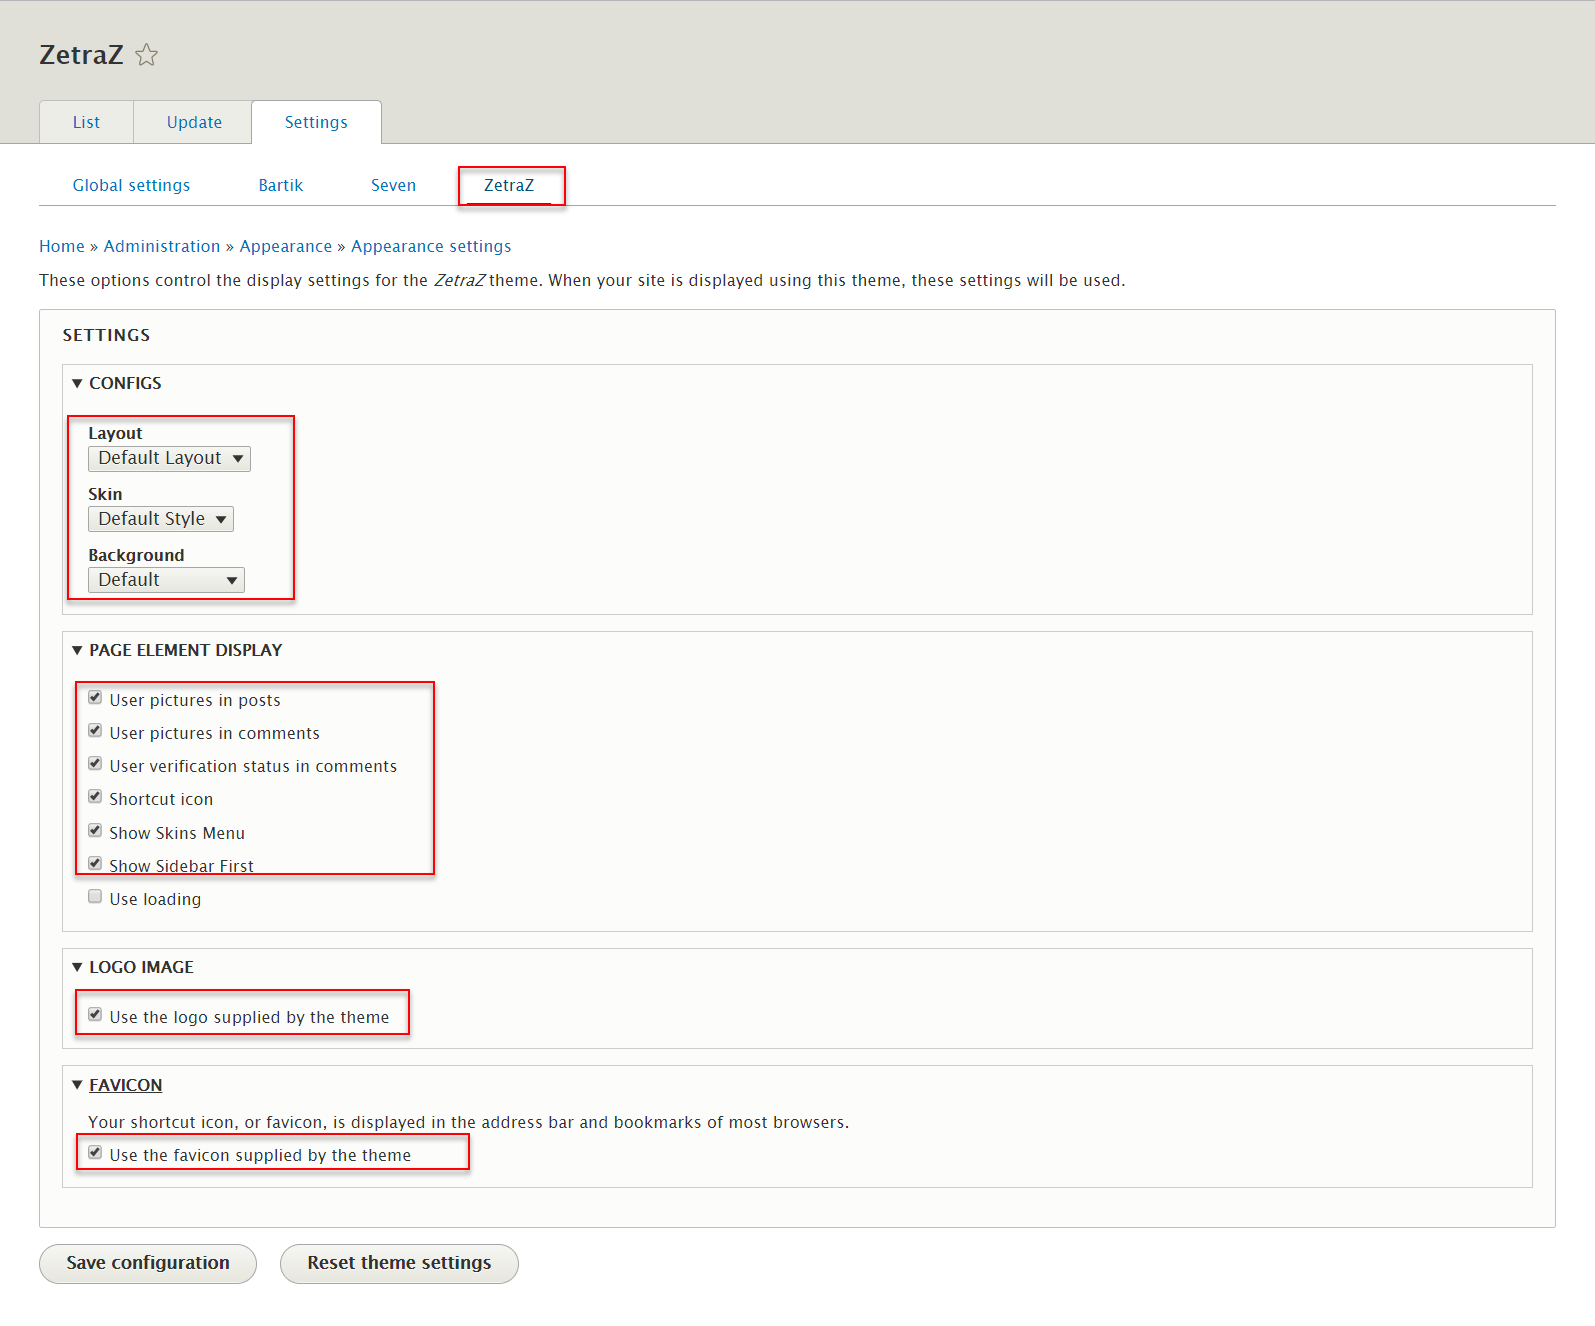
Step 3: Click on Save configuration button.
Create Homepage
Ad banner block
Front end Display

1. Create Ad banner block
Step 1: Navigate to Structure > Views, click Add new view, then create Ad view with following settings:
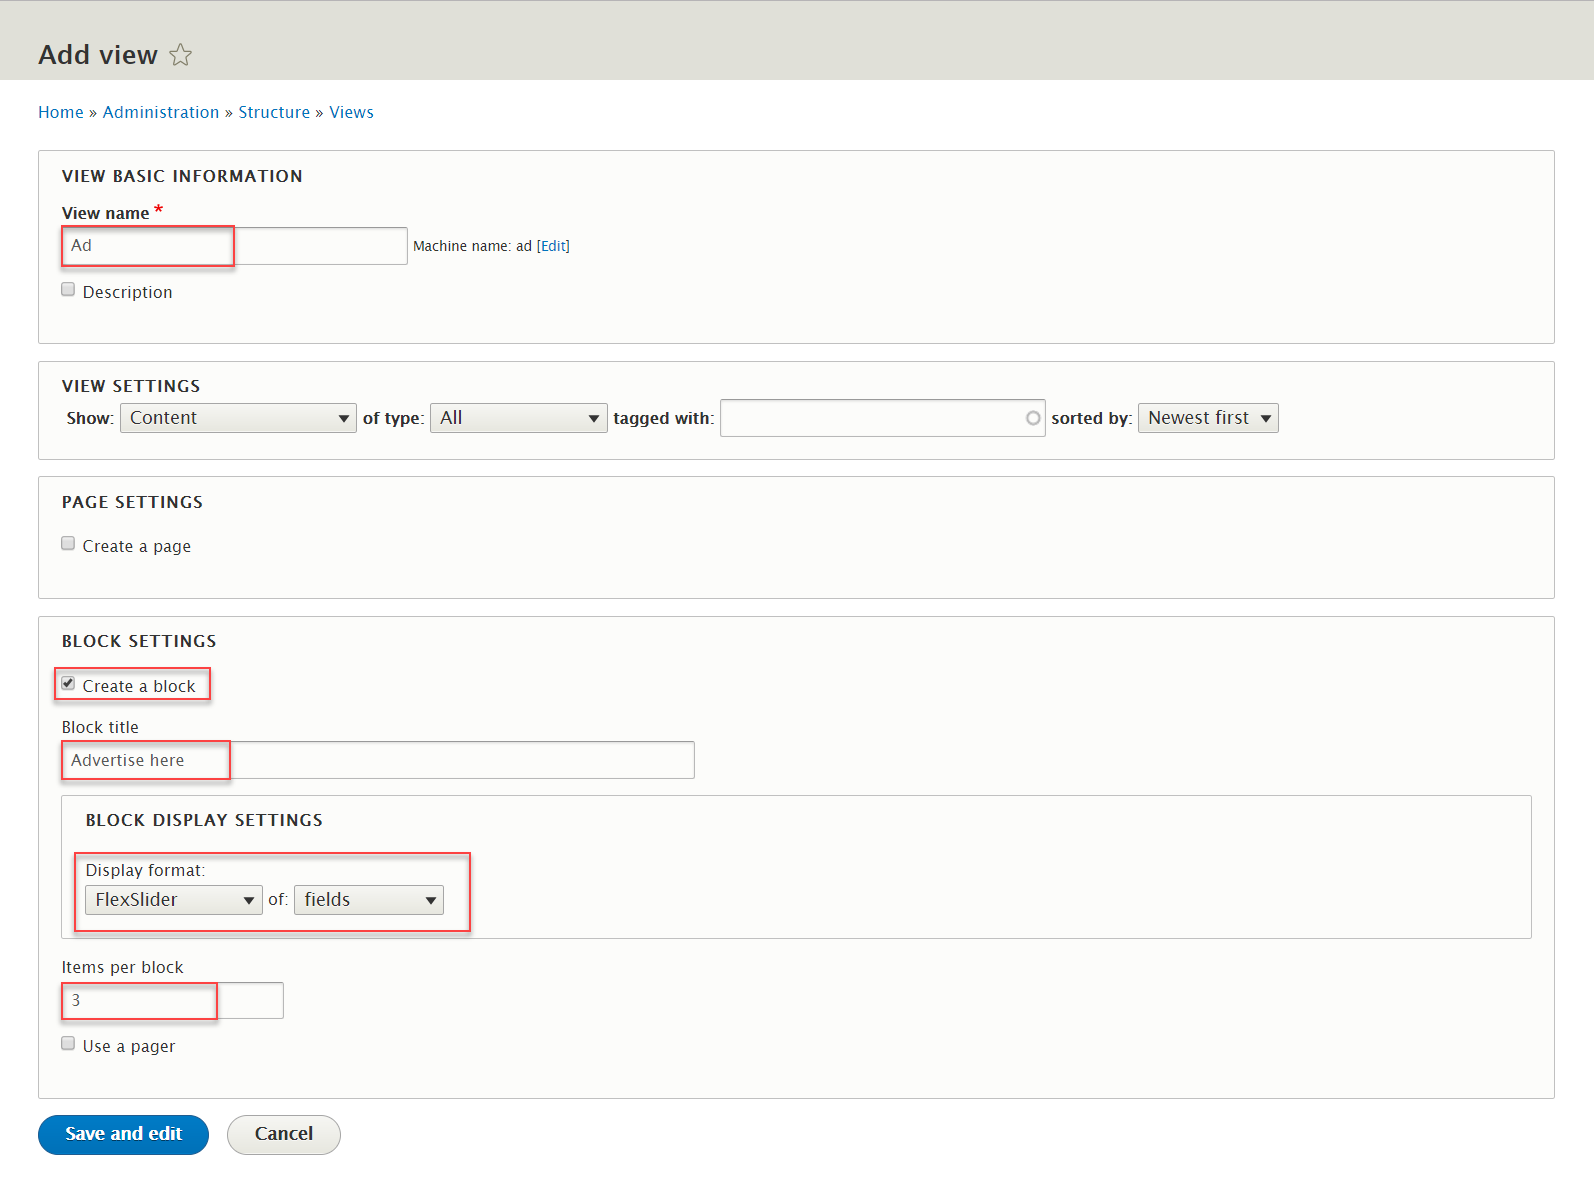
Step 2: Click Save and edit button. Next to steps below to set properties for following fields:

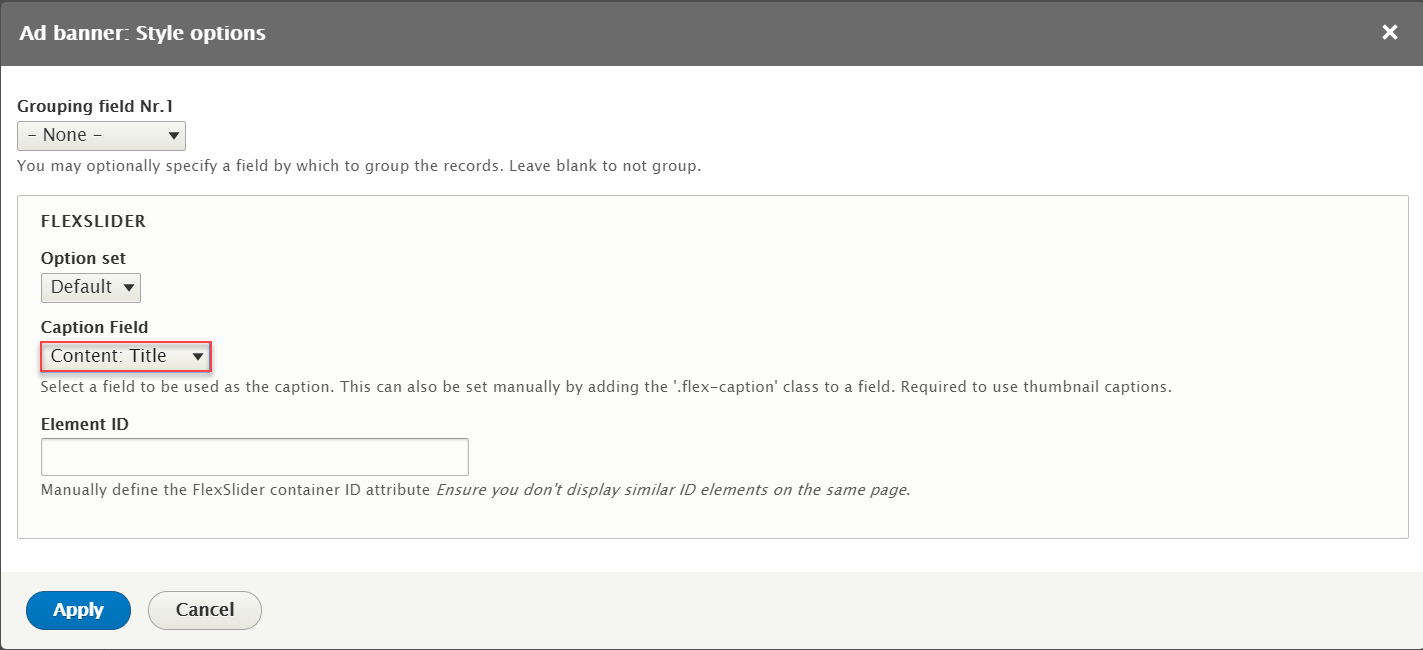
Step 3: At FORMAT area, click Settings link to settings fields: FlexSlider
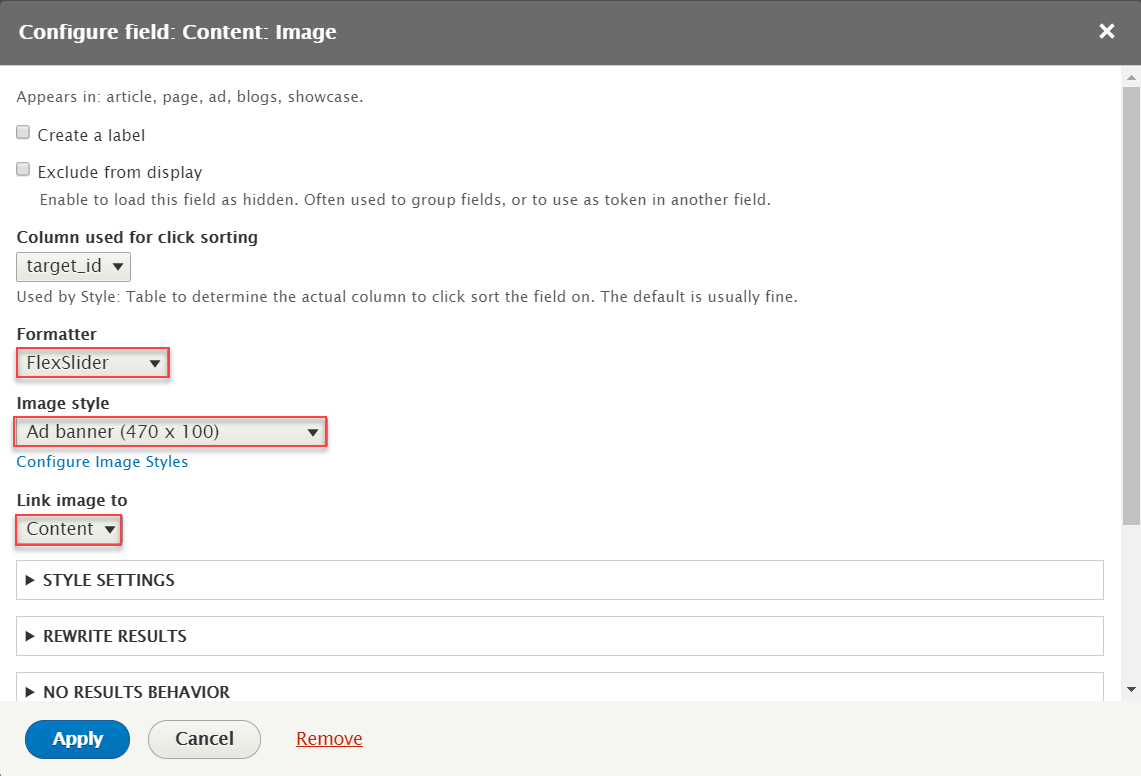
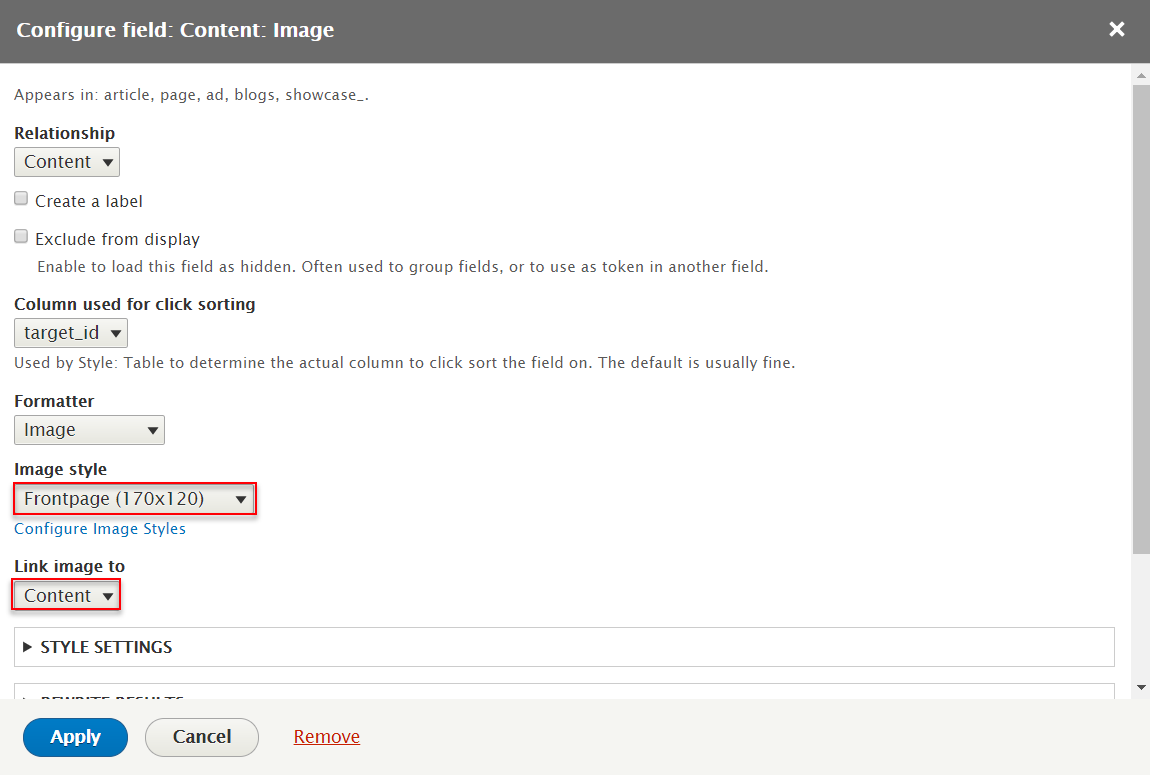
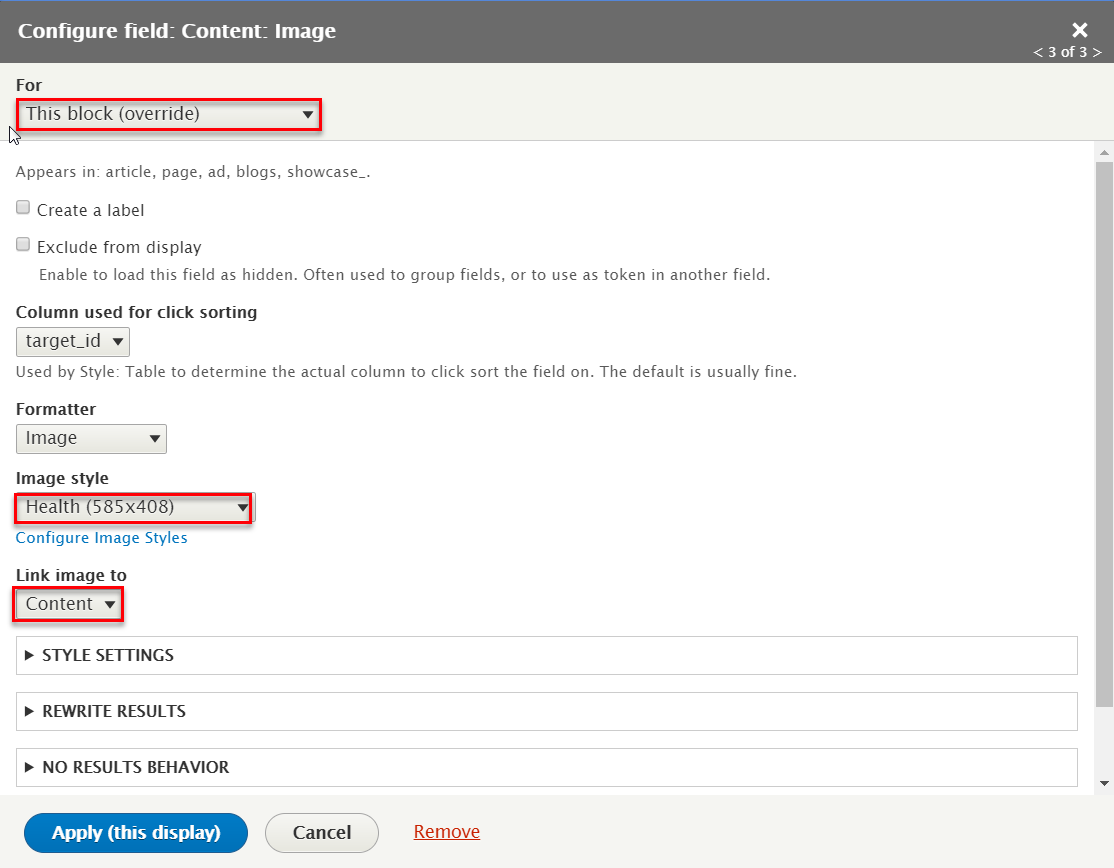
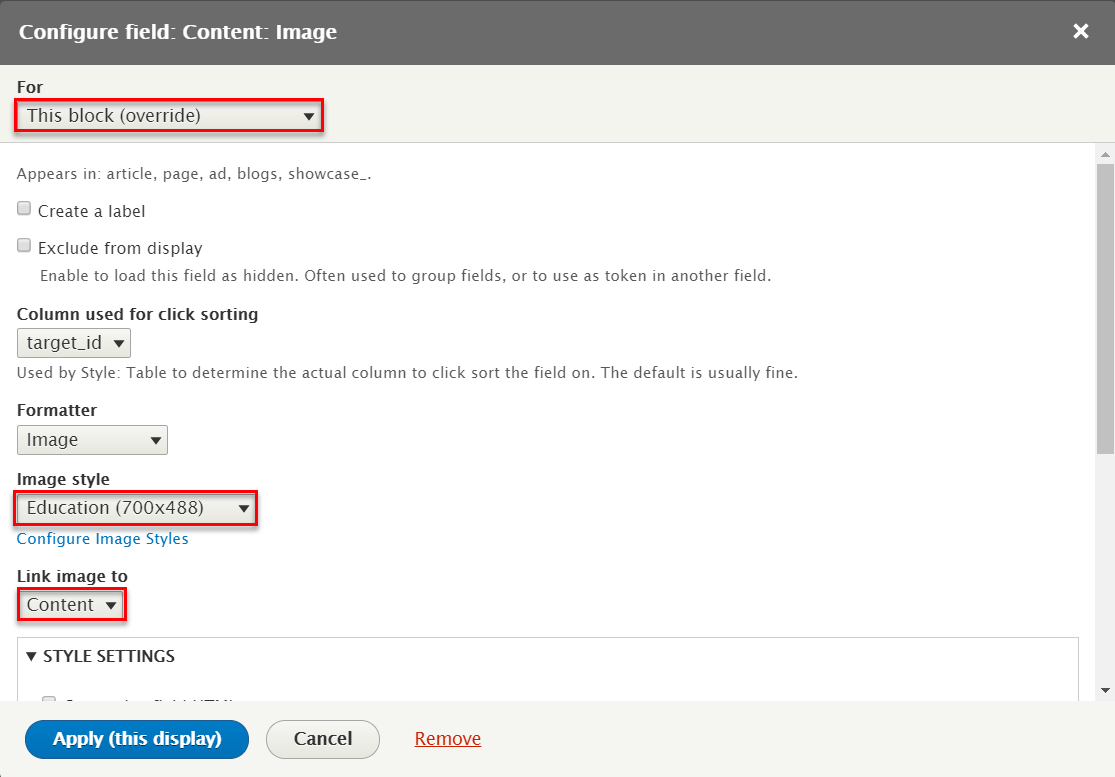
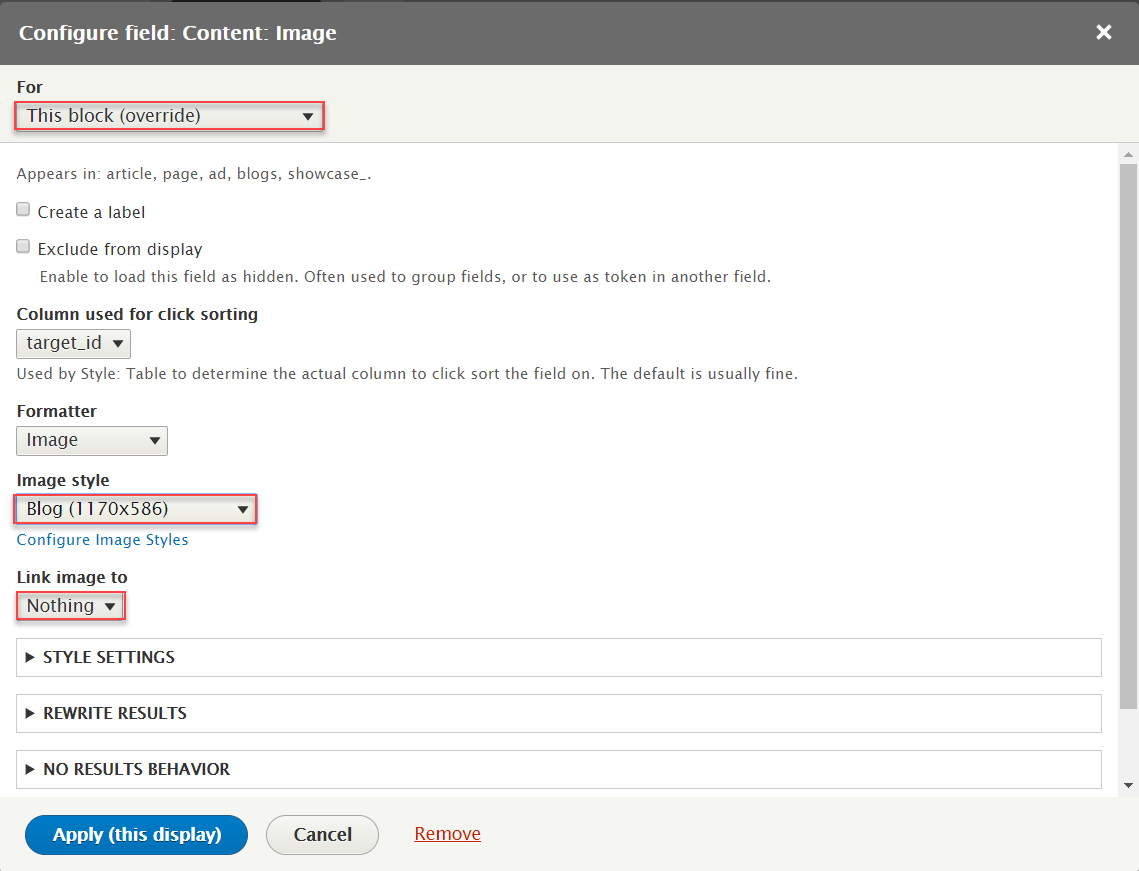
Step 4: At FIELDS area, click Add button to add fields: Content: Image. Set properties for Content: Image
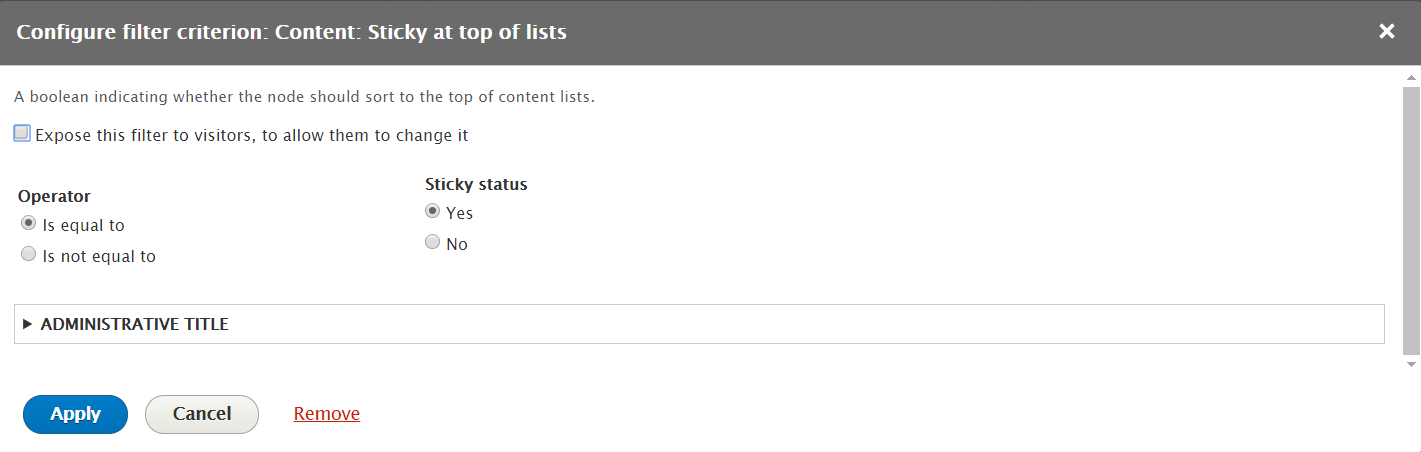
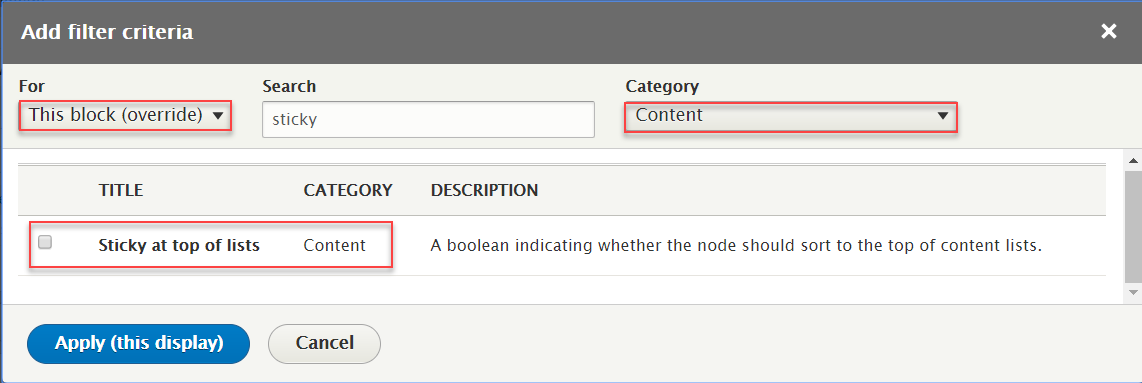
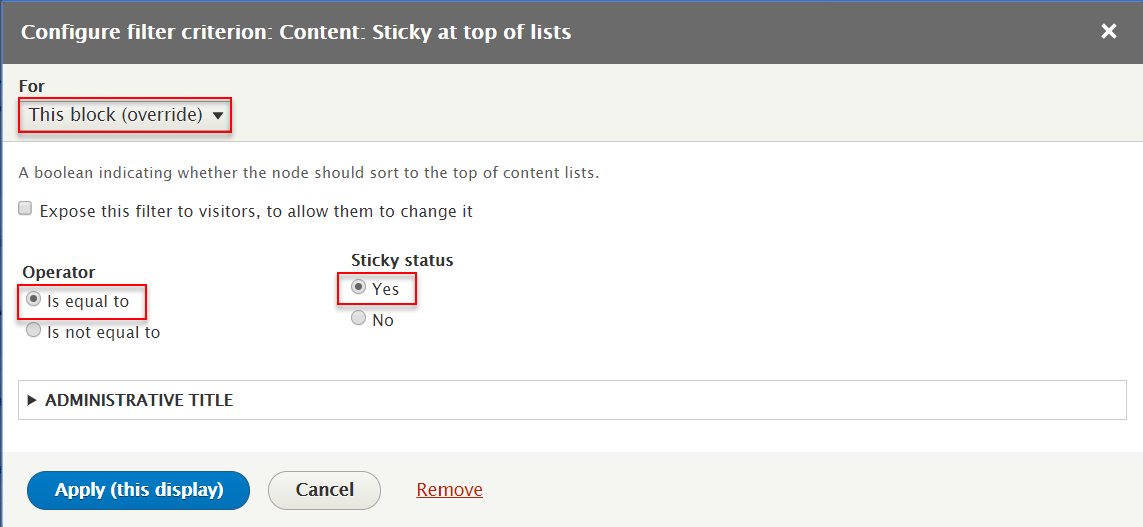
Step 5: At FILTER CRITERIA area, add Content: Content type, Content: Sticky at top of lists field and set properties:

Step 6: Click Save to save view
Note

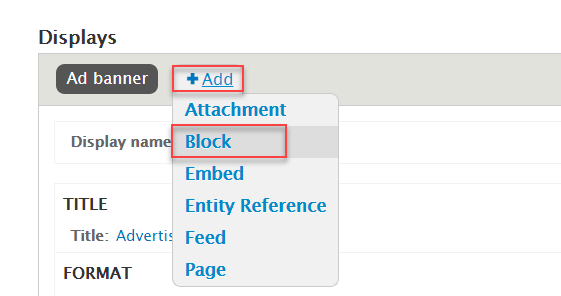
2. Create Ad block block
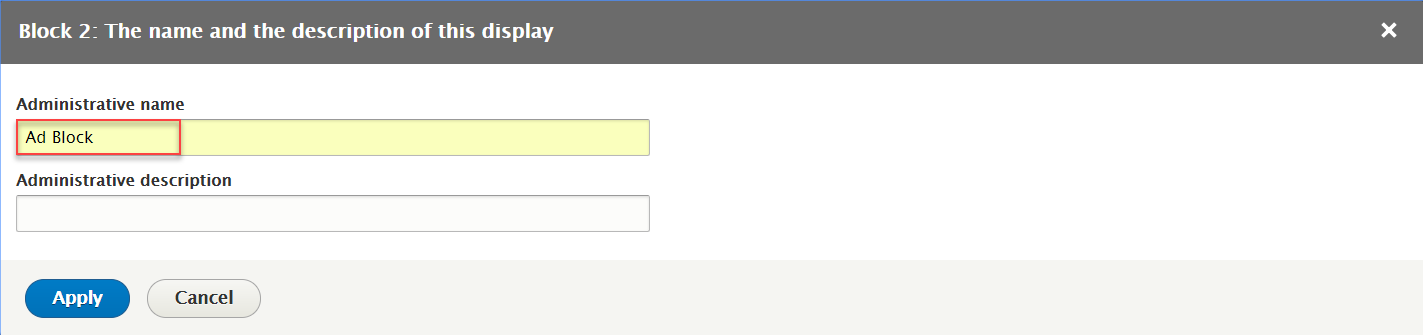
Step 1: Click Add > Block link, then create Ad block block with following settings:
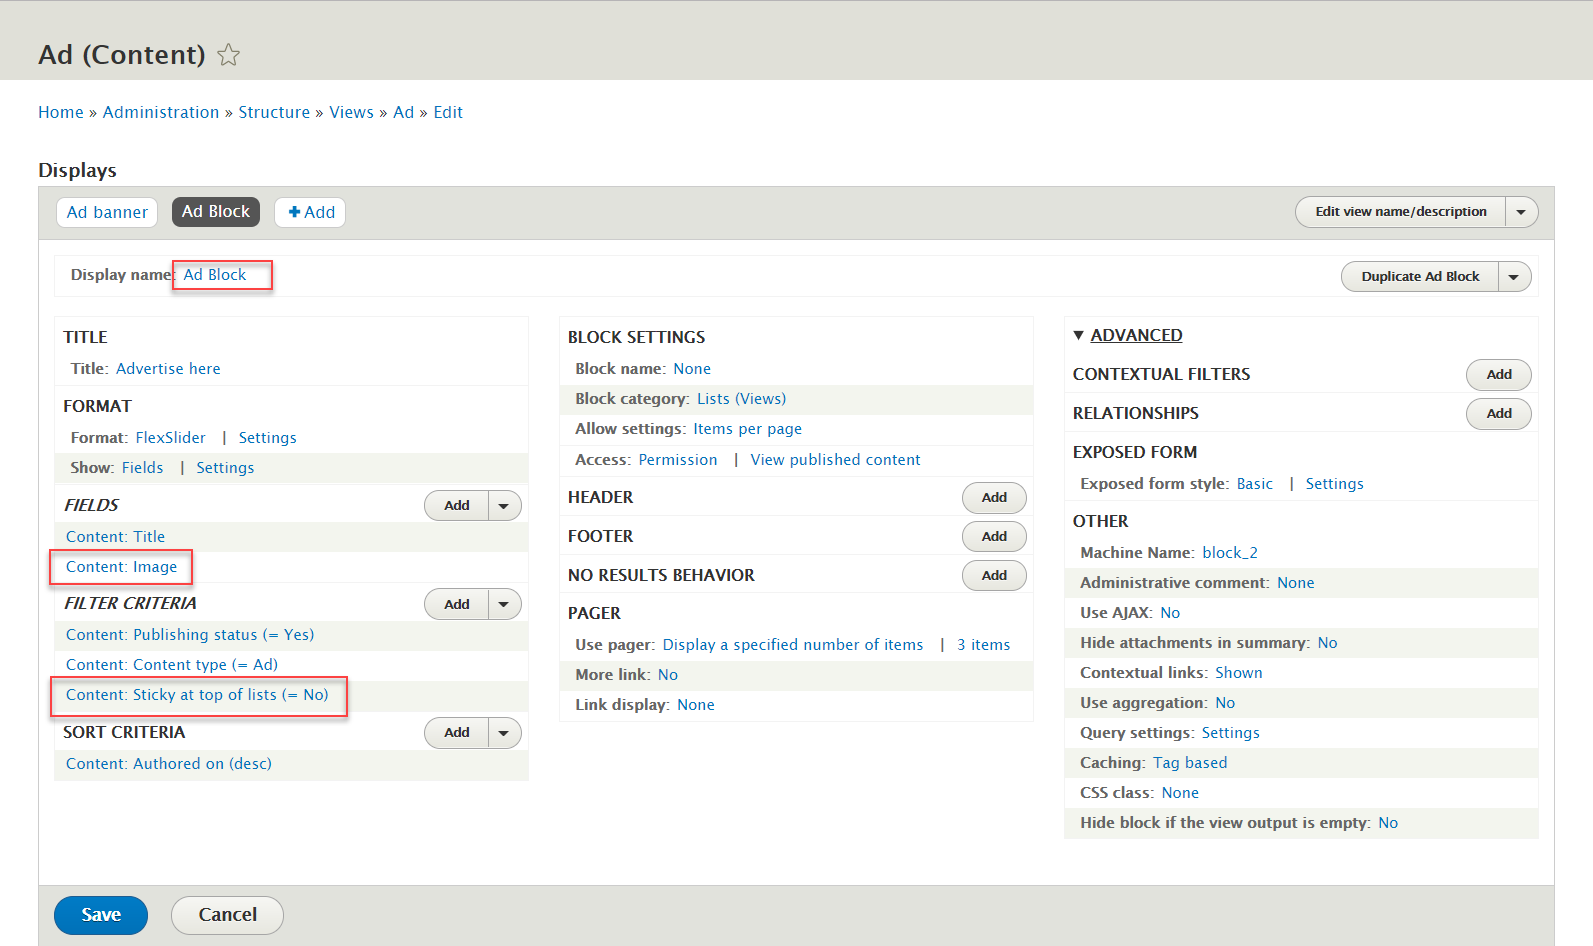
Step 2: At Display name area, Change name Ad Block
Step 3: At FIELDS area, click Content: Image field. Set properties for Content: Image

Step 4: At FILTER CRITERIA area, clickContent: Sticky at top of lists field and set properties:
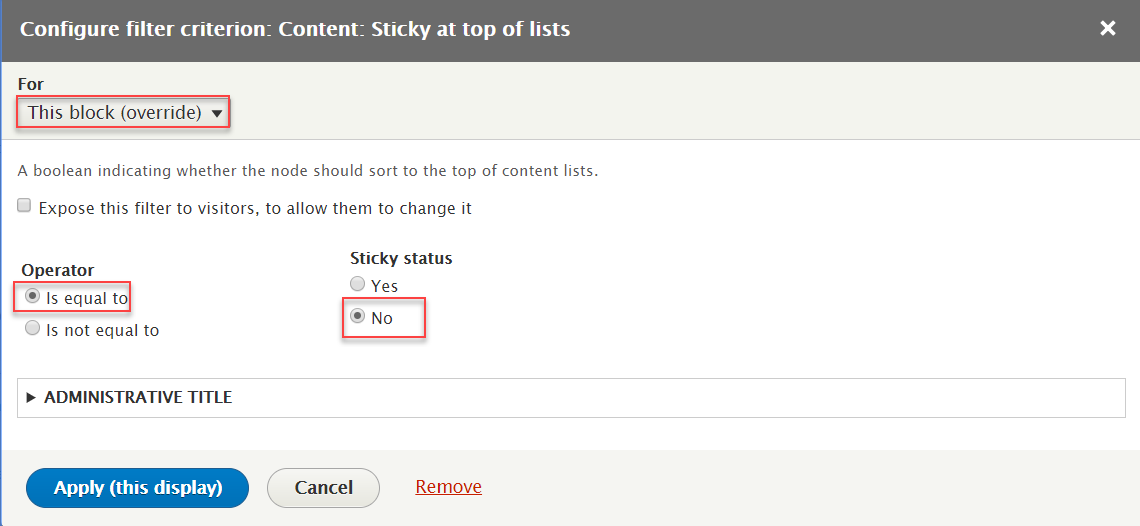
Step 5: Click Save to save view
3. Create Ad in content block
Step 1: Click Add > Block link, then create Ad in Content block with following settings:
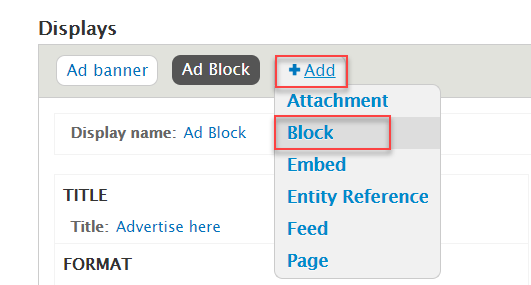

Step 2: At Display name area, Change name Ad in Content
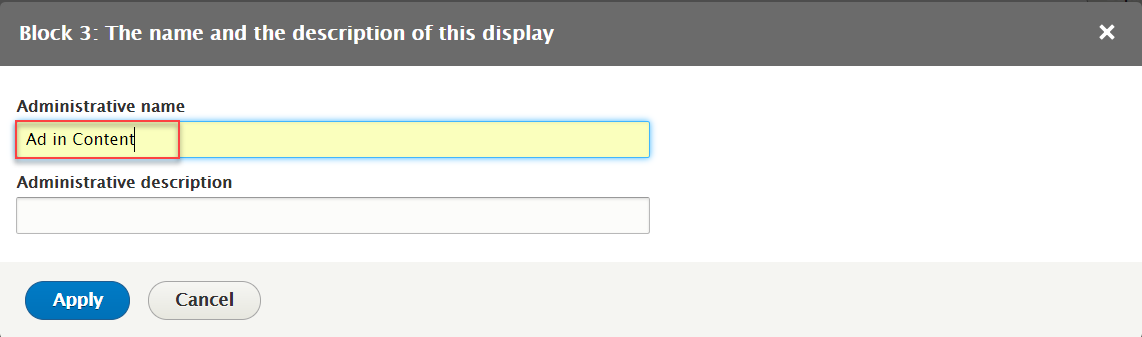
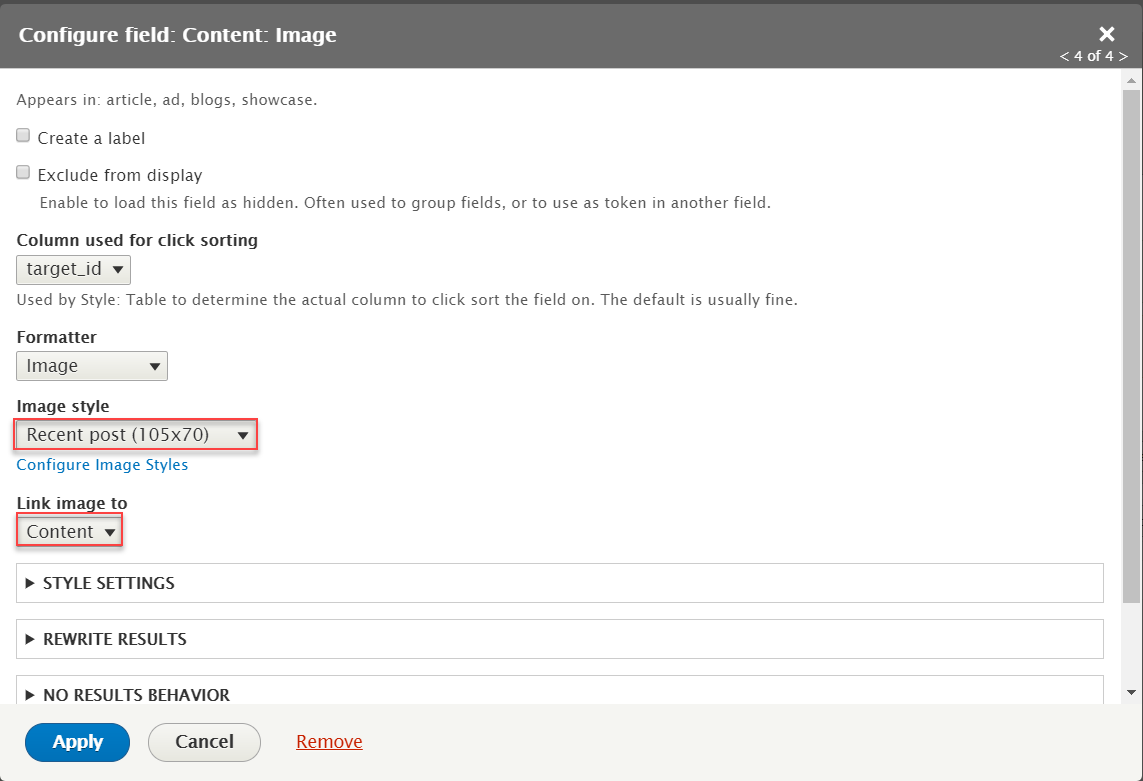
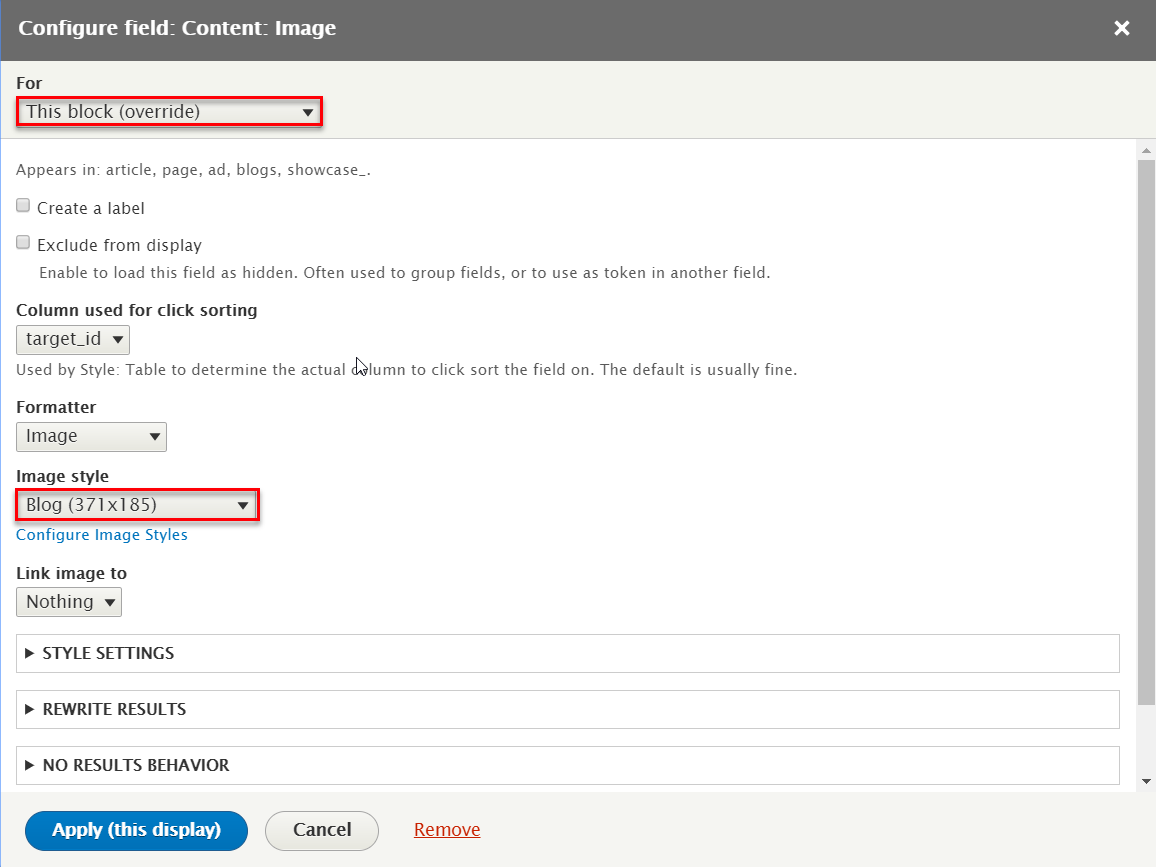
Step 3: At FIELDS area, click Content: Image field. Set properties for Content: Image
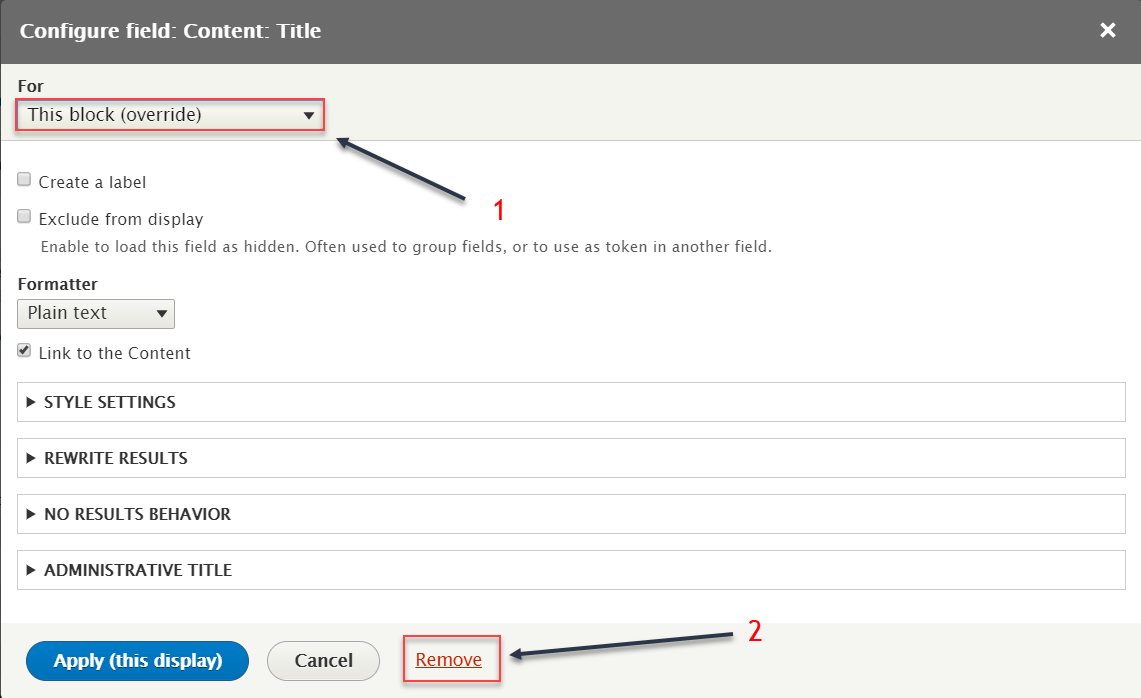
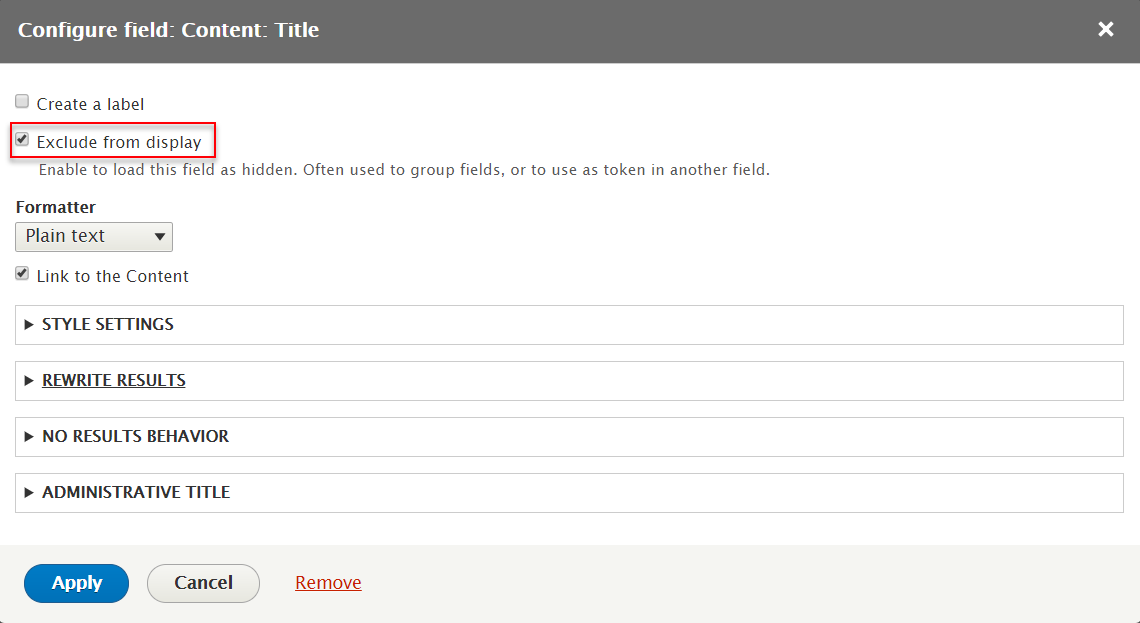
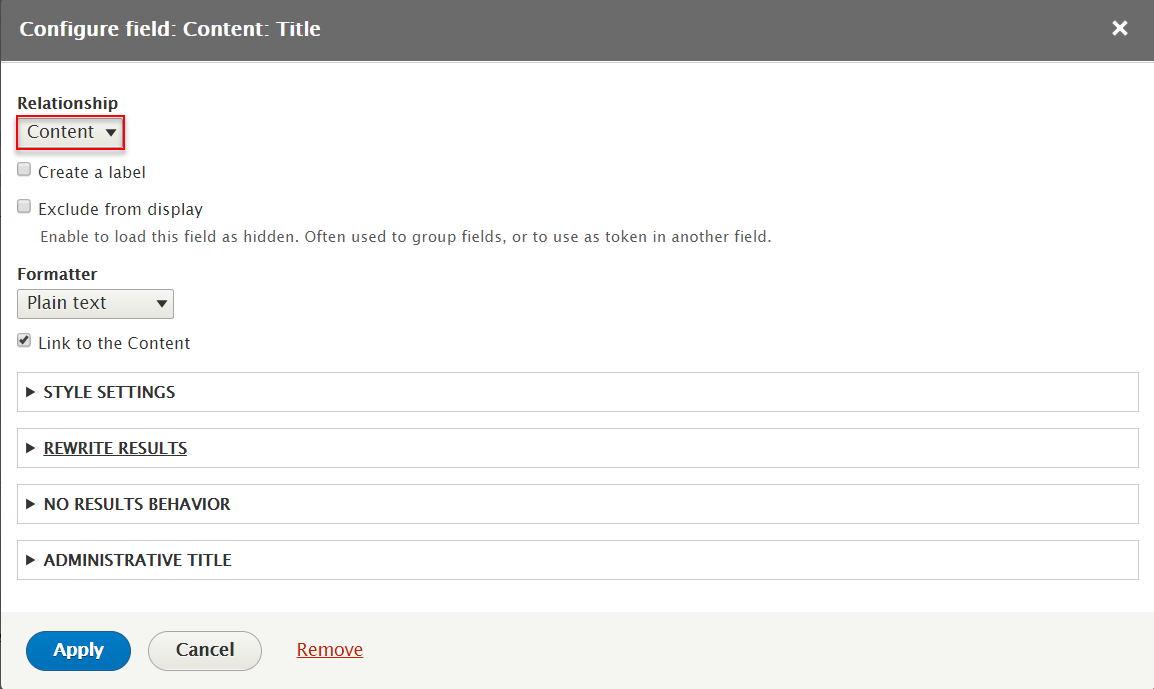
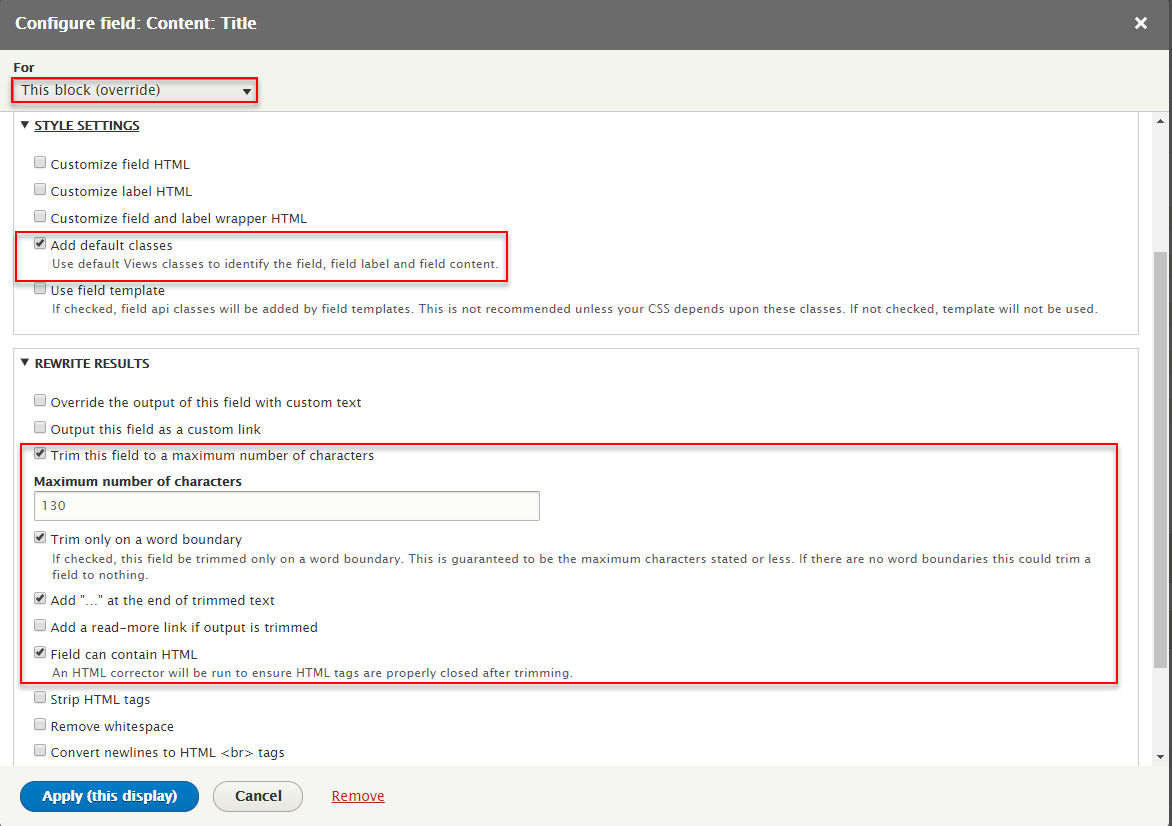
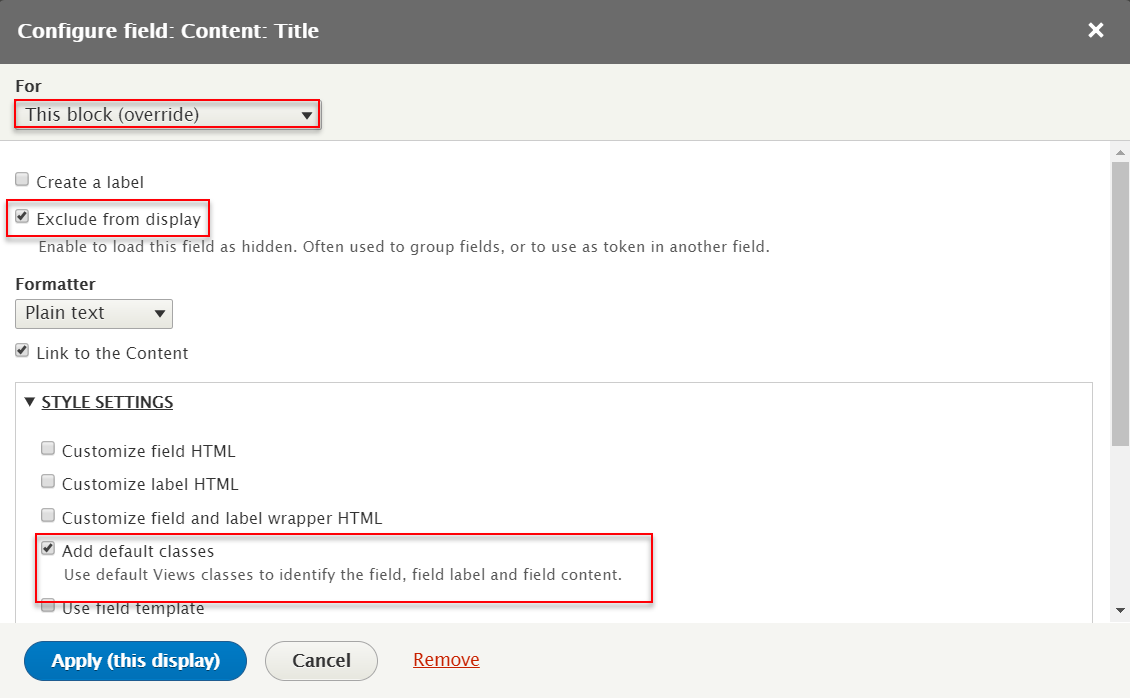
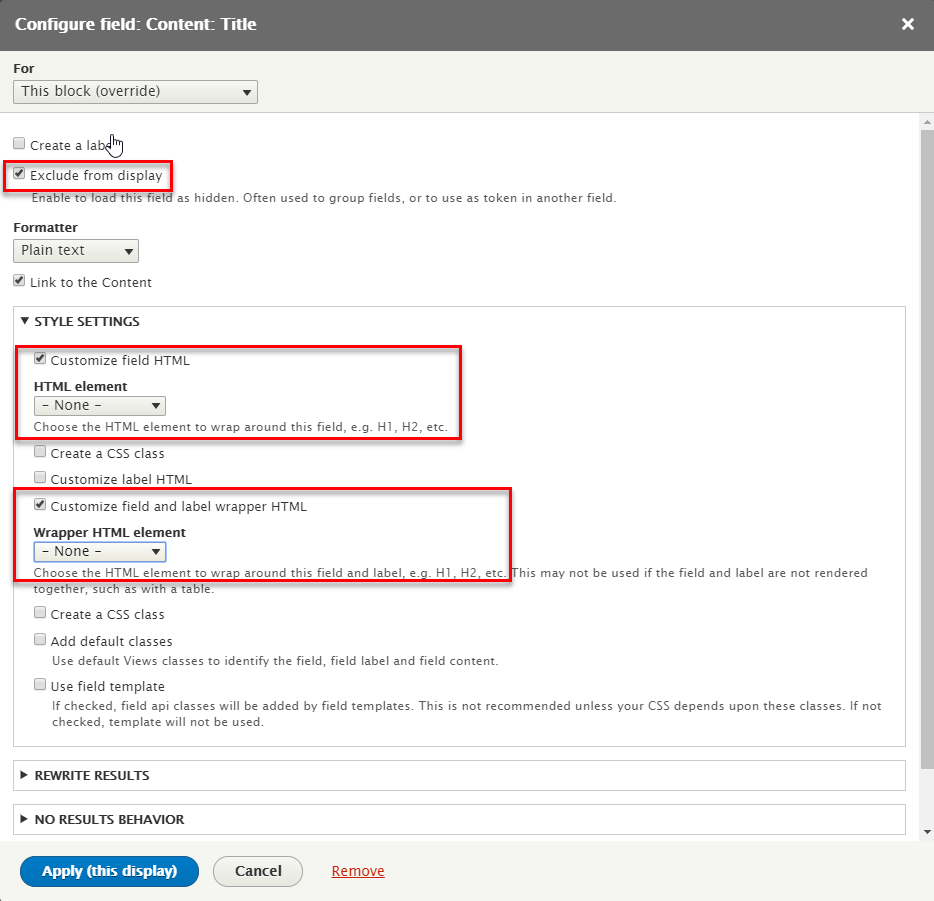
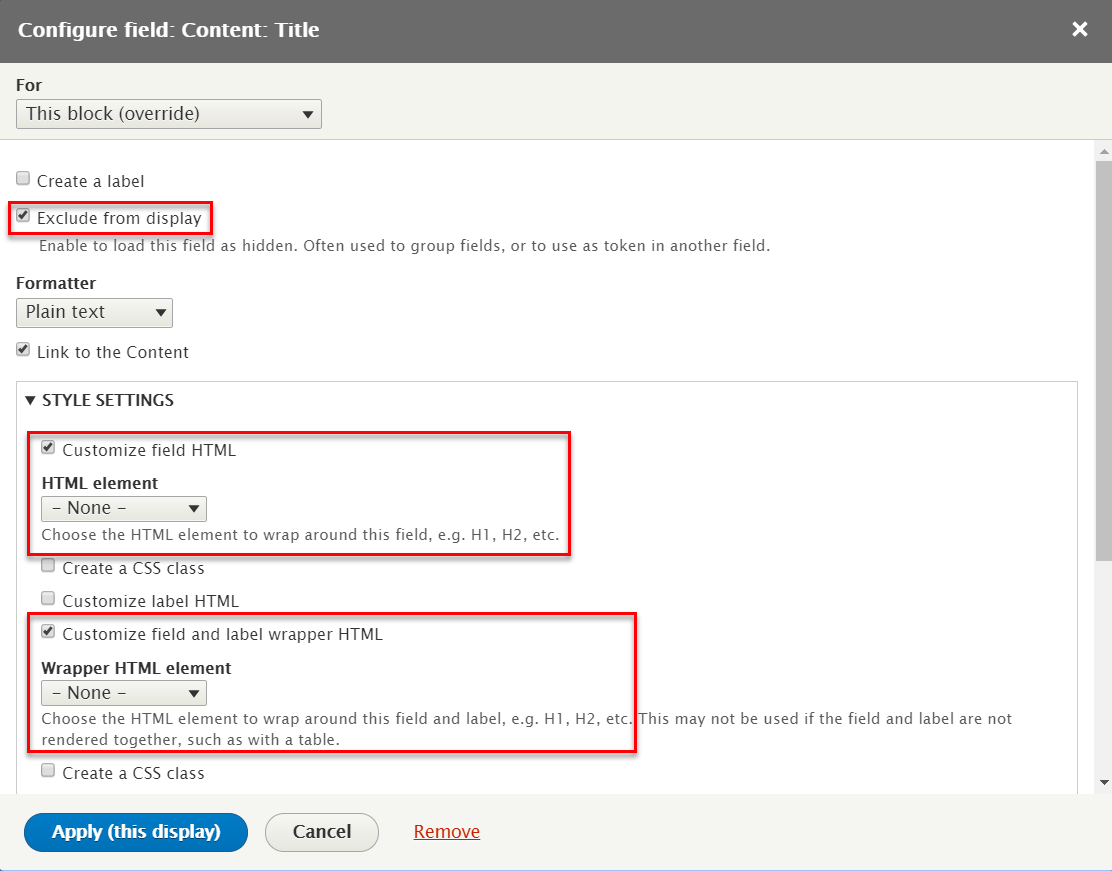
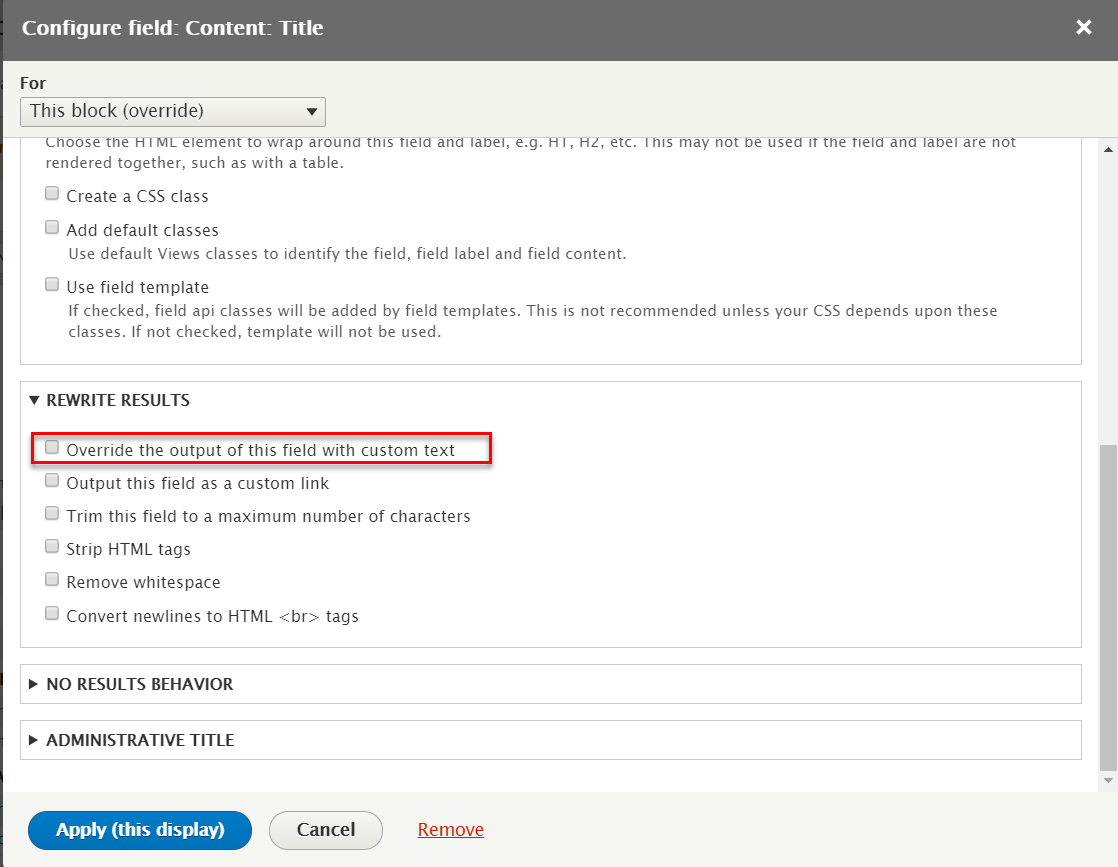
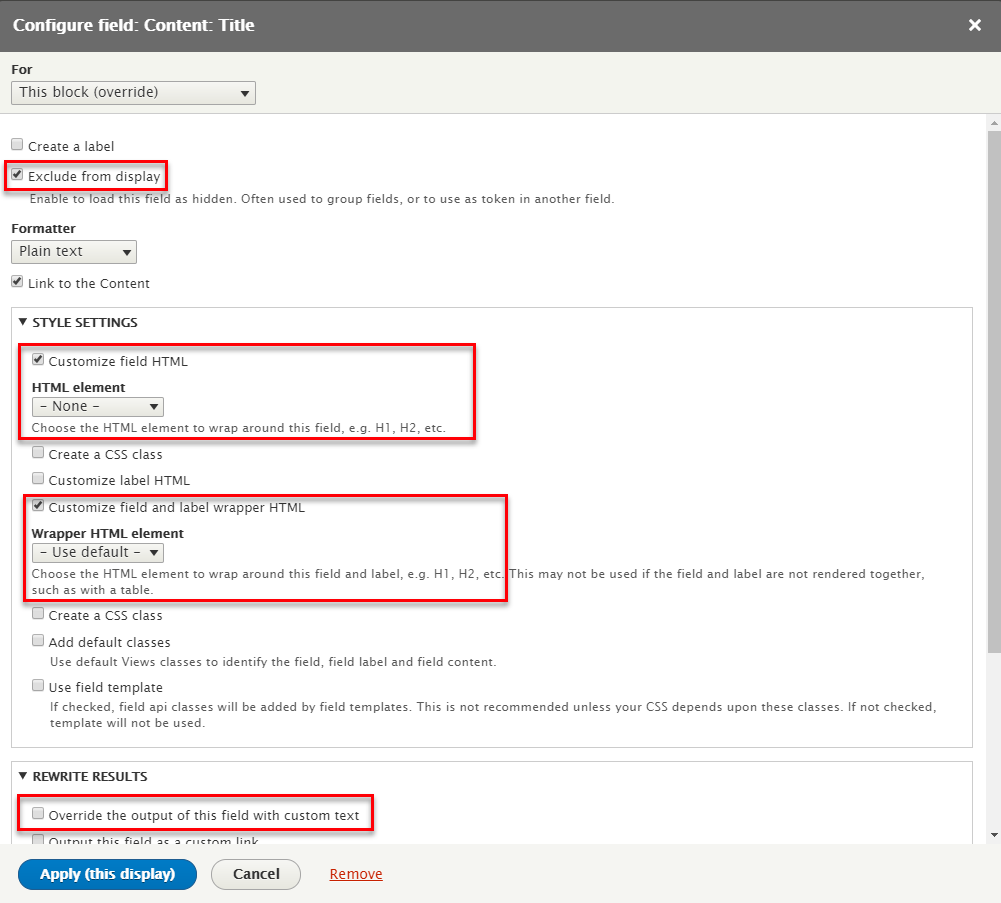
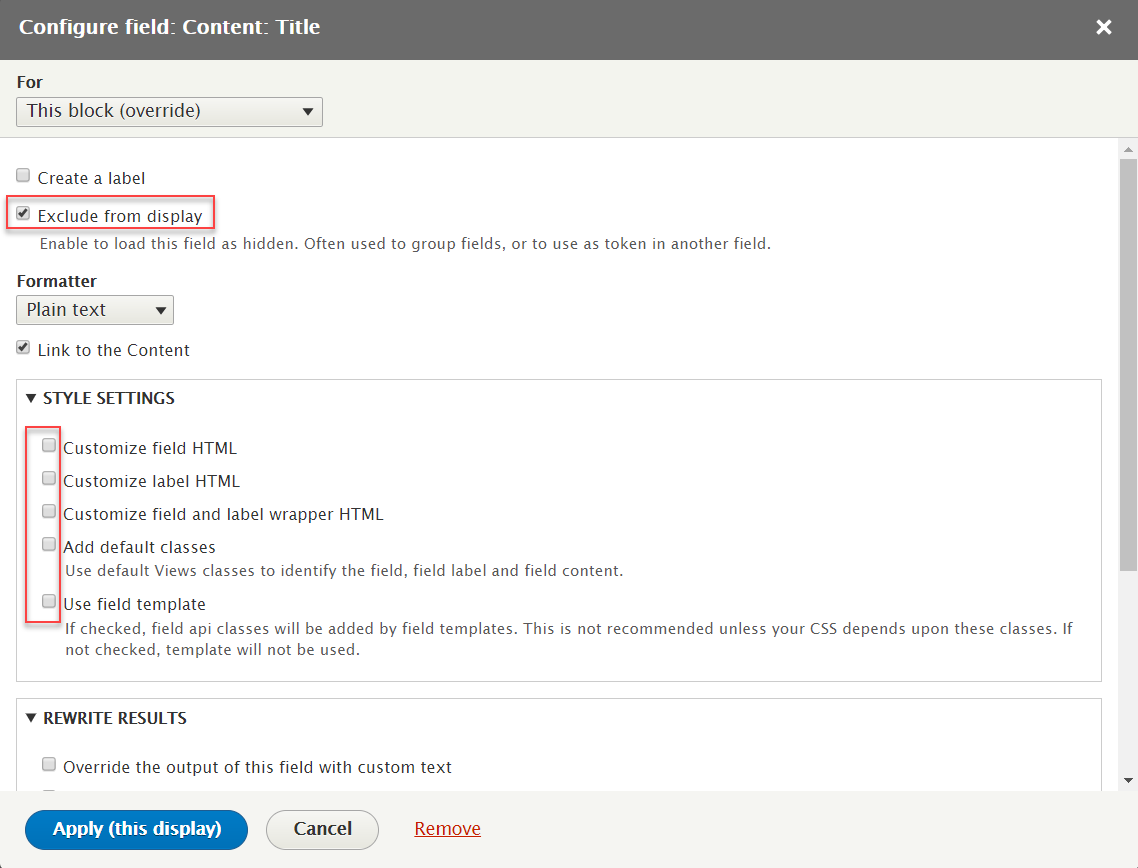
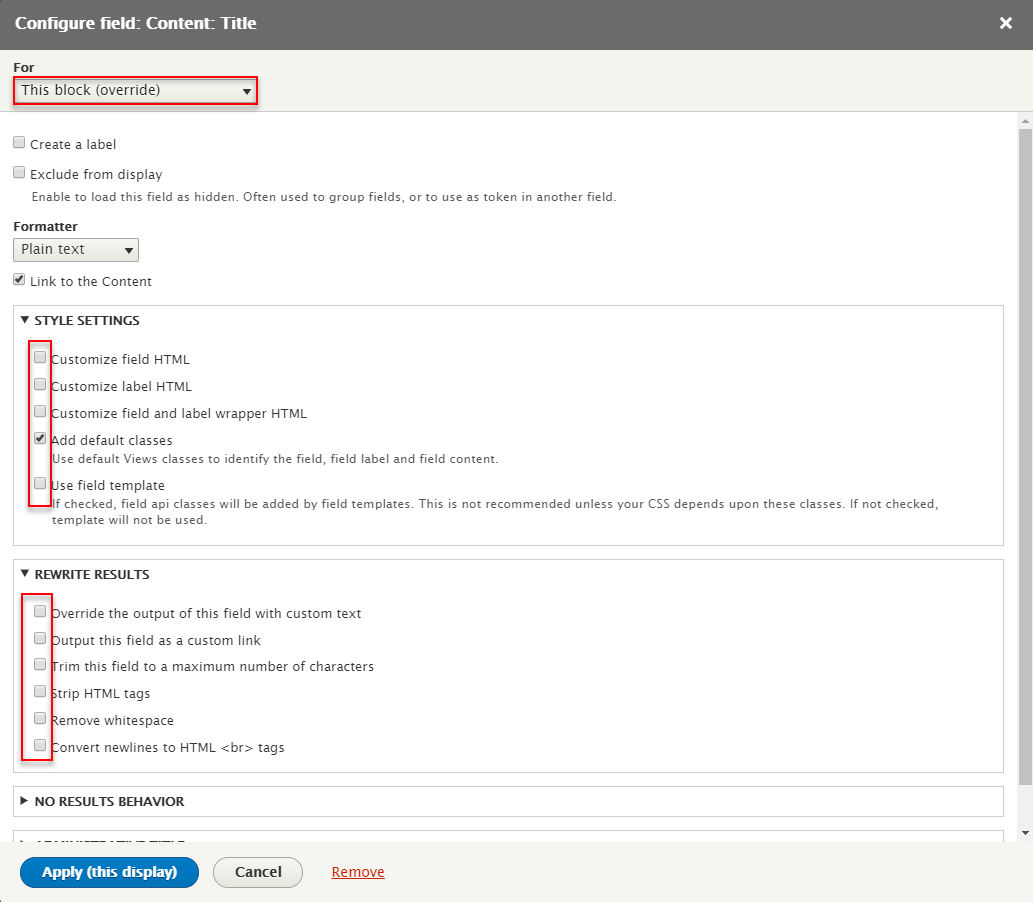
Step 4: At FIELDS area, click Content: Title field. And follow these steps
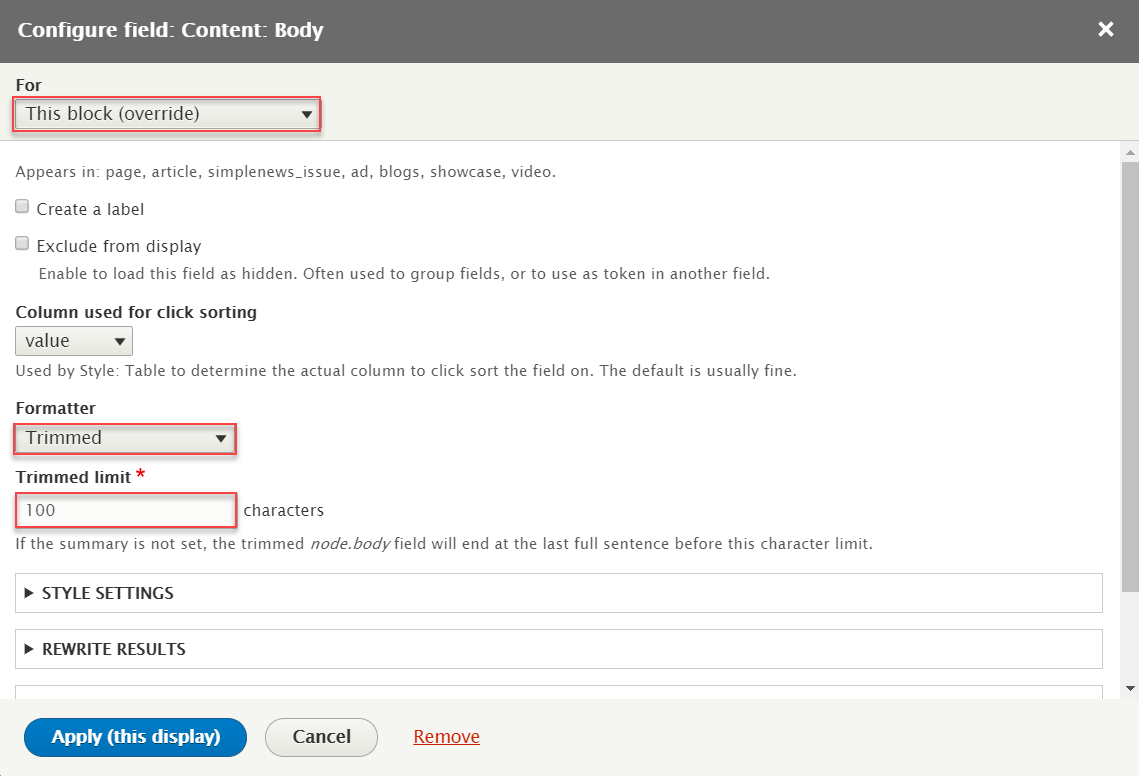
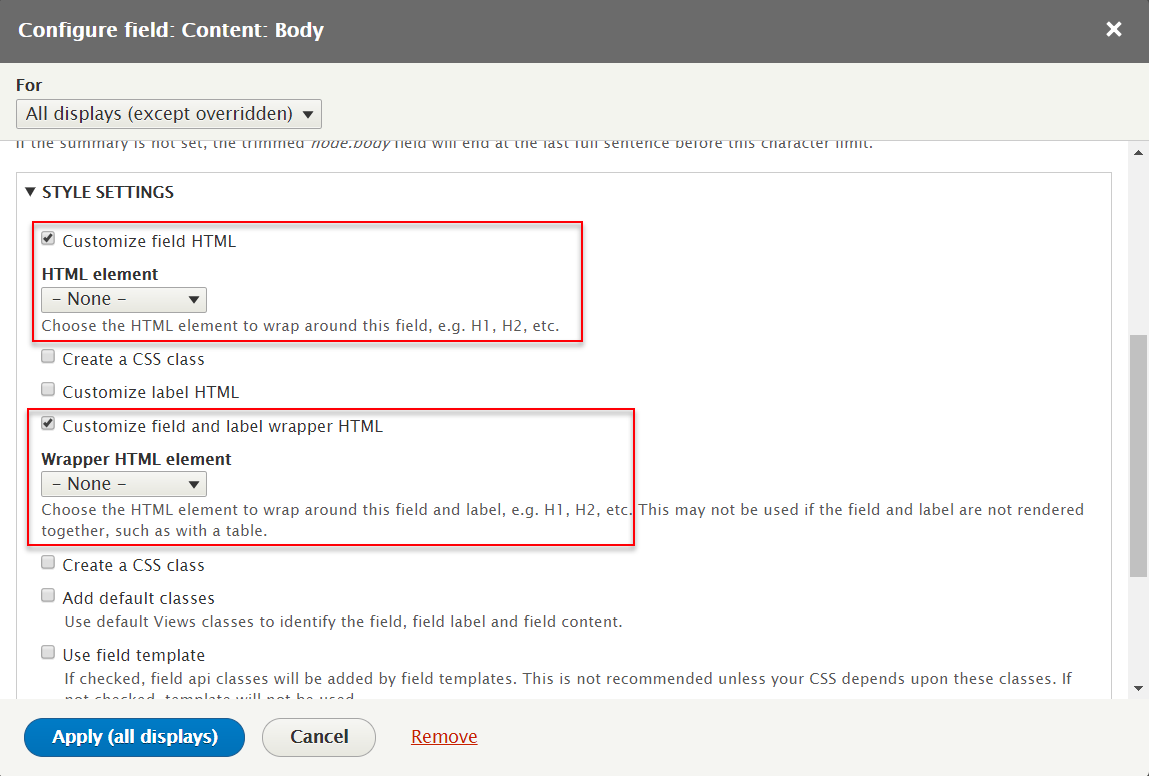
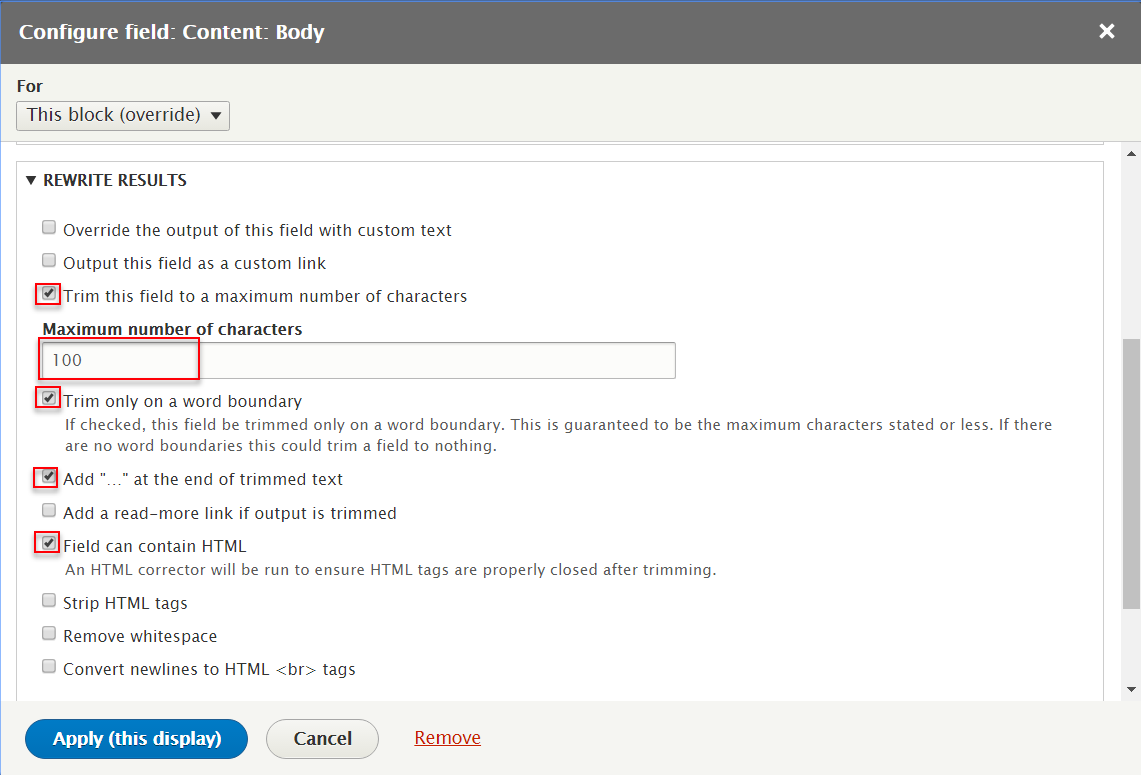
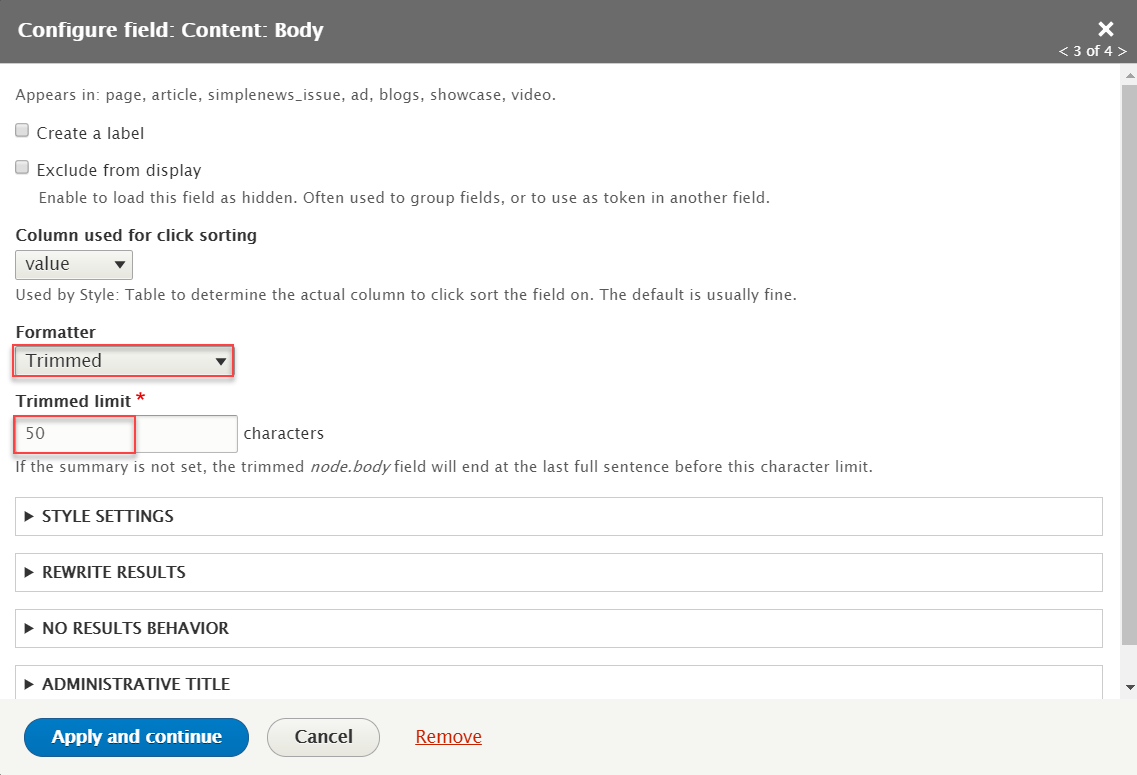
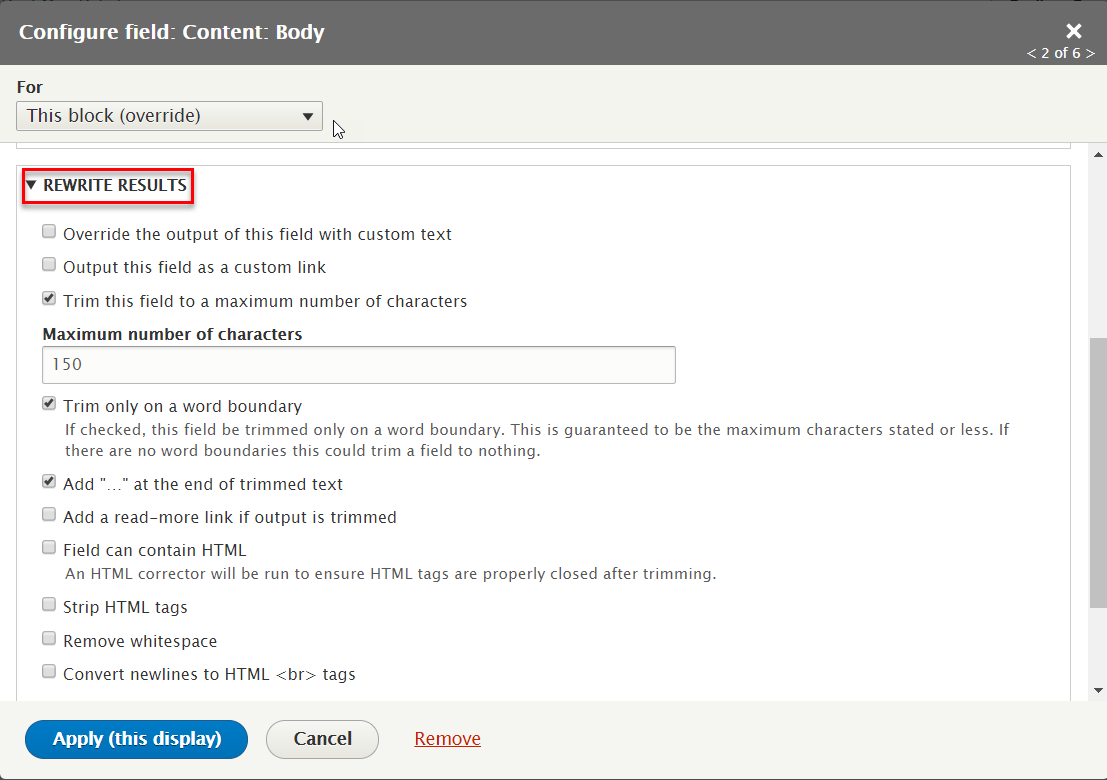
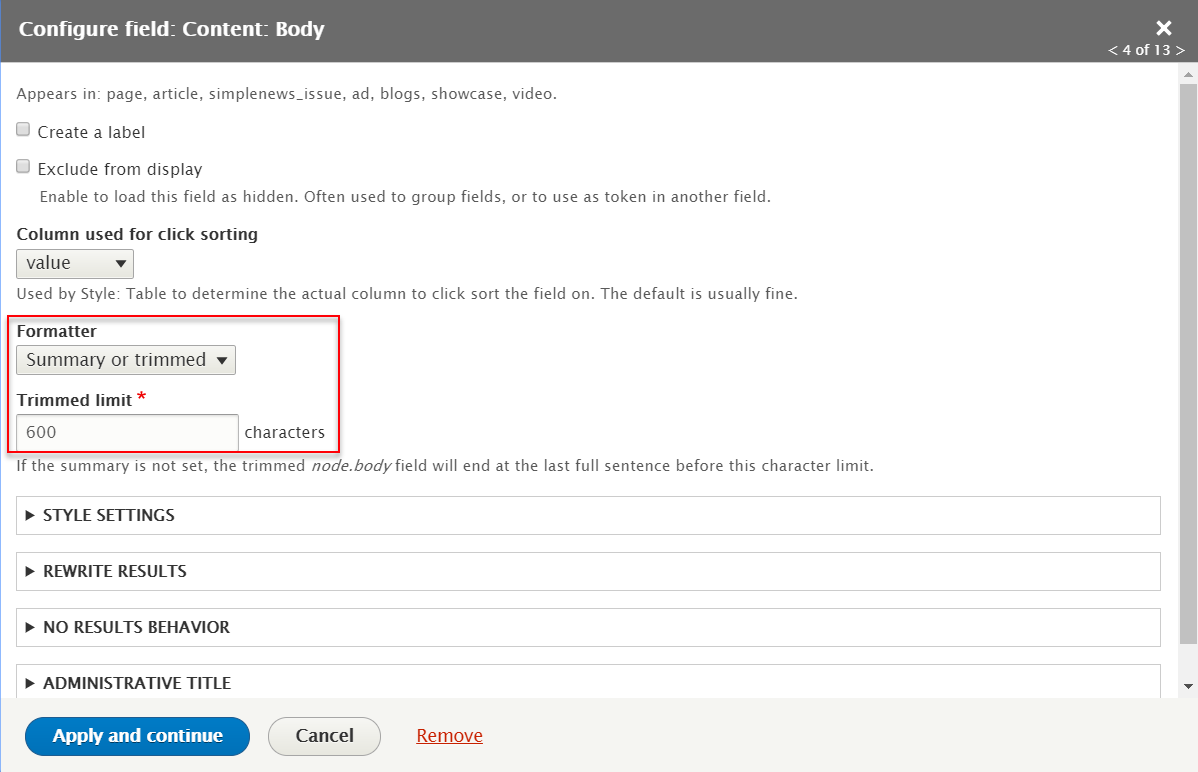
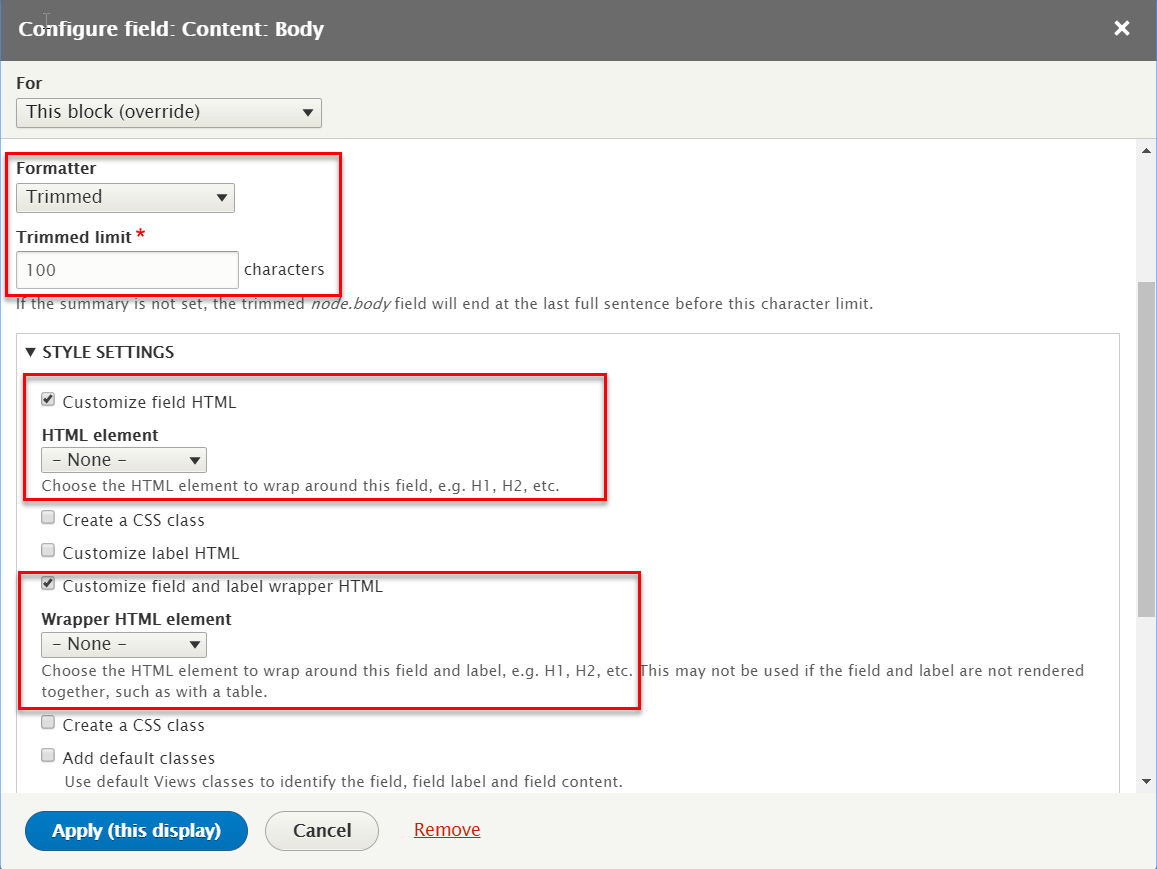
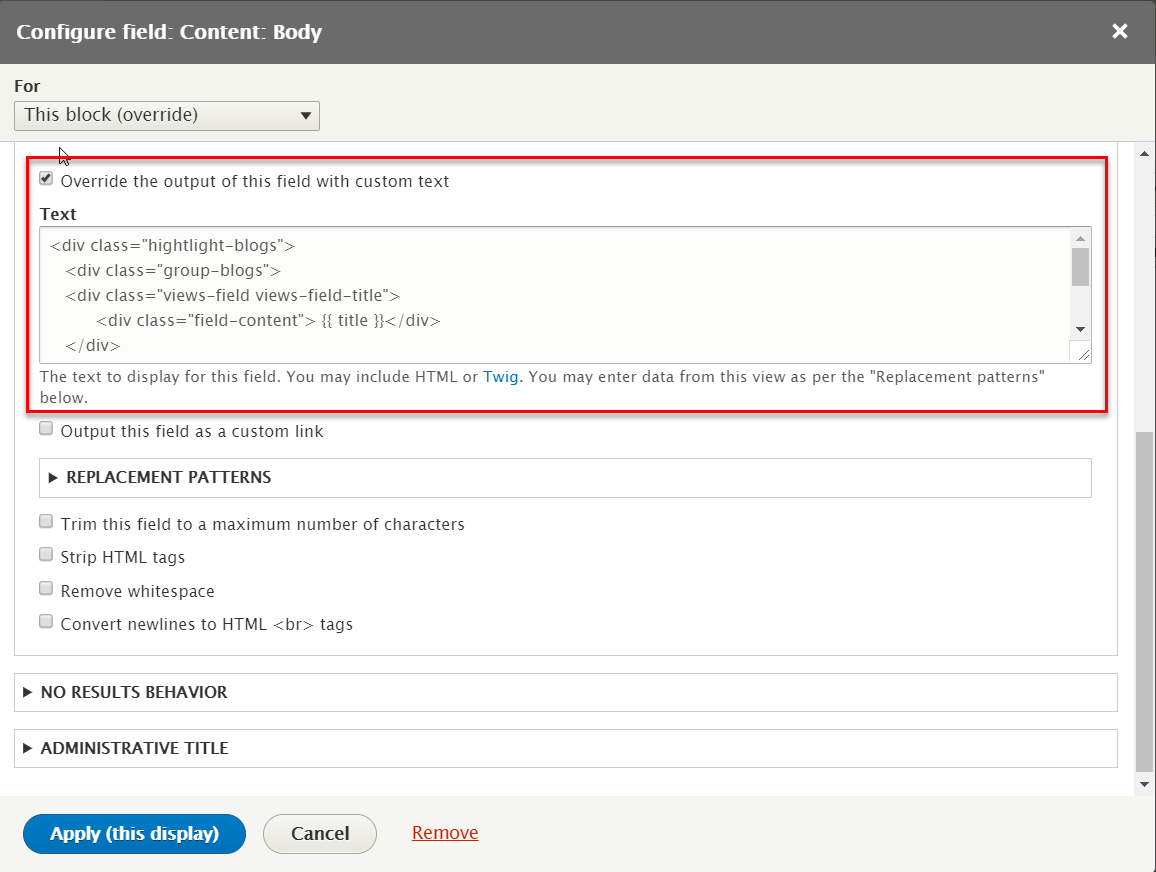
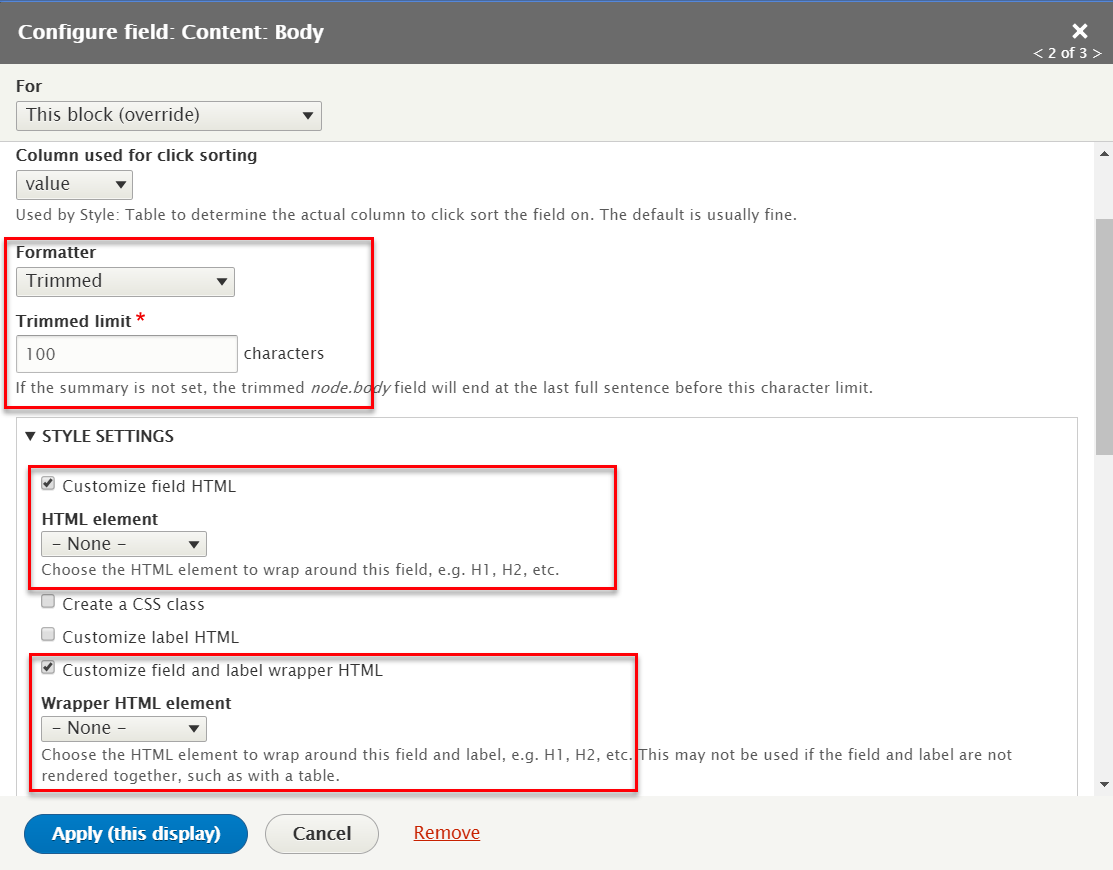
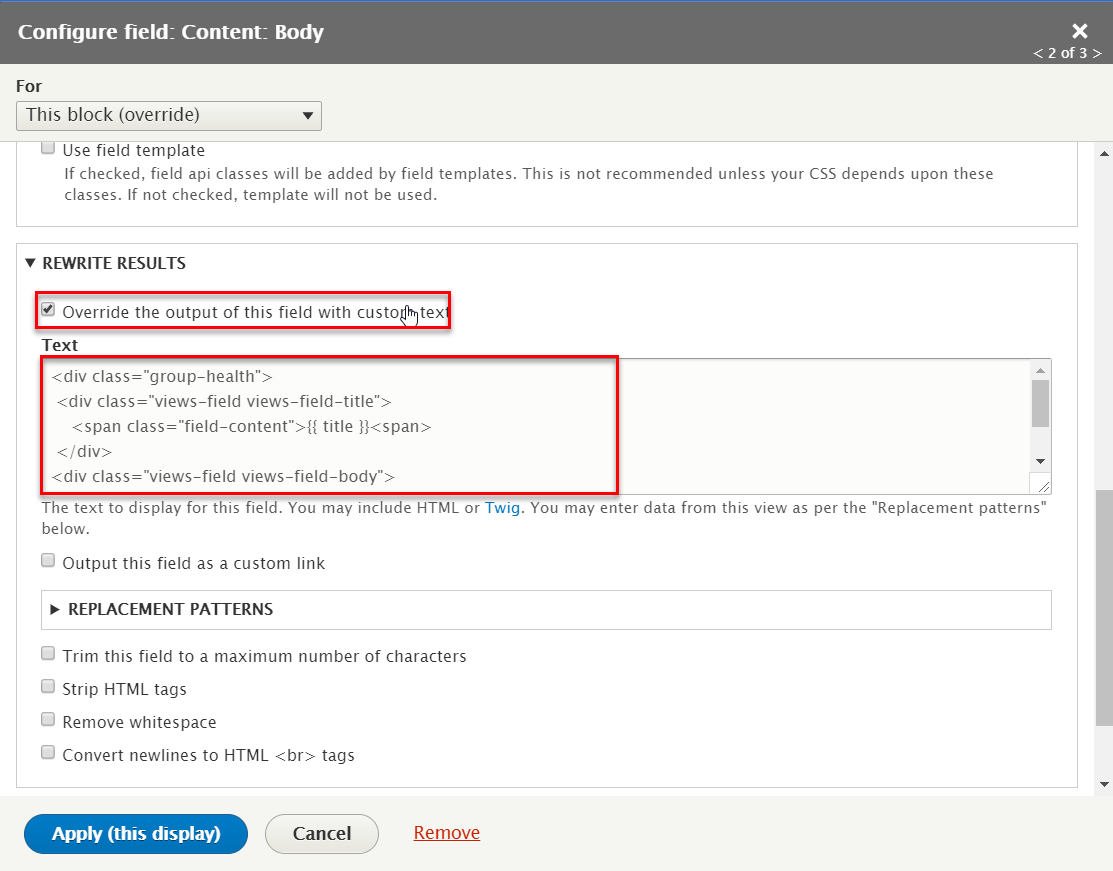
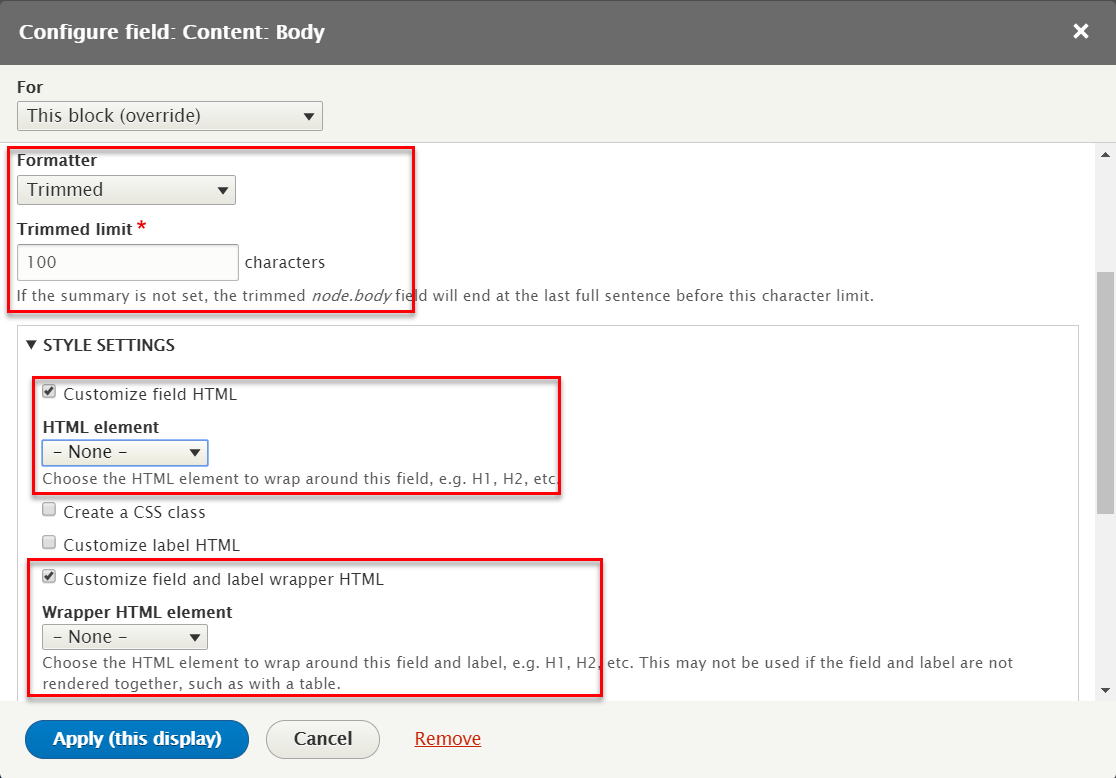
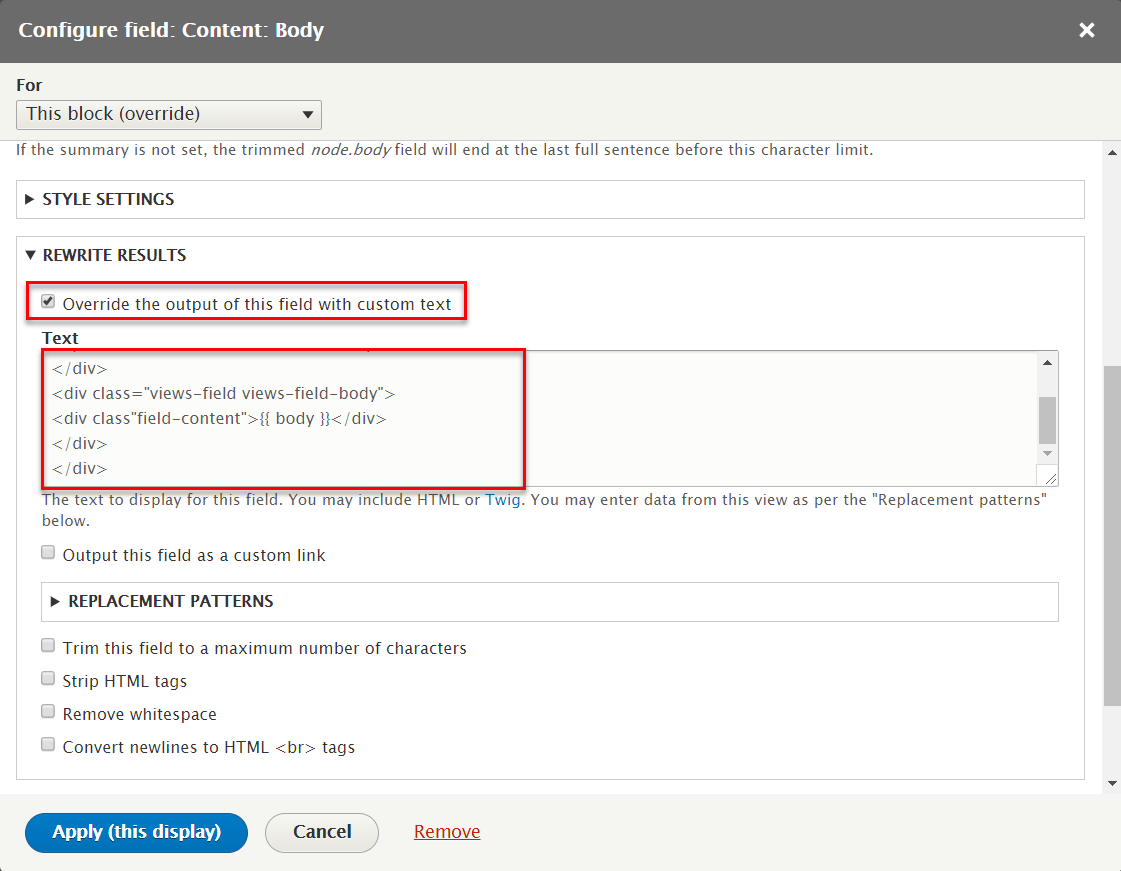
Step 5: At FIELDS area, click Add button to add fields: Content: Body. Set properties for Content: Body

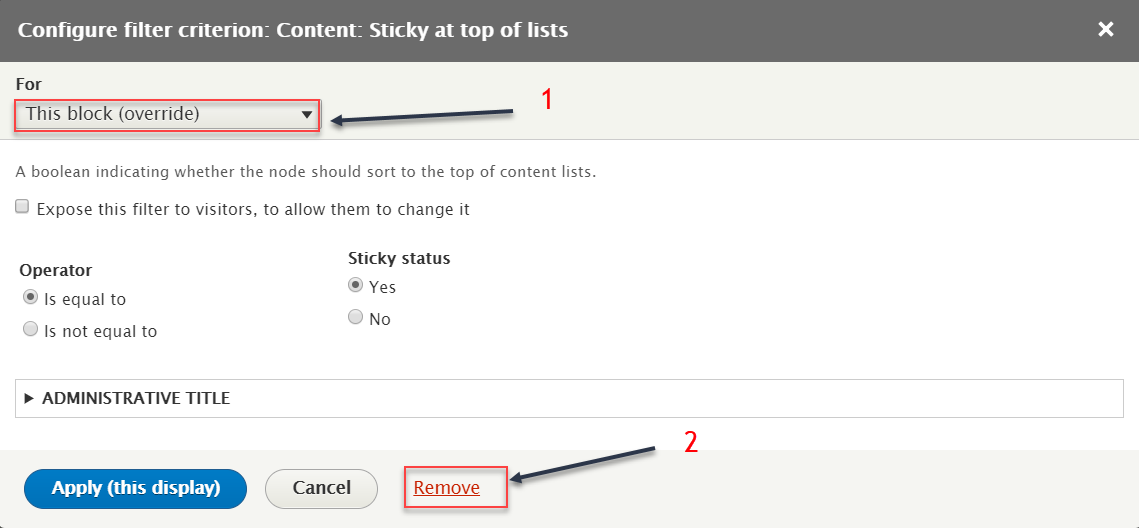
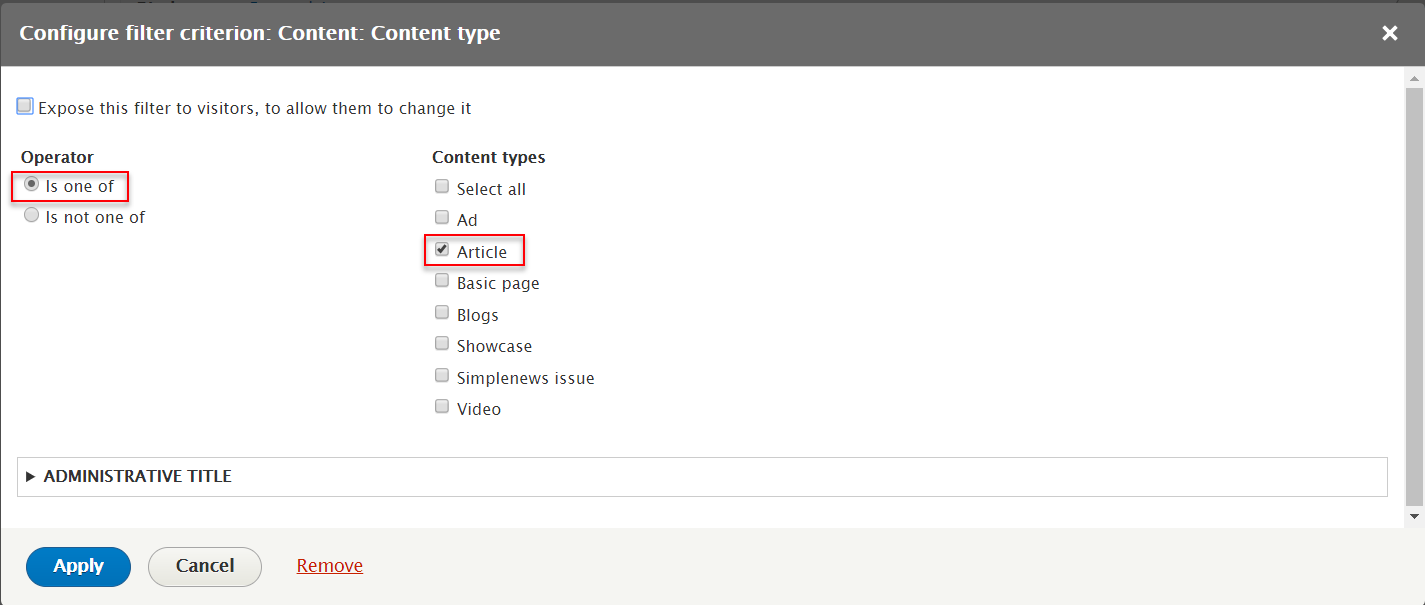
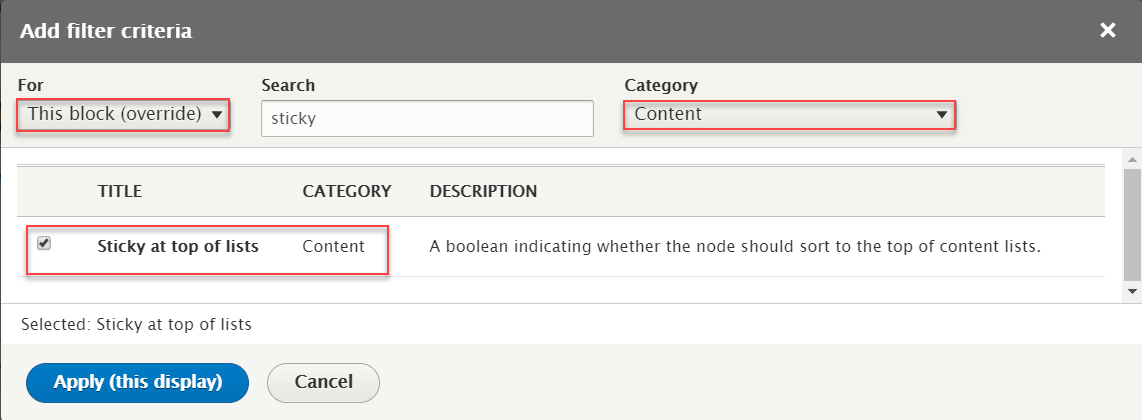
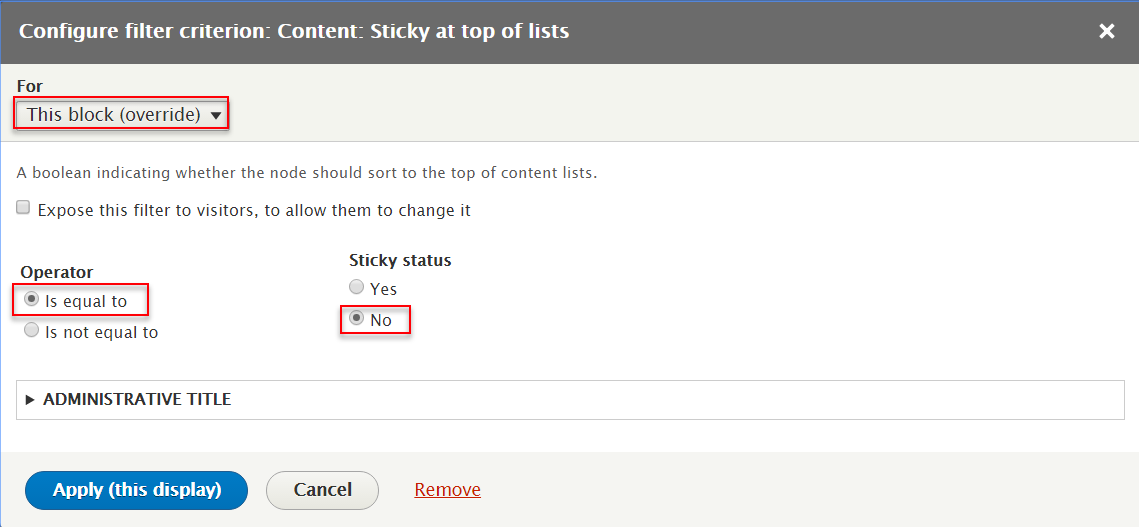
Step 6: At FILTER CRITERIA area, clickContent: Sticky at top of lists and follow these steps
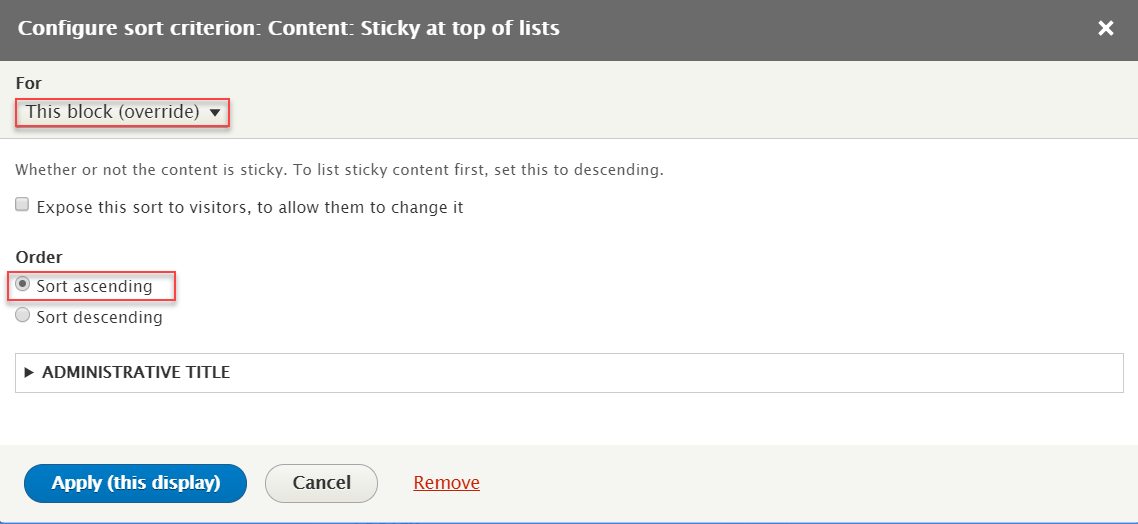
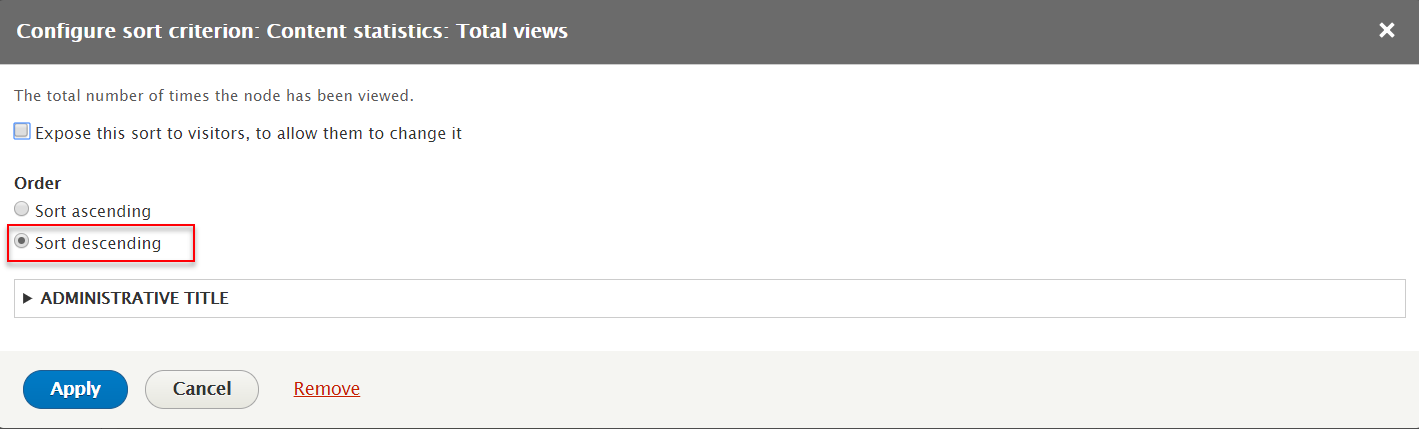
Step 7: At SORT CRITERIA area, clickAdd button to add fields: Content: Sticky at top of lists. Set properties for Content: Sticky at top of lists
Step 8: Click Save to save view
4. Configure View: Ad banner block
Step 1: Navigate to Structure > Block layout
Step 2: Find Header click Place block button
Step 3: Find Ad: Ad banner (Views) click Place block button and set following properites:
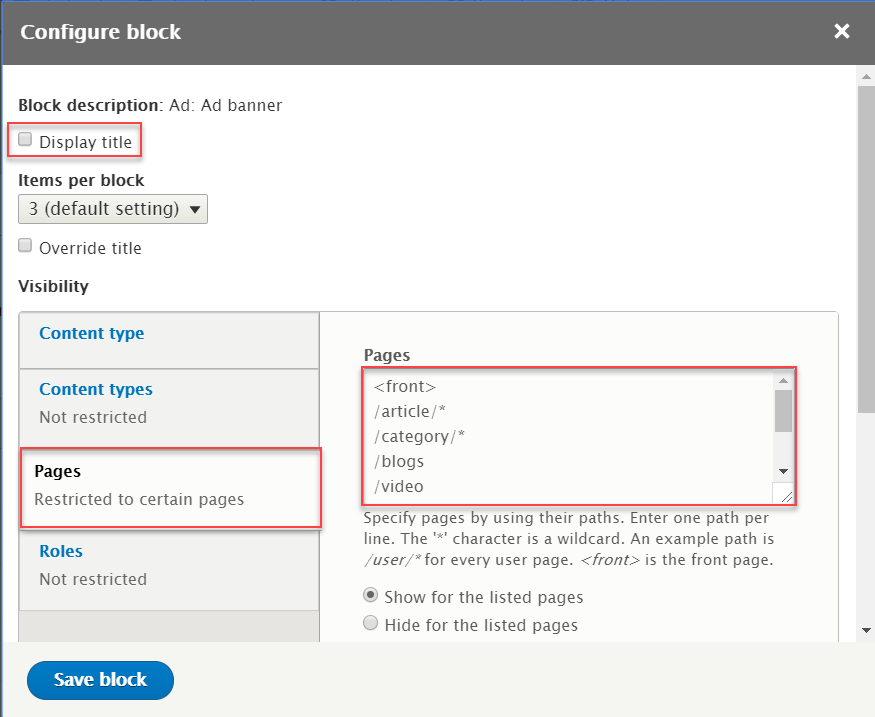
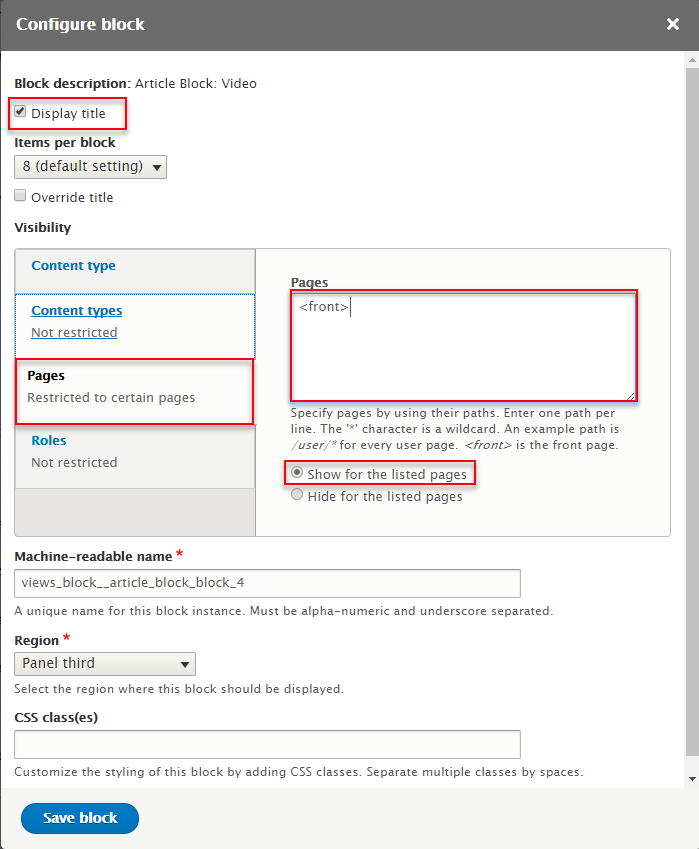
Refer to following HTML code:
                    <front>
                    /article/*
                    /category/*
                    /blogs
                    /video
                    /videos
                    /user/*
                    /search/*
                    /contact
Step 4: Click Save block button.
Real Time block
Front end Display

1. Create Real Time custom block
Step 1: Navigate to Structure > Block layout > Custom block library, click Add custom block, then create Real Time block with following settings:
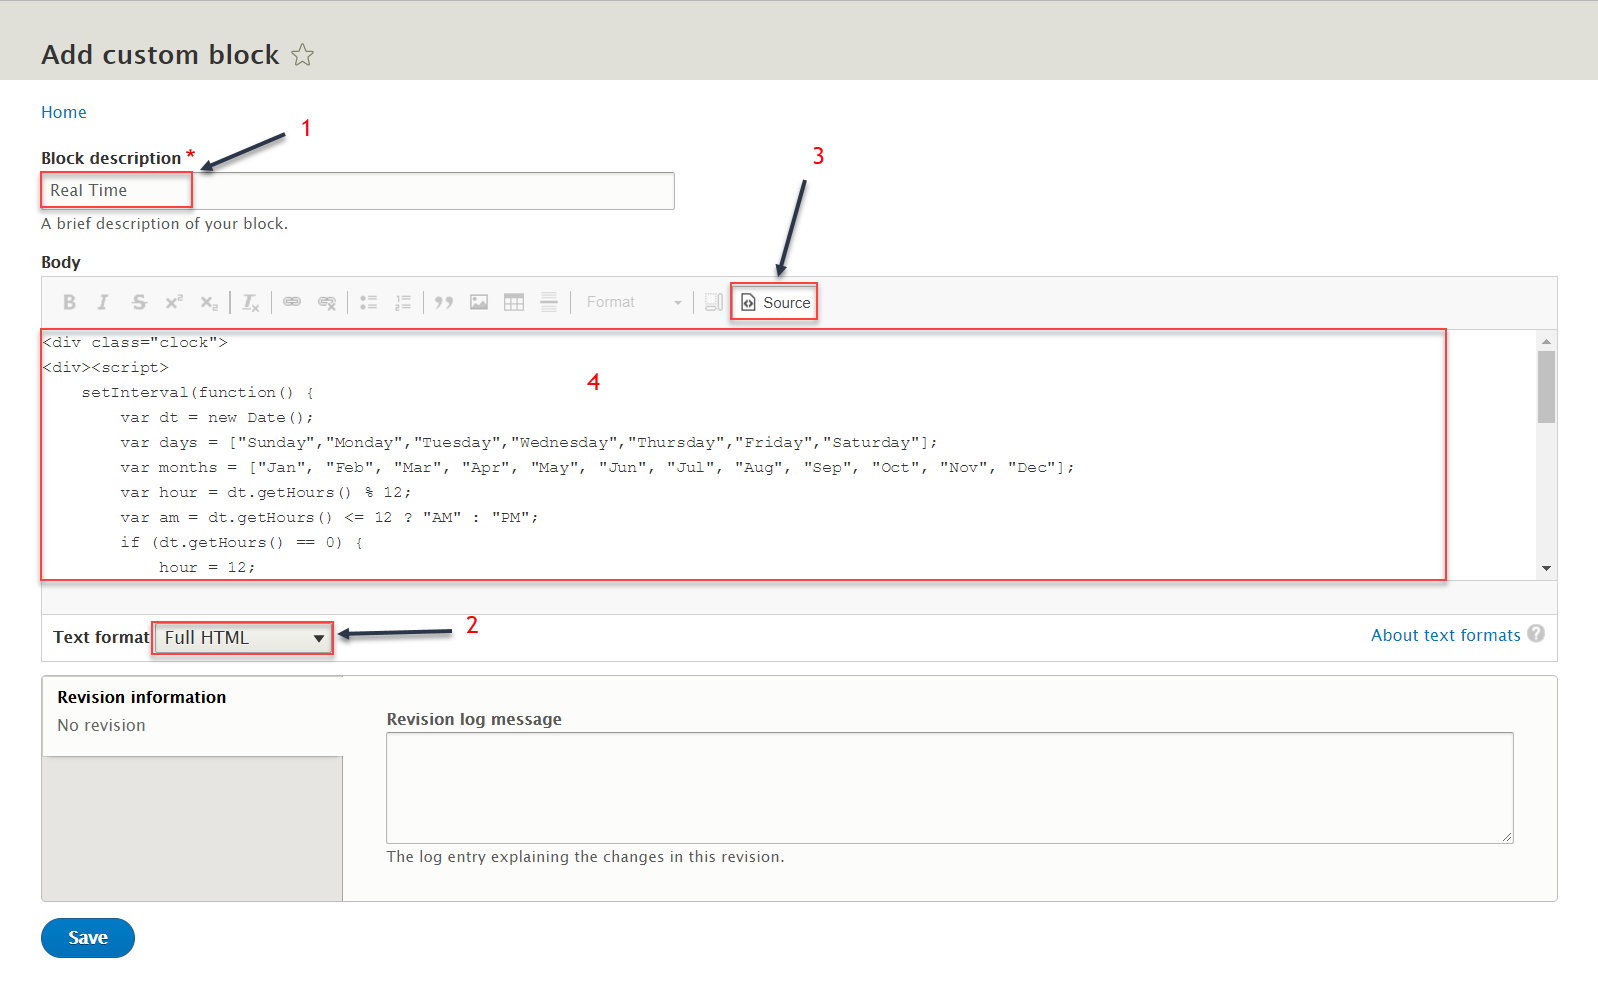
Refer to following HTML code:
Step 2: Click Save button.
2. Configure : Real Time block
Step 1: Navigate to Structure > Block layout
Step 2: Find Headline click Place block button
Step 3: Find Real Time (Custom) click Place block button and set following properites:

Step 4: Click Save block button.
Social Headline block
Front end Display

1. Create Social Headline block
Step 1: Navigate to Structure > Block layout > Custom block library, click Add custom block, then create Social Headline block with following settings:
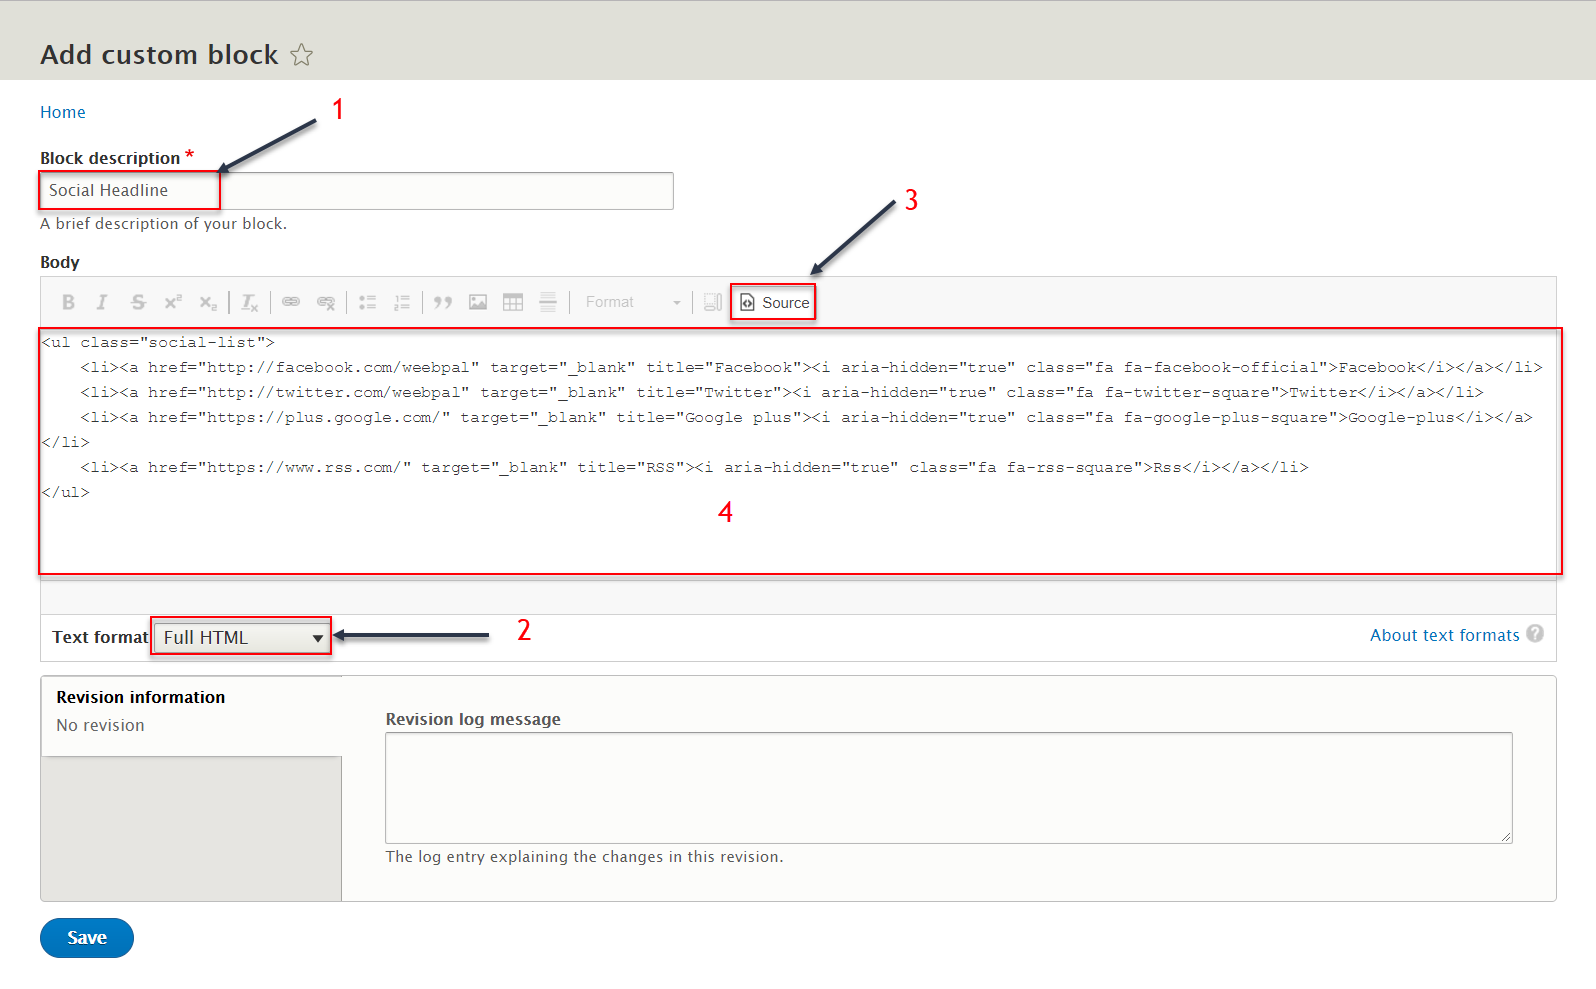
Step 2: Click Save button.
2. Configure : Social Headline block
Step 1: Navigate to Structure > Block layout
Step 2: Find Headline click Place block button
Step 3: Find Social Headline (Custom) click Place block button and set following properites:
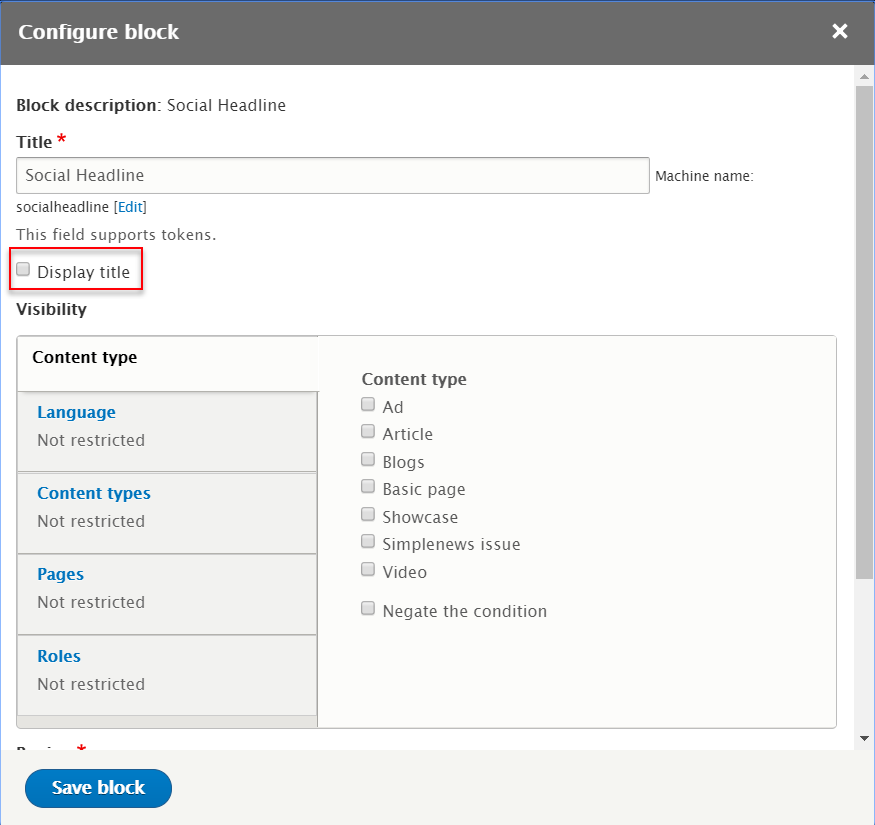
Step 4: Click Save block button.
Language switcher block
Front end Display

Configure : Language switcher block
Step 1: Navigate to Structure > Block layout
Step 2: Find Headline click Place block button
Step 3: Find Language switcher (System) click Place block button and set following properites:
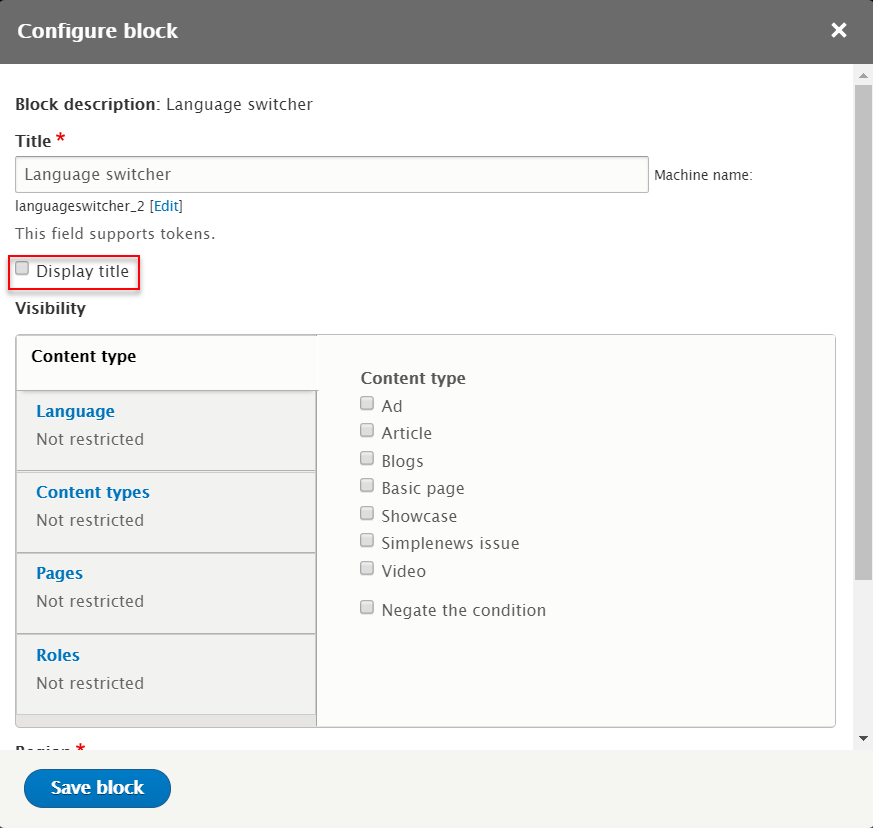
Step 4: Click Save block button.
Category Menu
Front end Display

1. Create Category Menu
Step 1: Navigate to Structure > Menus, click Add menu, then create Category Menu

Step 2: Navigate to Structure > Taxonomy menu, click Add TaxonomyMenu, then create Category Menu with following settings:

Step 3: Click Save button. And back to Structure > Menus, at Category Menu click Edit menu,:
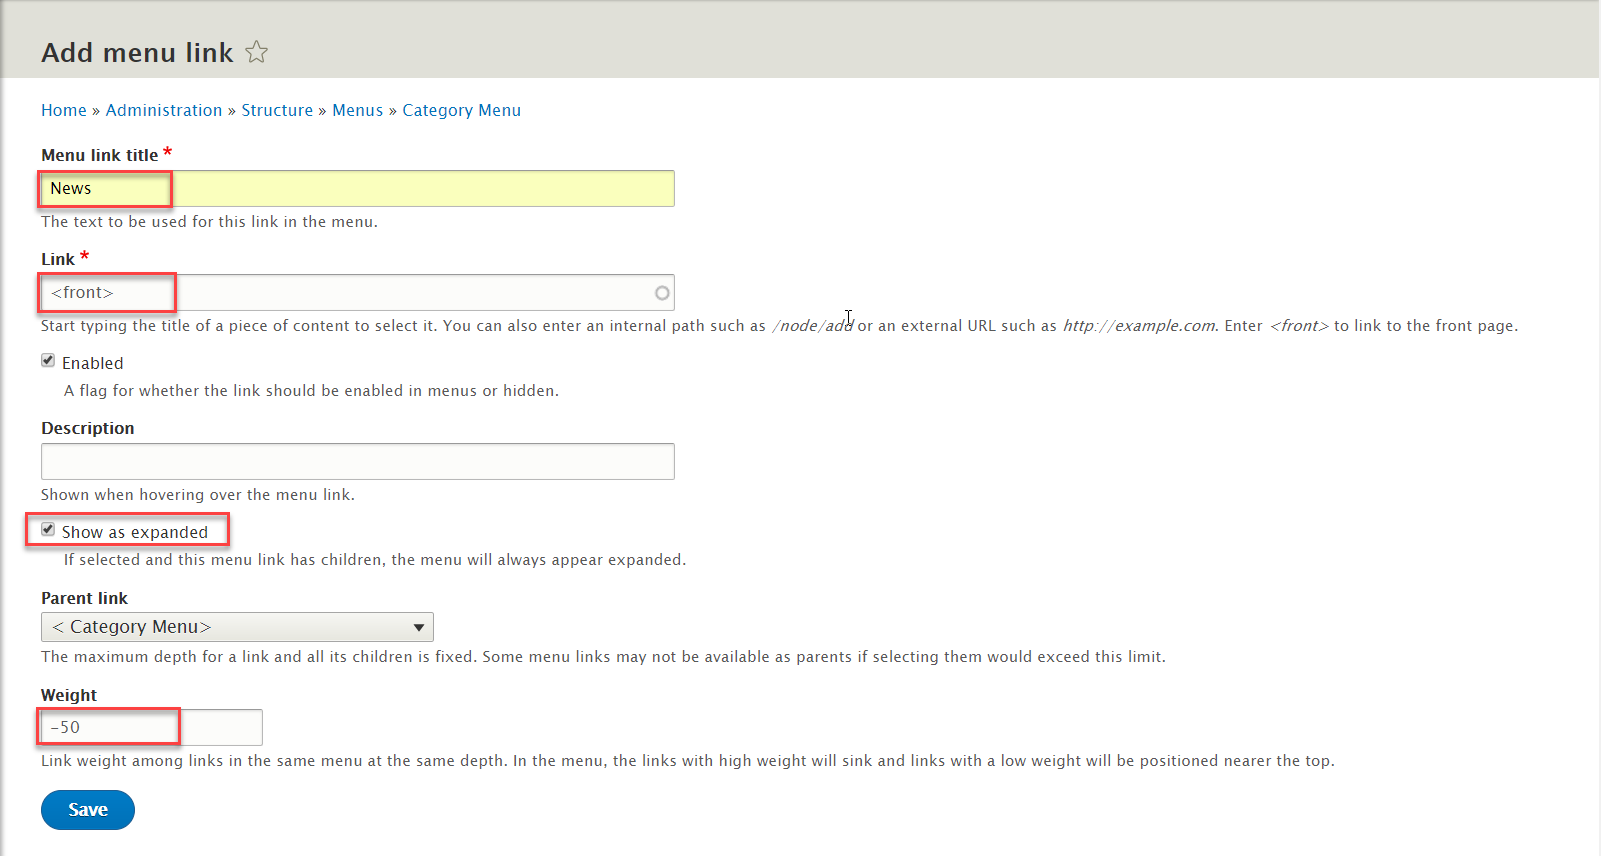
Step 4: Click Add link button to create News item menu
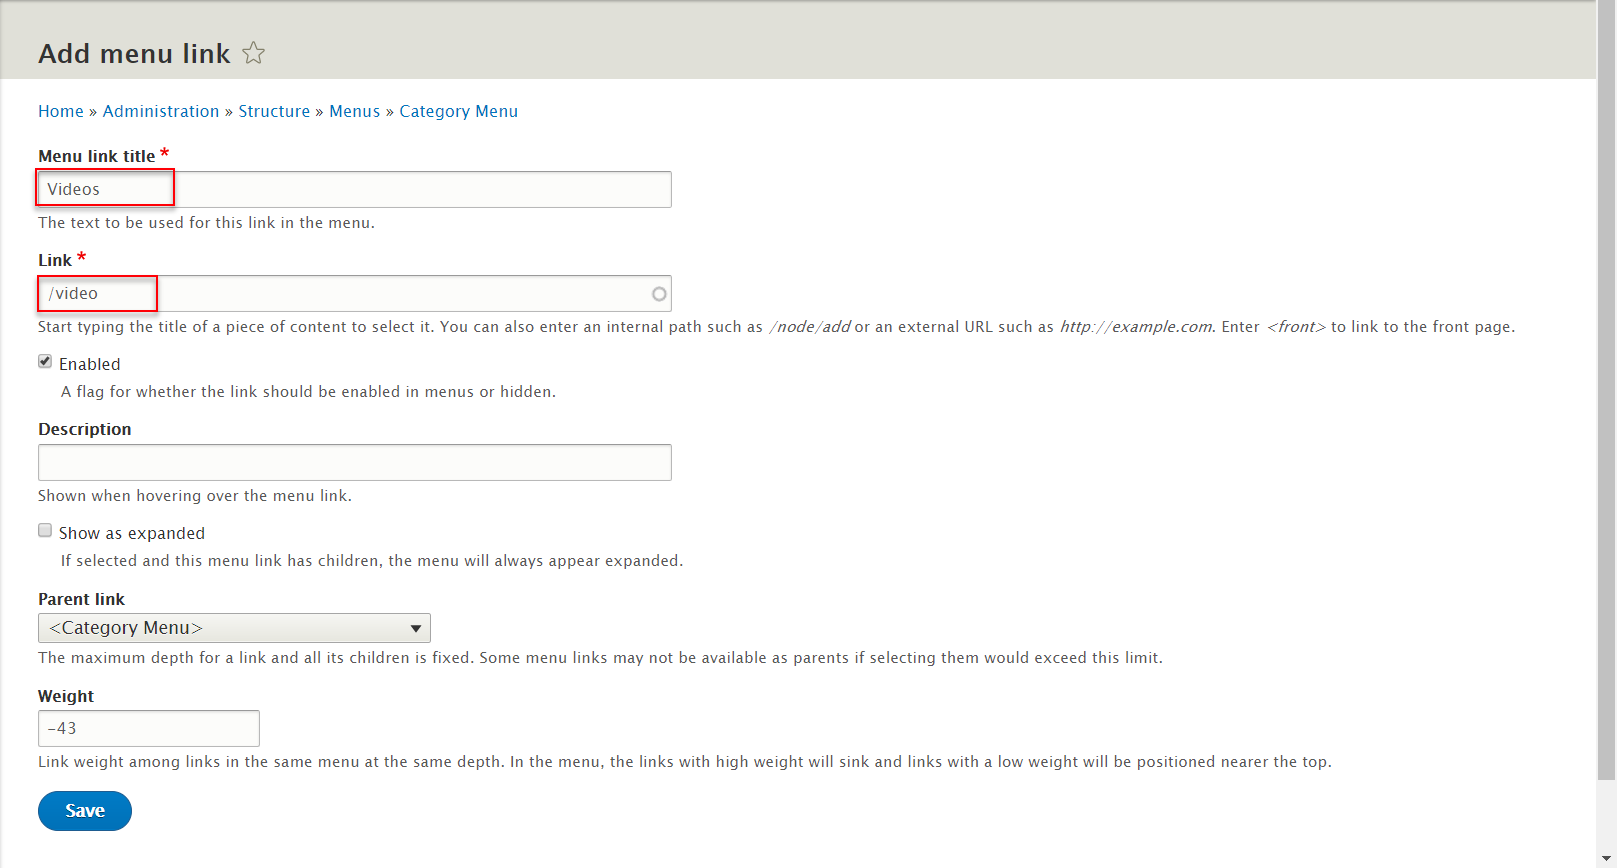
Step 5: Click Add link button to create Video item menu
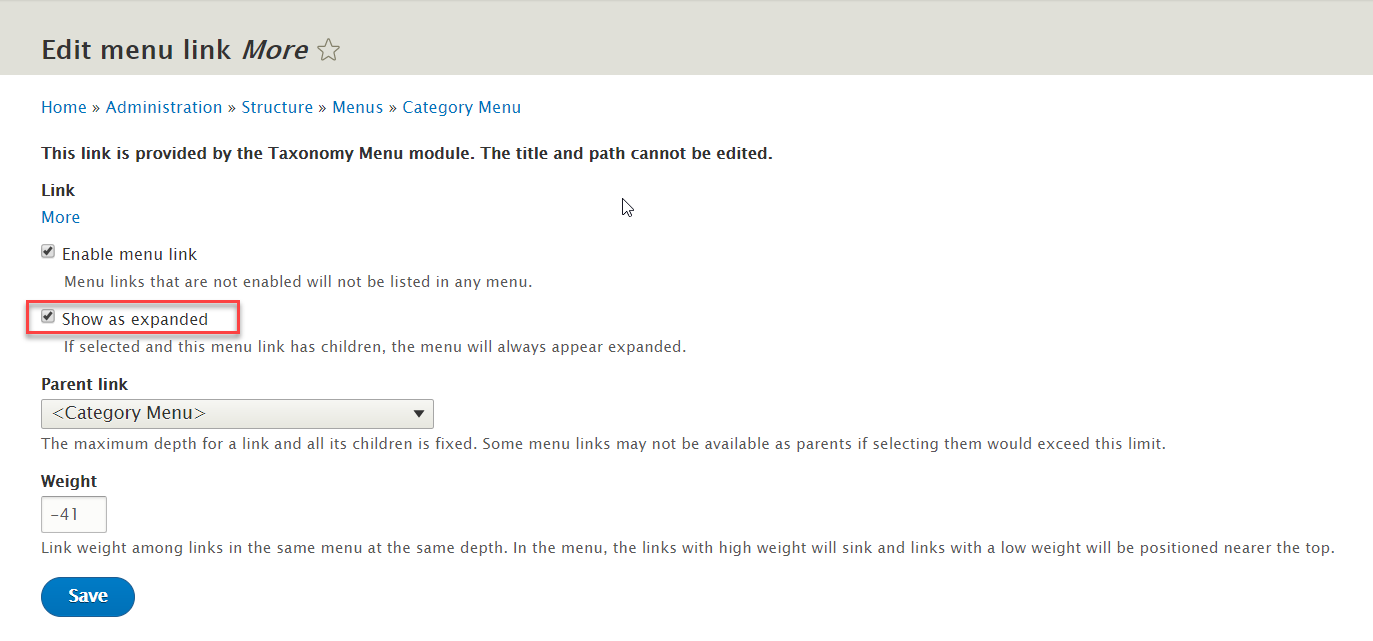
Step 5: At More item menu, click edit
Step 6: Drag and drop to rearrange Category Menu with following settings:
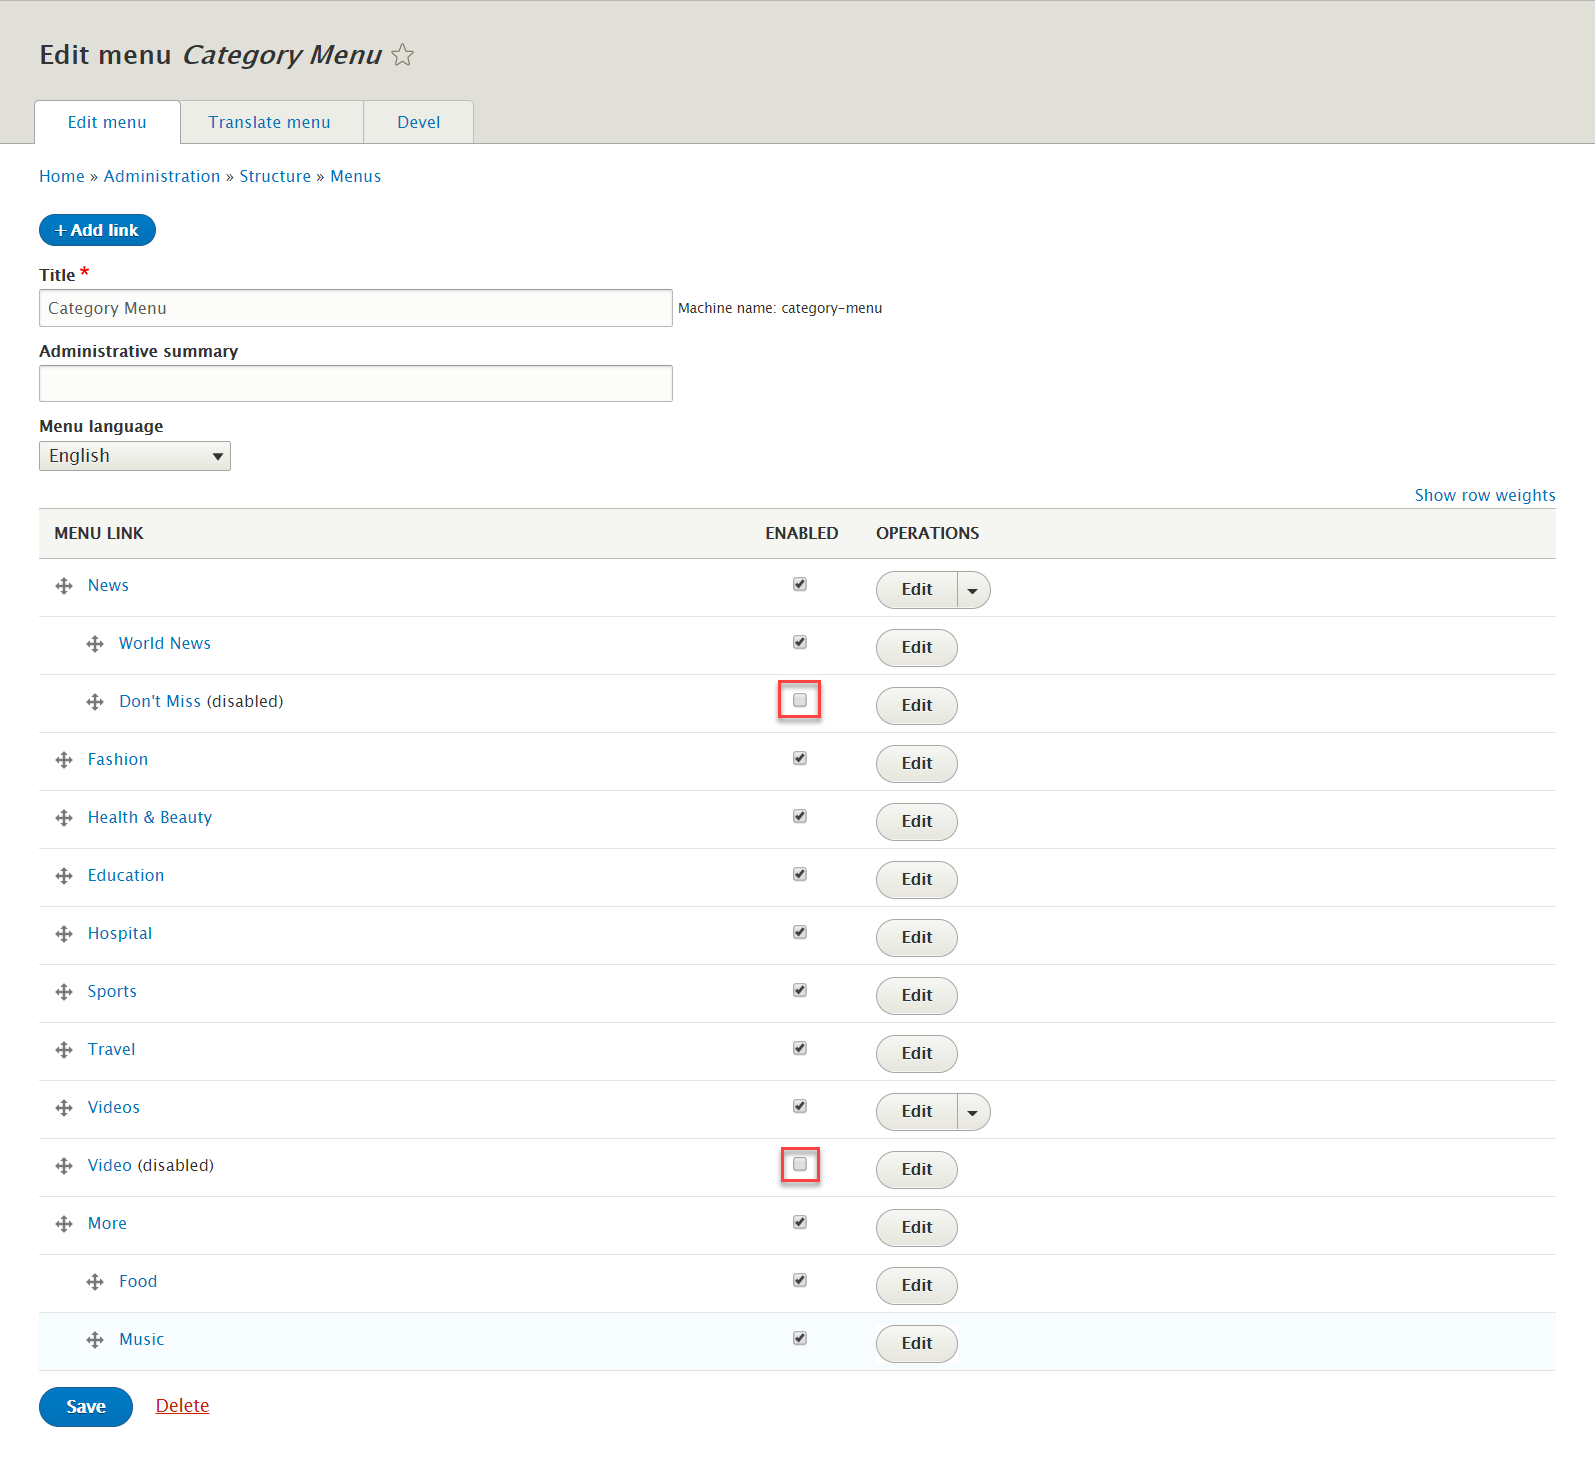
Step 7: Click Save button.
2. Configure : Category Menu
Step 1: Navigate to Structure > Block layout
Step 2: Find Primary menu click Place block button
Step 3: Find Category Menu (System) click Place block button and set following properites:
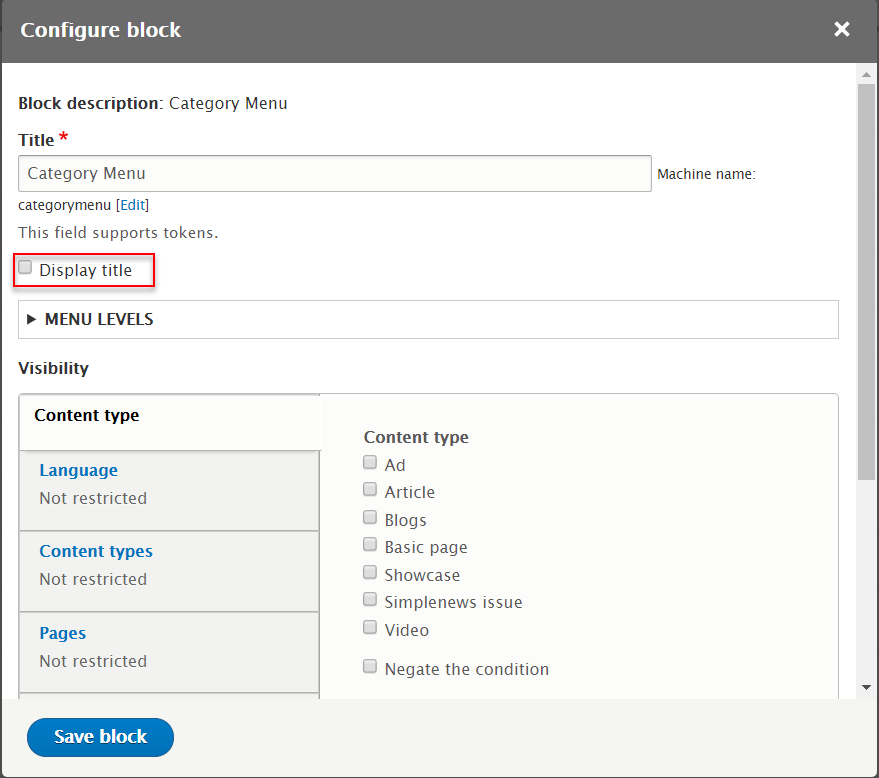
Step 4: Click Save block button.
3. Move : Old Main Menu
Step 1: Navigate to Structure > Block layout
Step 2: Find Primary menu > Main navigation click column Region and choose Headline
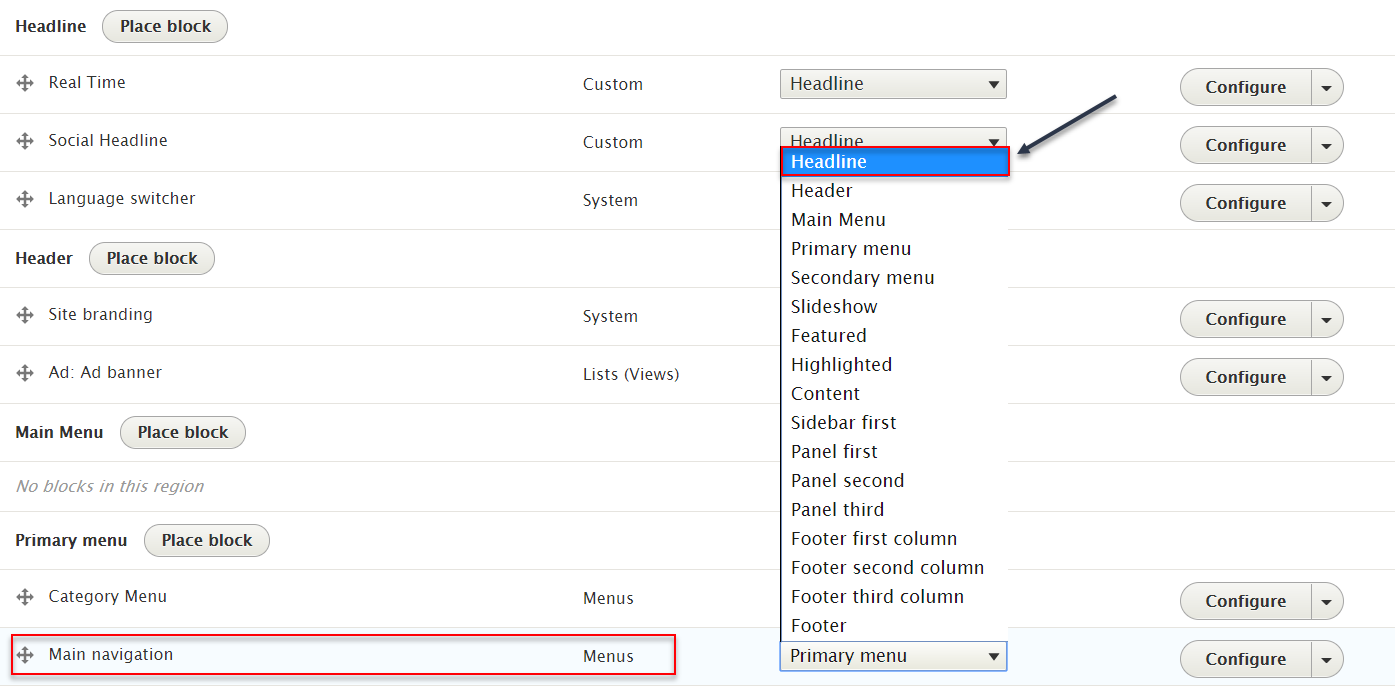
Step 1: Click Save blocks button
Article Block: Top Story block
Front end Display

1. Create Article Block: Top Story view
Step 1: Navigate to Structure > View, click Add view, then create Article Block view with following settings:
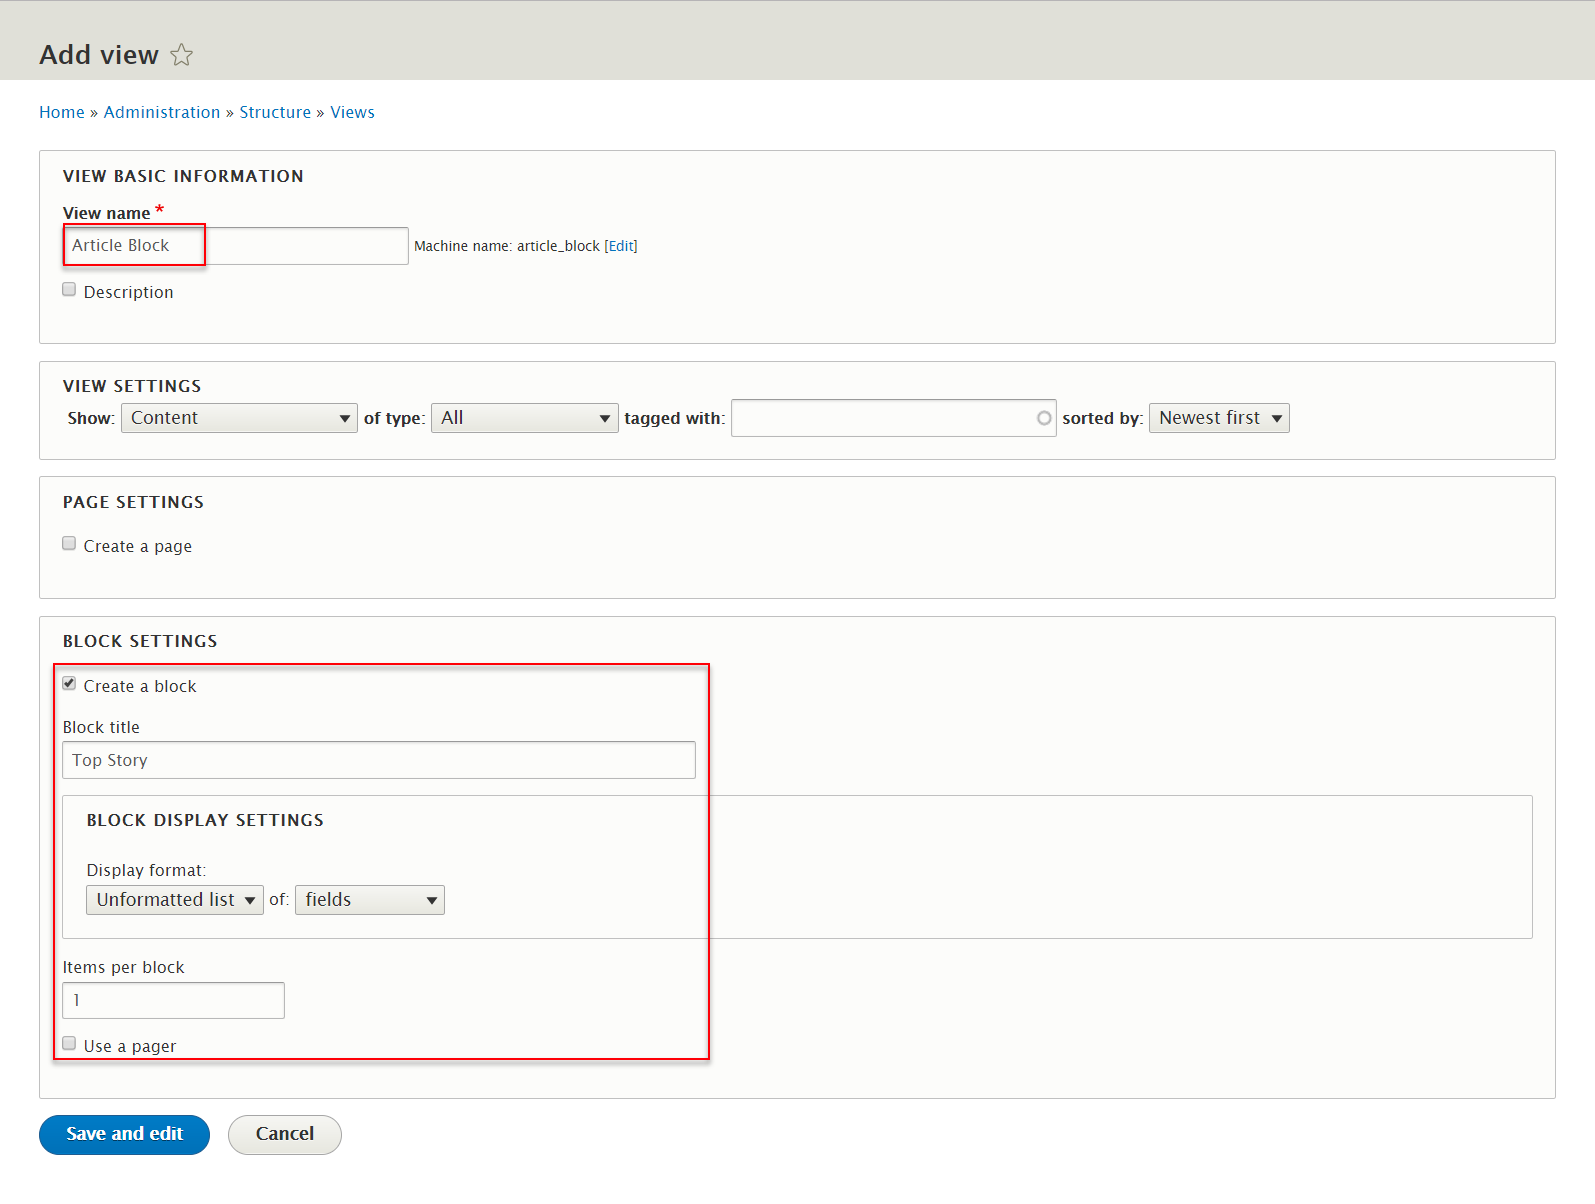
Step 2: Click Save and edit button. Next to steps below to set properties for following fields:
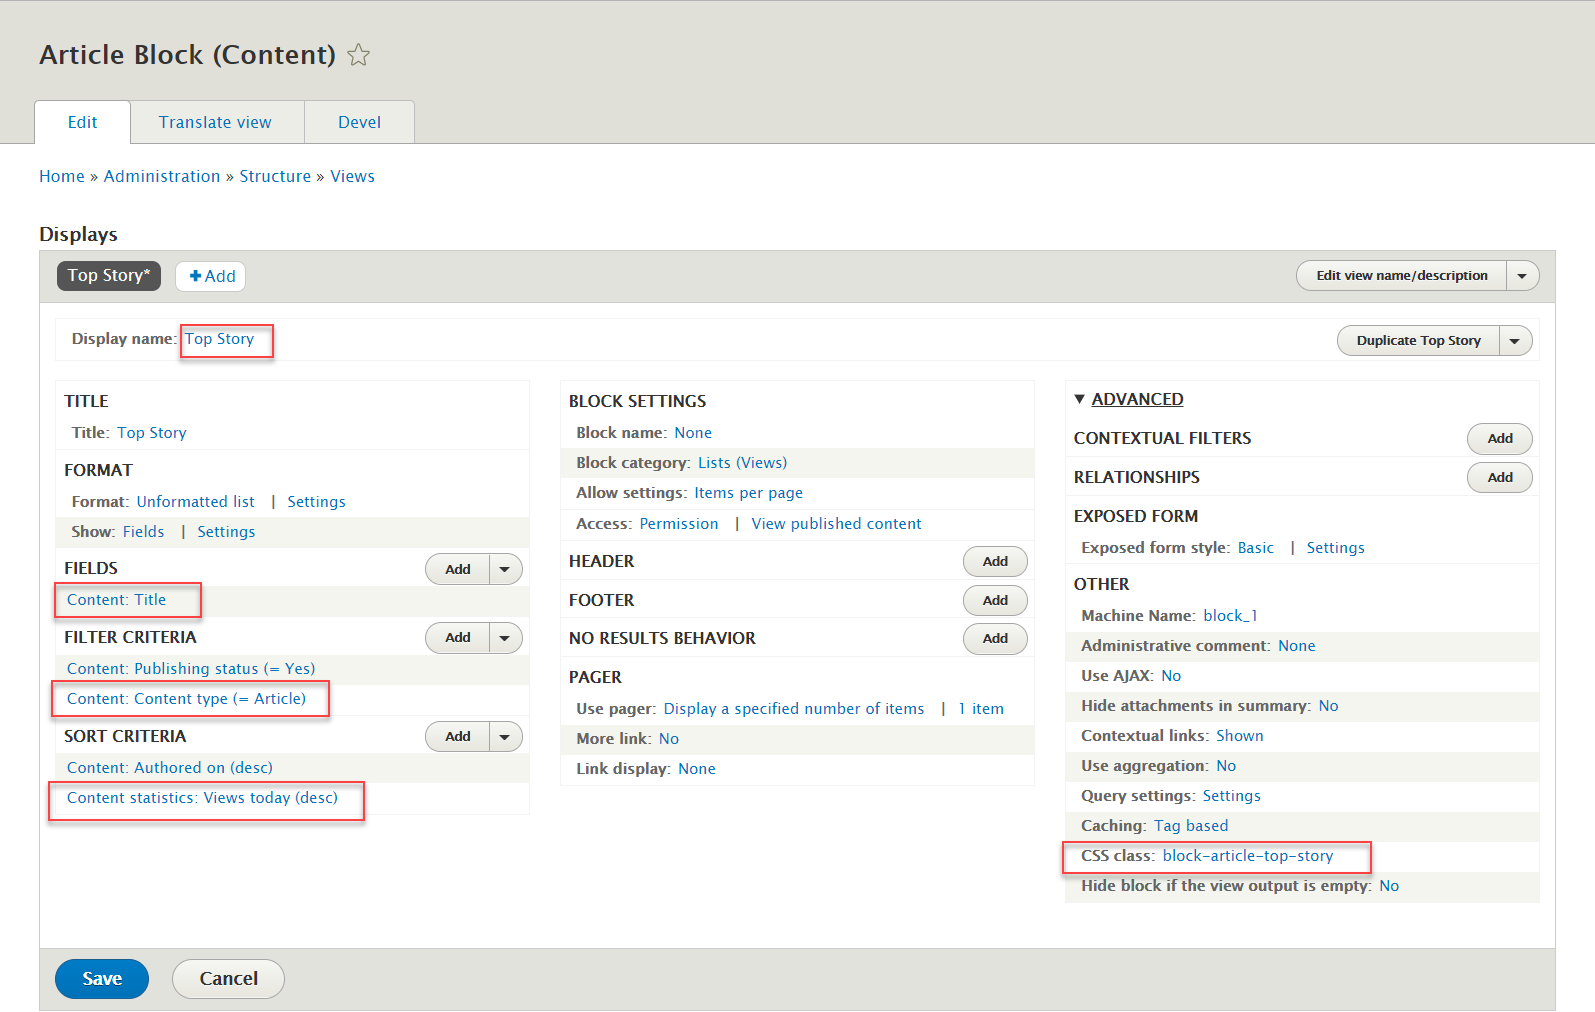
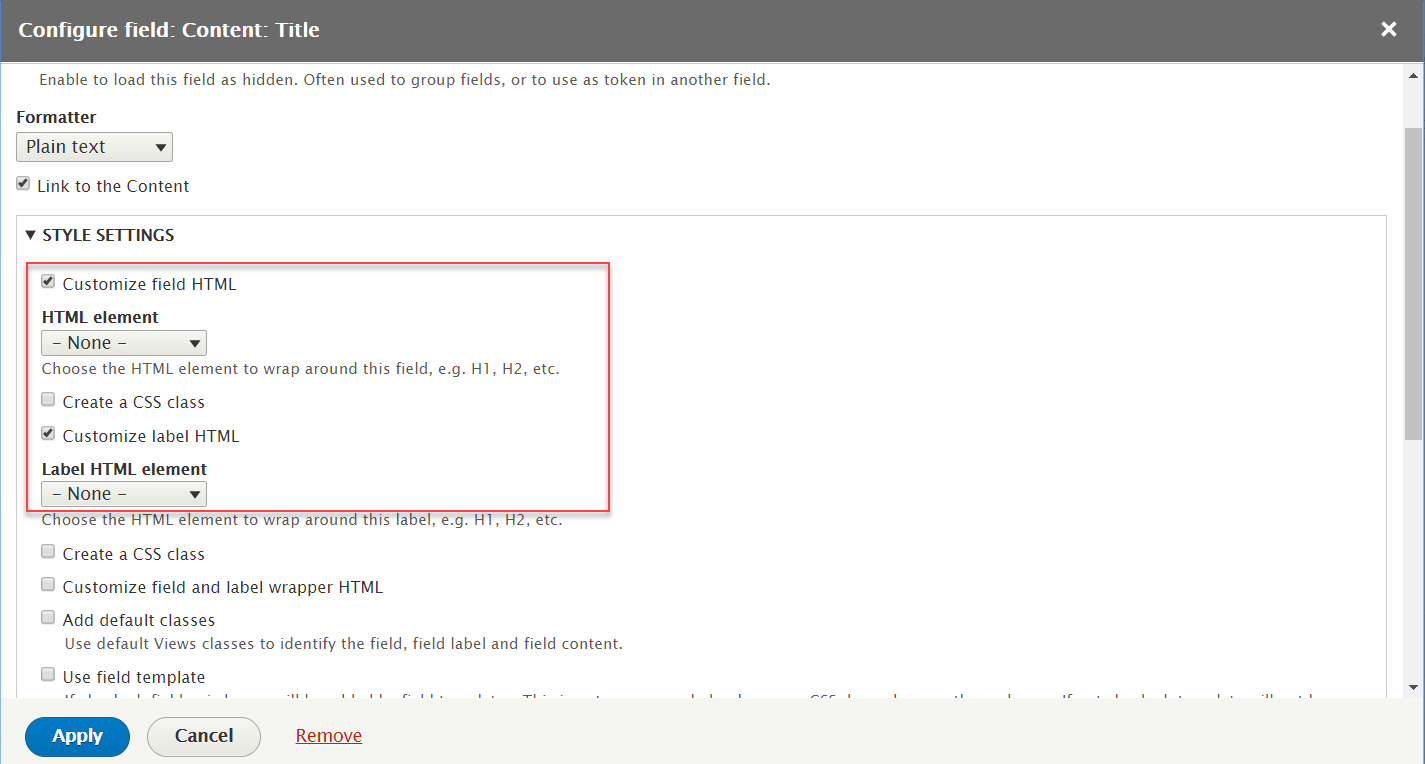
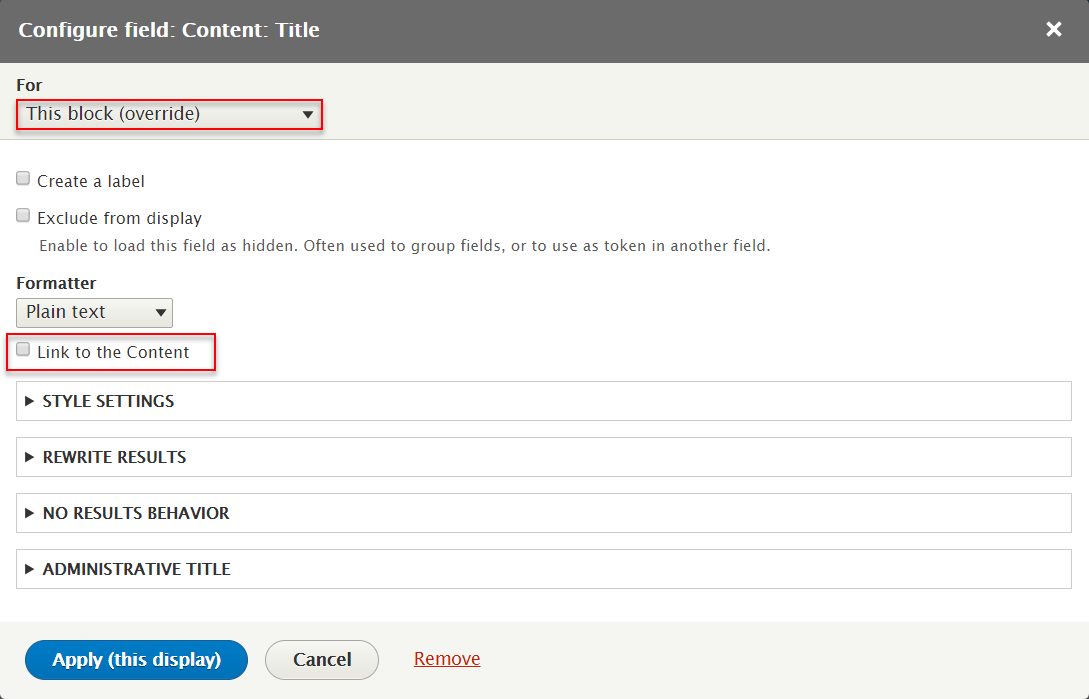
Step 3: At FIELDS area, click Content: Title field, set following properites
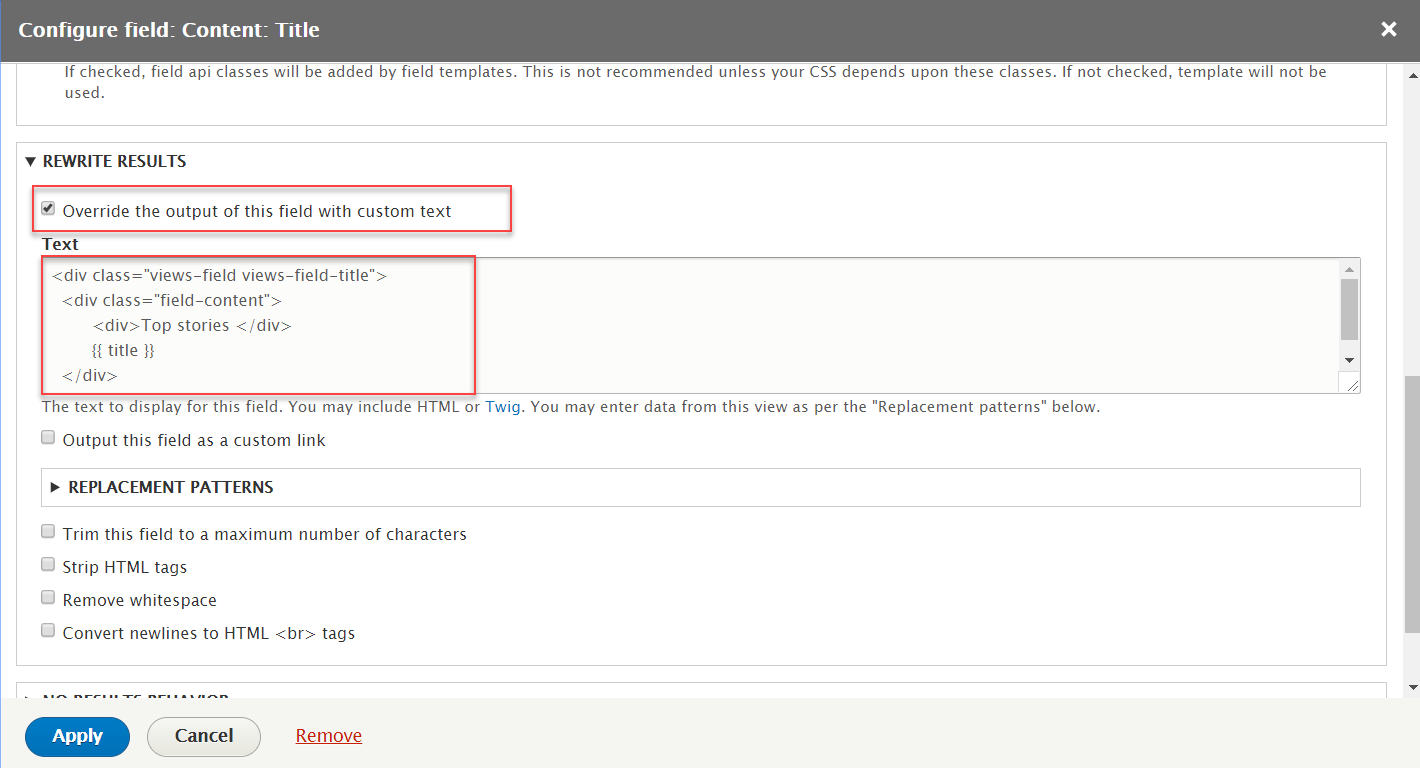
Refer to following HTML code:
                                Top stories
                                {{ title }}
Step 4: At FILTER CRITERIA area, add Content: Content type field set following properites

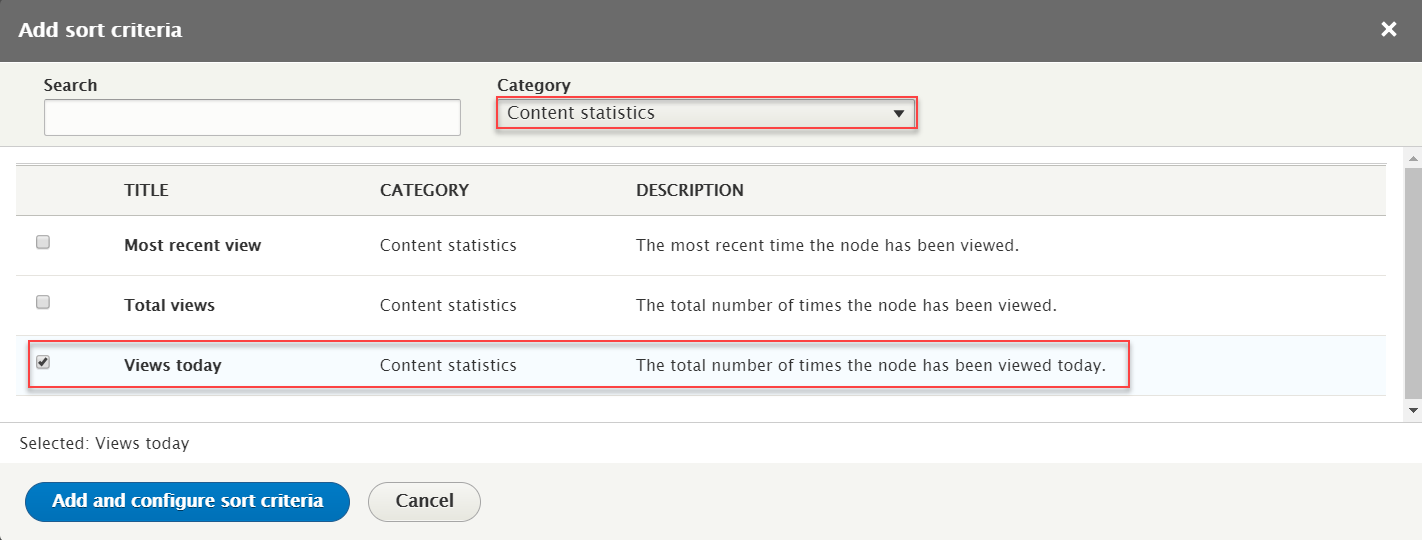
Step 5: At SORT CRITERIA area, add Content statistics: Views today field set following properites

Step 6: At OTHER > CSS class area, set following properites

Step 7: Click Save button.
2. Configure : Article Block: Top Story block
Step 1: Navigate to Structure > Block layout
Step 2: Find Secondary menu click Place block button
Step 3: Find Article Block: Top Story Lists (Views) click Place block button and set following properites:
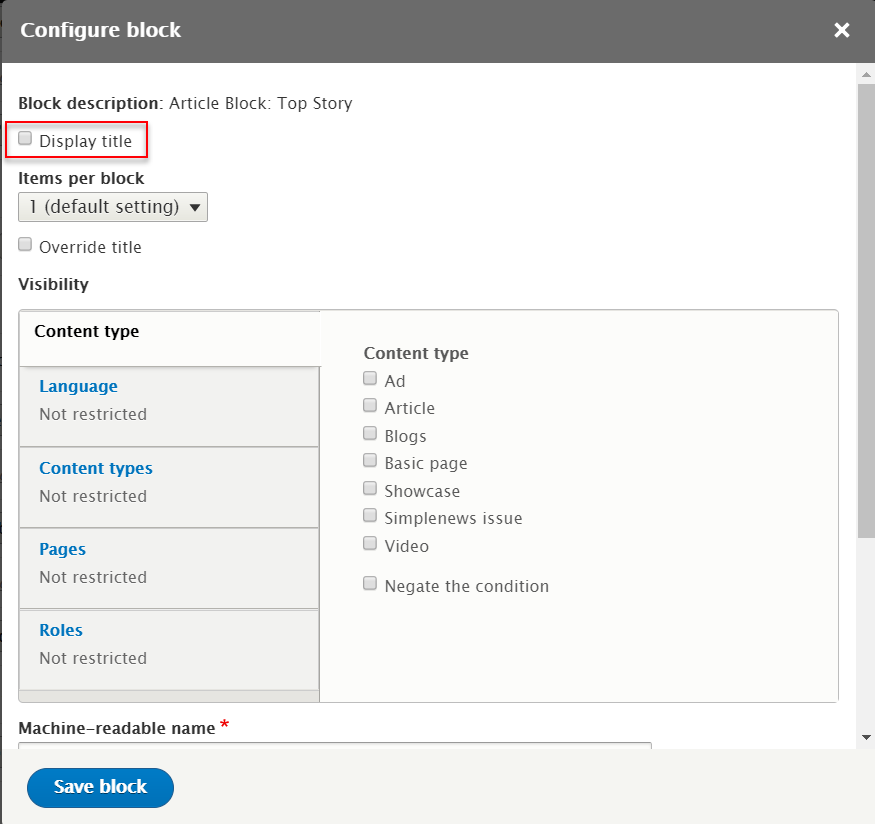
Step 4: Click Save block button.
3. Configure : Search form block
Step 1: Navigate to Structure > Block layout
Step 2: Find Secondary menu click Place block button
Step 3: Find Search form Froms click Place block button and set following properites:
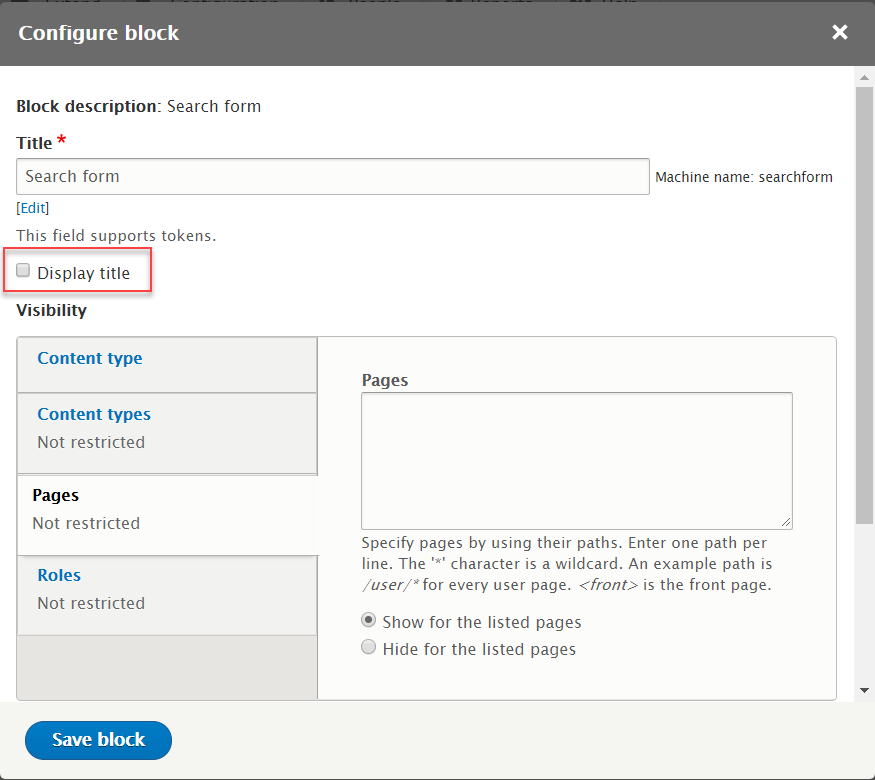
Step 4: Click Save block button.
Featured Home block
Front end Display

1. Create Featured 4 view
Step 1: Navigate to Structure > View, click Add view, then create Featured view with following settings:
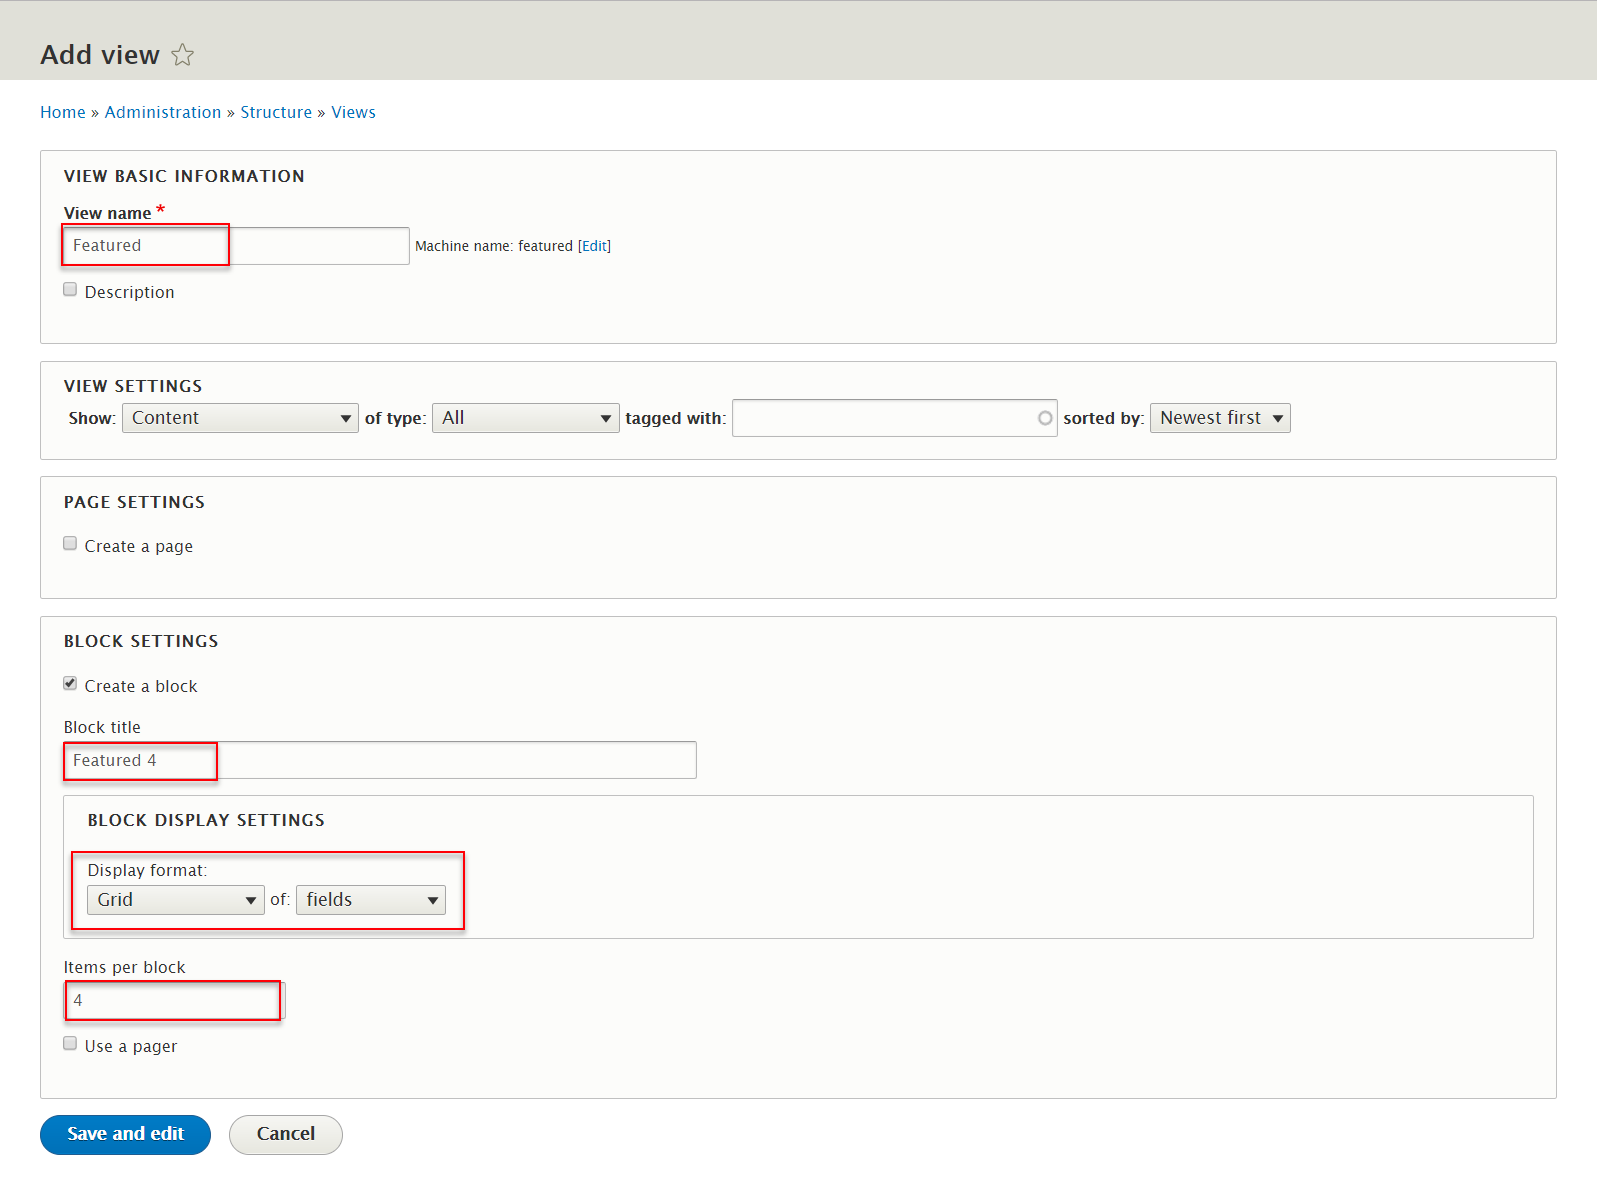
Step 2: Click Save and edit button. Next to steps below to set properties for following fields:
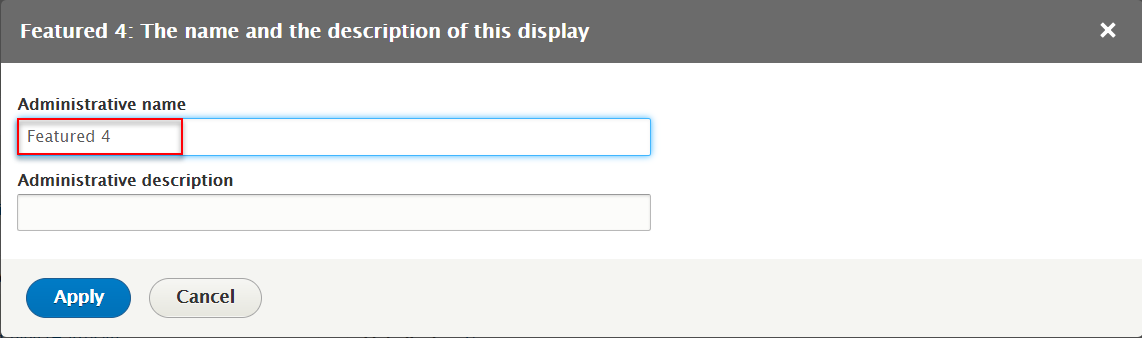
Step 3: At Display name area, Change name Featured 4
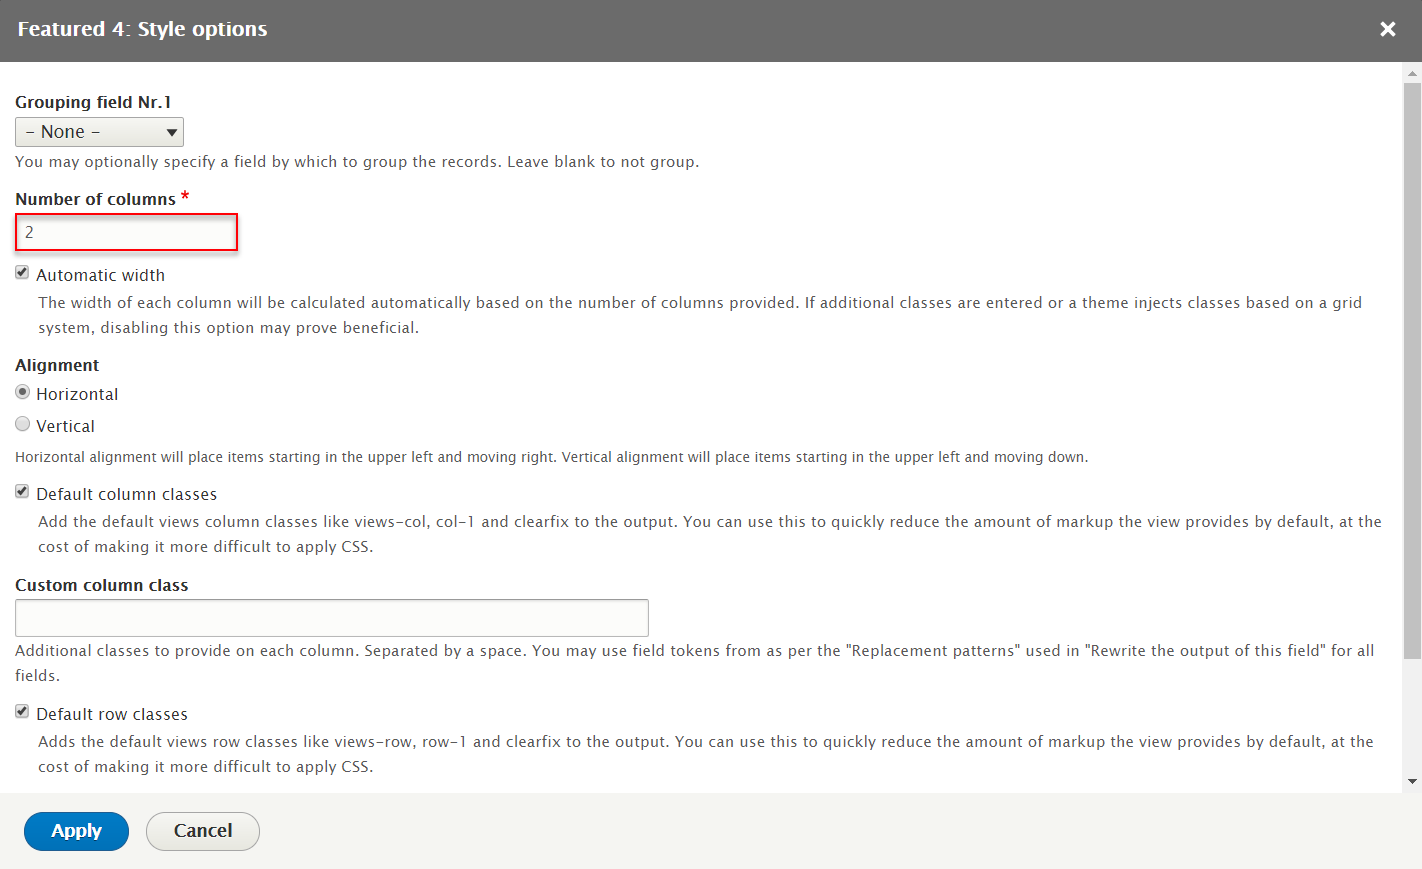
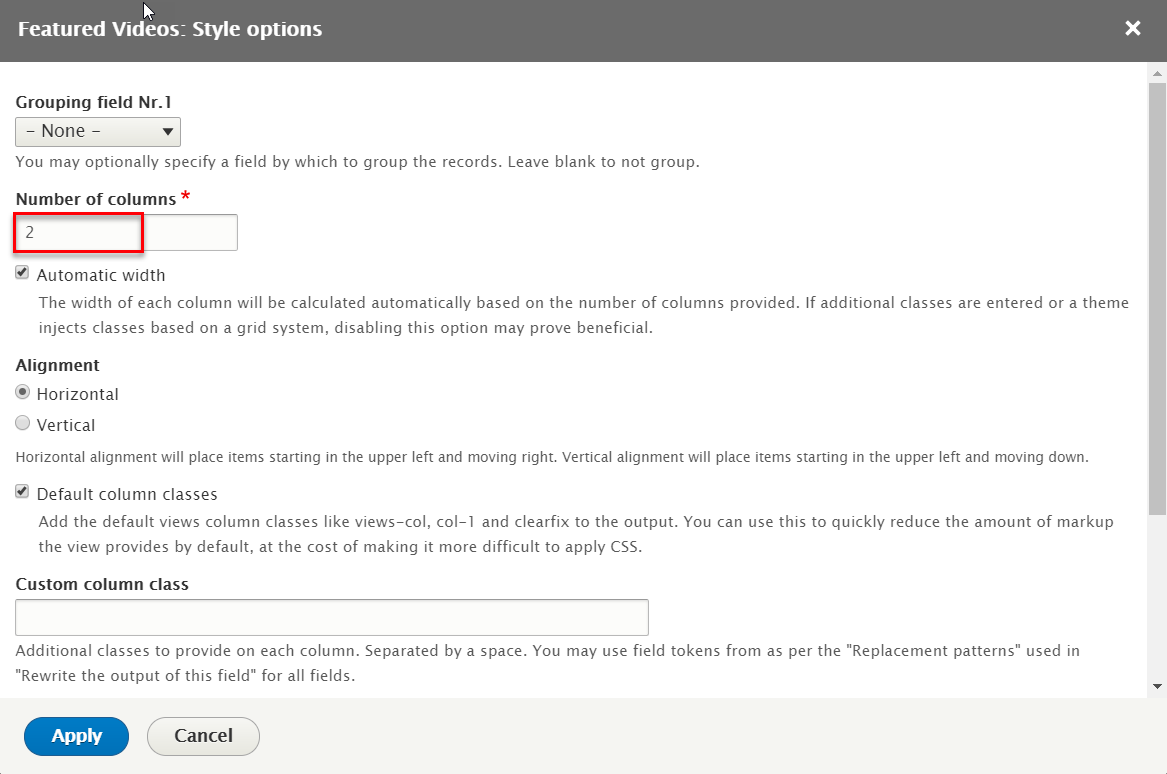
Step 4: At FORMAT > Grid area, click Setting, set following properites
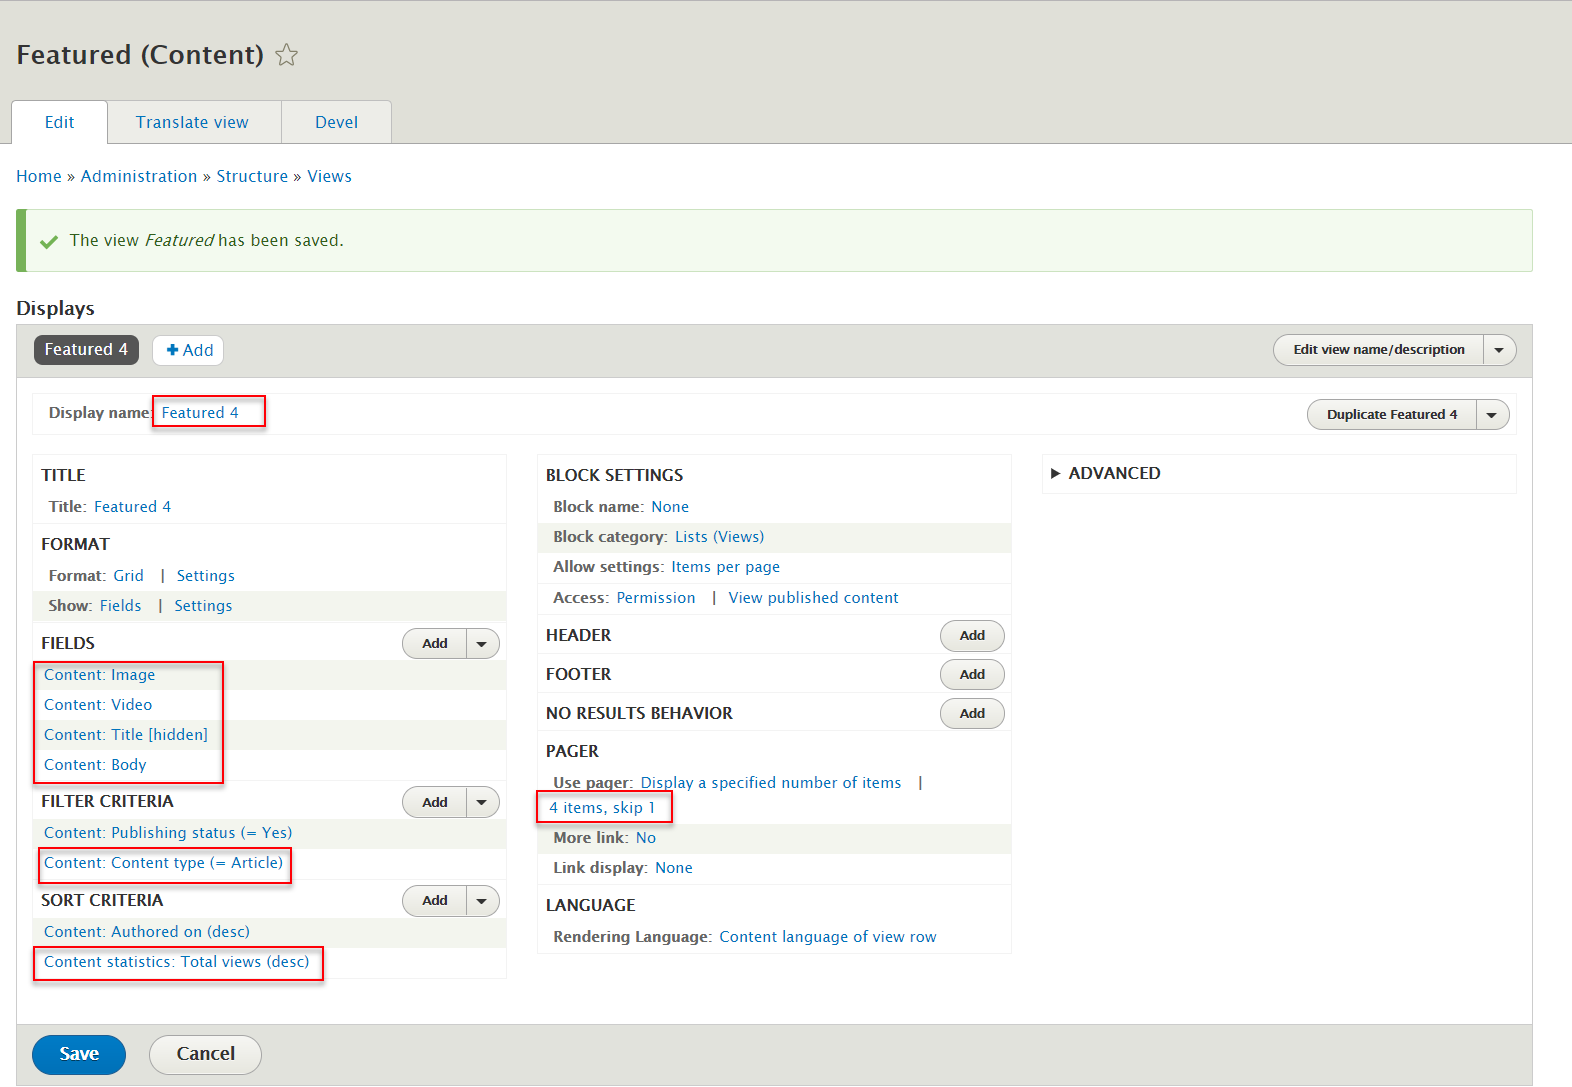
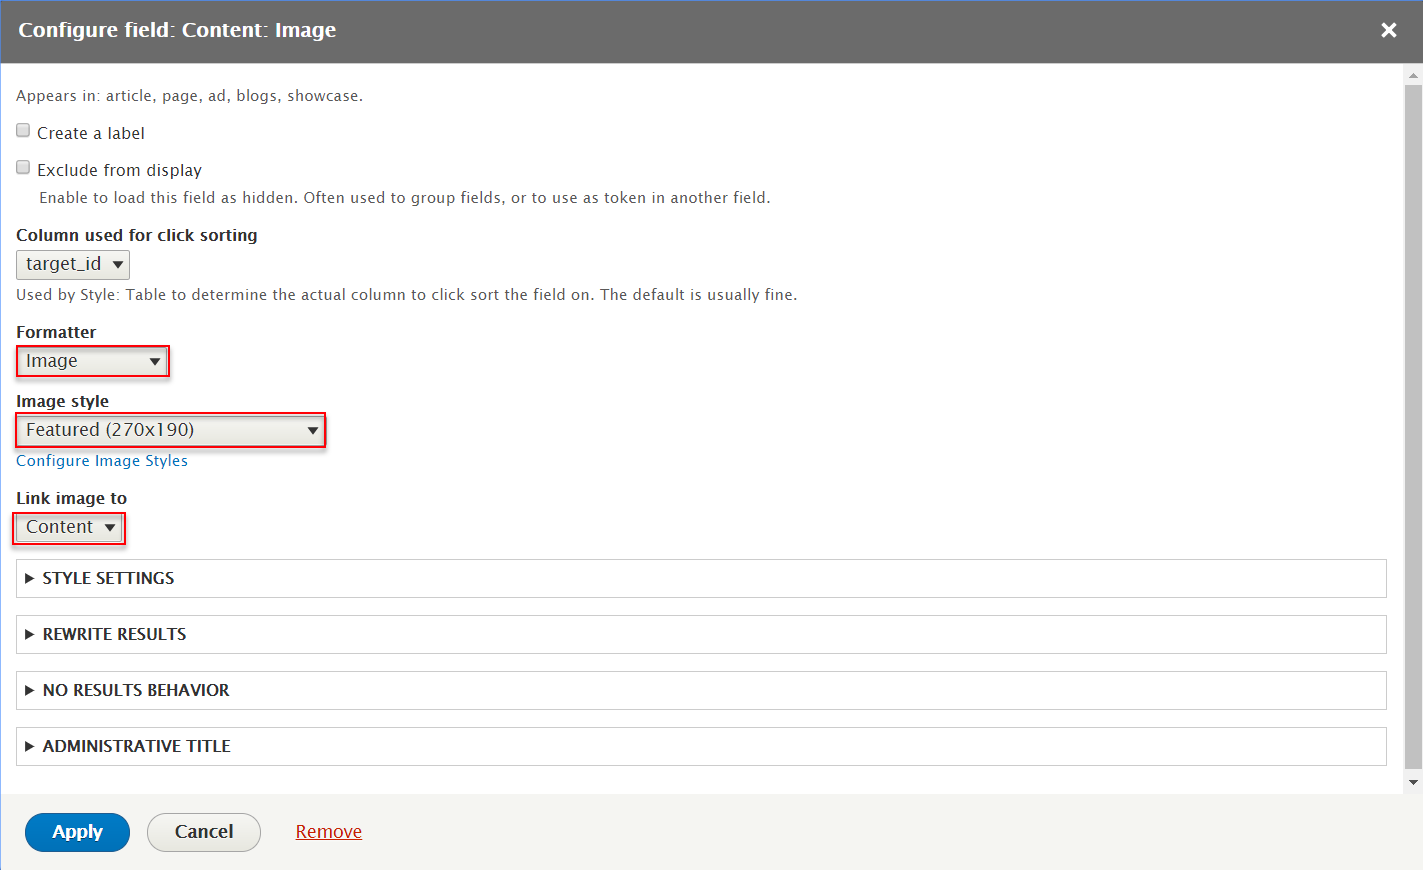
Step 5: At FIELD area, click Content: Image field, set following properites
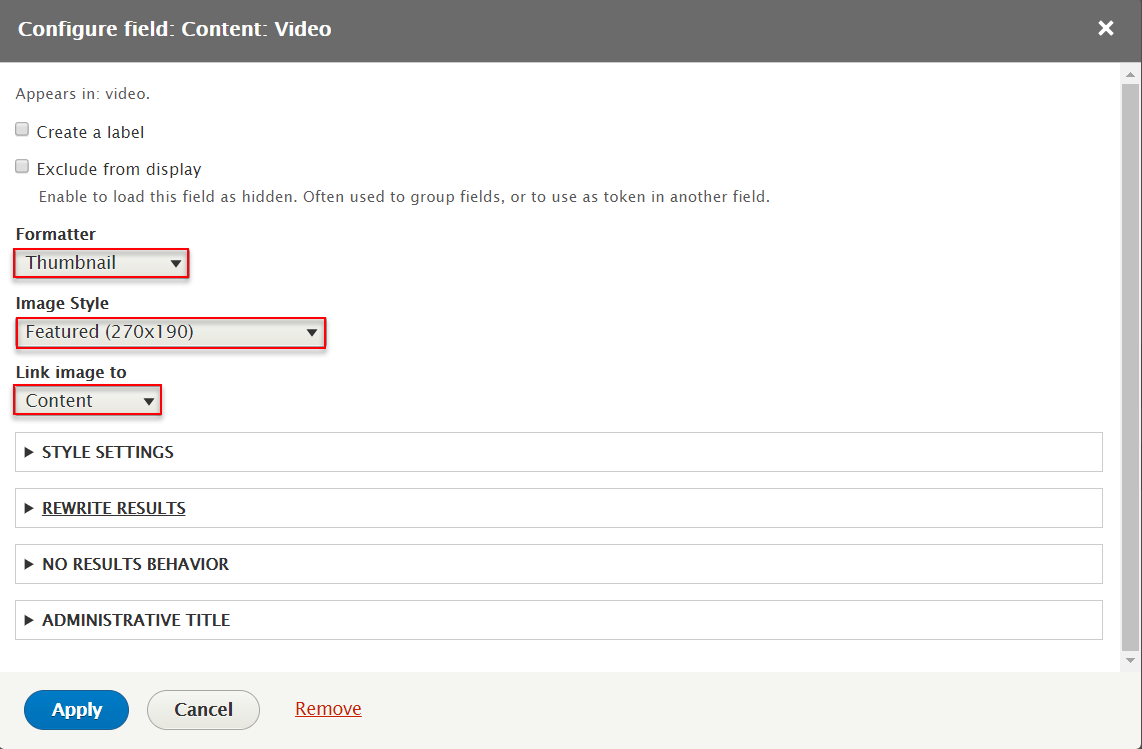
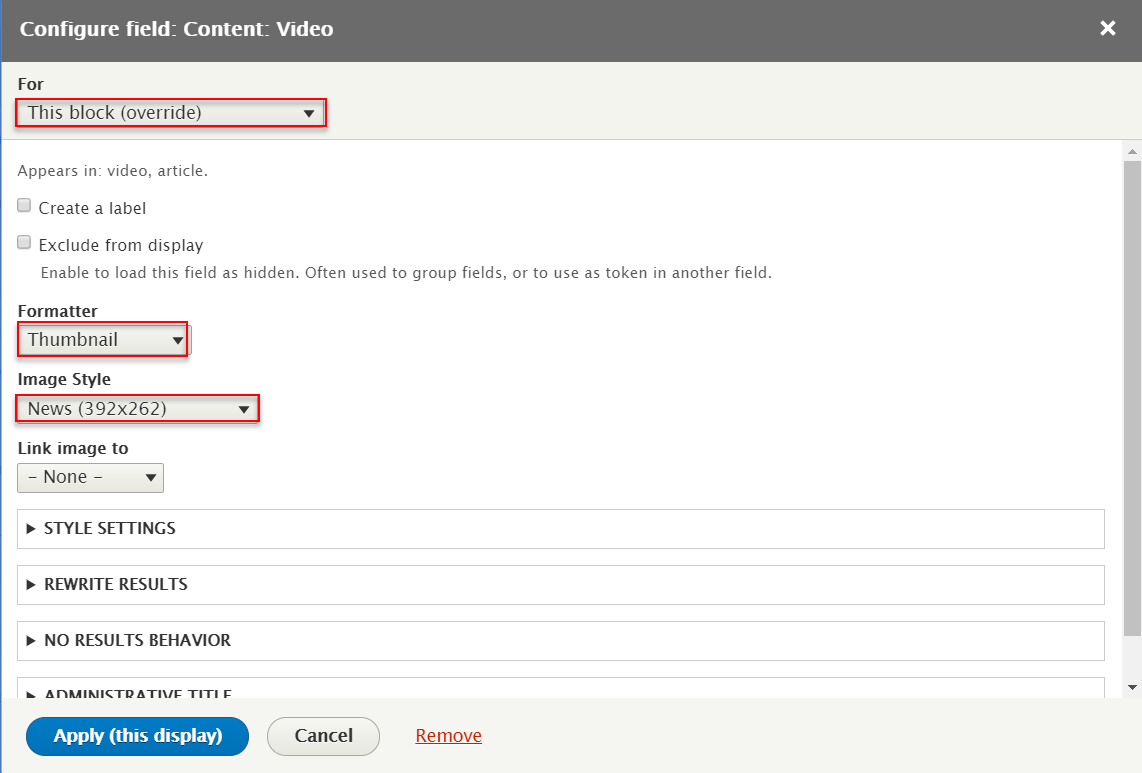
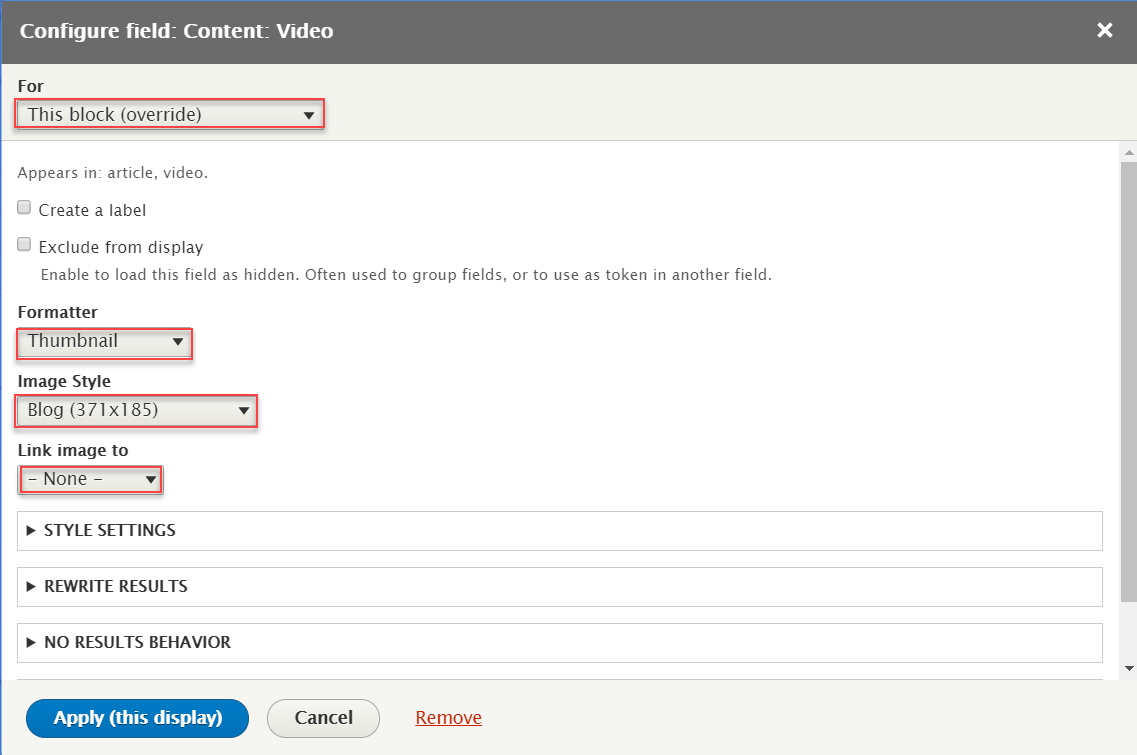
Step 6: At FIELD area, click Content: Video field, set following properites
Step 7: At FIELD area, click Content: Title field, set following properites
Step 8: At FIELD area, click Content: Body field, set following properites


Refer to following HTML code:
                                      {{ title }}


                                   {{ body }}
Step 9: At FILTER CRITERIA area, click Add button then create Content: Content type field, set following properites
Step 10: At SORT CRITERIA area, click Add button then create Content statistics: Total views field, set following properites
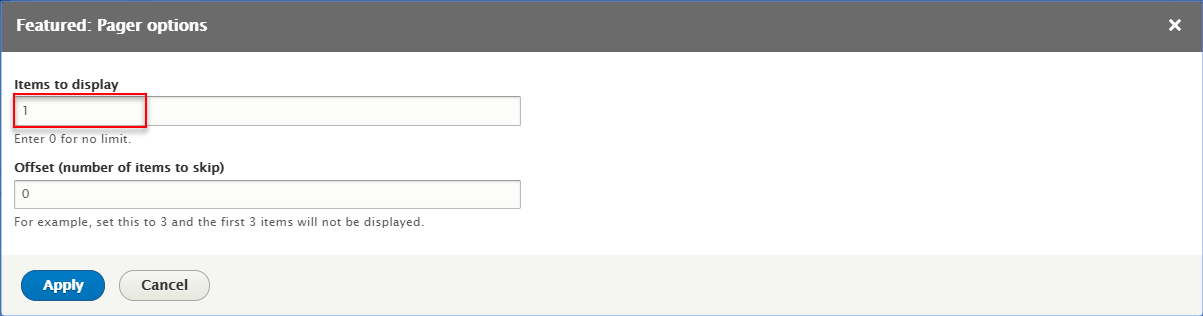
Step 11: At PAGER area, click number item field, set following properites

Step 12: Click Save button
2. Create Featured view
Step 1: Click Add > Block link, then create Featured block with following settings:
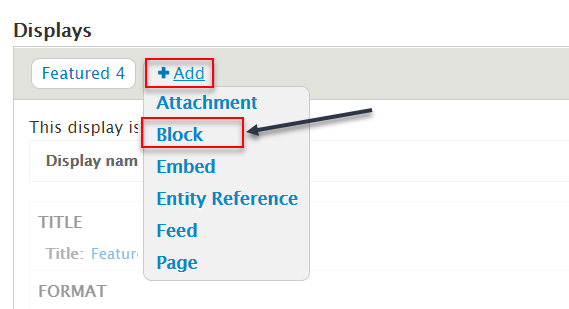
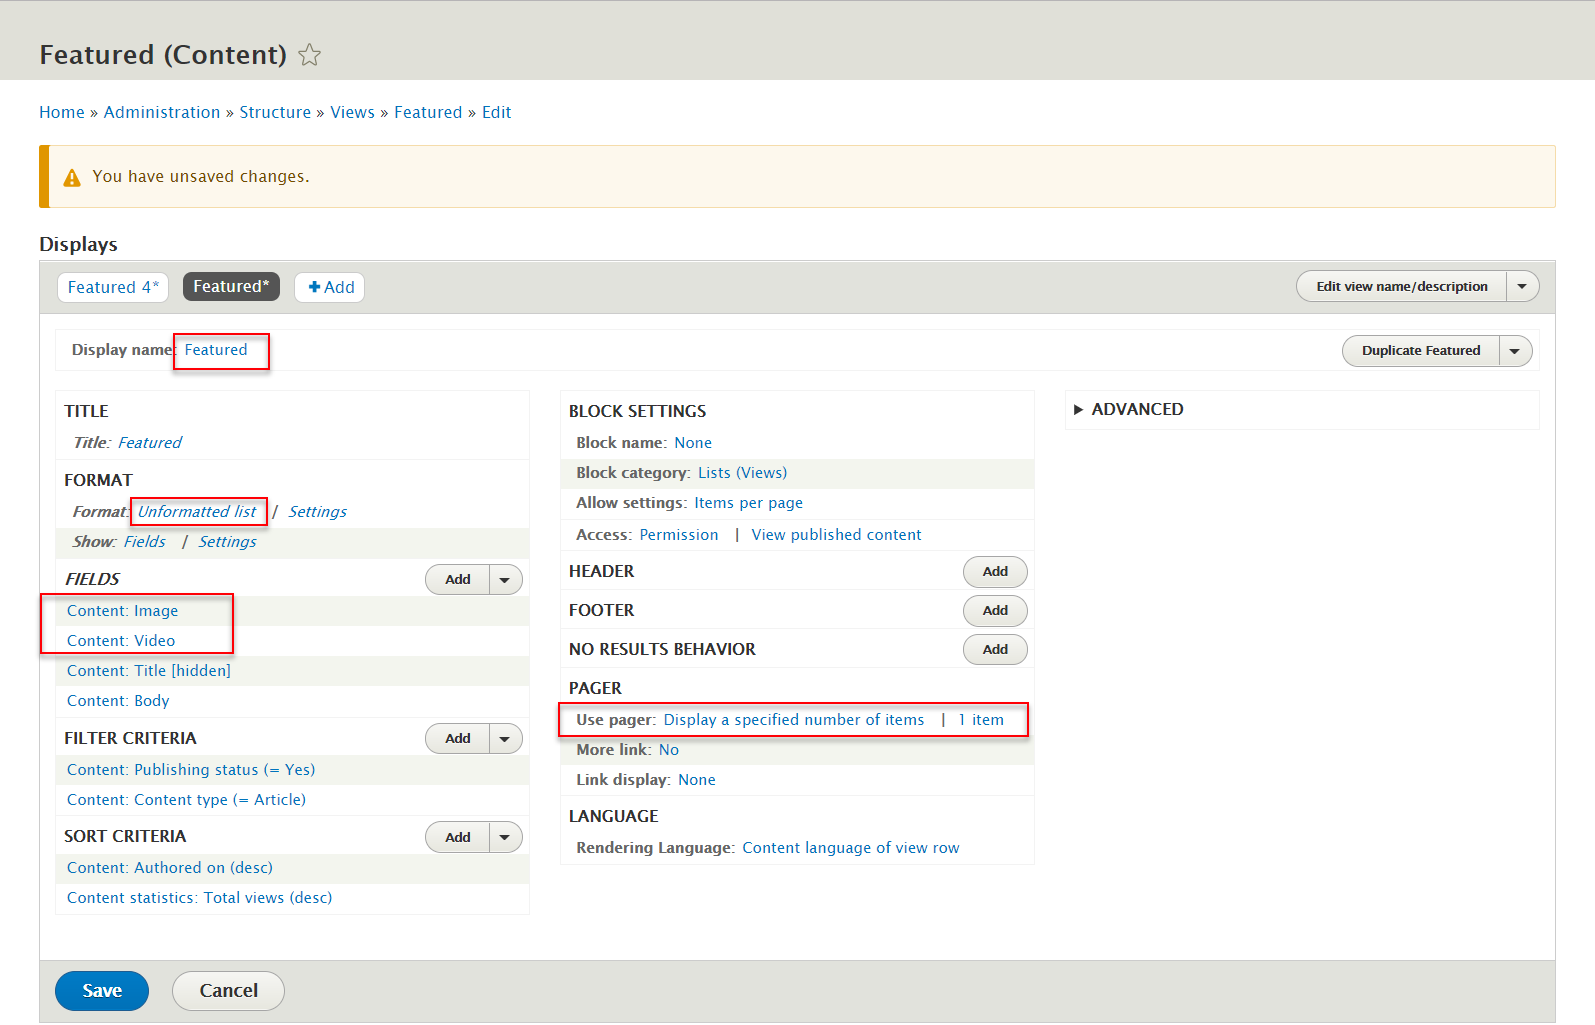
Step 2: At Display name area, Change name Featured

Step 3: At FORMAT > Unformatted list area, click Unformatted list, set following properites

Step 4: At FIELD area, click Content: Image field, set following properites
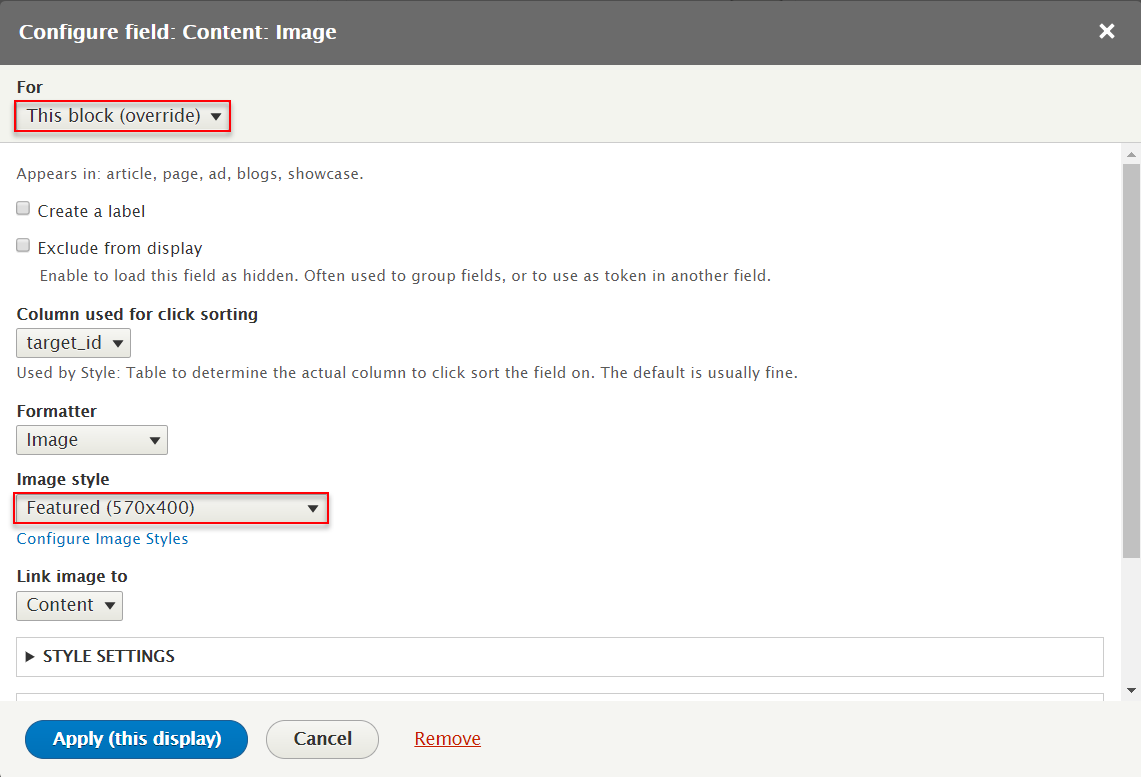
Step 5: At FIELD area, click Content: Video field, set following properites
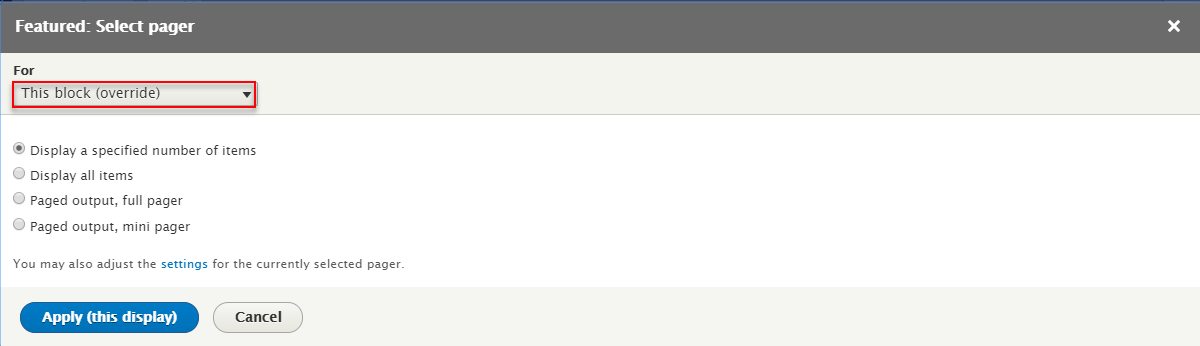
Step 6: At PAGER area, click Display a specified number of items and number item fields, set following properites
Step 7: Click Save button
3. Create Featured Home view
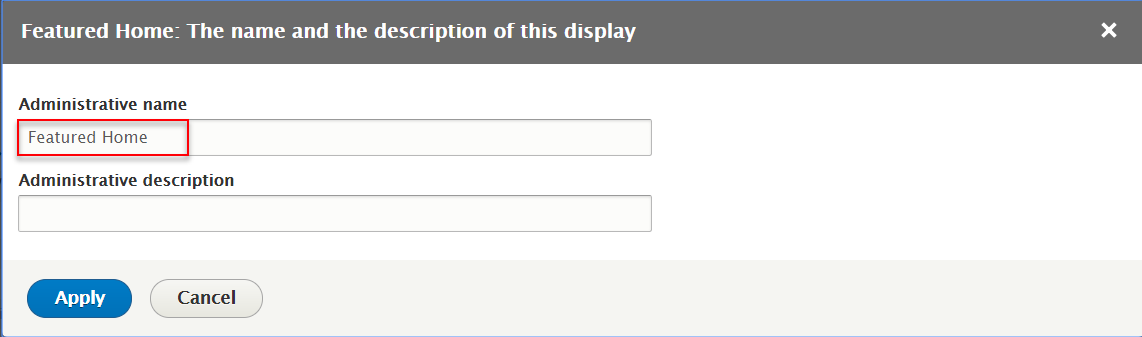
Step 1: Click Add > Block link, then create Featured Home block with following settings:

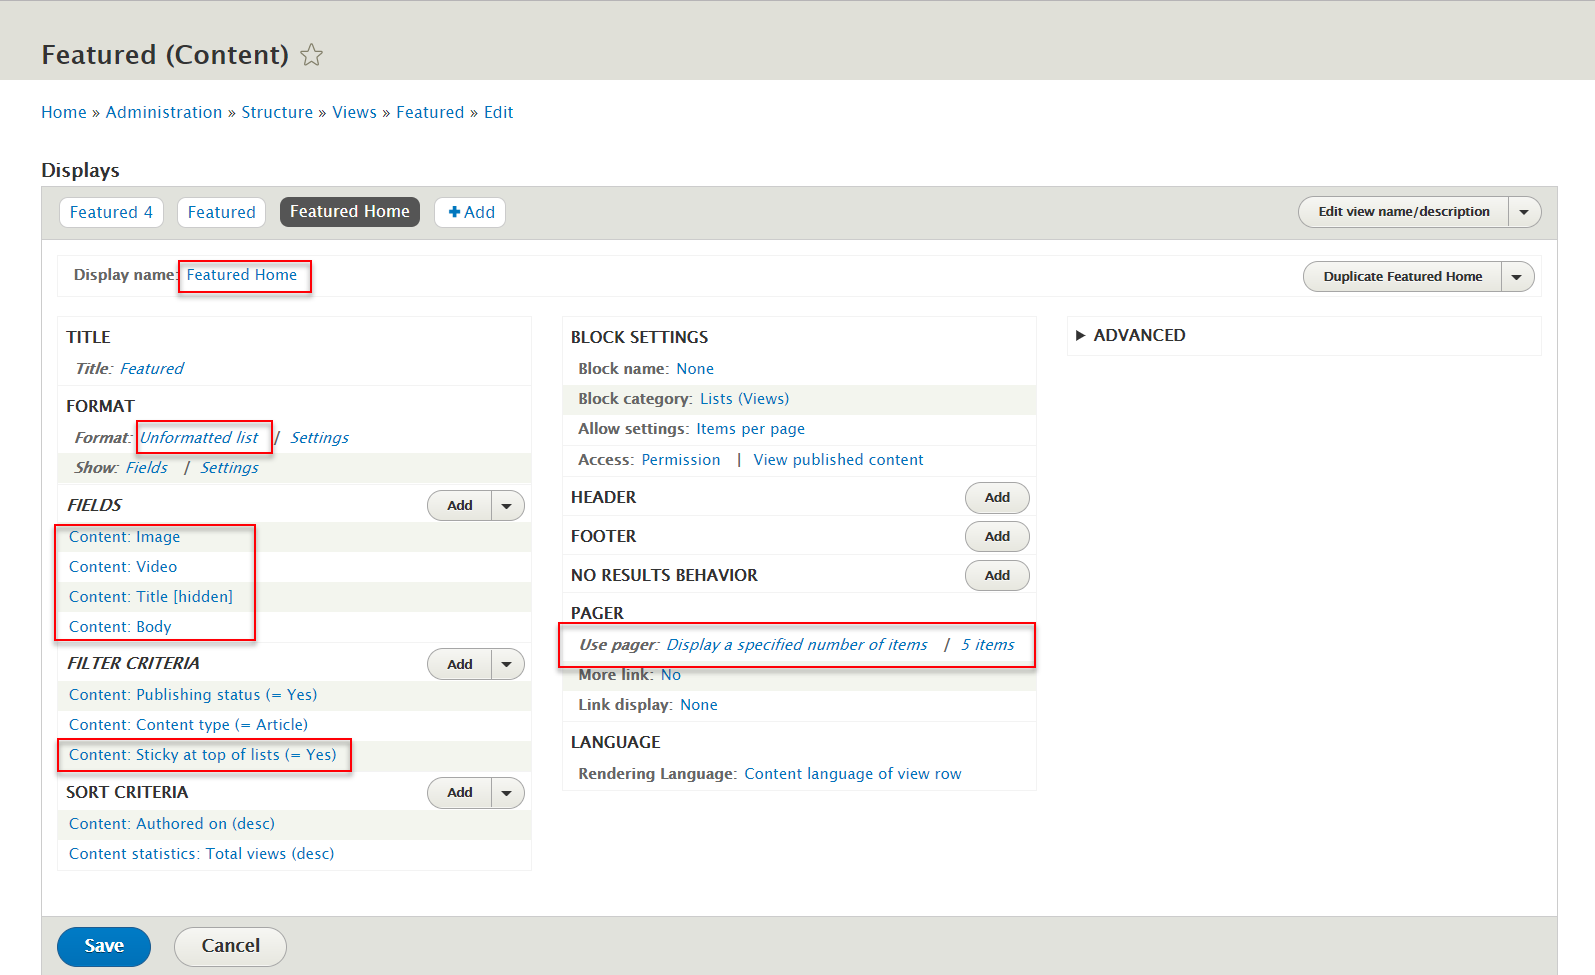
Step 2: At Display name area, Change name Featured
Step 3: At FORMAT > Unformatted list area, click Unformatted list, set following properites
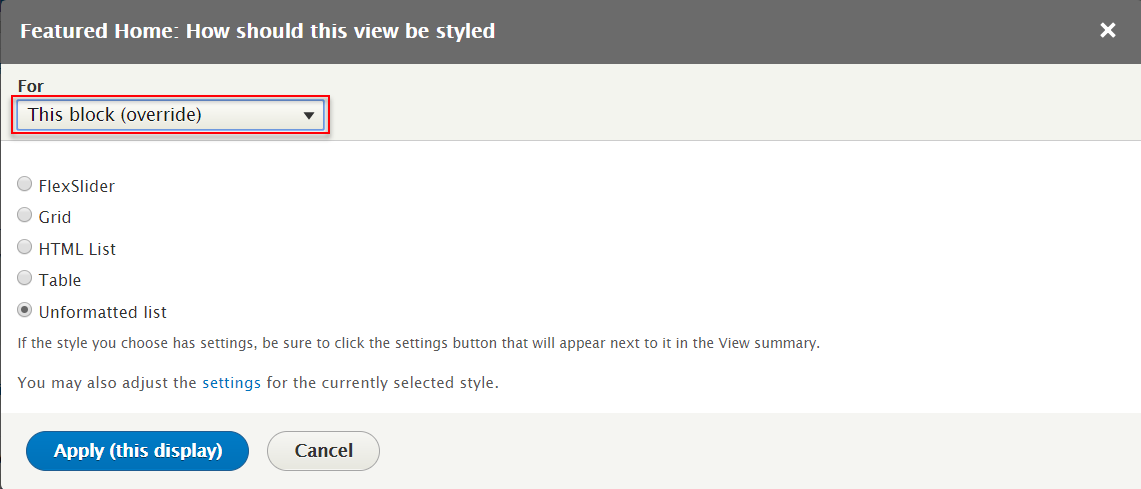
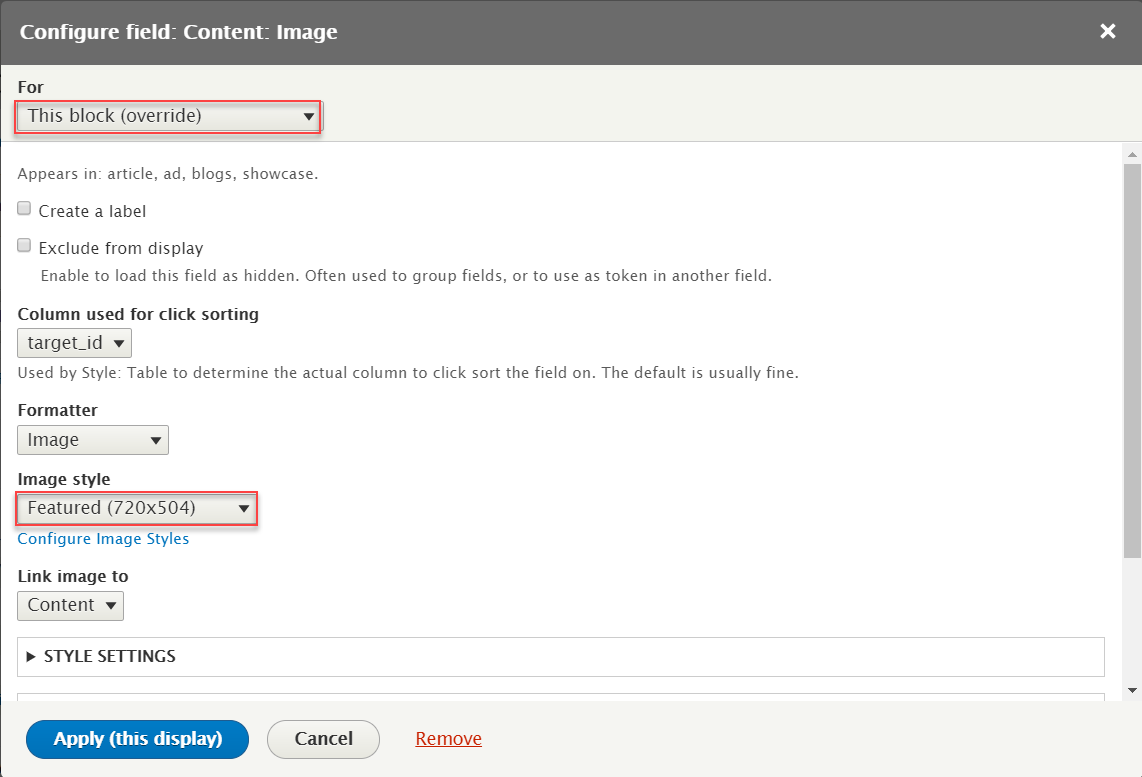
Step 4: At FIELD area, click Content: Image field, set following properites
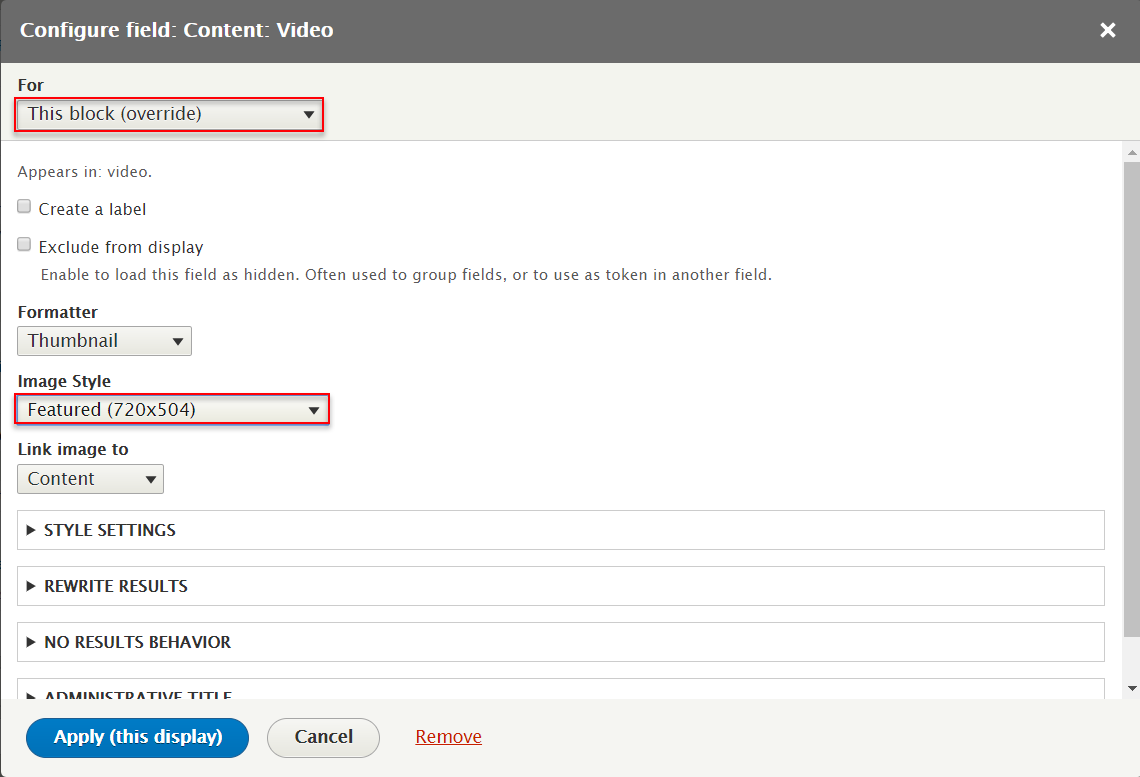
Step 5: At FIELD area, click Content: Video field, set following properites
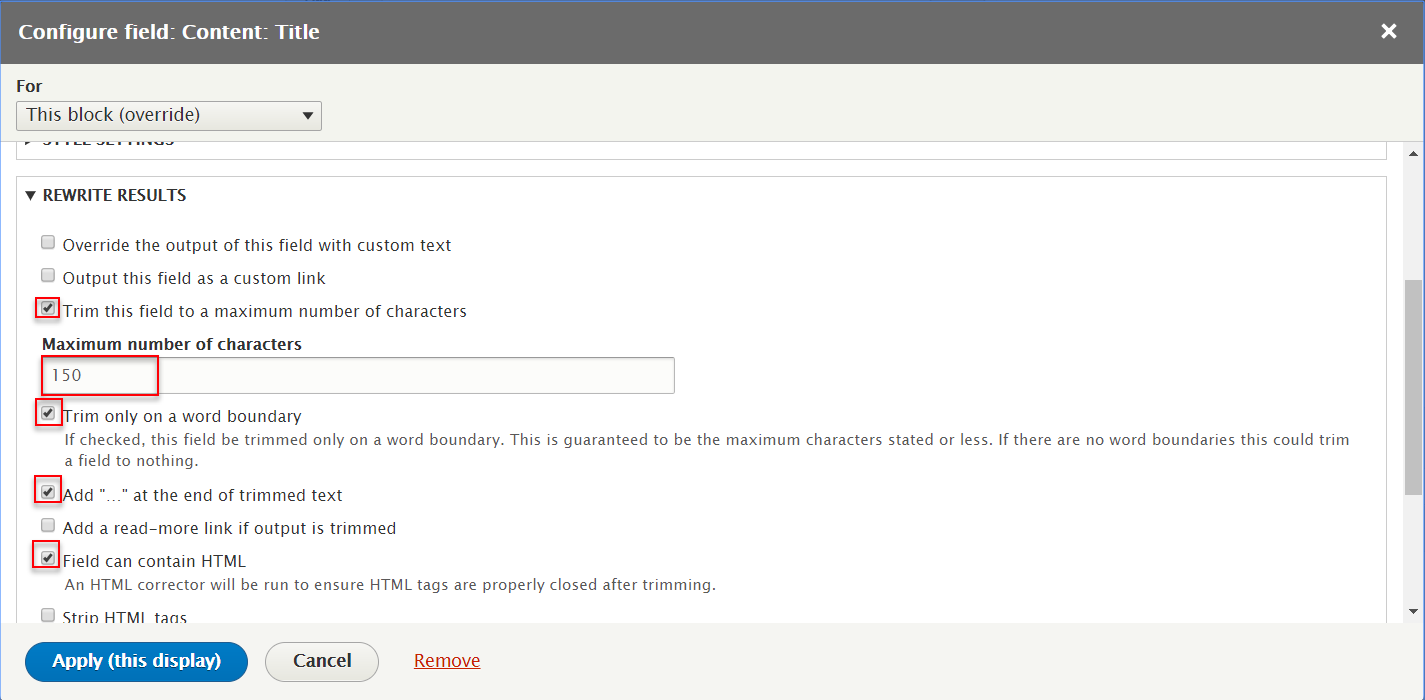
Step 6: At FIELD area, click Content: Title field, set following properites
Step 7: At FILTER CRITERIA area, click Add button then create Content: Sticky at top of lists field, set following properites
Step 8: At PAGER area, click Display a specified number of items and number item fields, set following properites

Step 9: Click Save button
4. Configure : Featured Home block
Step 1: Navigate to Structure > Block layout
Step 2: Find Featured click Place block button
Step 3: Find Featured: Featured Home Lists (Views) click Place block button and set following properites:
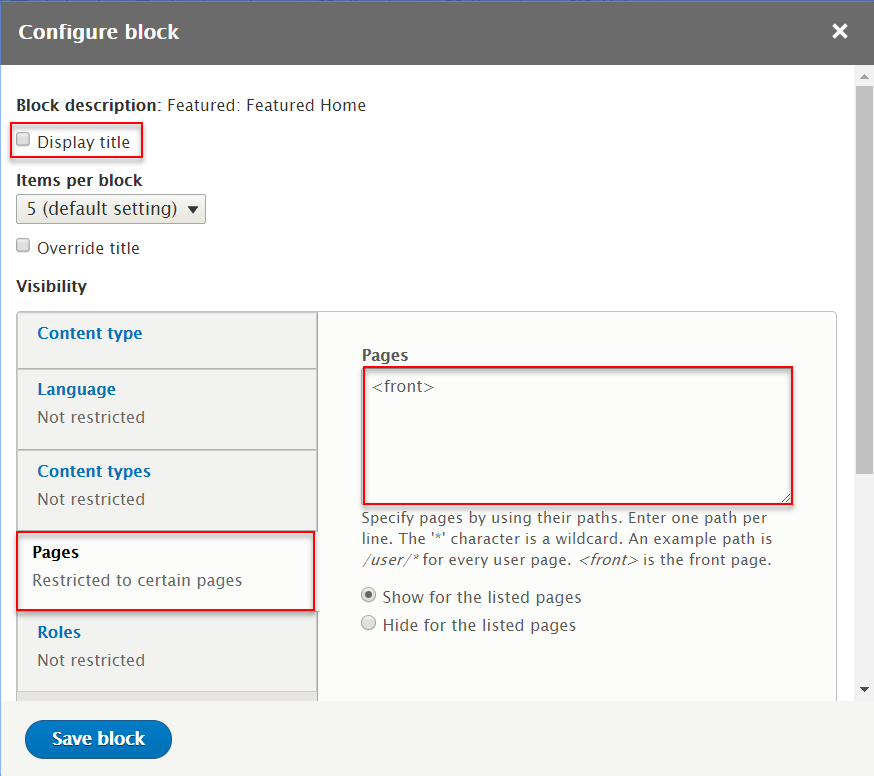
Step 4: Click Save block button.
Note
News block
Front end Display
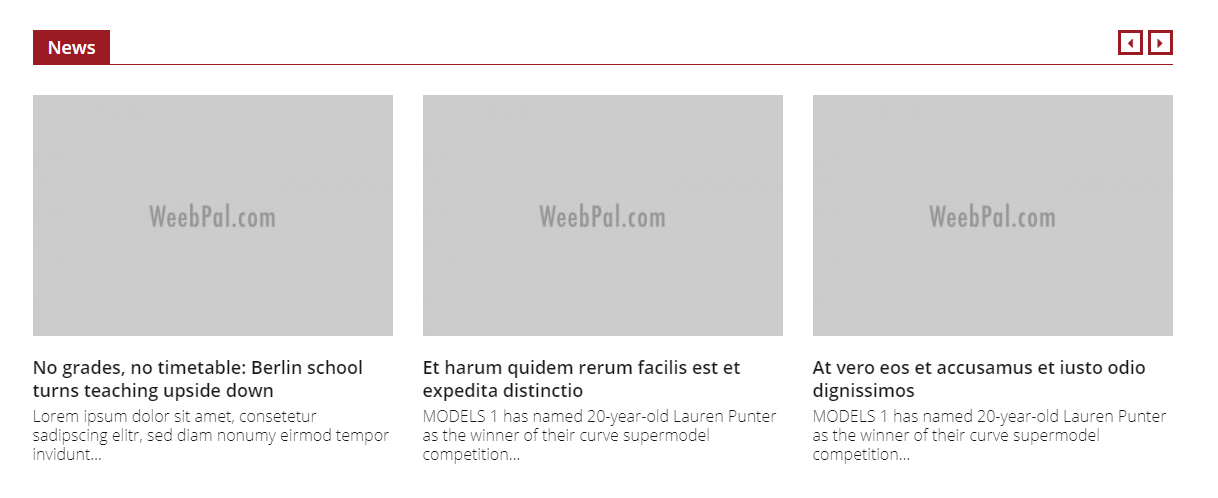
1. Create News block
Step 1: Navigate to Structure > View find Article Block view. Click Edit link

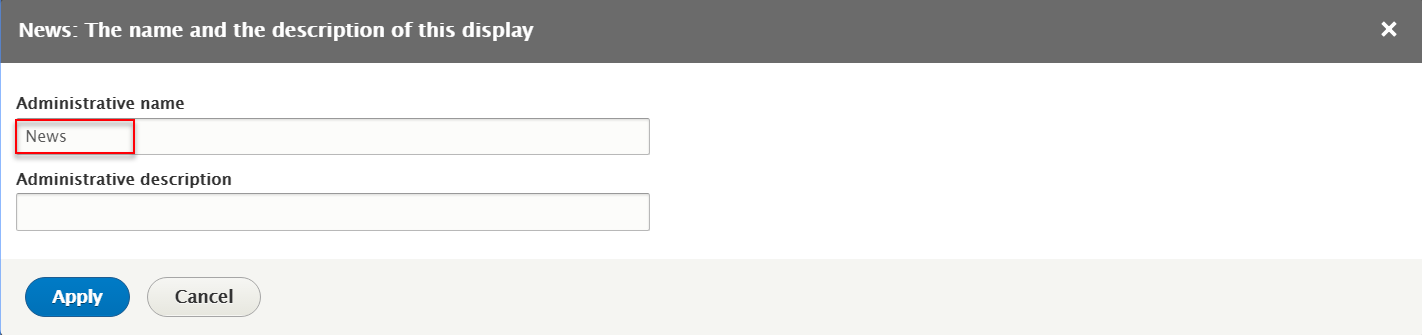
Step 2: Click Add > block, then create News view with following settings:

Step 3: At Display name area, Change name Featured
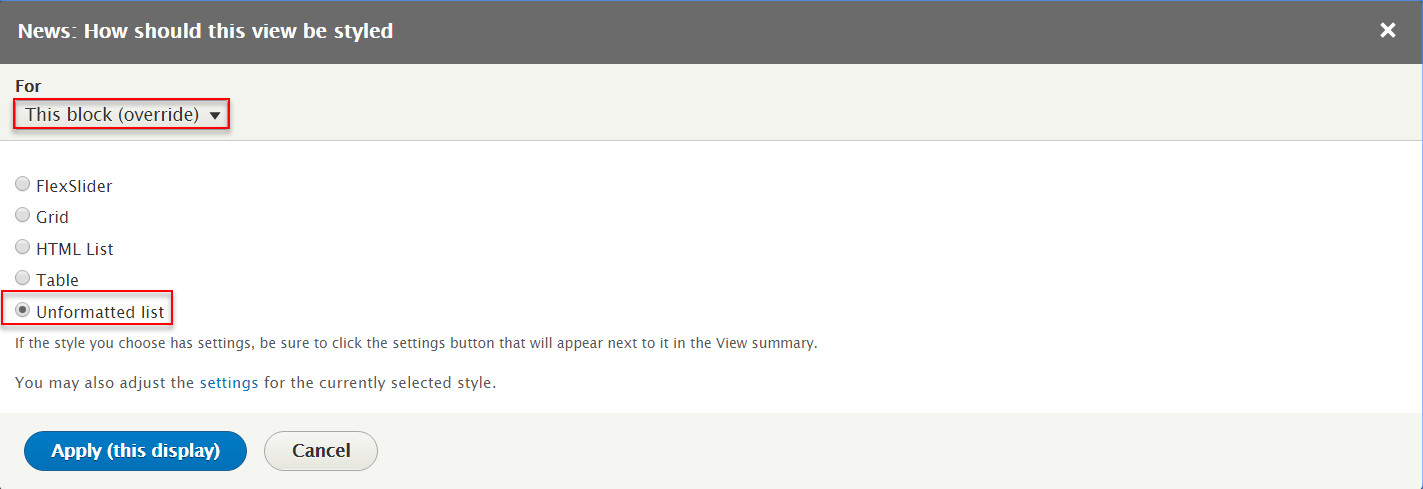
Step 4: At FORMAT > Unformatted list area, click Unformatted list, set following properites
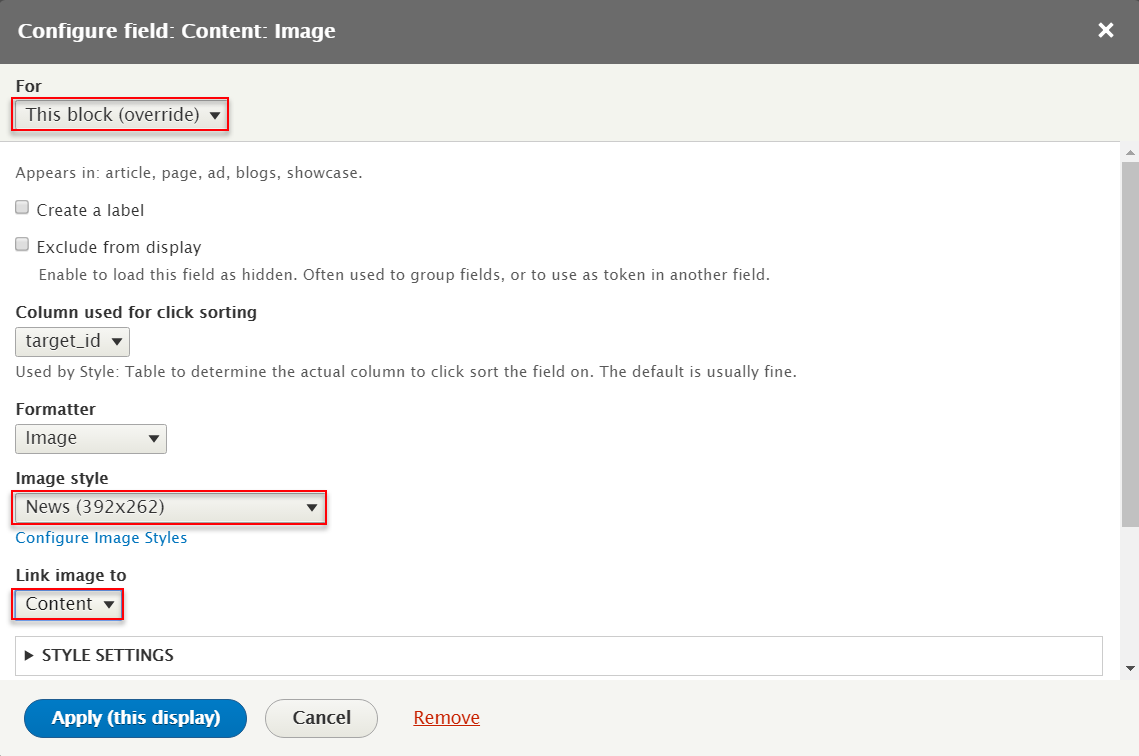
Step 5: At FIELD area, click Content: Image field, set following properites
Step 6: At FIELD area, click Content: Video field, set following properites

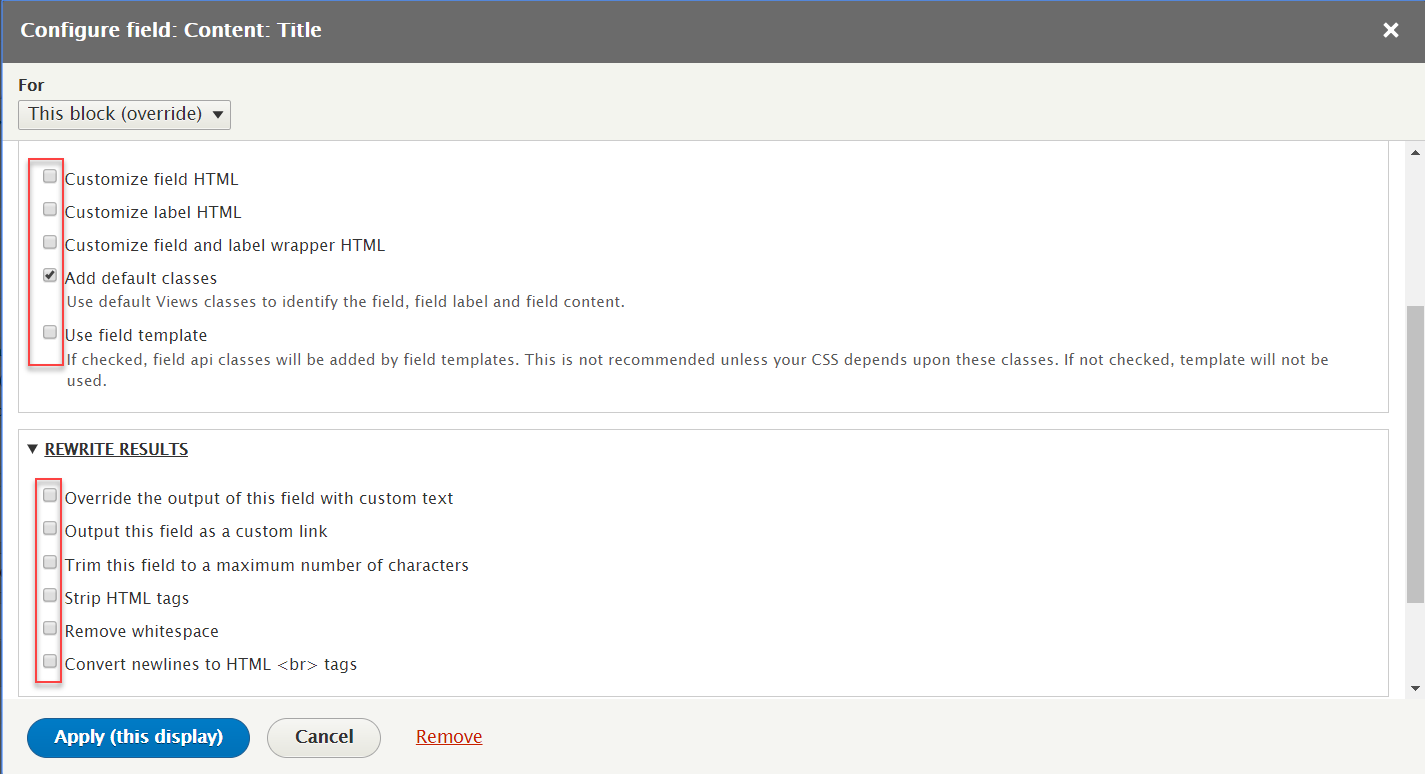
Step 7: At FIELD area, click Content: Title field, set following properites

Step 8: At FIELD area, click Content: Body field, set following properites
Step 9: At FILTER CRITERIA area, click Content: Sticky at top of lists field, set following properites
Step 10: At PAGER area, click Display a specified number of items and number item fields, set following properites

Step 11: At SORT CRITERIA area, click Content statistics: Views today fields, and follow these steps

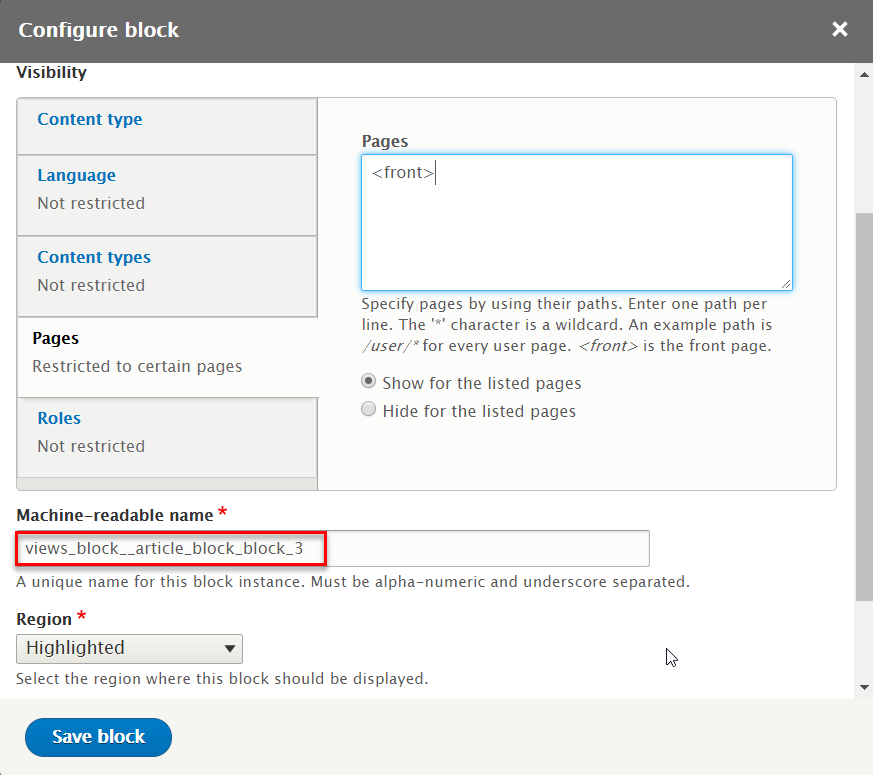
Step 12: At OTHER > Machine Name area, click block_2 fields, change to block_3

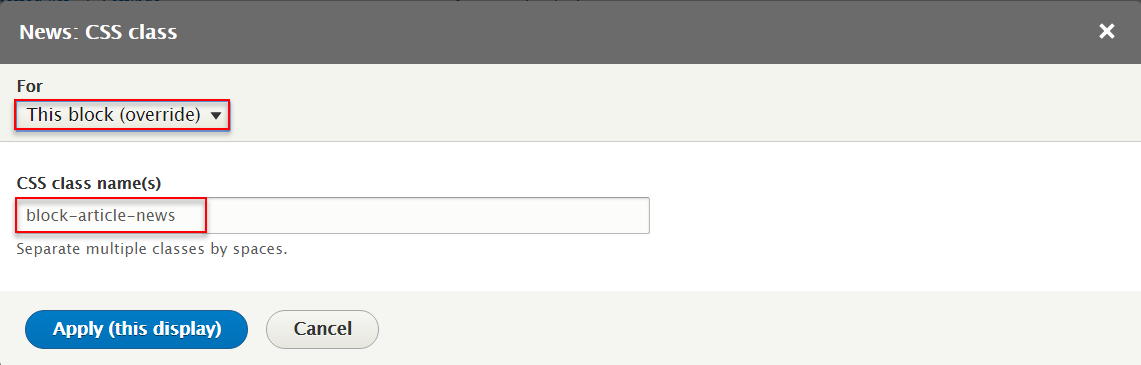
Step 13: At OTHER > CSS class area, set following properites
Step 14: Click Save button
2. Configure : News block
Step 1: Navigate to Structure > Block layout
Step 2: Find Highlighted click Place block button
Step 3: Find Article Block: News Lists (Views) click Place block button and set following properites:

Step 4: Click Save block button.
Quicktabs block
Front end Display

1. Create Tabs List view
Create Fashion block
Step 1: Navigate to Structure > View, click Add view, then create Tabs list view with following settings:
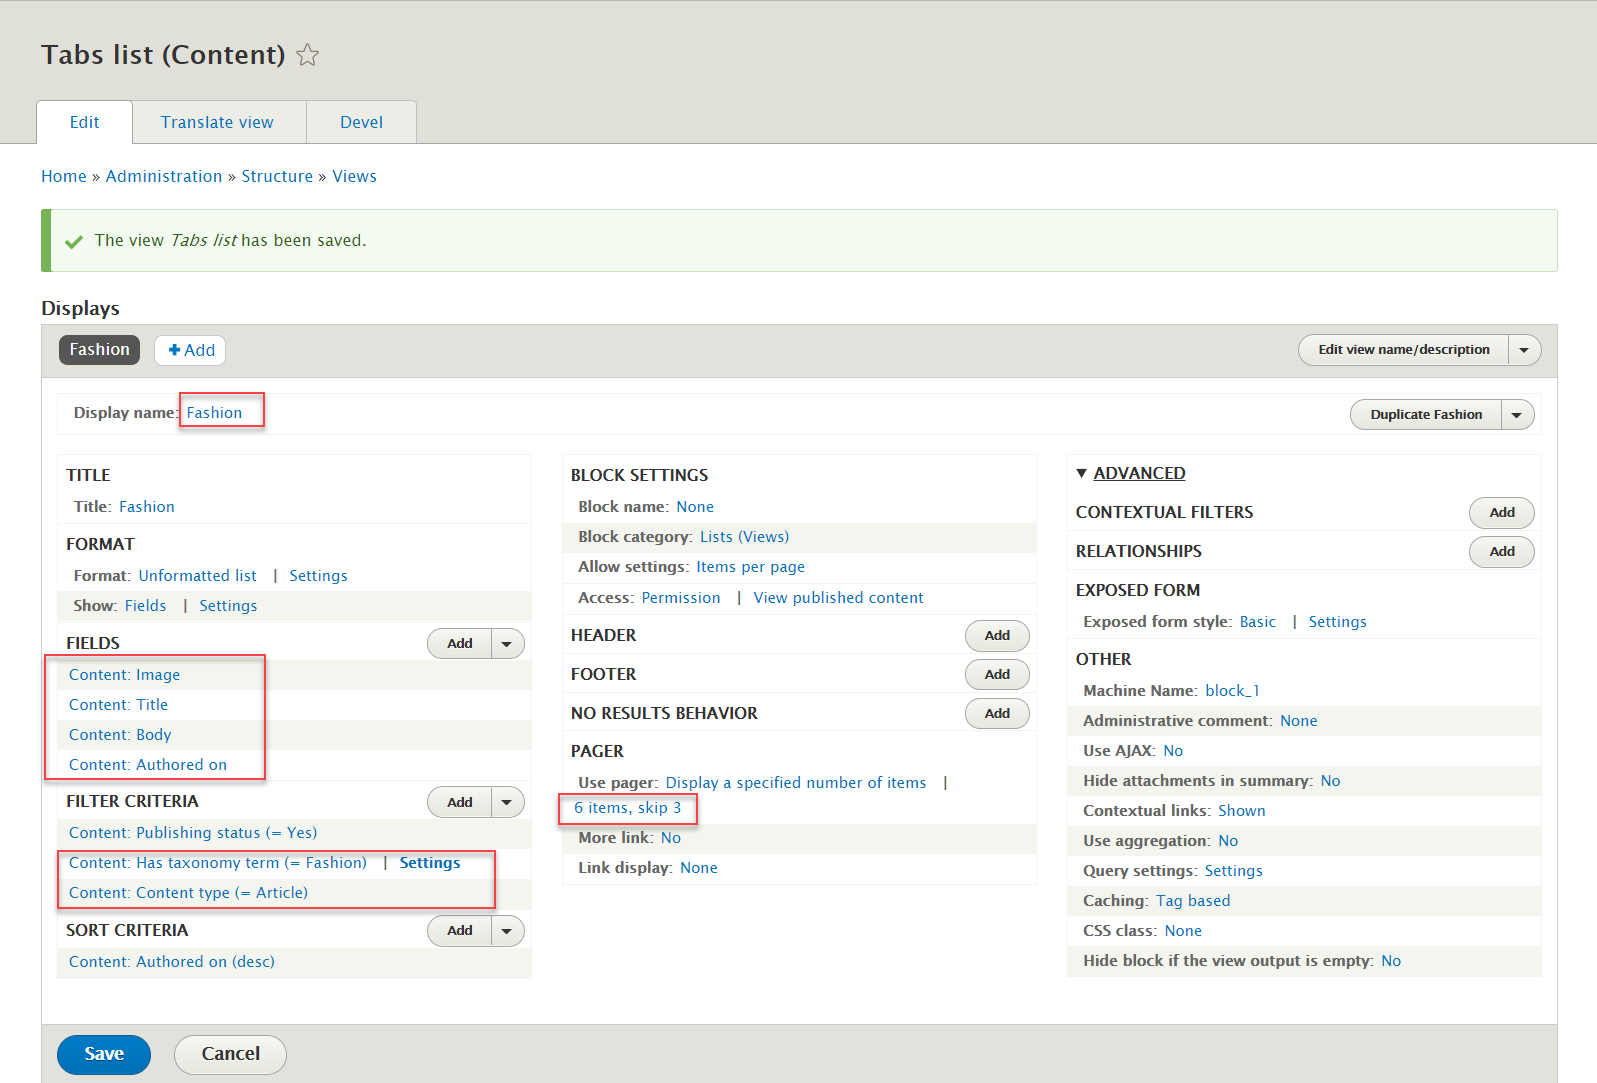
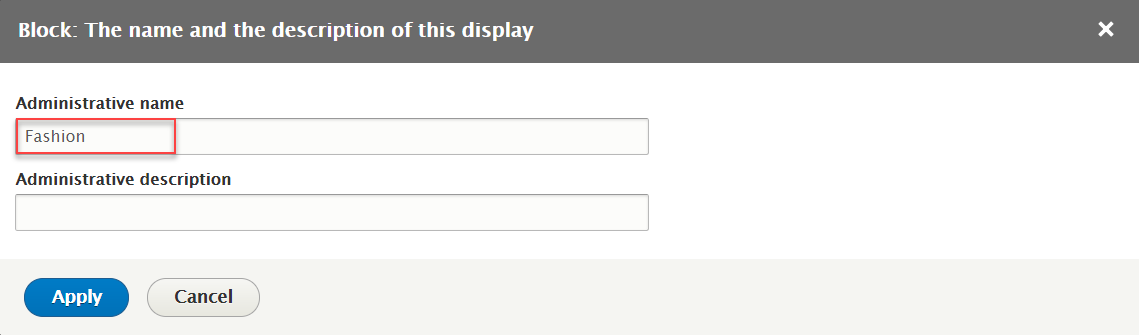
Step 2: At Display name area, Change name Fashion
Step 3: At FIELDS area, click Add button to add fields: Content: Image. Set properties for Content: Image
Step 4: At FIELDS area, click Add button to add fields: Content: Body. Set properties for Content: Body
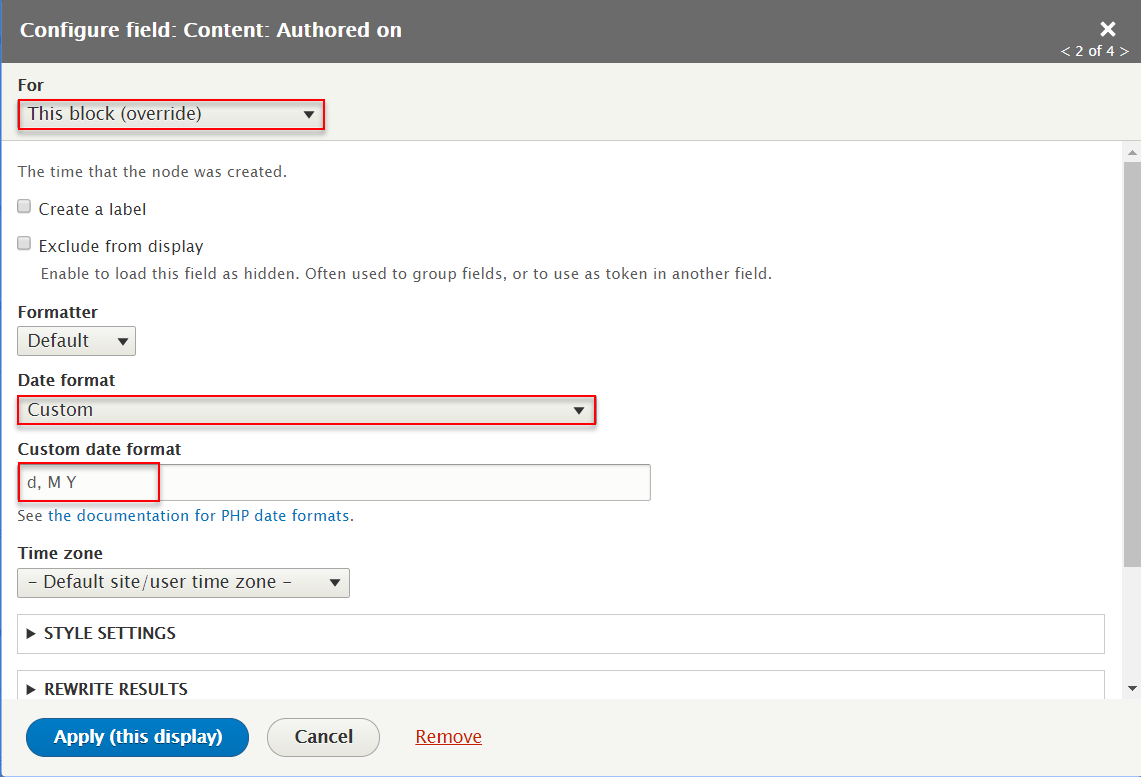
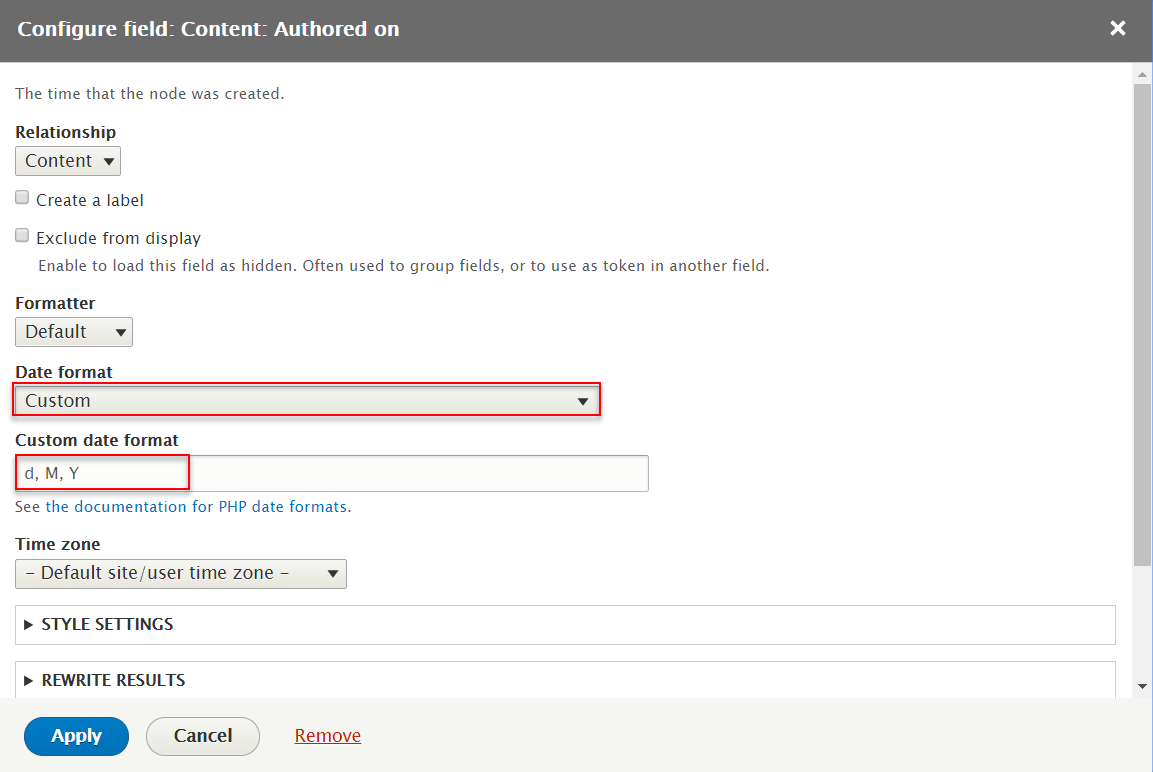
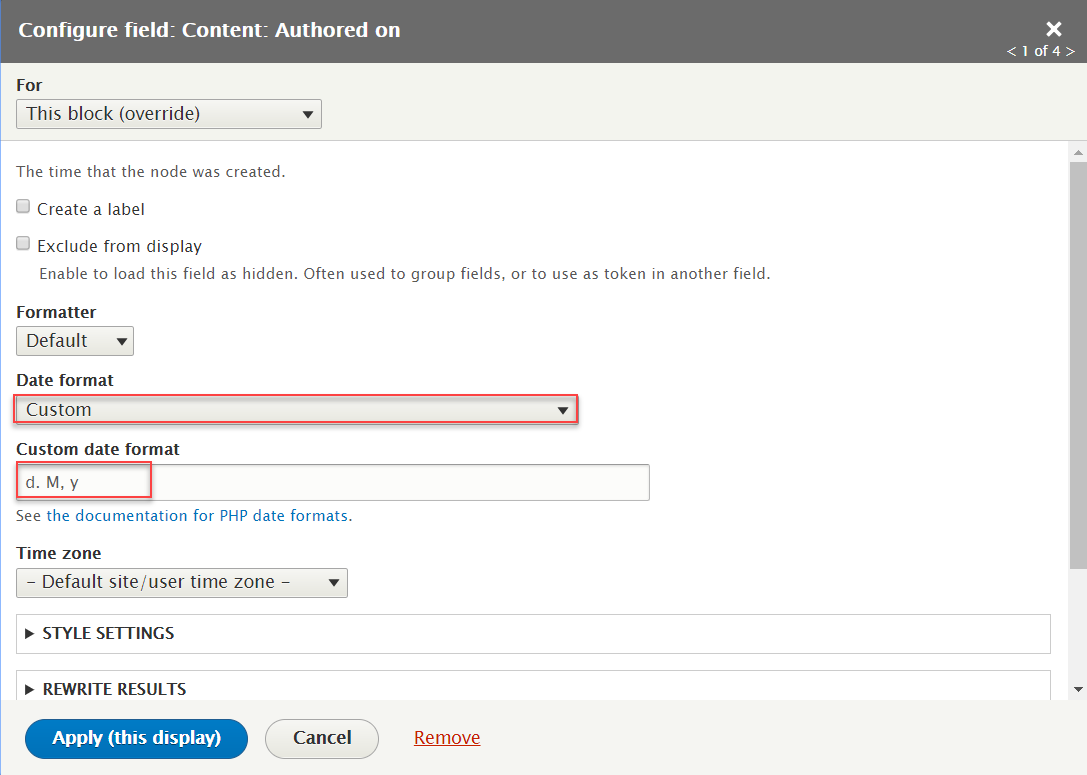
Step 5: At FIELDS area, click Add button to add fields: Content: Authored on. Set properties for Content: Authored on

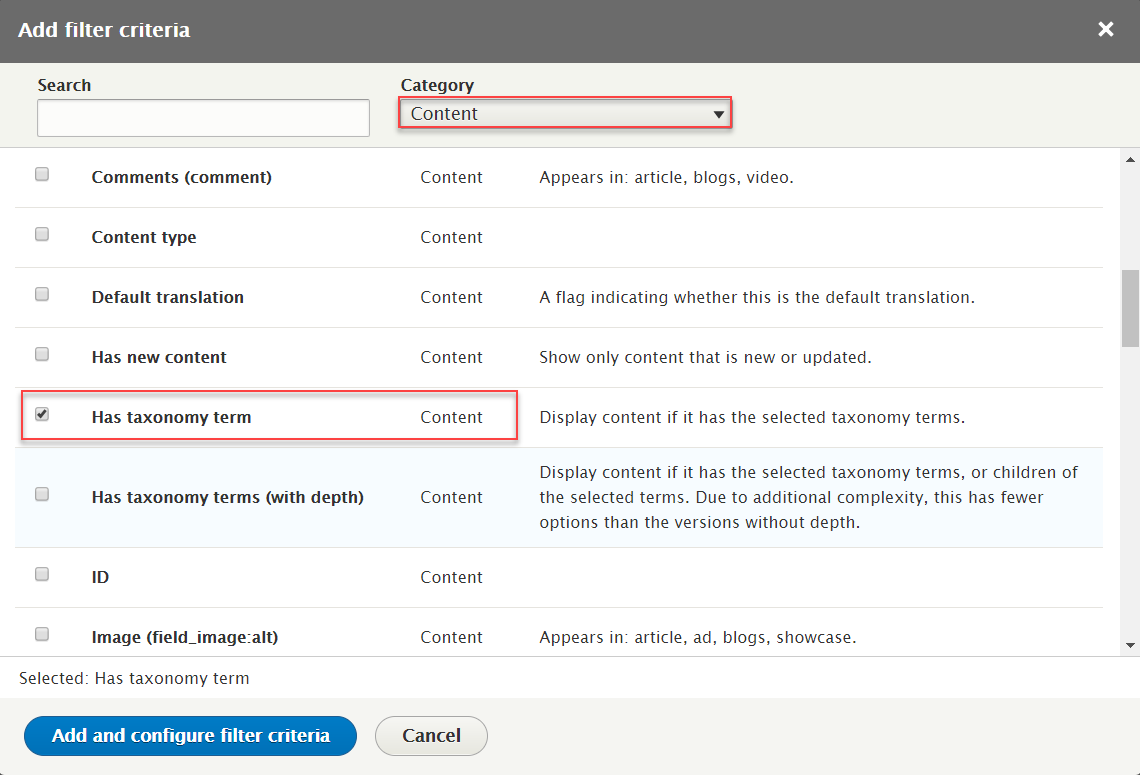
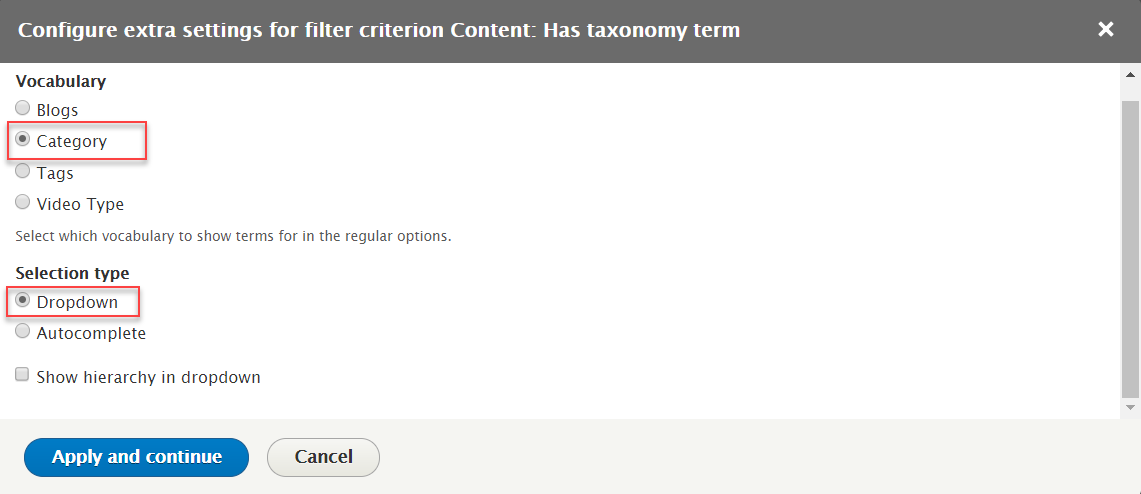
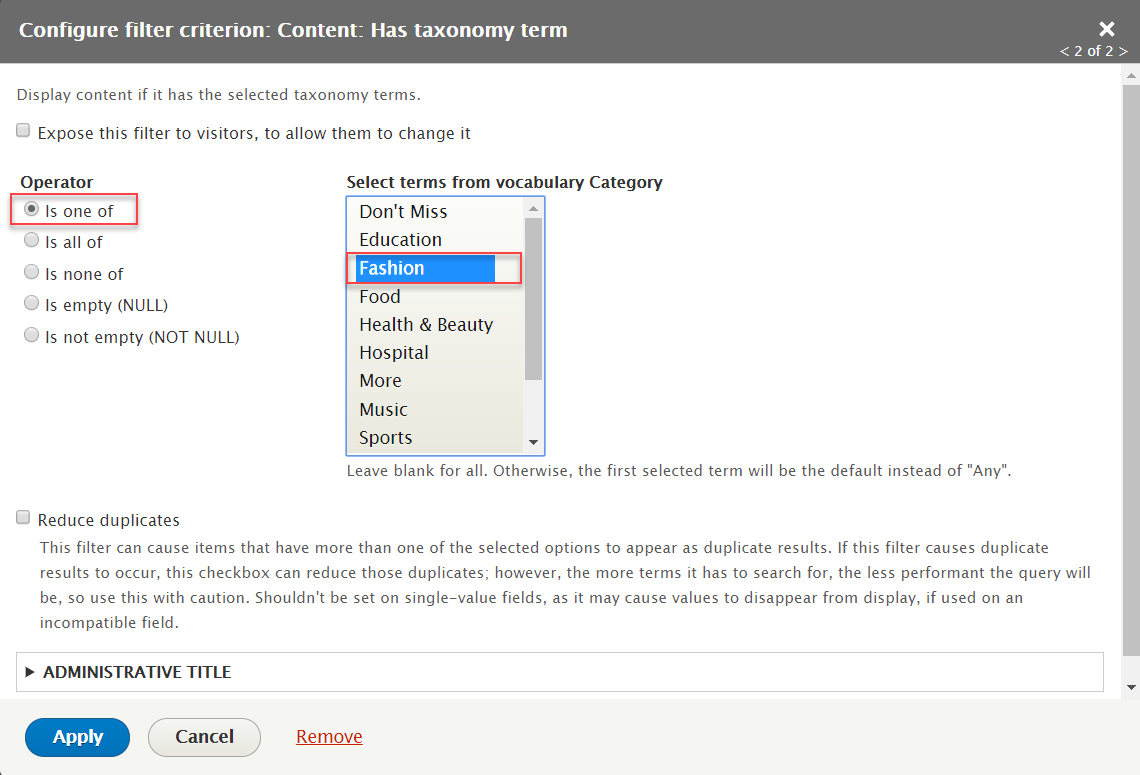
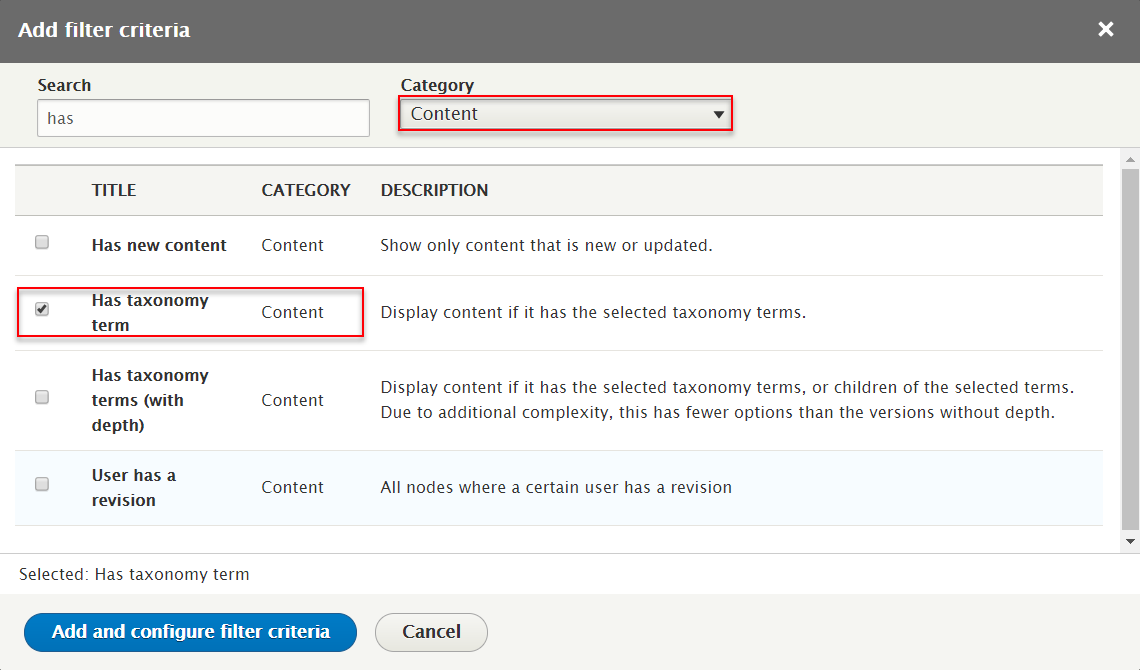
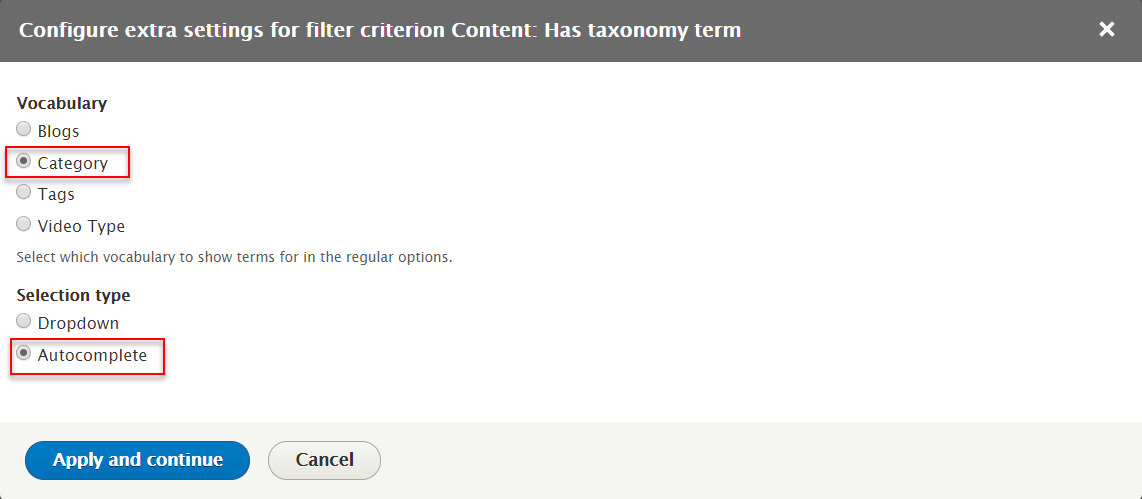
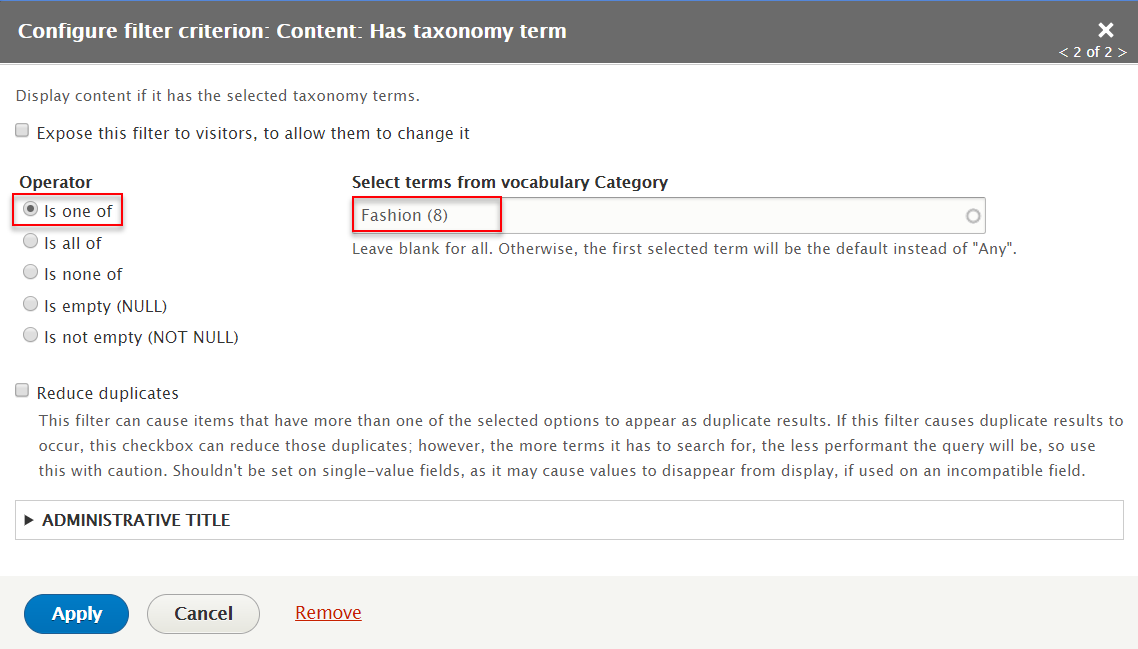
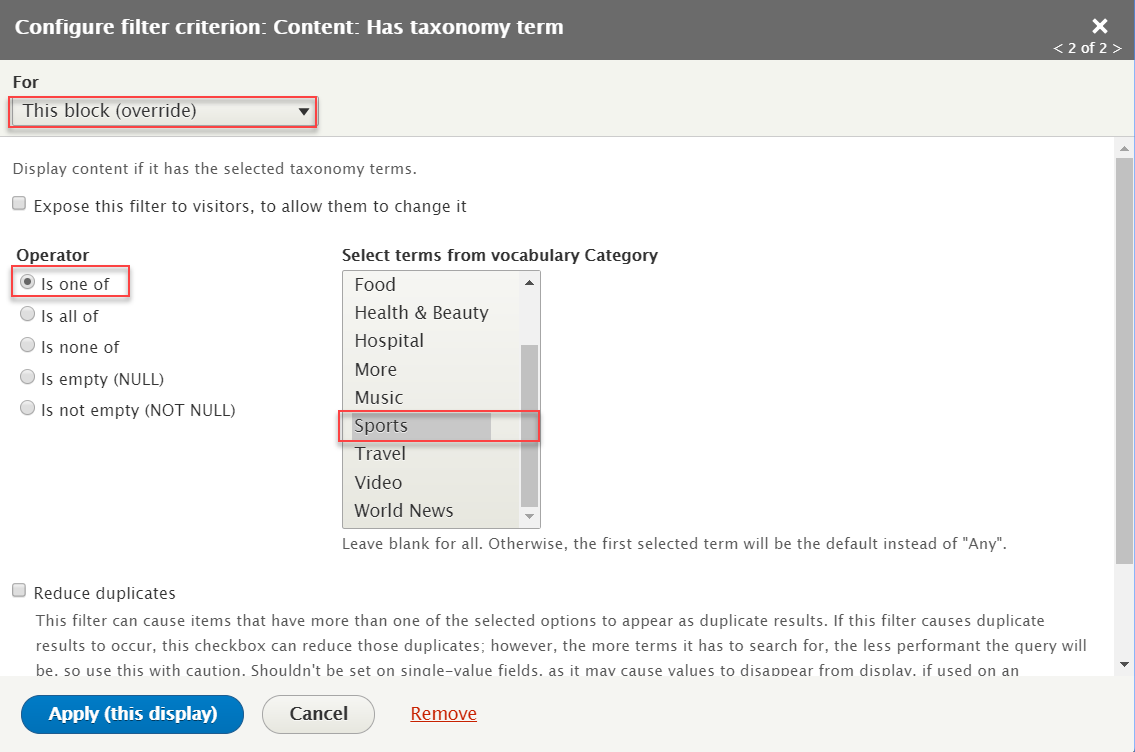
Step 6: At FILTER CRITERIA area, click Add button to add fields: Content: Has taxonomy term. Set properties for Content: Has taxonomy term
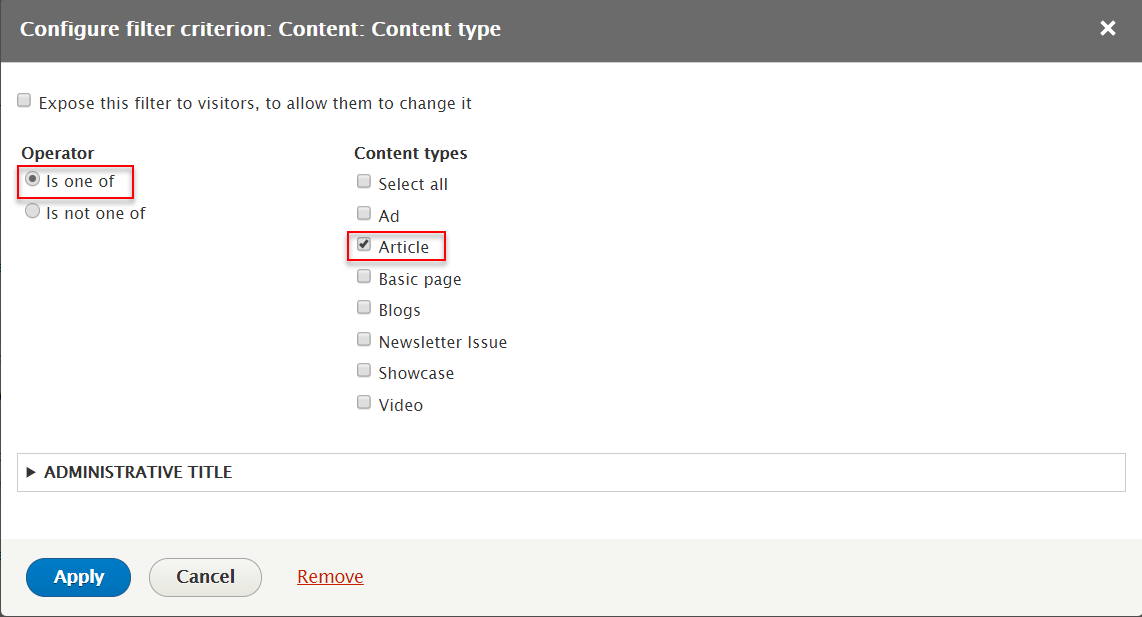
Step 7: At FILTER CRITERIA area, click Add button to add fields: Content: Content type. Set properties for Content: Content type

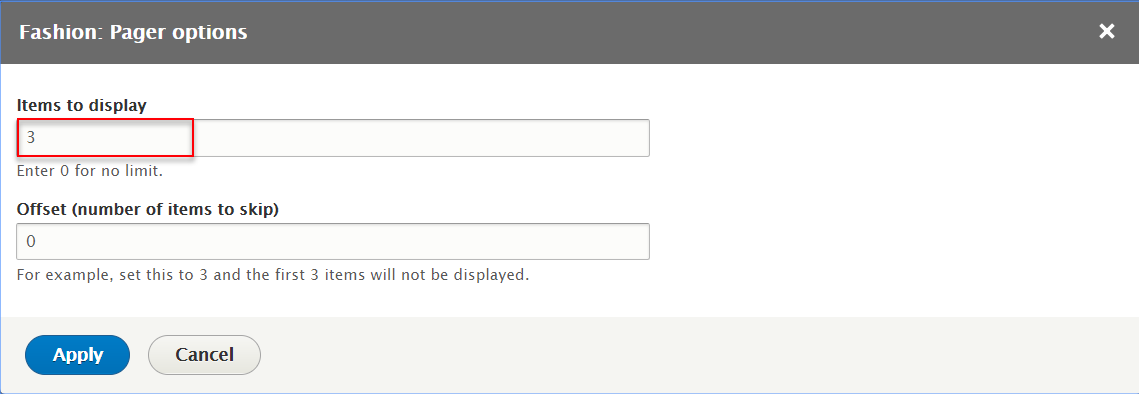
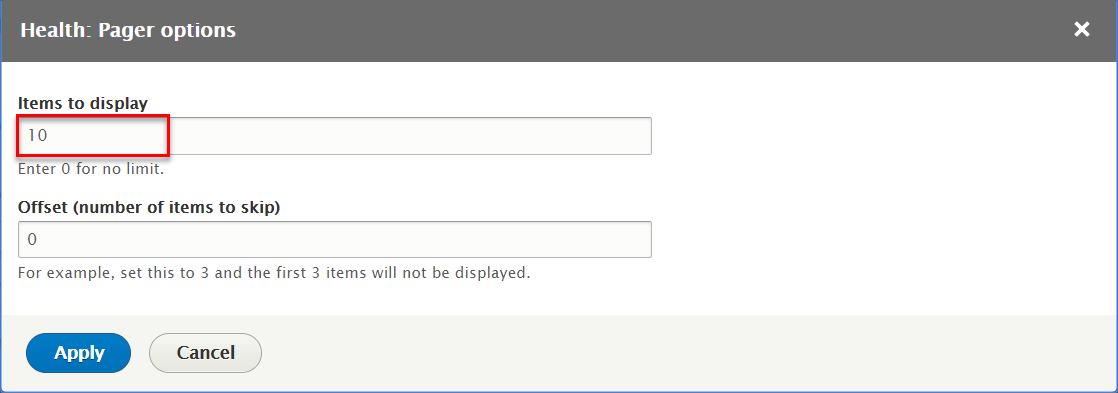
Step 8: At PAGER area, click number item field, set following properites

Step 9: Click Save button
Create Health block
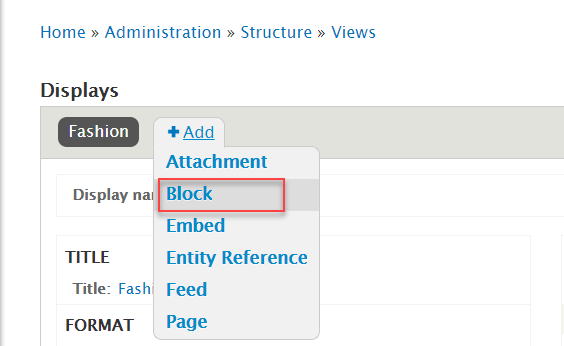
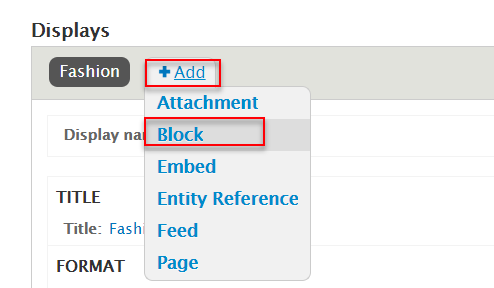
Step 1: Click Add > Block, then create Health block with following settings:
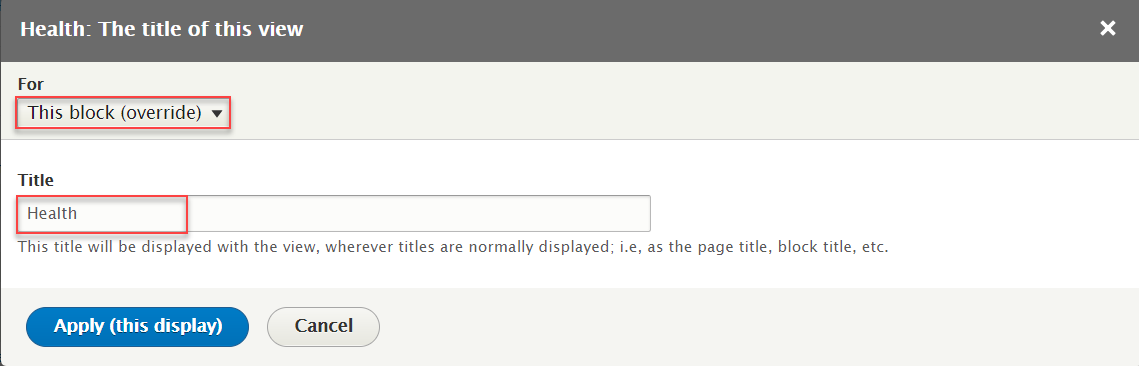
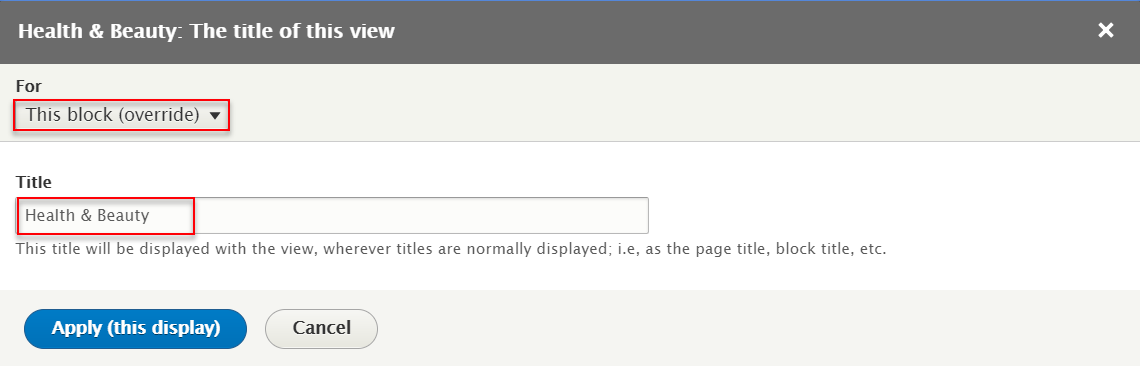
Step 2: At Display name and Title area, change name Health

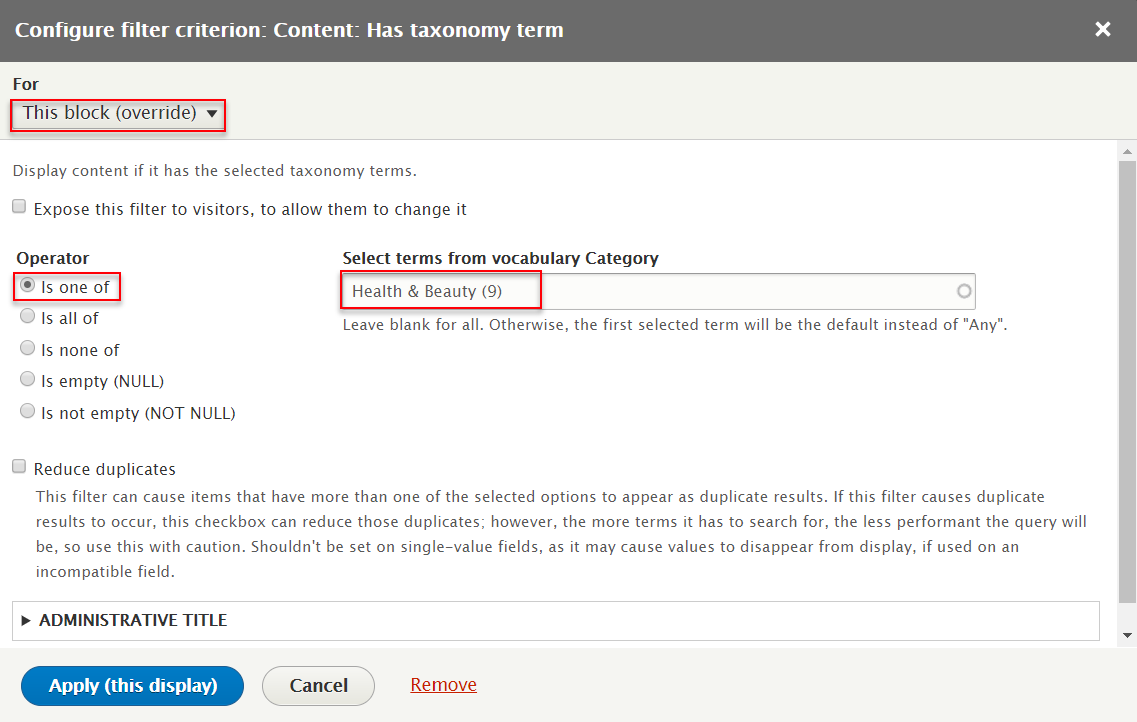
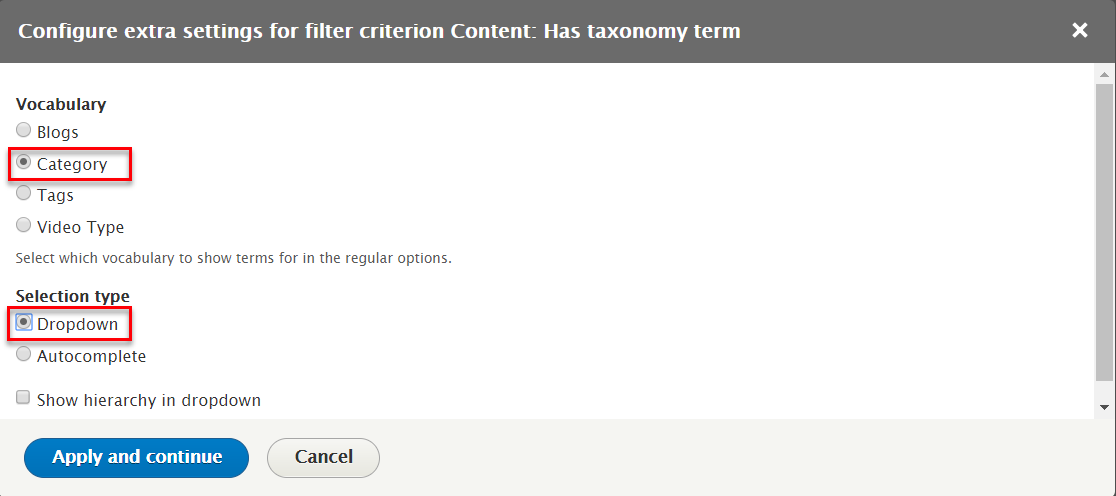
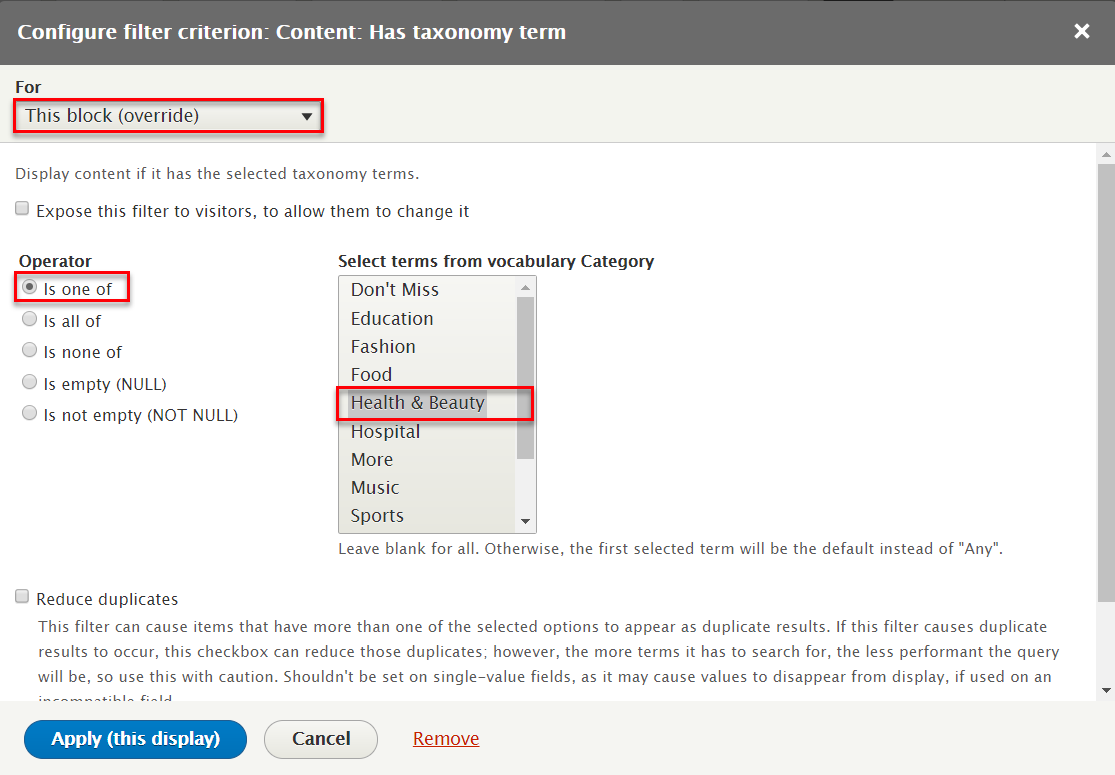
Step 3: At FILTER CRITERIA area, click Content: Has taxonomy term. Set properties for Content: Has taxonomy term

Step 4: Click Save button
Create Food block
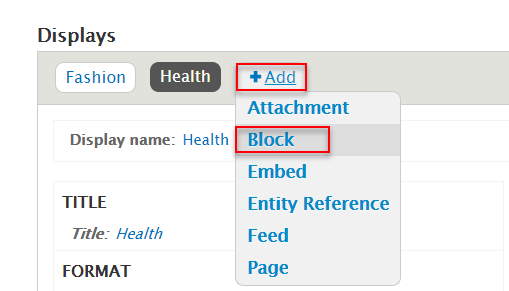
Step 1: Click Add > Block, then create Food block with following settings:
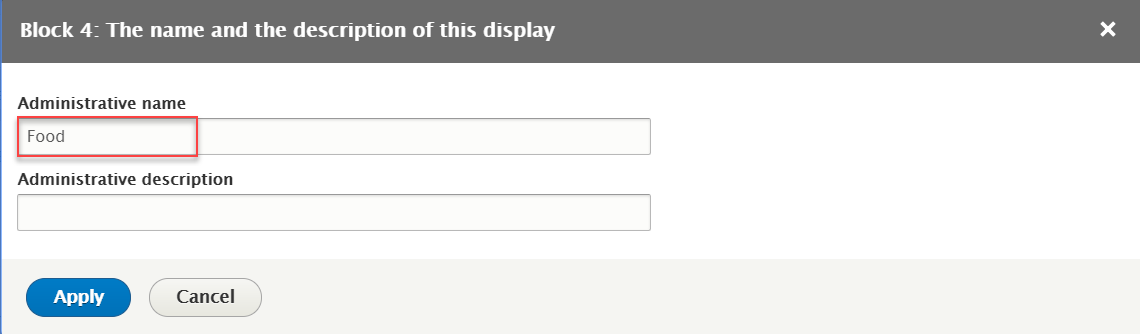
Step 2: At Display name and Title area, change name Food


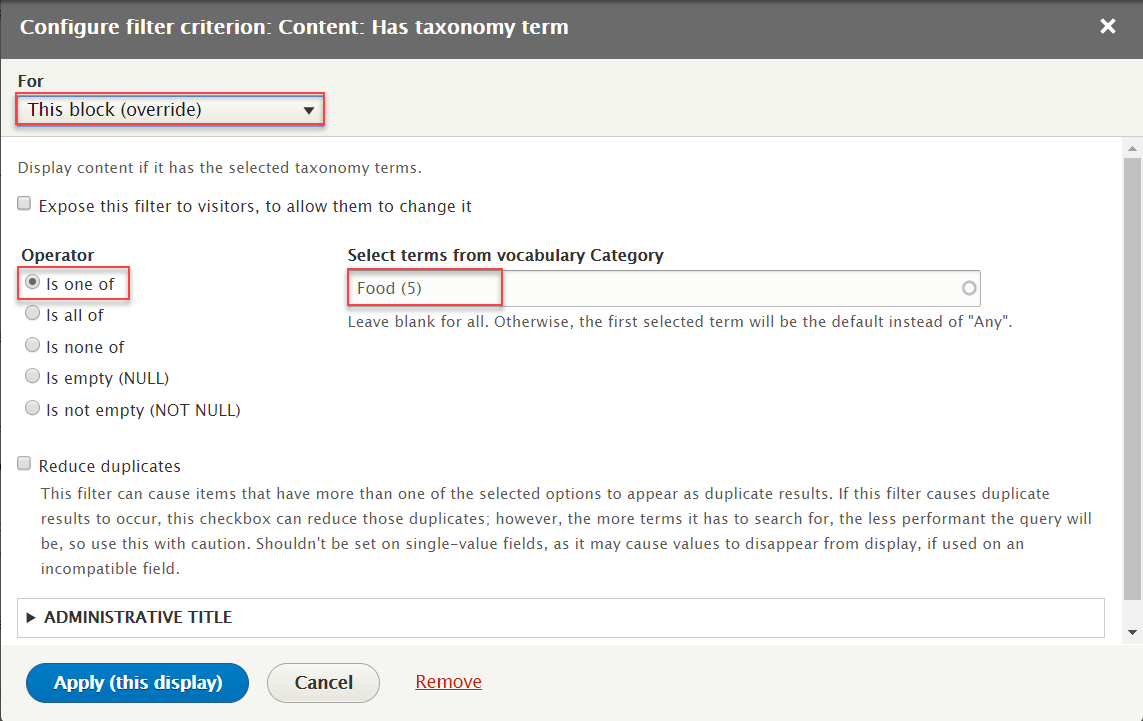
Step 3: At FILTER CRITERIA area, click Content: Has taxonomy term. Set properties for Content: Has taxonomy term
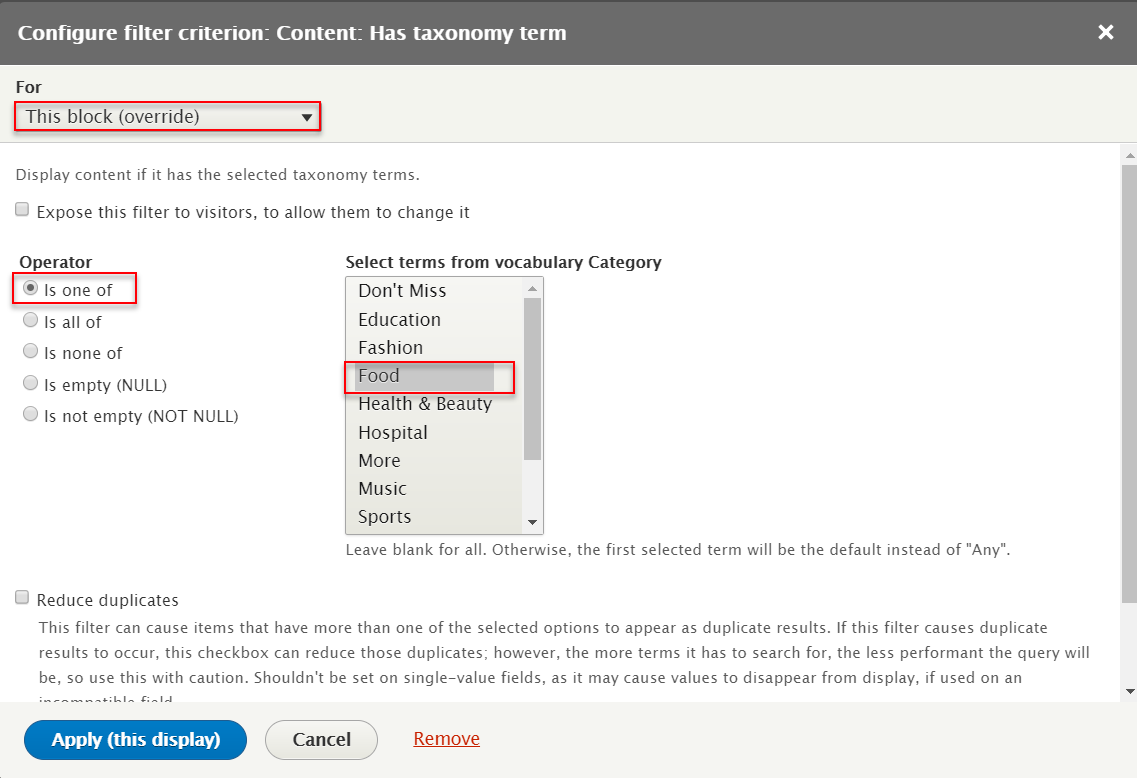
Step 4: Click Save button
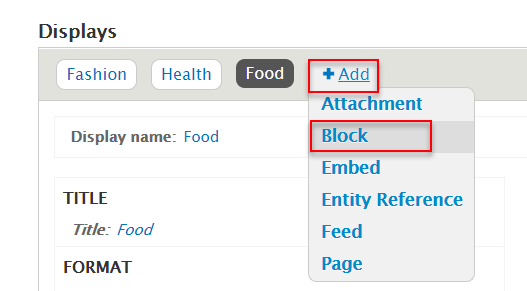
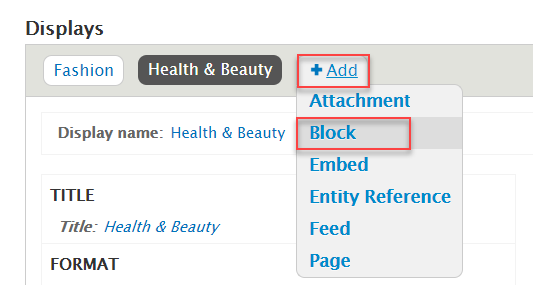
Create Music block
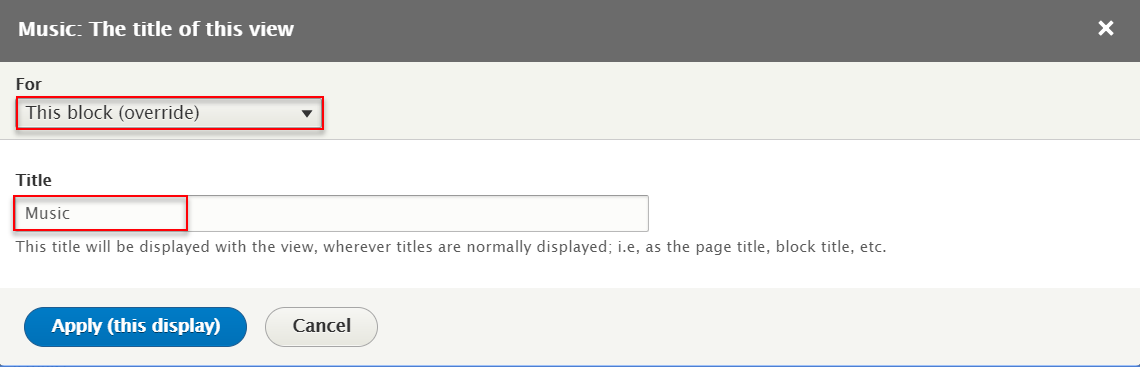
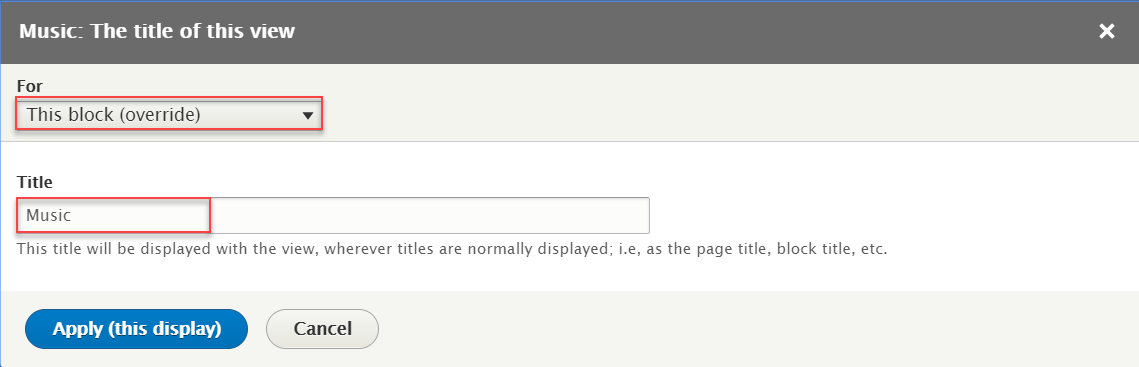
Step 1: Click Add > Block, then create Music block with following settings:
Step 2: At Display name and Title area, change name Music

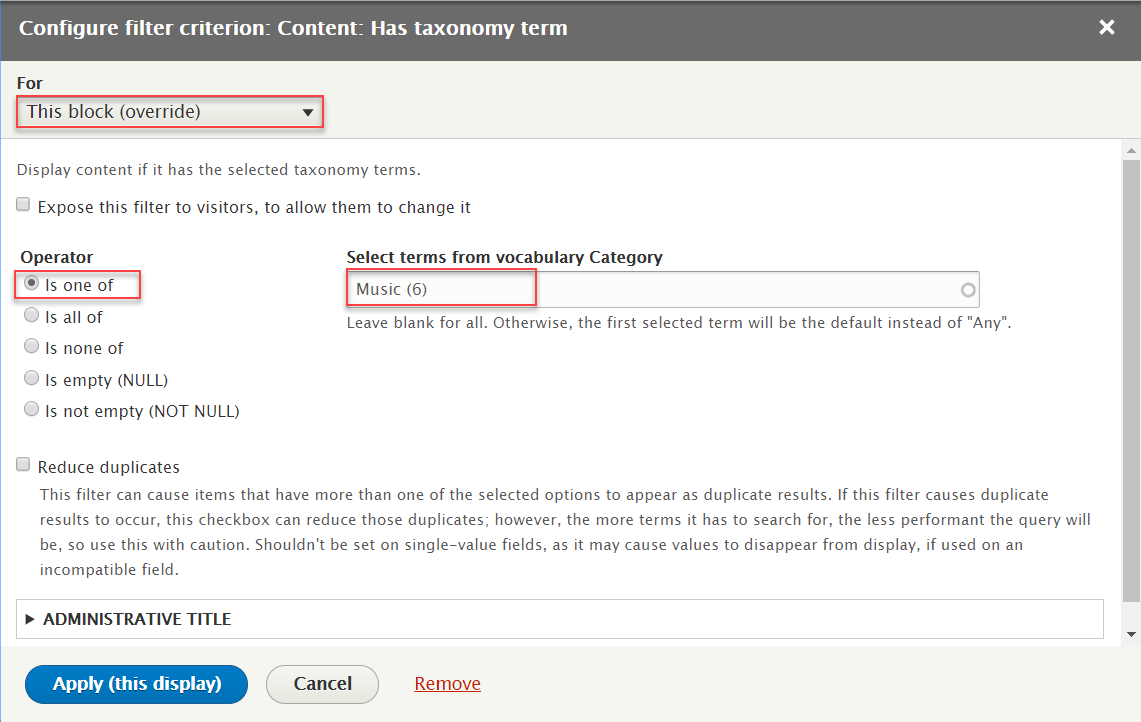
Step 3: At FILTER CRITERIA area, click Content: Has taxonomy term. Set properties for Content: Has taxonomy term
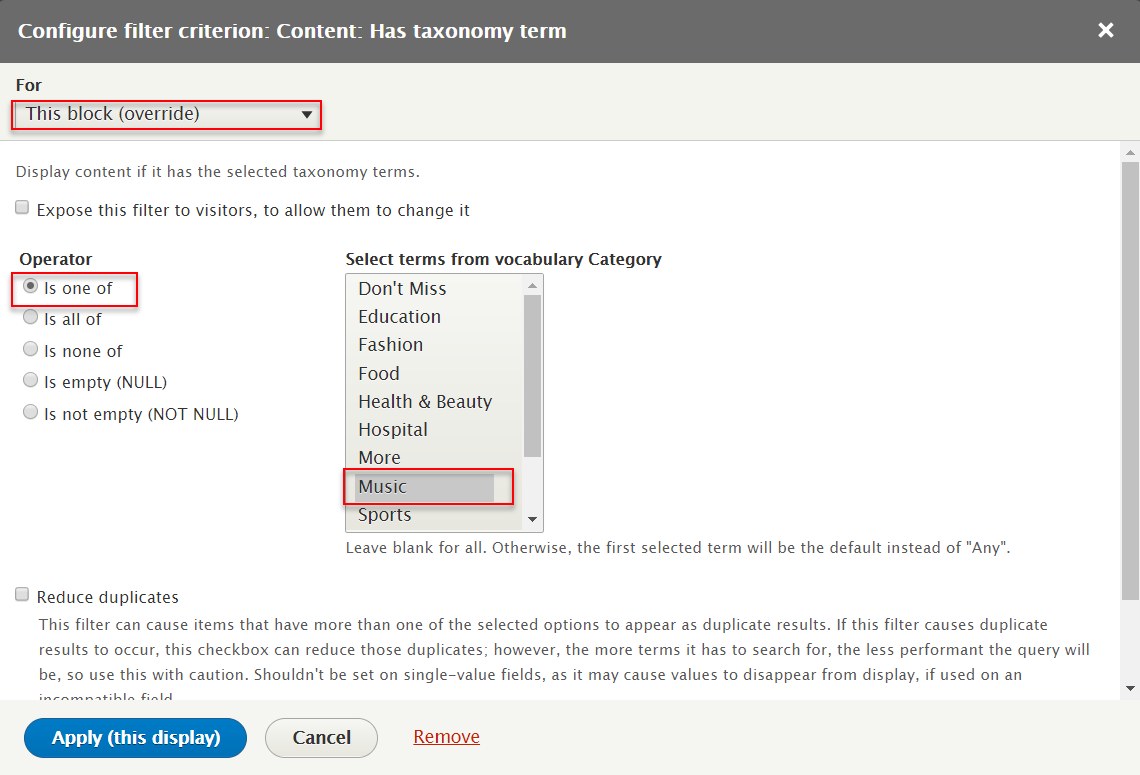
Step 4: Click Save button
2. Create Block Tabs view
Create Fashion block
Step 1: Navigate to Structure > View, click Add view, then create Block Tabs view with following settings:
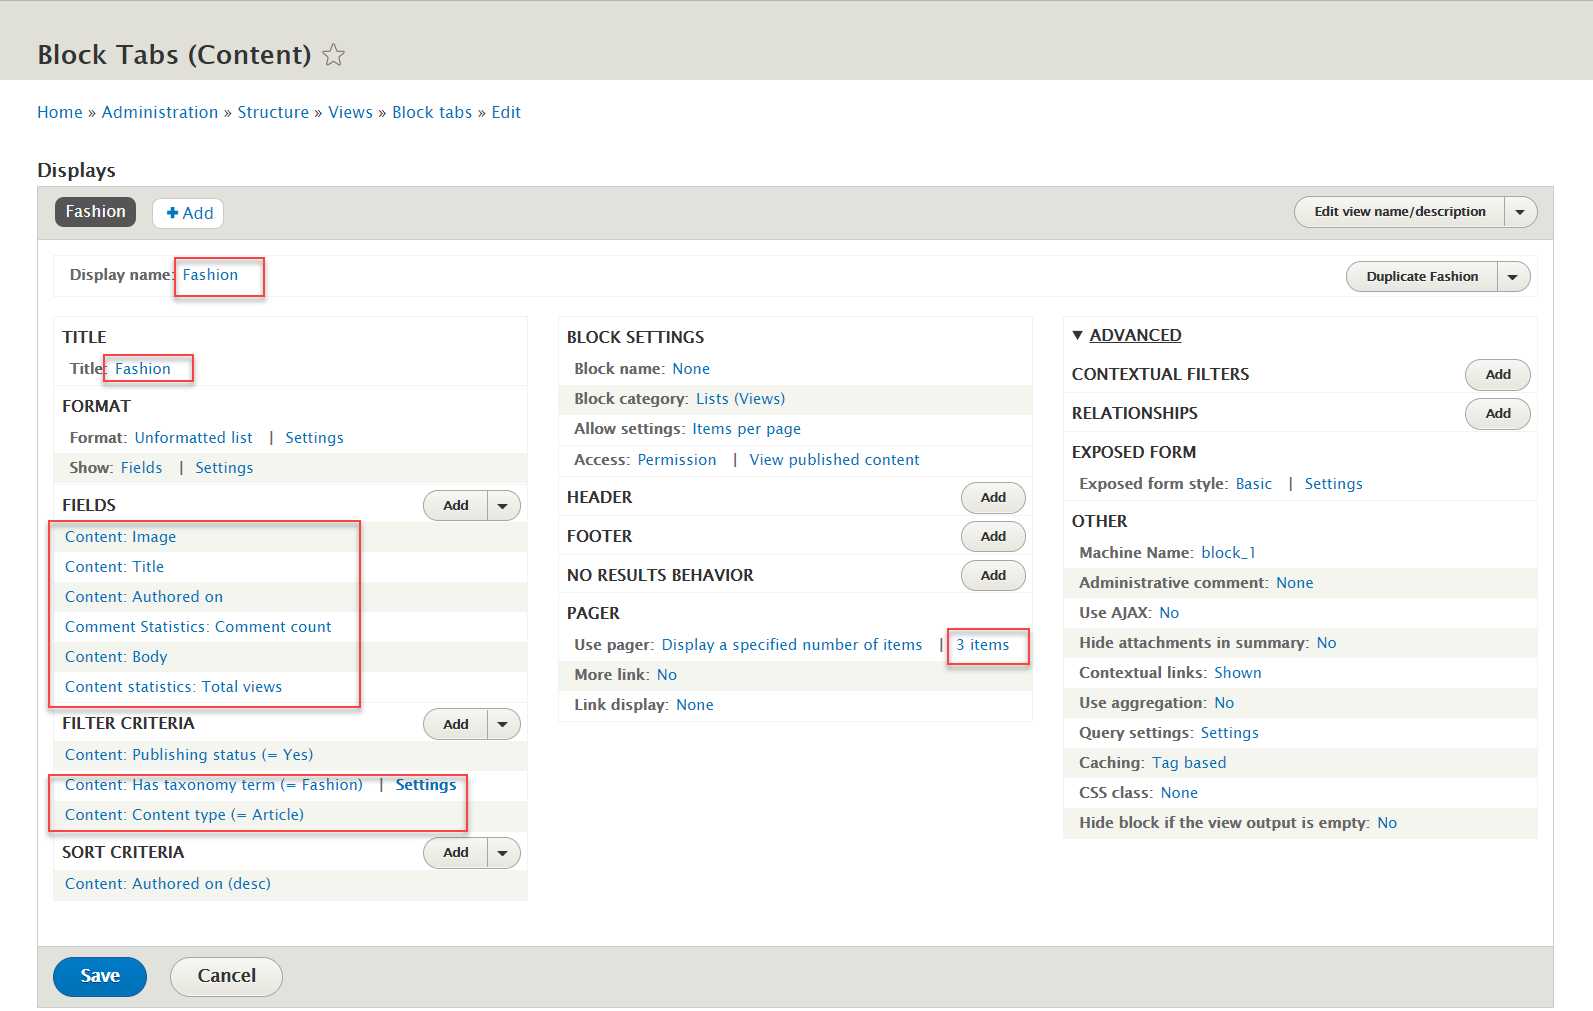
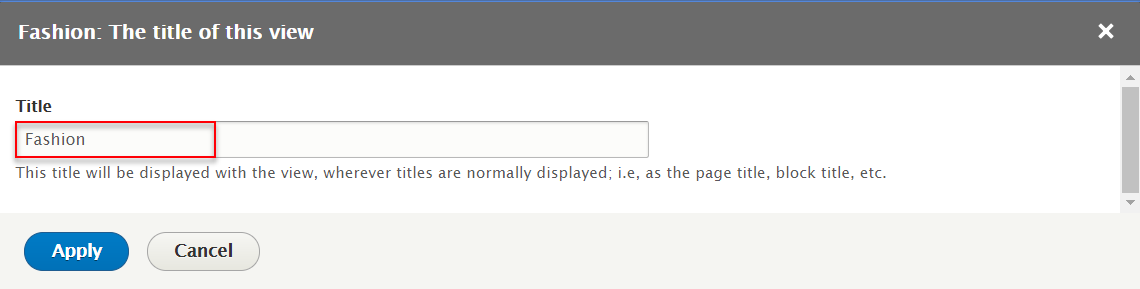
Step 2: At Display name and Title area, change name Fashion

Step 3: At FIELDS area, click Add button to add fields: Content: Image. Set properties for Content: Image

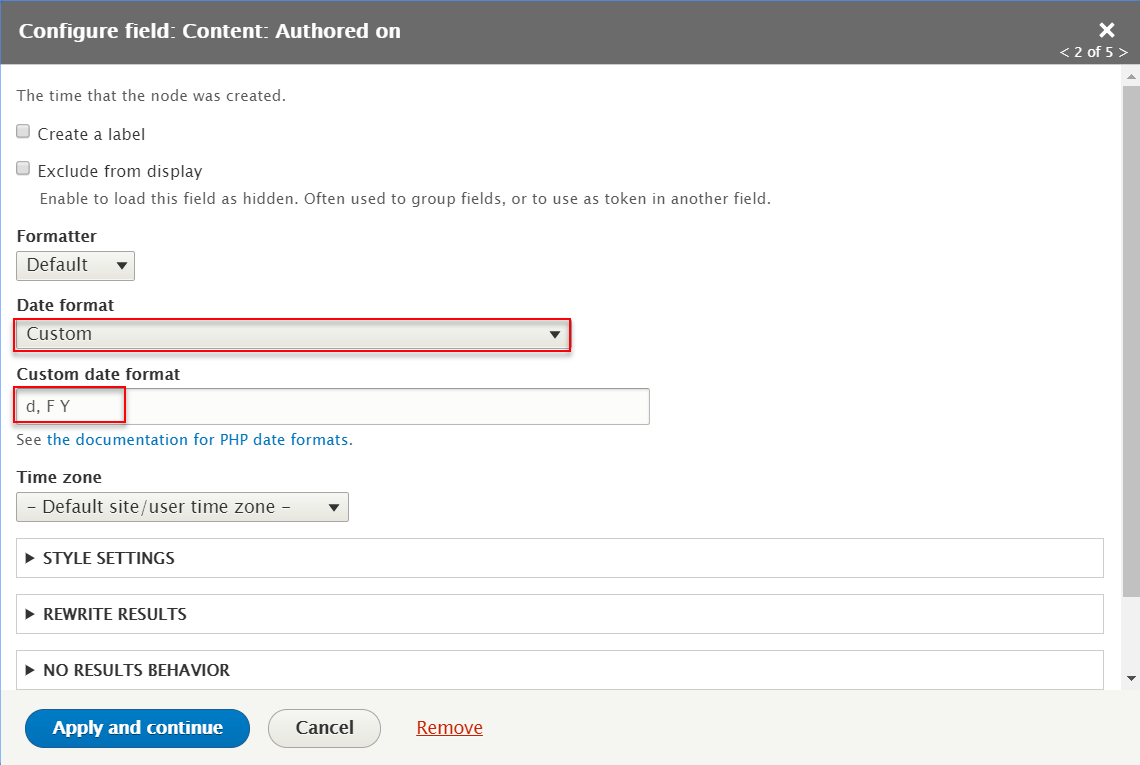
Step 3: At FIELDS area, click Add button to add fields: Content: Authored on. Set properties for Content: Authored on
Step 4: At FIELDS area, click Add button to add fields: Content: Body. Set properties for Content: Body

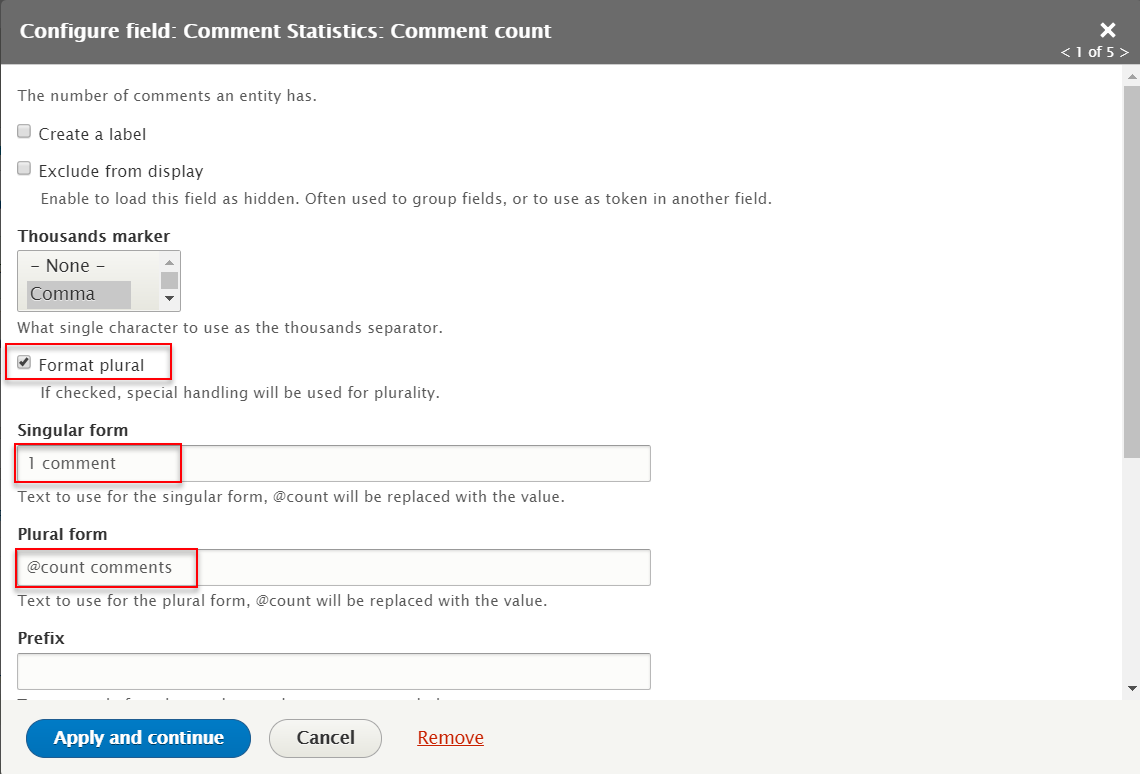
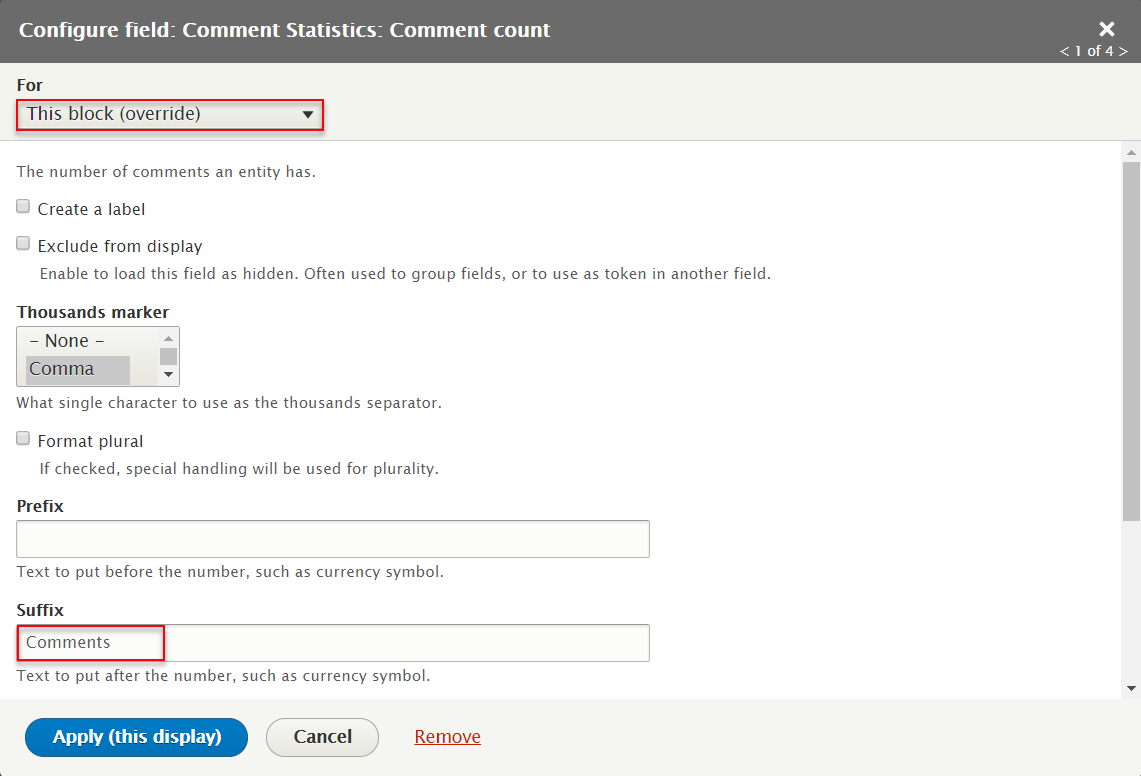
Step 5: At FIELDS area, click Add button to add fields: Comment Statistics: Comment count. Set properties for Comment Statistics: Comment count
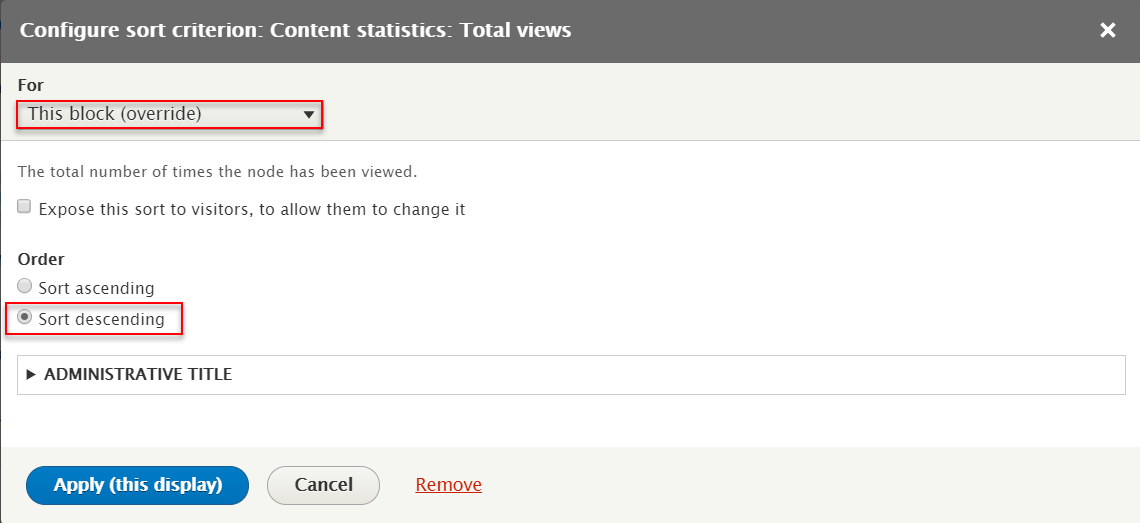
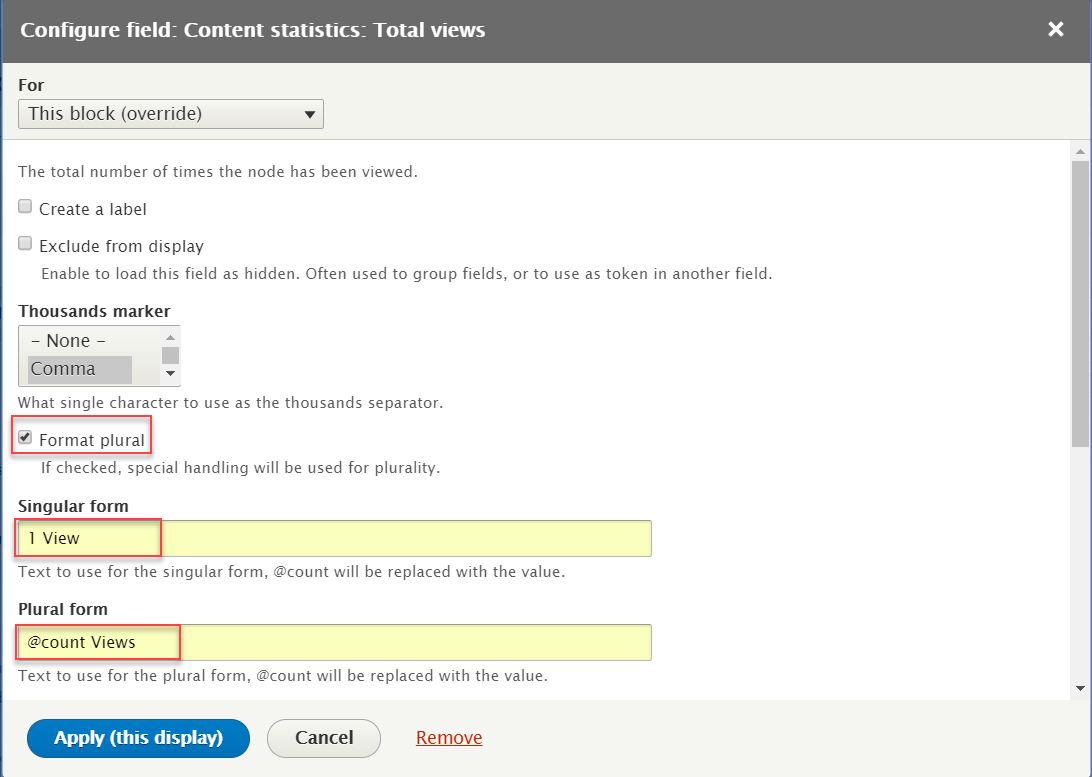
Step 6: At FIELDS area, click Add button to add fields: Content statistics: Total views. Set properties for Content statistics: Total views

Step 7: At FILTER CRITERIA area, click Add button to add fields: Content: Has taxonomy term. Set properties for Content: Has taxonomy term
Step 7: At FILTER CRITERIA area, click Add button to add fields: Content: Content type. Set properties for Content: Content type
Step 8: At PAGER area, click number item field, set following properites
Step 9: Click Save button
Create Health & Beauty block
Step 1: Click Add > Block, then create Health & Beauty block with following settings:
Step 2: At Display name and Title area, change name Health

Step 3: At FILTER CRITERIA area, click Content: Has taxonomy term. Set properties for Content: Has taxonomy term
Step 4: Click Save button
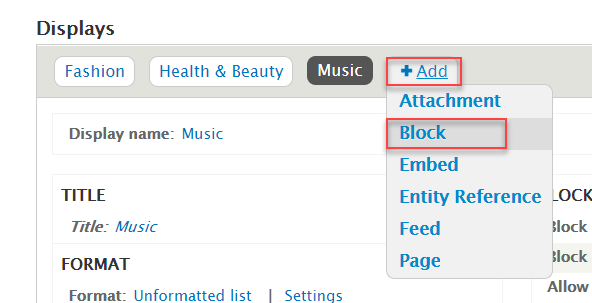
Create Music block
Step 1: Click Add > Block, then create Music block with following settings:
Step 2: At Display name and Title area, change name Music

Step 3: At FILTER CRITERIA area, click Content: Has taxonomy term. Set properties for Content: Has taxonomy term
Step 4: Click Save button
Create Food block
Step 1: Click Add > Block, then create Food block with following settings:
Step 2: At Display name and Title area, change name Food

Step 3: At FILTER CRITERIA area, click Content: Has taxonomy term. Set properties for Content: Has taxonomy term
Step 4: Click Save button
3. Create : Home Quicktabs
Step 1: Navigate to Structure > Block tabs
Step 2: Click Add block tabs button
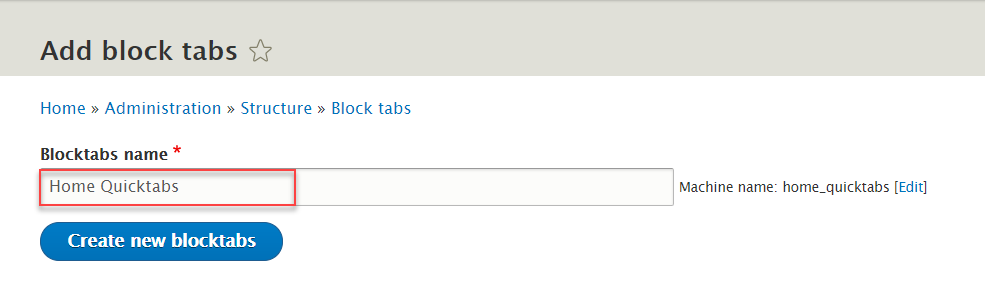
Step 3: Click Create new blocktabs button, to create Home Quicktabs block tabs.
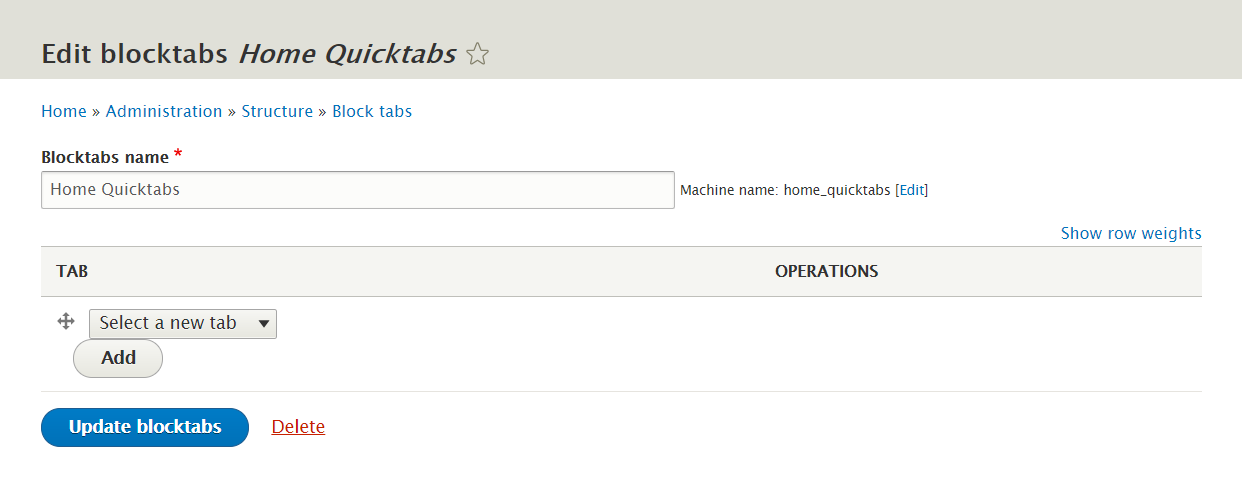
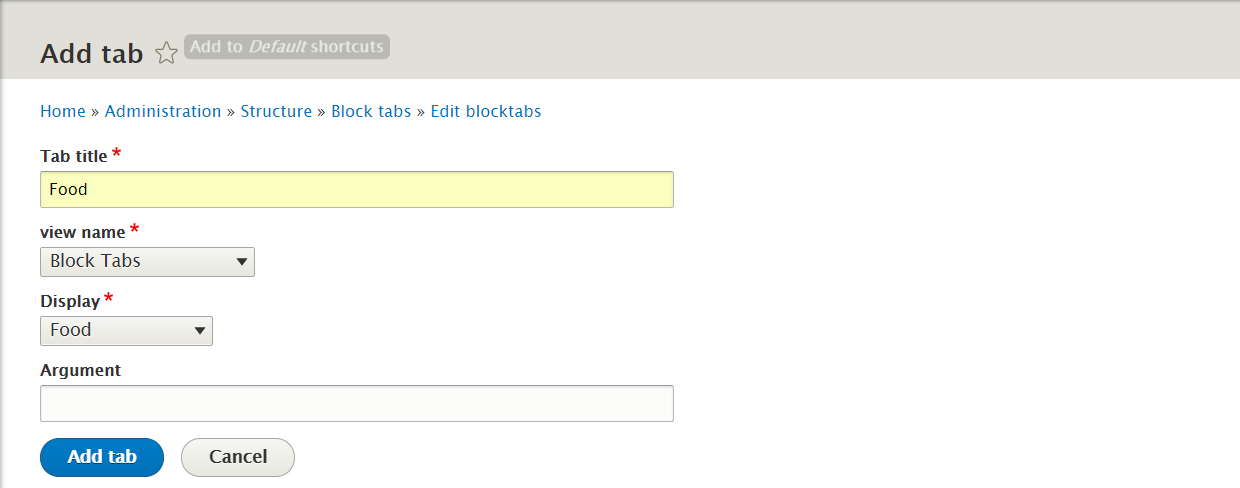
Step 4: Click Select a new tab > view tab and click Add button, then create Fashion tab with following settings:
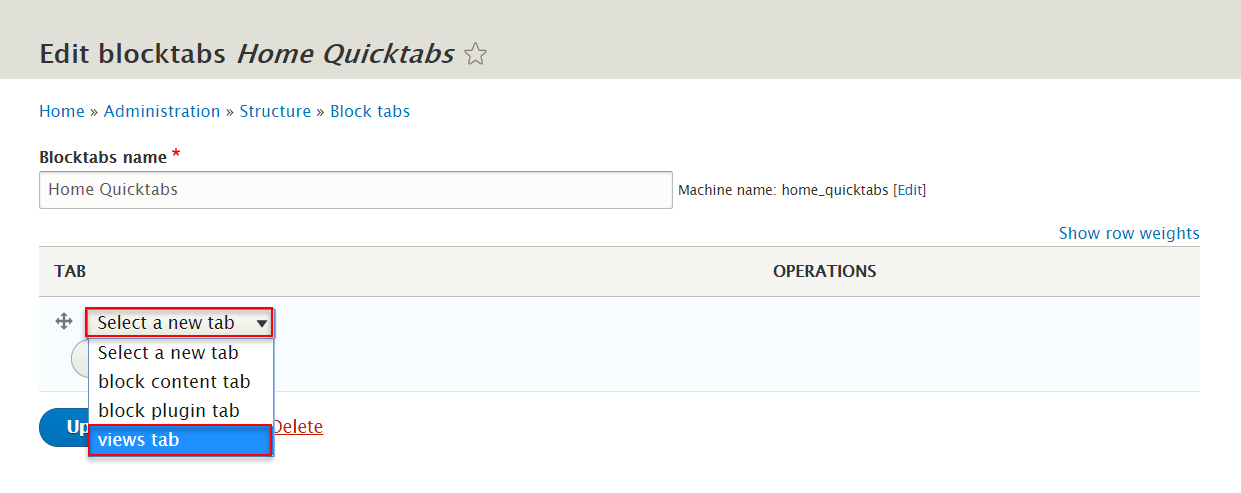

Step 5: CLick Add tab button, 3 tabs Health & Beauty, Food, Music do the same as above


4. Configure : Home Quicktabs
Step 1: Navigate to Structure > Block layout
Step 2: Find Content click Place block button
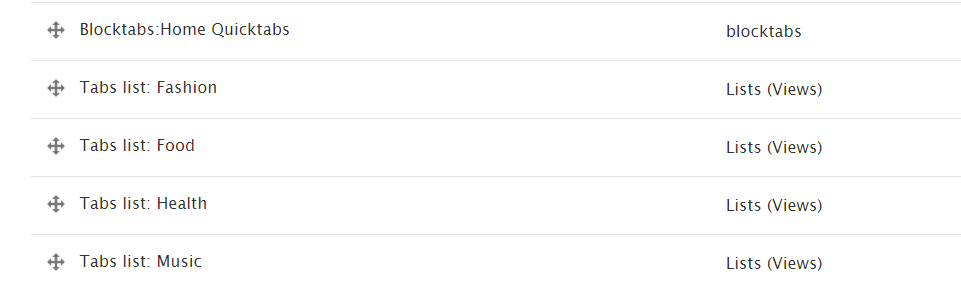
Step 3: Find Blocktabs:Home Quicktabs blocktabs click Place block button and set following properites:
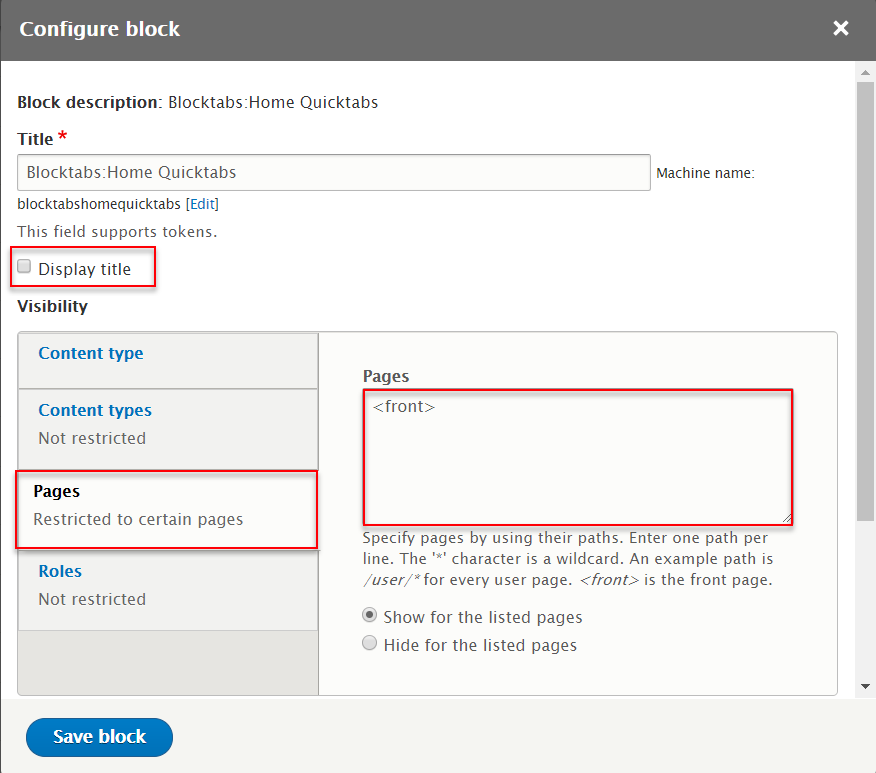
Step 4: Click Save block button
Step 5: Find Content click Place block button
Step 6: Find Tabs List: Fashion Lists (Views) click Place block button and set following properites:

Step 7: Click Save block button
Step 8: Find Content click Place block button
Step 9: Find Tabs List: Health Lists (Views) click Place block button and set following properites:
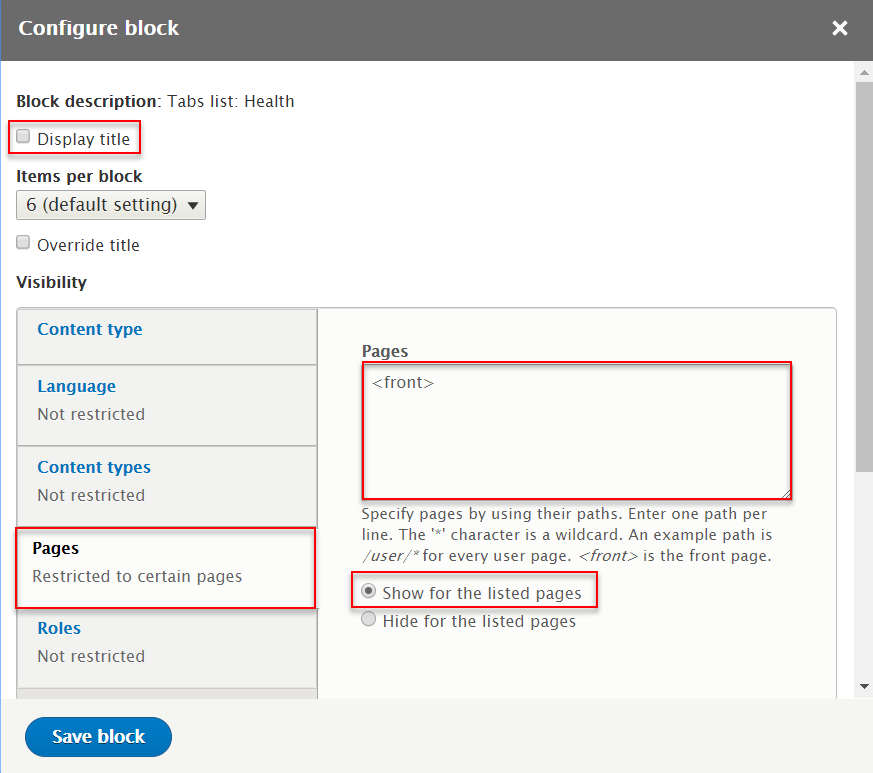
Step 10: Click Save block button
Step 11: Find Content click Place block button
Step 12: Find Tabs List: Food Lists (Views) click Place block button and set following properites:

Step 13: Click Save block button
Step 14: Find Content click Place block button
Step 15: Find Tabs List: Music Lists (Views) click Place block button and set following properites:

Step 16: Click Save block button
- Note: Rearrange Blocktabs:Home Quicktabs, Tabs List: Fashion, Tabs List: Health, Tabs List: Food, Tabs List: Music like guide:
Step 17: Click Save block button
Ad Block block
Front end Display

1. Configure: Ad block block
Step 1: Navigate to Structure > Block layout
Step 2: Find Sidebar first click Place block button
Step 3: Find Ad: Ad block Lists (Views) click Place block button and set following properites:

Step 4: Click Save block button.
Most Views block
Front end Display

1. Create Most Views block
Step 1: Navigate to Structure > Views, find Article Block views and click Edit link
Step 2: Click Add link to create Most Views view and set following properites:
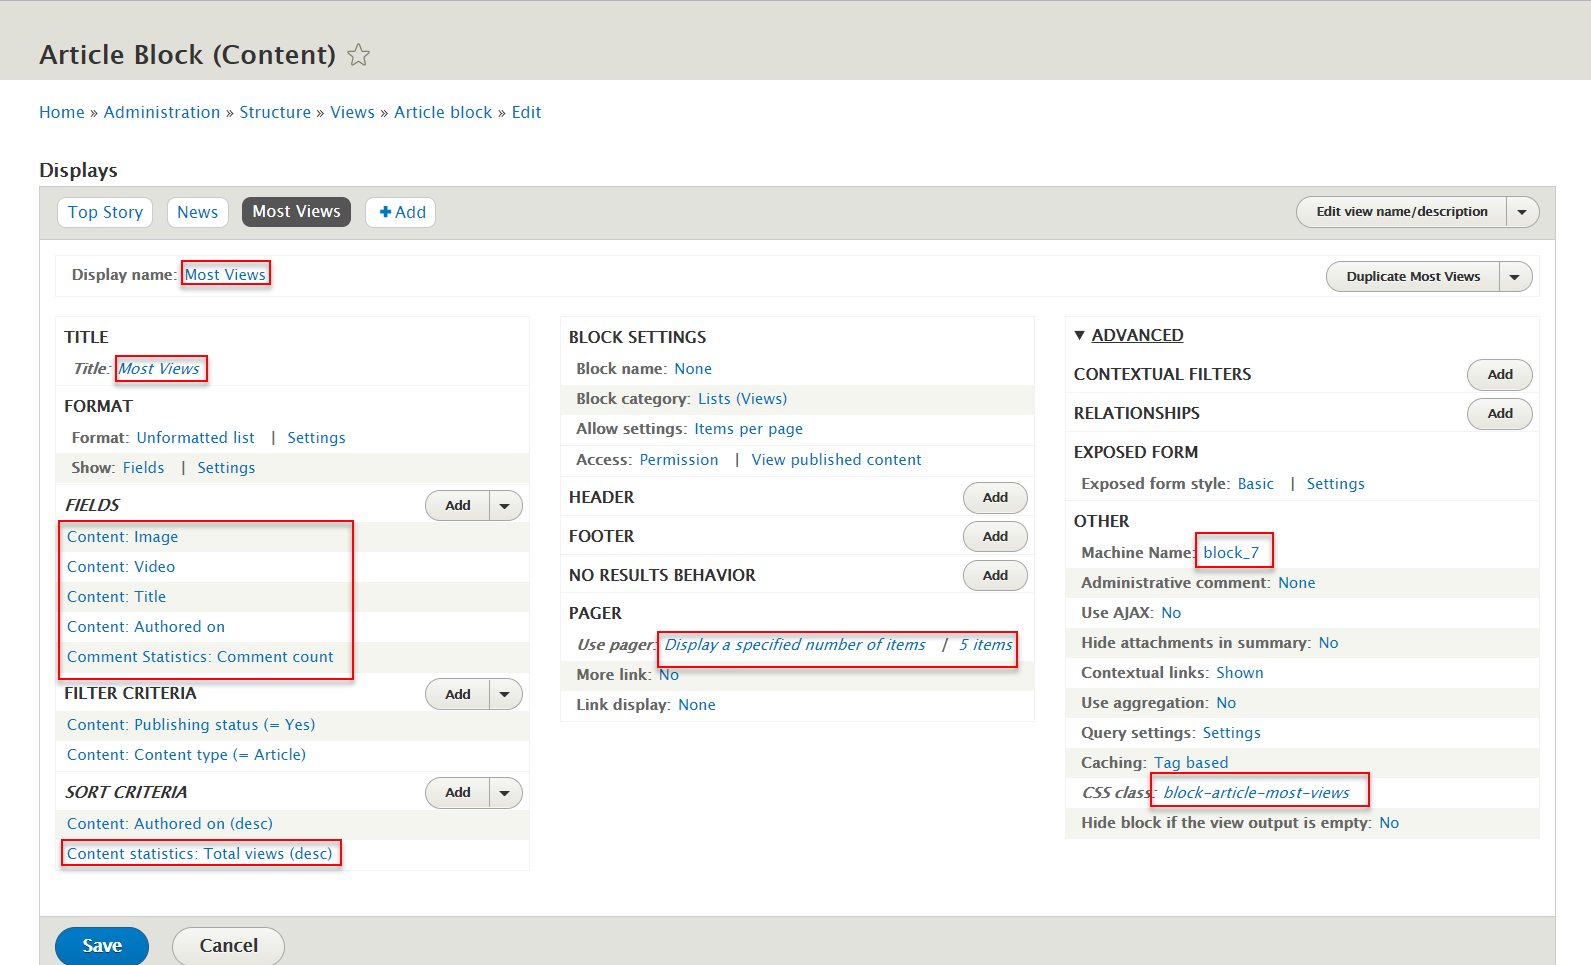
Step 3: At Display name and Title areas, change name Most Views


Step 4: At FIELDS area, click Add button to add fields: Content: Image. Set properties for Content: Image

Step 5: At FIELDS area, click Add button to add fields: Content: Authored on. Set properties for Content: Authored on
Step 6: At FIELDS area, click Add button to add fields: Content: Video. Set properties for Content: Video
<
Step 7: At FIELDS area, click Add button to add fields: Comment Statistics: Comment count. Set properties for Comment Statistics: Comment count
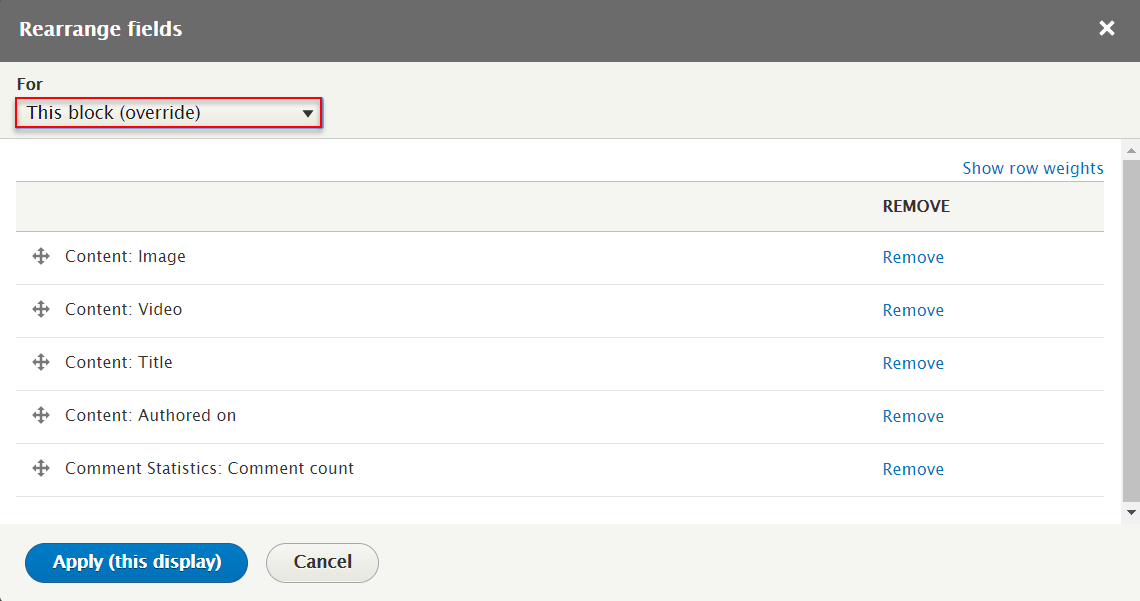
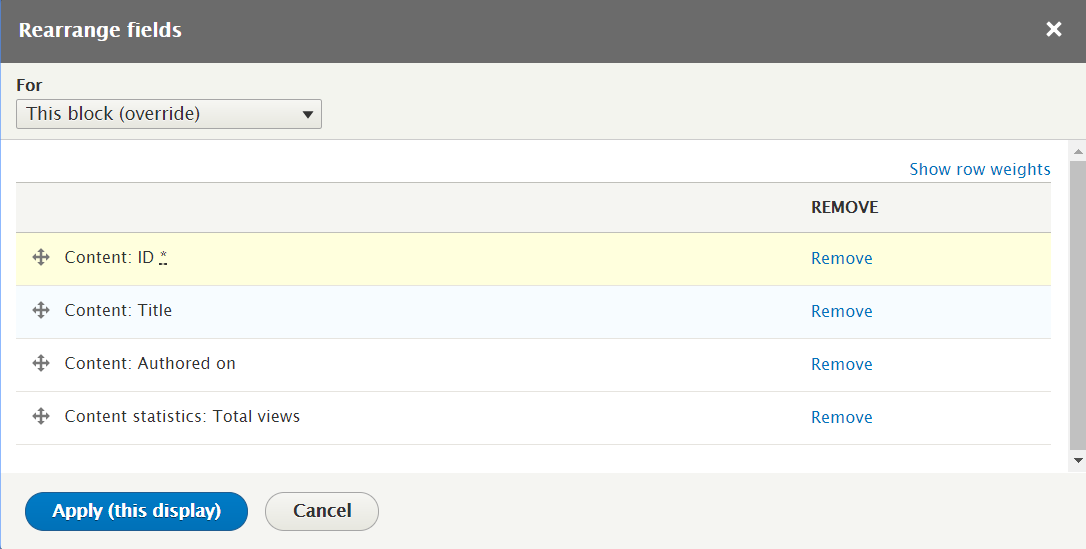
Step 8: At FIELDS area, click Dropdown of Add and click Rearrange button to rearrange fields
Step 9: At SORT CRITERIA area, click Content statistics: Views today field and follow these steps

Step 10: At SORT CRITERIA area, click Add button to add fields: Content statistics: Total views. Set properties for ontent statistics: Total views
Step 11: At Use pager area, click Display a specified number of items | 1 items fields

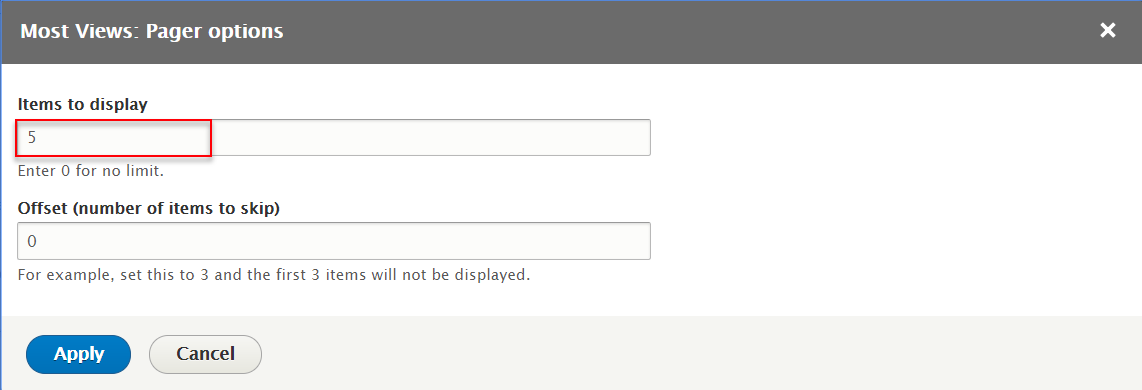
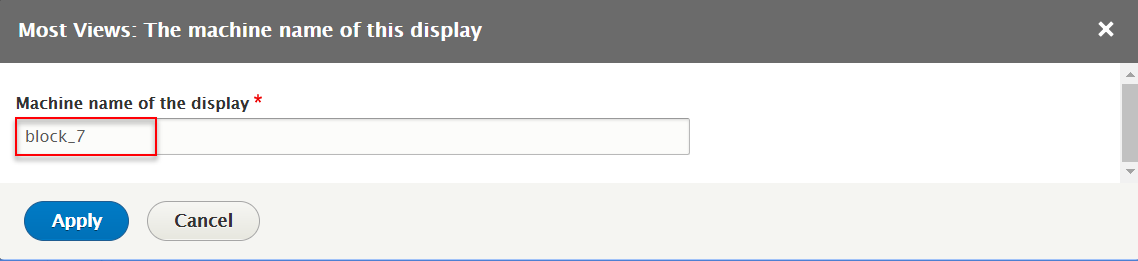
Step 12: At Machine Name area, change name block_7
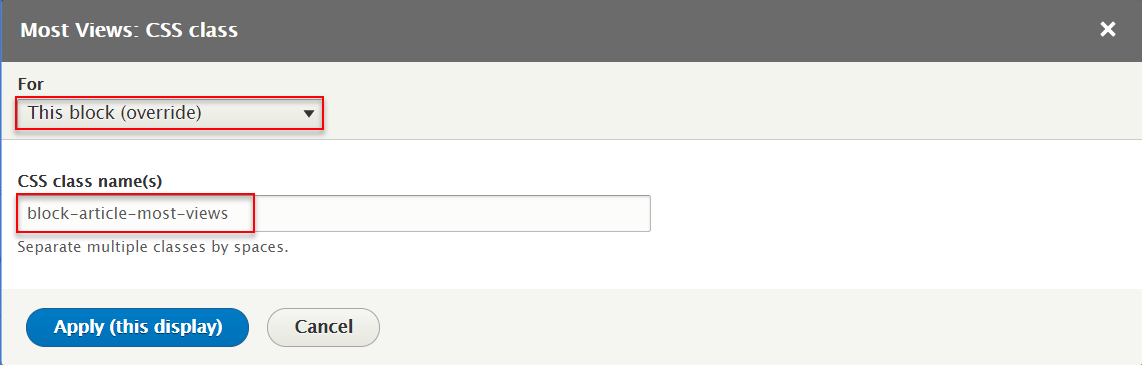
Step 13: At CSS class area, change block-article-most-views
Step 14: Click Save button
2. Configure Most Views block
Step 1: Navigate to Structure > Block layout
Step 2: Find Sidebar first click Place block button
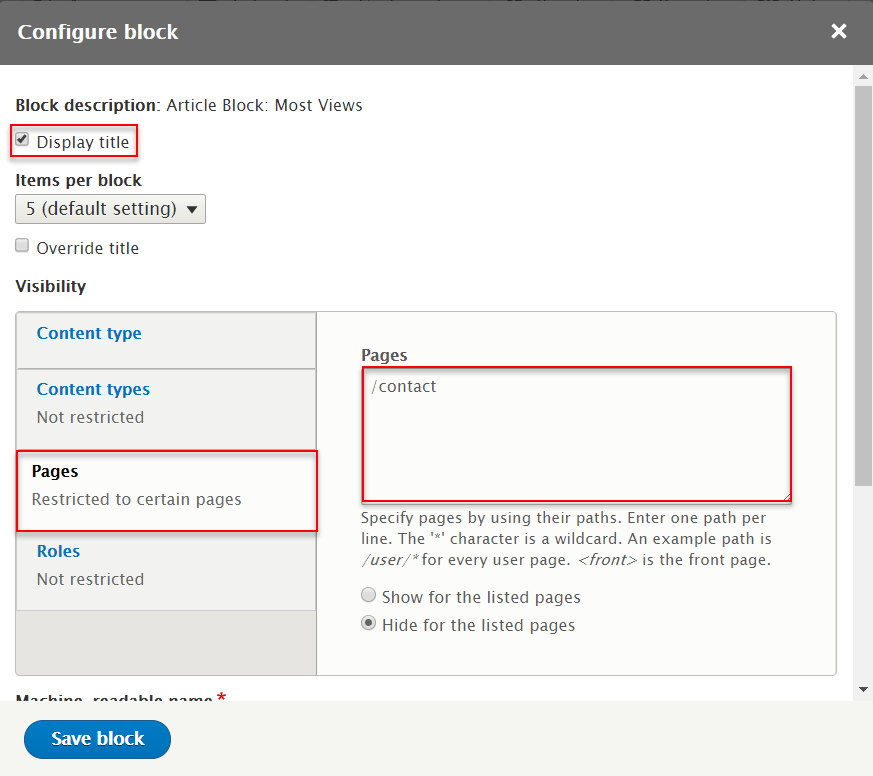
Step 3: Find Article Block: Most Views Lists (Views) click Place block button and set following properites:
Step 4: Click Save block button.
Recent Posts block
Front end Display

1. Create Recent Posts block
Step 1: Navigate to Structure > Views, find Article Block views and click Edit link
Step 2: Click Add link to create Recent Posts view and set following properites:
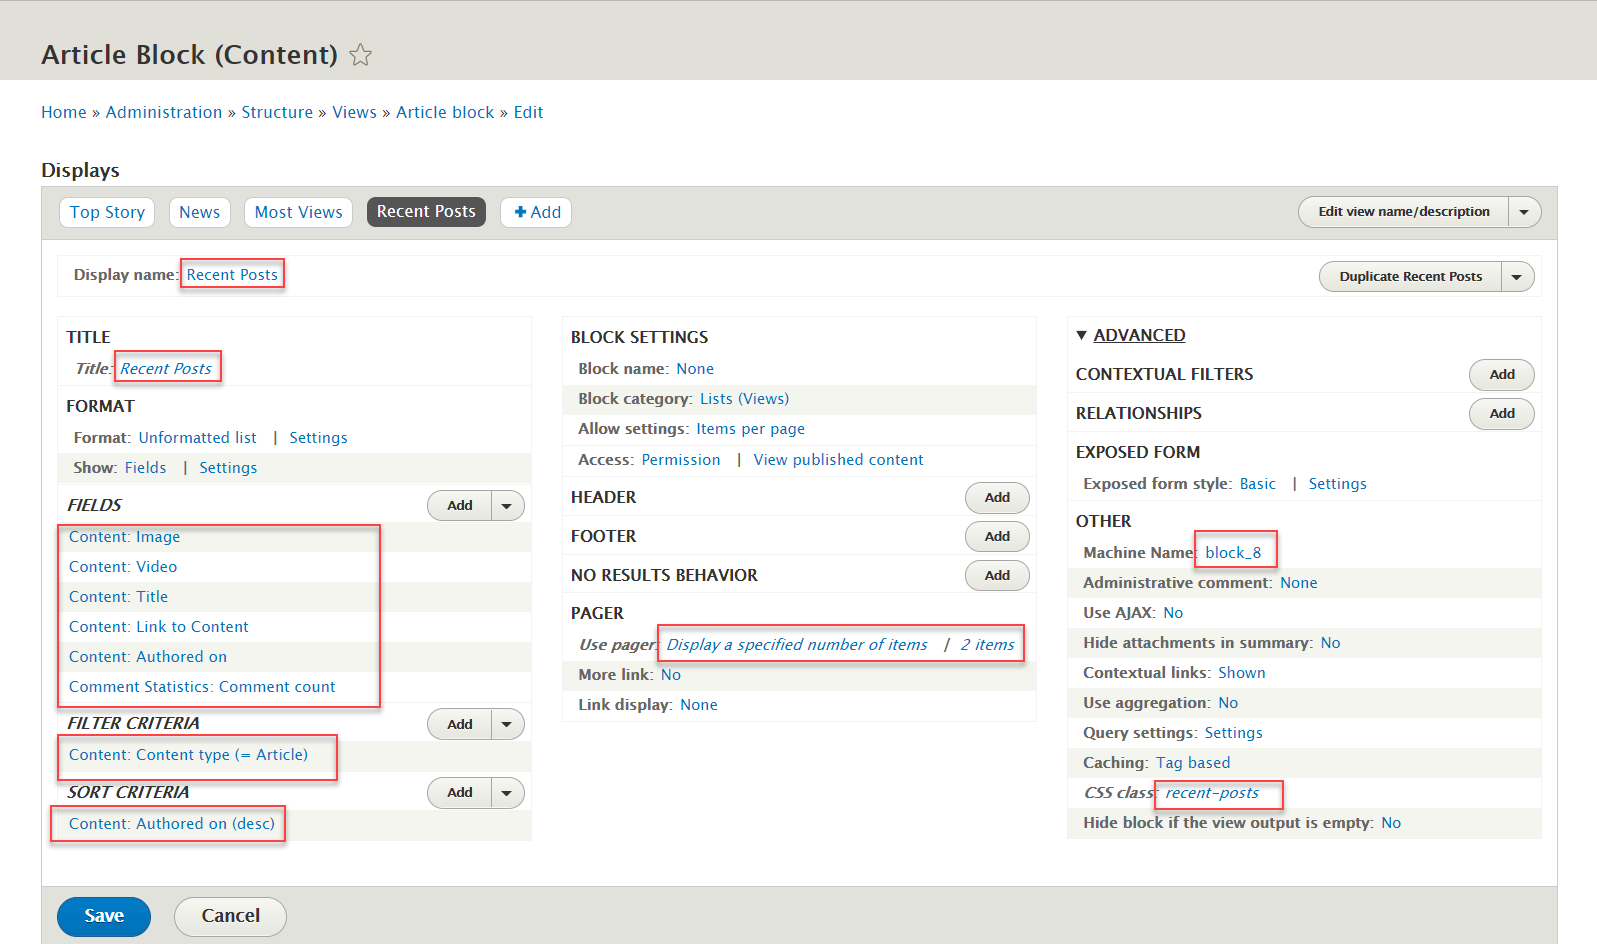
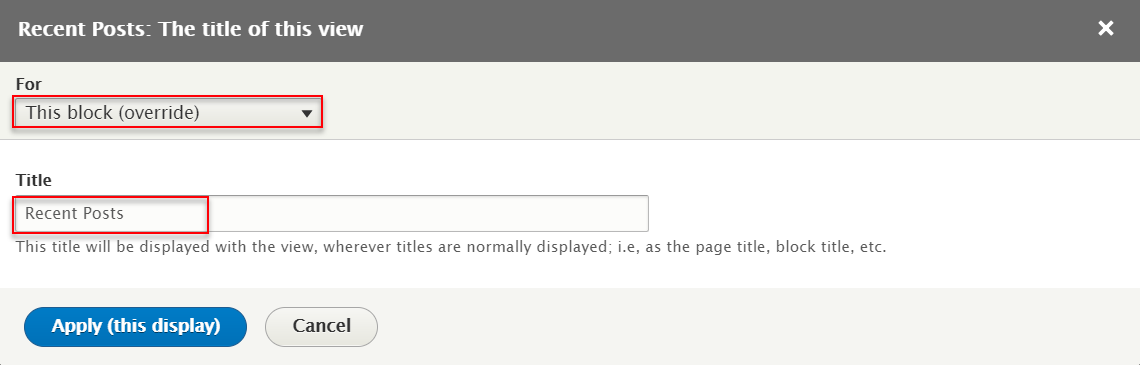
Step 3: At Display name and Title areas, change name Recent Posts

Step 4: At FIELDS area, click Add button to add fields: Content: Image. Set properties for Content: Image

Step 4: At FIELDS area, click Content: Title. Set properties for Content: Title

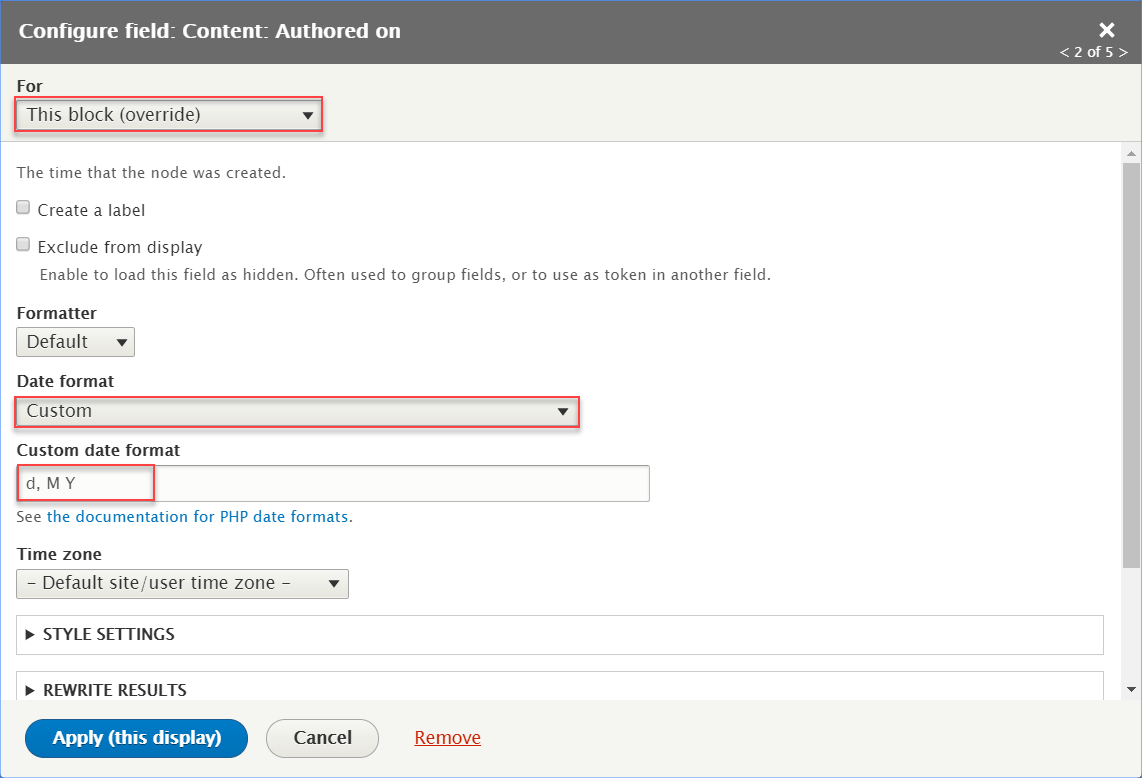
Step 5: At FIELDS area, click Add button to add fields: Content: Authored on. Set properties for Content: Authored on
Step 6: At FIELDS area, click Add button to add fields: Content: Video. Set properties for Content: Video
<

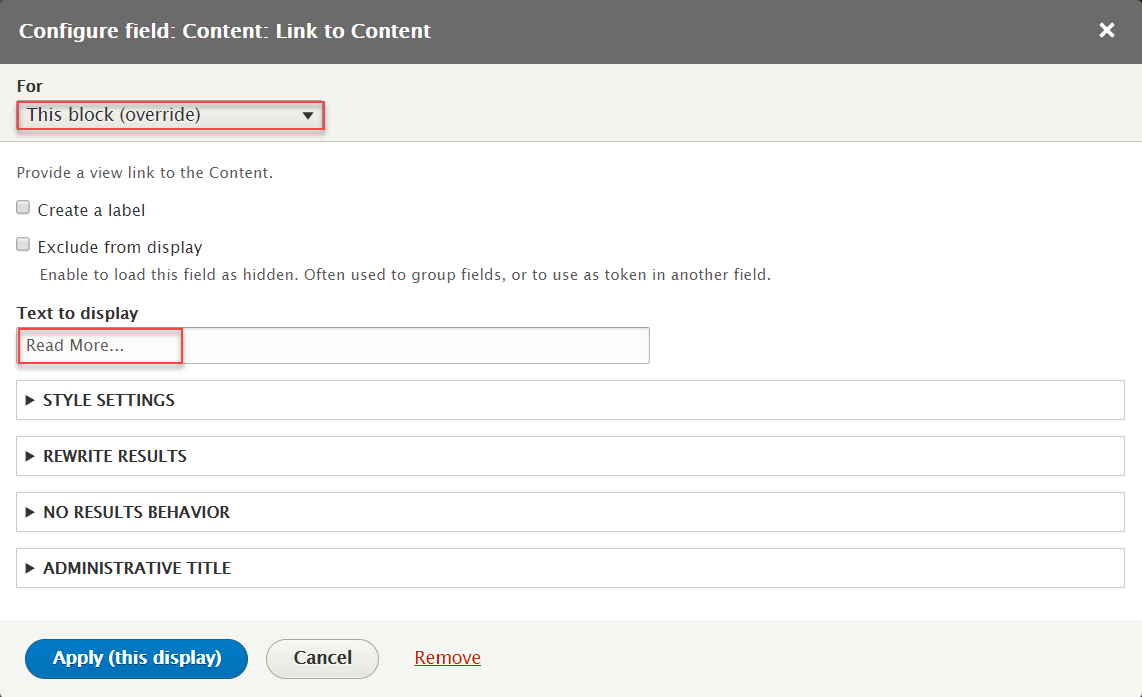
Step 7: At FIELDS area, click Add button to add fields: Content: Link to Content. Set properties for Content: Link to Content
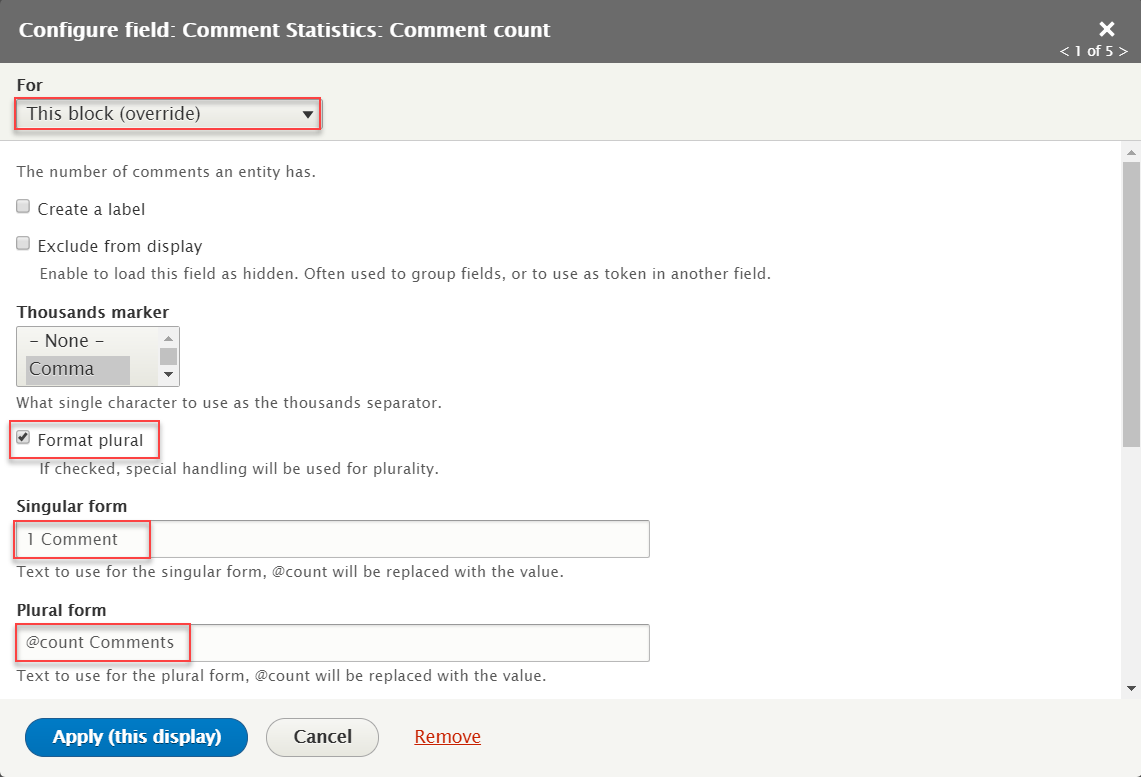
Step 7: At FIELDS area, click Add button to add fields: Comment Statistics: Comment count. Set properties for Comment Statistics: Comment count
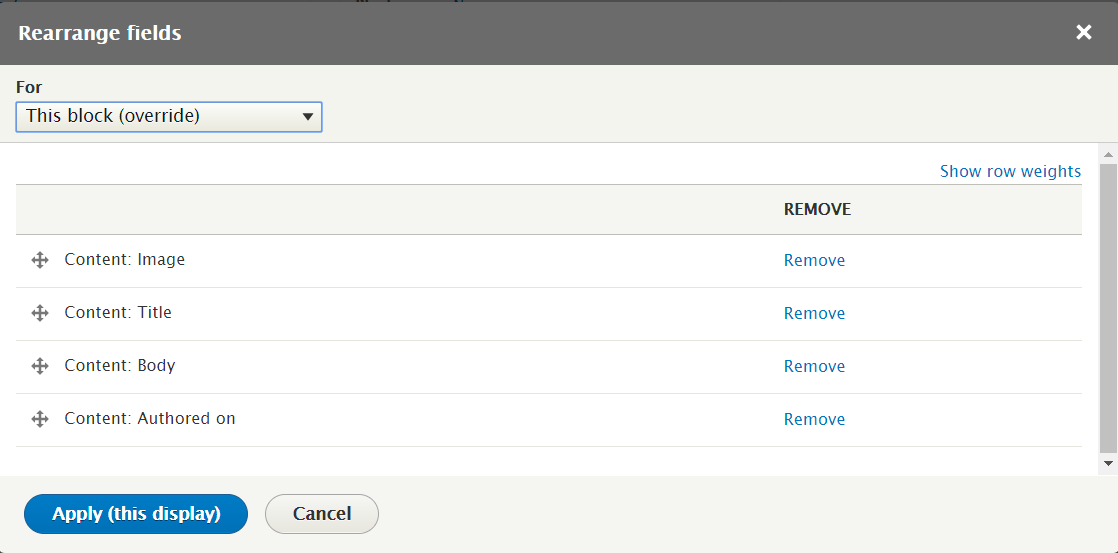
Step 8: At FIELDS area, click Dropdown of Add and click Rearrange button to rearrange fields
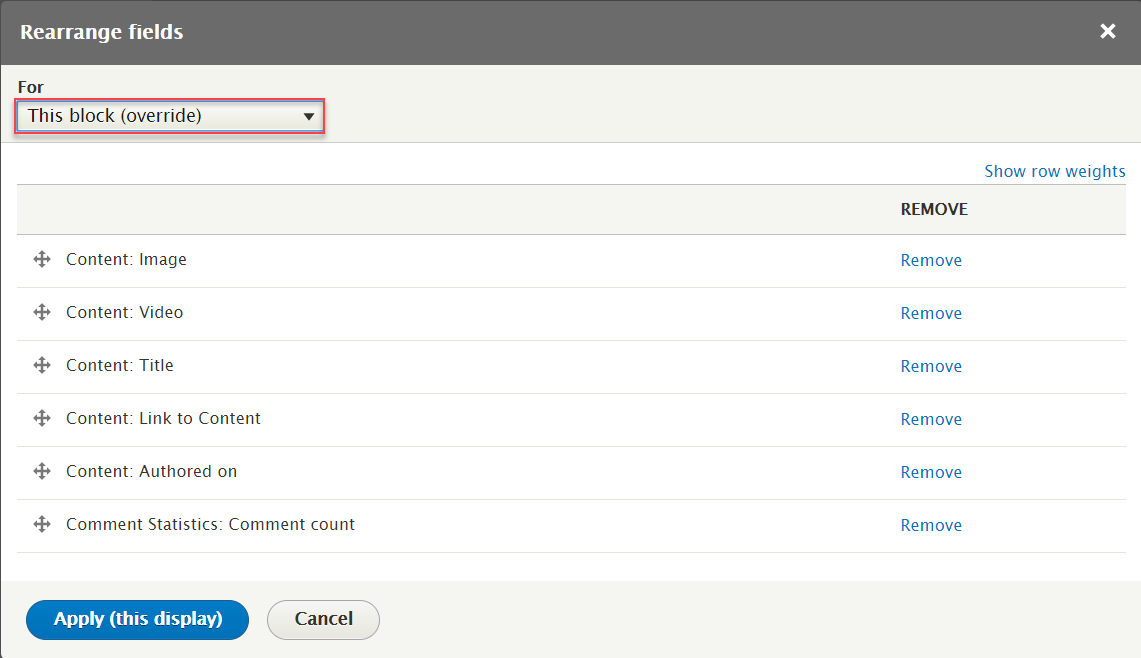
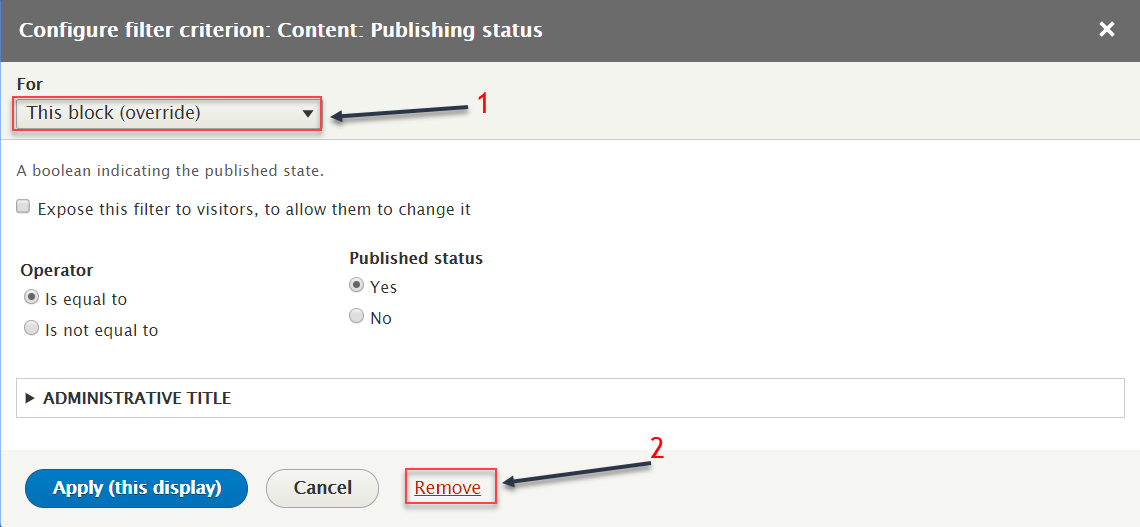
Step 9: At FILTER CRITERIA area, click Content: Publishing status field and follow these steps
Step 10: At SORT CRITERIA area, click Content statistics: Views today field and follow these steps

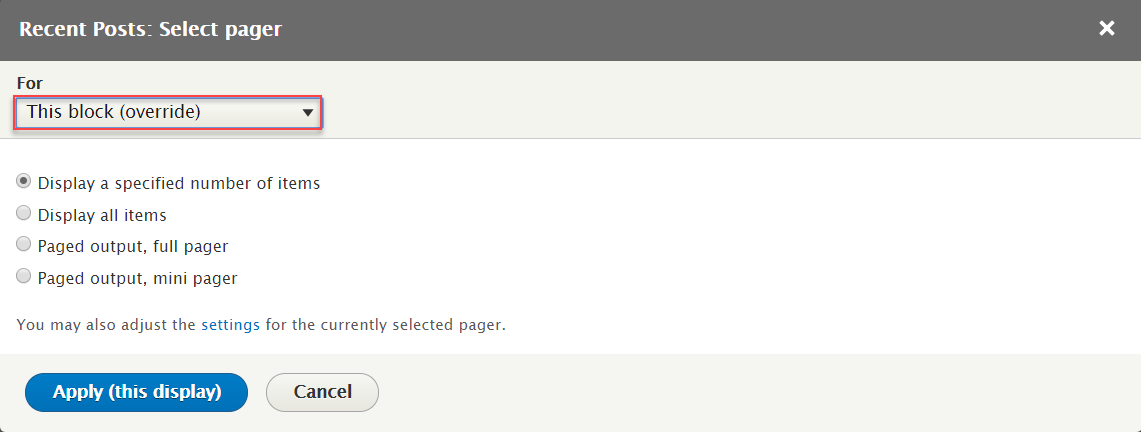
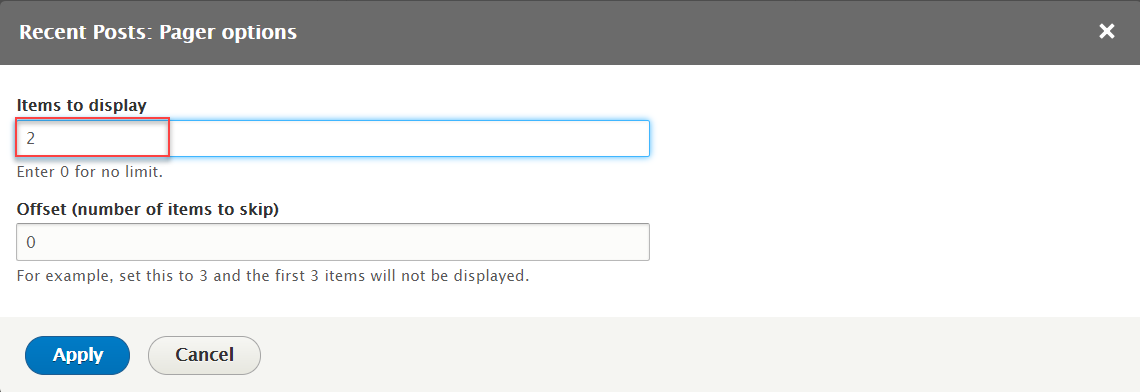
Step 11: At Use pager area, click Display a specified number of items | 1 items fields
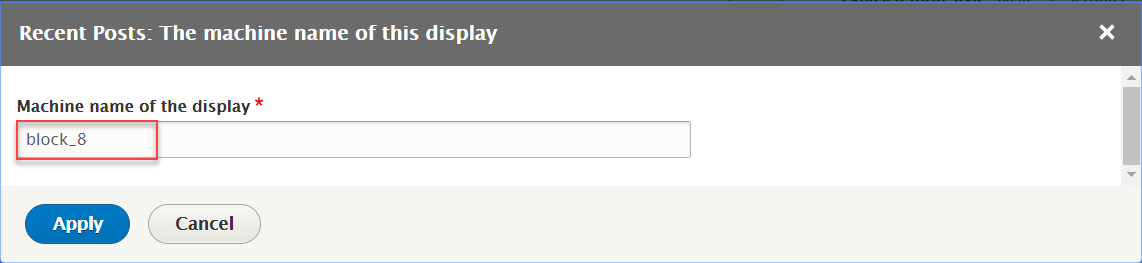
Step 12: At Machine Name area, change name block_8
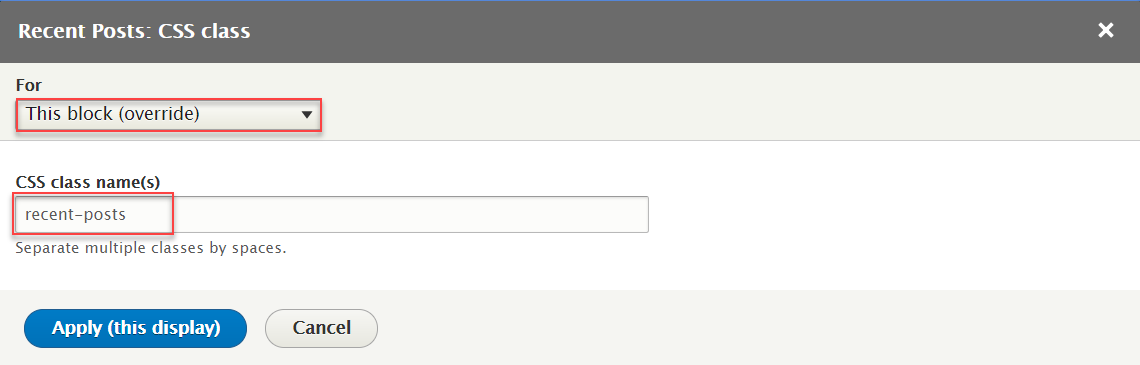
Step 13: At CSS class area, change recent-posts
Step 14: Click Save button
2. Configure Recent Posts block
Step 1: Navigate to Structure > Block layout
Step 2: Find Sidebar first click Place block button
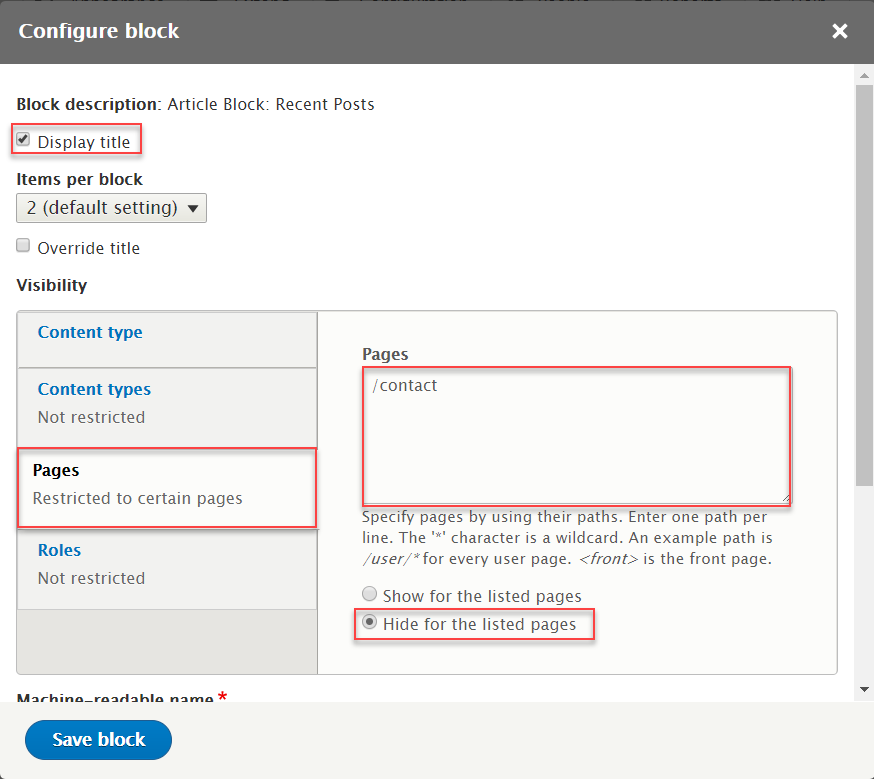
Step 3: Find Article Block: Recent Posts Lists (Views) click Place block button and set following properites:
Step 4: Click Save block button.
Keep Connected block
Front end Display

1. Create Keep Connected block
Step 1: Navigate to Structure > Block layout > Custom block library, click Add custom block, then create Keep Connected block with following settings:

Refer to following HTML code:
Step 2: Click Save button.
2. Configure : Keep Connected block
Step 1: Navigate to Structure > Block layout
Step 2: Find Sidebar first click Place block button
Step 3: Find Keep Connected (Custom) click Place block button and set following properites:

Step 4: Click Save block button.
Lastest Comments block
Front end Display
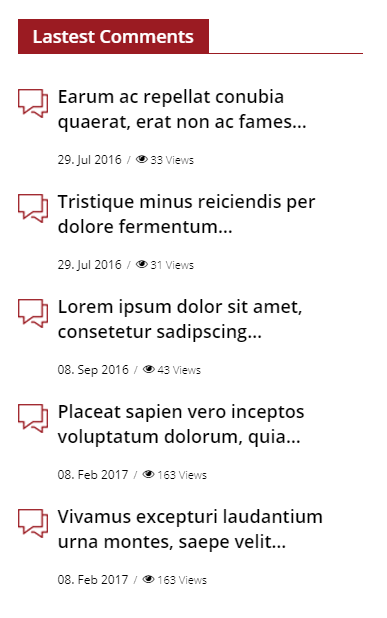
1. Create Lastest Comments block
Step 1: Navigate to Structure > Views, click Add new view, then create Lastest Comments view with following settings:

Step 2: Click Save and edit button. Next to steps below to set properties for following fields:
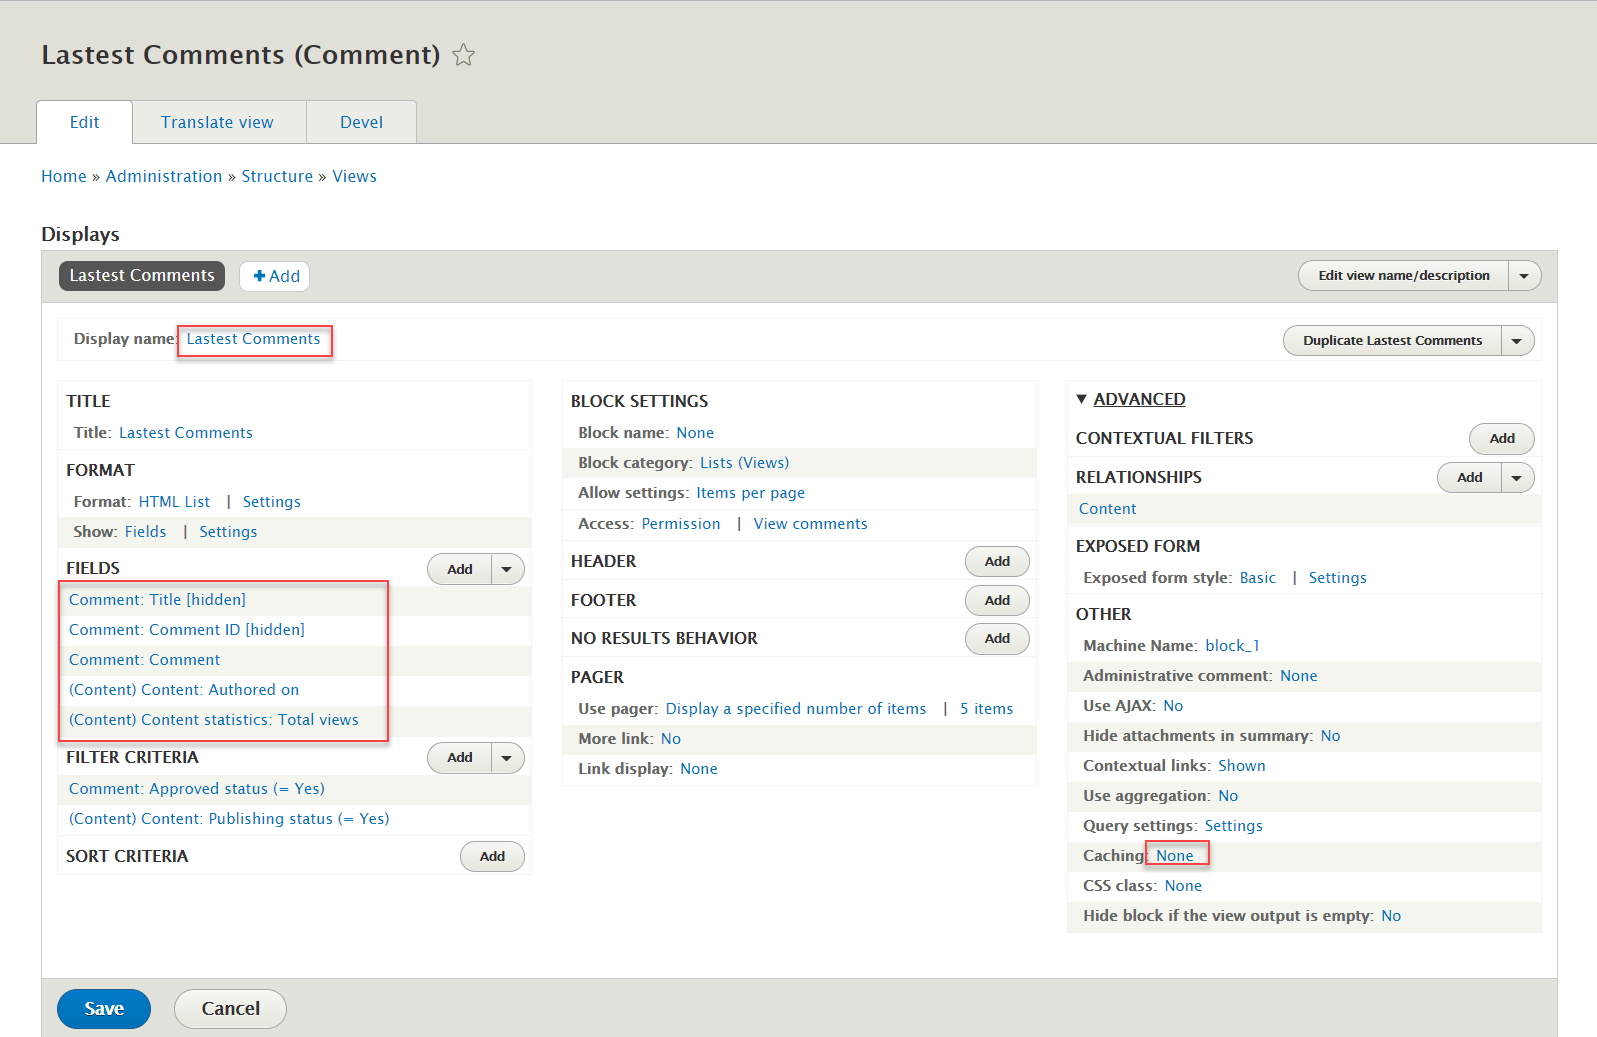
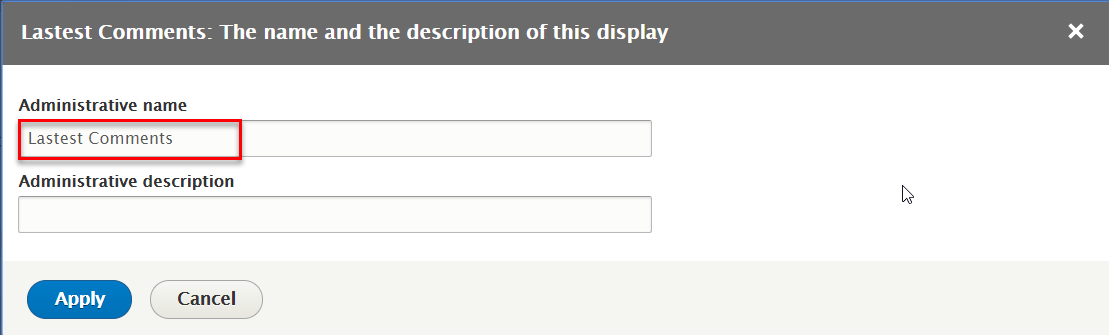
Step 3: At Display name area, Change name Lastest Comments
Step 4: At FIELDS area, click Add button to add fields: Comment: Comment ID. Set properties for Comment: Comment ID

Step 5: At FIELDS area, click Add button to add fields: Comment: Comment. Set properties for Comment: Comment
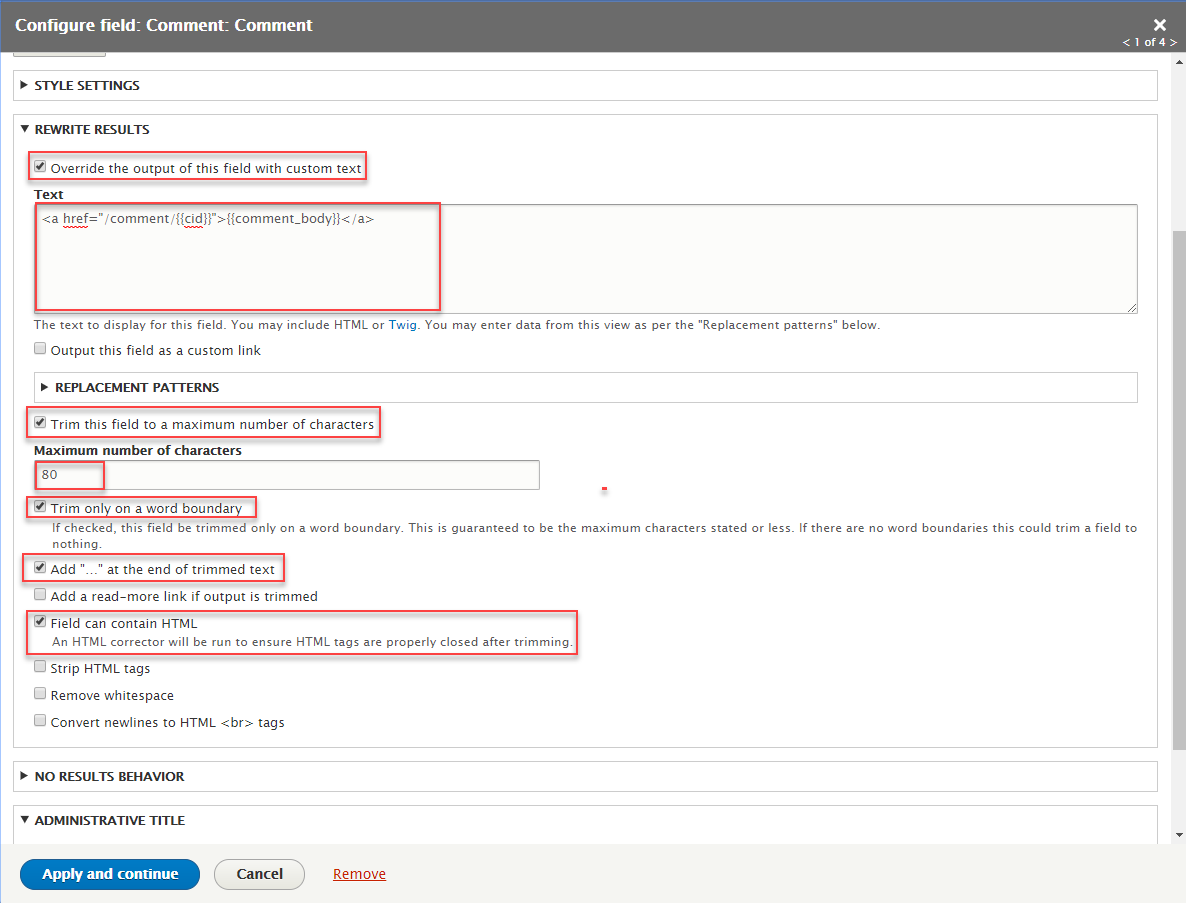
Refer to following HTML code:
{{comment_body}}
Step 6: At FIELDS area, click Add button to add fields: (Content) Content: Authored on. Set properties for (Content) Content: Authored on

Step 7: At FIELDS area, click Add button to add fields: (Content) Content statistics: Total views. Set properties for (Content) Content statistics: Total views

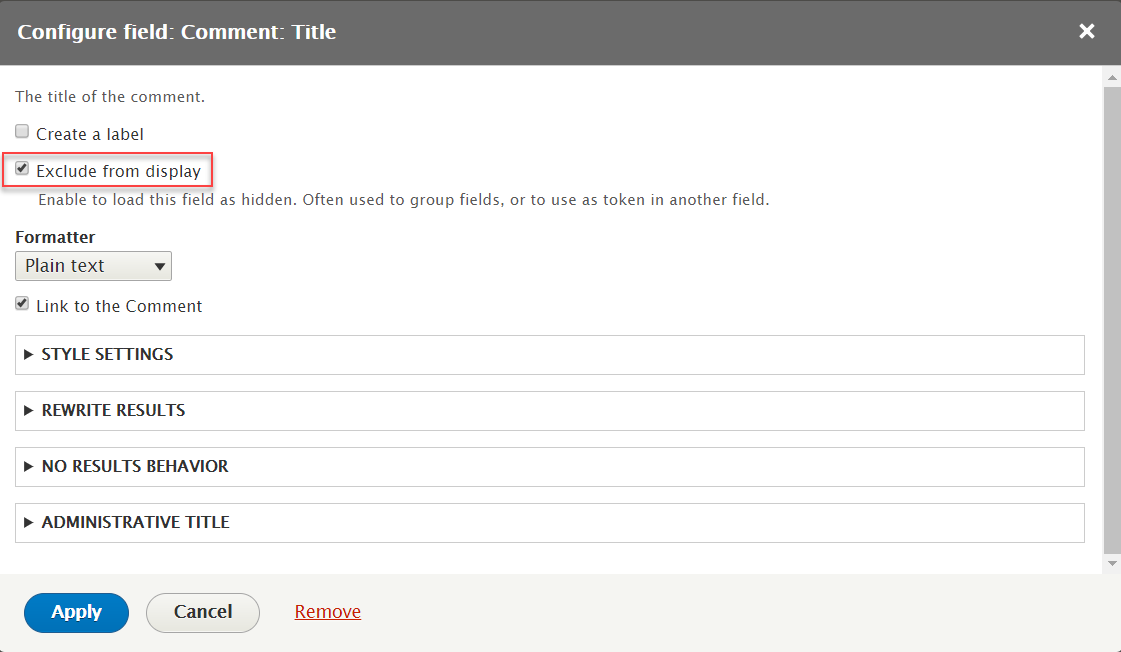
Step 8: At FIELDS area, click Comment: Title. Set properties for Comment: Title
Step 9: At Caching area, change None field and set properties:

Step 10: Click Save button
2. Configure : Lastest Comments block
Step 1: Navigate to Structure > Block layout
Step 2: Find Sidebar first click Place block button
Step 3: Find Lastest Comments: Lastest Comments Lists (Views) click Place block button and set following properites:
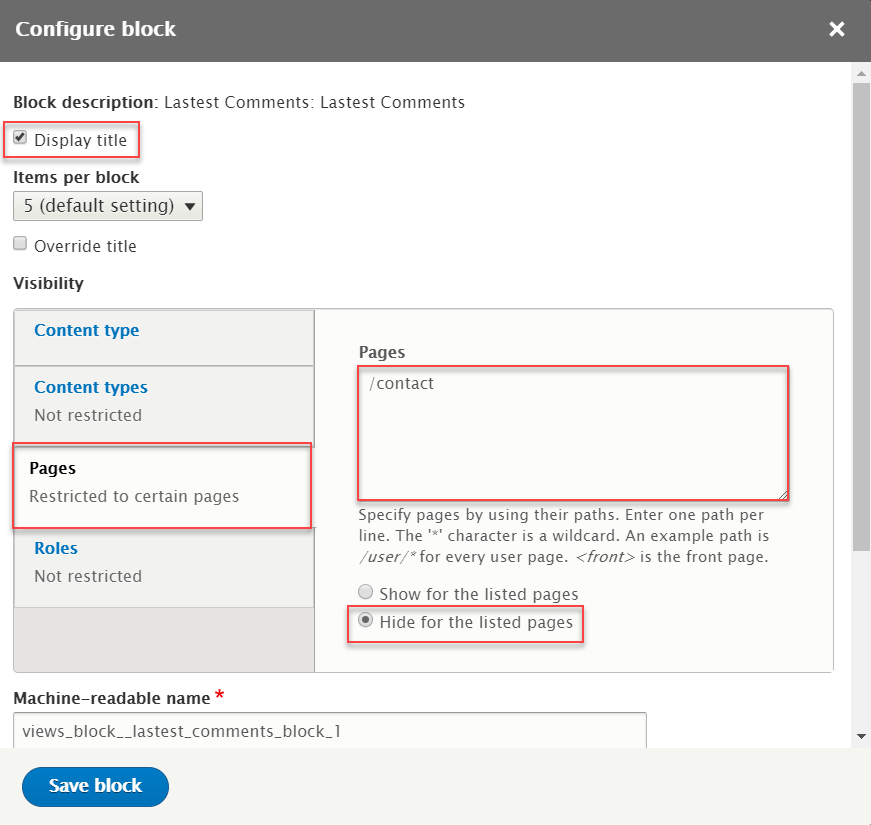
Step 4: Click Save block button.
World News block
Front end Display
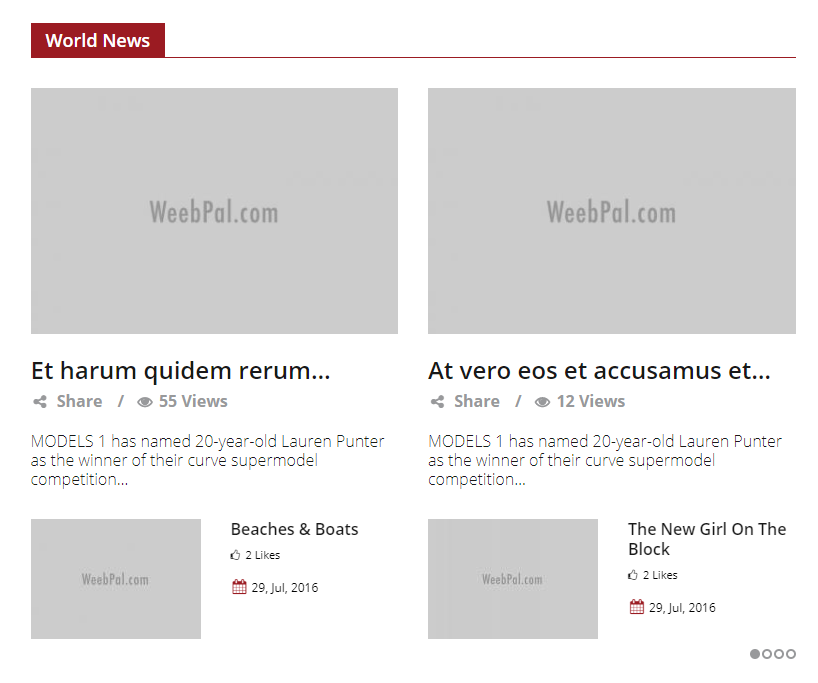
1. Create World News block
Step 1: Navigate to Structure > Views, find Article Block views and click Edit link
Step 2: Click Add link to create World News view and set following properites:
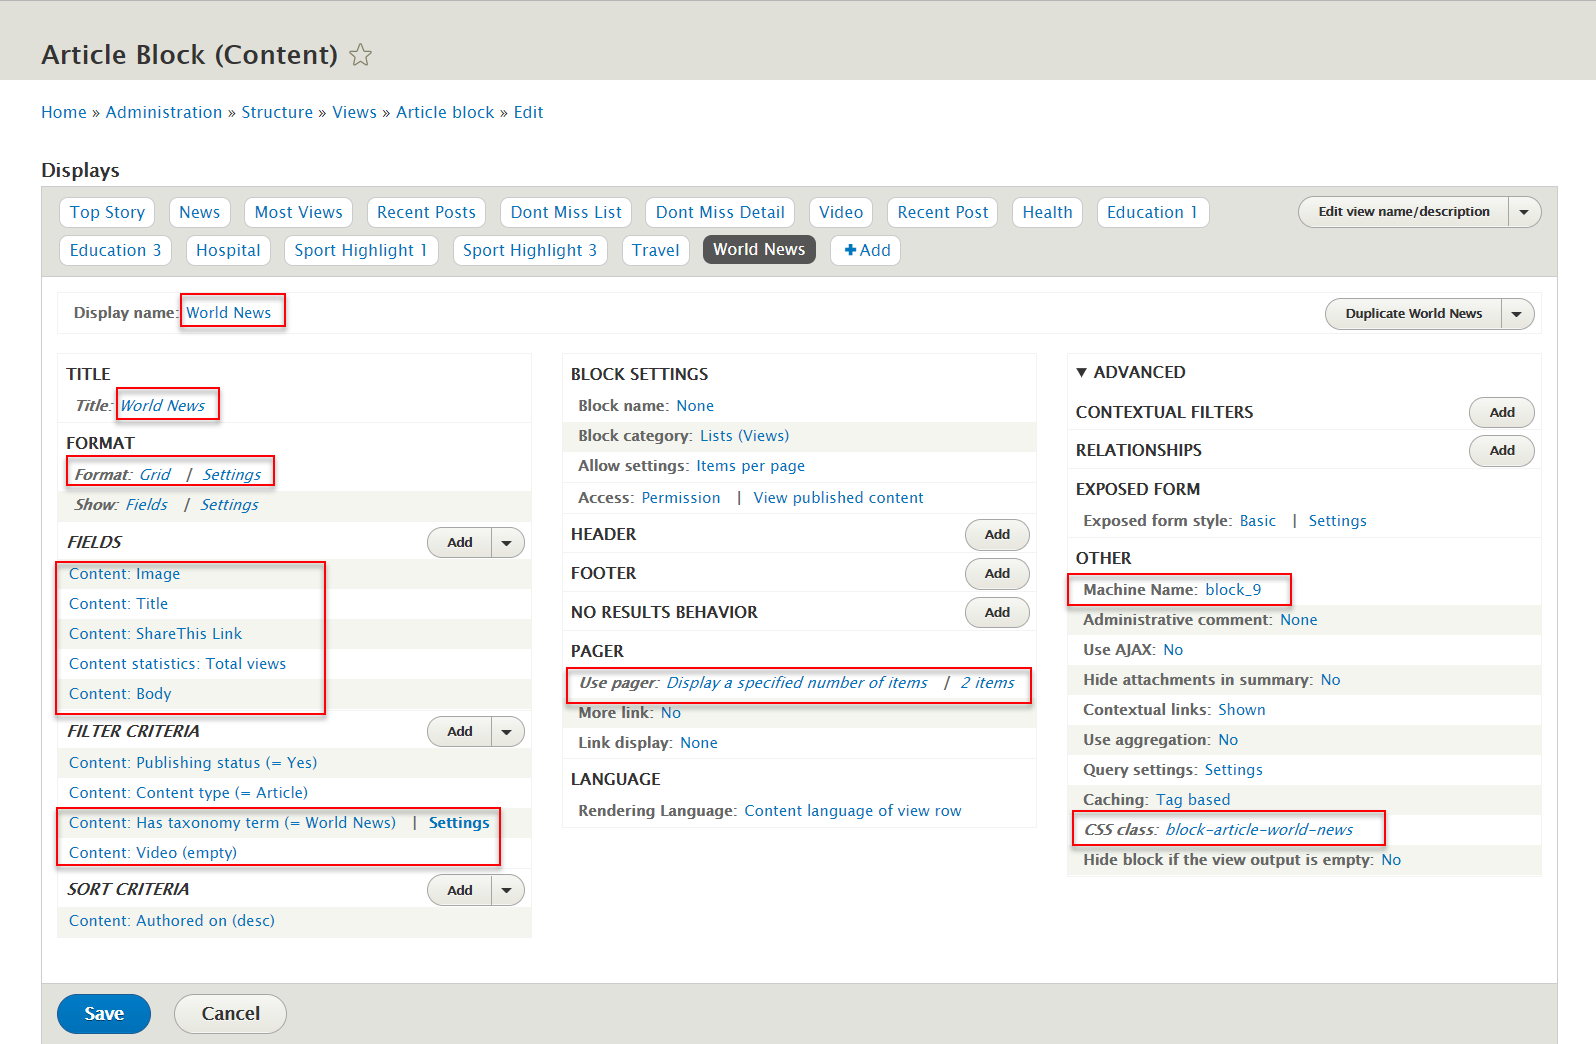
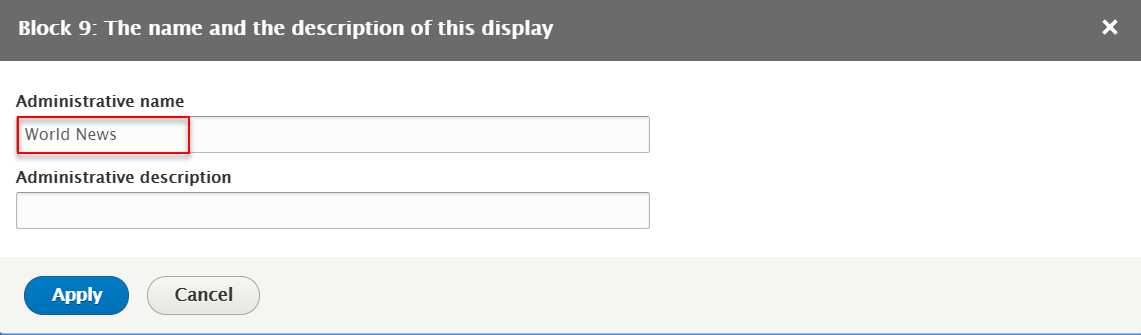
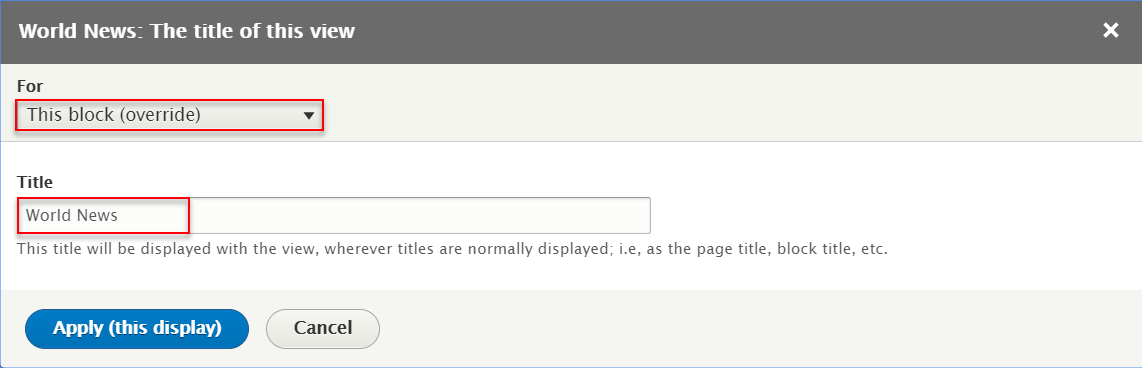
Step 4: At Display name and Title areas, change name World News
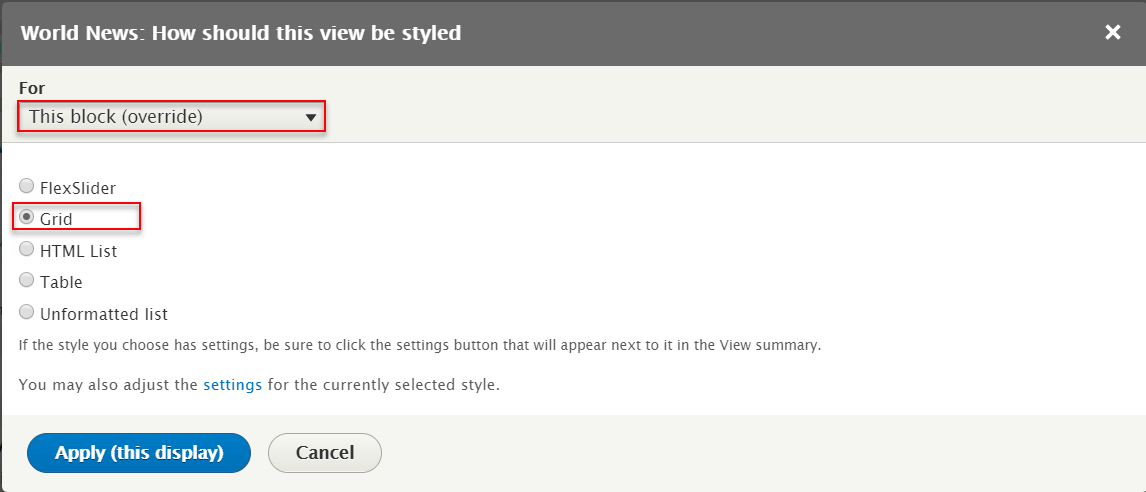
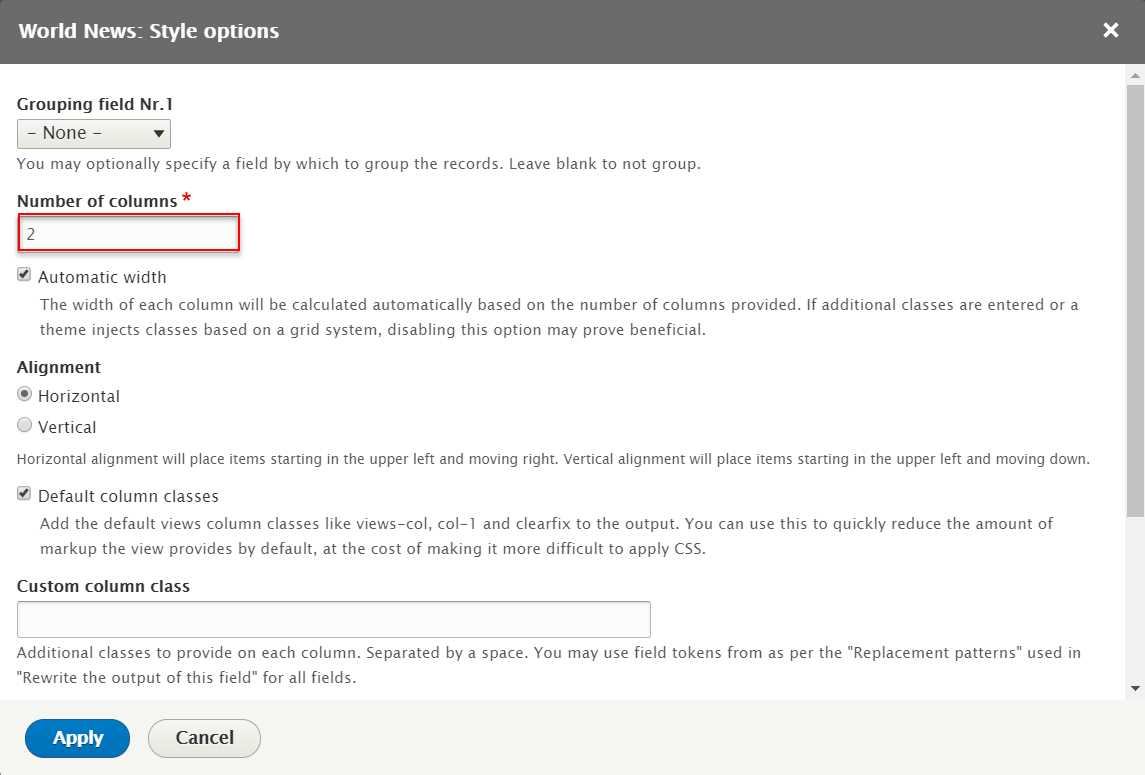
Step 5: At FORMAT > Format areas, click Unformatted list link to change properites:
Step 5: At FIELDS areas, click add button to create Content: Image field and set following properites:

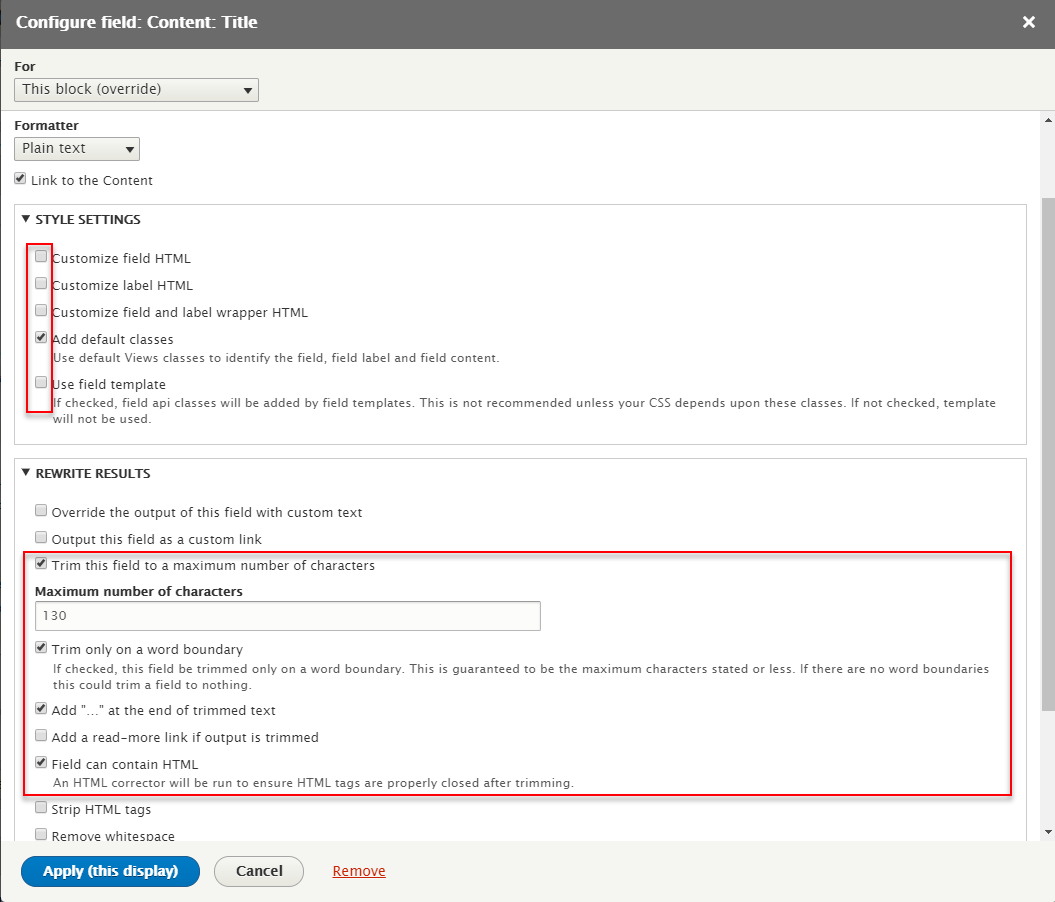
Step 6: At FIELDS areas, click Content: Title field and set following properites:
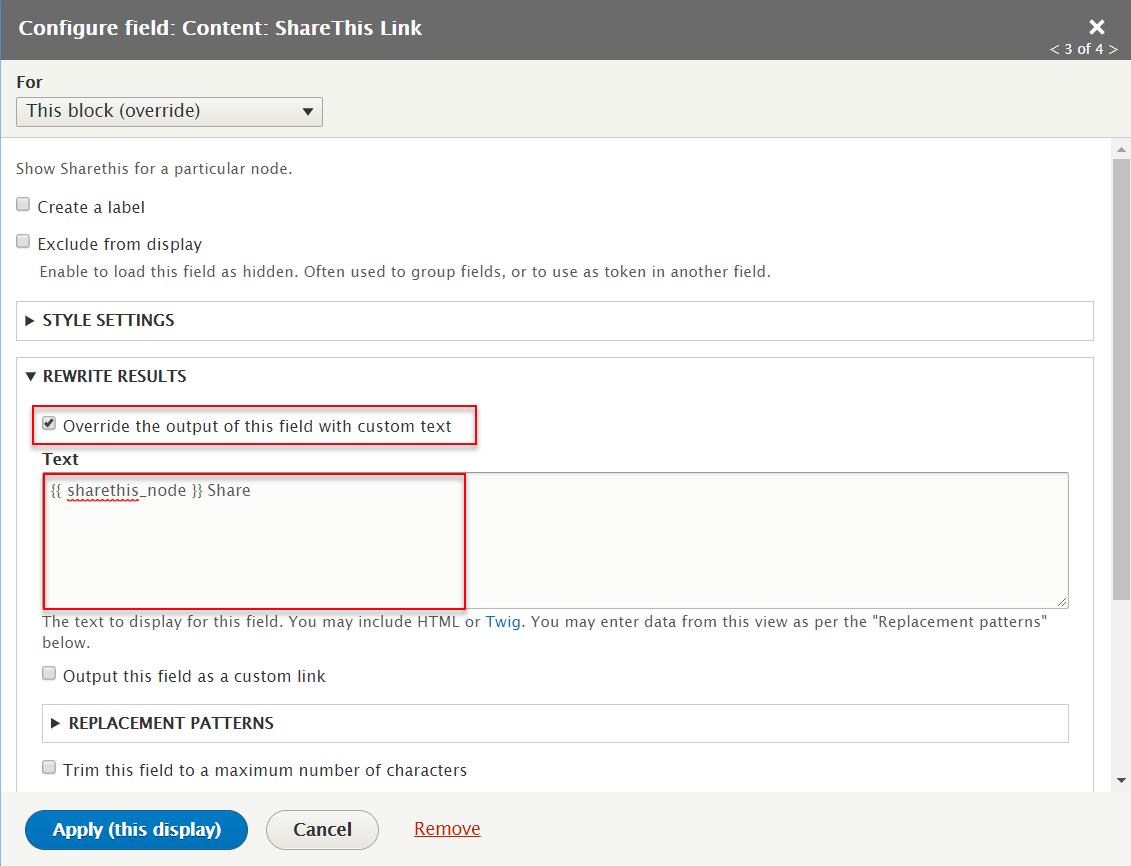
Step 5: At FIELDS areas, click add button to create Content: Sharethis Link field and set following properites:
Step 5: At FIELDS areas, click add button to create Content statistics: Total views field and set following properites:
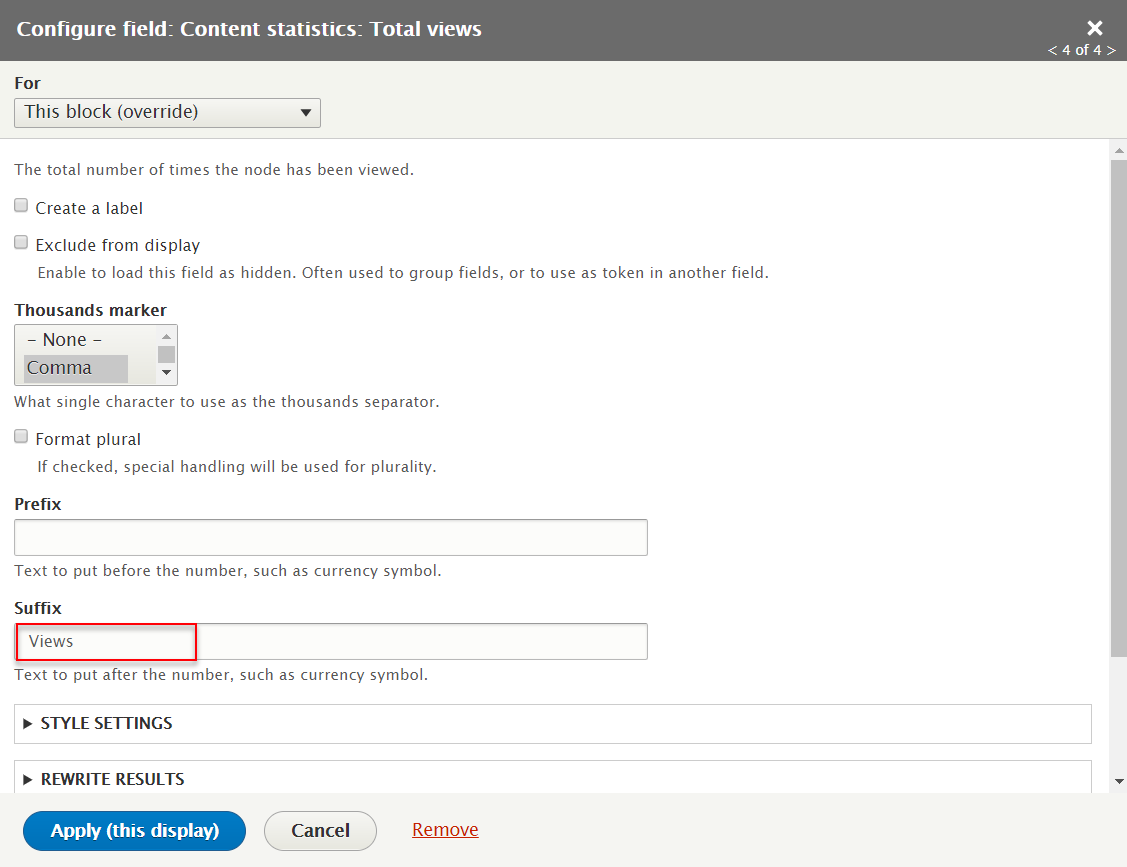
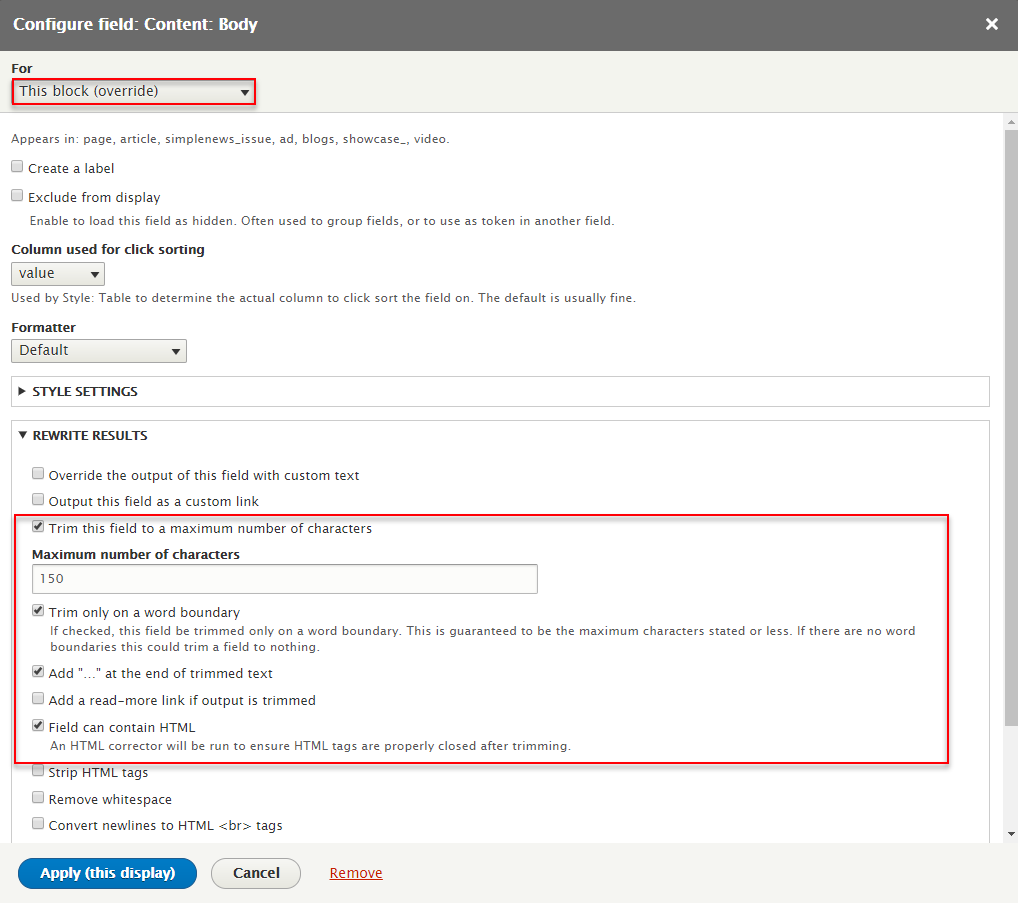
Step 7: At FIELDS areas, click add button to create Content: Body field and set following properites:
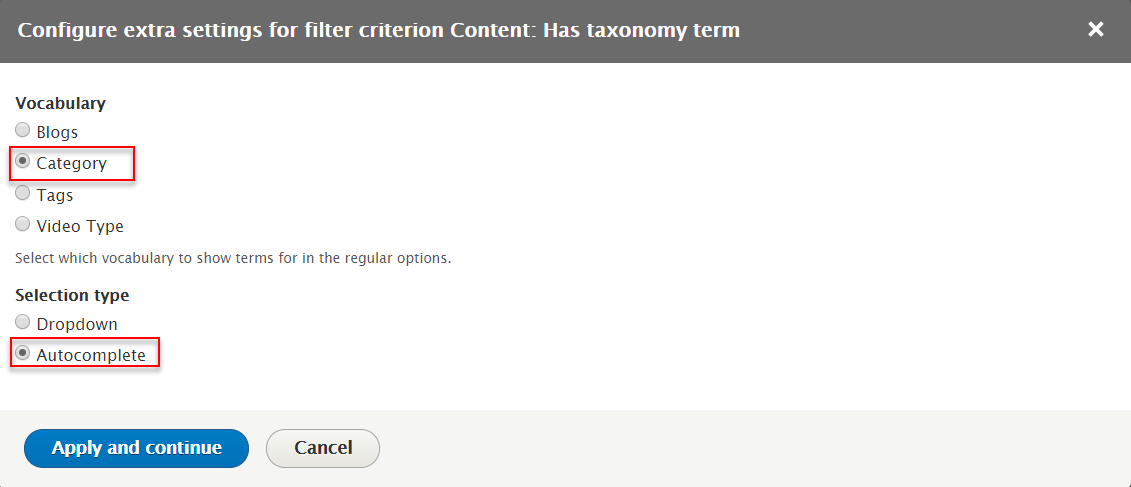
Step 8: At FILTER CRITERIA areas, click add button to create Content: Has taxonomy term field and set following properites:
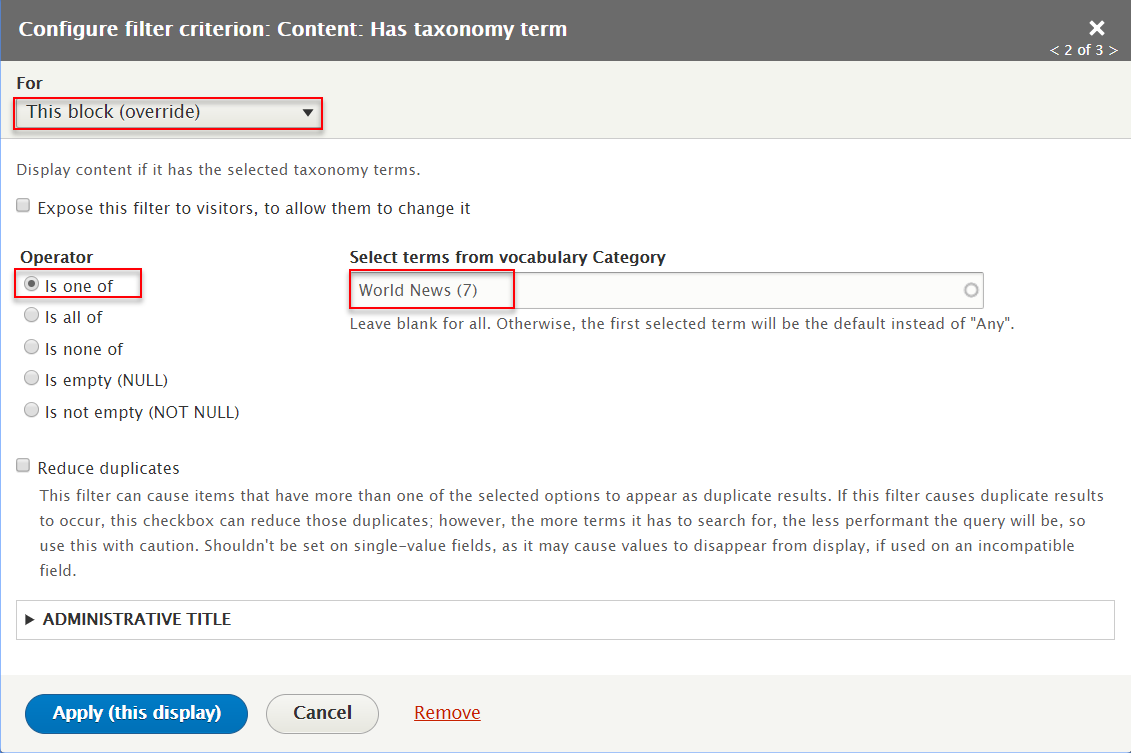
Step 8: At FILTER CRITERIA areas, click add button to create Content: Video field and set following properites:

Step 9: At SORT CRITERIA areas, click Content statistics: Views today link to remove this field

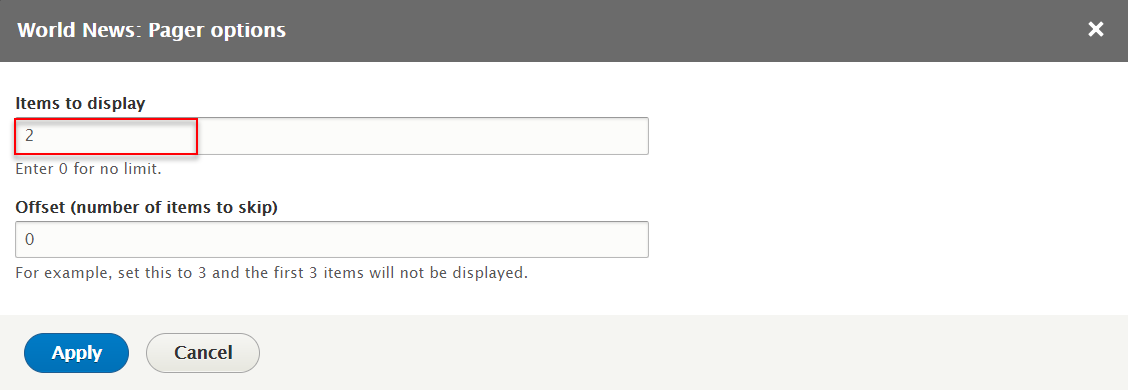
Step 10: At PAGER > Use pager area, click Display a specified number of items to change options this field

Step 11: At PAGER > Use pager area, click 1 items to change options this field
Step 12: At OTHER > Machine Name area, change machine name block_9

Step 13: At OTHER > Css class area, change Css class block-article-health
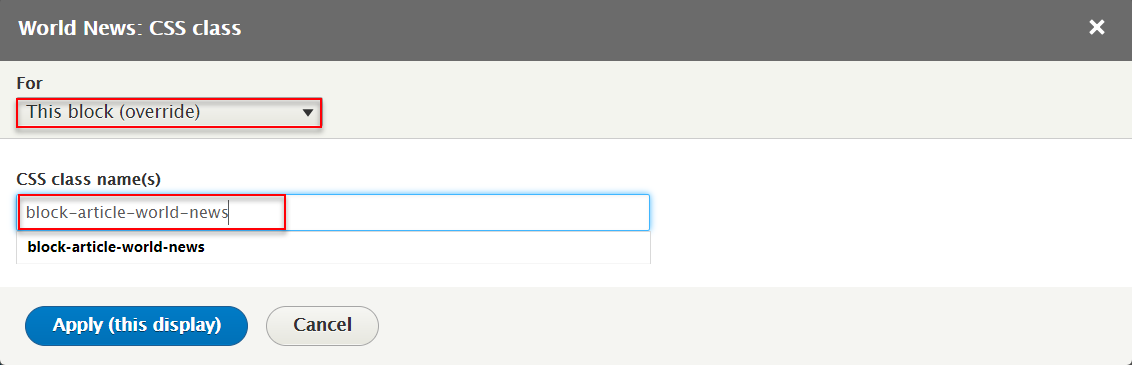
Step 14: Click Save button to save view
2. Configure Sharethis
Step 1: Navigate to Configuration > Web services > Sharethis, find Choose Your Services. area

Step 2: Click the arrows to move services at Selected Service and set following properites:

Step 2: Click Save configuration button.
3. Create Top Views block
Step 1: Navigate to Structure > View, click Add view, then create Top Views view with following settings:
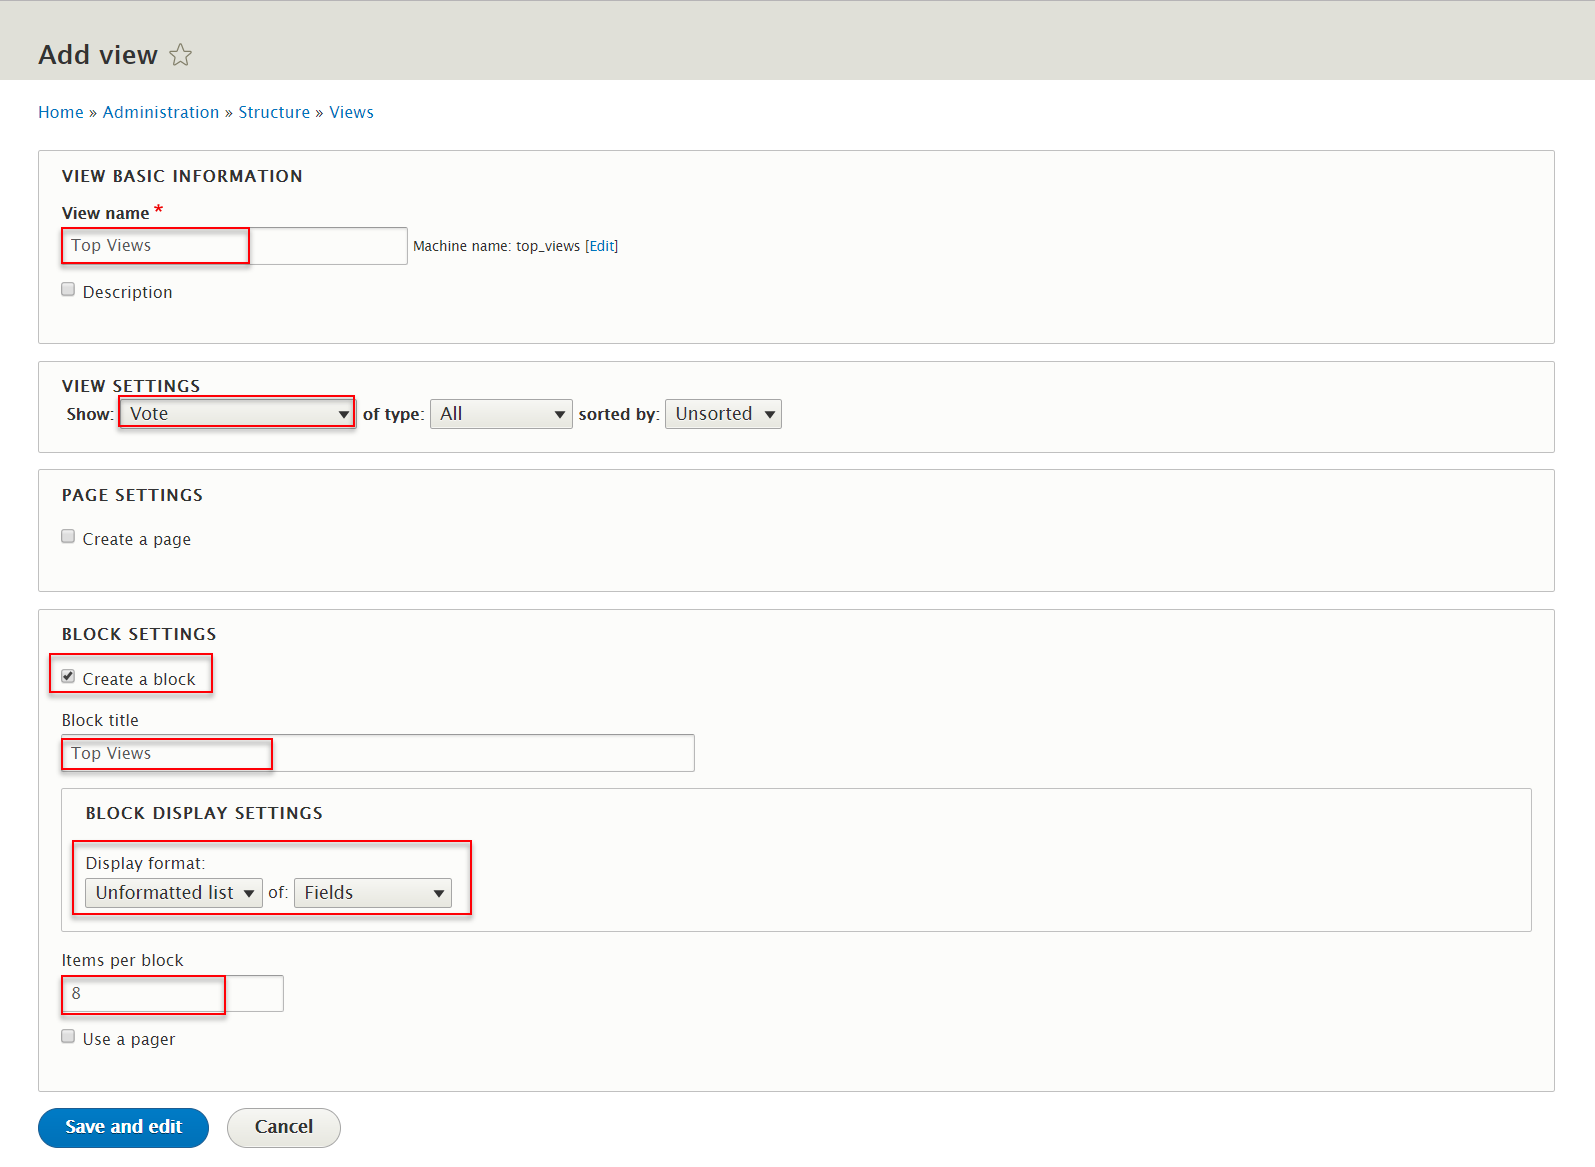
Step 2: Click Save and edit button. Next to steps below to set properties for following fields:
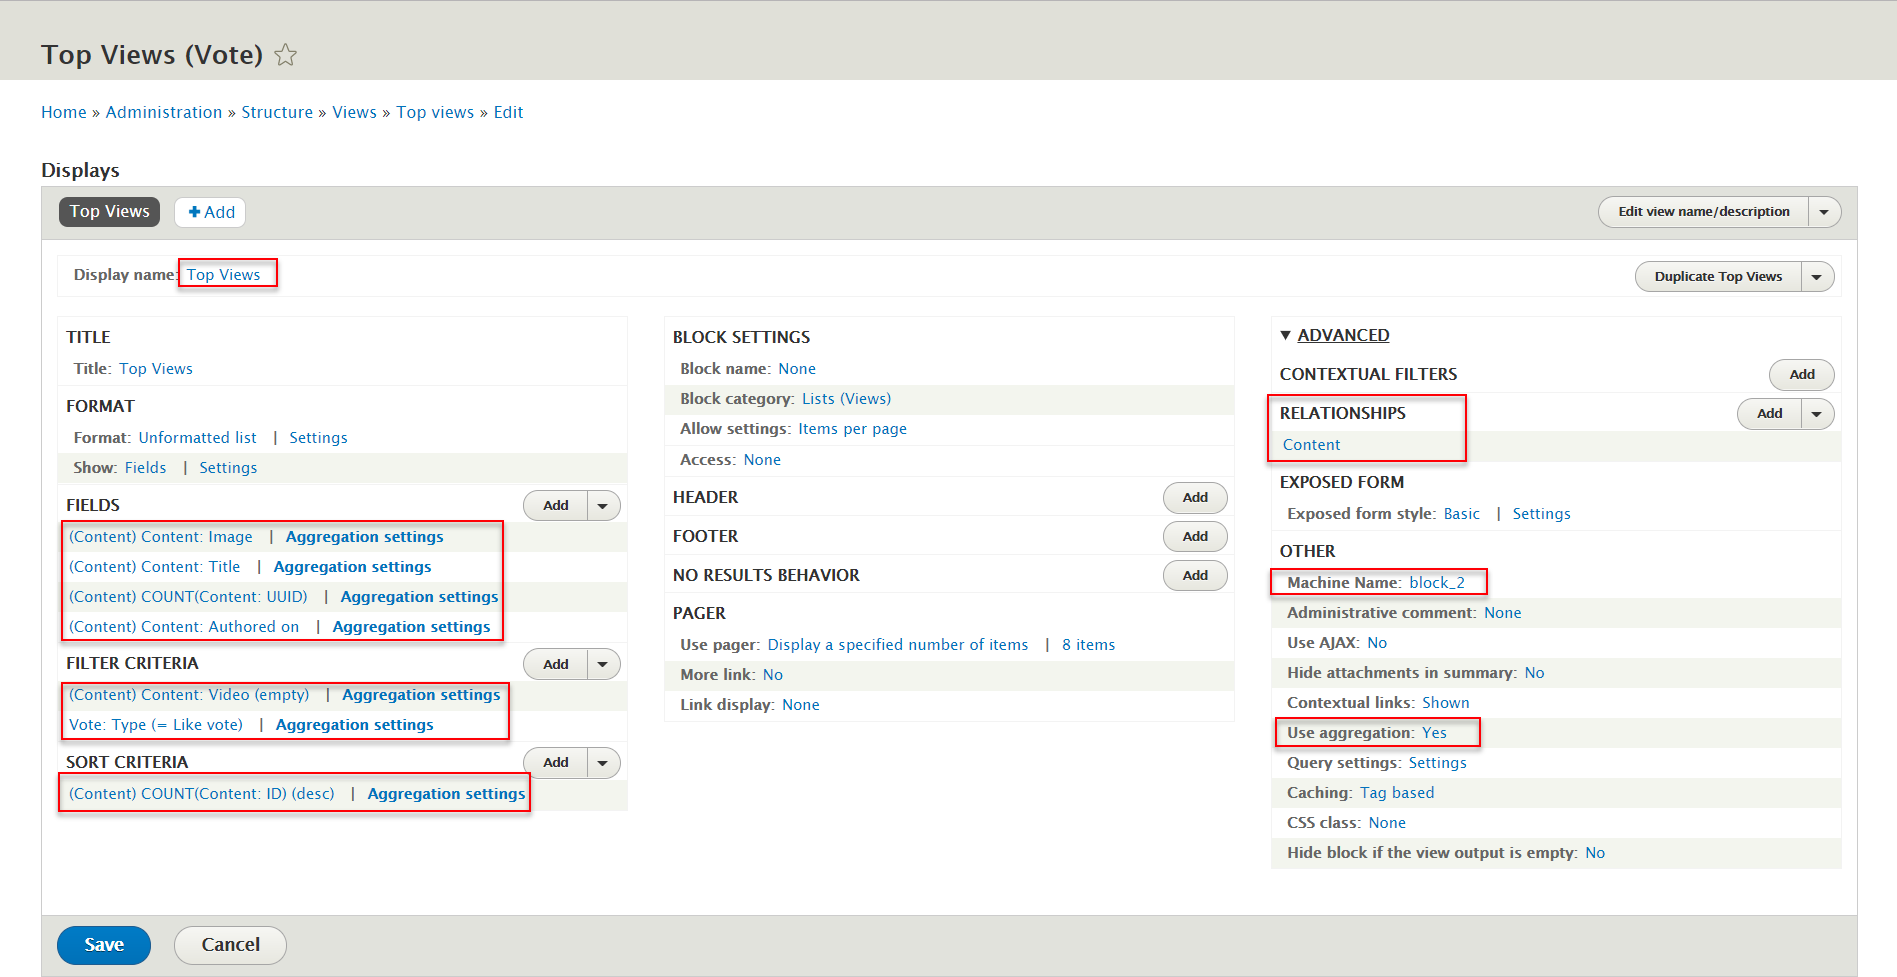
Step 3: At Display name area, change name Top Views

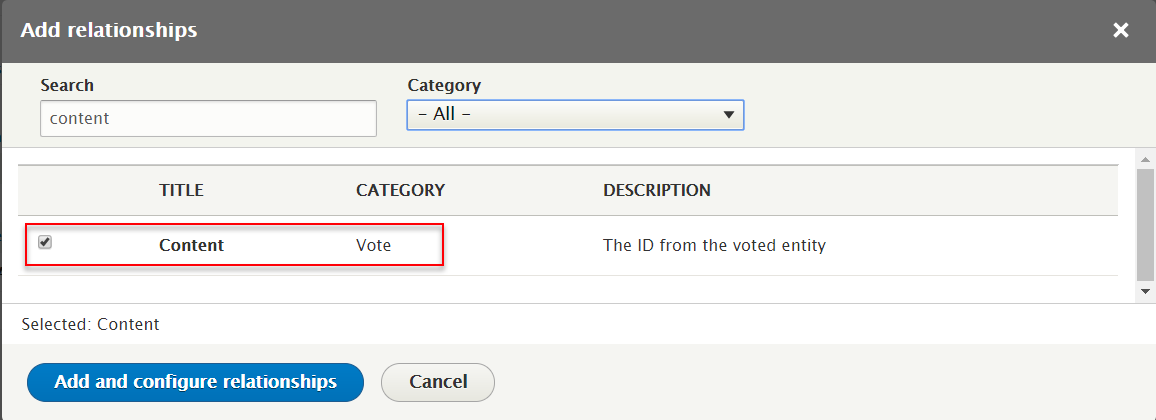
Step 4: At RELATIONSHIPS area, click Add button to add fields: Content.
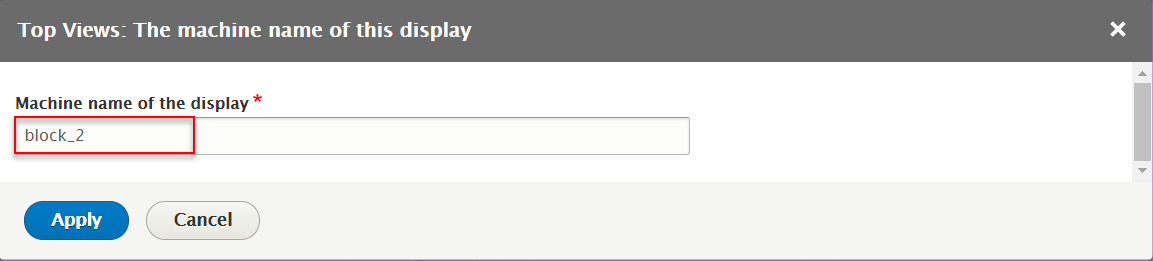
Step 5: At OTHER > Machine Name area, change configure block_2 .
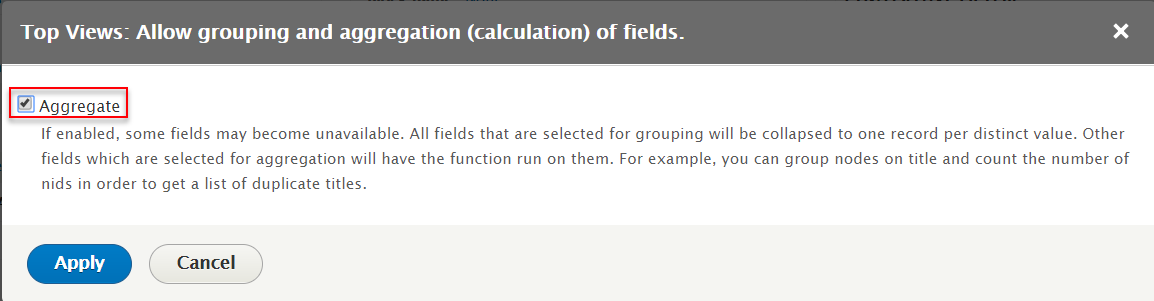
Step 6: At OTHER > Use aggregation area, change configure Yes .
Step 7: At FIELDS area, click Add button to add fields: Content: Image. Set properties for Content: Image
Step 8: At FIELDS area, click Add button to add fields: Content: Title. Set properties for Content: Body
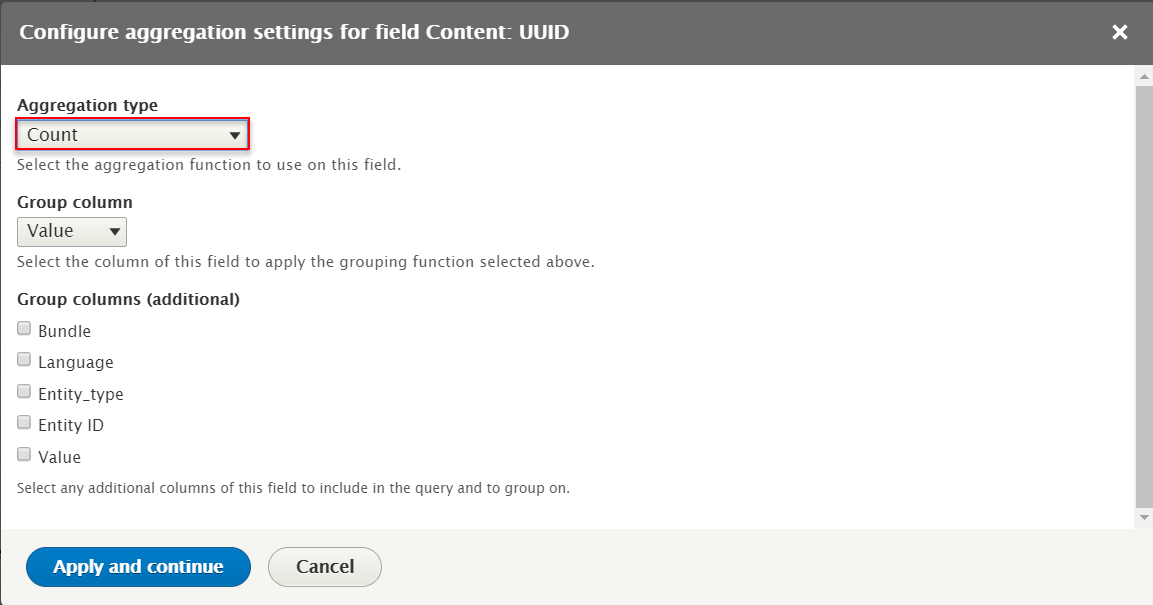
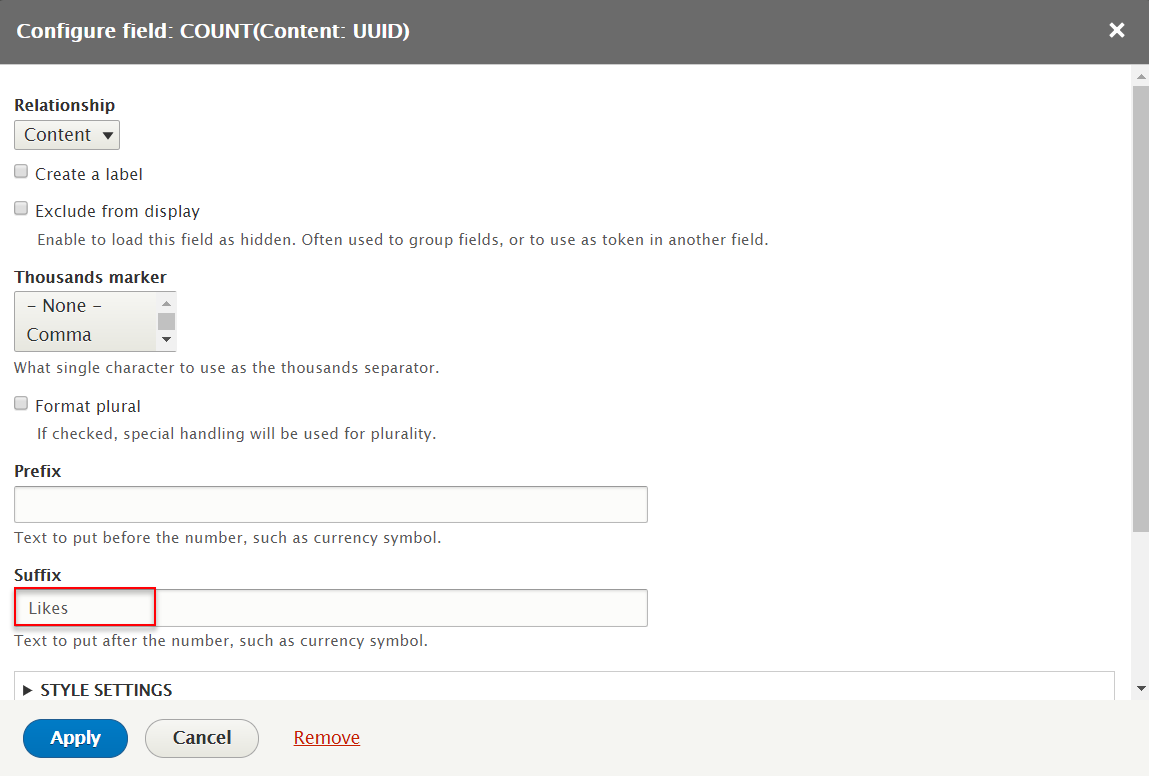
Step 9: At FIELDS area, click Add button to add fields: COUNT(Content: UUID). Set properties for COUNT(Content: UUID)
Step 10: At FIELDS area, click Add button to add fields: Content: Authored on. Set properties for Content: Authored on
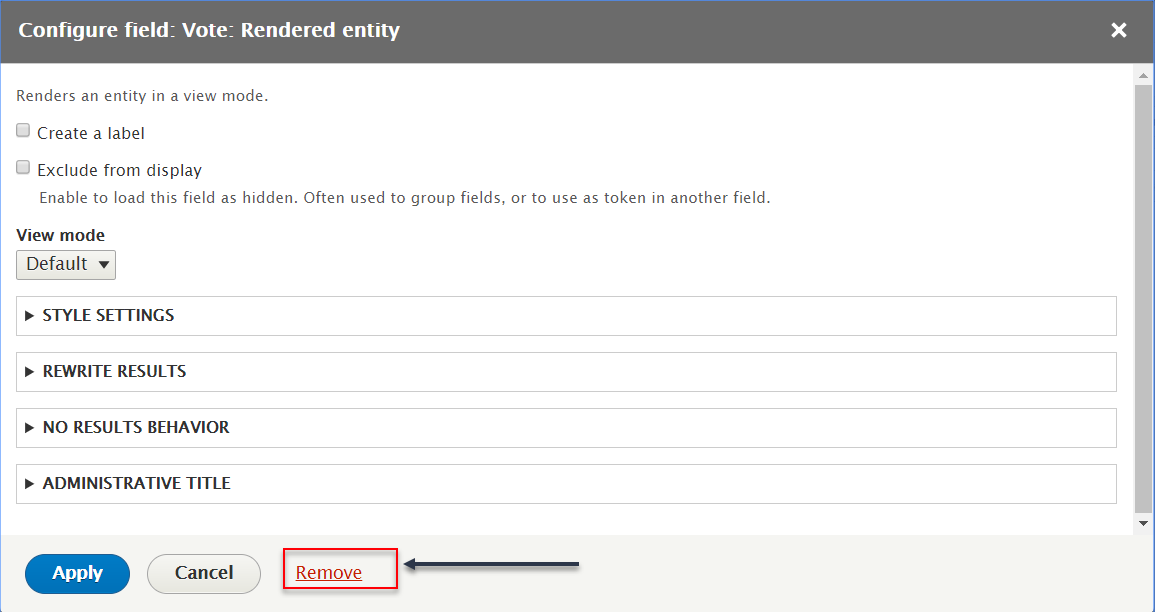
Step 11: At FIELDS area, click Vote: Rendered entity to remove Content: Authored on field
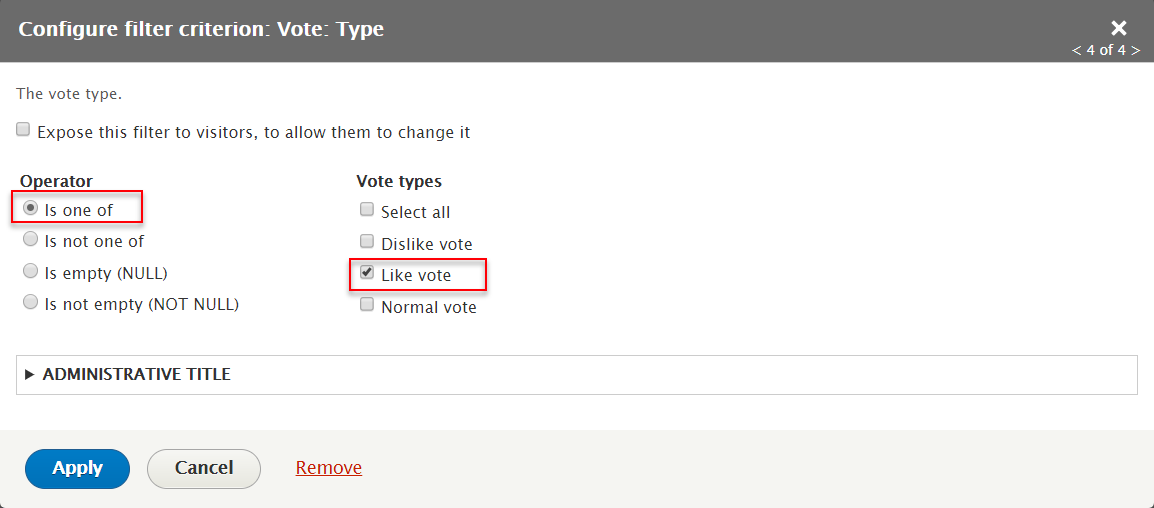
Step 12: At FILTER CRITERIA area, click Add button to add fields: Vote: Type. Set properties for Vote: Type
Step 13: At FILTER CRITERIA area, click Add button to add fields: Content: Video. Set properties for Content: Video

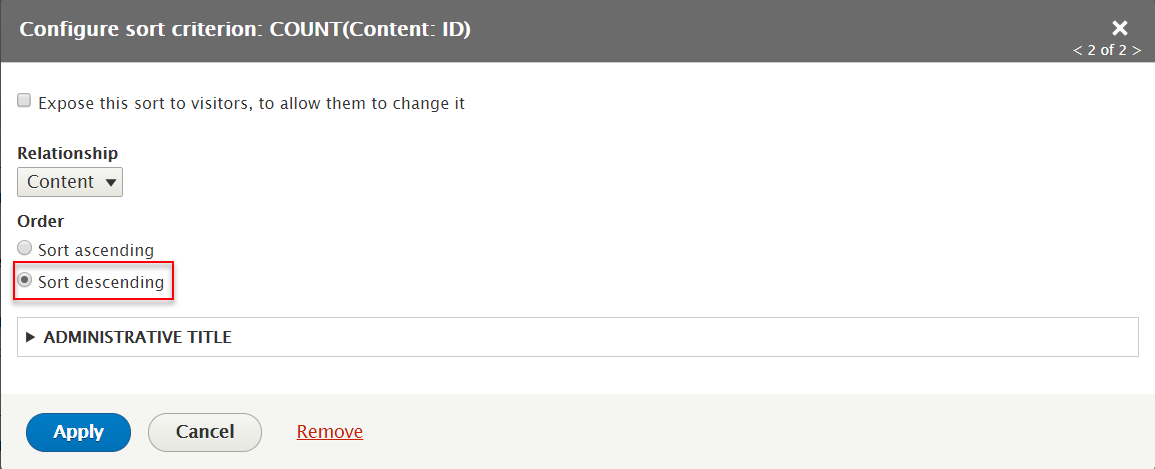
Step 14: At SORT CRITERIA area, click Add button to add fields: Content: ID. Set properties for Content: ID

Step 15: Click Save button to save view
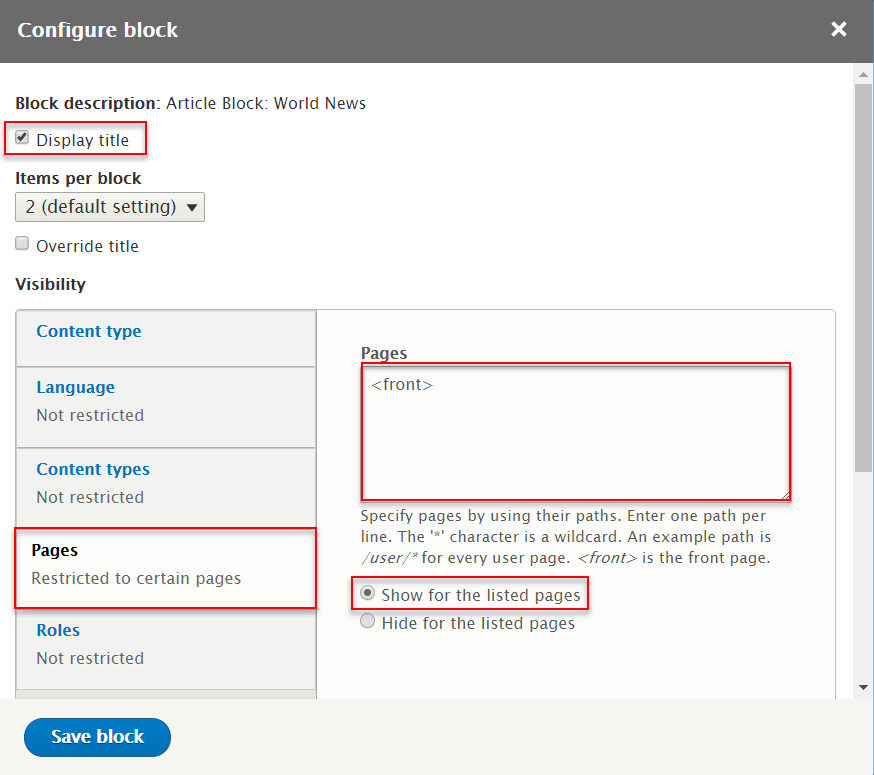
4. Configure : World News block
Step 1: Navigate to Structure > Block layout
Step 2: Find Content click Place block button
Step 3: Find Article Block: World News Lists (Views) click Place block button and set following properites:
Step 4: Click Save block button.
Step 5: Find Content click Place block button
Step 6: Find Top Views: Top Views Lists (Views) click Place block button and set following properites:
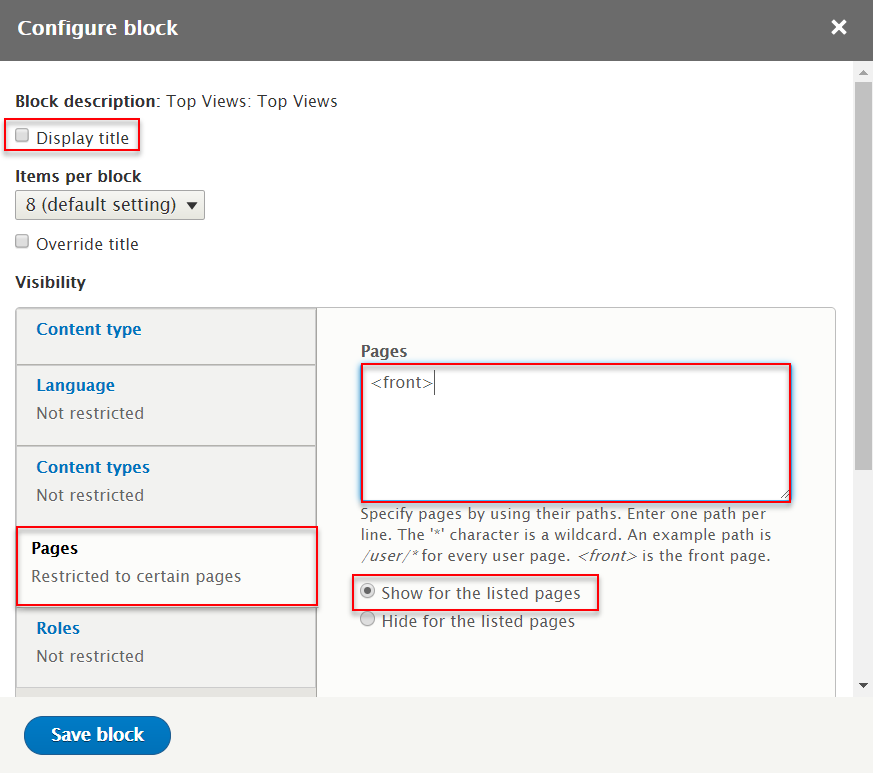
Step 7: Click Save block button.
Don't Miss block
Front end Display
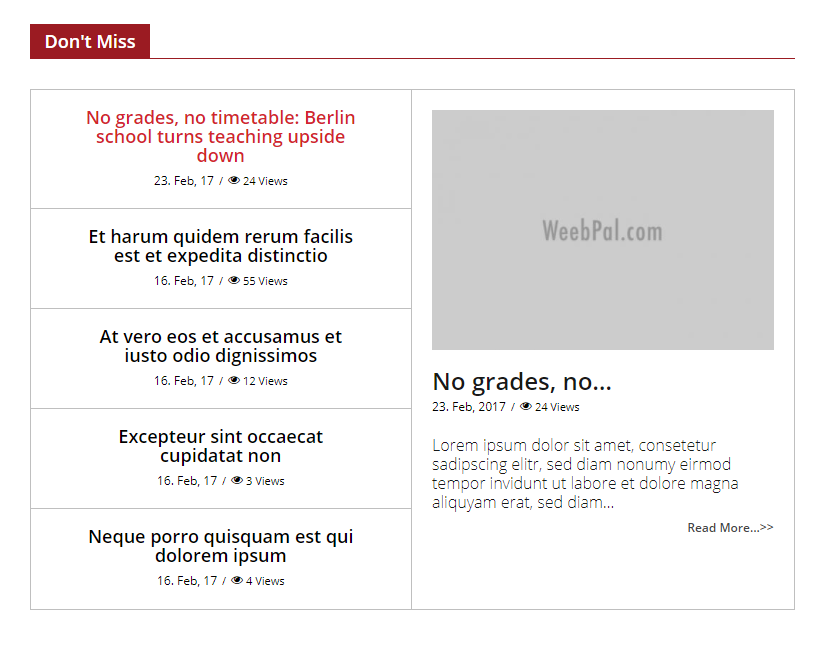
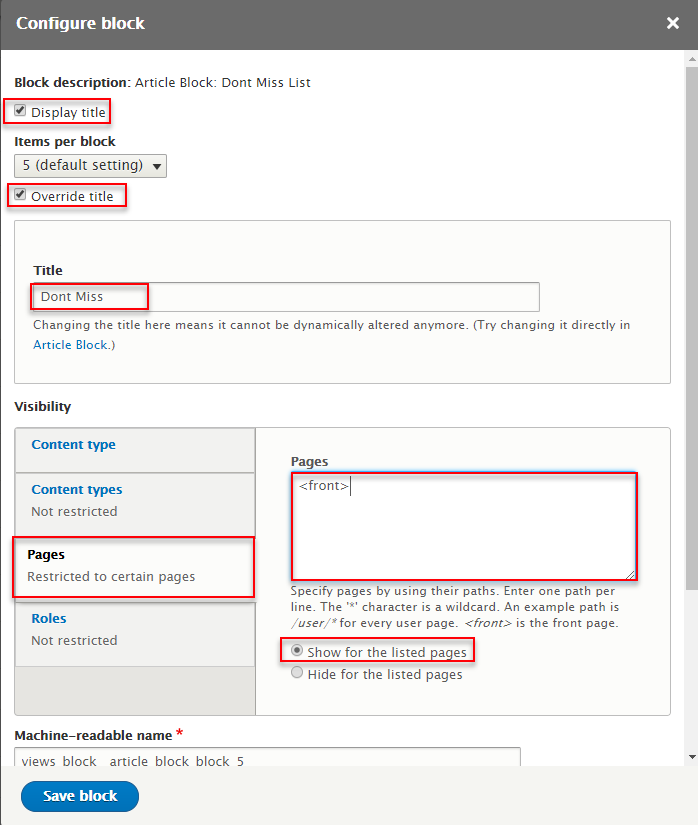
1. Create : Dont Miss List block
Step 1: Navigate to Structure > Views, find Article Block views and click Edit link
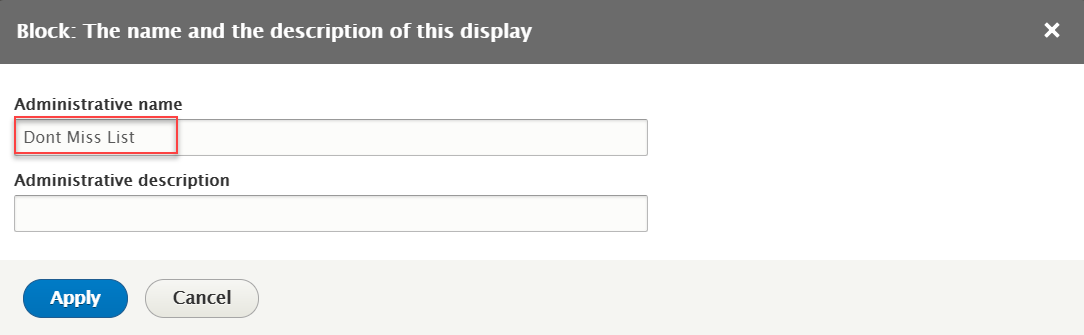
Step 2: Click Add link to create Dont Miss List view and set following properites:
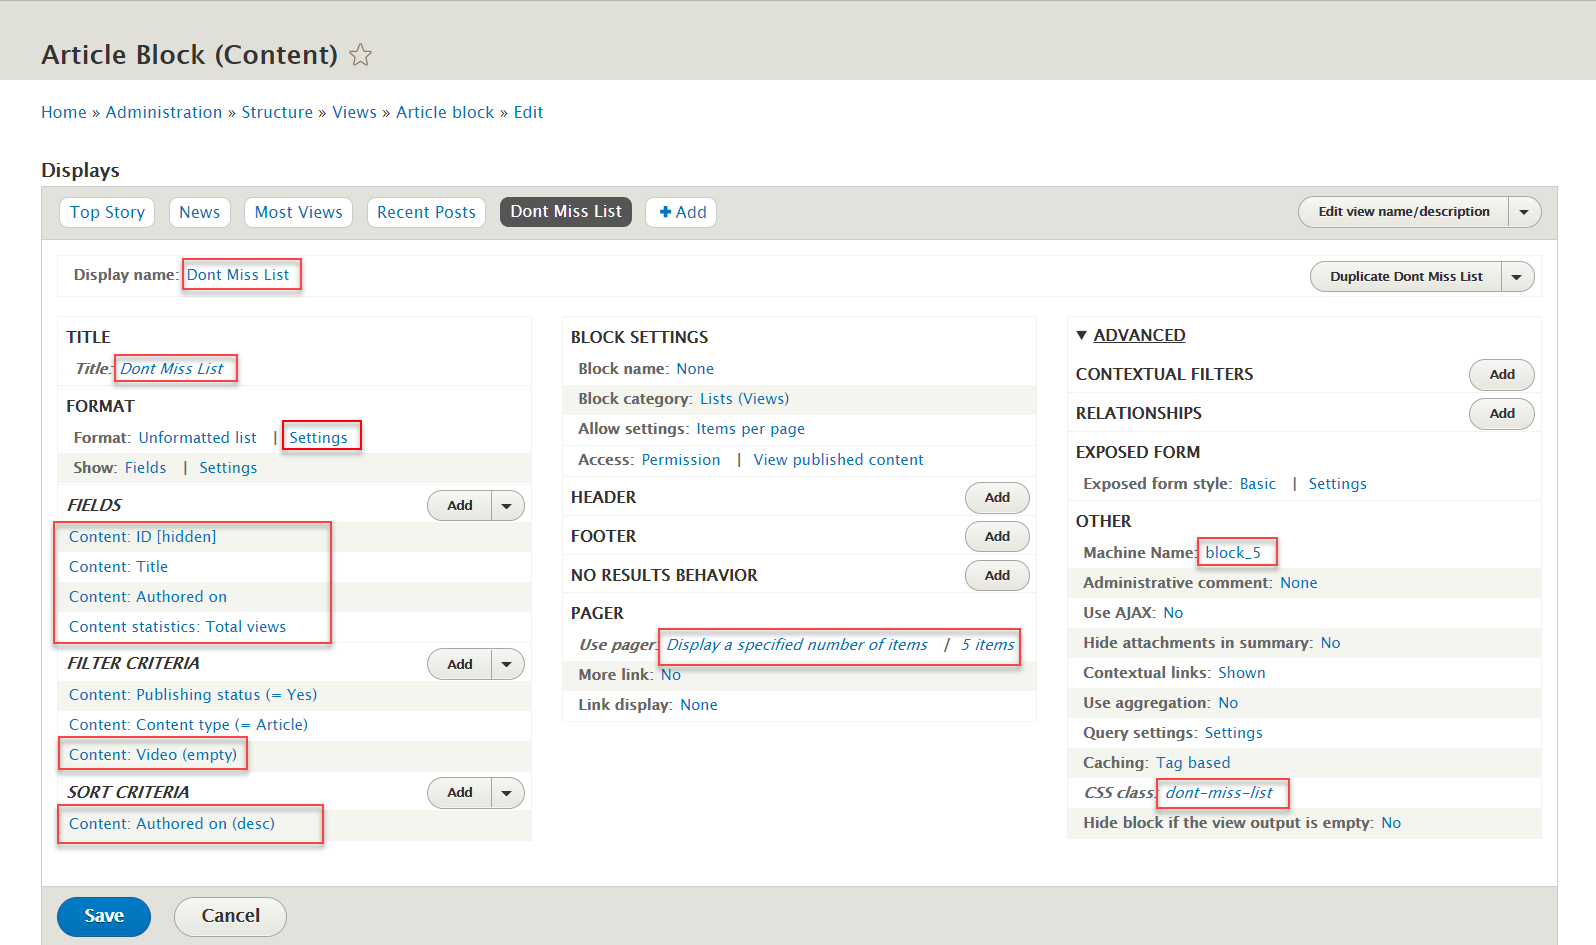
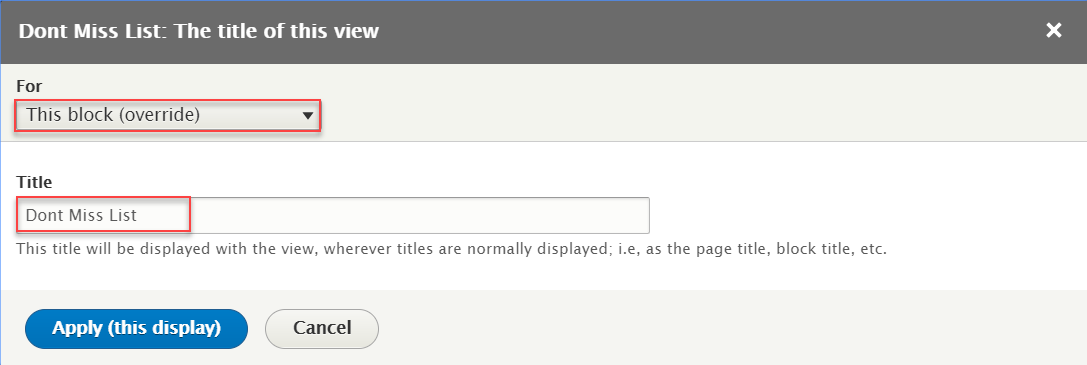
Step 3: At Display name and Title areas, change name Dont Miss List
Step 4: At FORMAT > Format:Unformatted list area, click Settings button and set properties for Format:Unformatted list
Step 5: At FIELDS area, click Add button to add fields: Content: ID. Set properties for Content: ID
Step 6: At FIELDS area, click Add button to add fields: Content: Authored on. Set properties for Content: Authored on
Step 7: At FIELDS area, click Add button to add fields: Content statistics: Total views. Set properties for Content statistics: Total views
Step 8: At FIELDS area, click Content: Title. Set properties for Content: Title

Step 9: At FIELDS area, click Dropdown of Add and click Rearrange button to rearrange fields
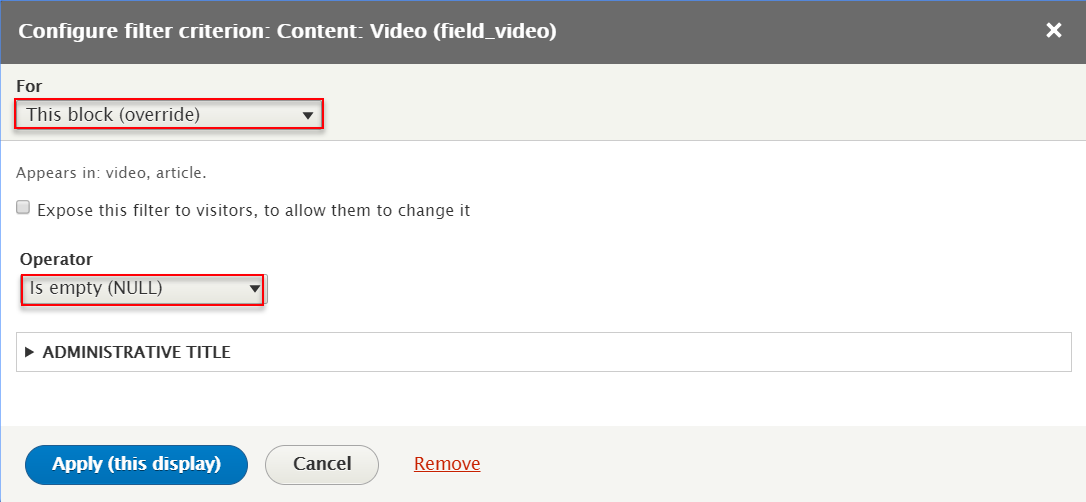
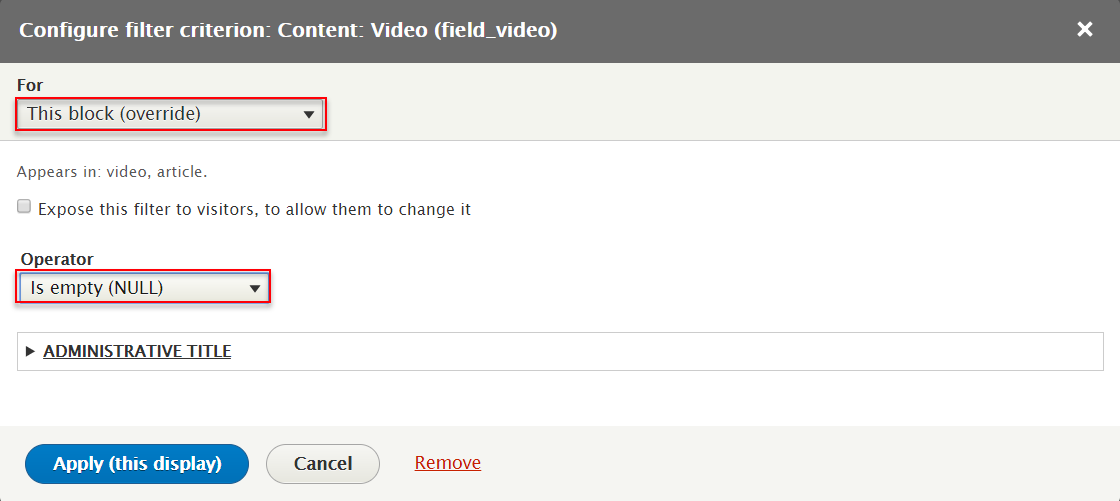
Step 10: At FILTER CRITERIA area, click Add button to add fields: Content: Video. Set properties for Content: Video
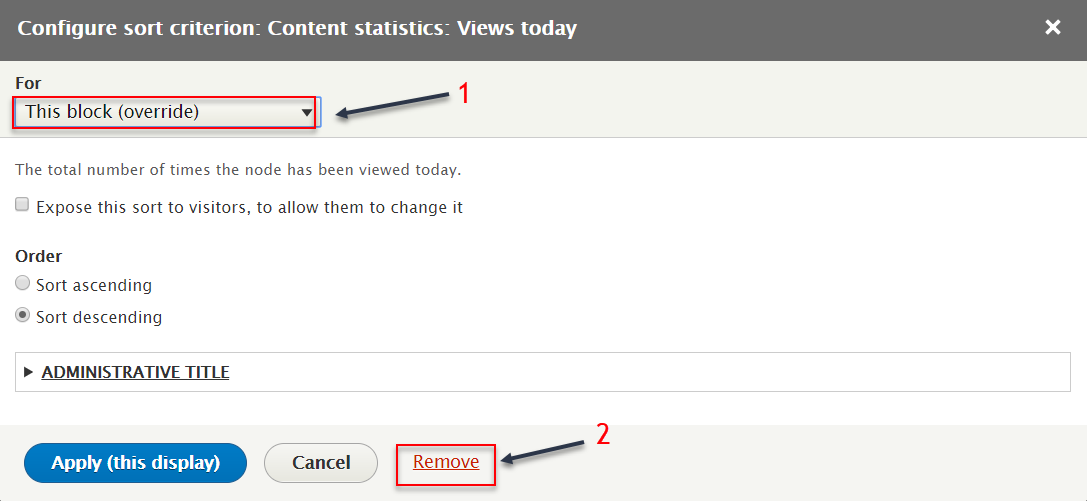
Step 11: At SORT CRITERIA area, click Content statistics: Views today field and follow these steps
Step 12: At Use pager area, click Display a specified number of items | 1 items fields


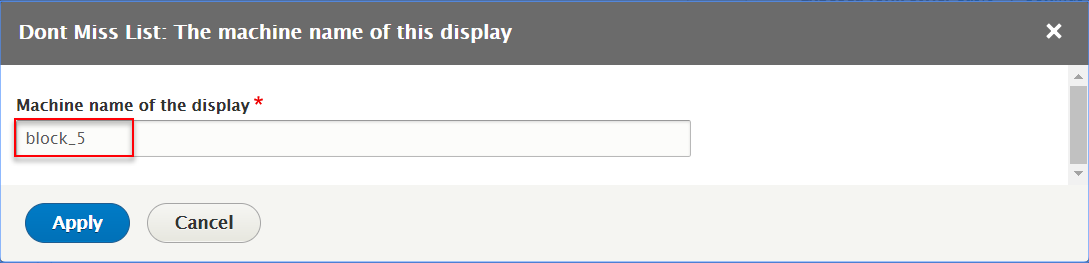
Step 13: At Machine Name area, change name block_5
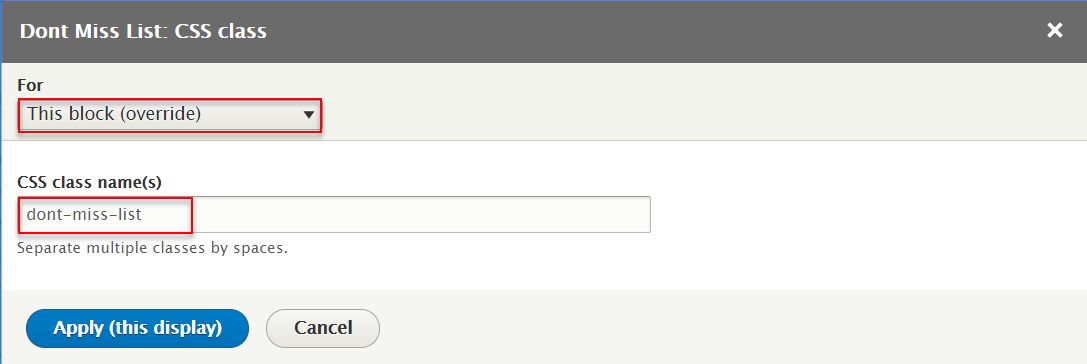
Step 14: At CSS class area, change dont-miss-list
Step 15: Click Save button
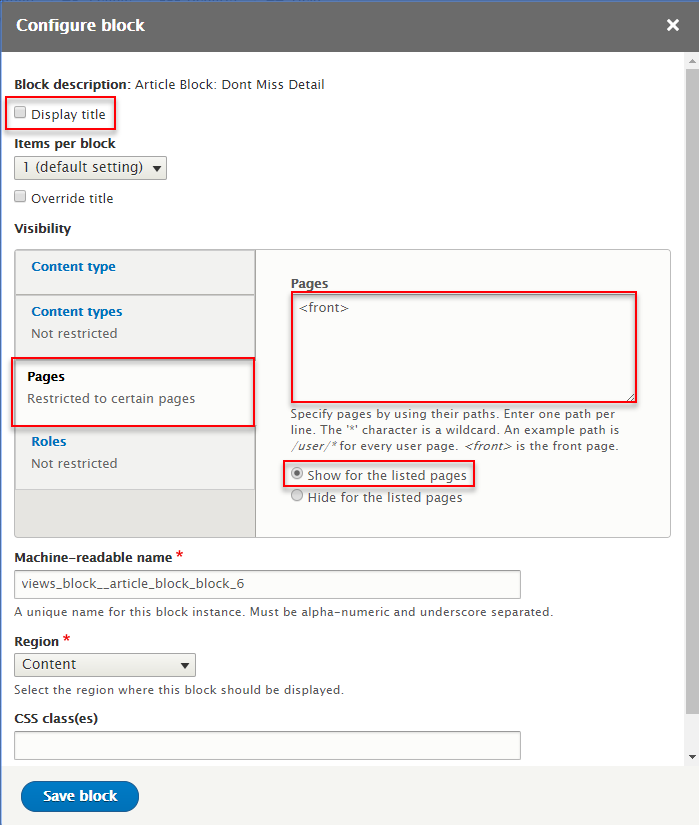
1. Create : Dont Miss Detail block
Step 1: Navigate to Structure > Views, find Article Block views and click Edit link
Step 2: Click Add link to create Dont Miss Detail view and set following properites:
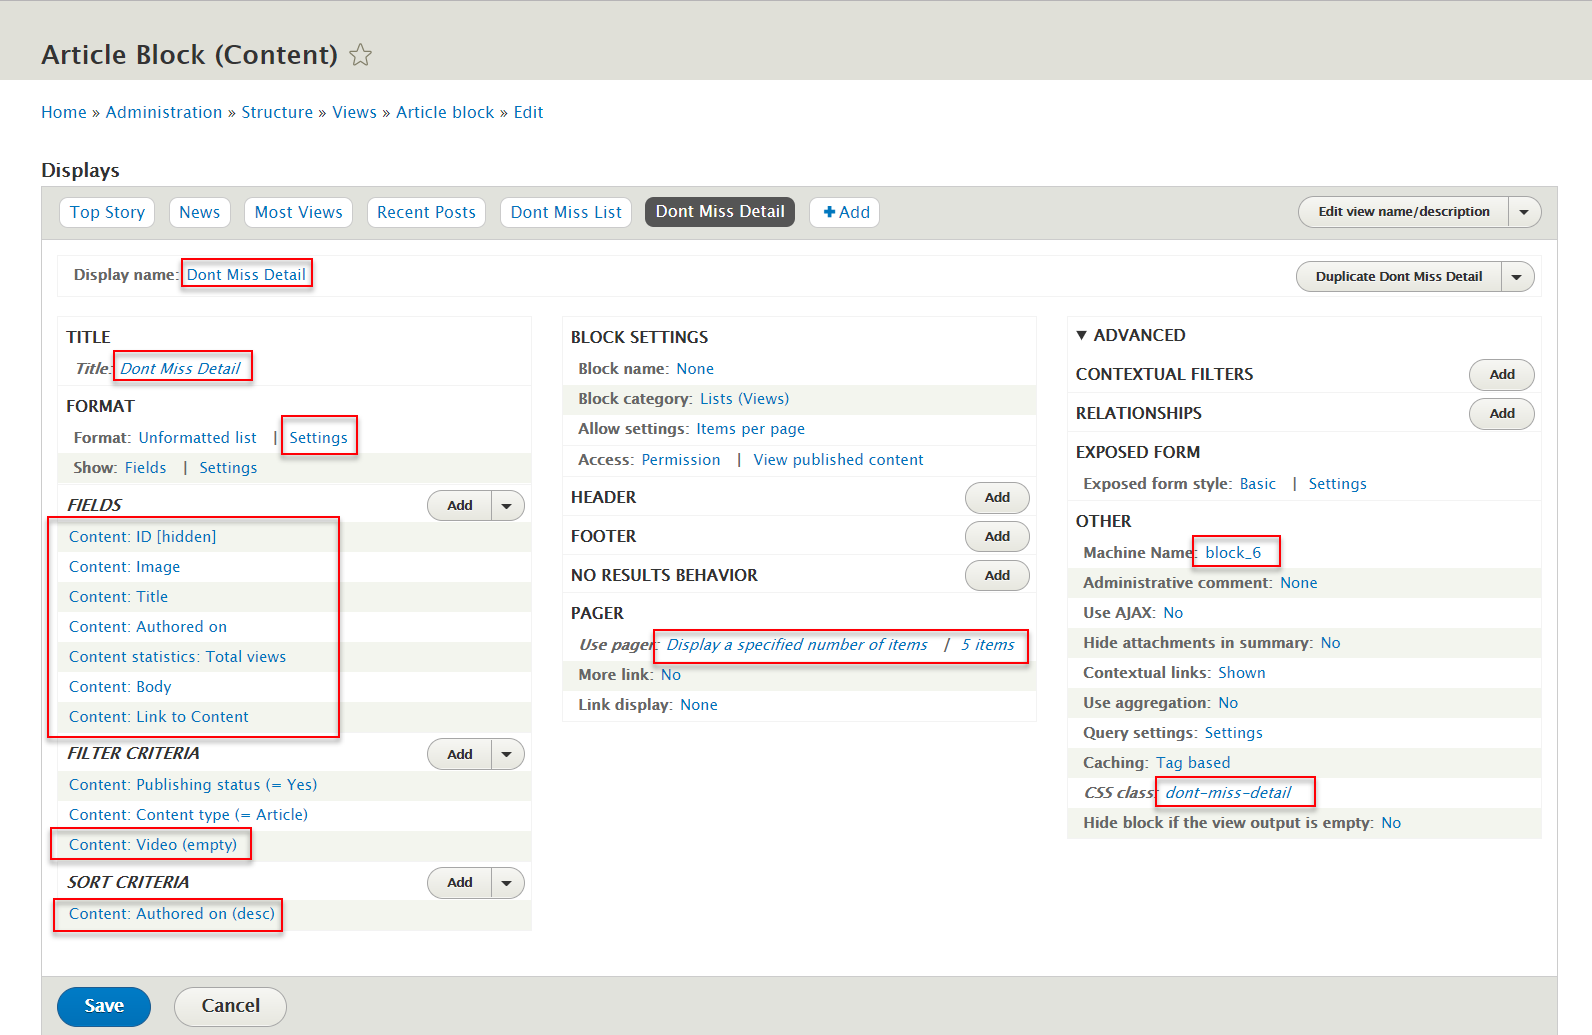
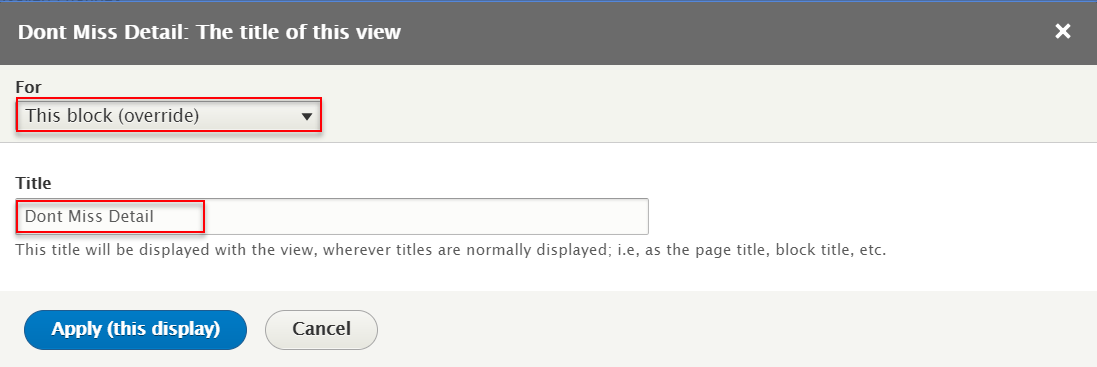
Step 3: At Display name and Title areas, change name Dont Miss List

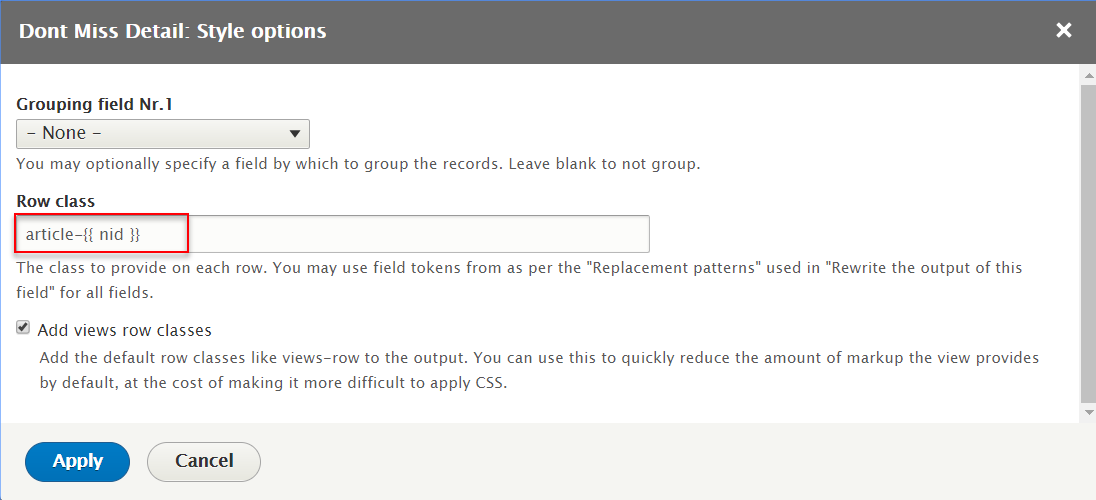
Step 4: At FORMAT > Format:Unformatted list area, click Settings button and set properties for Format:Unformatted list
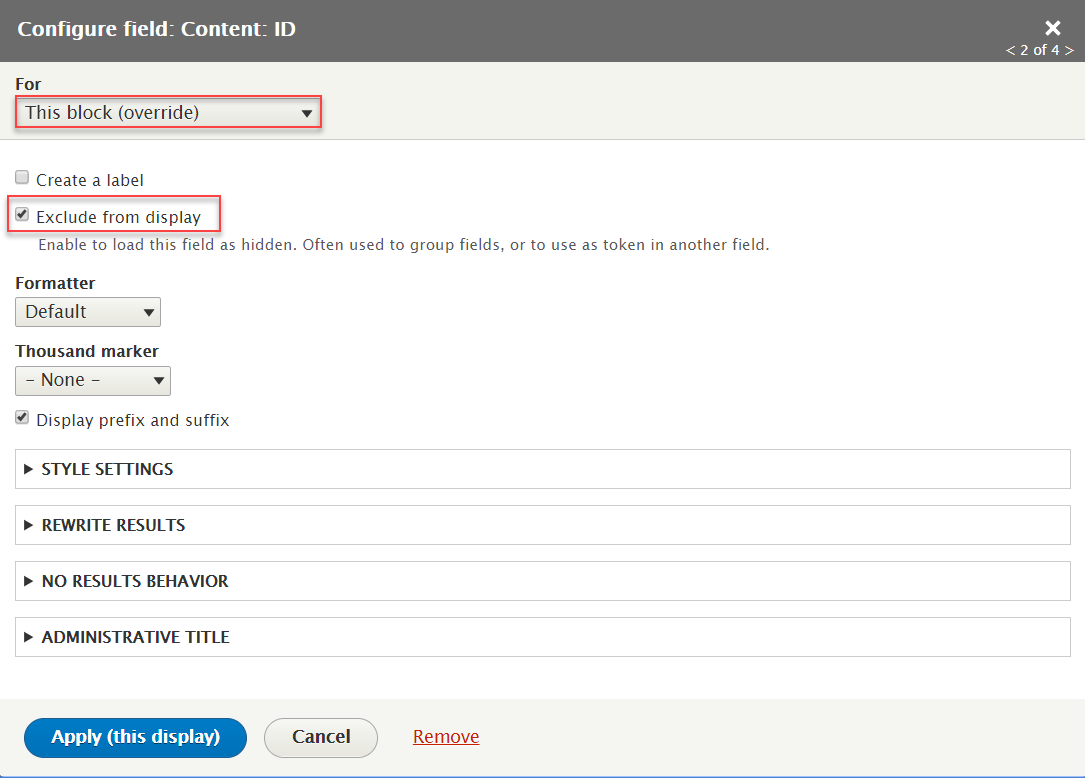
Step 5: At FIELDS area, click Add button to add fields: Content: ID. Set properties for Content: ID

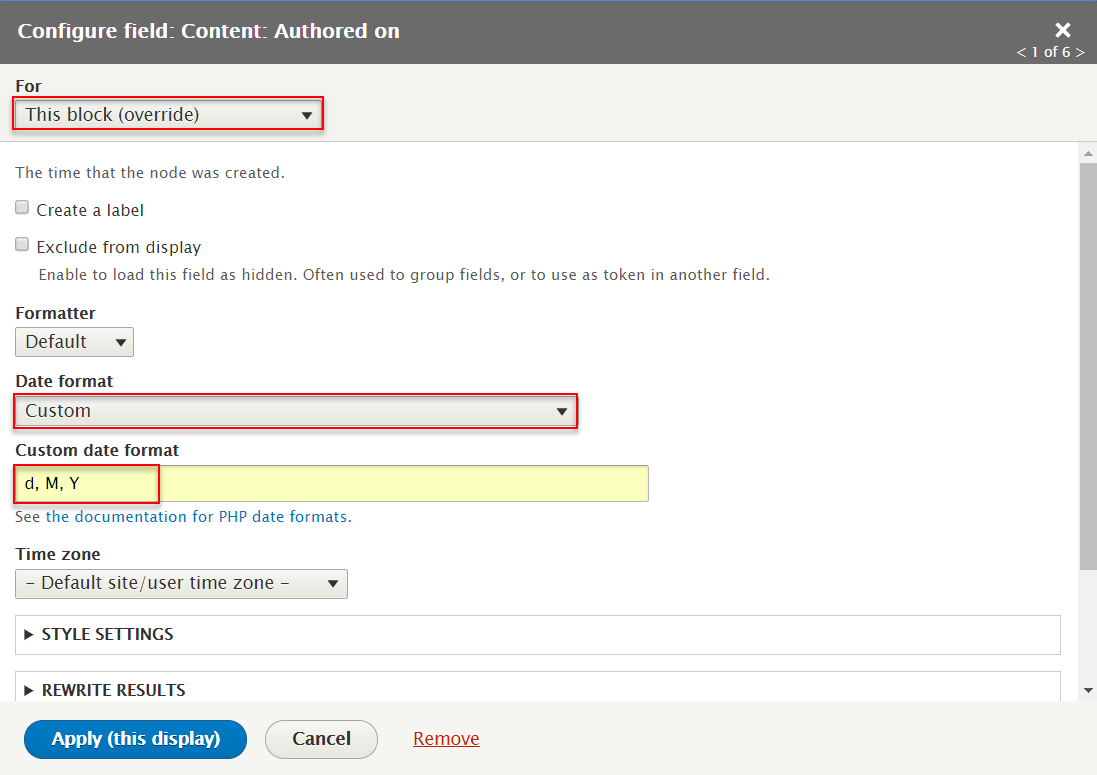
Step 6: At FIELDS area, click Add button to add fields: Content: Authored on. Set properties for Content: Authored on
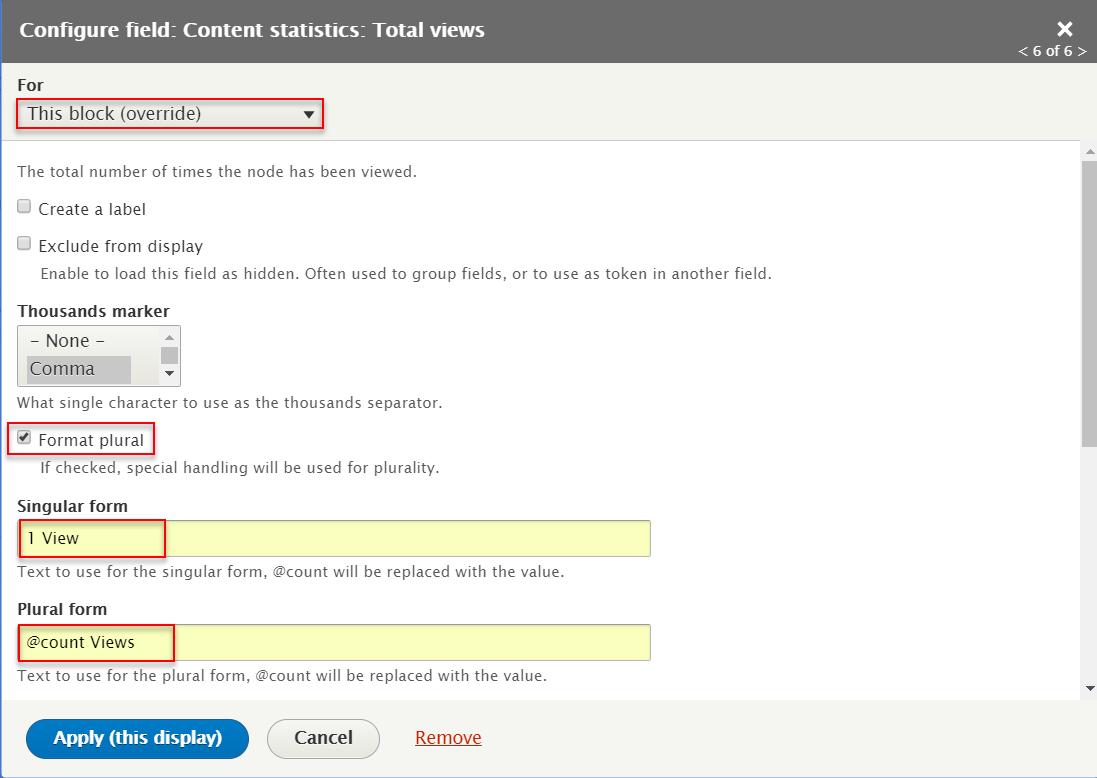
Step 7: At FIELDS area, click Add button to add fields: Content statistics: Total views. Set properties for Content statistics: Total views
Step 8: At FIELDS area, click Add button to add fields: Content: Image. Set properties for Content: Image

Step 9: At FIELDS area, click Add button to add fields: Content: Link to Content. Set properties for Content: Link to Content

Step 10: At FIELDS area, click Add button to add fields: Content: Body. Set properties for Content: Body
Step 11: At FIELDS area, click Content: Title. Set properties for Content: Title
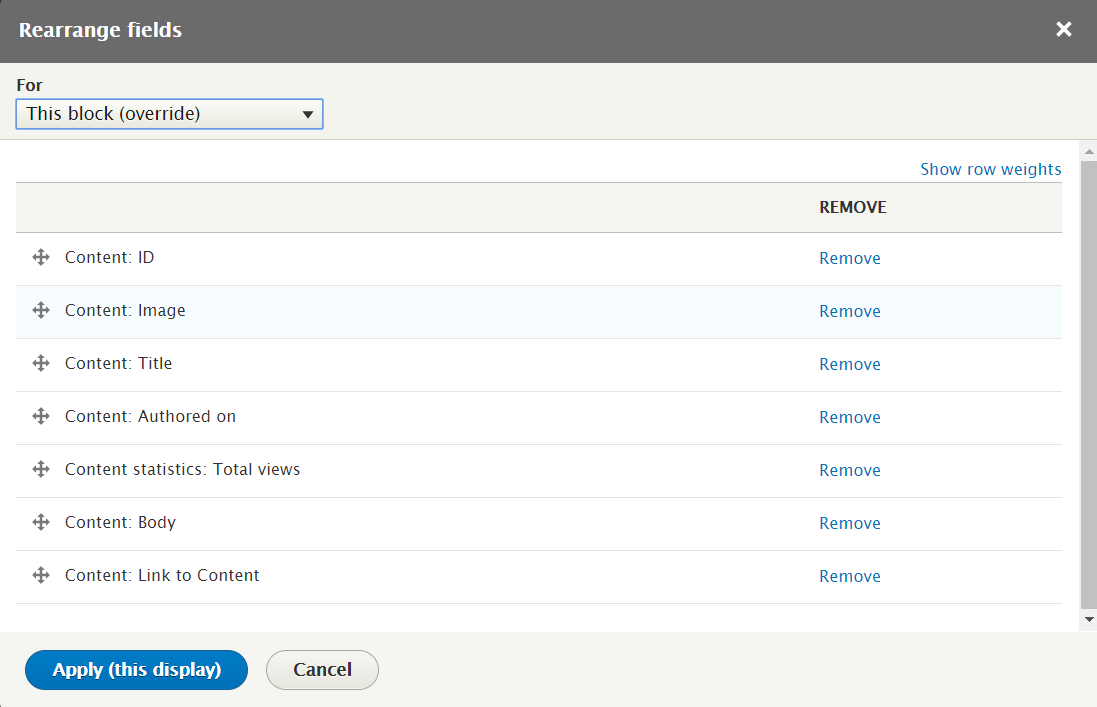
Step 12: At FIELDS area, click Dropdown of Add and click Rearrange button to rearrange fields
Step 13: At FILTER CRITERIA area, click Add button to add fields: Content: Video. Set properties for Content: Video
Step 14: At SORT CRITERIA area, click Content statistics: Views today field and follow these steps
Step 15: At Use pager area, click Display a specified number of items | 1 items fields
Step 16: At Machine Name area, change name block_6

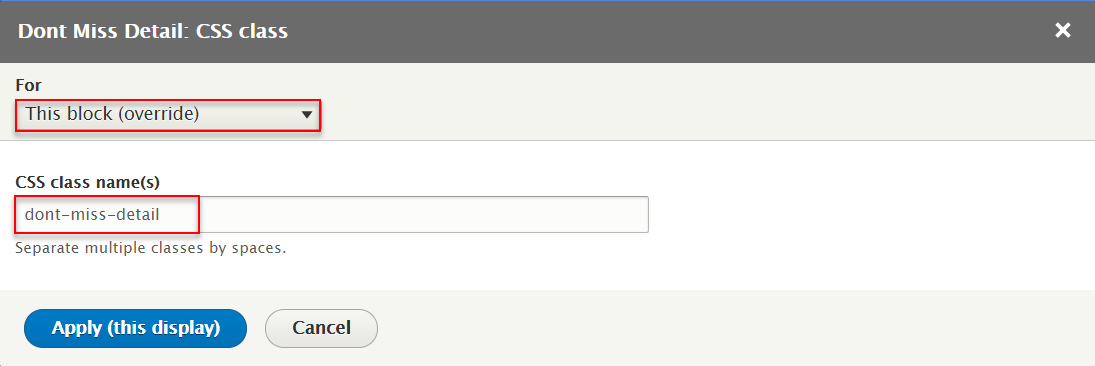
Step 17: At CSS class area, change dont-miss-detail
Step 18: Click Save button
2. Configure : Dont Miss block
Step 1: Navigate to Structure > Block layout
Step 2: Find Content click Place block button
Step 3: Find Article Block: Dont Miss List Lists (Views) click Place block button and set following properites:
Step 4: Click Save block button.
Step 5: Find Content click Place block button
Step 6: Find Article Block: Dont Miss Detail Lists (Views) click Place block button and set following properites:
Step 7: Click Save block button.
- Note: Rearrange Article Block: Dont Miss Detail block under Dont Miss block

Videos block
Front end Display

1. Create : Videos block
Step 1: Navigate to Structure > Views, find Article Block views and click Edit link
Step 2: Click Add link to create Video view and set following properites:
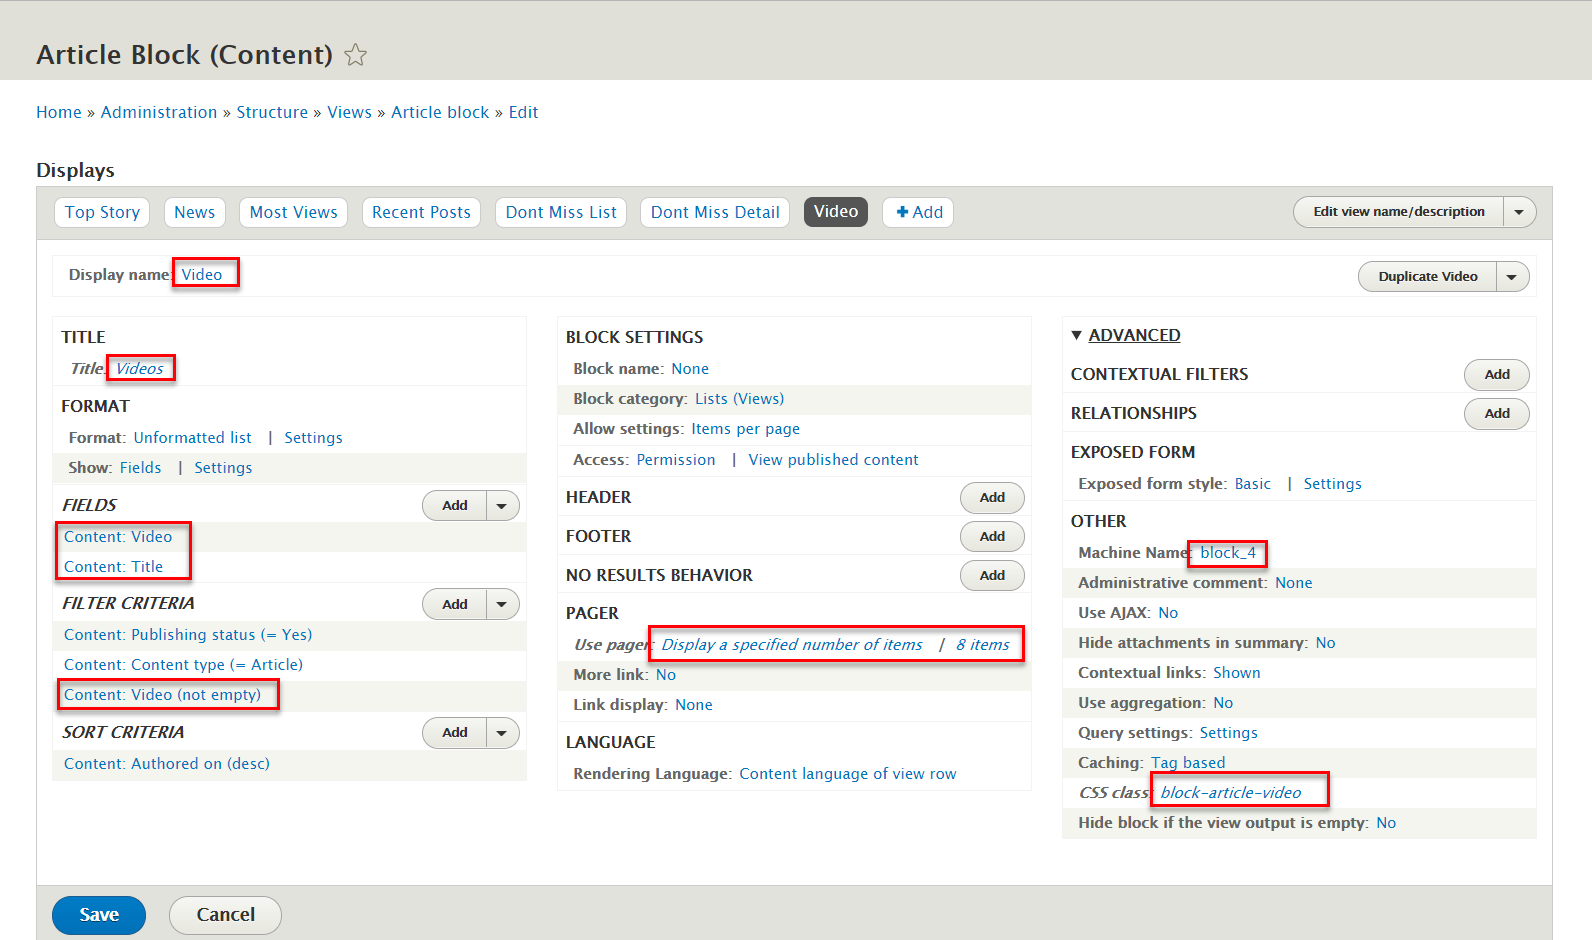
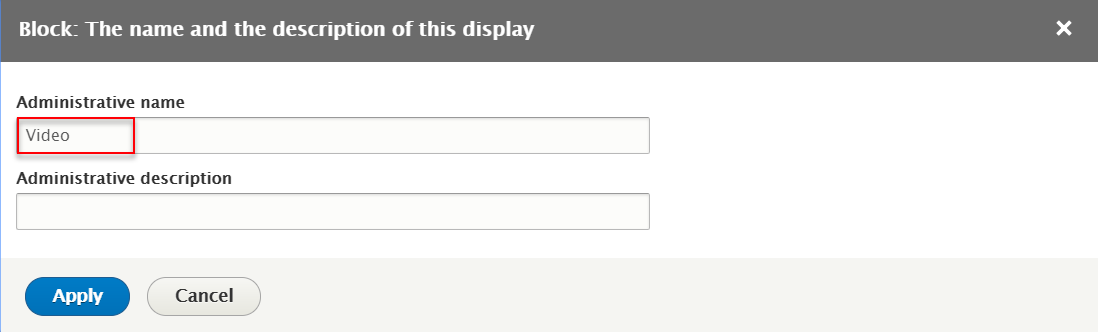
Step 3: At Display name and Title areas, change name Video
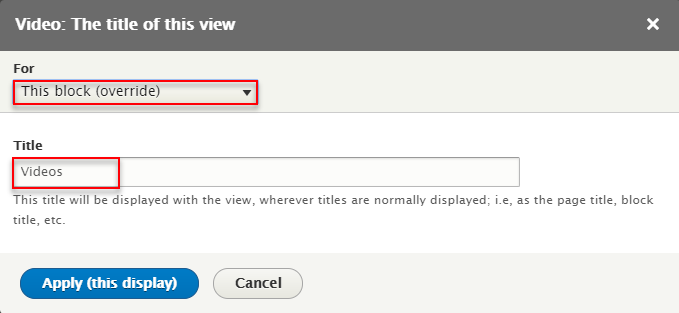
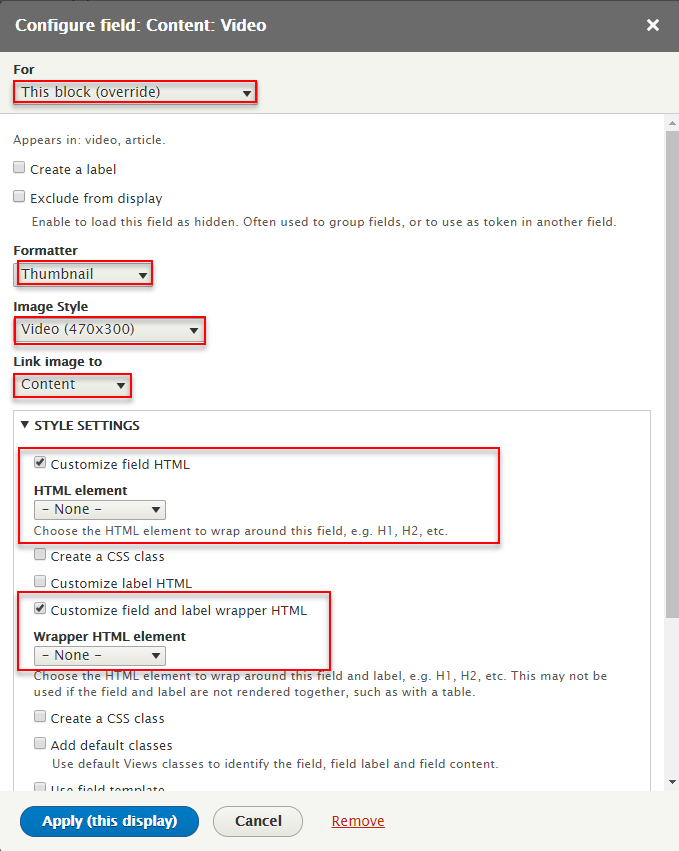
Step 8: At FIELDS area, click Add button to add fields: Content: Video. Set properties for Content: Video
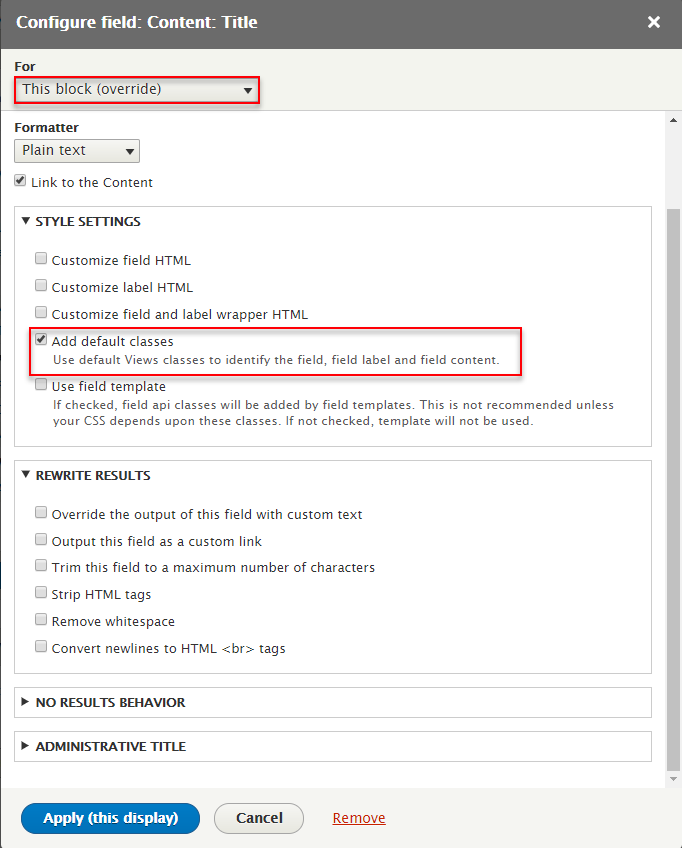
Step 10: At FIELDS area, click Content: Title. Set properties for Content: Title
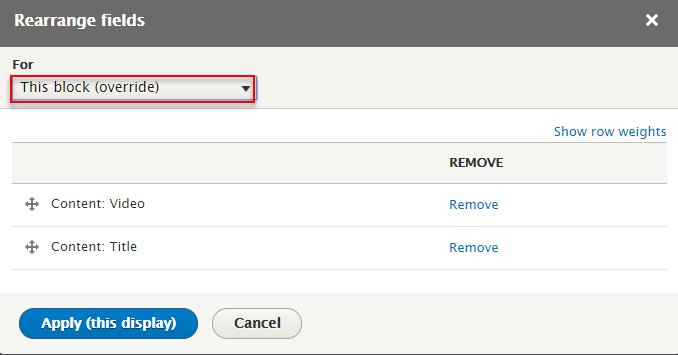
Step 11: At FIELDS area, click Dropdown of Add and click Rearrange button to rearrange fields
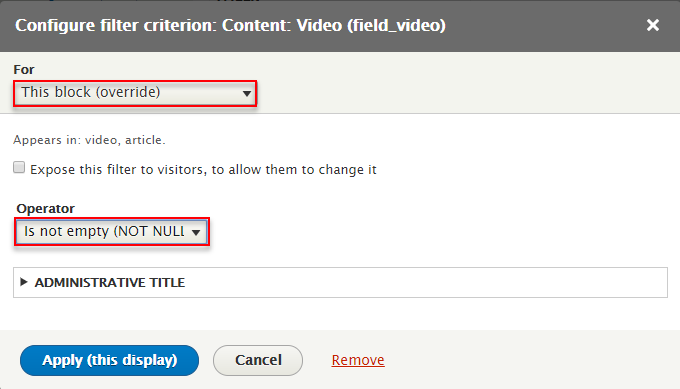
Step 12: At FILTER CRITERIA area, click Add button to add fields: Content: Video. Set properties for Content: Video
Step 13: At SORT CRITERIA area, click Content statistics: Views today field and follow these steps
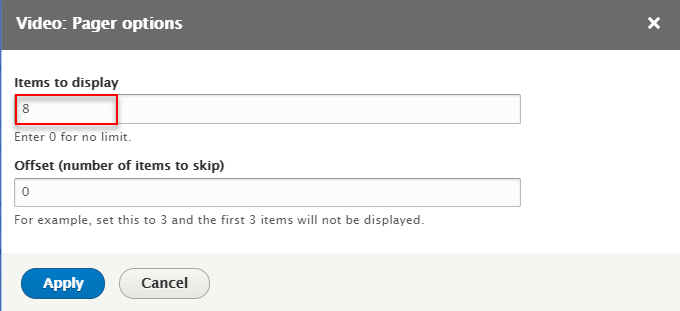
Step 14: At Use pager area, click Display a specified number of items | 1 items fields
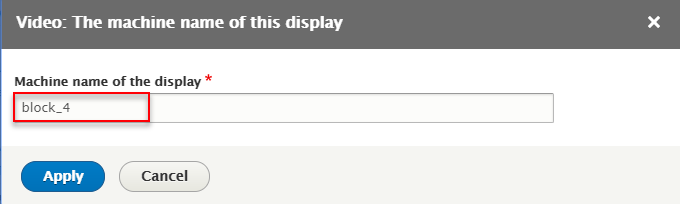
Step 15: At Machine Name area, change name block_4
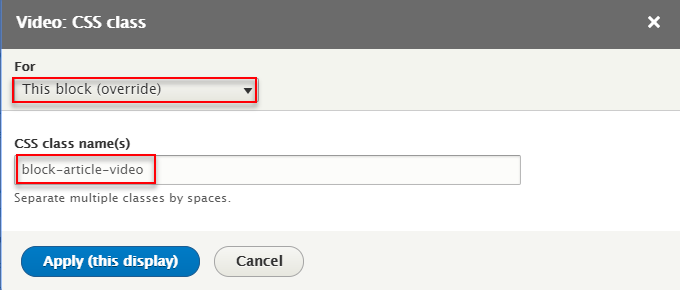
Step 16: At CSS class area, change dont-miss-detail
Step 17: Click Save button
2. Configure : Video block
Step 1: Navigate to Structure > Block layout
Step 2: Find Panel third click Place block button
Step 3: Find Article Block: Video Lists (Views) click Place block button and set following properites:
Contact Us block
Front end Display

1. Create : Contact Us block
Step 1: Navigate to Structure > Block layout > Custom block library, click Add custom block, then create Contact Us block with following settings:
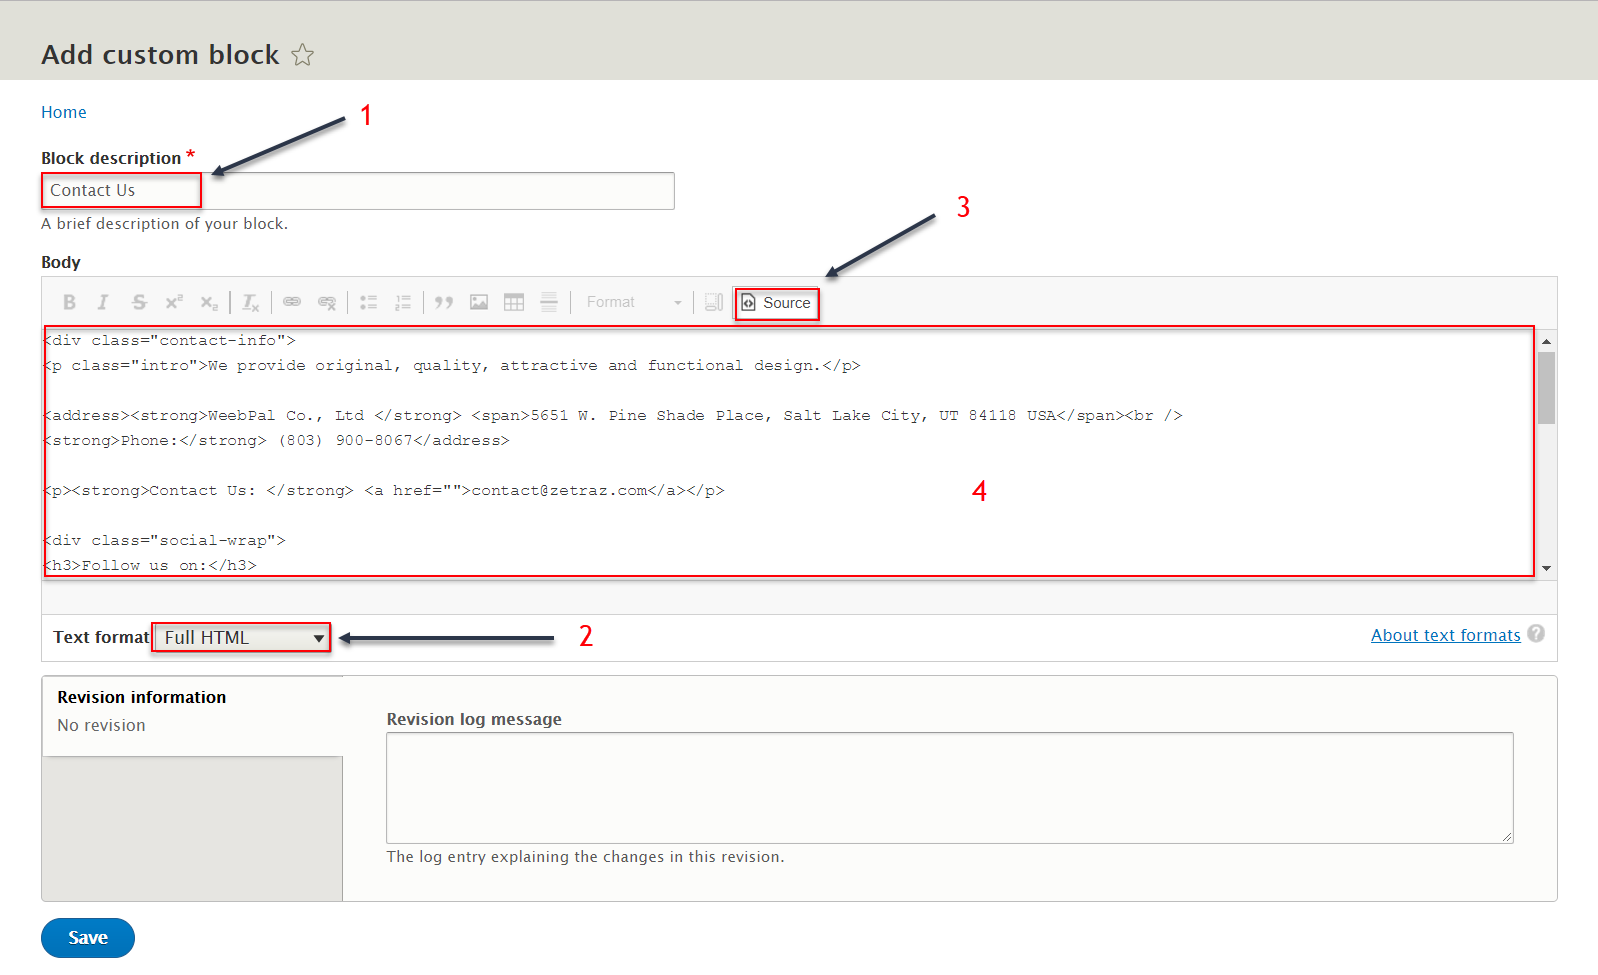
Refer to following HTML code:
We provide original, quality, attractive and functional design.
WeebPal Co., Ltd 5651 W. Pine Shade Place, Salt Lake City, UT 84118 USA
Phone: (803) 900-8067
Contact Us: [email protected]
Step 2: Click Save button.
2. Configure : Contact Us block
Step 1: Navigate to Structure > Block layout
Step 2: Find Footer first column click Place block button
Step 3: Find Contact Us (Custom) click Place block button and set following properites:
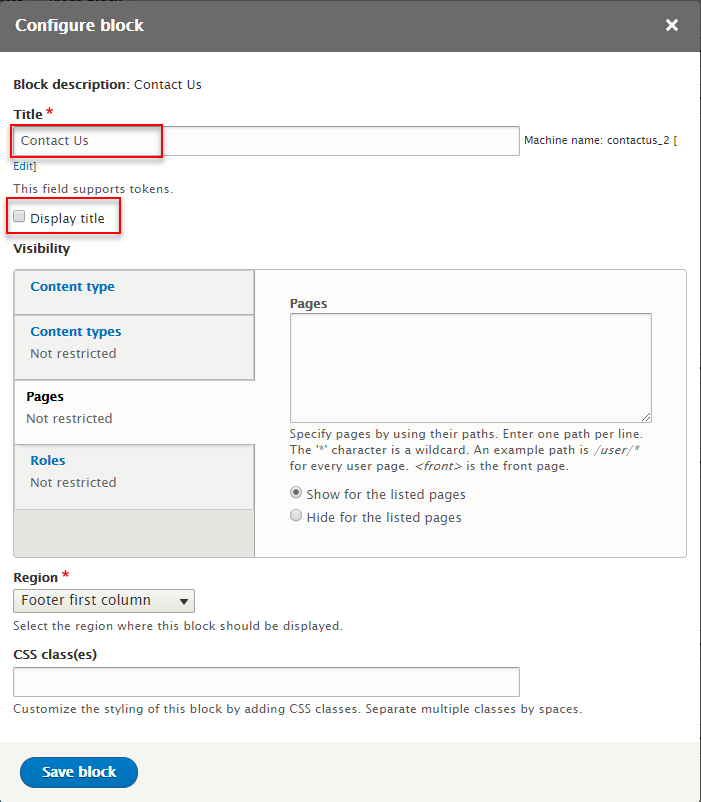
Step 4: Click Save block button.
Recent Post block
Front end Display
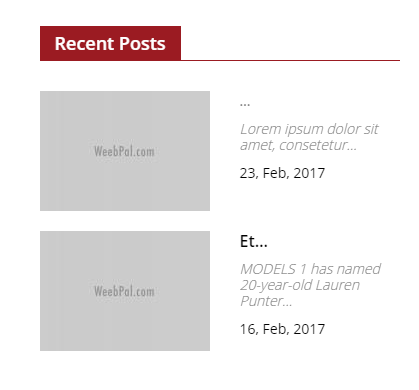
1. Create : Recent Post block
Step 1: Navigate to Structure > Views, find Article Block views and click Edit link
Step 2: Click Add link to create Recent Post view and set following properites:
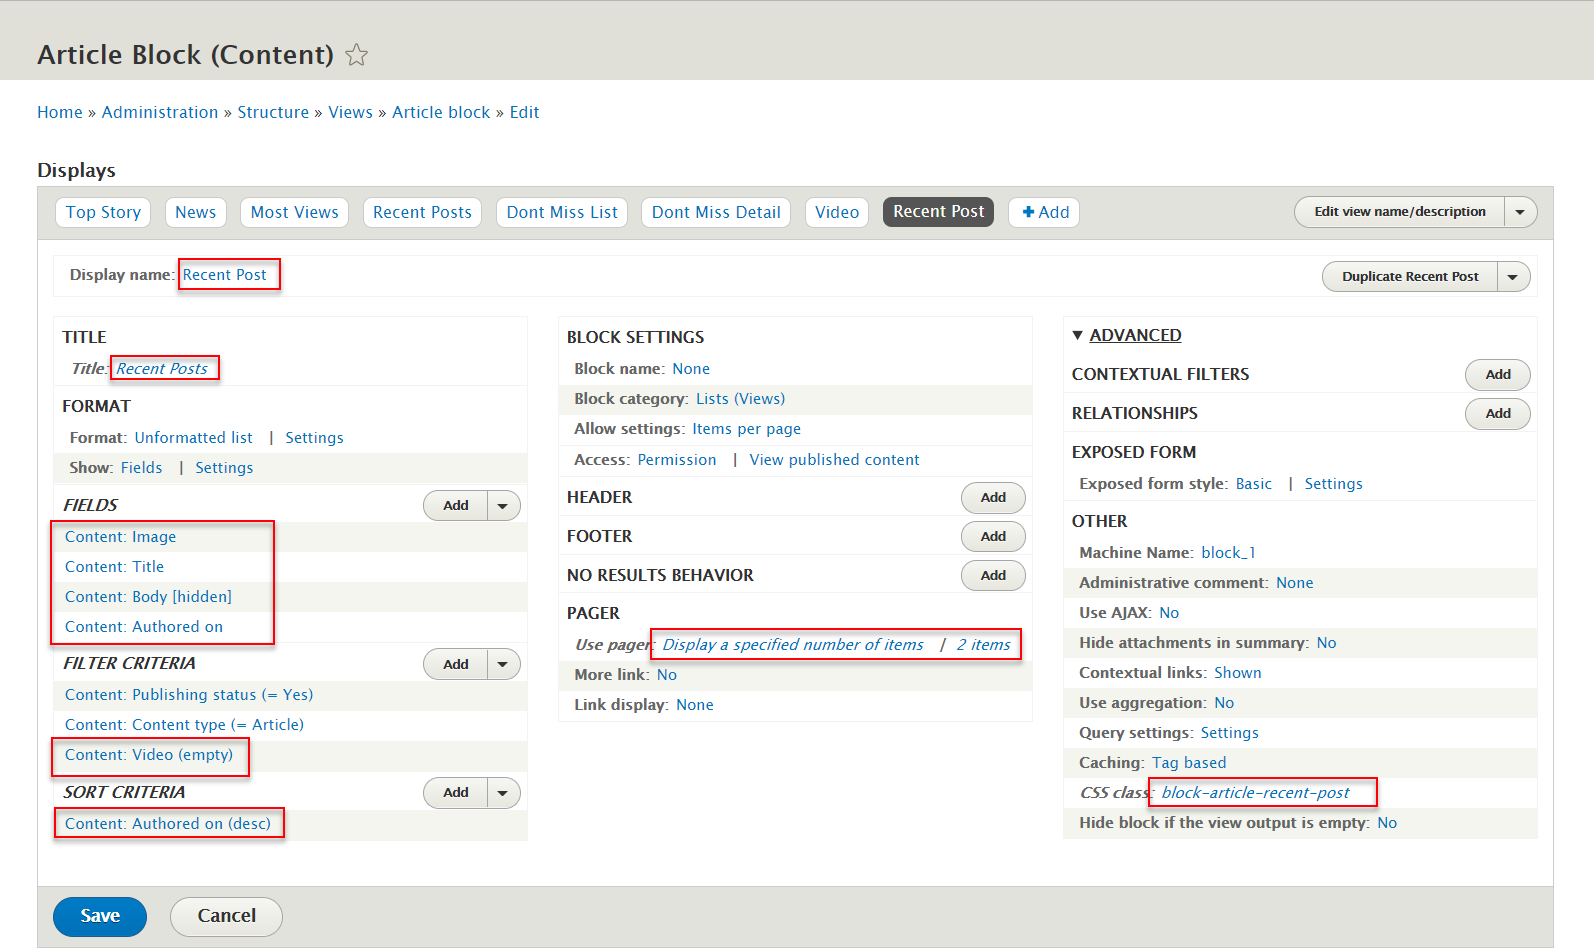
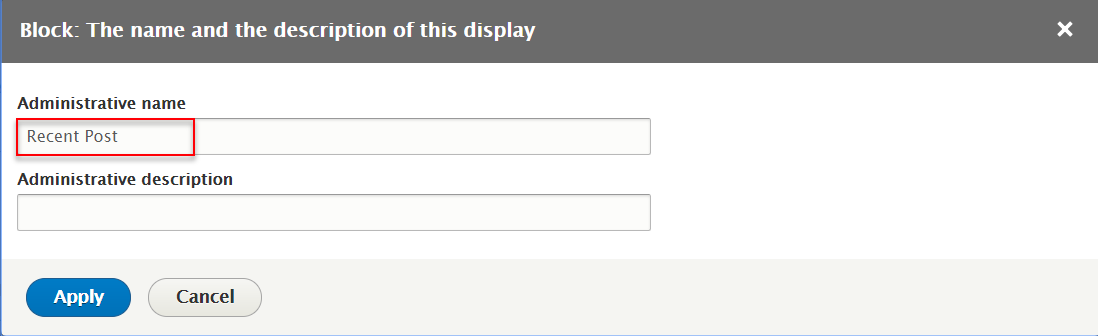
Step 3: At Display name and Title areas, change name Recent Post

Step 4: At FIELDS area, click Add button to add fields: Content: Image. Set properties for Content: Image

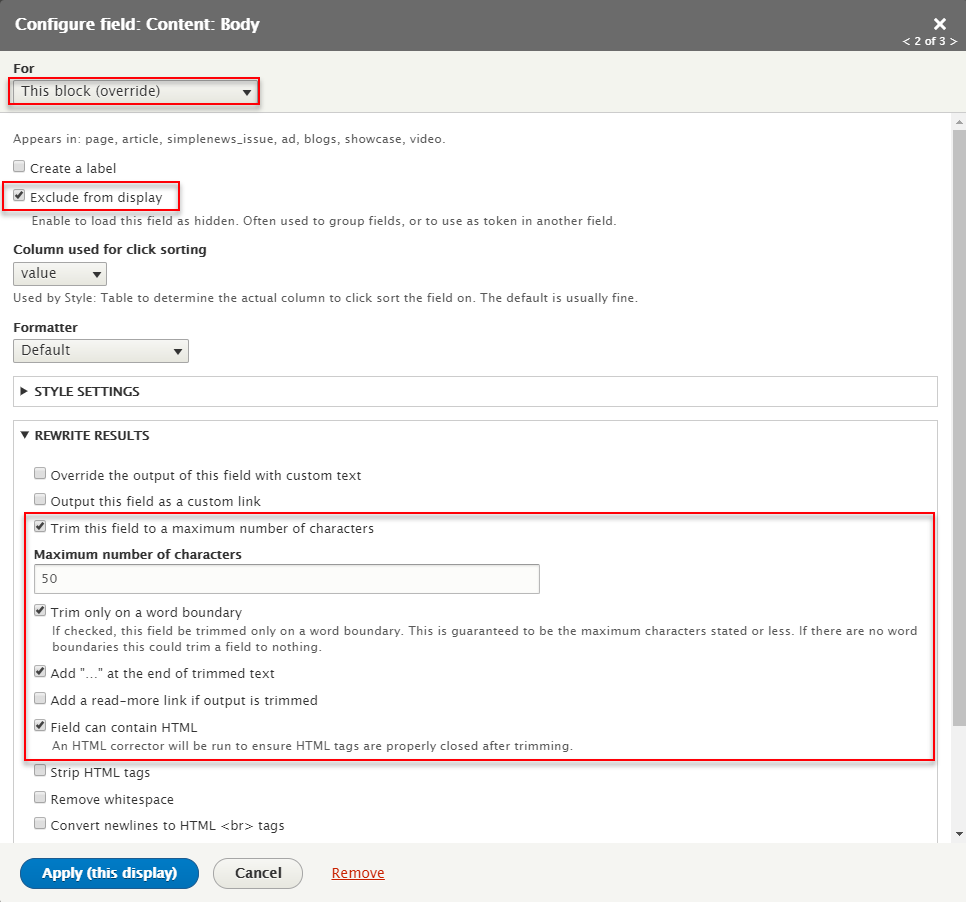
Step 5: At FIELDS area, click Add button to add fields: Content: Body. Set properties for Content: Body
Step 6: At FIELDS area, click Add button to add fields: Content: Authored on. Set properties for Content: Authored on

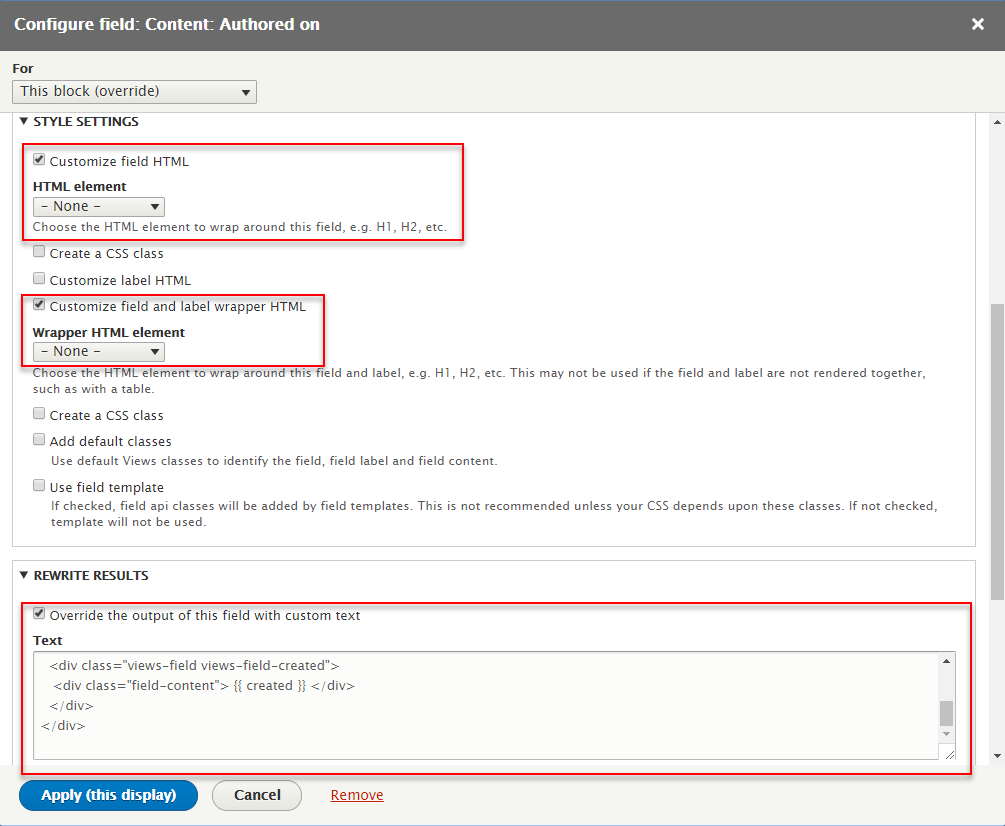
Refer to following HTML code:
                               {{ title }}


                            {{ body }}


                            {{ created }}
Step 7: At FIELDS area, click Content: Title. Set properties for Content: Title

Step 8: At FIELDS area, click Dropdown of Add and click Rearrange button to rearrange fields
Step 9: At FILTER CRITERIA area, click Add button to add fields: Content: Video. Set properties for Content: Video
Step 10: At SORT CRITERIA area, click Content statistics: Views today field and follow these steps
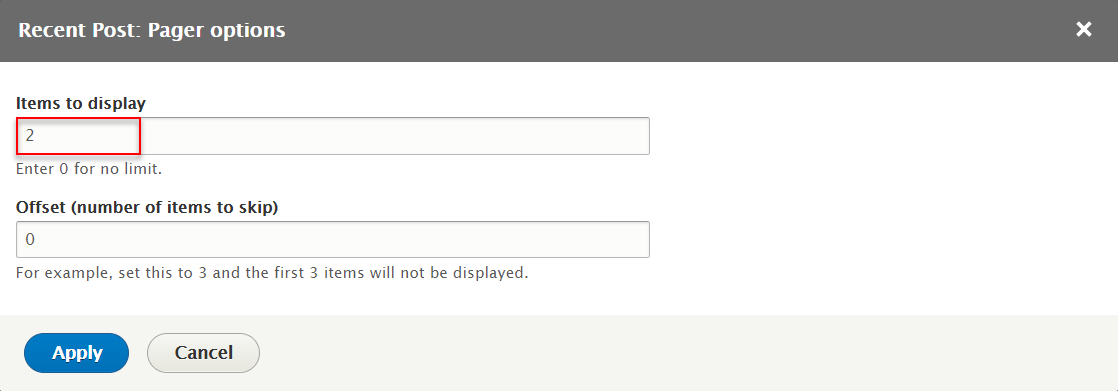
Step 11: At Use pager area, click Display a specified number of items | 1 items fields
Step 12: At Machine Name area, change name block_1

Step 13: At CSS class area, change block-article-recent-post
Step 14: Click Save button
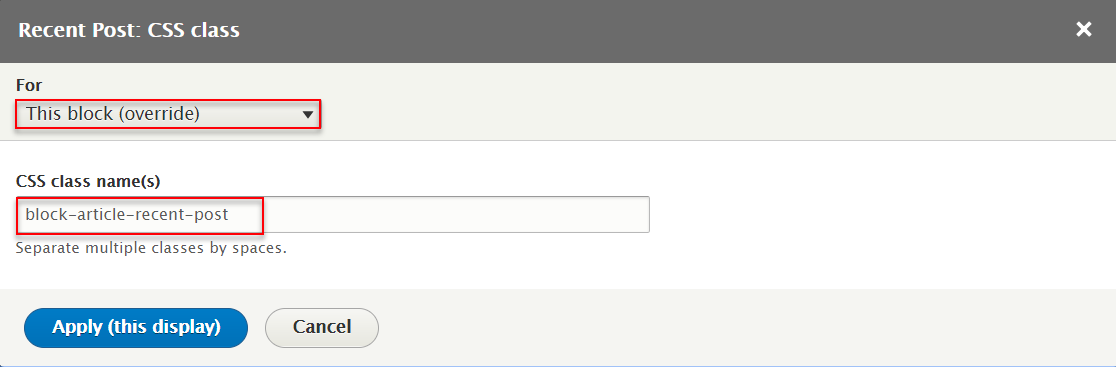
2. Configure : Recent Post block
Step 1: Navigate to Structure > Block layout
Step 2: Find Footer second column click Place block button
Step 3: Find Article Block: Recent Post Lists (Views) click Place block button and set following properites:
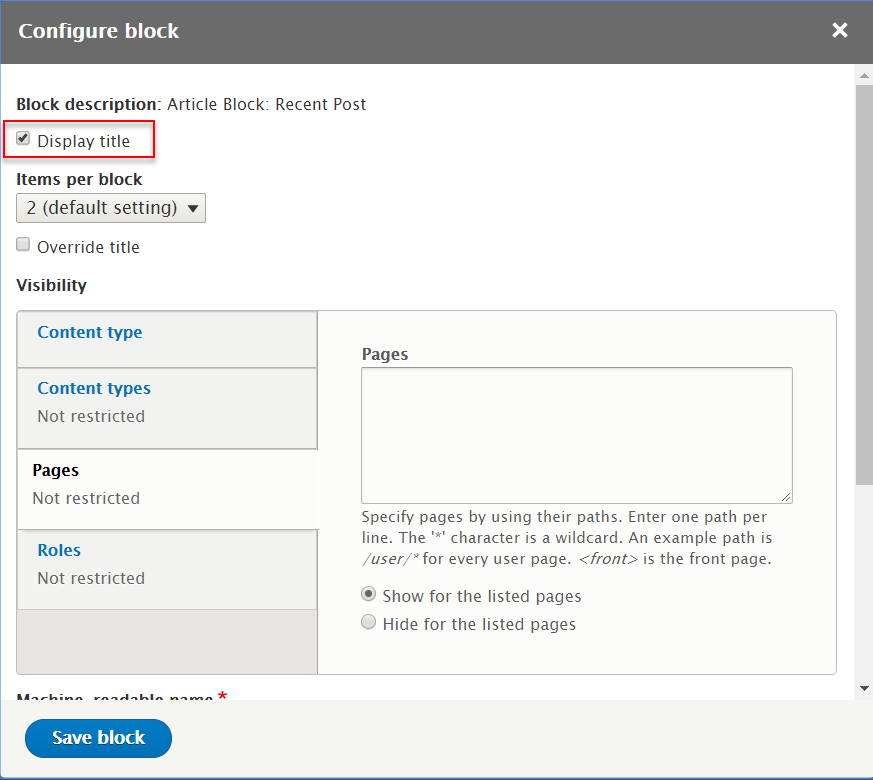
Step 4: Click Save block button.
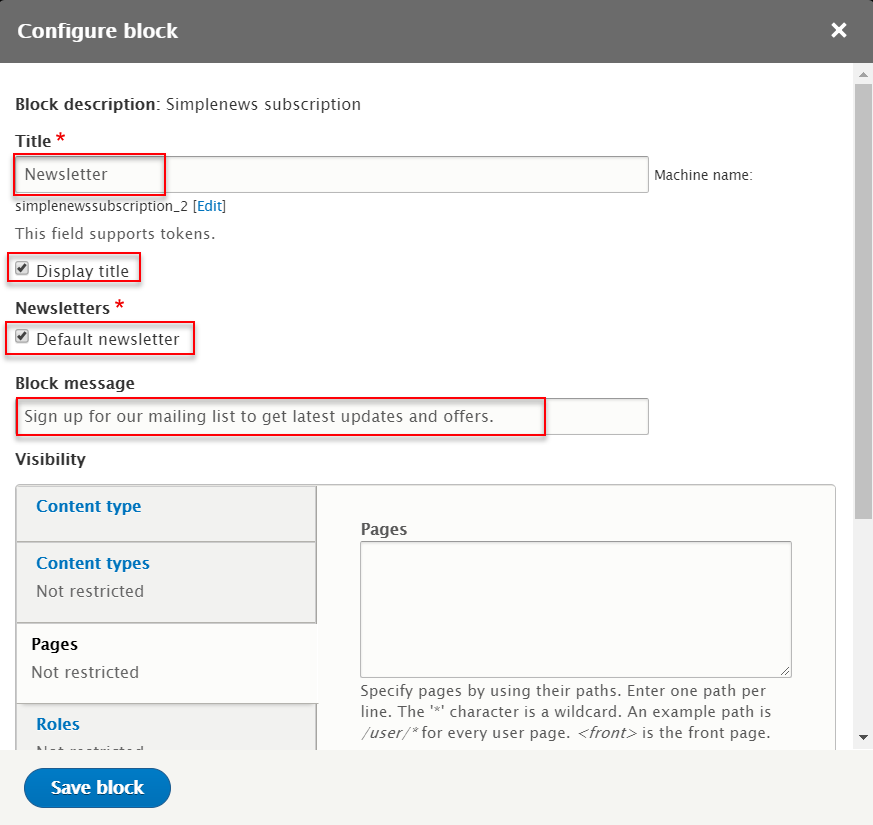
Newsletter block
Front end Display
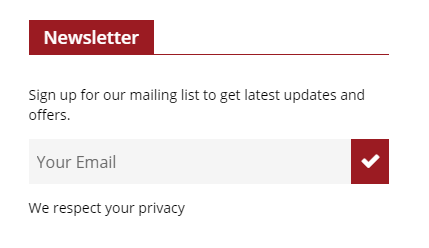
1. Create Newsletter block
Step 1: Navigate to Structure > Block layout > Custom block library, click Add custom block, then create Newsletter block with following settings:
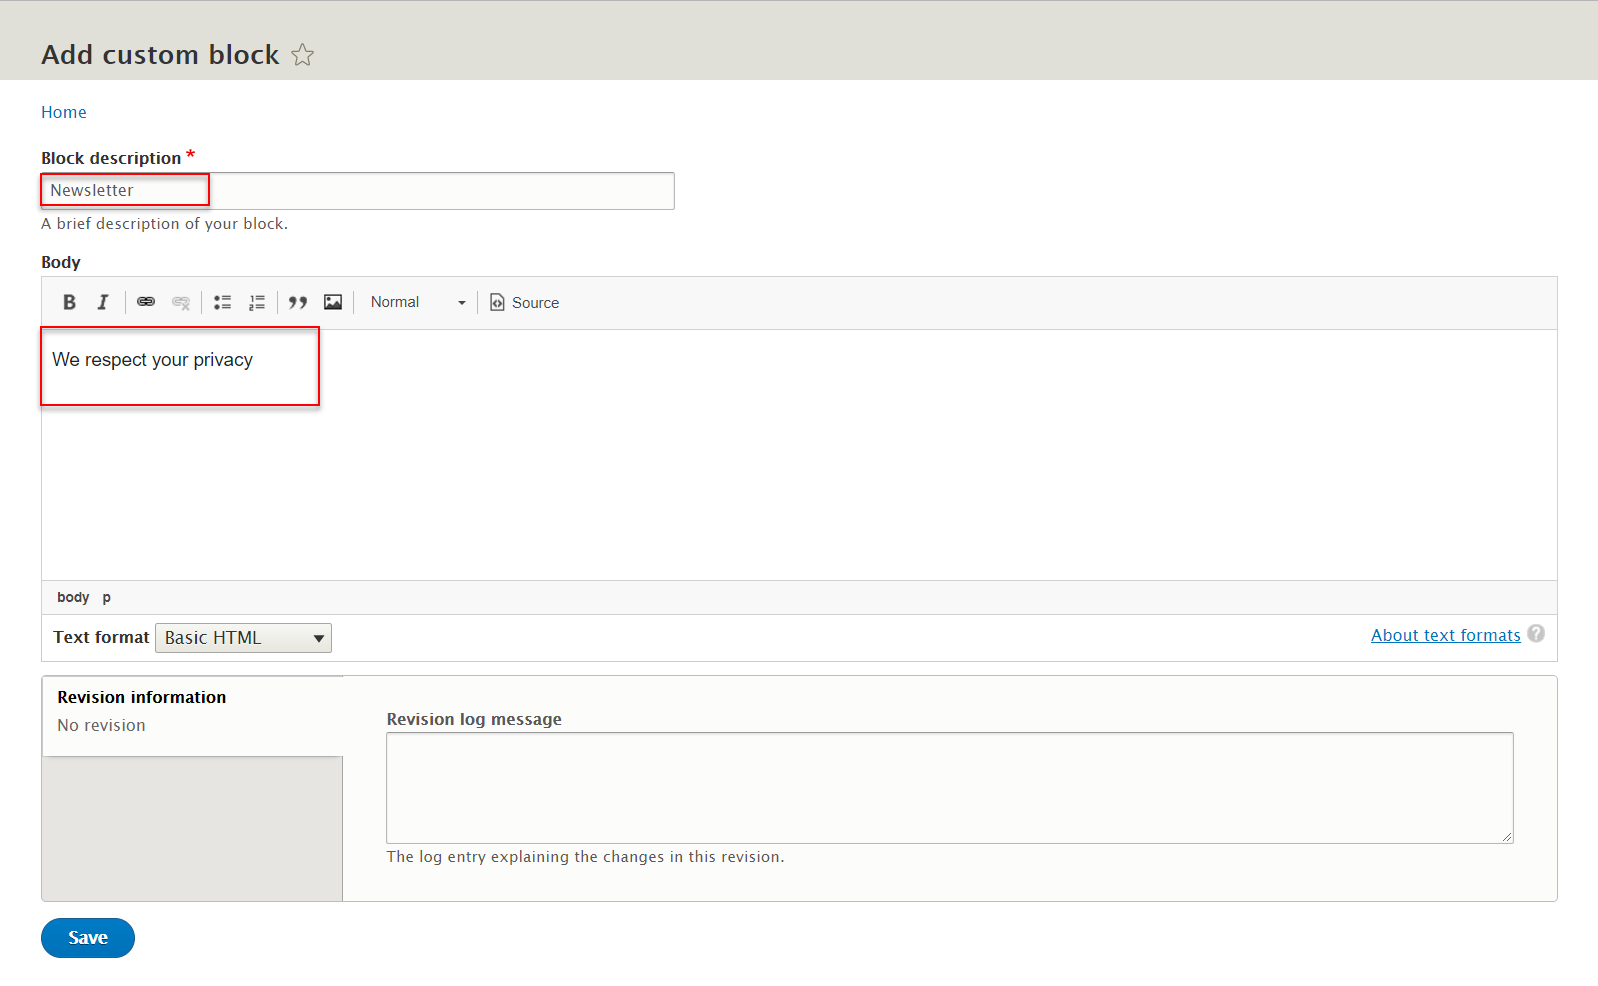
Step 2: Click Save button.
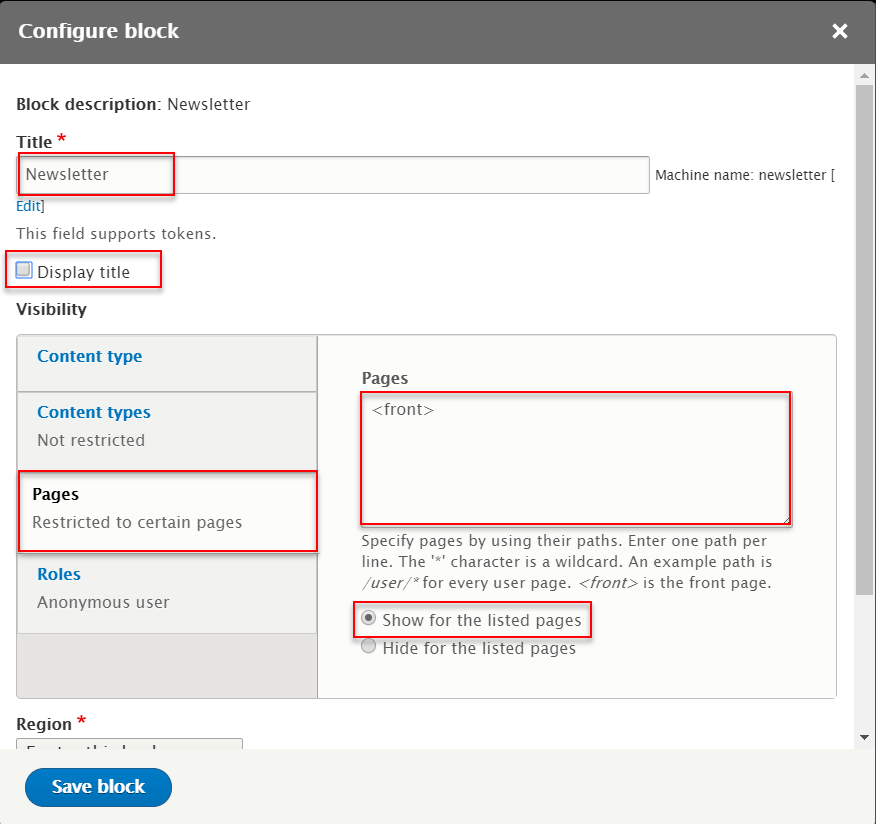
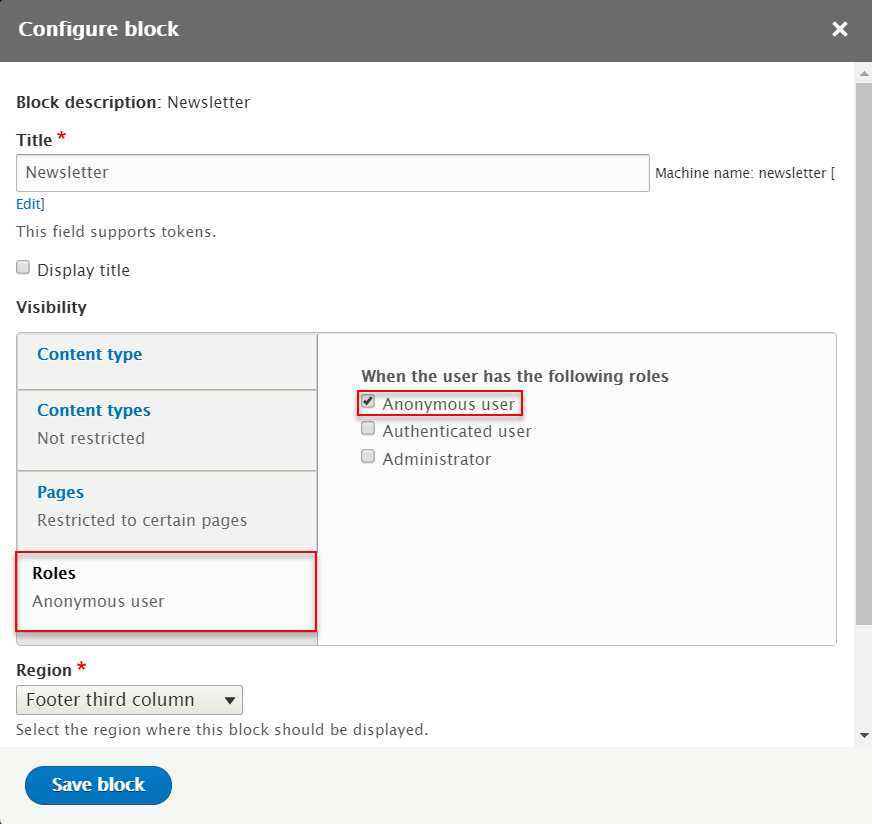
2. Configure : Keep Connected block
Step 1: Navigate to Structure > Block layout
Step 2: Find Footer third column click Place block button
Step 3: Find Simplenews subscription (Simplenews) click Place block button and set following properites:
Step 4: Click Save block button.
Step 5: Find Footer third column click Place block button
Step 6: Find Newsletter (Custom) click Place block button and set following properites:
Step 7: Click Save block button.
- Note: Rearrange Newsletter (Custom) block under Newsletter (Simplenews) block

Copy Right block
Front end Display

1. Create Copy Right block
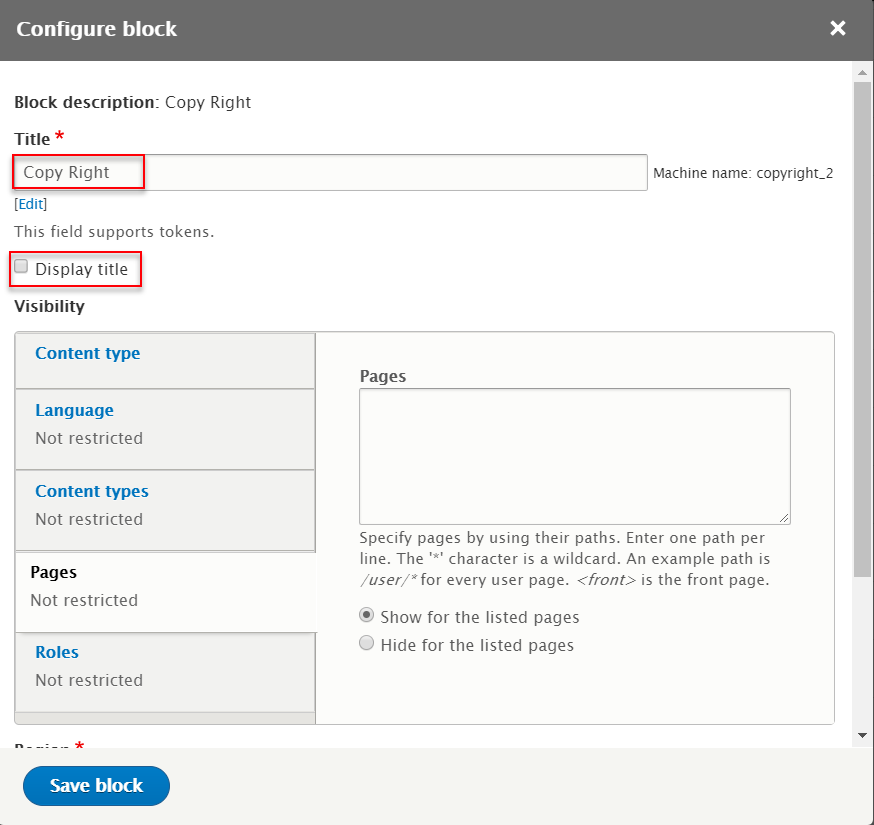
Step 1: Navigate to Structure > Block layout > Custom block library, click Add custom block, then create Copy Right block with following settings:
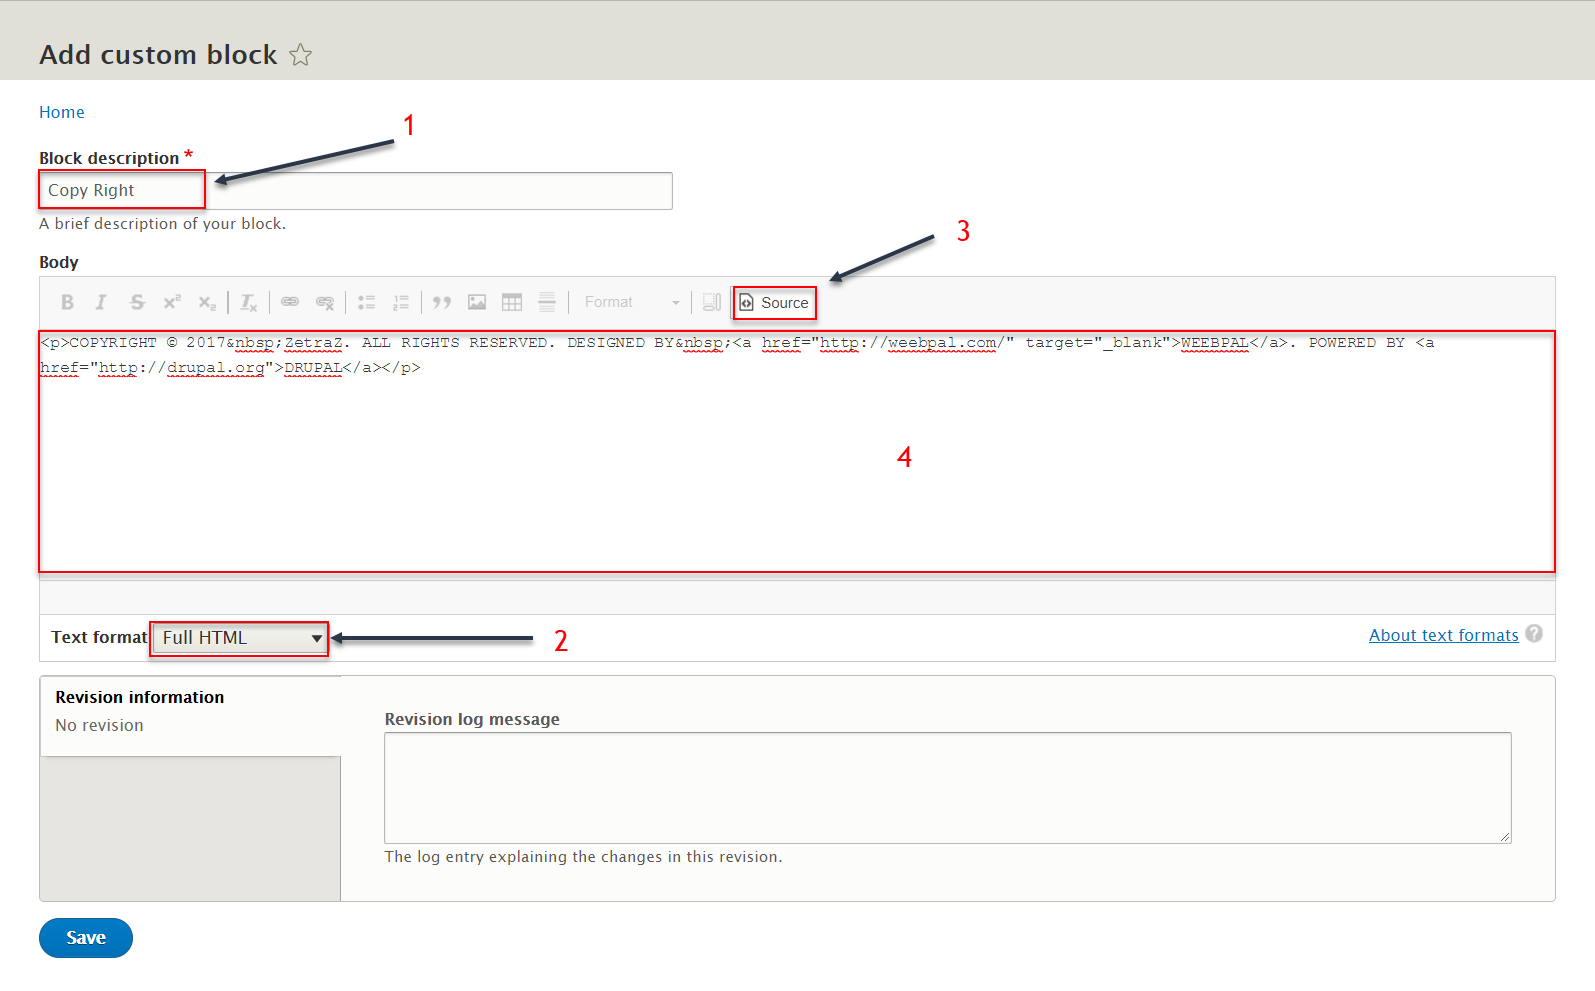
Refer to following HTML code:
COPYRIGHT © 2017 ZetraZ. ALL RIGHTS RESERVED. DESIGNED BY WEEBPAL. POWERED BY DRUPAL
Step 2: Click Save button.
2. Configure : Copy Right block
Step 1: Navigate to Structure > Block layout
Step 2: Find Footer click Place block button
Step 3: Find Copy Right (Custom) click Place block button and set following properites:
Step 4: Click Save block button.
Main menu block
Front end Display

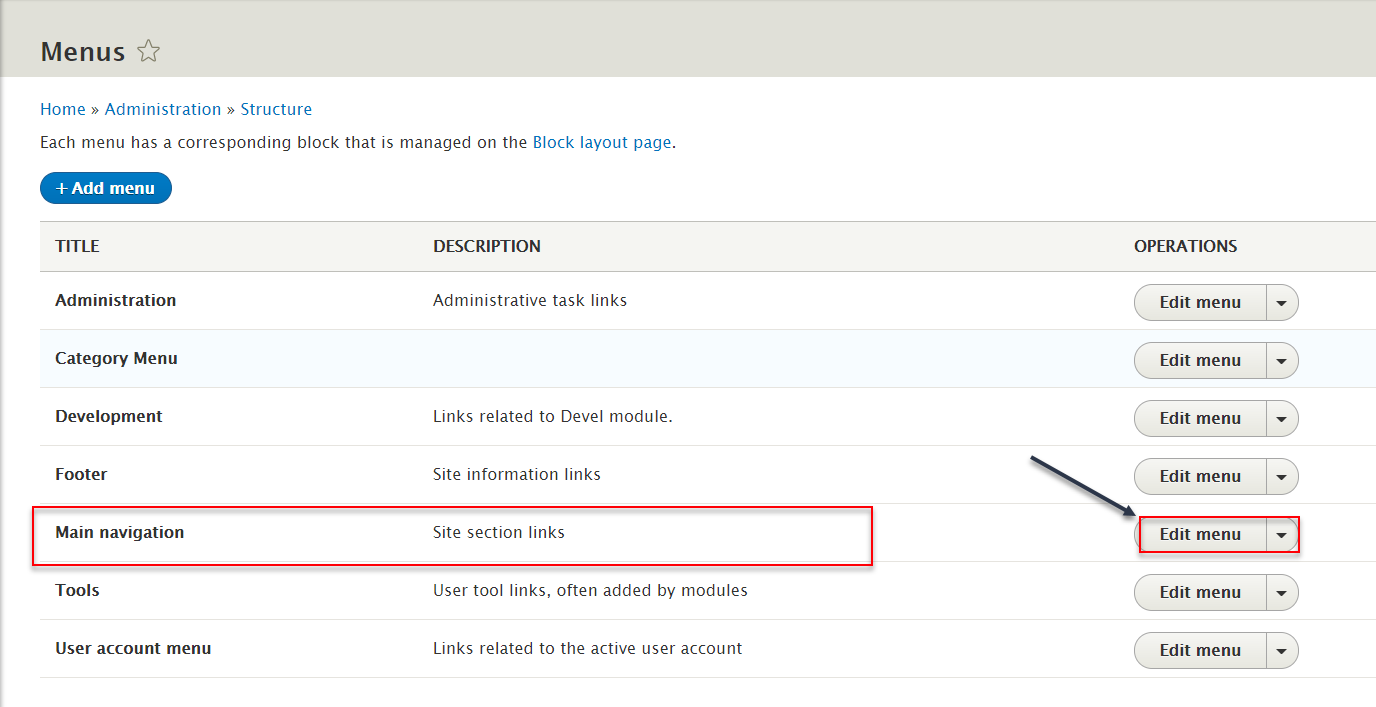
Create Main menu list
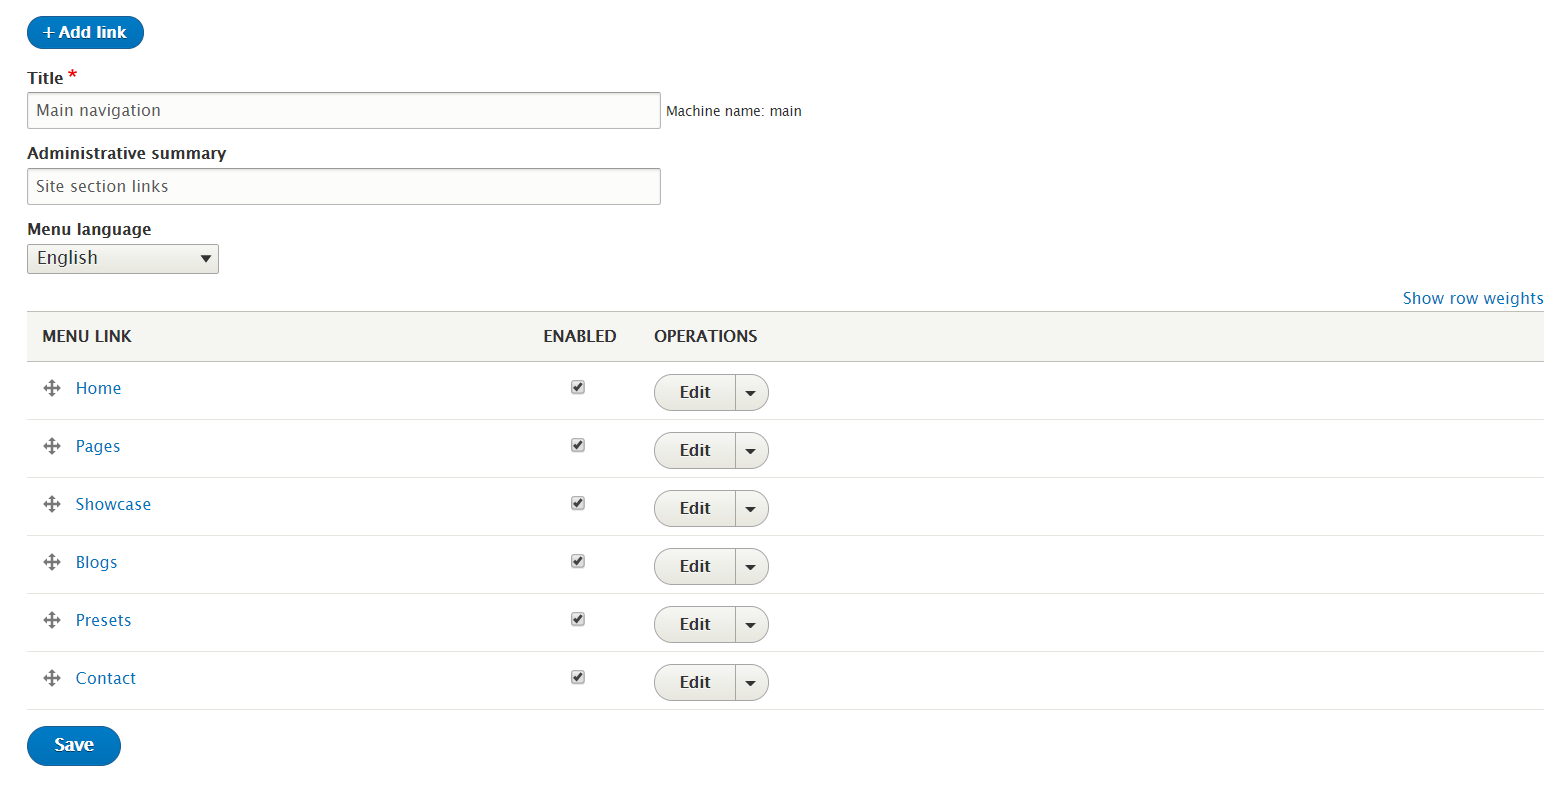
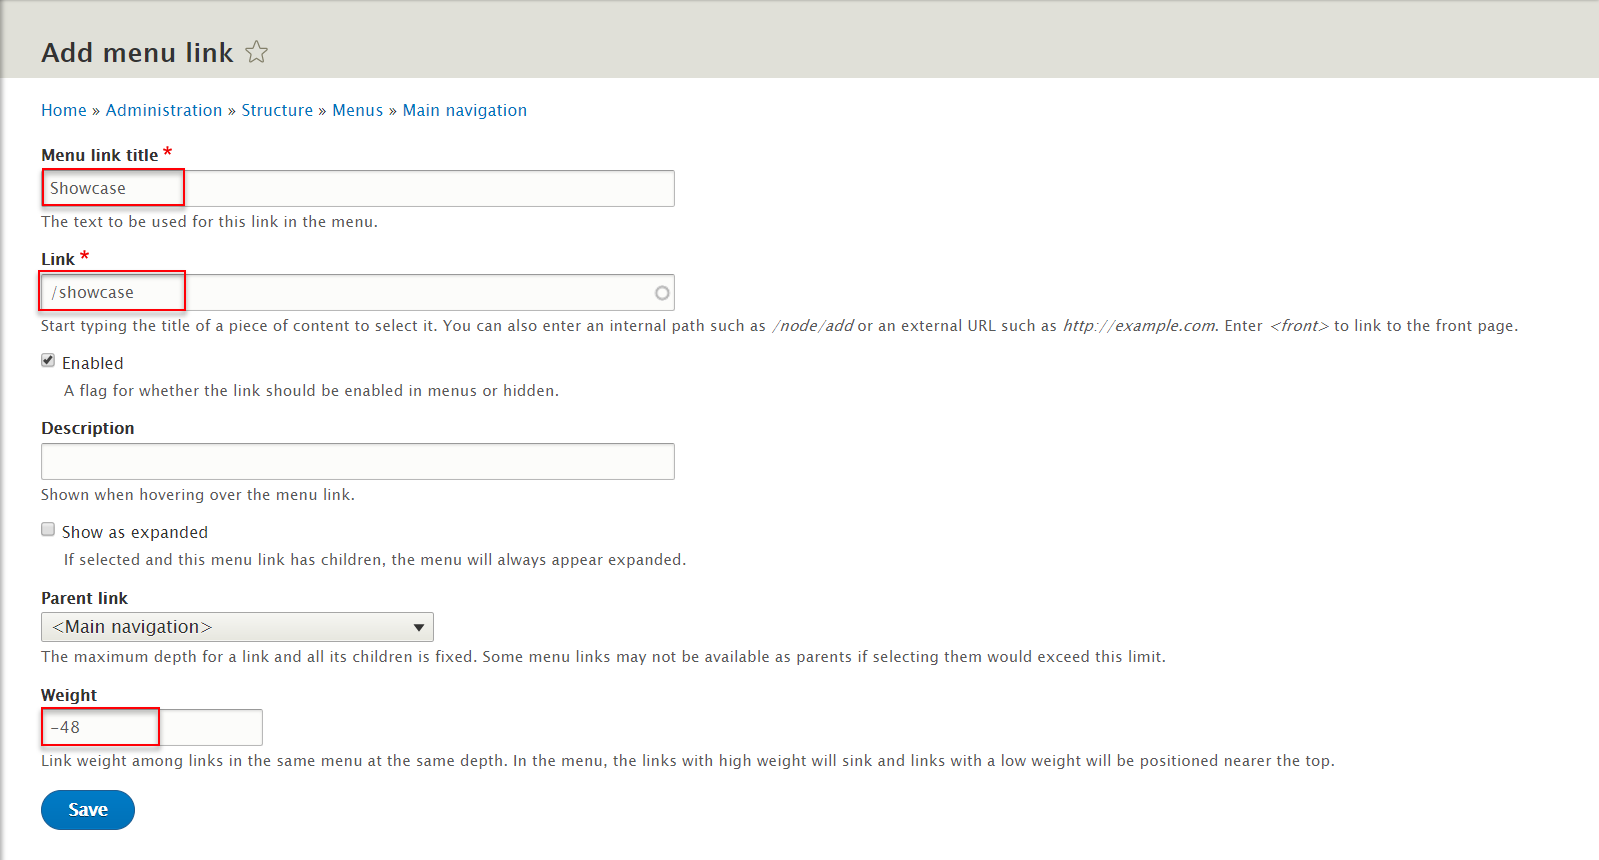
Step 1: Navigate to Structure > Menus, At Main navigation, click Edit Menu with following settings:
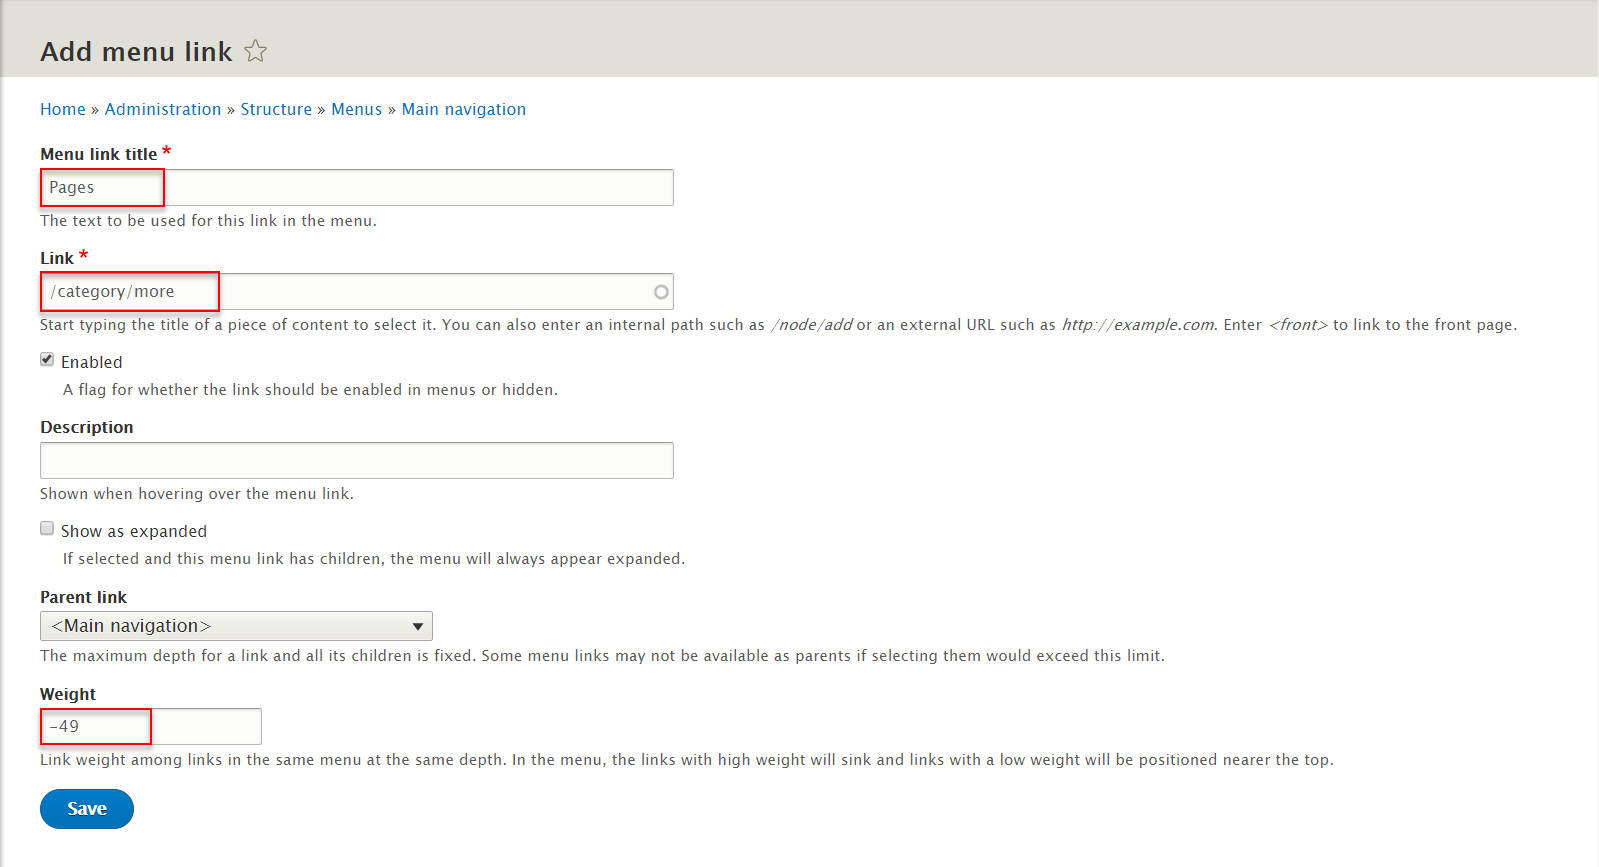
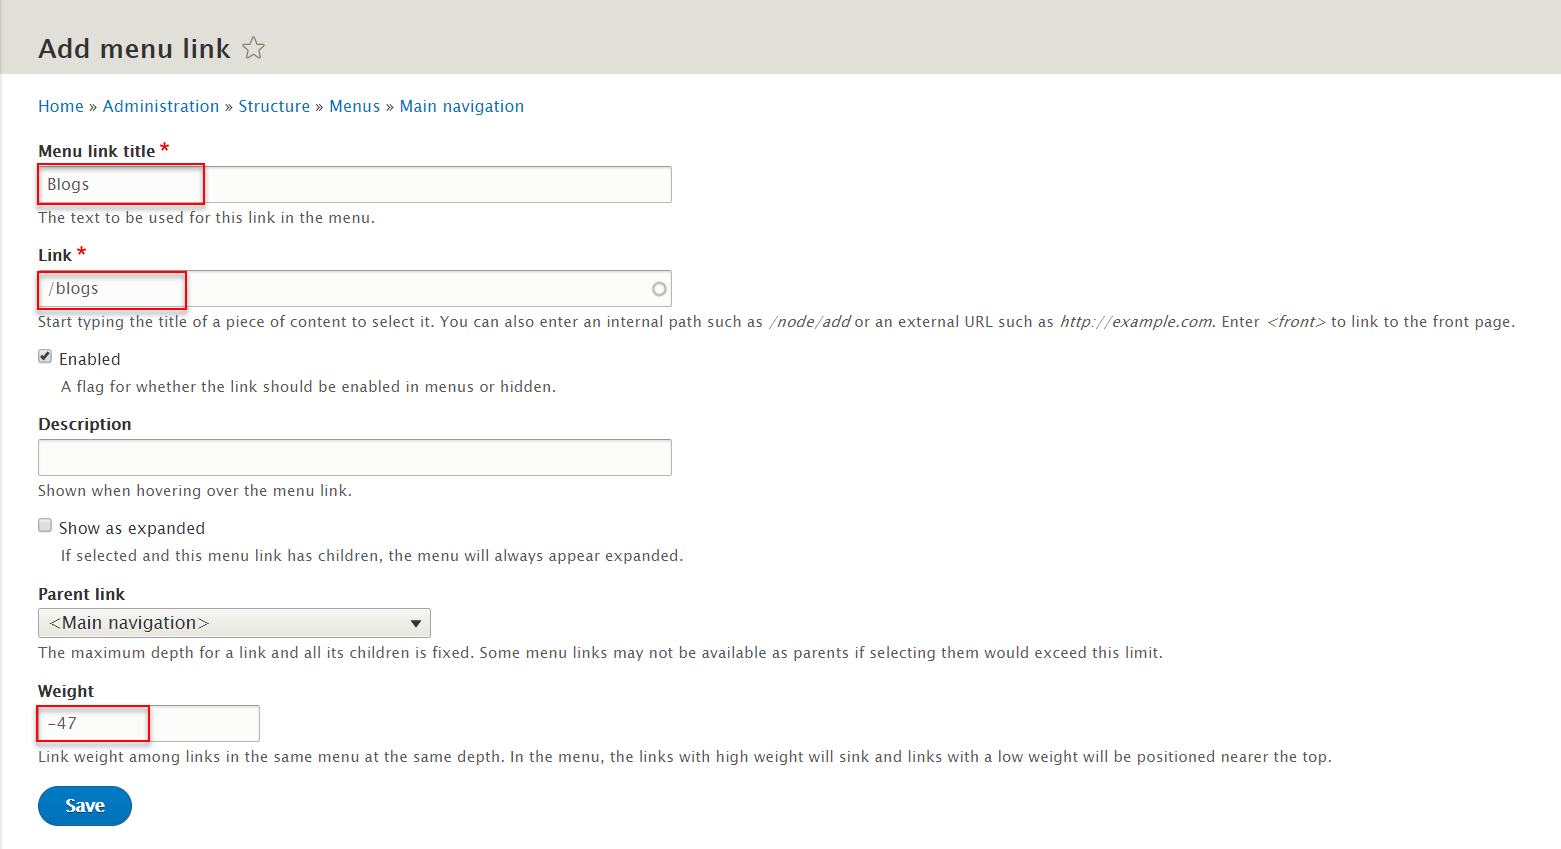
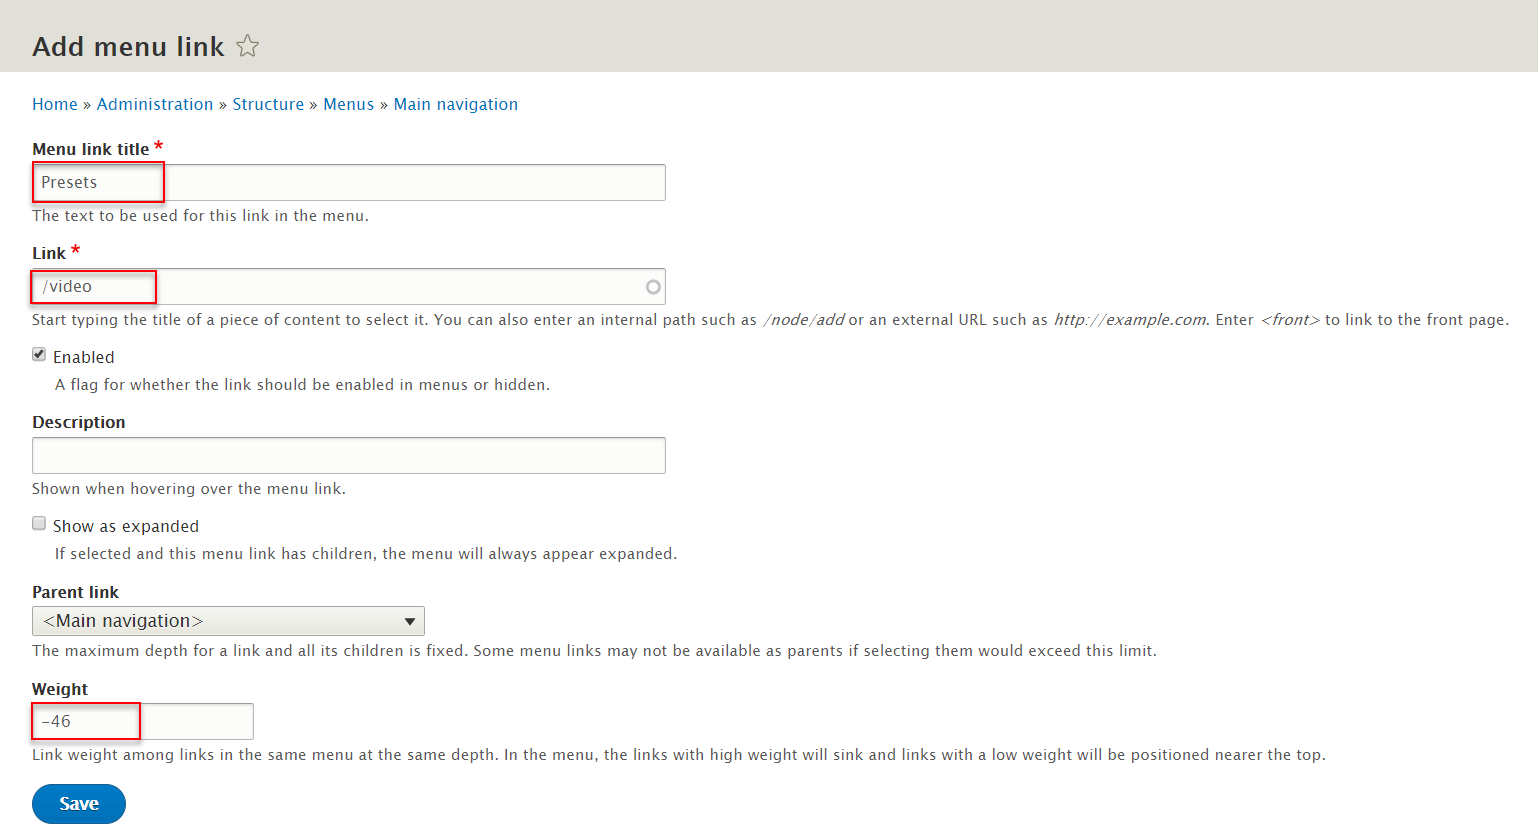
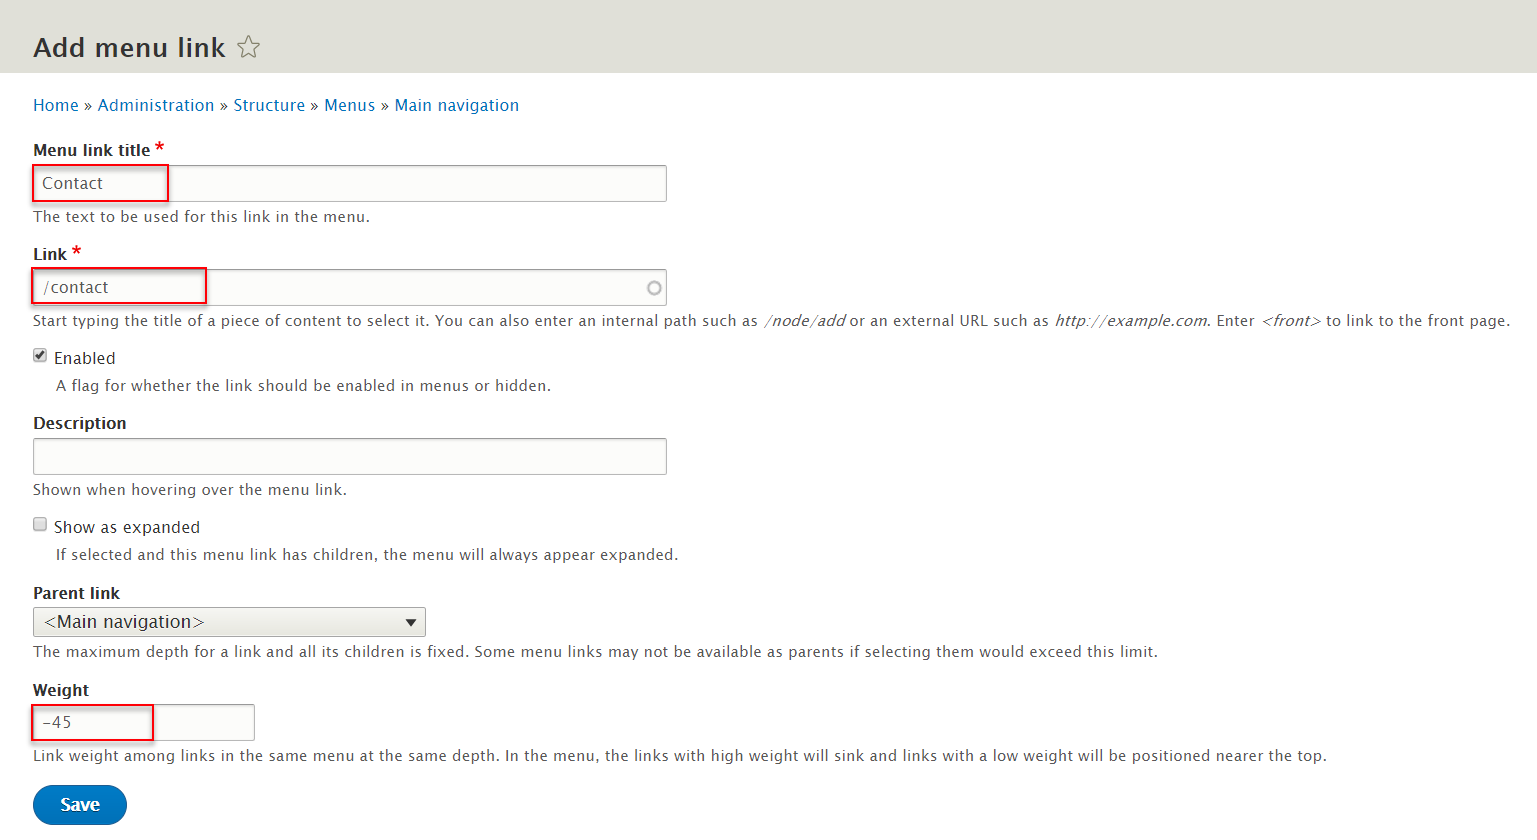
Step 2: Click Add link button. Create list menu:
Step 3:Set properites for Menu: Pages
Step 4:Set properites for Menu: Showcase
Step 5:Set properites for Menu: Blogs
Step 6:Set properites for Menu: Presets
Step 7:Set properites for Menu: Contact
Create Subpages
Configure URL aliases
Step 1: Navigate to Configuration > Search and metadata > URL aliases click Patterns tabs then add Add Pathauto pattern following properties:

Step 2:Set properites for Article pattern

Step 3:Set properites for Blog pattern

Step 4:Set properites for Category pattern

Step 5:Set properites for Showcase pattern

Step 8: Click Save button
Site branding block
Configure Site branding block
Step 1: Navigate to Structure > Block layout
Step 2: Find Header > Site branding click Configure button and set following properites:
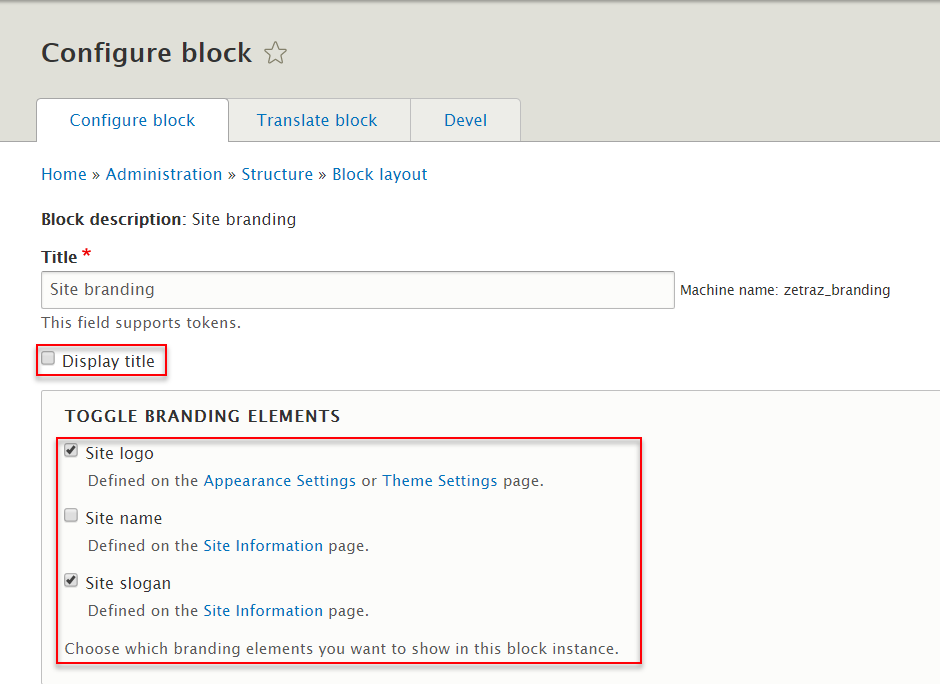
Step 4: Click Save block button.
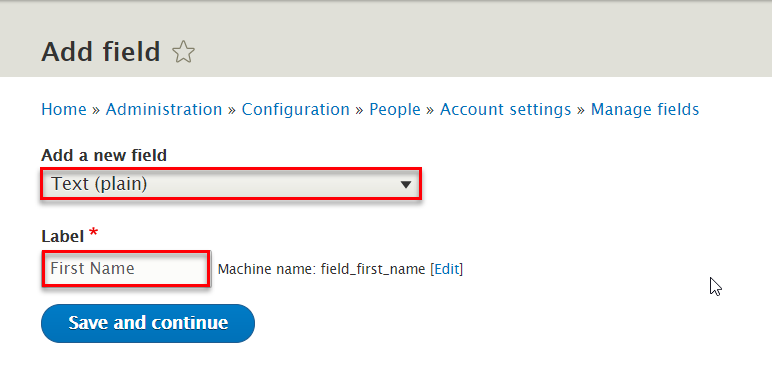
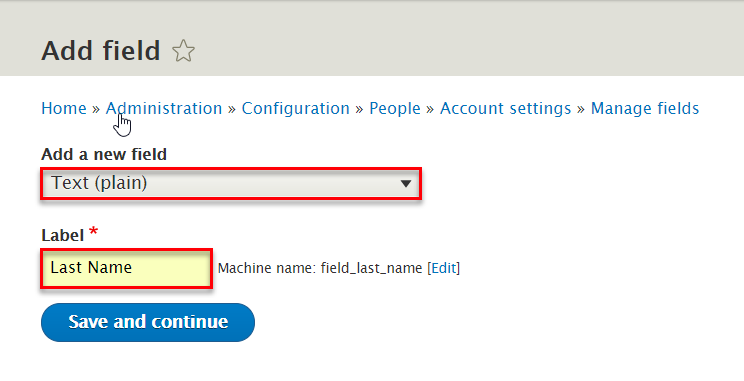
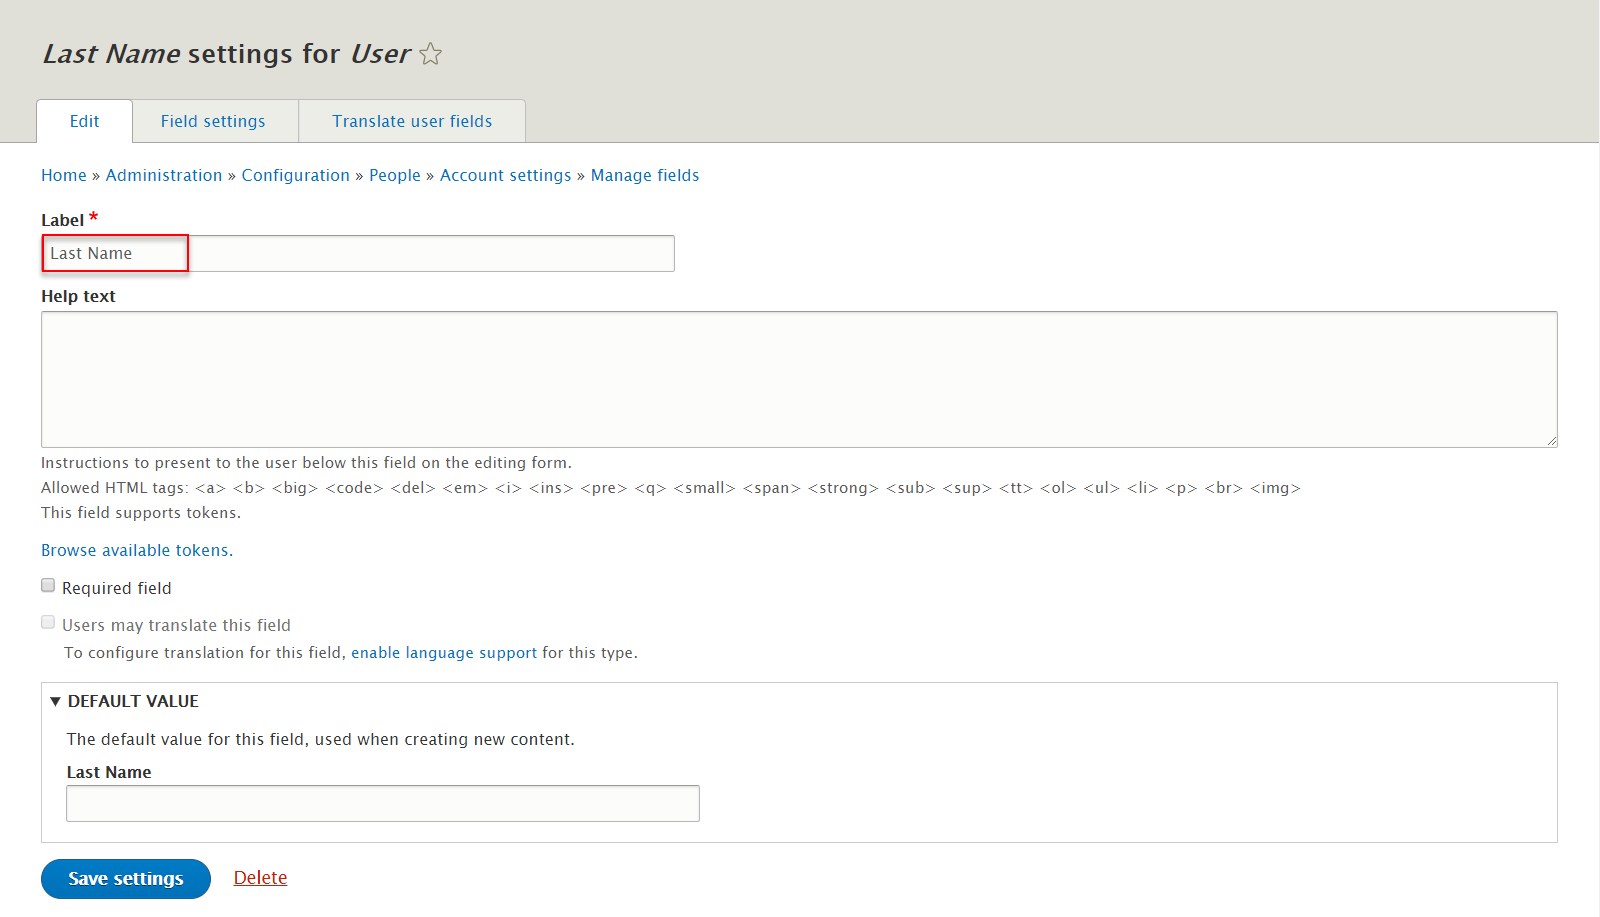
Pages page
1. Create Page view
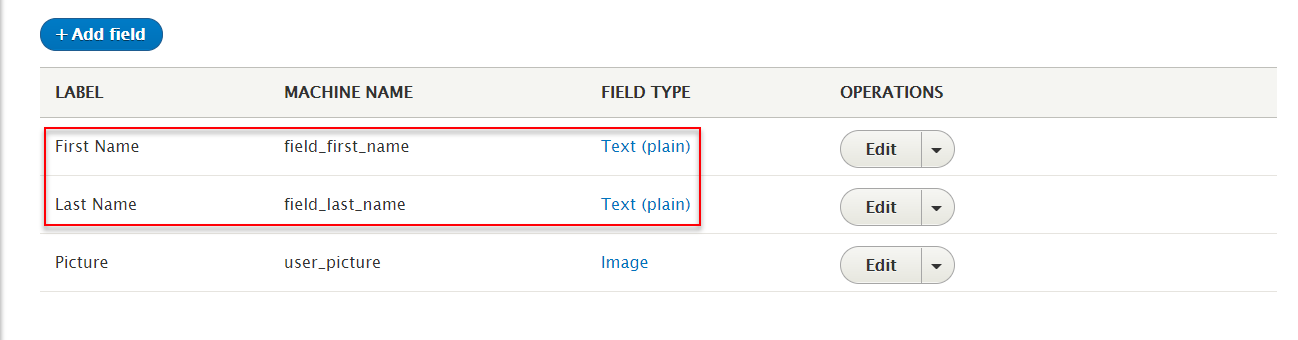
Step 1: Navigate to Configuration > People > Account settings > Manage fields, click Add field, then create First Name and Last Name fields with following settings:

Step 2: Navigate to Structure > Views, click Add view, then create Page view with following settings:
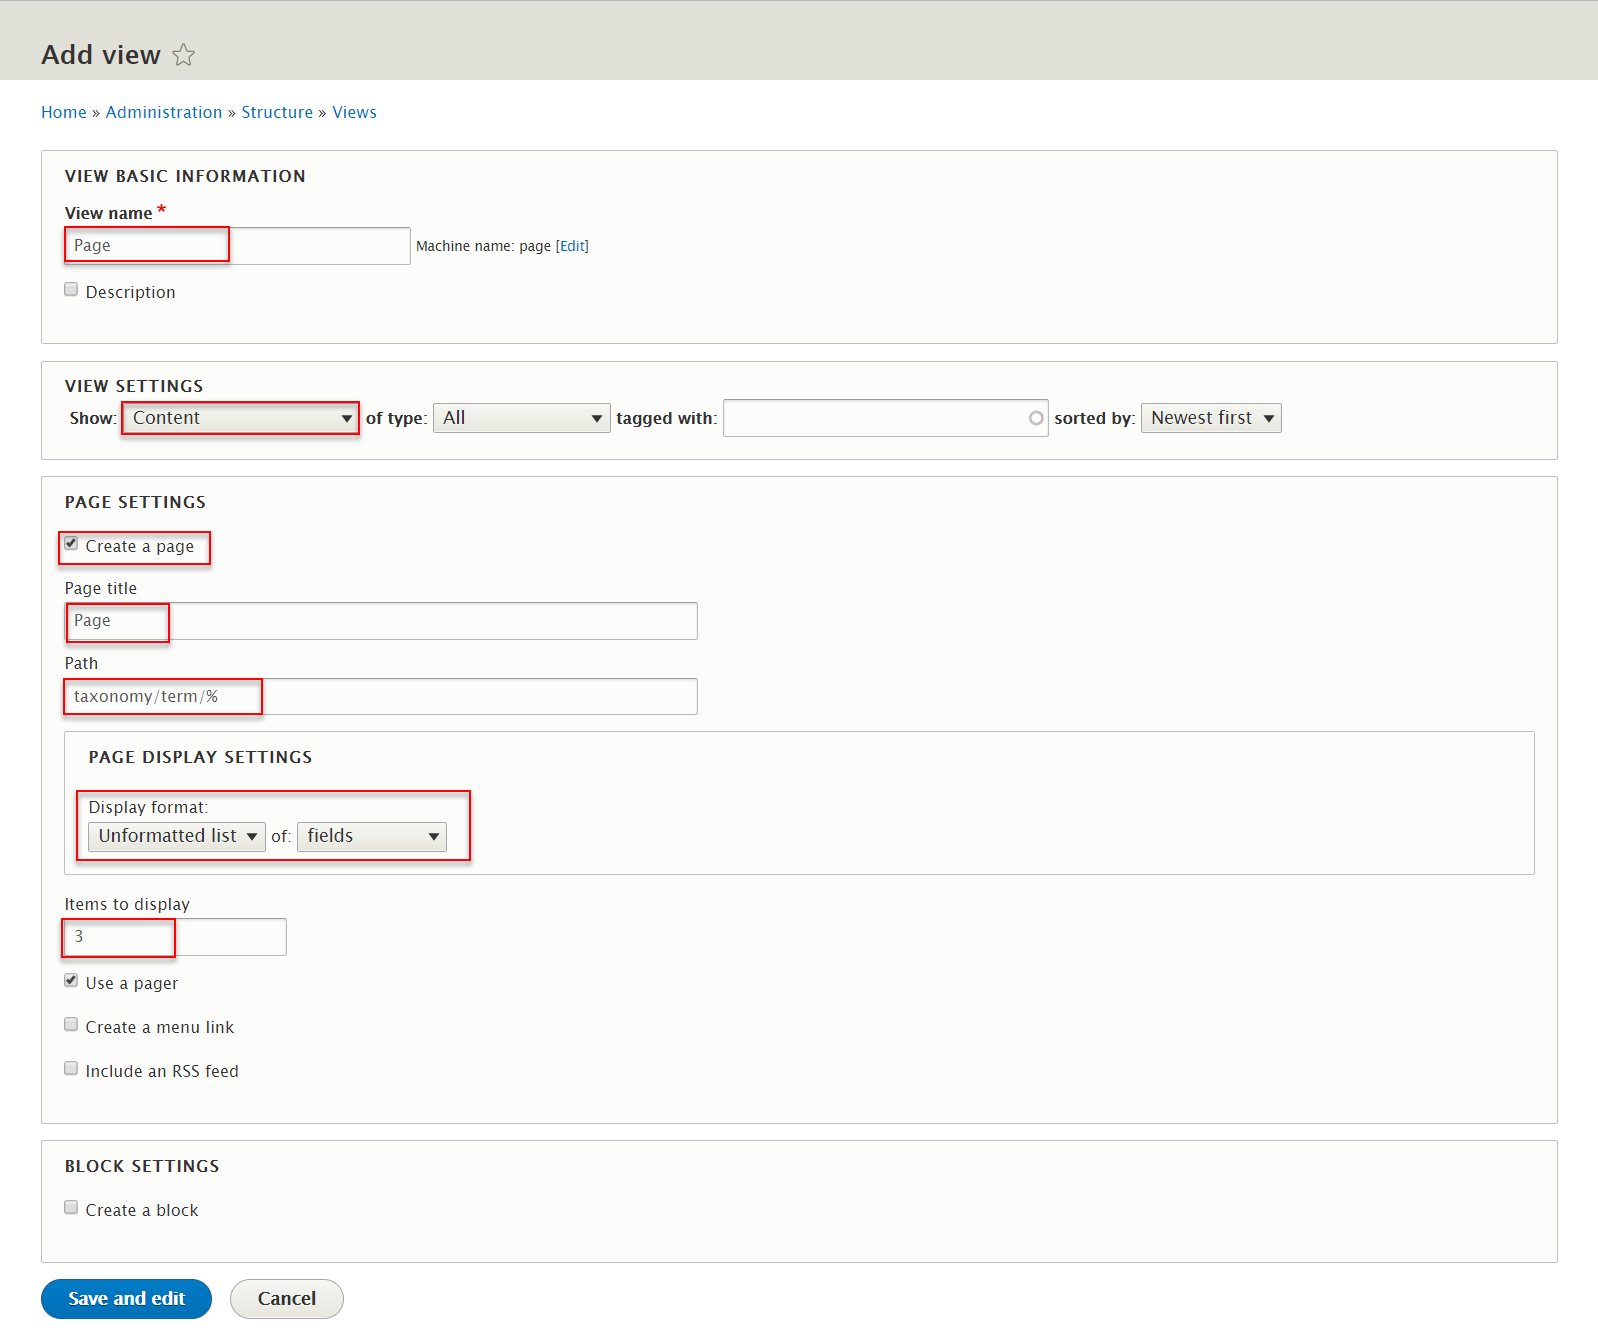
Step 3: Click Save and edit button. Next to steps below to set properties for following fields:
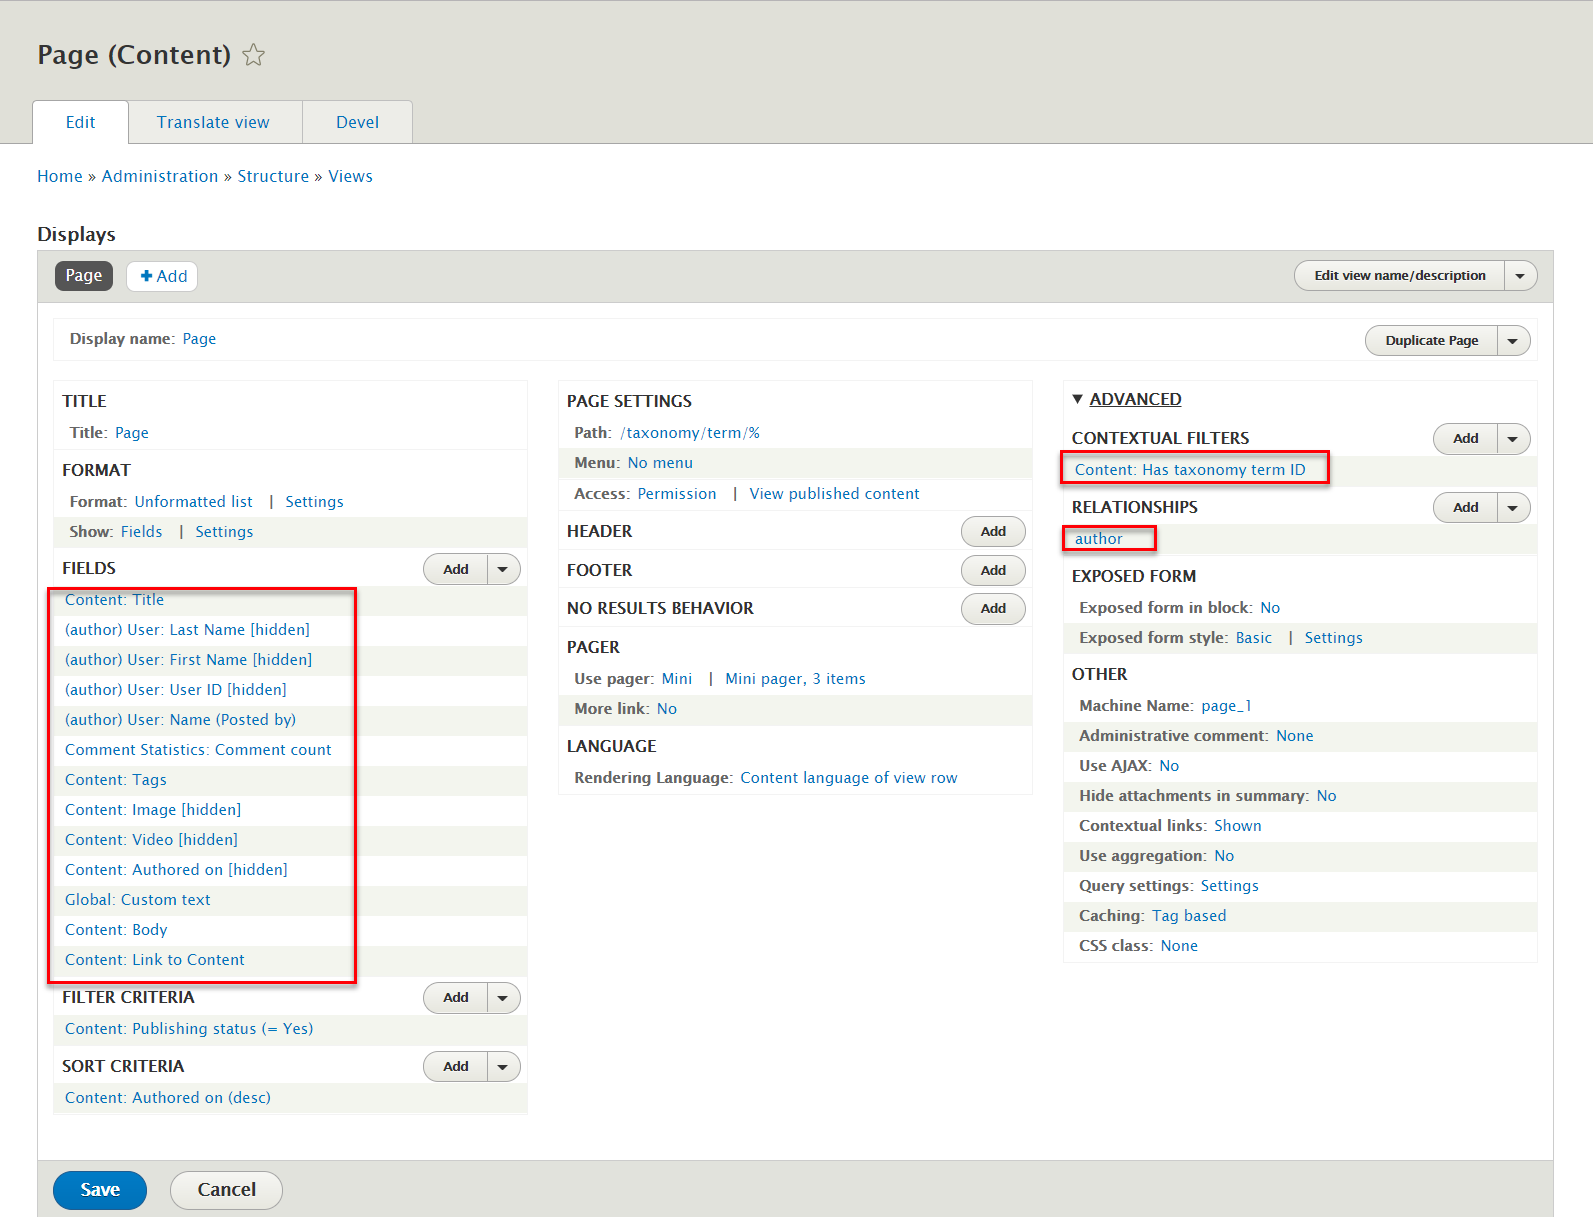
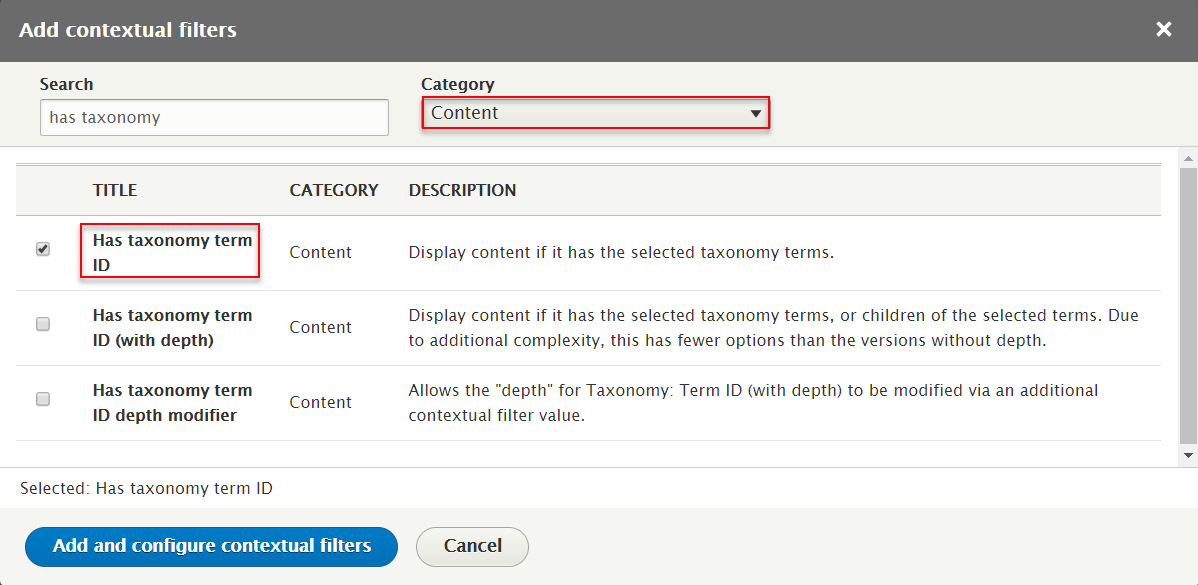
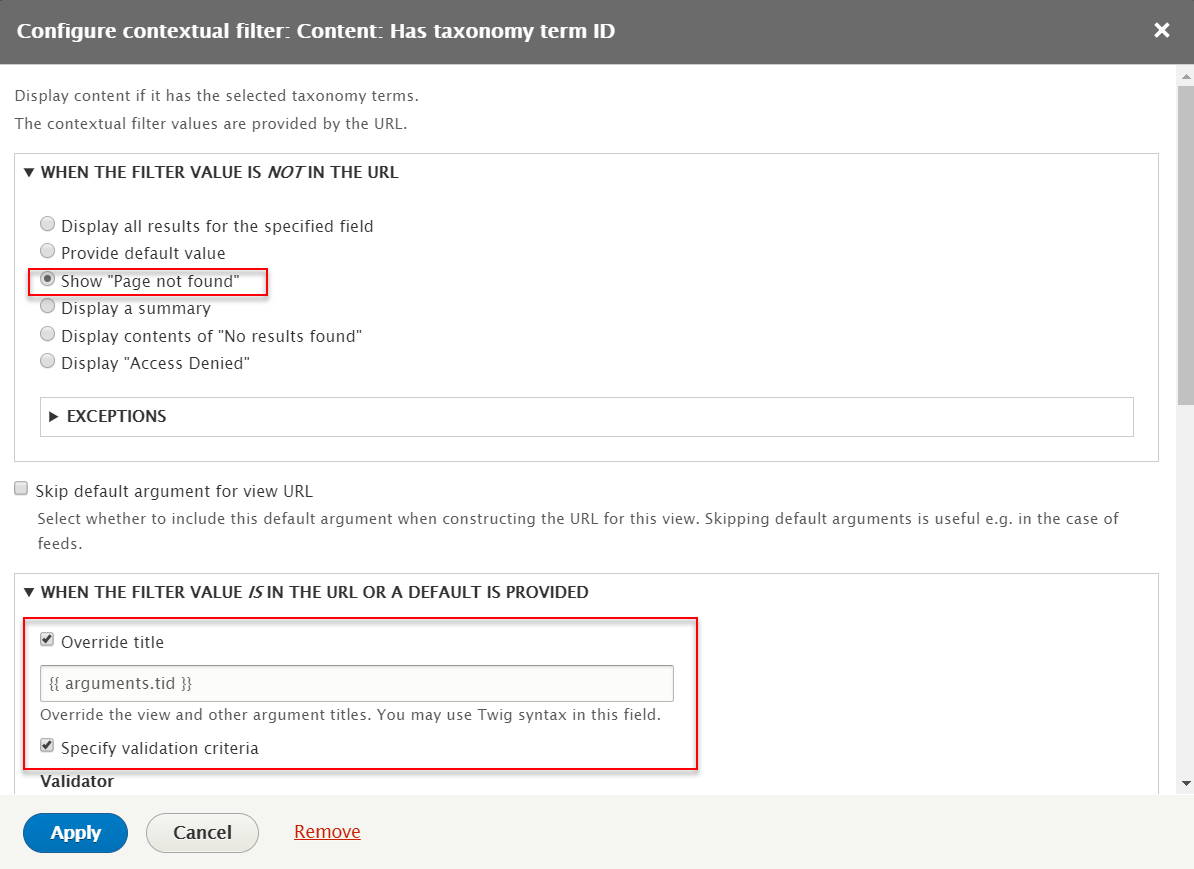
Step 4: At ADVANCED > CONTEXTUAL FILTERS area, click Add button to add fields: Content: Has taxonomy term ID field with following settings:

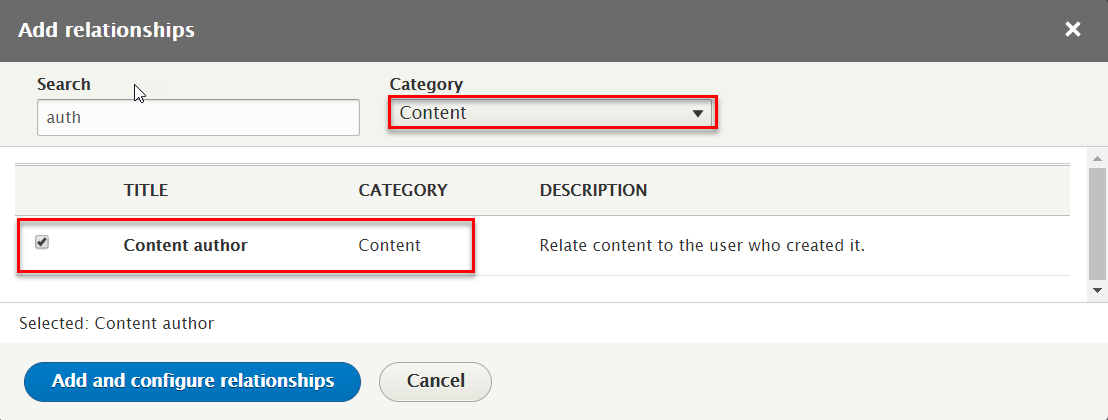
Step 5: At ADVANCED > RELATIONSHIPS area, click Add button to add fields: author field with following settings:
Step 6: At FIELDS area, click Add button to add fields: User: Last Name field with following settings:

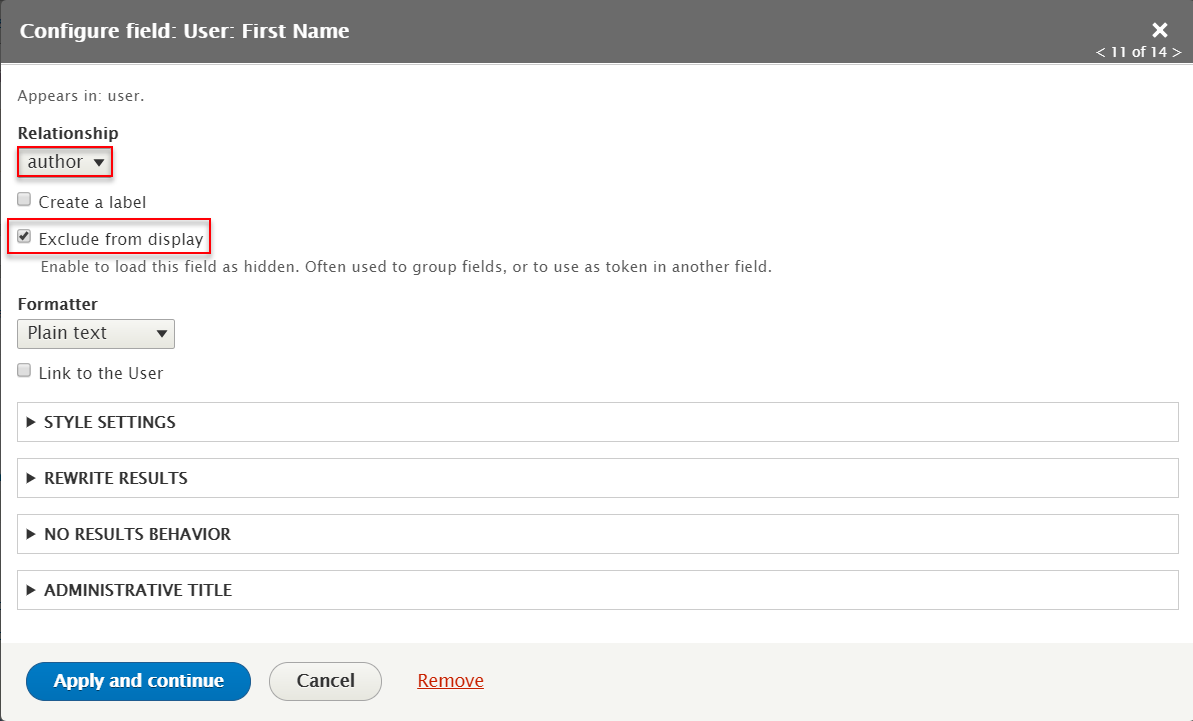
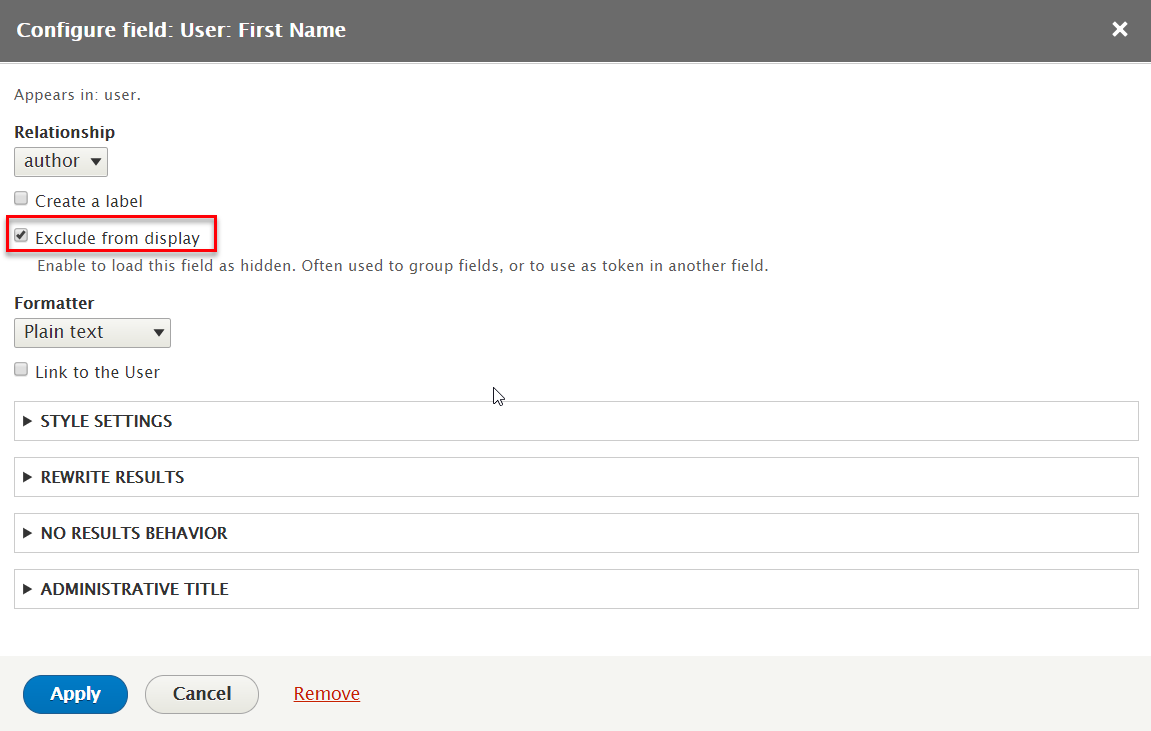
Step 7: At FIELDS area, click Add button to add fields: User: First Name field with following settings:
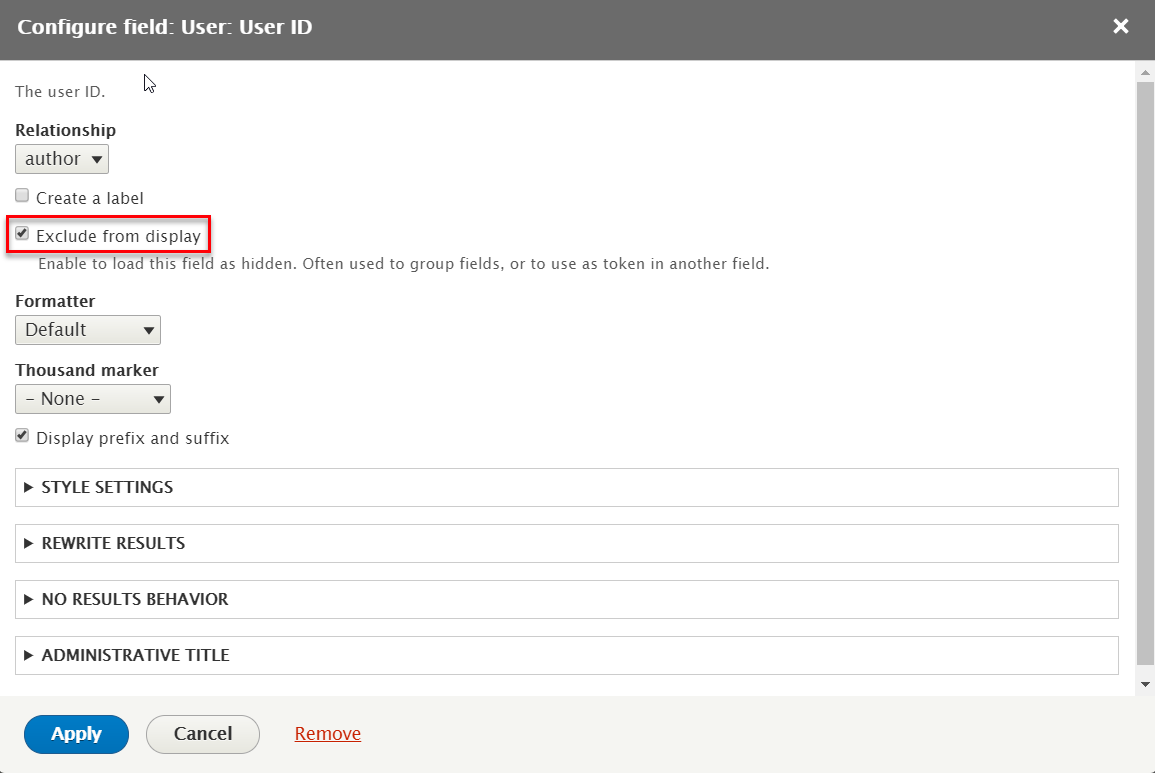
Step 8: At FIELDS area, click Add button to add fields: User: User ID field with following settings:

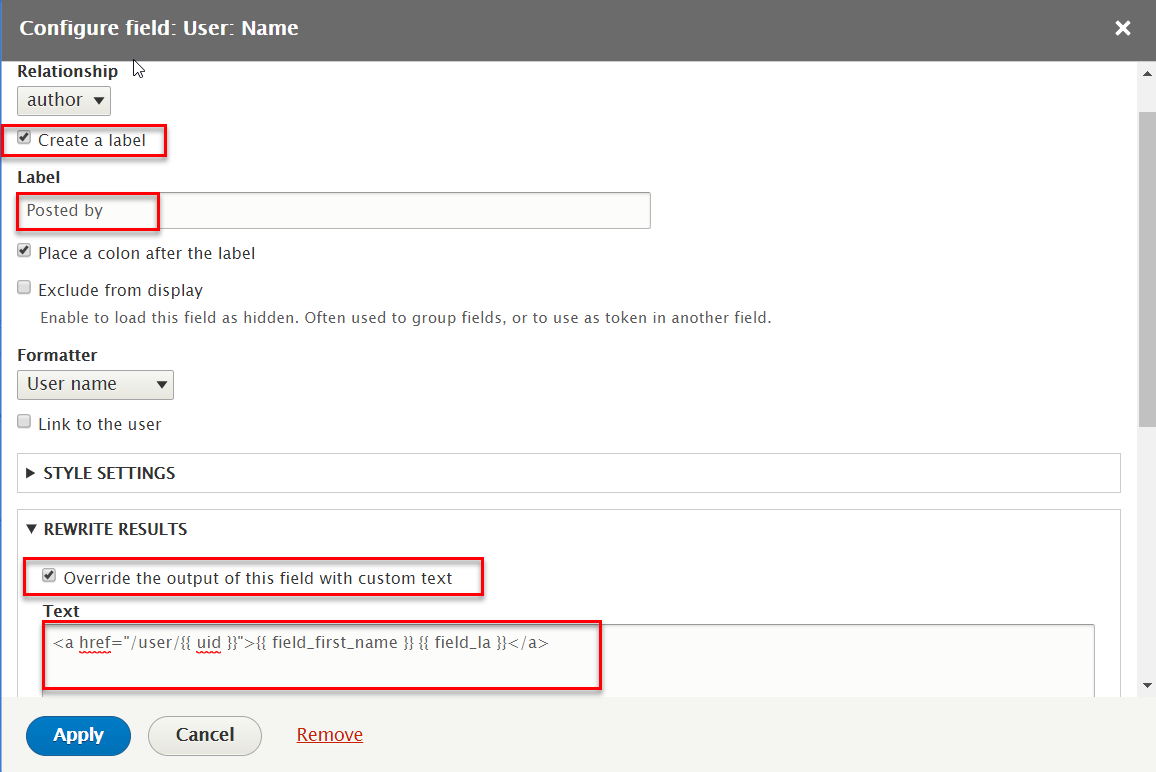
Step 9: At FIELDS area, click Add button to add fields: User: Name field with following settings:

Refer to following HTML code:
{{ field_first_name }} {{ field_la }}
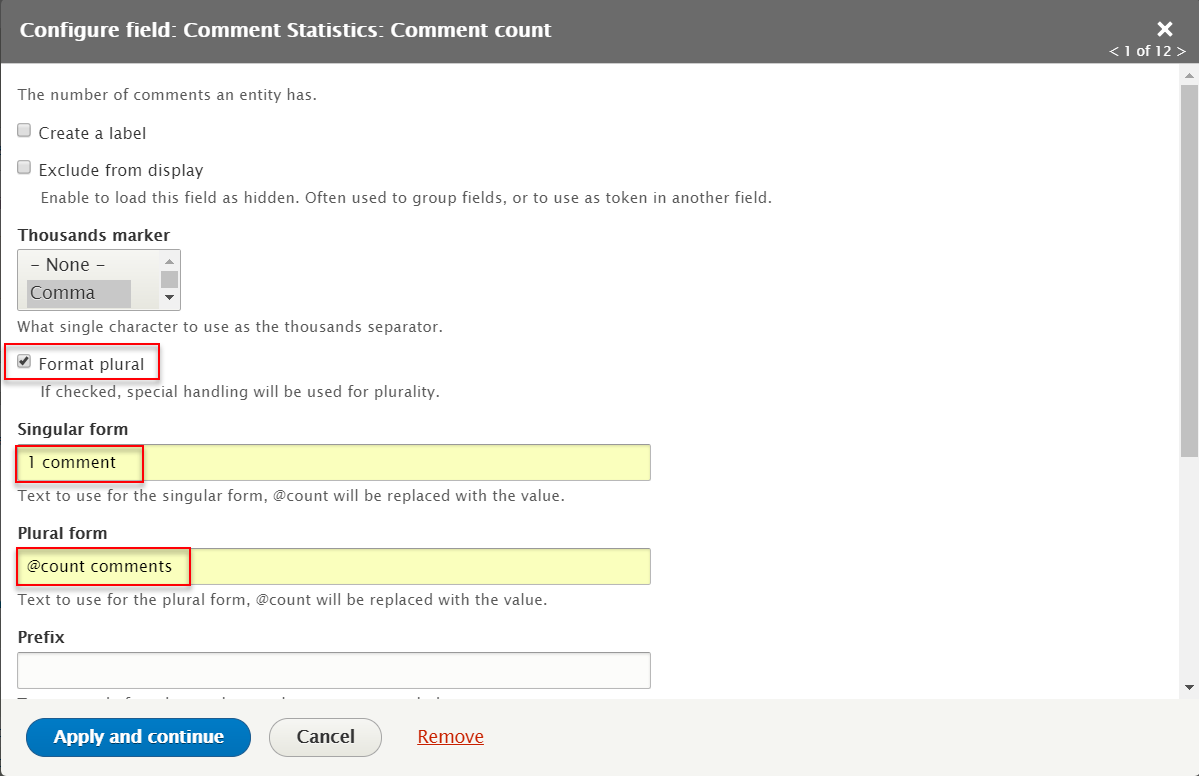
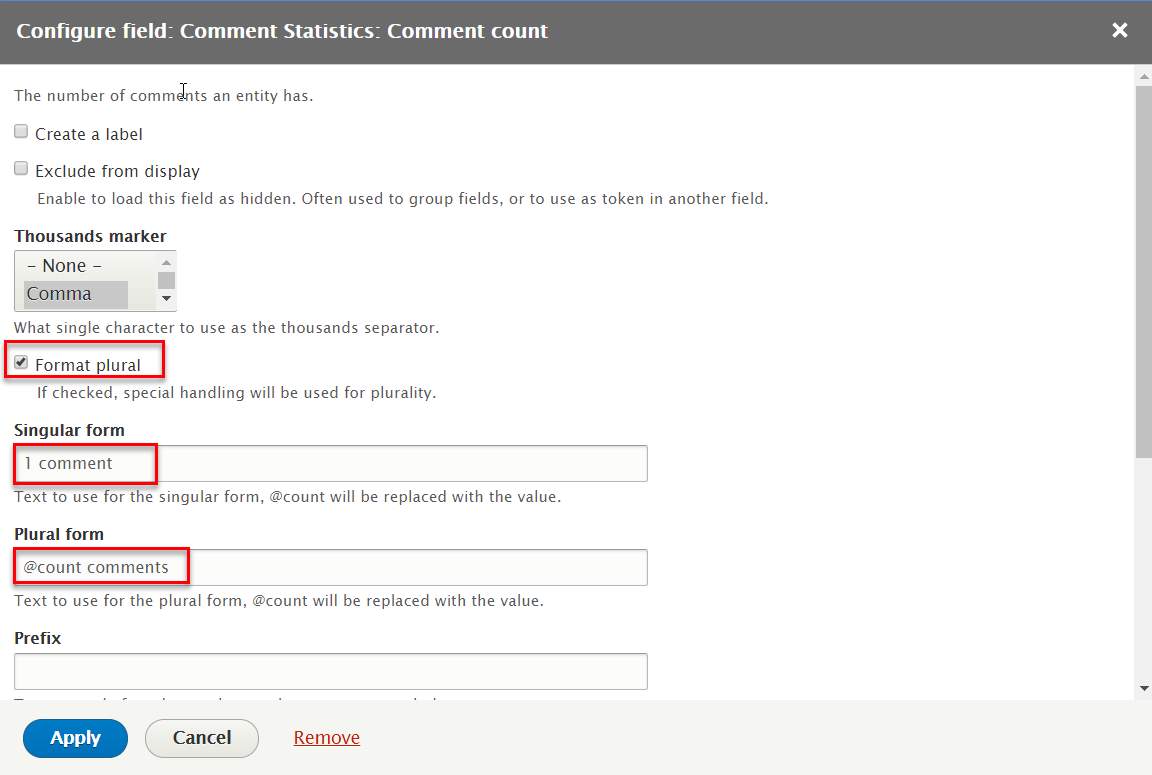
Step 10: At FIELDS area, click Add button to add fields: Comment Statistics: Comment count field with following settings:
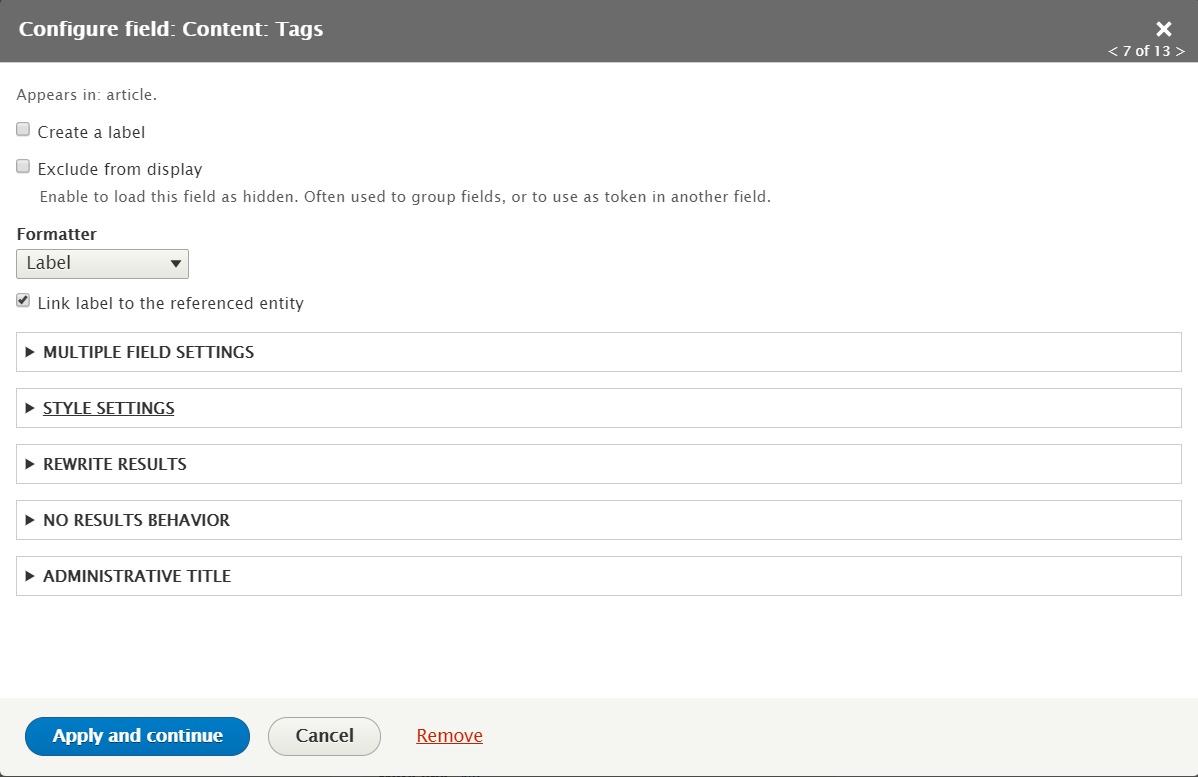
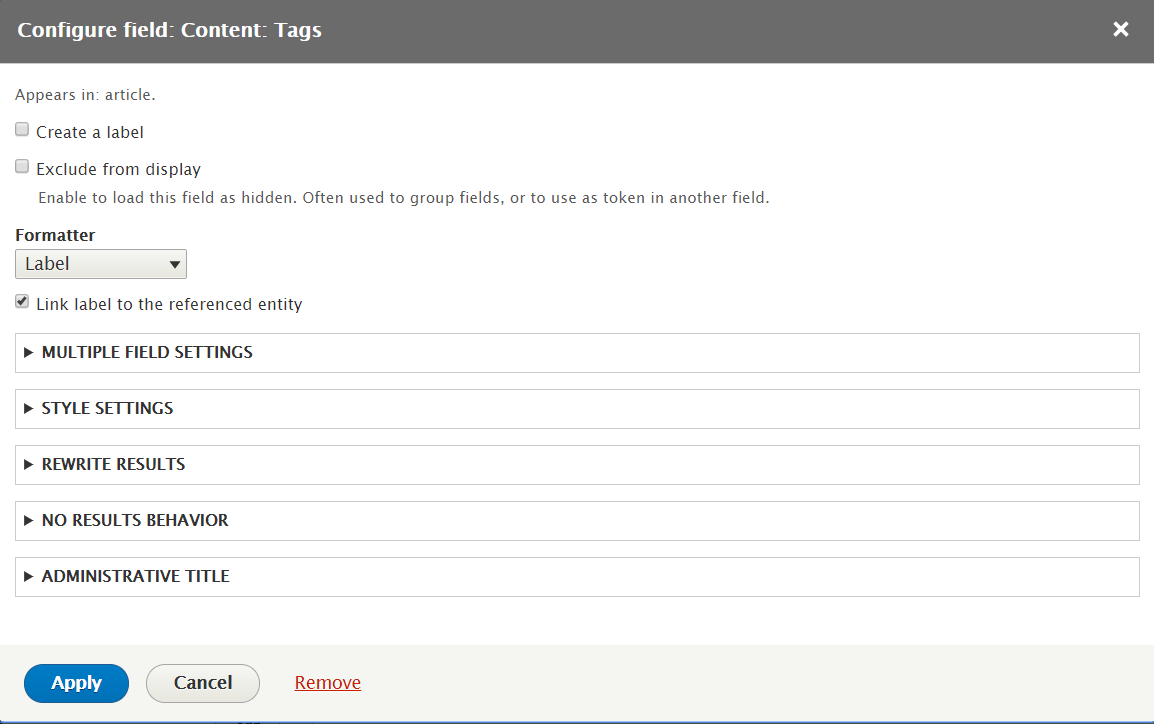
Step 11: At FIELDS area, click Add button to add fields: Content: Tags field with following settings:
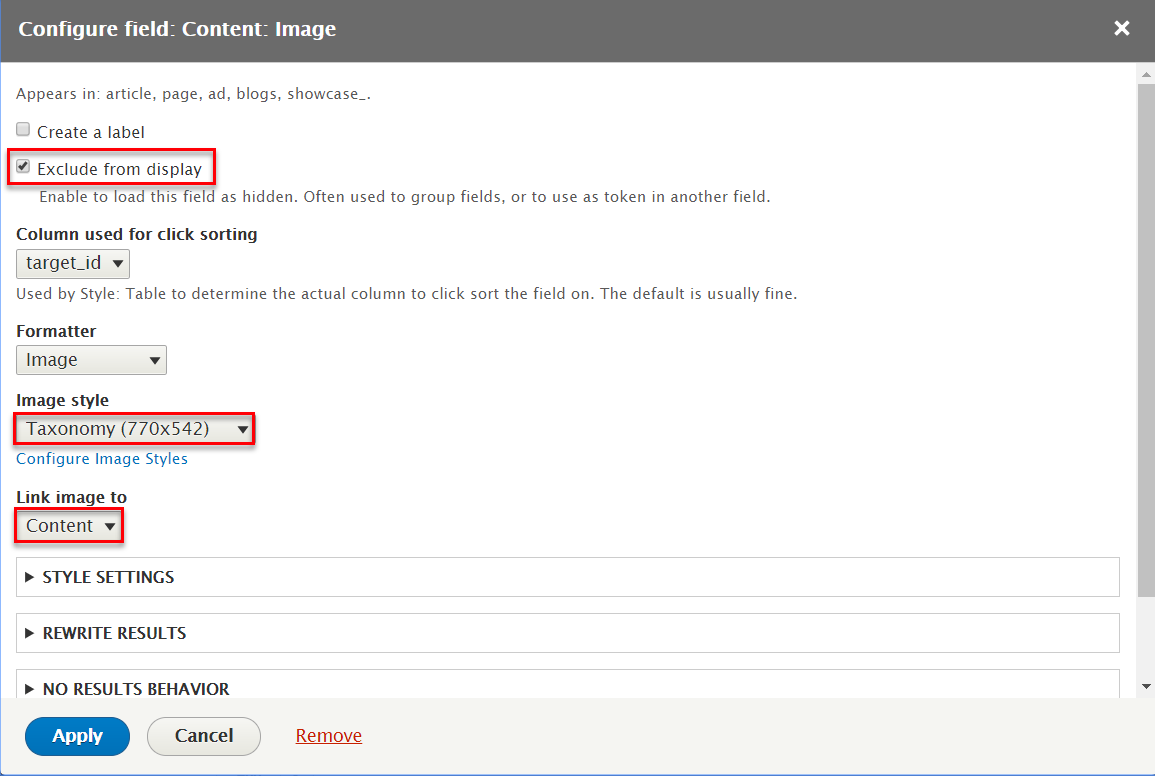
Step 12: At FIELDS area, click Add button to add fields: Content: Image field with following settings:

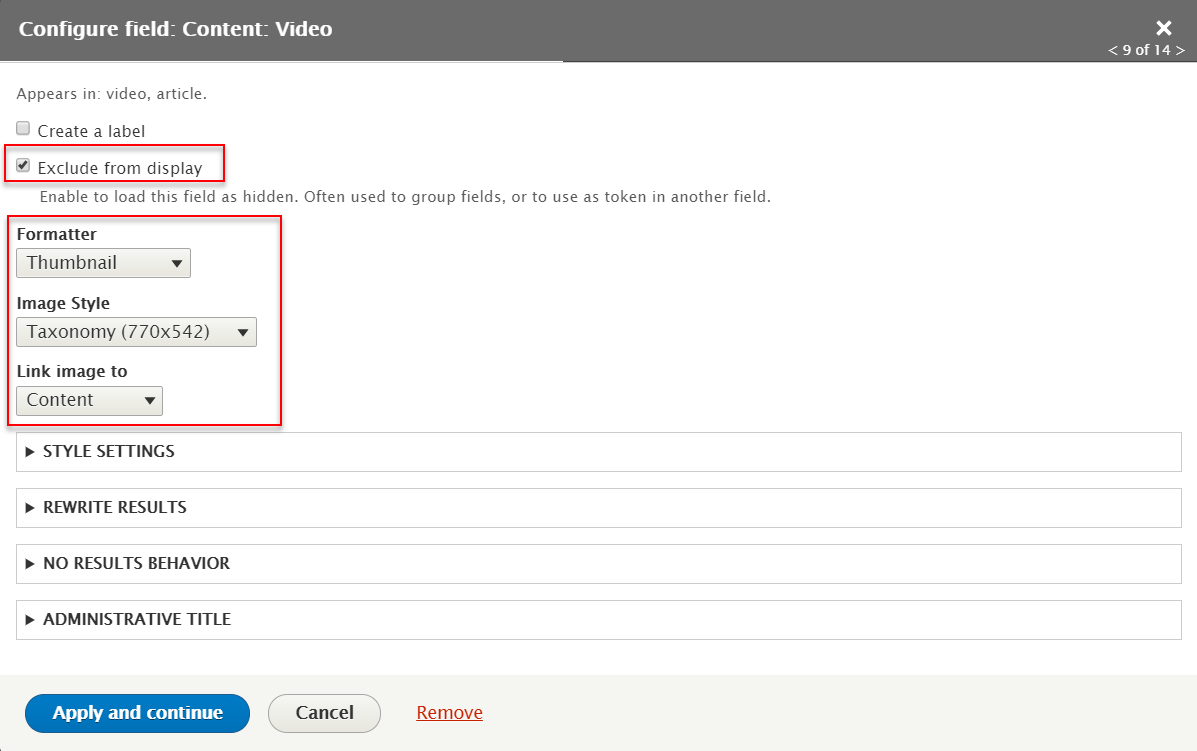
Step 13: At FIELDS area, click Add button to add fields: Content: Video field with following settings:
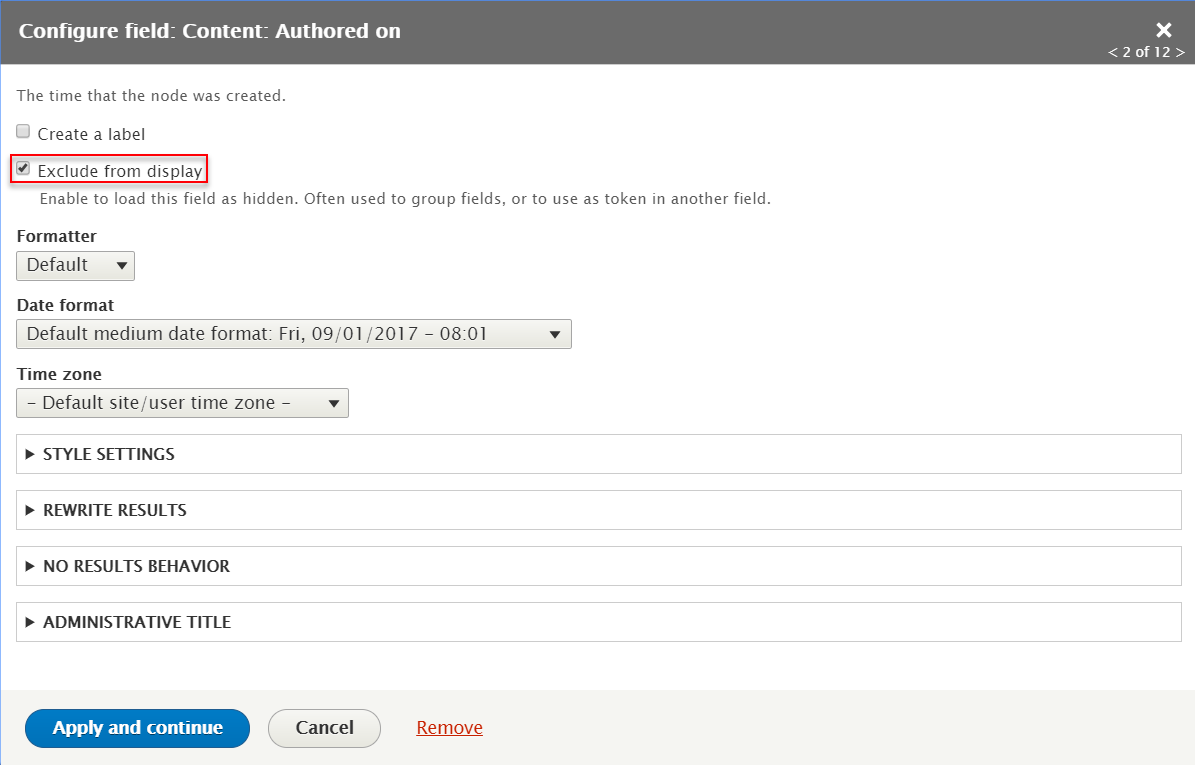
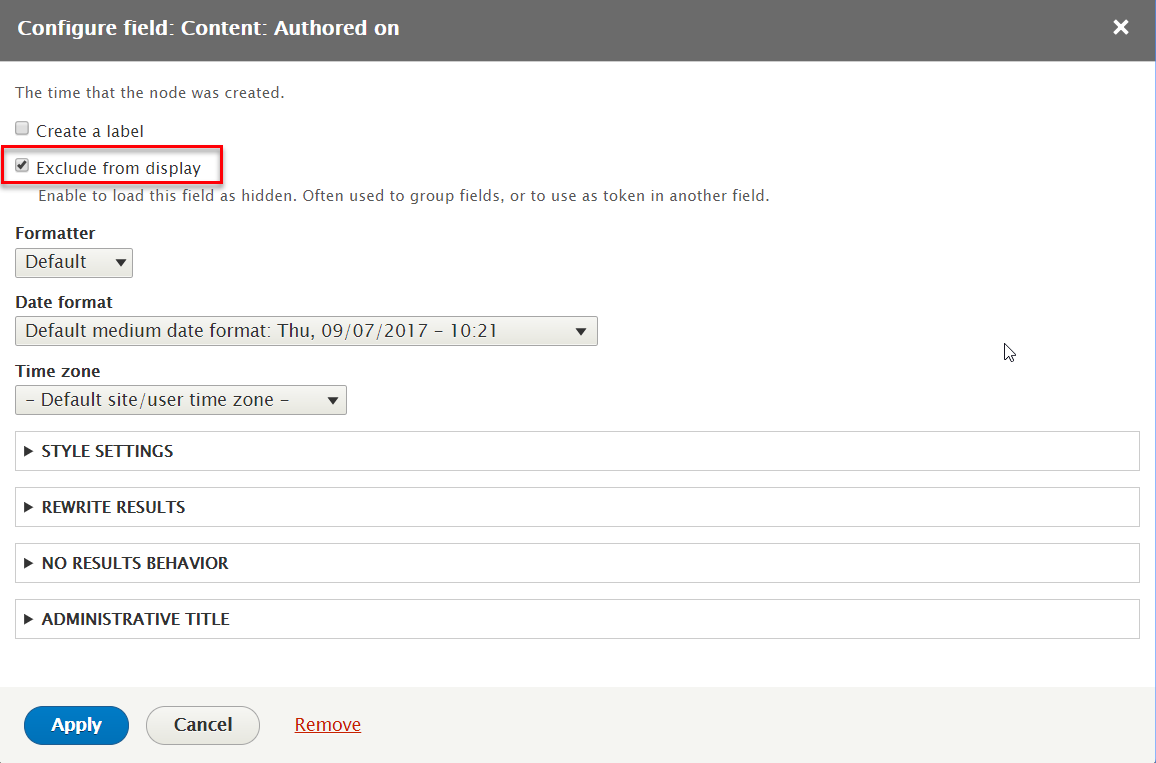
Step 14: At FIELDS area, click Add button to add fields: Content: Authored on field with following settings:
Step 15: At FIELDS area, click Add button to add fields: Global: Custom text field with following settings:
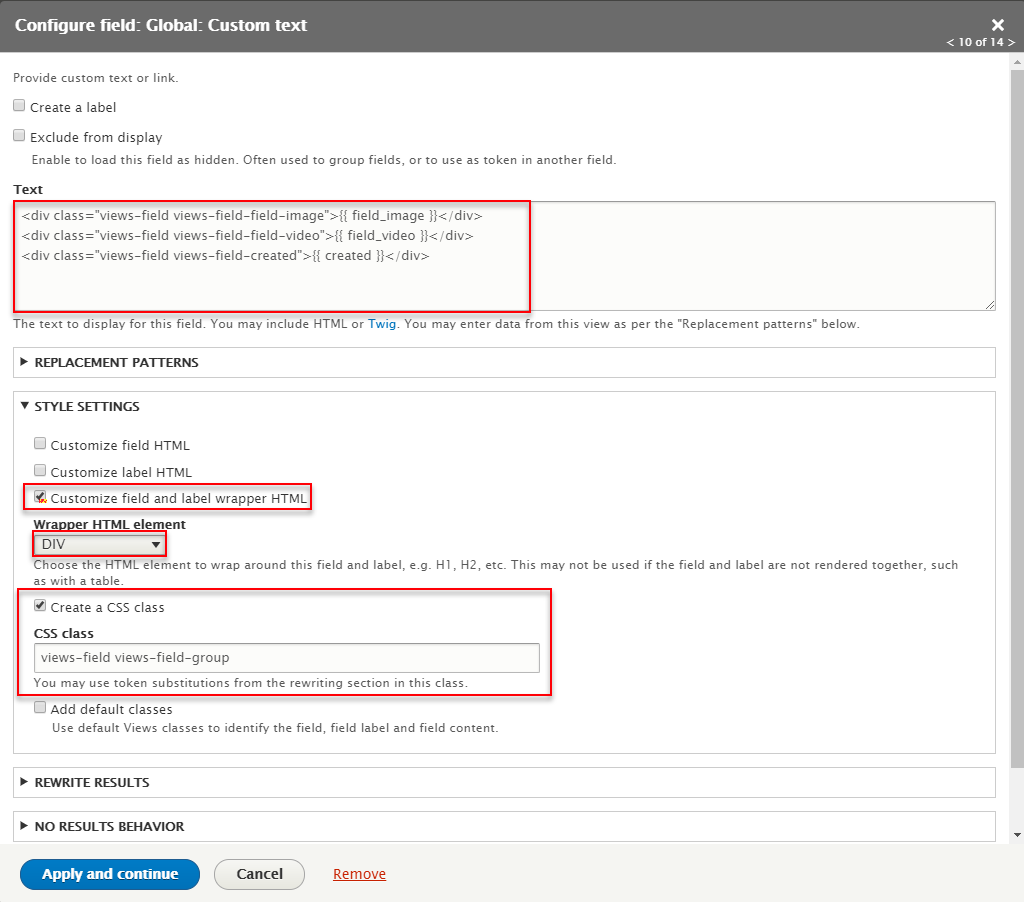
Refer to following HTML code:
                            {{ field_image }}
                            {{ field_video }}
                            {{ created }}
Step 16: At FIELDS area, click Add button to add fields: Content: Body field with following settings:
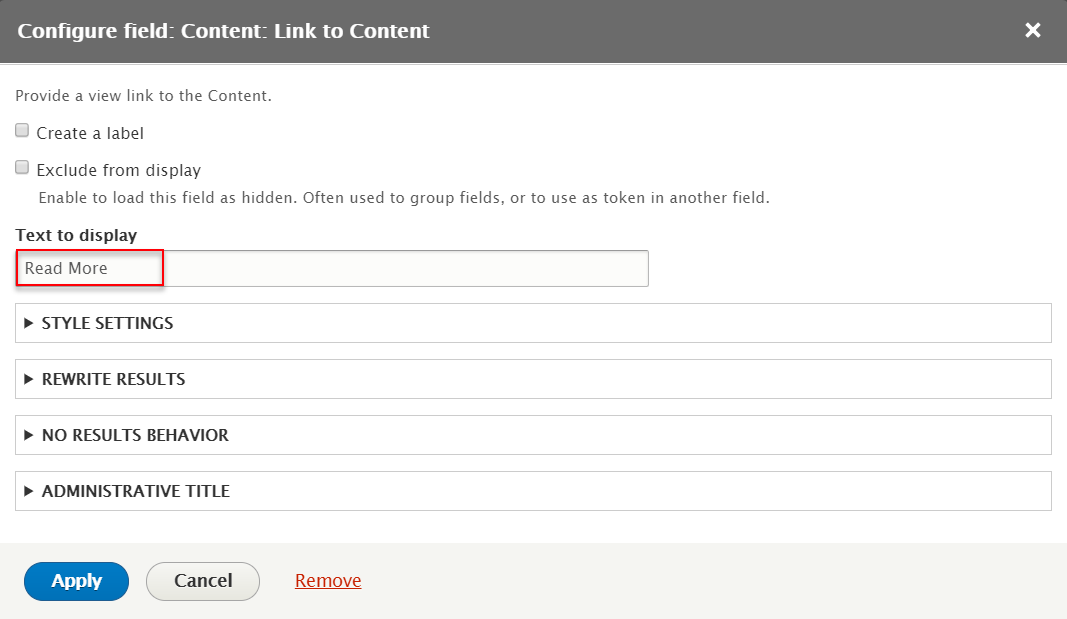
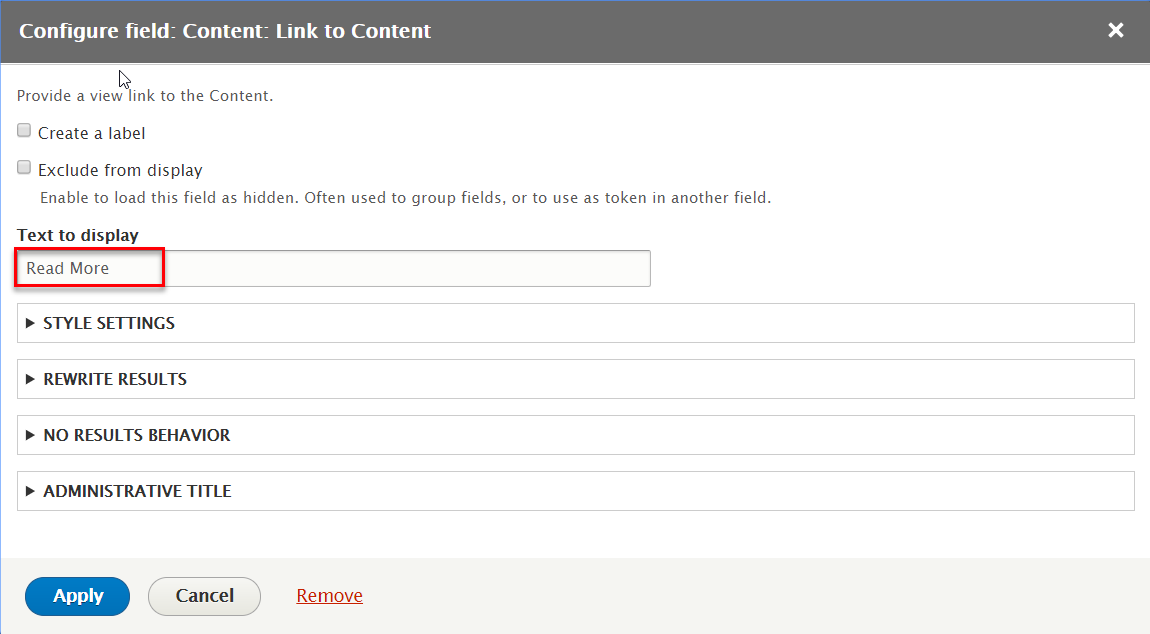
Step 17: At FIELDS area, click Add button to add fields: Content: Link to Content field with following settings:
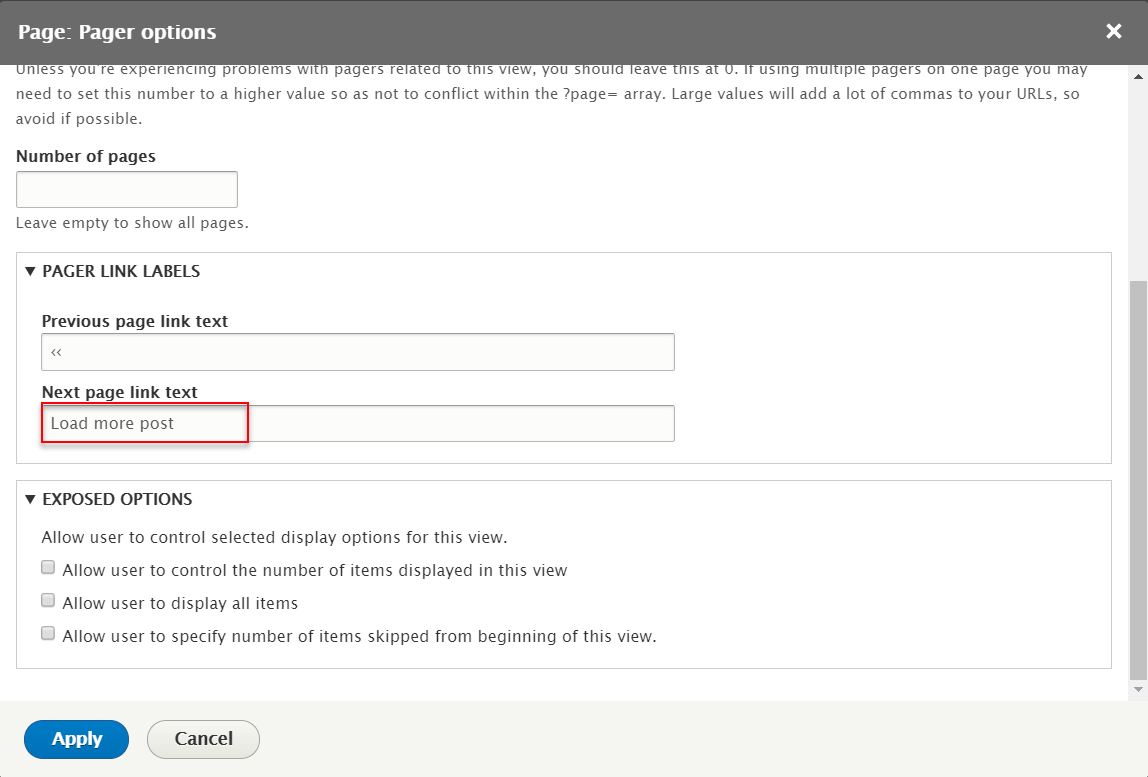
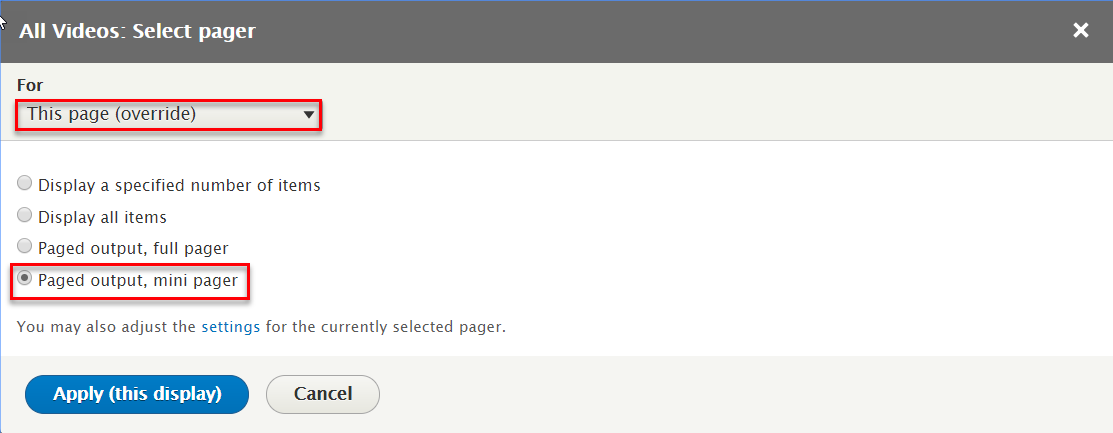
Step 17: At PAGER > Use pager area, click Mini pager, 3 items link to change configuration:
Step 18: Click Save button
Showcase Page
1. Create Showcase view
Step 1: Navigate to Structure > Views, click Add view, then create Showcase view with following settings:
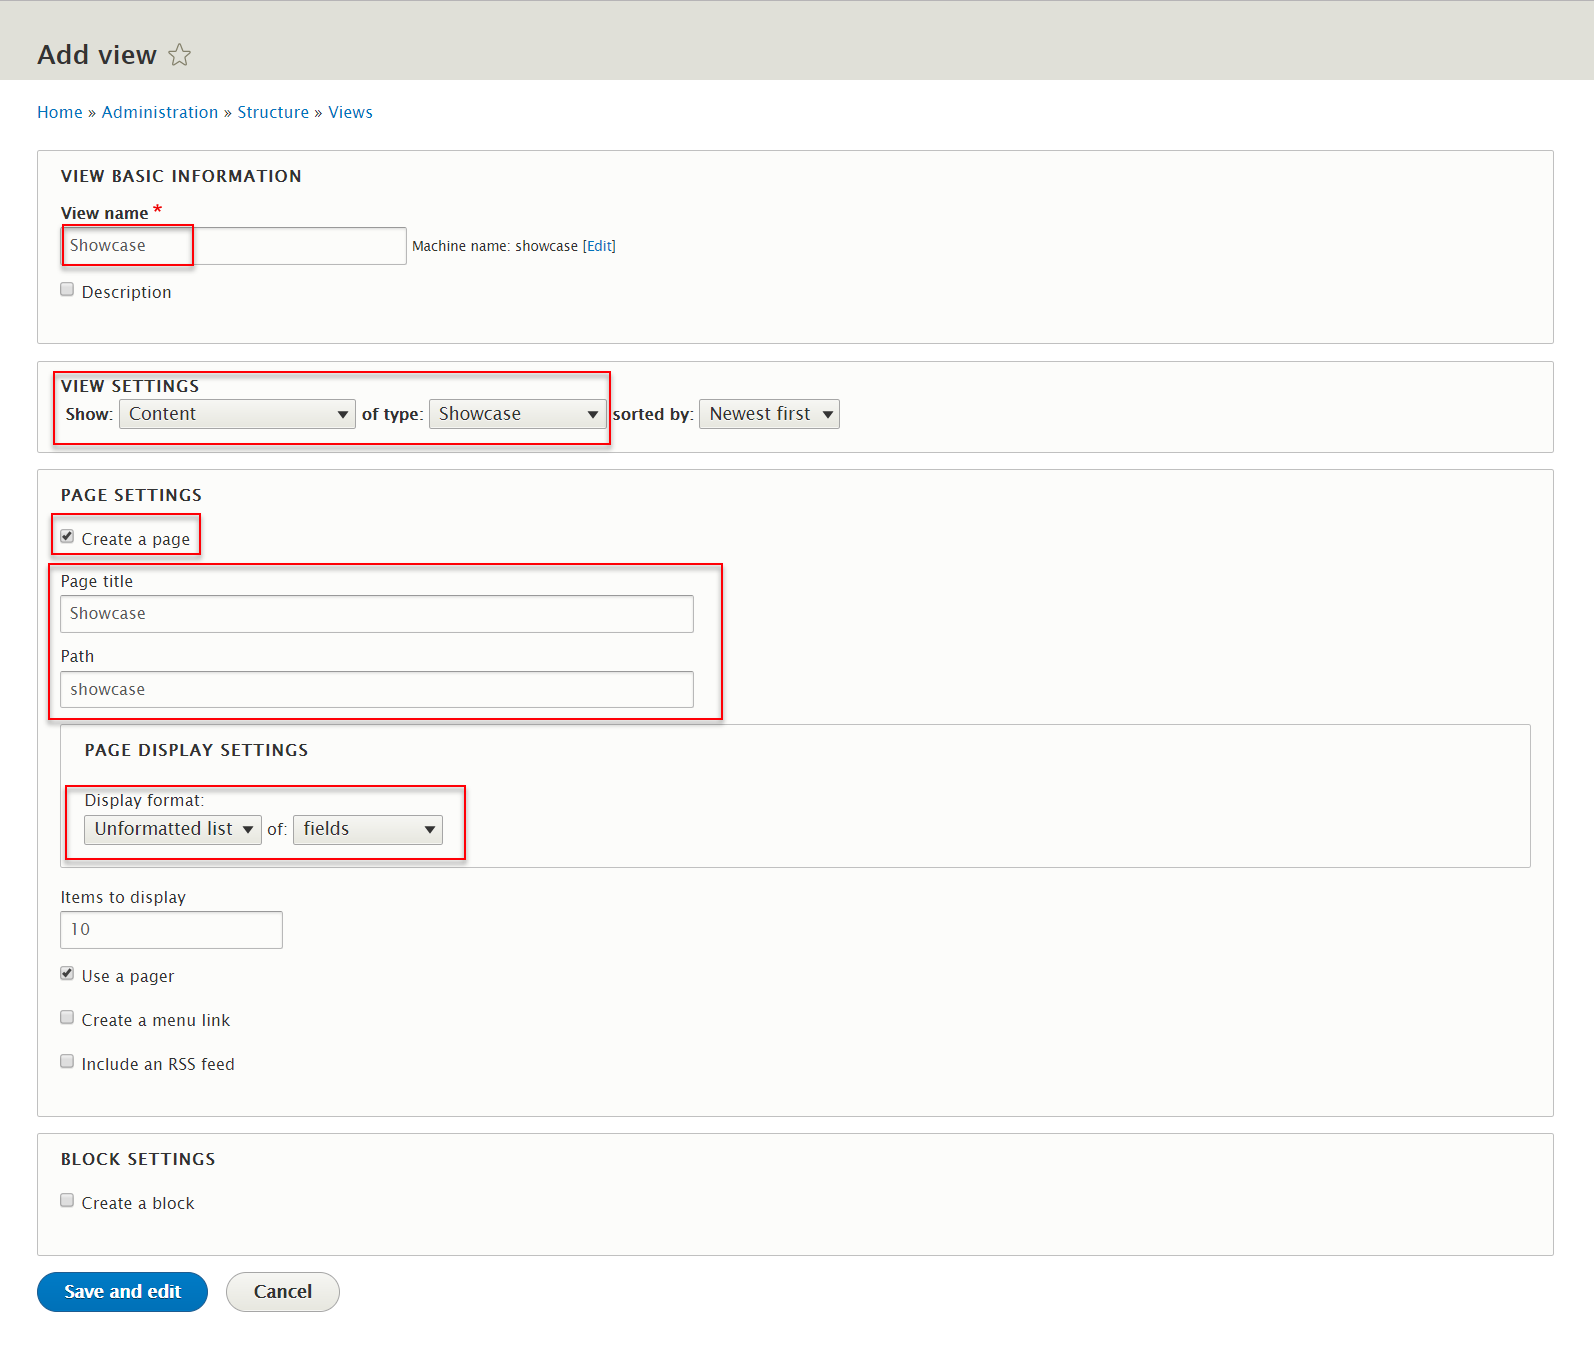
Step 2: Click Save and edit button. Next to steps below to set properties for following fields:
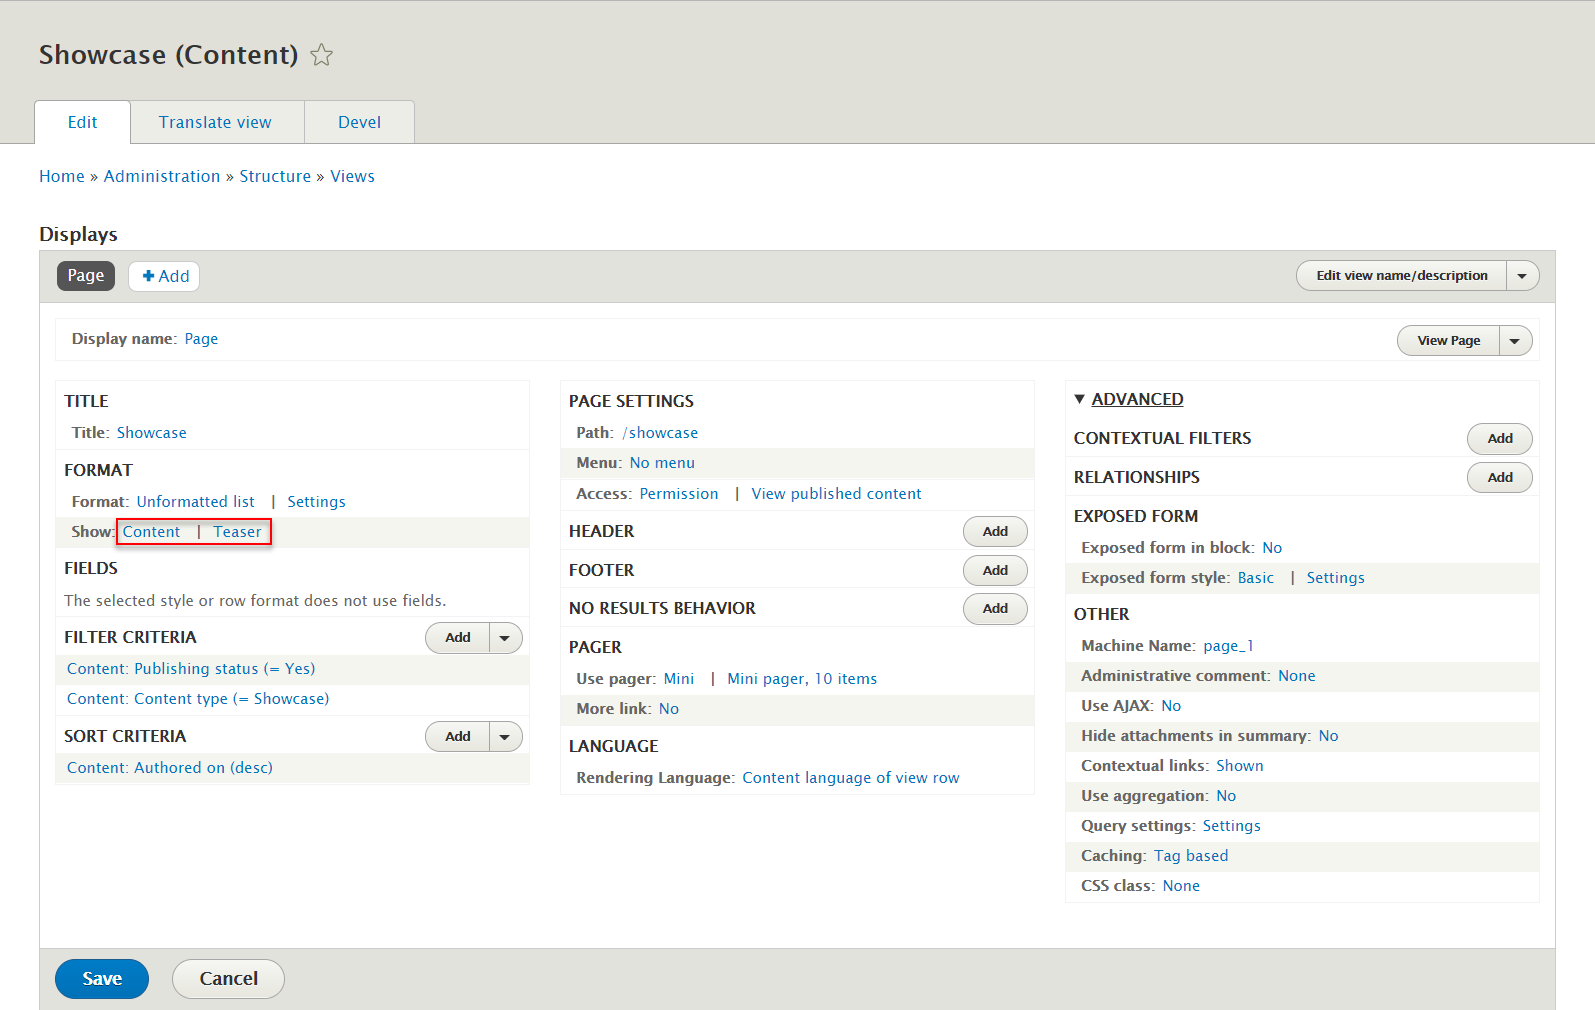
Step 3: At FORMAT > Show area, click Fields link to change fields: Content | Teaser field with following settings:
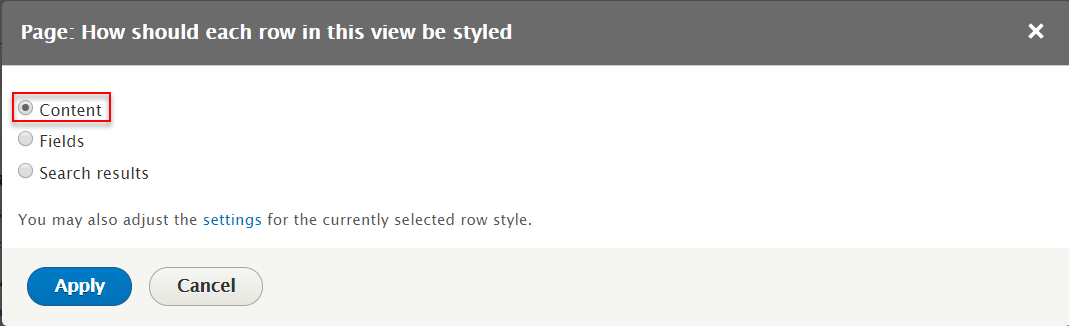
Step 4: Click Apply button
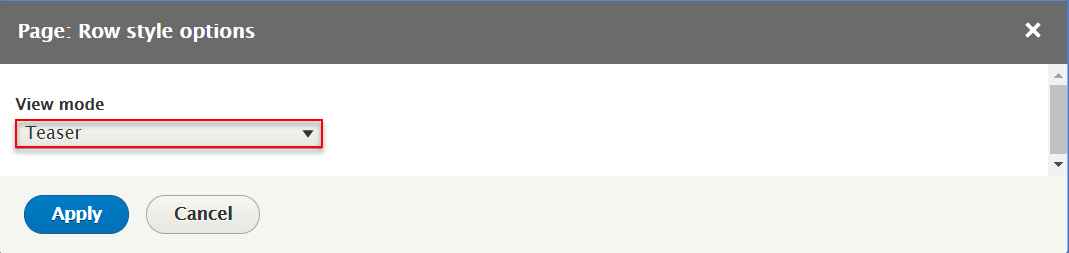
Step 5: Click Apply button
Blogs page
Front end Display

Ads block

1.1 Create Ads block
Step 1: Navigate to Structure > Views, click Add view, then create Blog Block view with following settings:
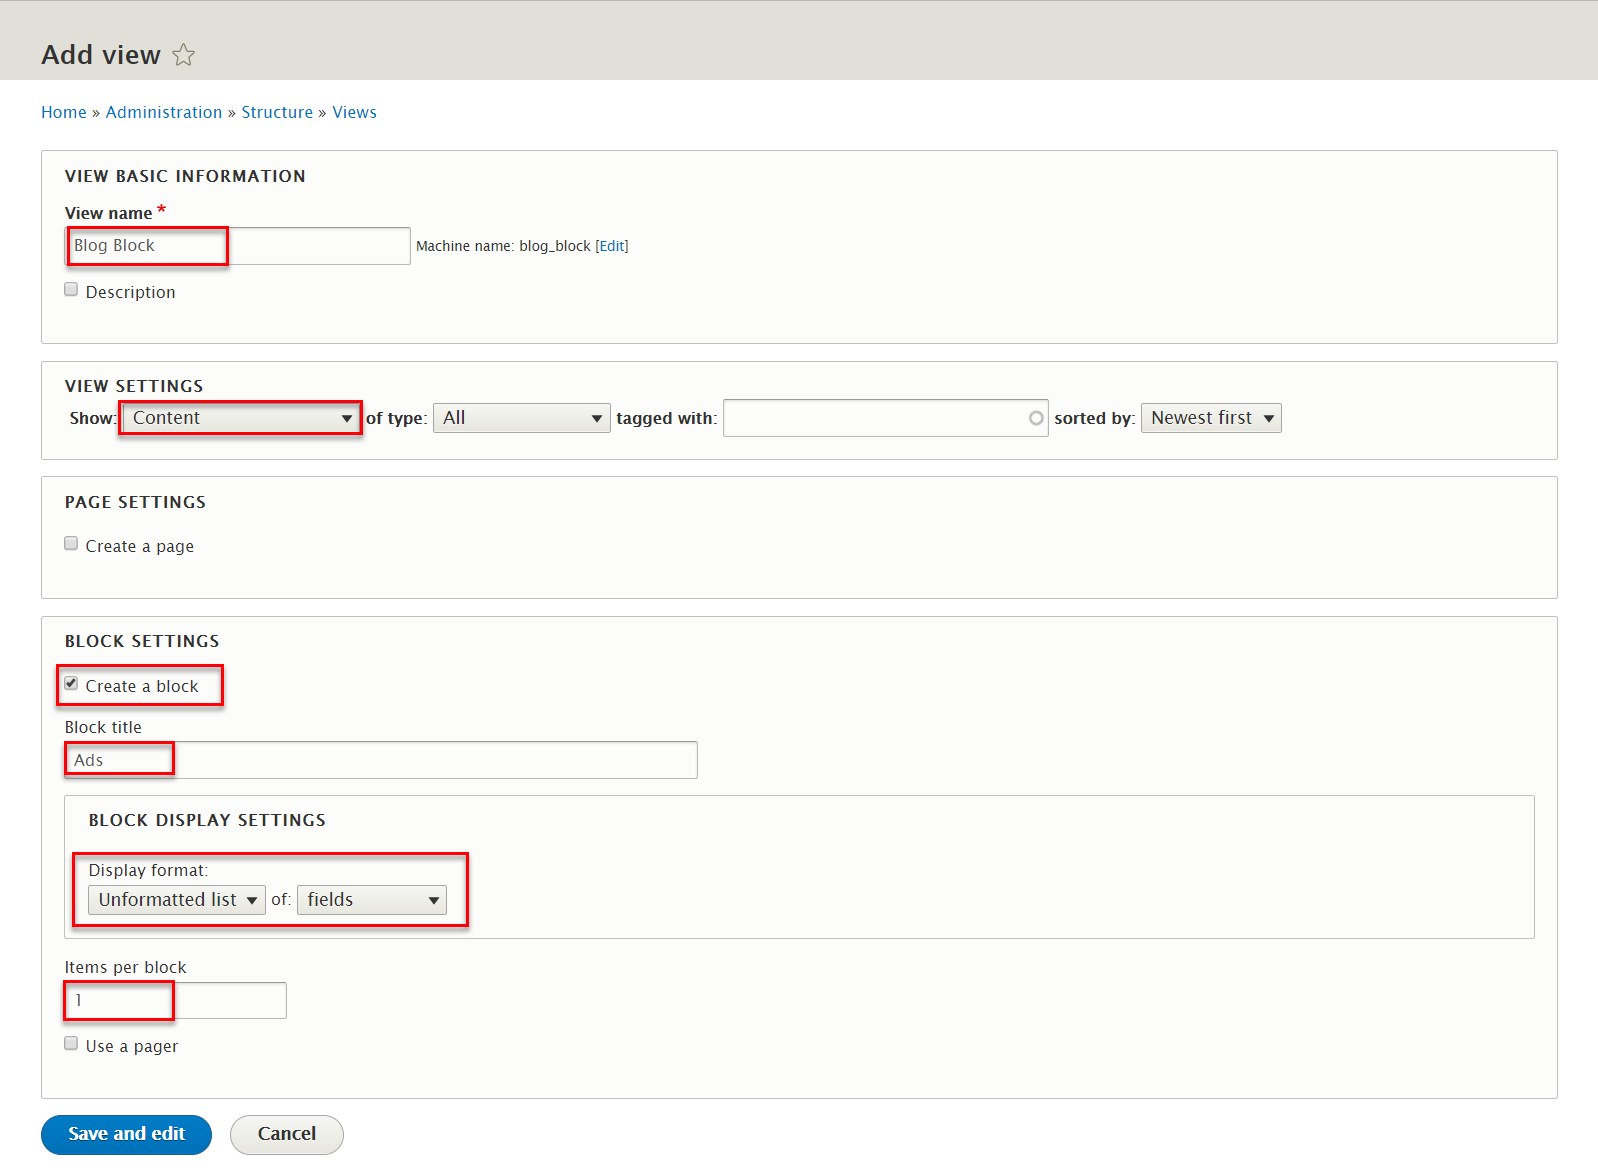
Step 2: Click Save and edit button. Next to steps below to set properties for following fields:
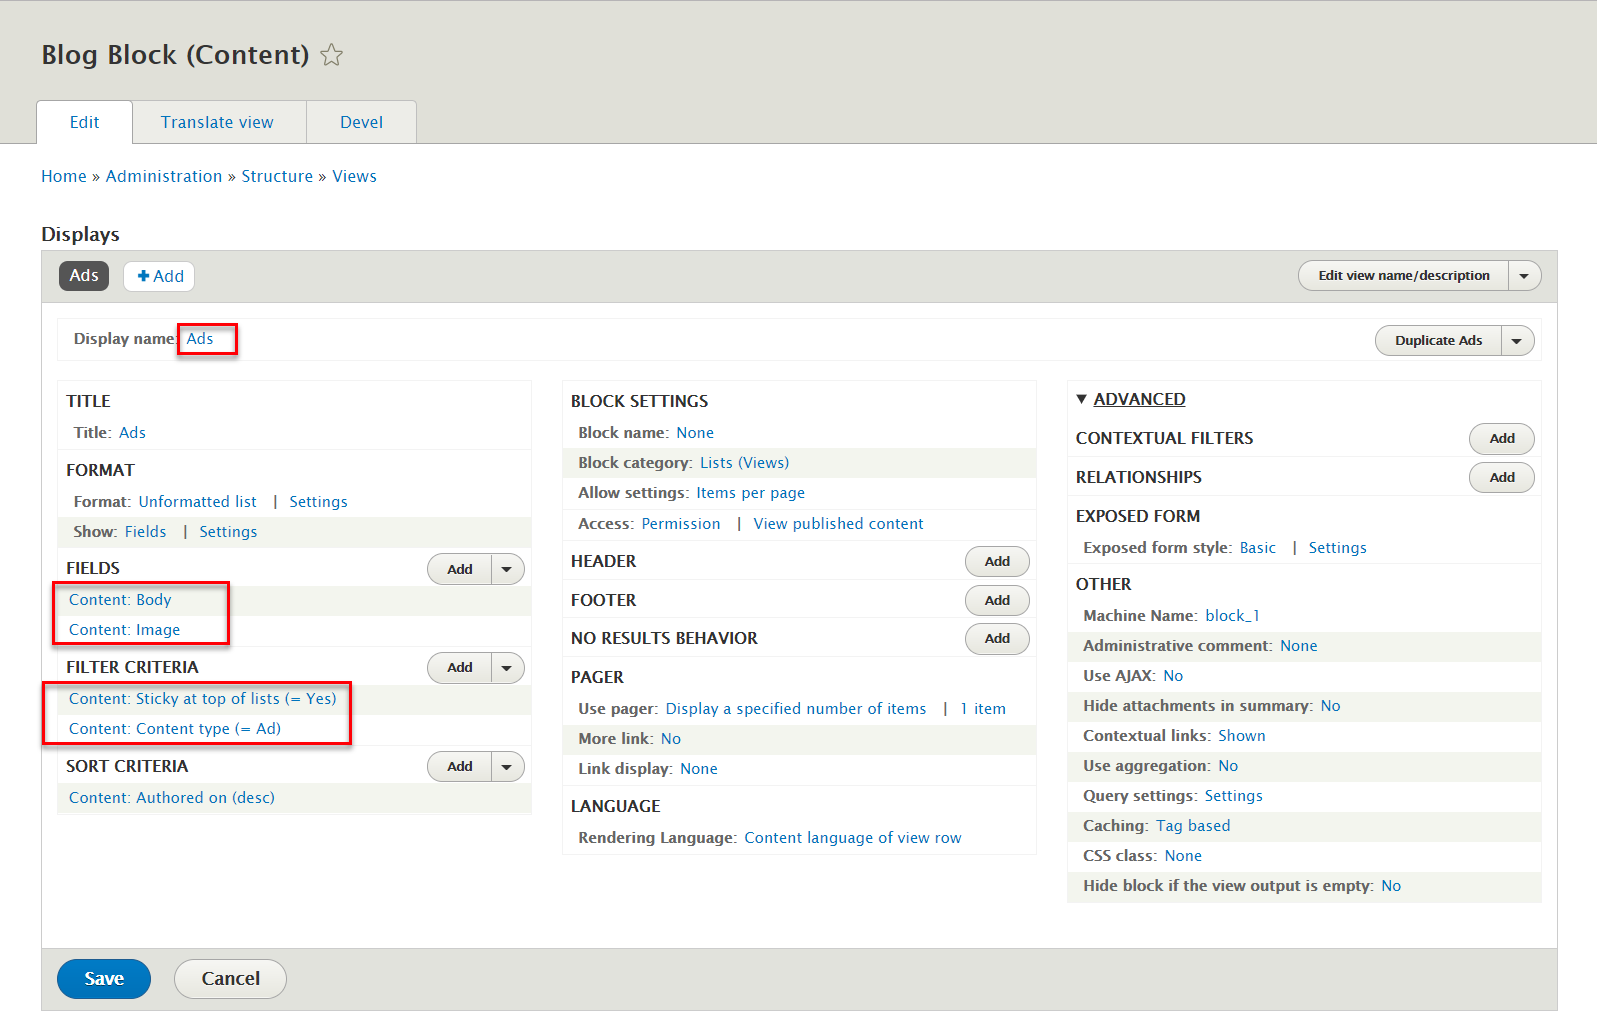
Step 3: At FIELDS area, click Add button to add fields: Content: Body field with following settings:

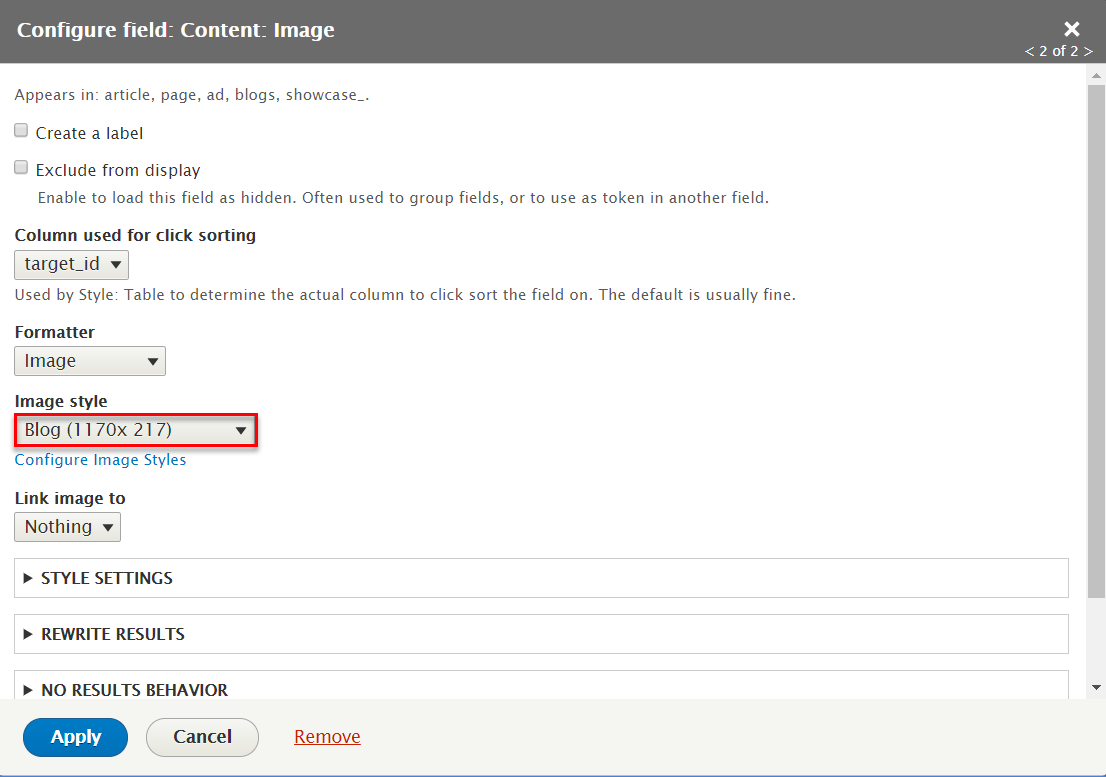
Step 4: At FIELDS area, click Add button to add fields: Content: Image field with following settings:
Step 5: At FIELDS area, click Content: Title to remove this field:

Step 6: At FILTER CRITERIA area, click Add button to add fields: Content: Sticky at top of lists field with following settings:

Step 7: At FILTER CRITERIA area, click Add button to add fields: Content: Content type field with following settings:

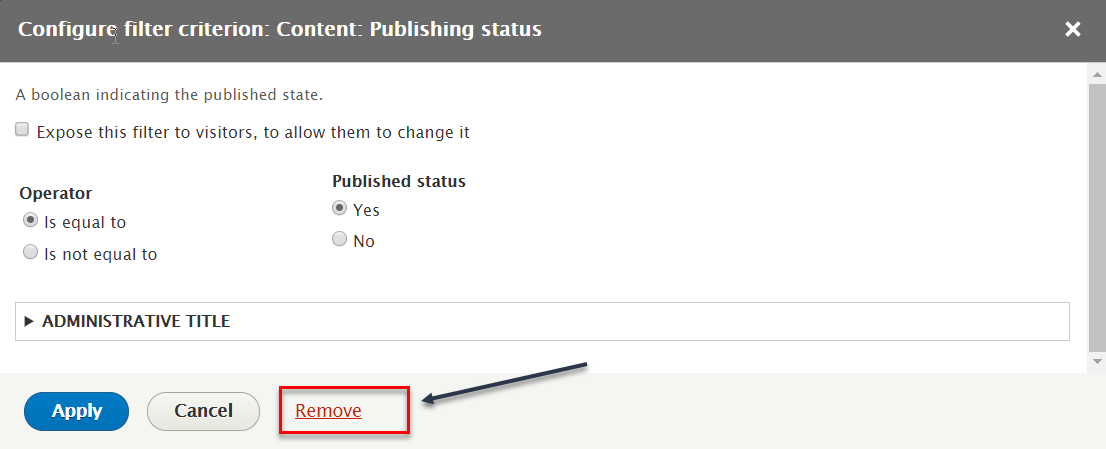
Step 8: At FILTER CRITERIA area, click Content: Publishing status to remove this field
1.2 Configure Ads block
Step 1: Navigate to Structure > Block layout
Step 2: Find Featured click Place block button
Step 3: Find Blog Block: Ads Lists (Views) click Place block button and set following properites:
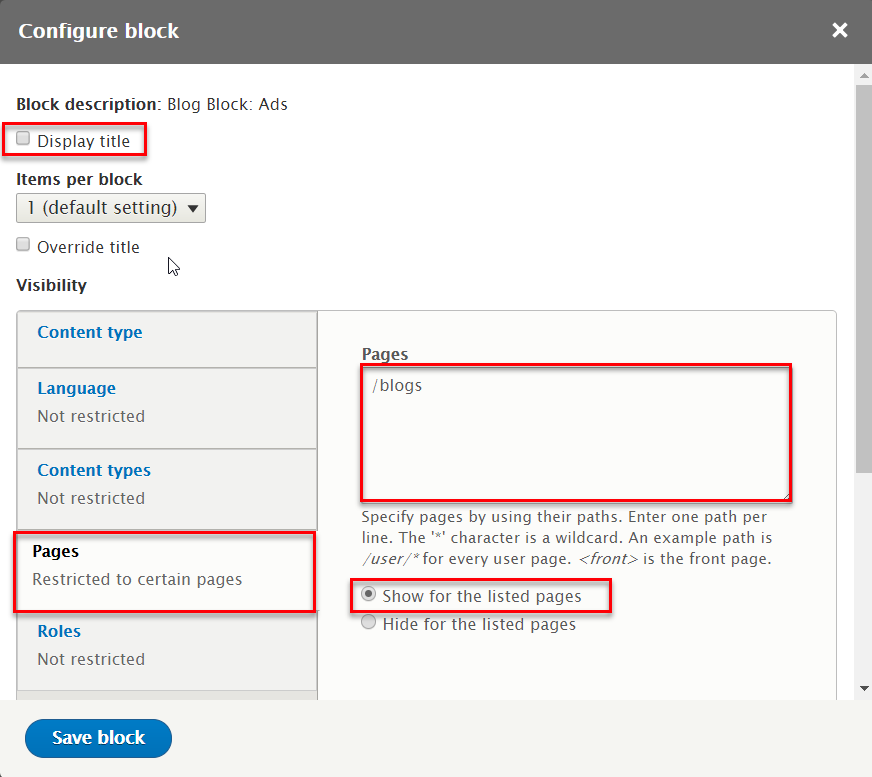
Step 4: Click Save block button.
Highlight block
Front end Display

2.1 Create Highlight 1 block
Step 1: Navigate to Structure > Views, find Blog Block views and click Edit link
Step 2: Click Add link to create Highlight 1 view and set following properites:
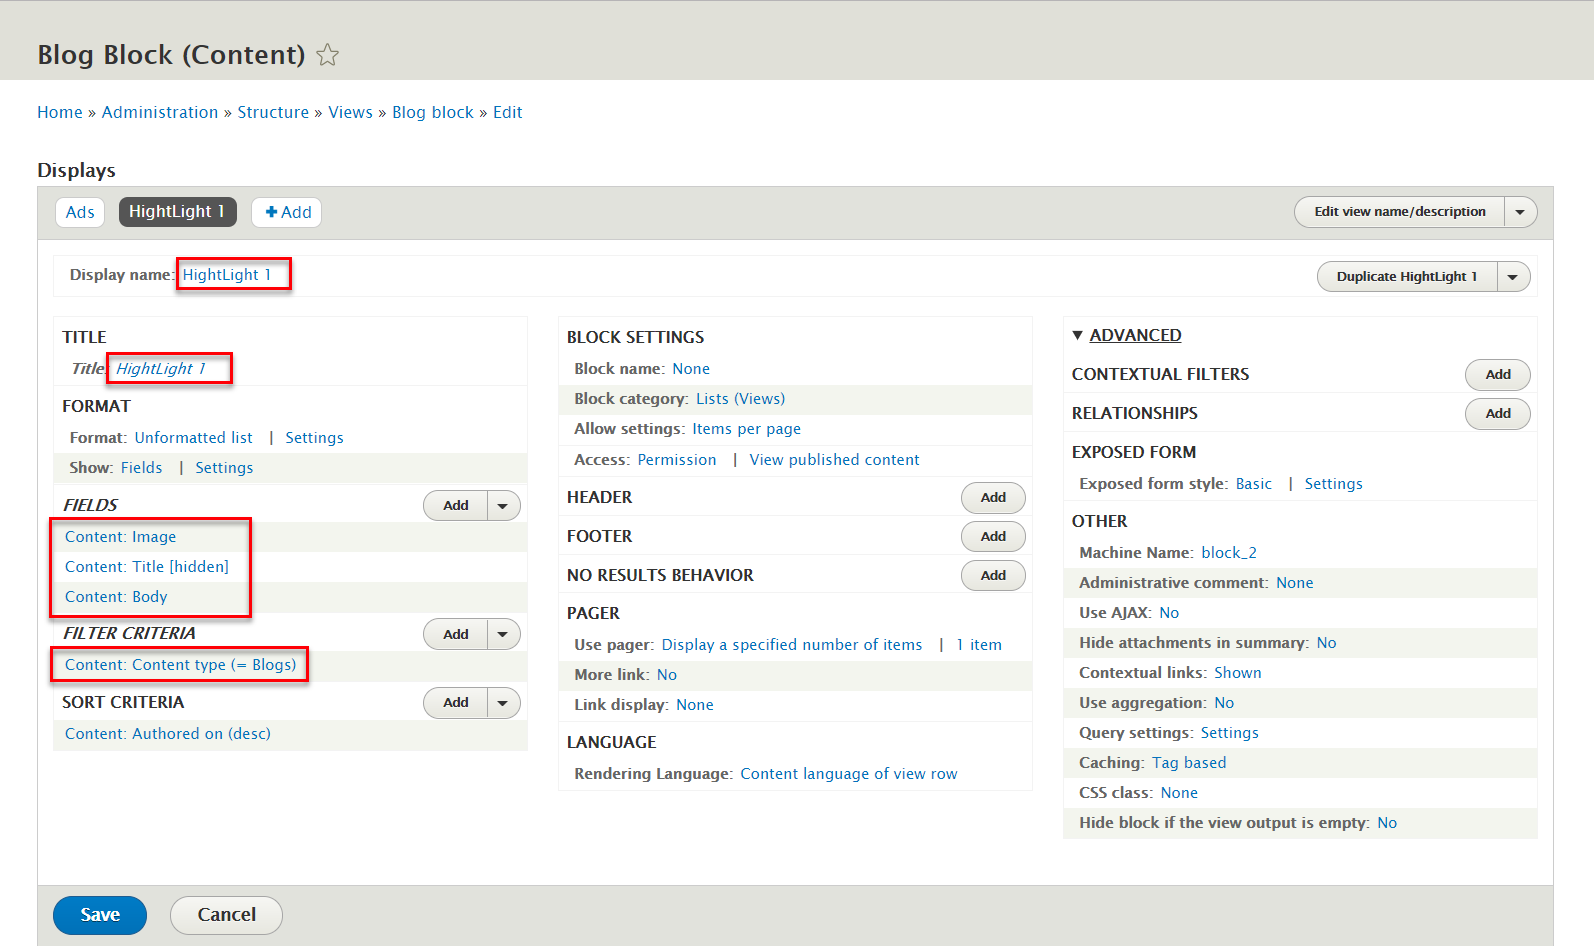
Step 3: At Display name and Title areas, change name Highlight 1

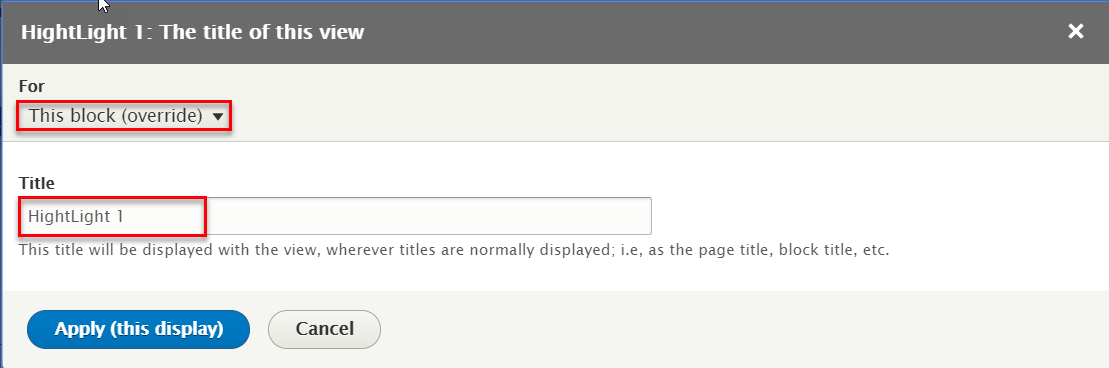
Step 4: At FIELDS area, click Add button to add fields: Content: Title. Set properties for Content: Title

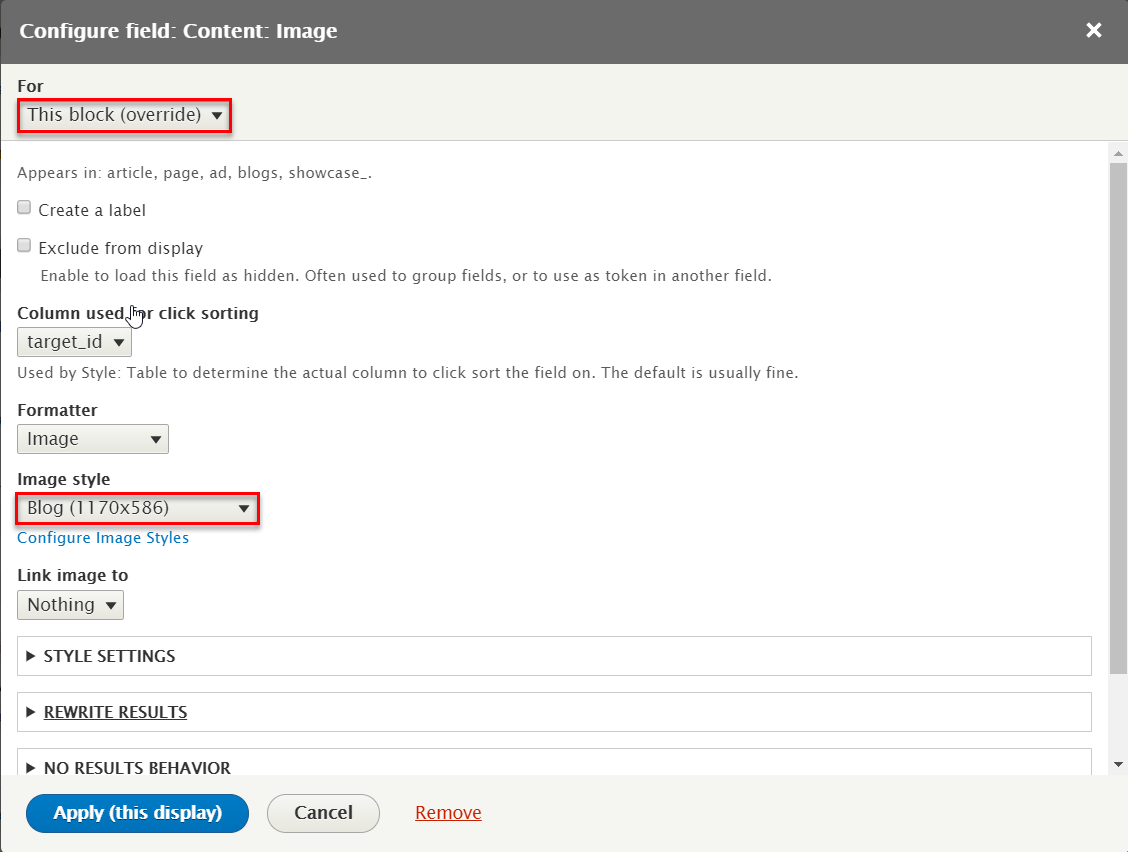
Step 5: At FIELDS area, click Content: Image field. Set properties for Content: Image
Step 6: At FIELDS area, click Content: Body field. Set properties for Content: Body

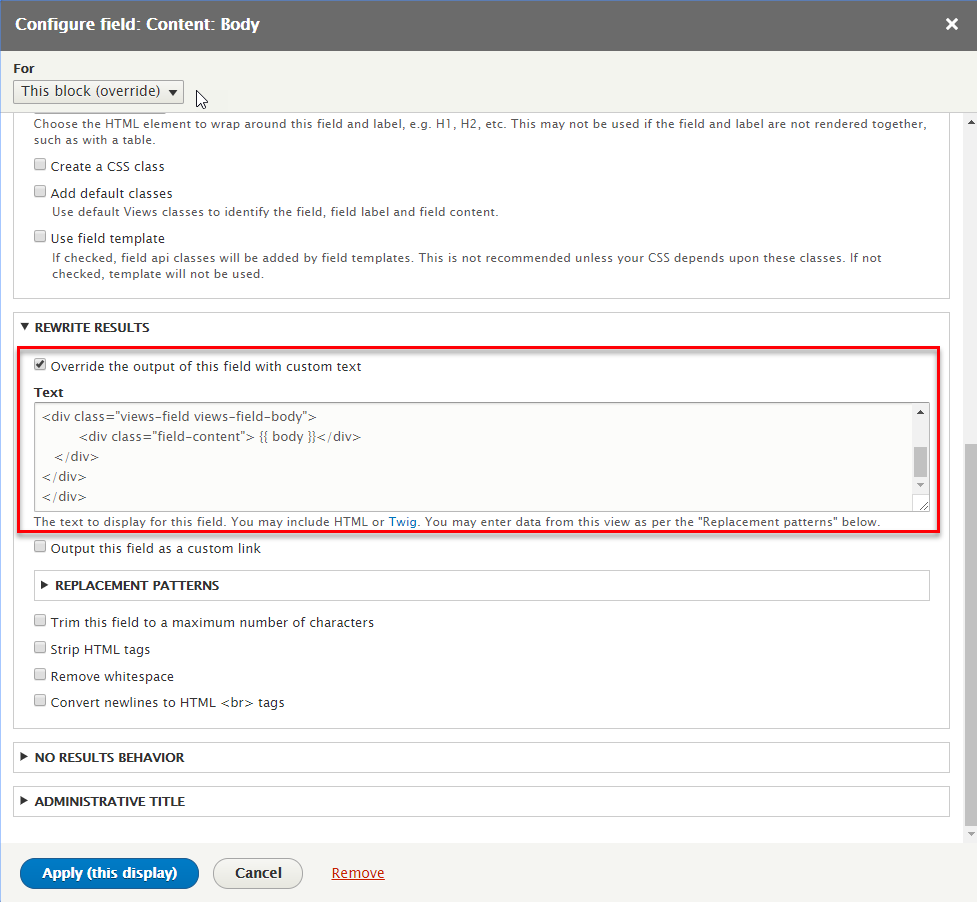
Refer to following HTML code:
                                          {{ title }}


                                          {{ body }}
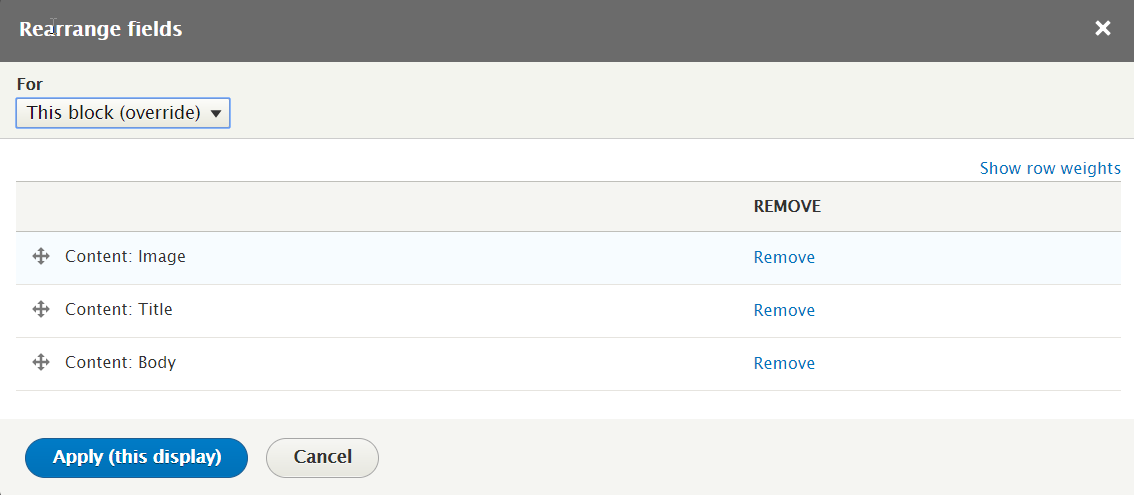
Step 8: At FIELDS area, click Dropdown of Add and click Rearrange button to rearrange fields
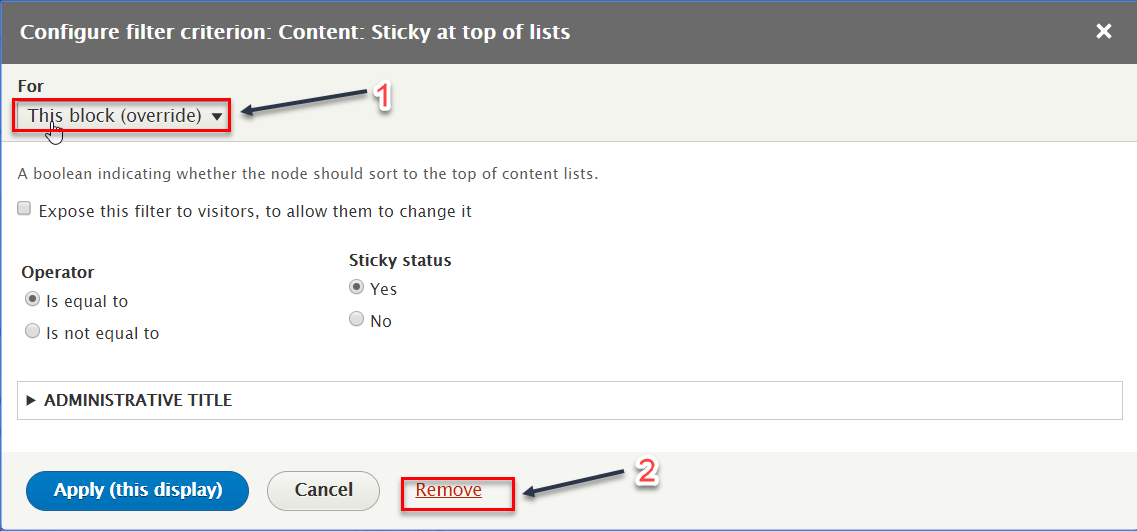
Step 8: At FILTER CRITERIA area, click Content: Sticky at top of lists field to remove this field
Step 8: At FILTER CRITERIA area, click Content: Content type field to change properties for Content: Content type

Step 8: Click Save button.
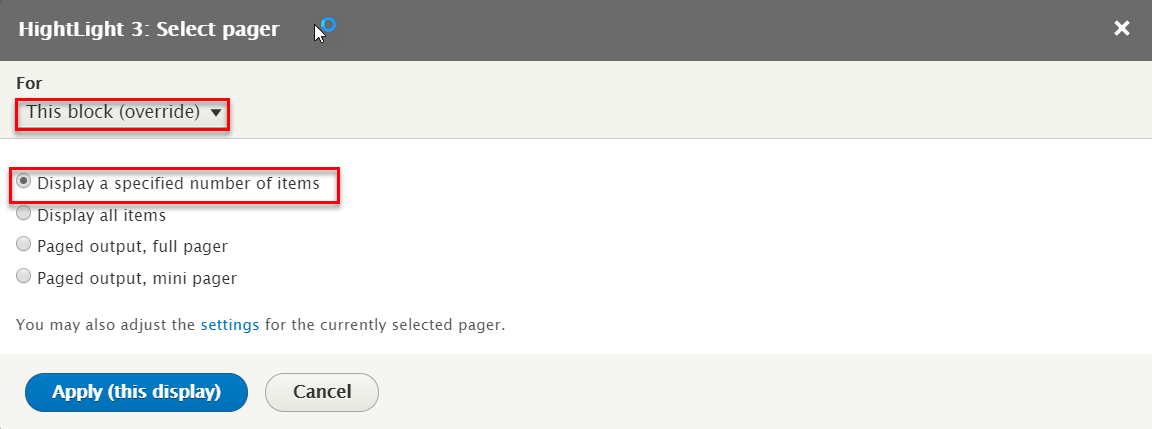
2.2 Create Highlight 3 block
Step 1: Navigate to Structure > Views, find Blog Block views and click Edit link
Step 2: Click Add link to create Highlight 3 view and set following properites:
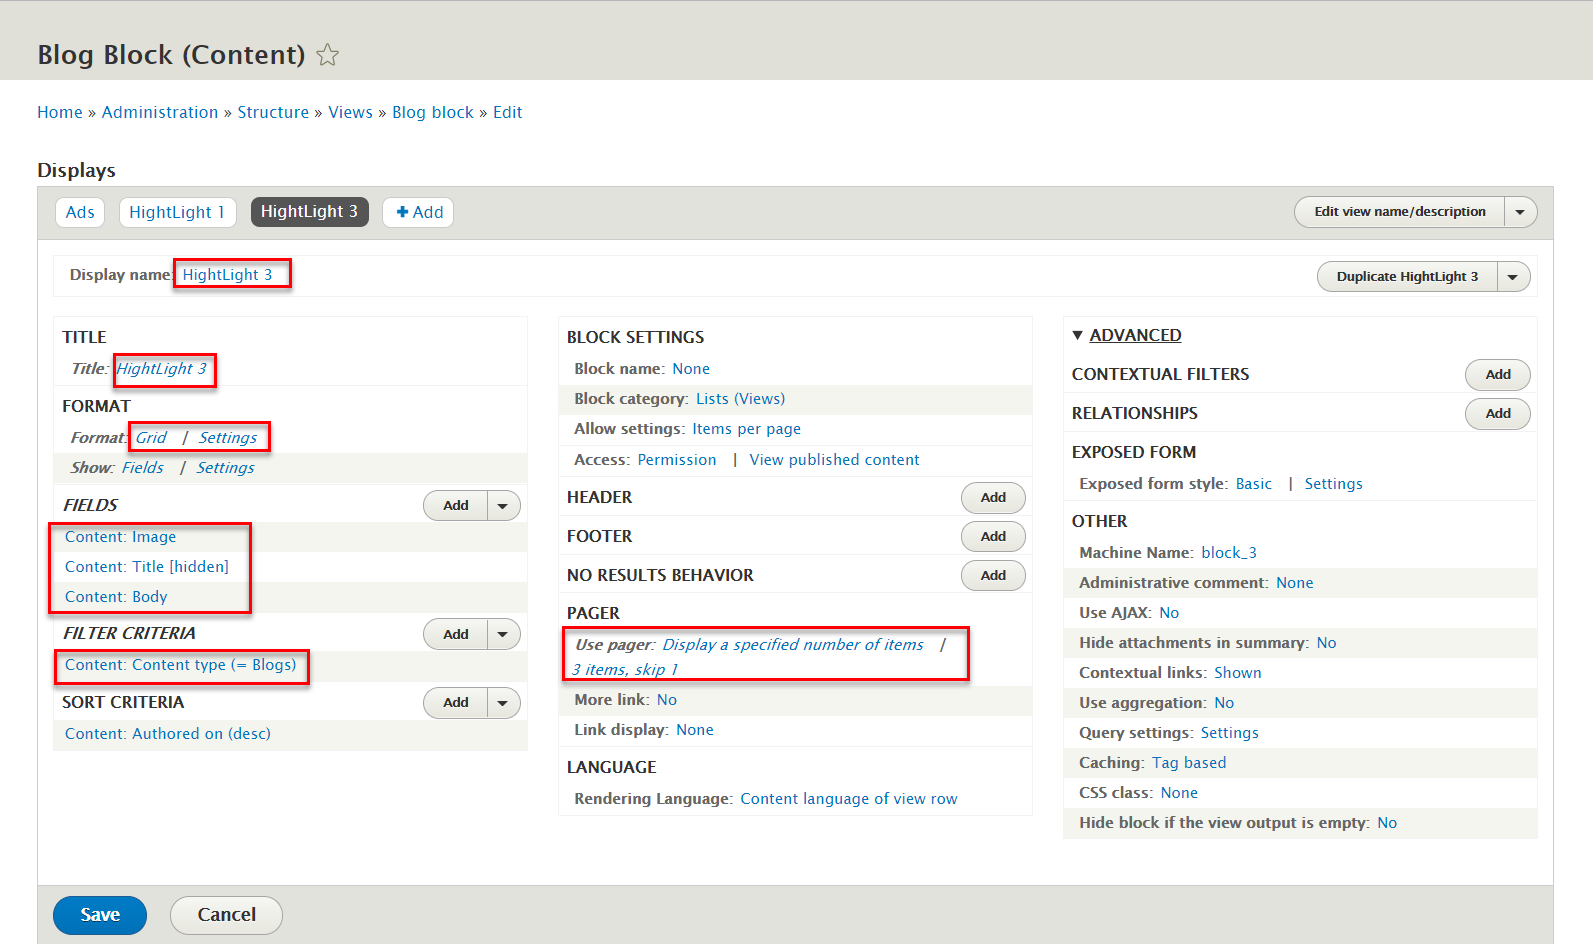
Step 3: At Display name and Title areas, change name Highlight 3


Step 4: At FORMAT > Format area, click Unformatted list link to change fields: Grid. Set properties for Grid

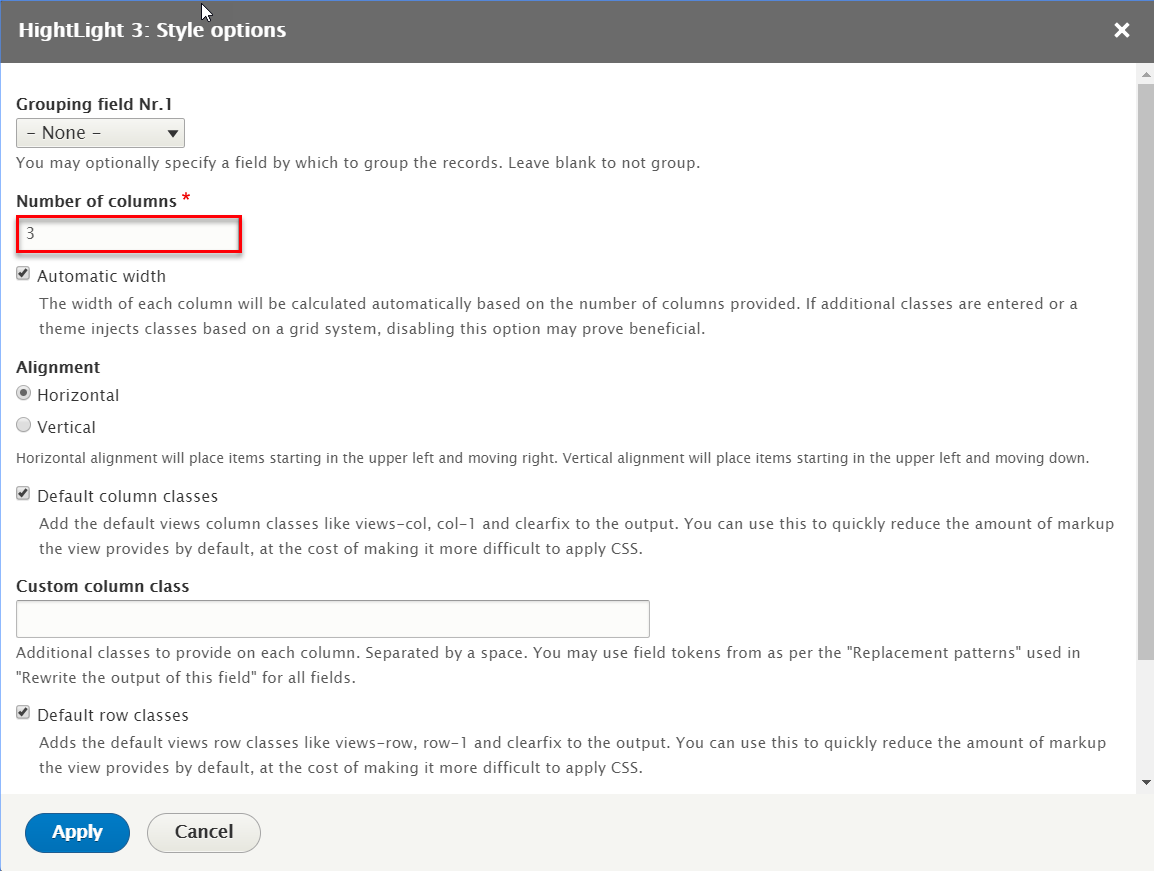
Step 4: At FIELDS area, click Add button to add fields: Content: Title. Set properties for Content: Title
Step 5: At FIELDS area, click Content: Image field. Set properties for Content: Image
Step 6: At FIELDS area, click Content: Body field. Set properties for Content: Body
Refer to following HTML code:
                                          {{ title }}


                                          {{ body }}
Step 8: At FIELDS area, click Dropdown of Add and click Rearrange button to rearrange fields
Step 8: At FILTER CRITERIA area, click Content: Sticky at top of lists field to remove this field
Step 8: At FILTER CRITERIA area, click Content: Content type field to change properties for Content: Content type
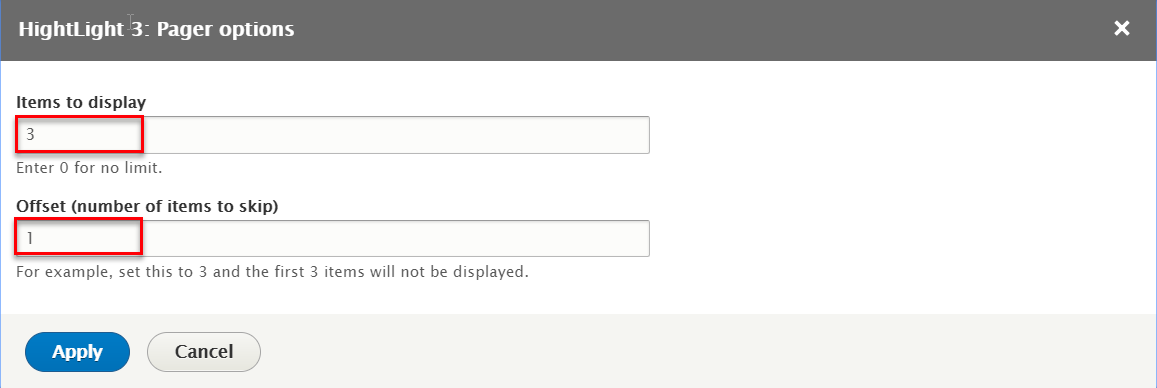
Step 11: At Use pager area, click Display a specified number of items | 3 items fields
Step 8: Click Save button.
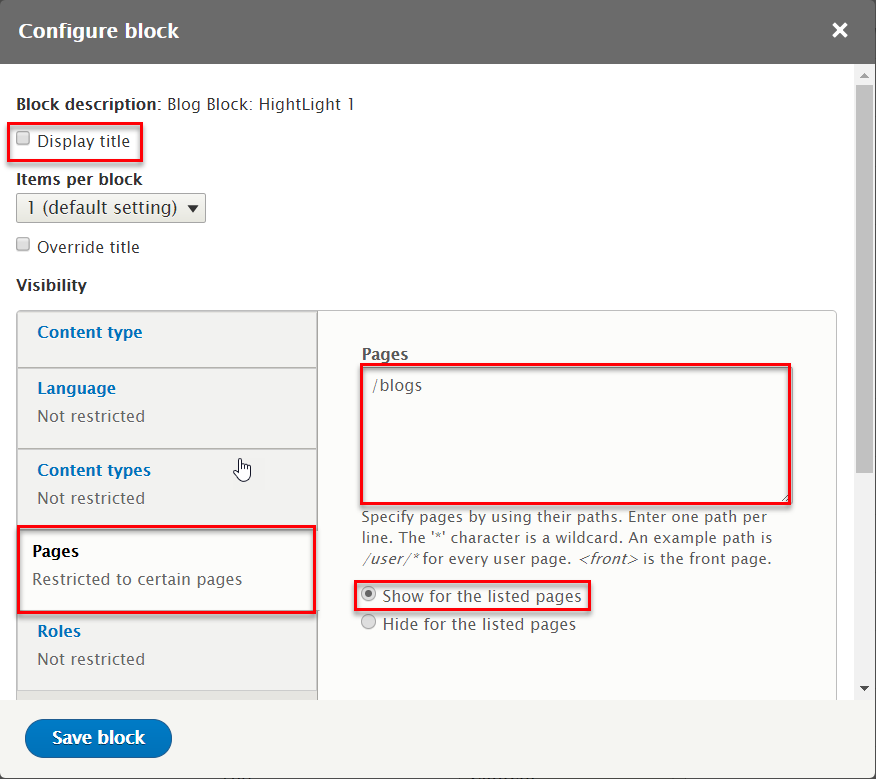
2.3 Configure Highlight 1 and Highlight 2 blocks
Step 1: Navigate to Structure > Block layout
Step 2: Find Highlighted click Place block button
Step 3: Find Blog Block: HightLight 1 Lists (Views) click Place block button and set following properites:
Step 4: Click Save block button.
Step 5: Find Highlighted click Place block button
Step 6: Find Blog Block: HightLight 3 Lists (Views) click Place block button and set following properites:

Step 7: Click Save block button.
3.1 Create Blog page
Step 1: Navigate to Structure > Views, click Add view, then create Blog view with following settings:
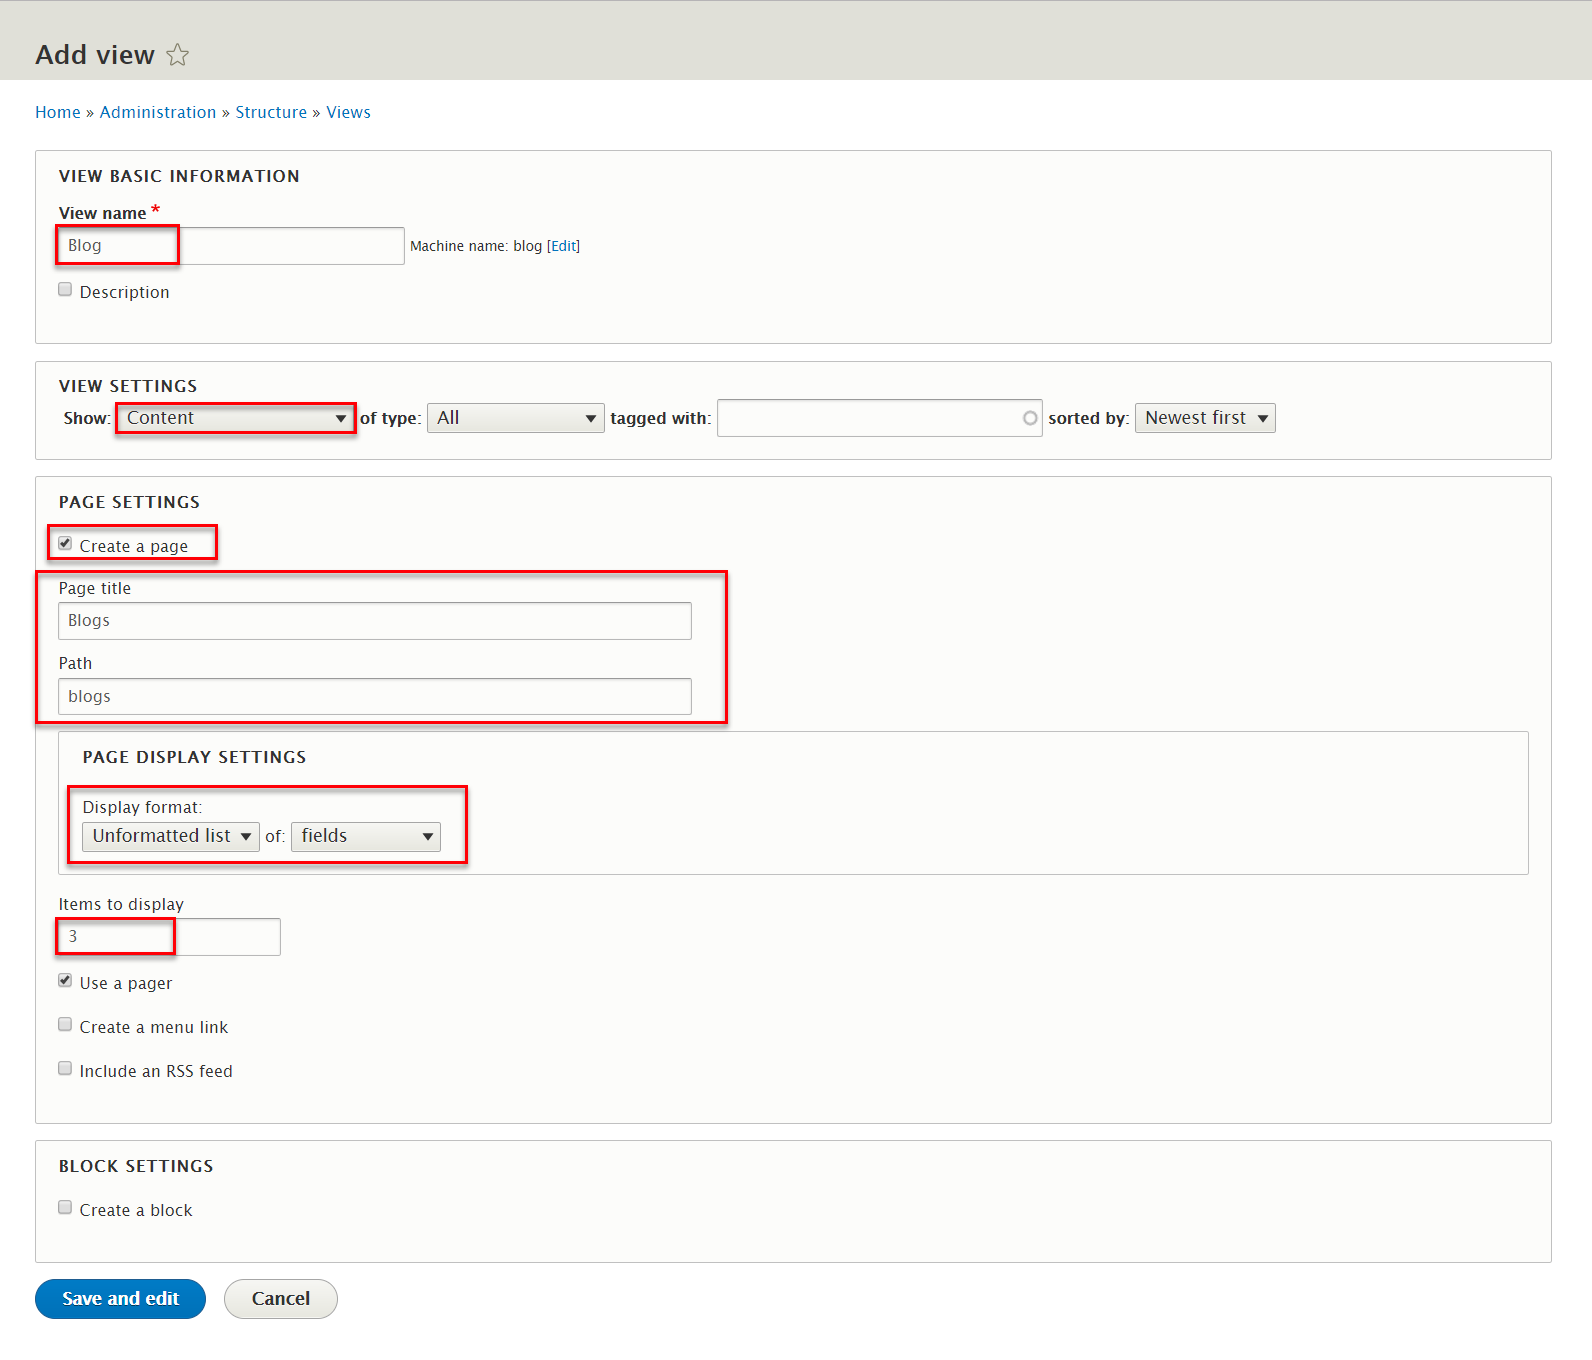
Step 2: Click Save and edit button. Next to steps below to set properties for following fields:

Step 3: At ADVANCED > RELATIONSHIPS area, click Add button to add fields: author field with following settings:

Step 4: At FIELDS area, click Add button to add fields: User: Last Name field with following settings:

Step 5: At FIELDS area, click Add button to add fields: User: First Name field with following settings:
Step 6: At FIELDS area, click Add button to add fields: User: User ID field with following settings:
Step 7: At FIELDS area, click Add button to add fields: User: Name field with following settings:
Refer to following HTML code:
{{ field_first_name }} {{ field_la }}
Step 8: At FIELDS area, click Add button to add fields: Comment Statistics: Comment count field with following settings:
Step 9: At FIELDS area, click Add button to add fields: Content: Tags field with following settings:
Step 10: At FIELDS area, click Add button to add fields: Content: Image field with following settings:
Step 11: At FIELDS area, click Add button to add fields: Content: Video field with following settings:

Step 12: At FIELDS area, click Add button to add fields: Content: Authored on field with following settings:
Step 13: At FIELDS area, click Add button to add fields: Global: Custom text field with following settings:
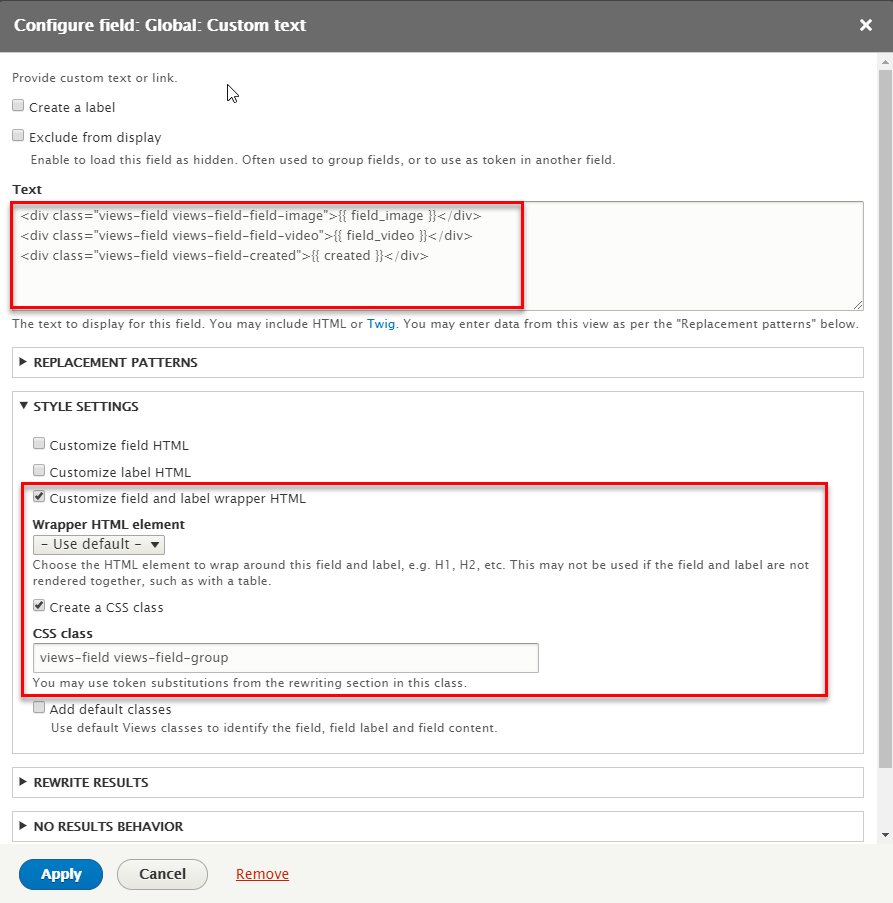
Refer to following HTML code:
                            {{ field_image }}
                            {{ field_video }}
                            {{ created }}
Step 14: At FIELDS area, click Add button to add fields: Content: Body field with following settings:
Step 15: At FIELDS area, click Add button to add fields: Content: Link to Content field with following settings:
Step 16: At FILTER CRITERIA area, click Add button to add fields: Content: Content type field with following settings:

Step 17: At PAGER > Use pager area, click Mini pager, 3 items link to change configuration:
Step 18: Click Save button
Presets page
Front end Display

1. Create Featured Videos
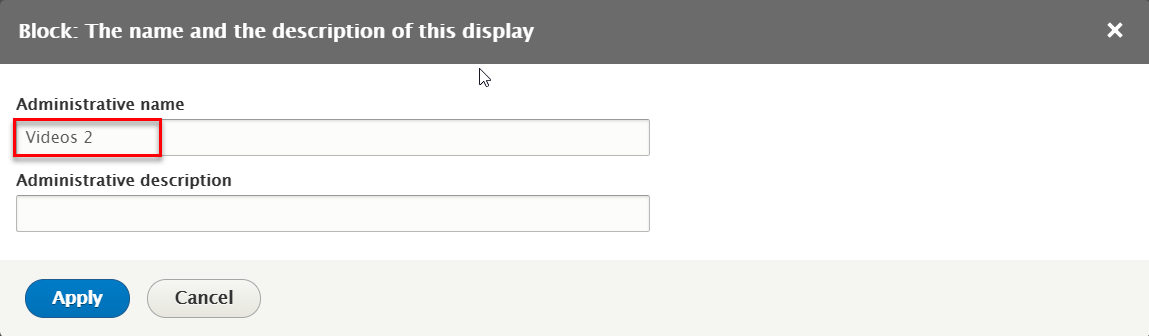
1.1 Create Videos 2 block
Step 1: Navigate to Structure > Views, click Add view, then create Video view with following settings:
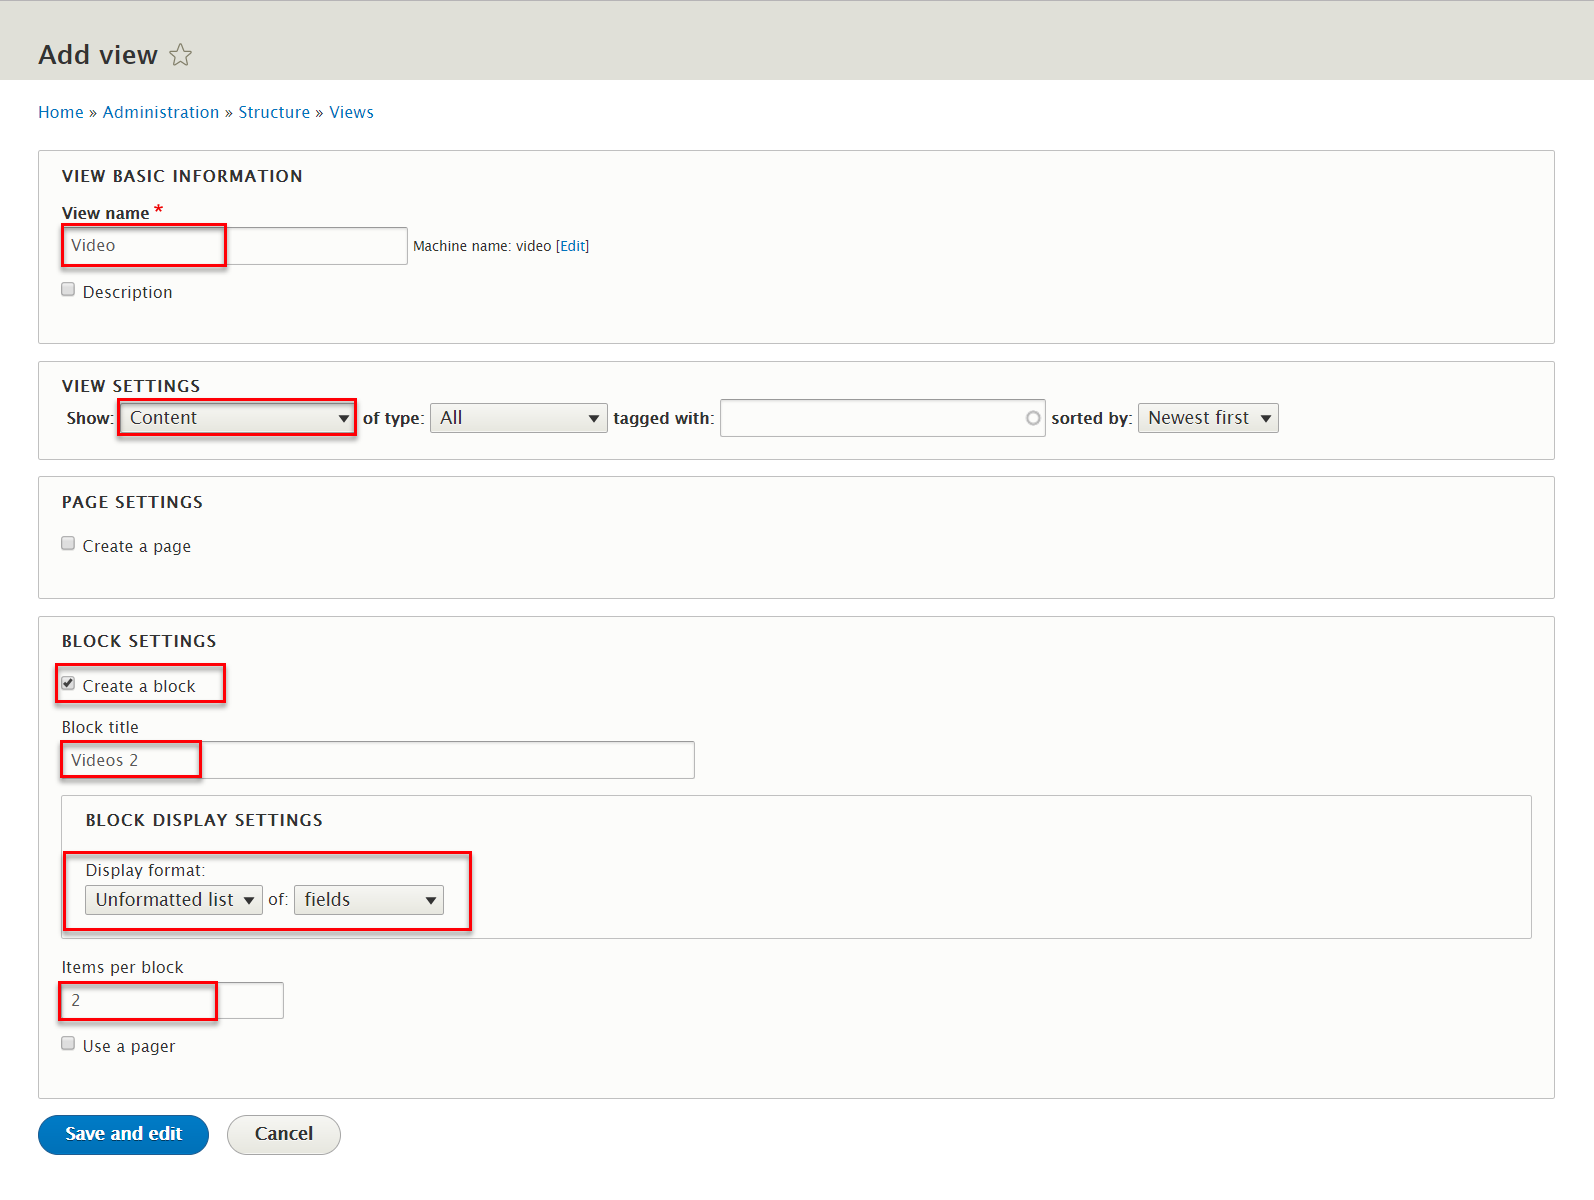
Step 2: Click Save and edit button. Next to steps below to set properties for following fields:
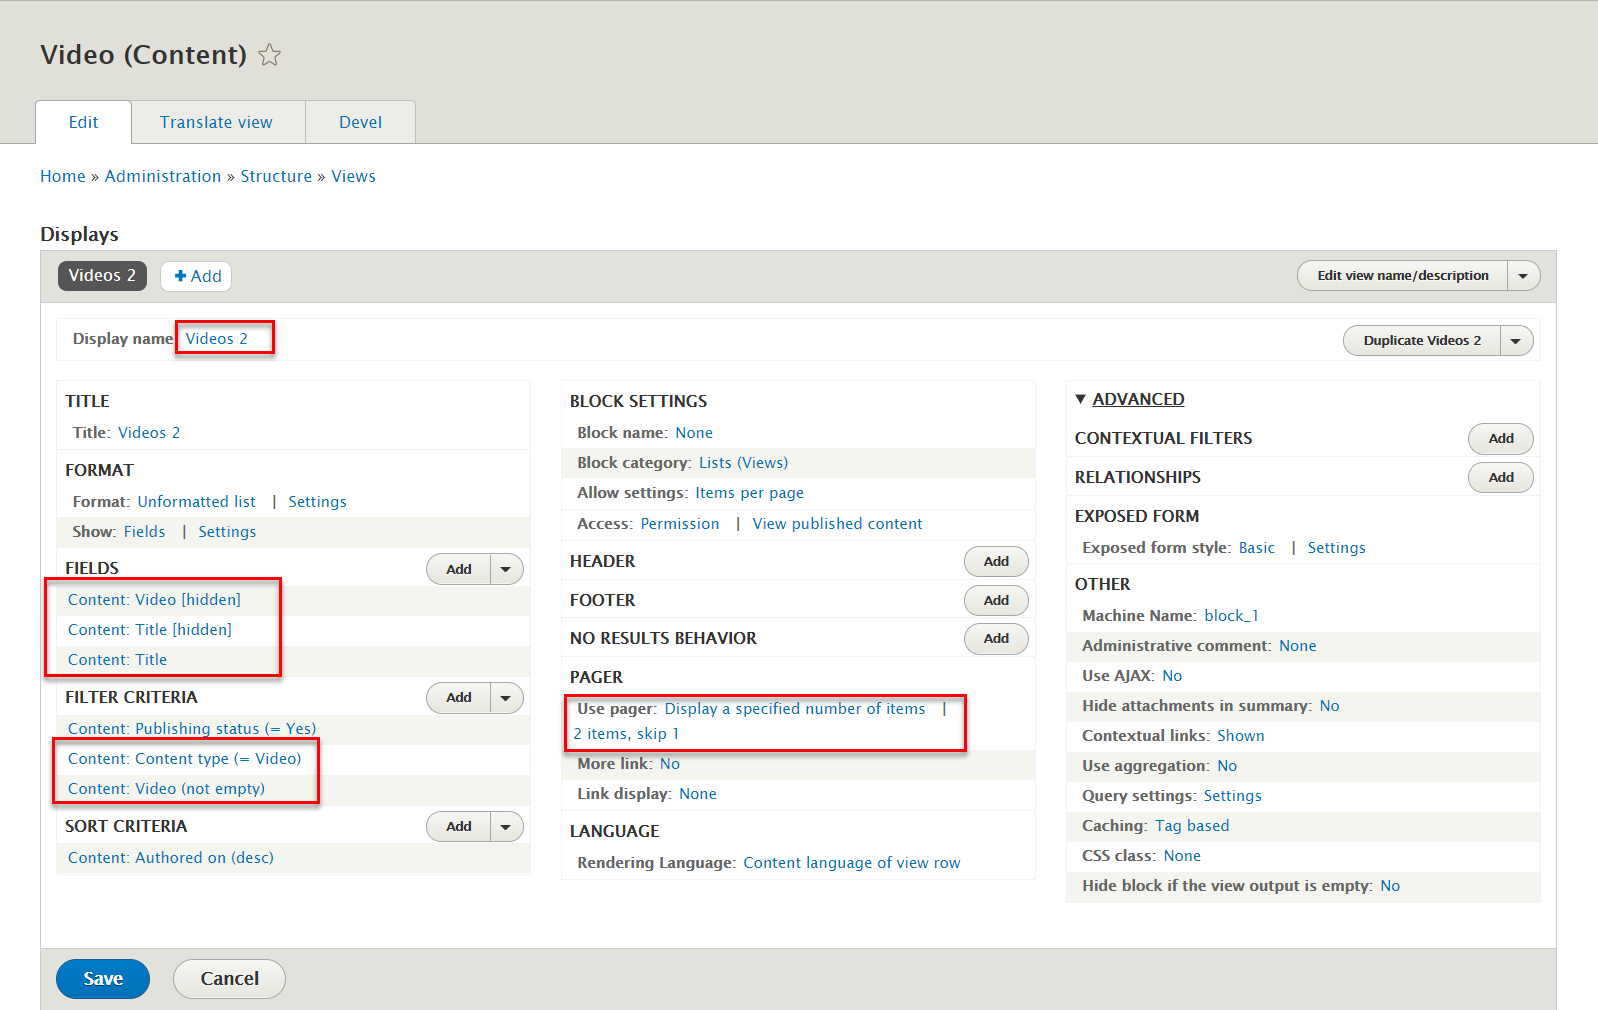
Step 3: At Display name area, Change name Videos 2
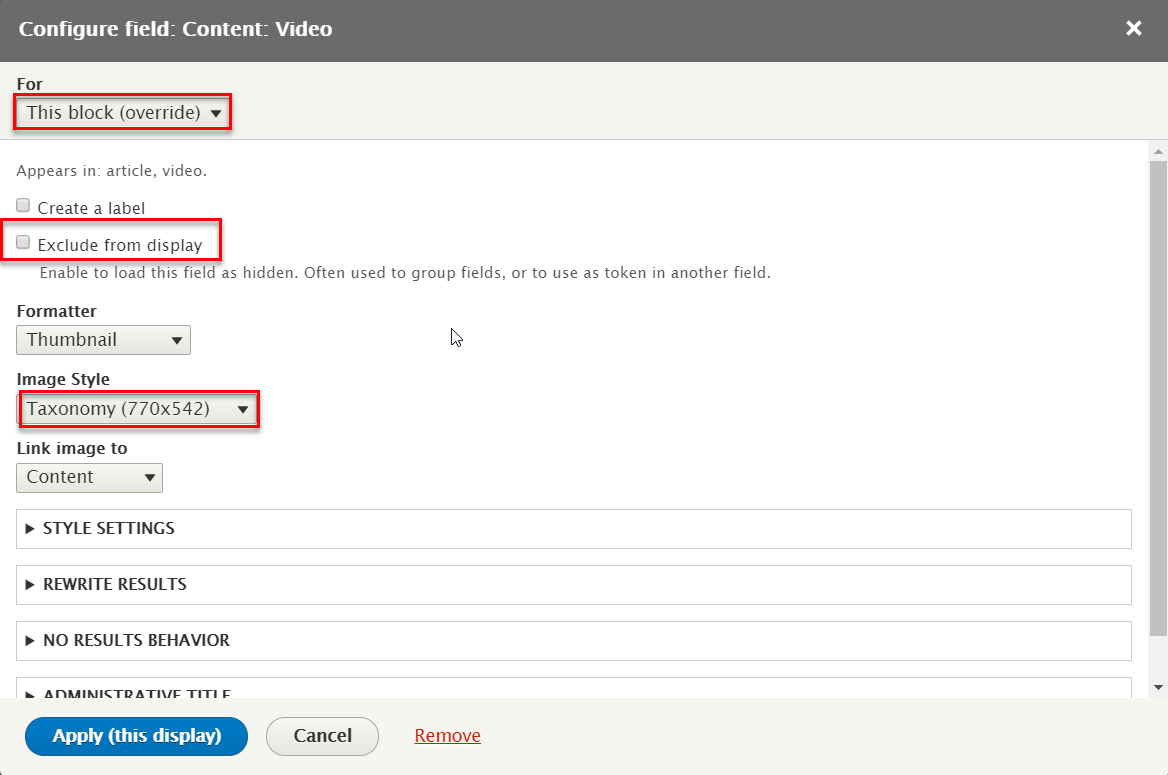
Step 4: At FIELDS area, click Add button to add fields: Content: Video field with following settings:

Step 5: At FIELDS area, click Add button to add fields: Content: Title field with following settings:
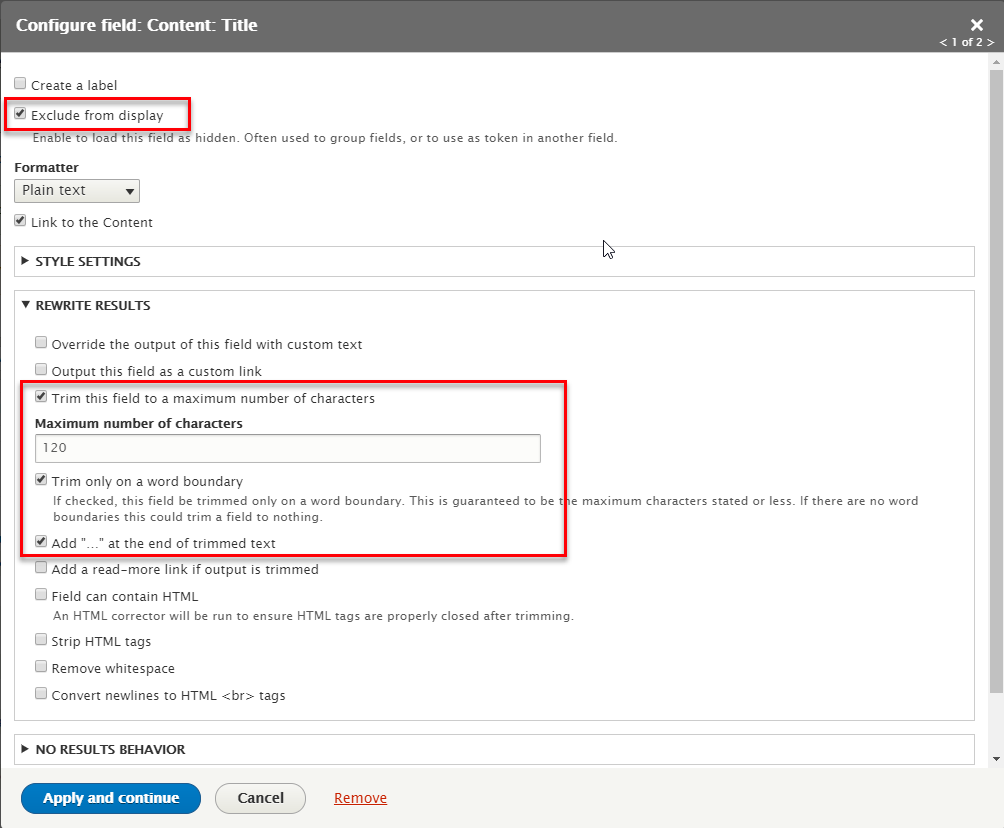
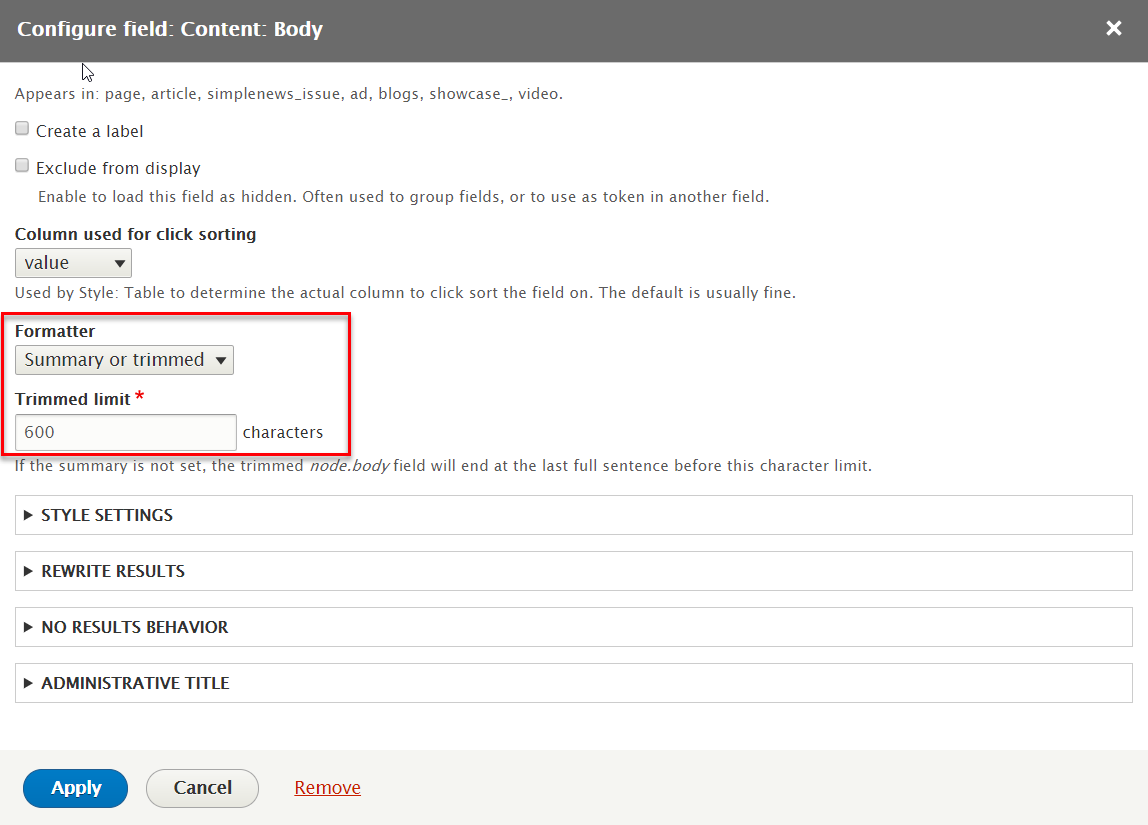
Step 6: At FIELDS area, click original Content: Title to configure this field:
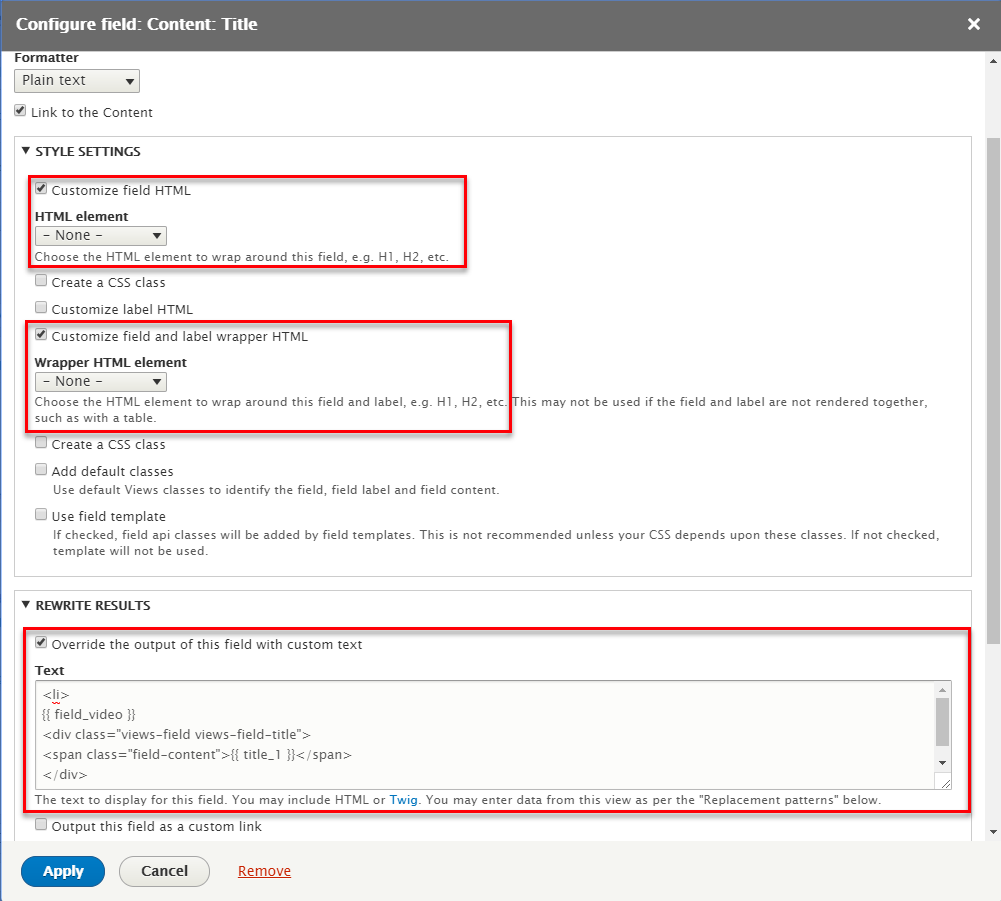
Refer to following HTML code:
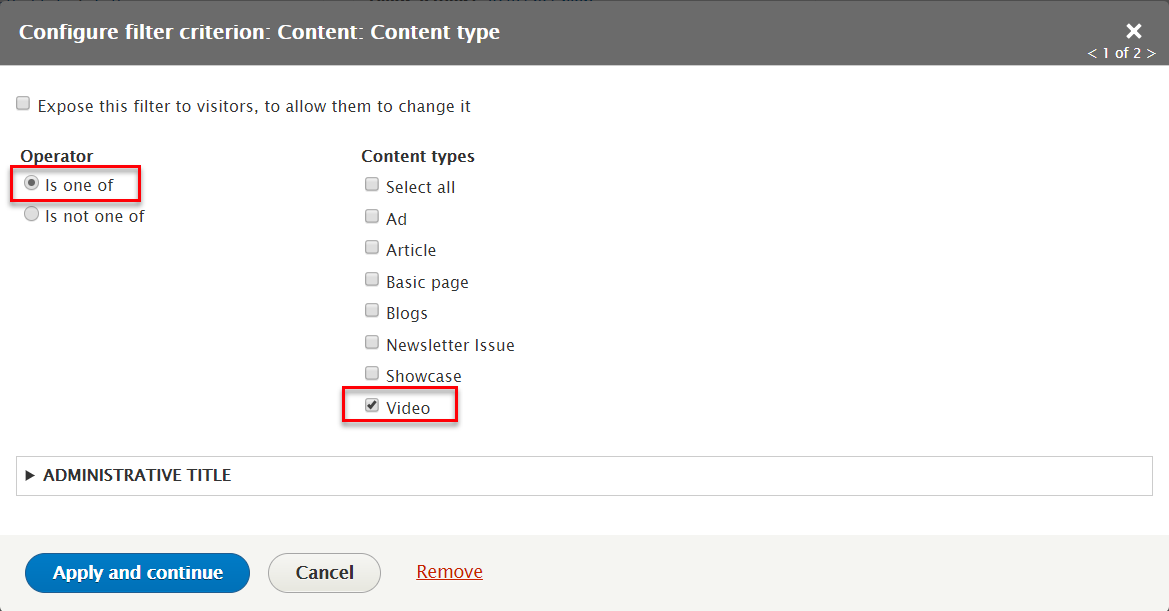
Step 7: At FILTER CRITERIA area, click Add button to add fields: Content: Video field with following settings:
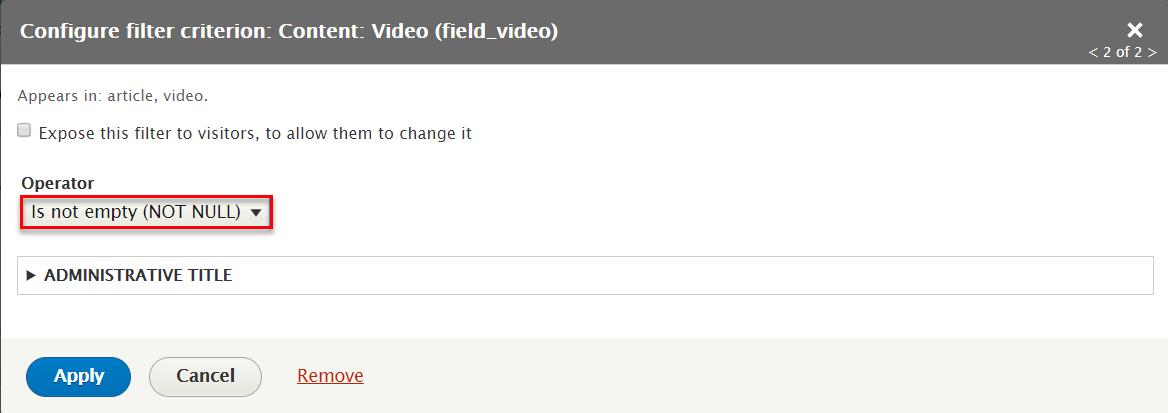
Step 8: At FILTER CRITERIA area, click Add button to add fields: Content: Content type field with following settings:
Step 9: At PAGER > Use pager area, click 2 item to change options this field
Step 9: Click Save button to save view
1.2 Create Featured Videos block
Step 1: Click Add link to create Featured Videos block and set following properites:
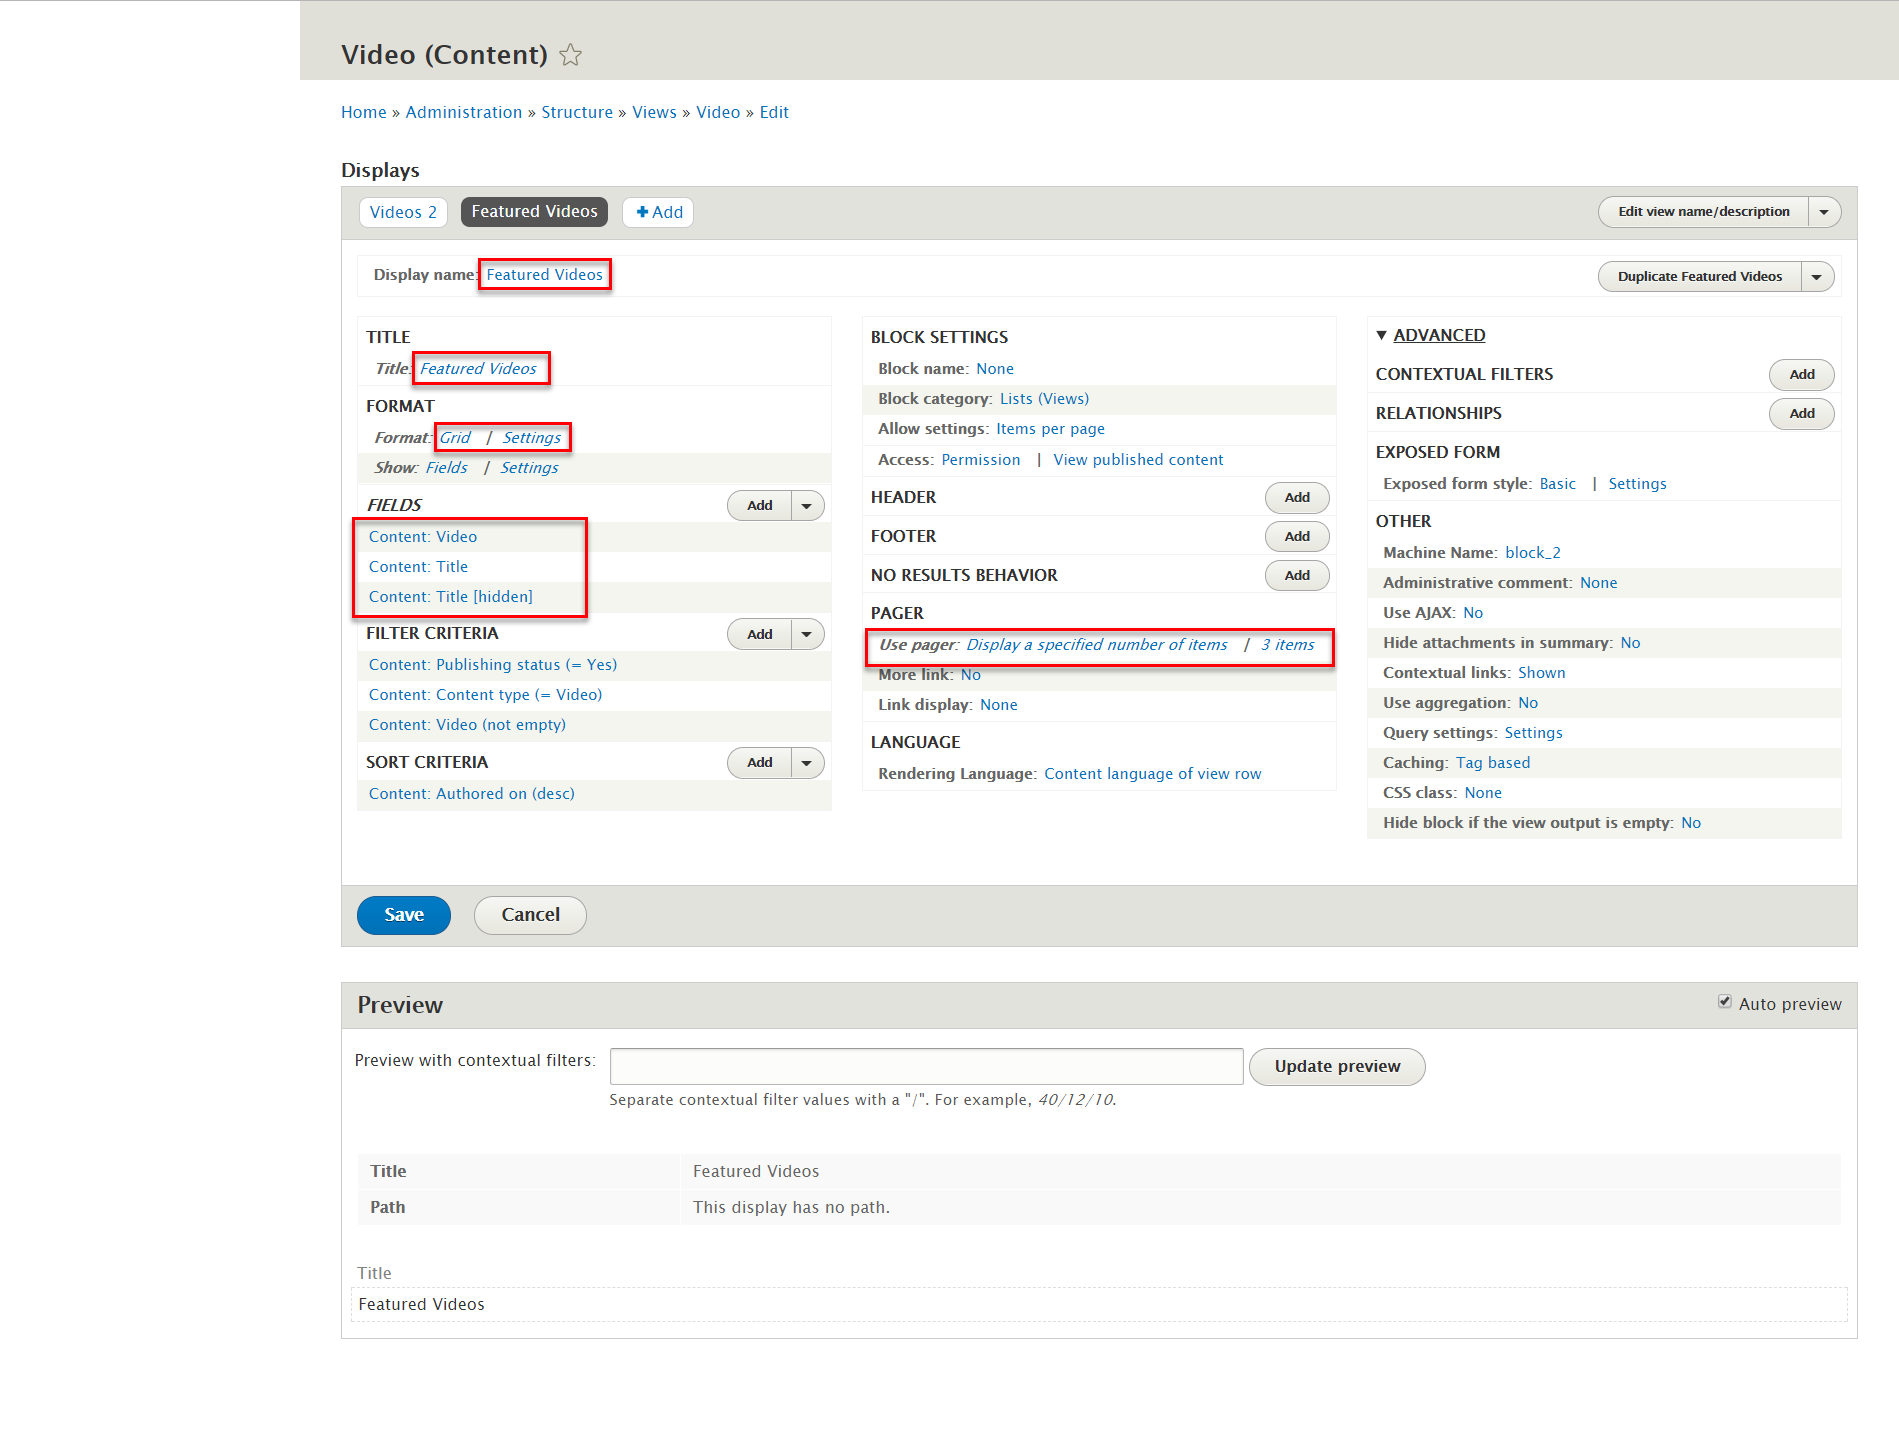
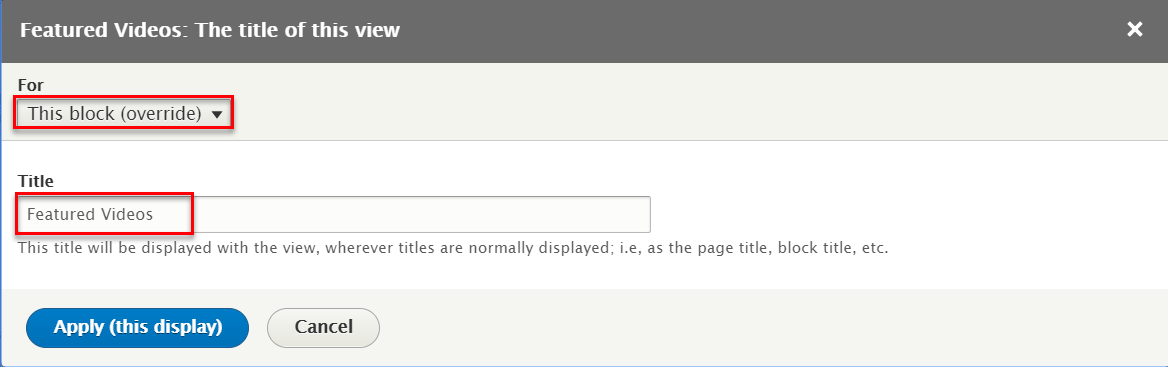
Step 2: At Display name and Title areas, change name Featured Videos

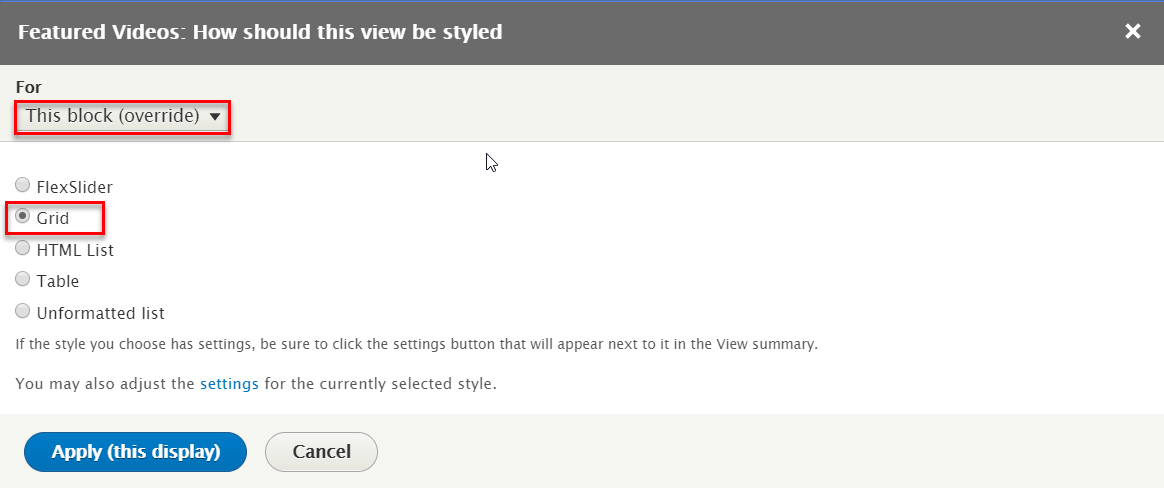
Step 3: At FORMAT > Format areas, click Unformatted list link to change configure
Step 4: At FIELDS area, click Content: Video field with following settings:
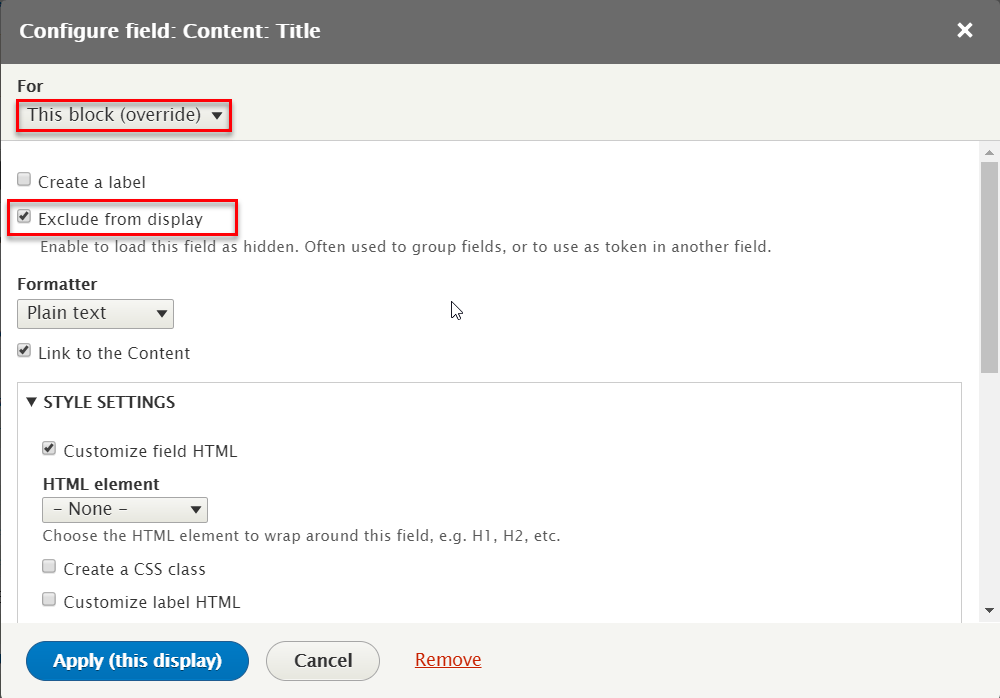
Step 5: At FIELDS area, click Content: Title field with following settings:

Step 6: At FIELDS area, click original Content: Title to configure this field:
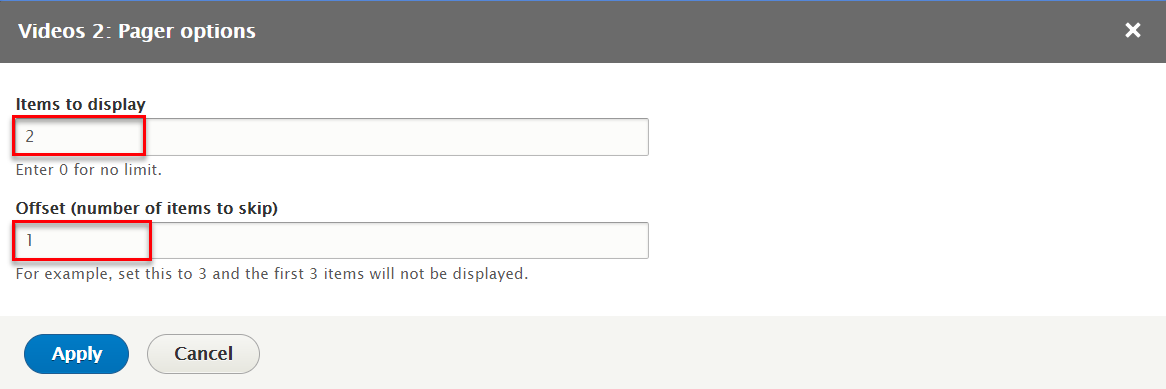
Step 7: At PAGER > Use pager area, click Display a specified number of items to change options this field
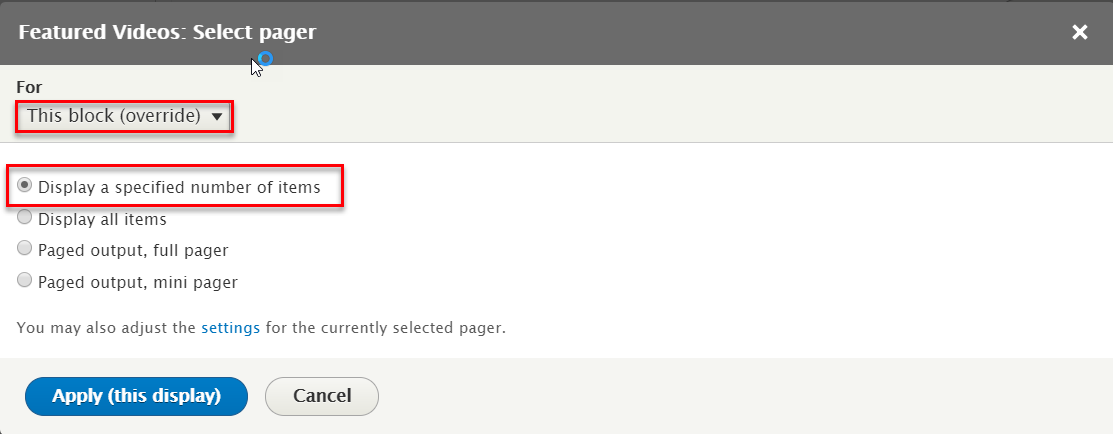
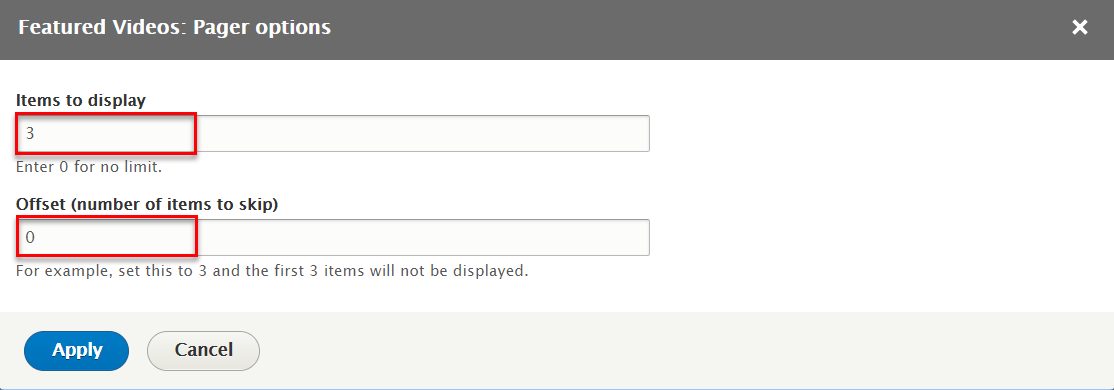
Step 8: At PAGER > Use pager area, click 2 items, skip 1 to change options this field
Step 9: Click Save button to save view
1.3 Configure Featured Videos block
Step 1: Navigate to Structure > Block layout
Step 2: Find Featured click Place block button
Step 3: Find Video: Featured Videos Lists (Views) click Place block button and set following properites:

Step 4: Click Save block button.
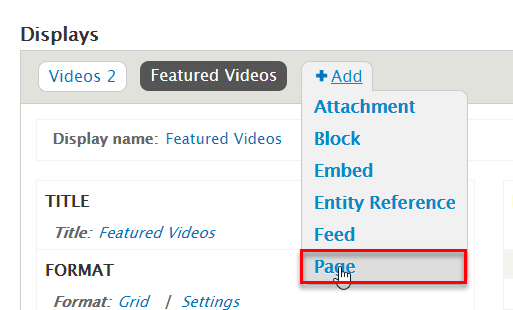
2.1 Create All Videos page
Step 1: Navigate to Structure > Views, find Video views and click Edit link
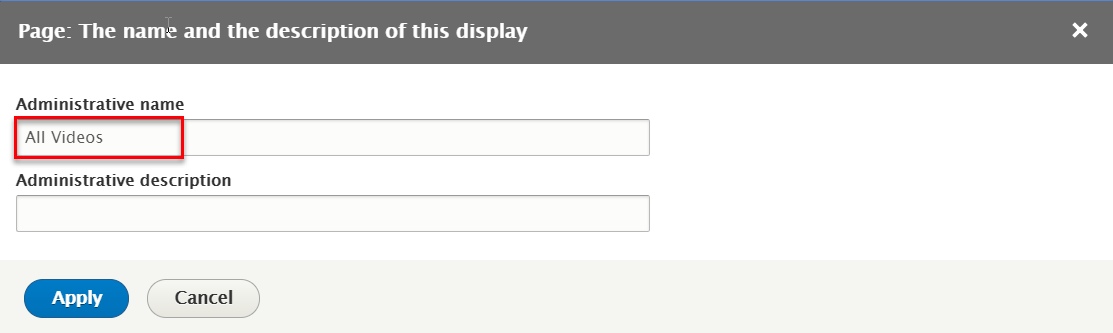
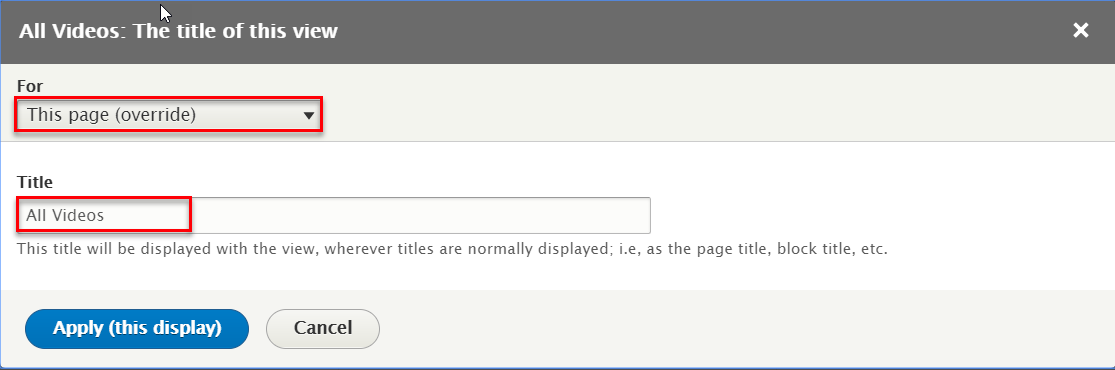
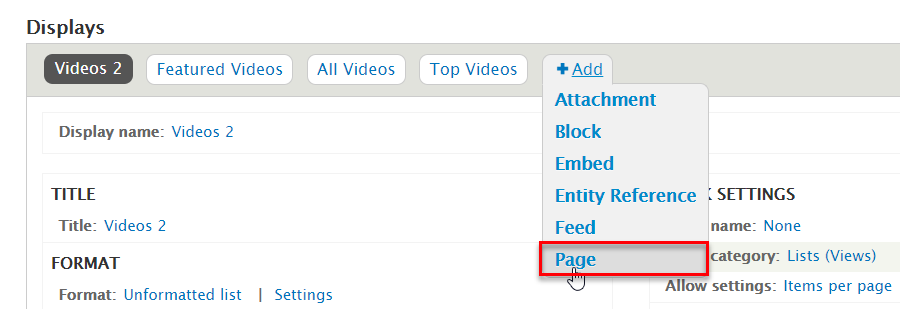
Step 2: Click Add link to create All Videos page and set following properites:

Step 3: At Display name and Title areas, change name Featured Videos
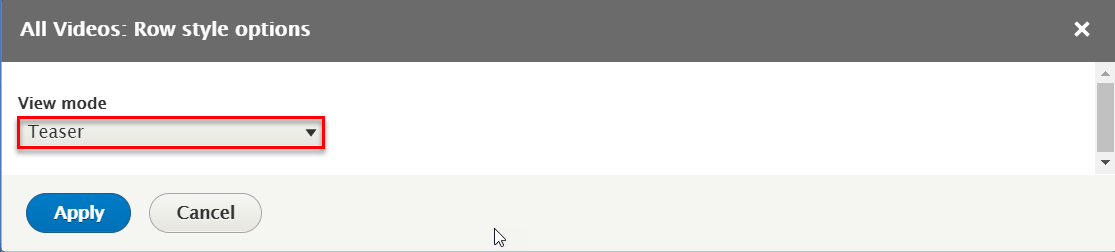
Step 4: At FORMAT > Format areas, click Unformatted list link to change configure

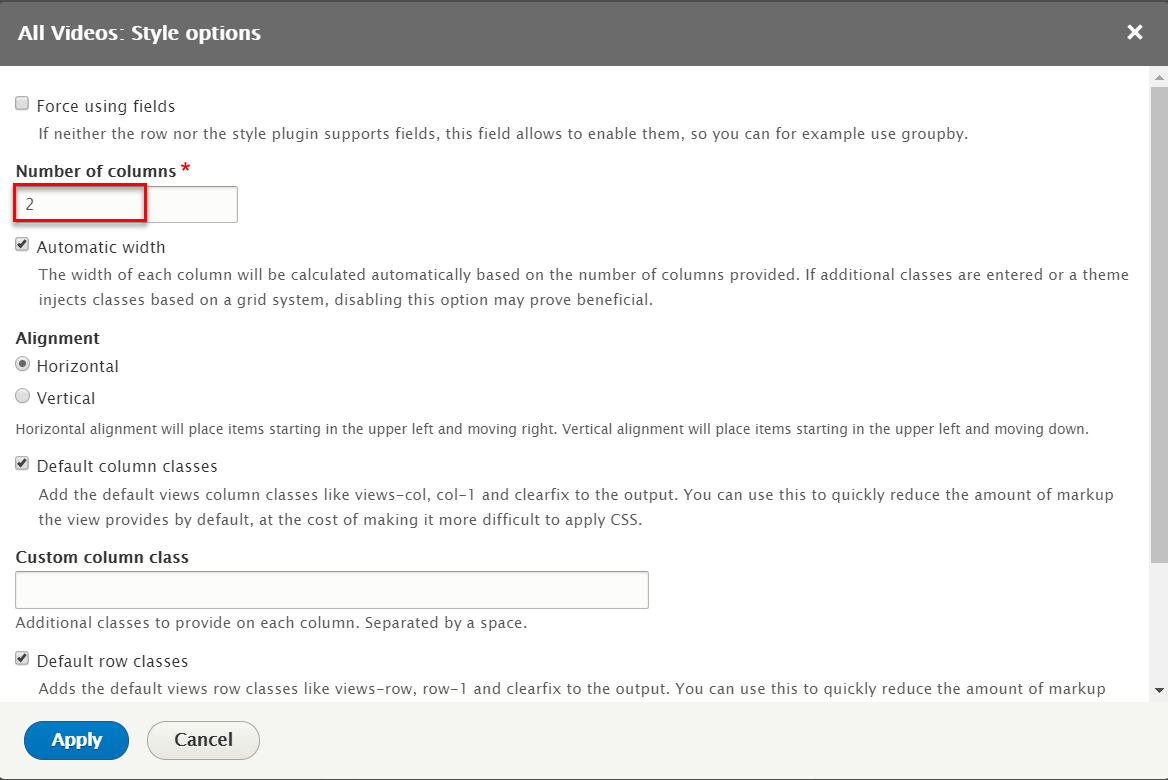
Step 5: At FORMAT > Show areas, click Fields link to change configure

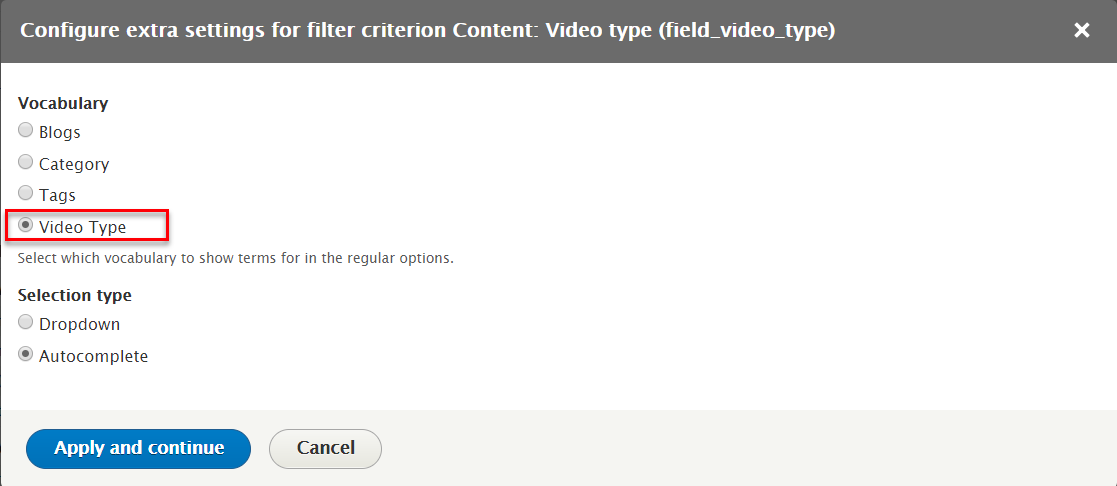
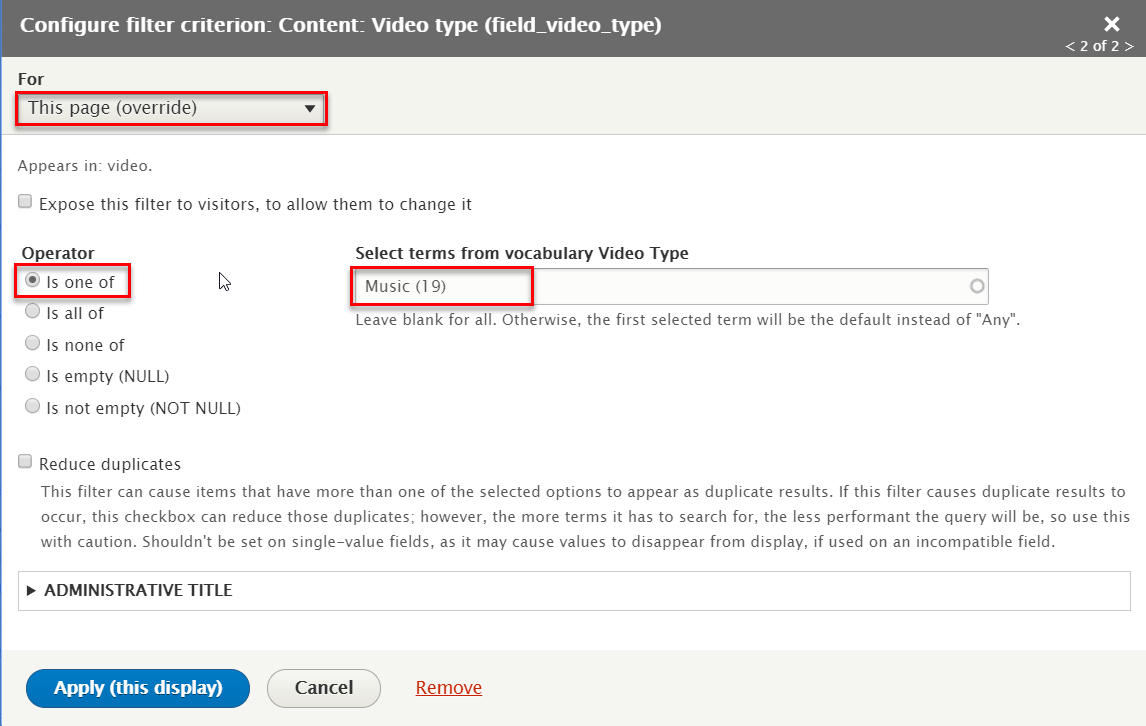
Step 6: At FILTER CRITERIA area, click Add button to add fields: Content: Video type field with following settings:

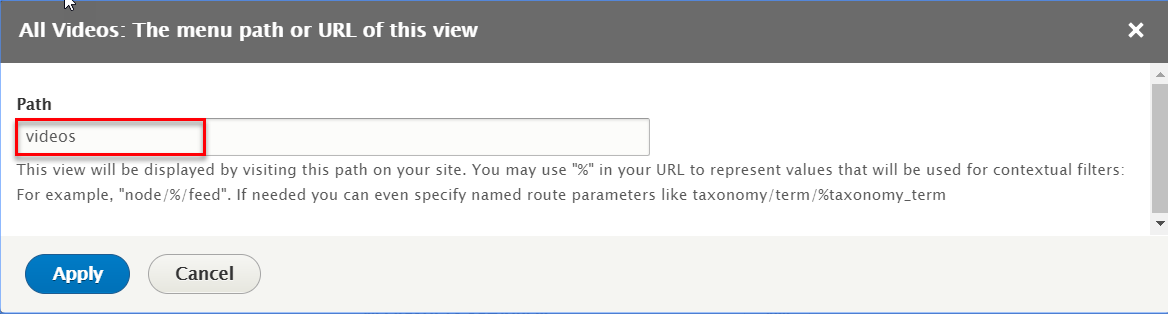
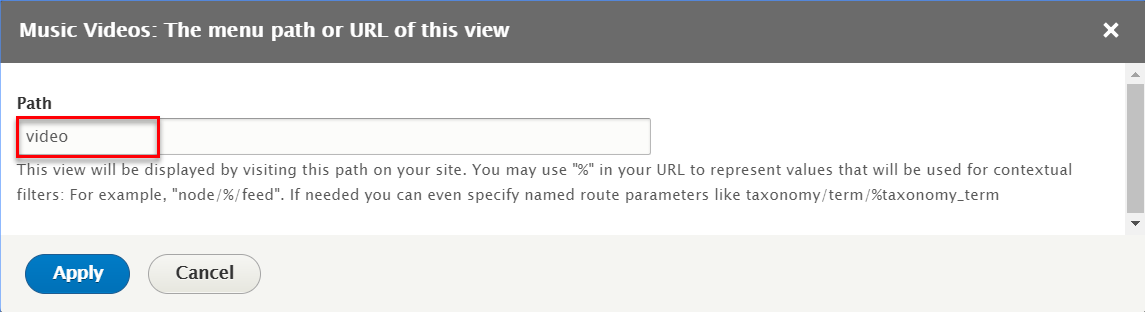
Step 7: At PAGE SETTINGS > Path area, click None link to change fields with following settings:
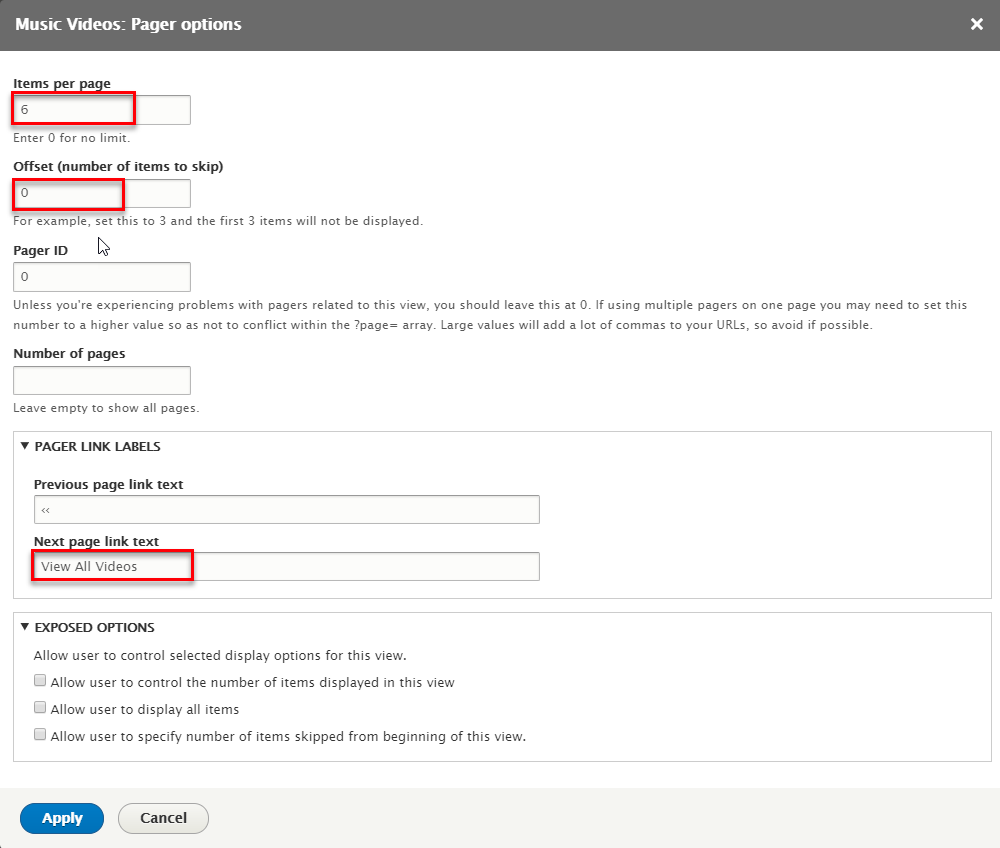
Step 8: At PAGER > Use pager area, click Display a specified number of items to change options this field
Step 9: At PAGER > Use pager area, click 2 items, skip 1 to change options this field

Step 10: At Advanced > Machine Name area, click and set following properites:

Step 11: Click Save button to save view
2.2 Create Top Videos block
Step 1: Click Add link to create Top Videos block and set following properites:
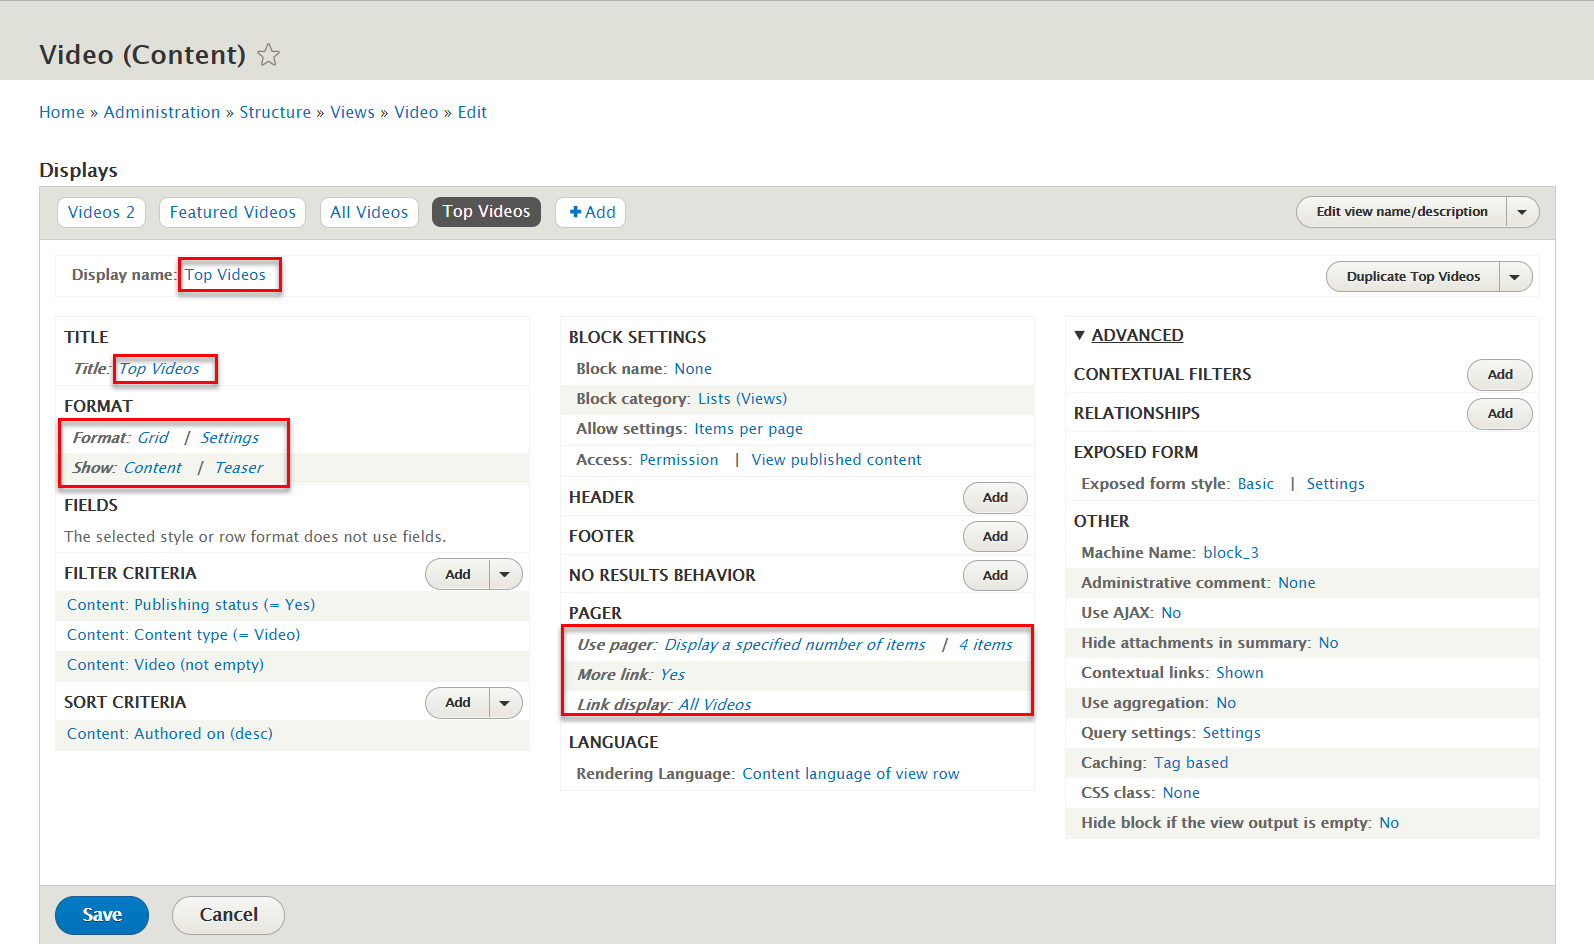
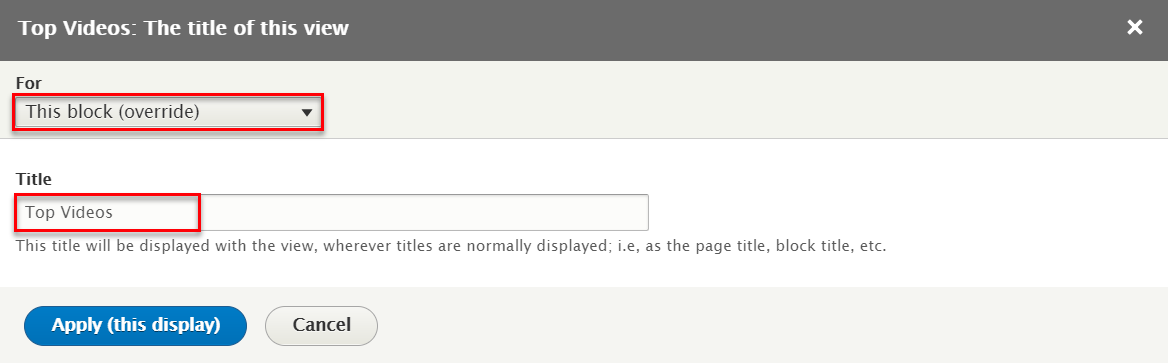
Step 2: At Display name and Title areas, change name Top Videos

Step 3: At FORMAT > Format areas, click Unformatted list link to change configure
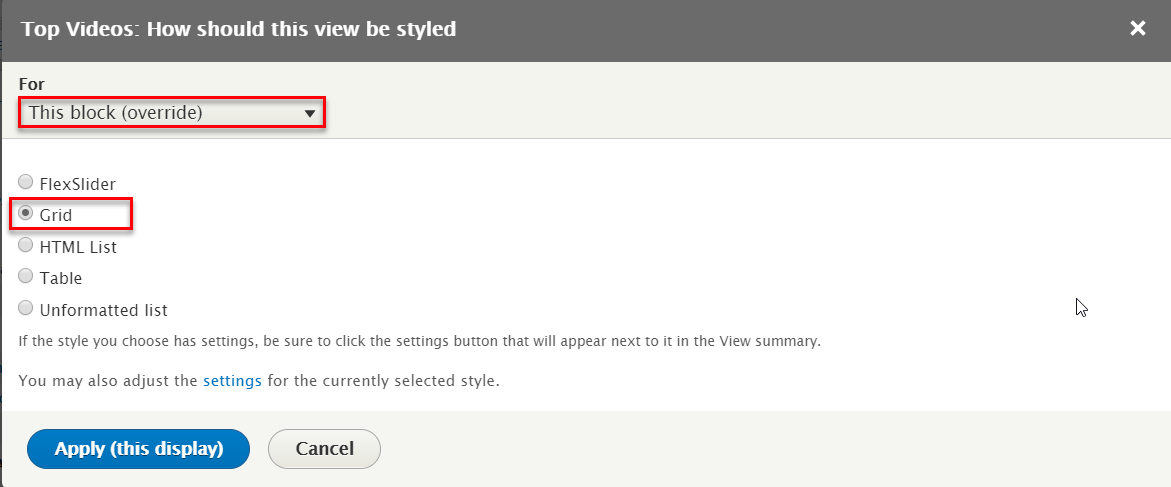
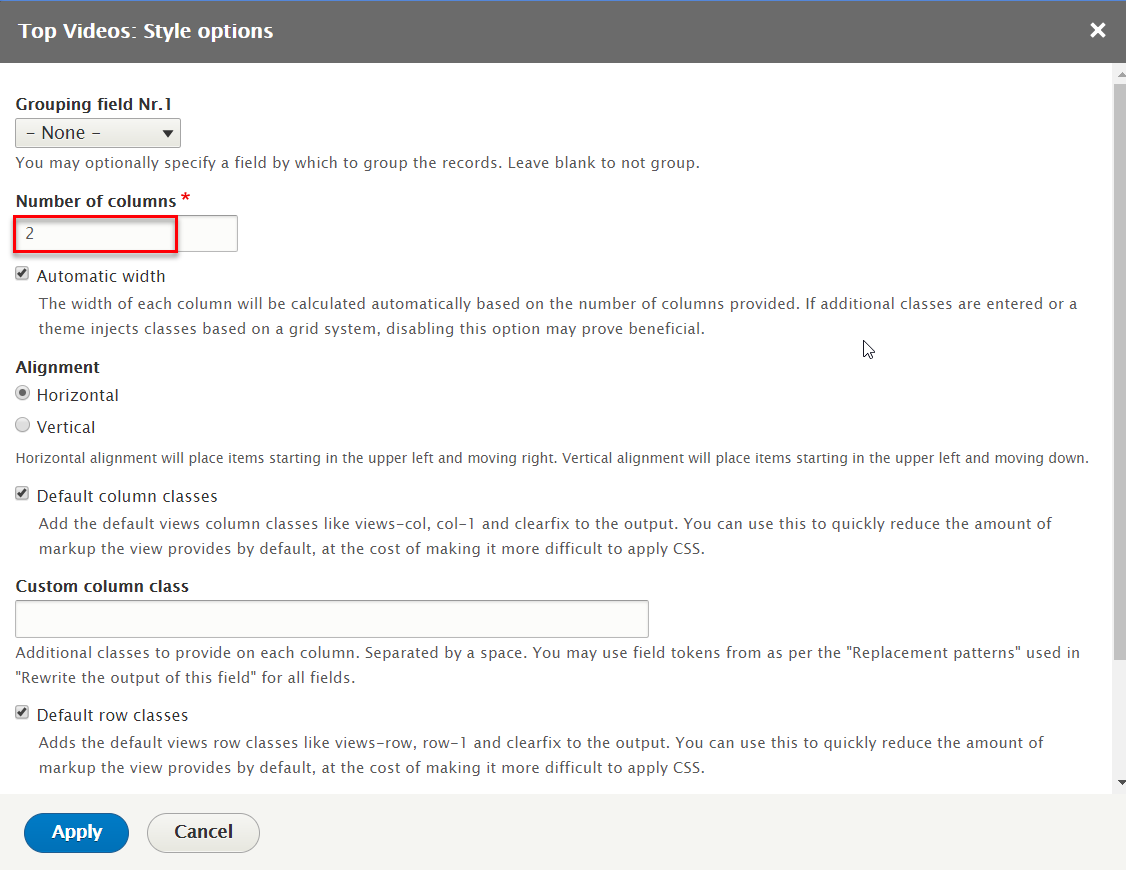
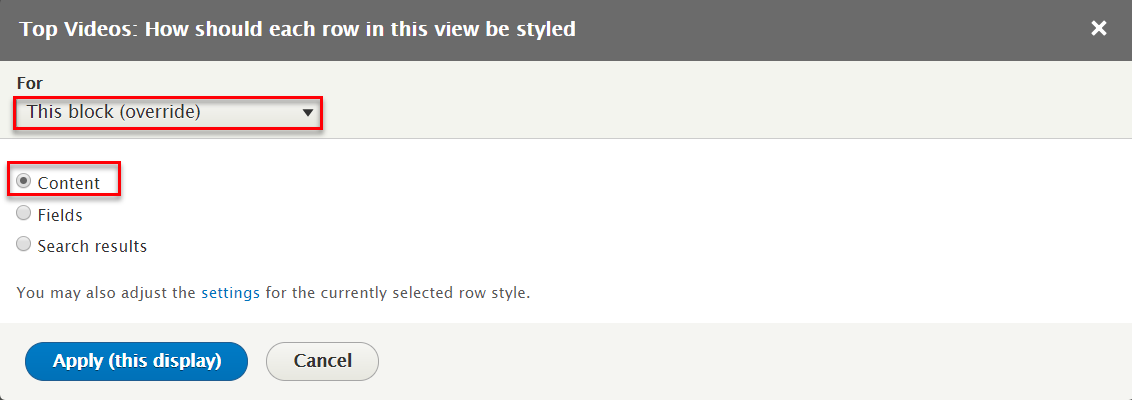
Step 4: At FORMAT > Show areas, click Fields link to change configure

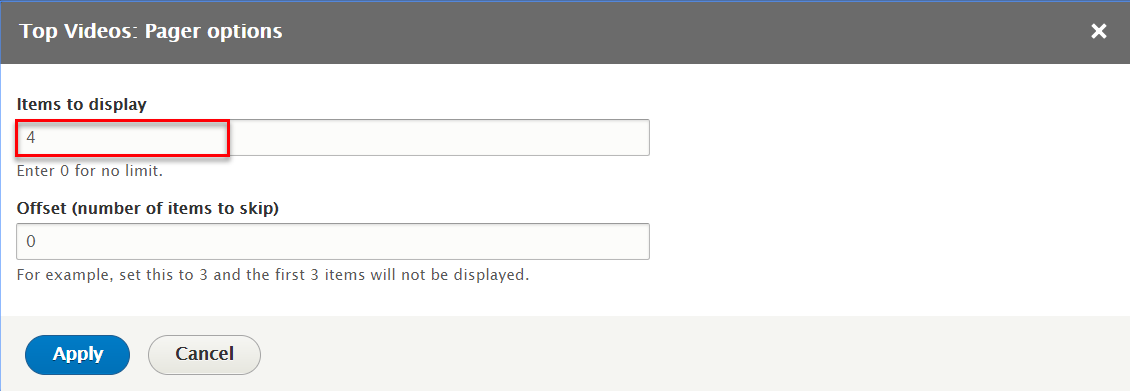
Step 5: At PAGER > Use pager area, click Display a specified number of items to change options this field
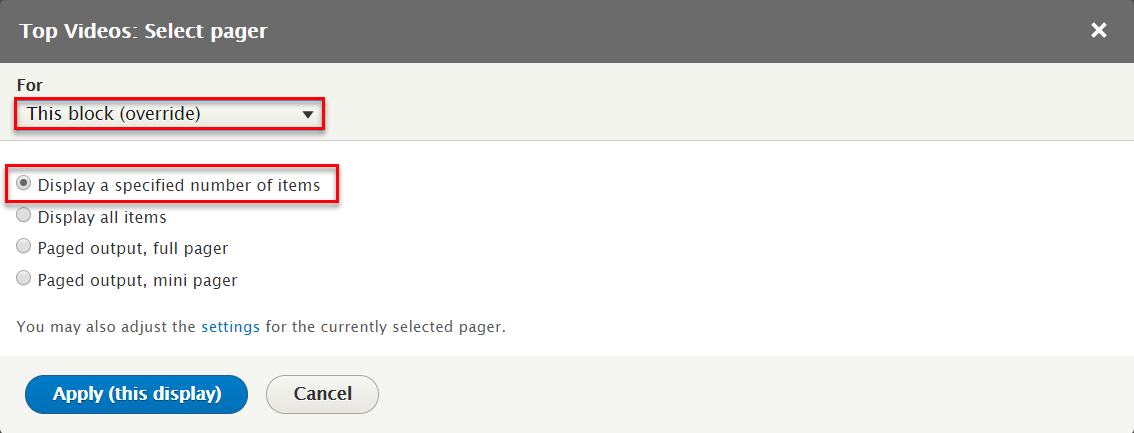
Step 6: At PAGER > Use pager area, click 2 items, skip 1 to change options this field
Step 7: At PAGER > More link area, click No to change options this field

Step 8: At PAGER > Link display area, click None to change options this field

Step 9: Click Save button to save view
2.3 Configure Top Videos block
Step 1: Navigate to Structure > Block layout
Step 2: Find Content click Place block button
Step 3: Find Video: Top Videos Lists (Views) click Place block button and set following properites:

Step 4: Click Save block button.
3.1 Create Music Videos page
Step 1: Navigate to Structure > Views, find Video views and click Edit link
Step 2: Click Add link to create All Videos page and set following properites:
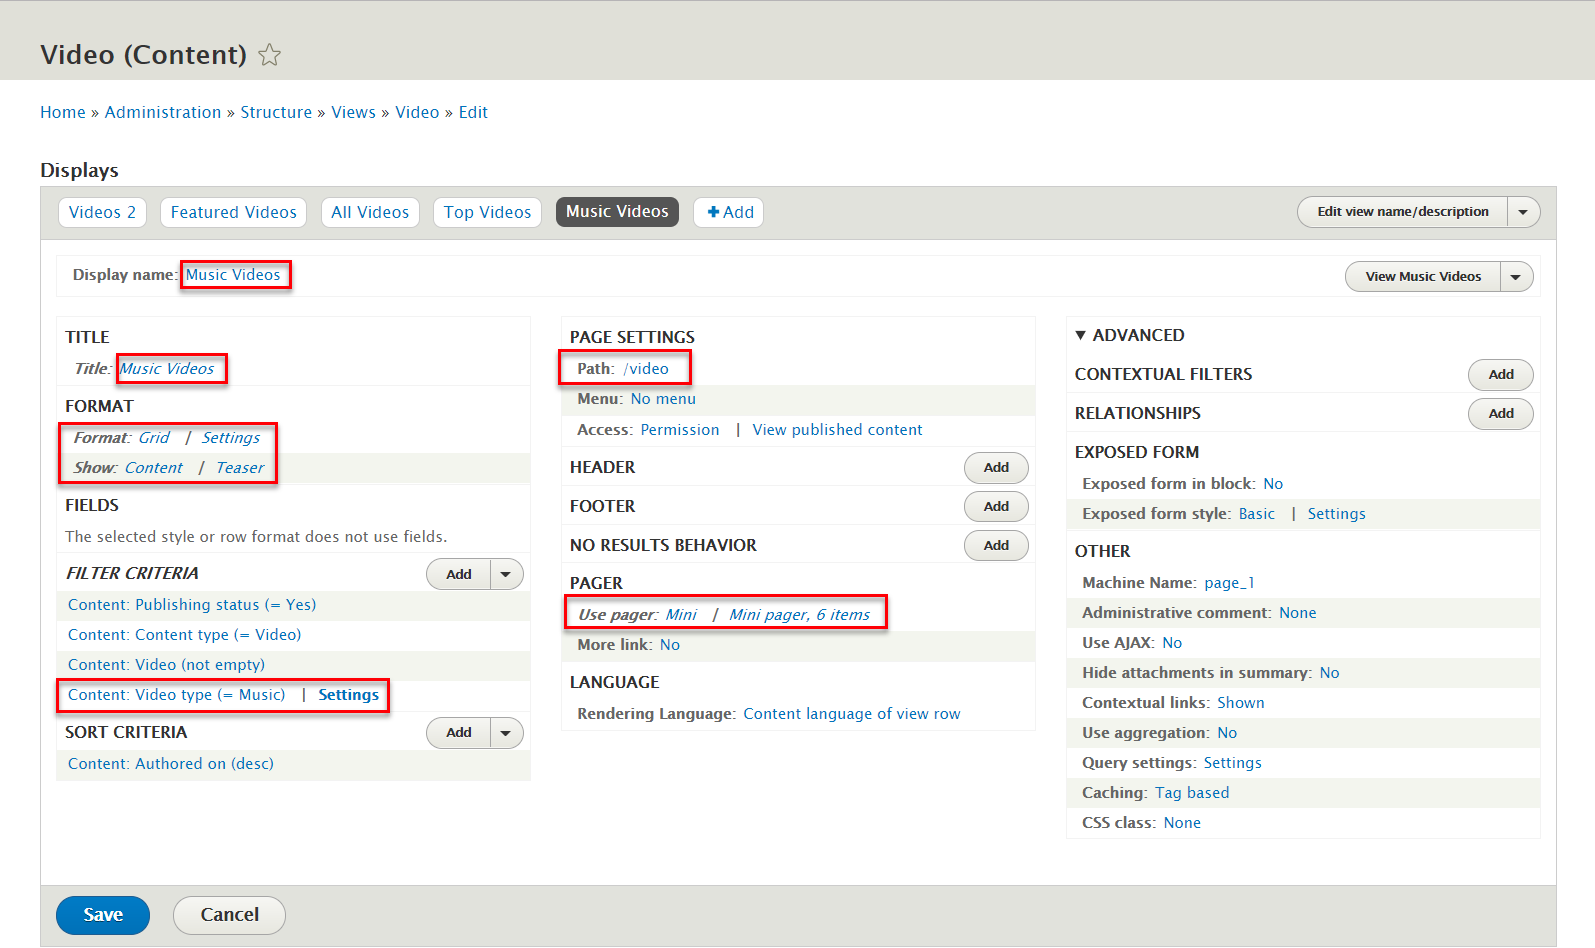
Step 3: At Display name and Title areas, change name Featured Videos


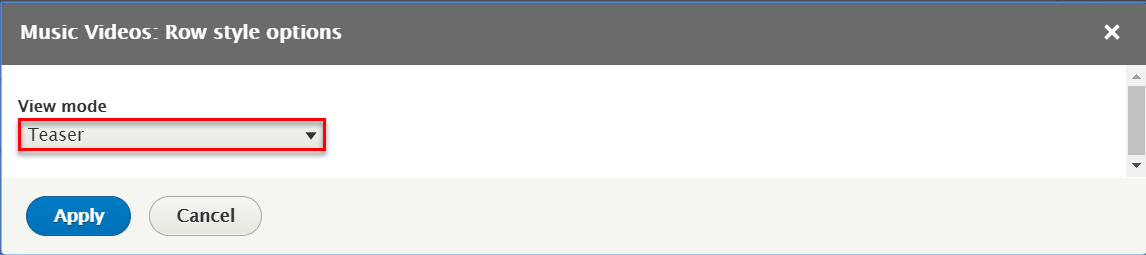
Step 3: At FORMAT > Format areas, click Unformatted list link to change configure
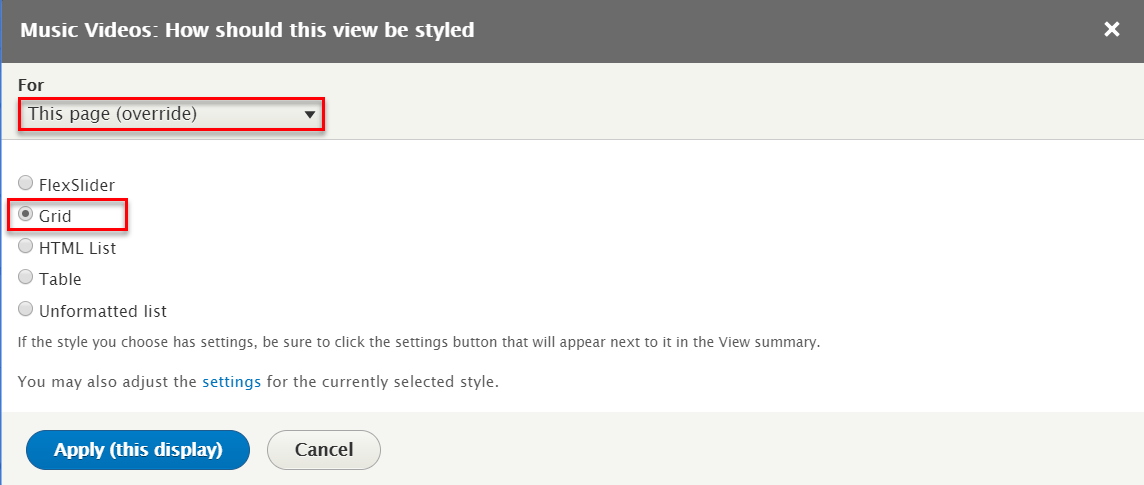
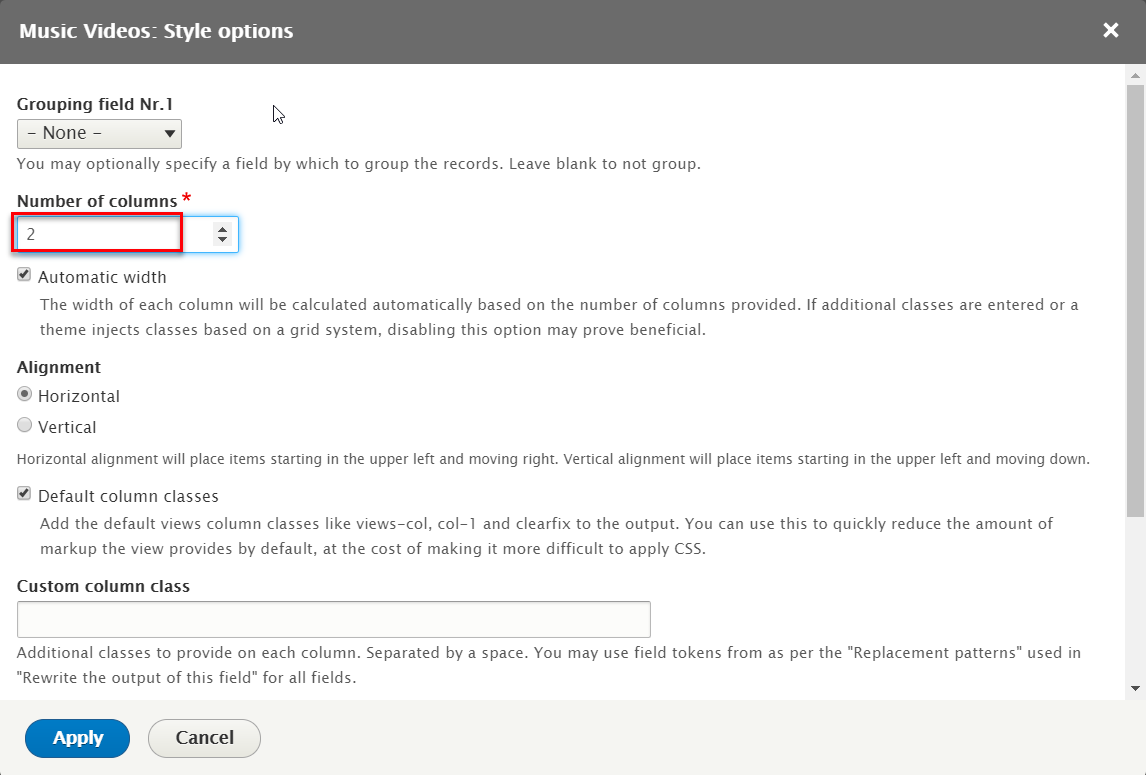
Step 4: At FORMAT > Show areas, click Fields link to change configure

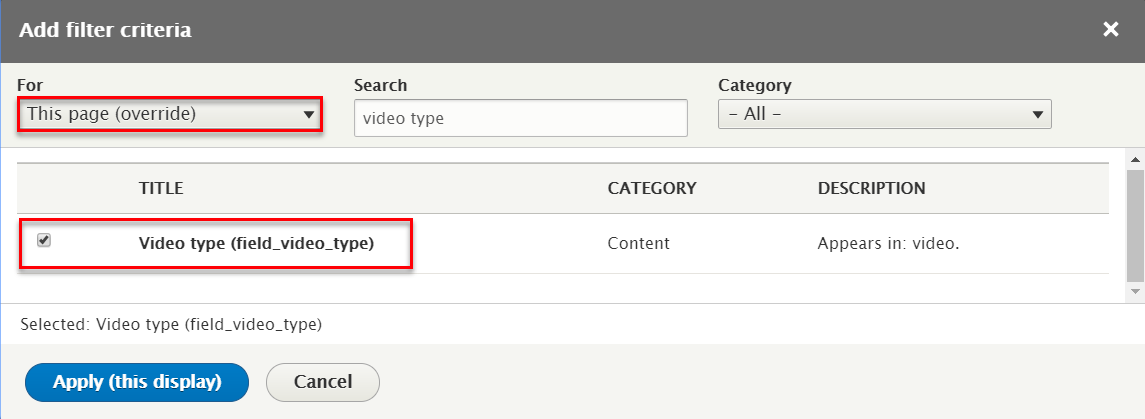
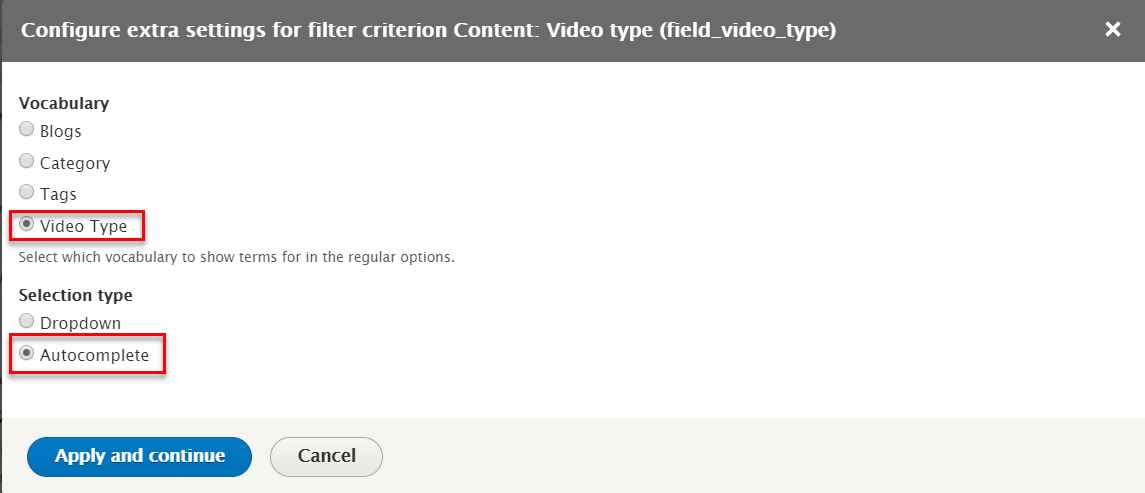
Step 4: At FILTER CRITERIA areas, click add button to create Content: Video typefield and set following properites:
Step 4: At PAGE SETTINGS > Path areas, click no link to change video configure and set following properites:
Step 5: At PAGER > Use pager area, click Display a specified number of items to change options this field

Step 6: At PAGER > Use pager area, click 2 items, skip 1 to change options this field

Step 6: Click Save button to save view
Contact page
1. Create Contact info custom block

Step 1: Navigate to Structure > Block layout > Custom block library, click Add custom block, then create Contact block with following settings:
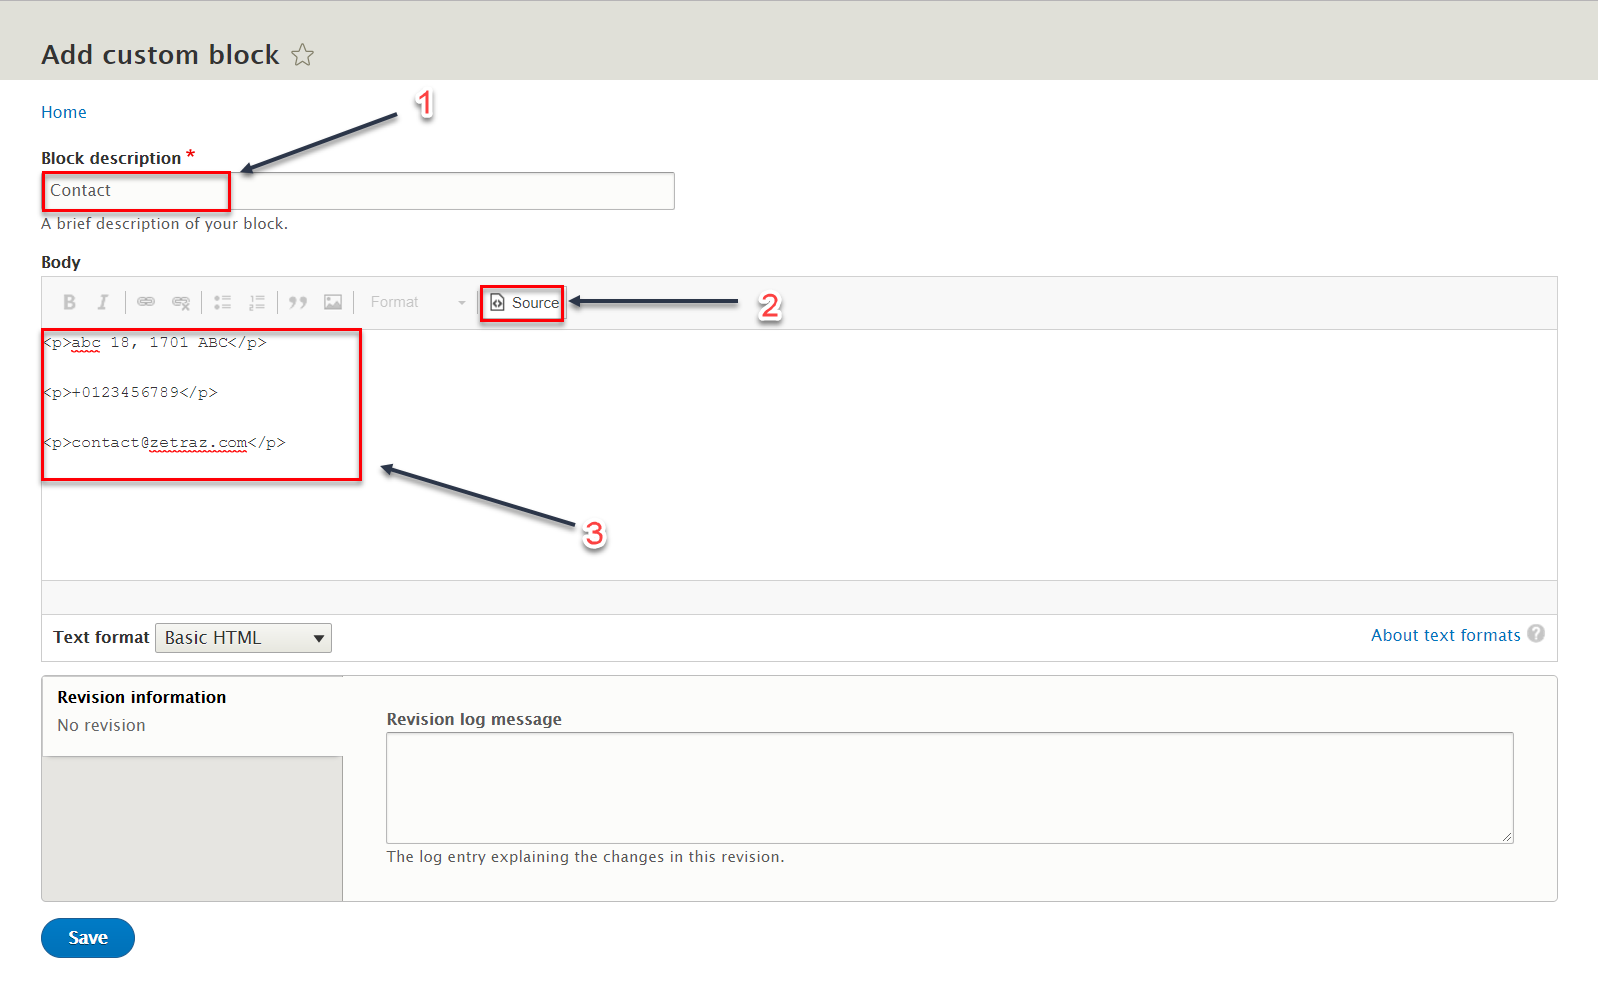
Refer to following HTML code:
abc 18, 1701 ABC
+0123456789
2. Configure Contact info custom block
Step 1: Navigate to Structure > Block layout
Step 2: Find Content click Place block button
Step 3: Find Contact (Custom) click Place block button and set following properites:
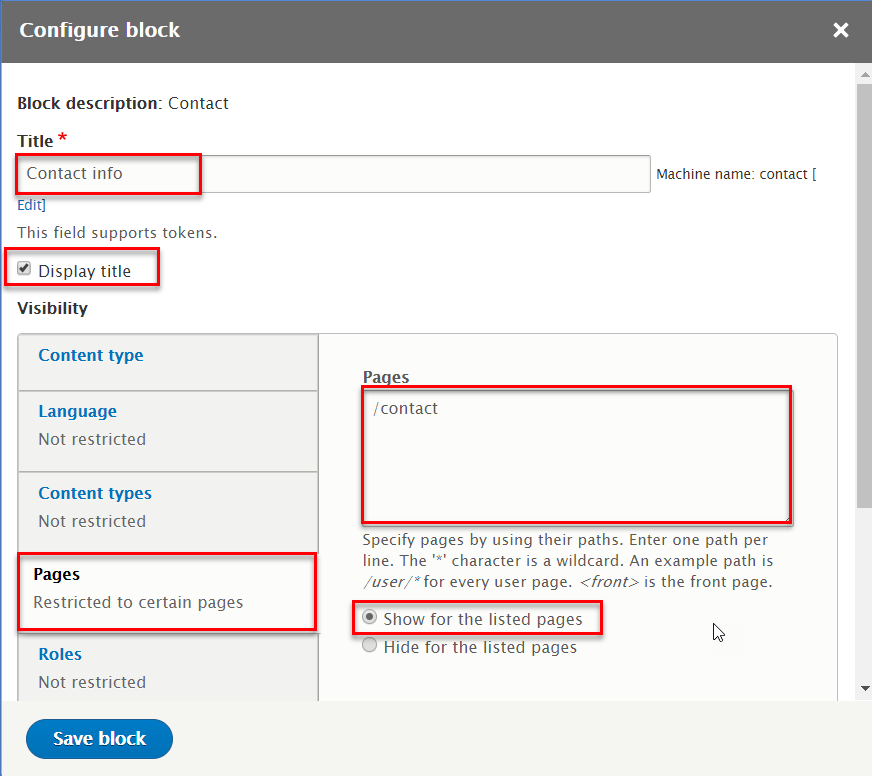
Step 4: Click Save block button.
3. Create Contact forms: Send us a message

Step 1: Navigate to Structure > Contact forms click Add contact form button, create Send us a message contact from and set with following properties:

Step 2: Click Save button
Fashion page
1. Fashion banner

1.1 Create Block types: Image Block
Step 1: Navigate to Structure > Block layout > Custom block library click Block types > Add custom block type button, create Image Block custom block with following properties:


Step 2: Click Save button, after successfully adding Image Block. Click Manage fields button.

Step 3: Click Add field button, to add Image field and set with following properties

Step 4: Click Save and continue button

Step 5: Click Save and settings button

Step 6: Click Save settings button and navigate to Manage display tab and set with following properties

Step 7: Click Save button
1.2 Create Image block: Fashion
Step 1: Navigate to Structure > Block layout > Custom block library click Add custom block button and click Image Block link to create Fashion custom block with following properties:

Step 7: Click Save button
1.3 Configure Fashion custom image block
Step 1: Navigate to Structure > Block layout
Step 2: Find Featured click Place block button
Step 3: Find Fashion (Custom) click Place block button and set following properites:
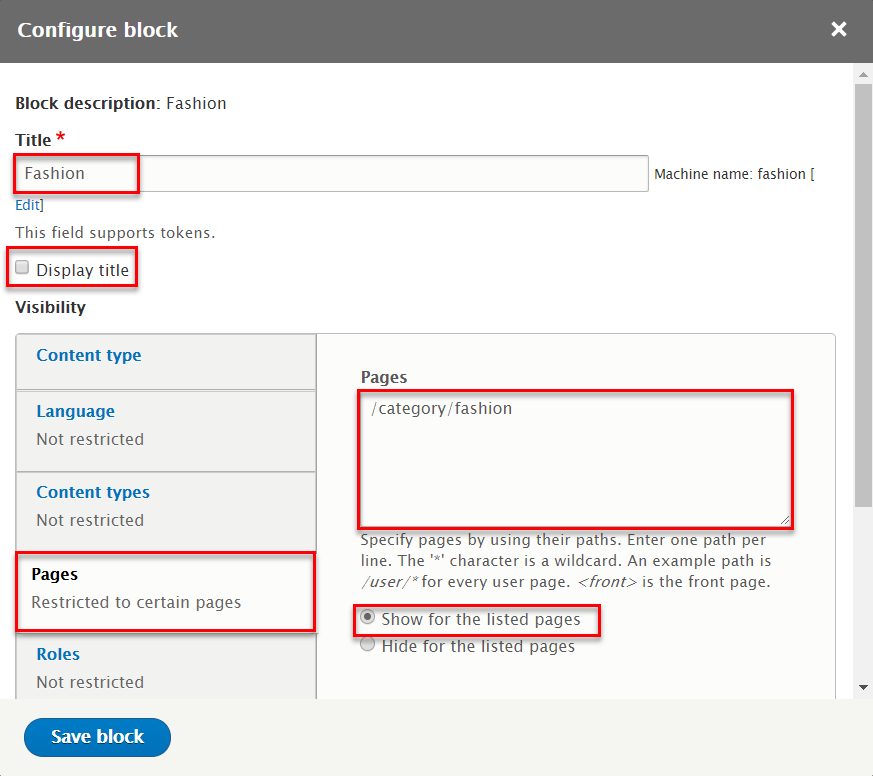
Step 4: Click Save block button.
Health & Beauty page
1. Health & Beauty slideshow

1.1 Create Health block
Step 1: Navigate to Structure > Views
Step 2: Find Article block click Edit button
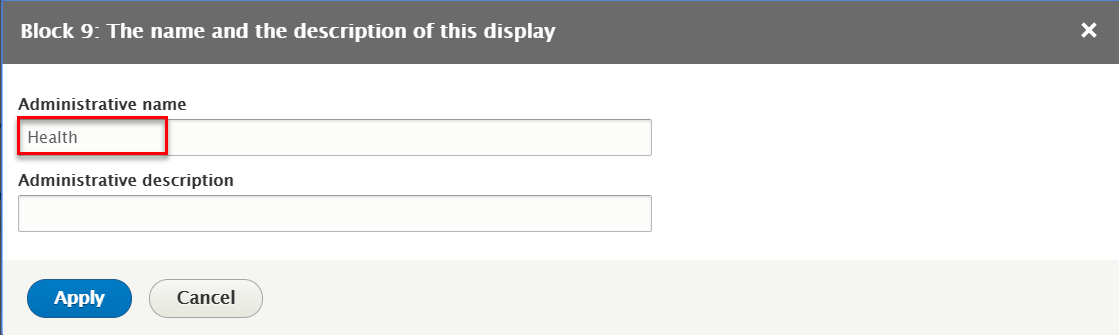
Step 3: Click Add link to create Health block and set following properites:
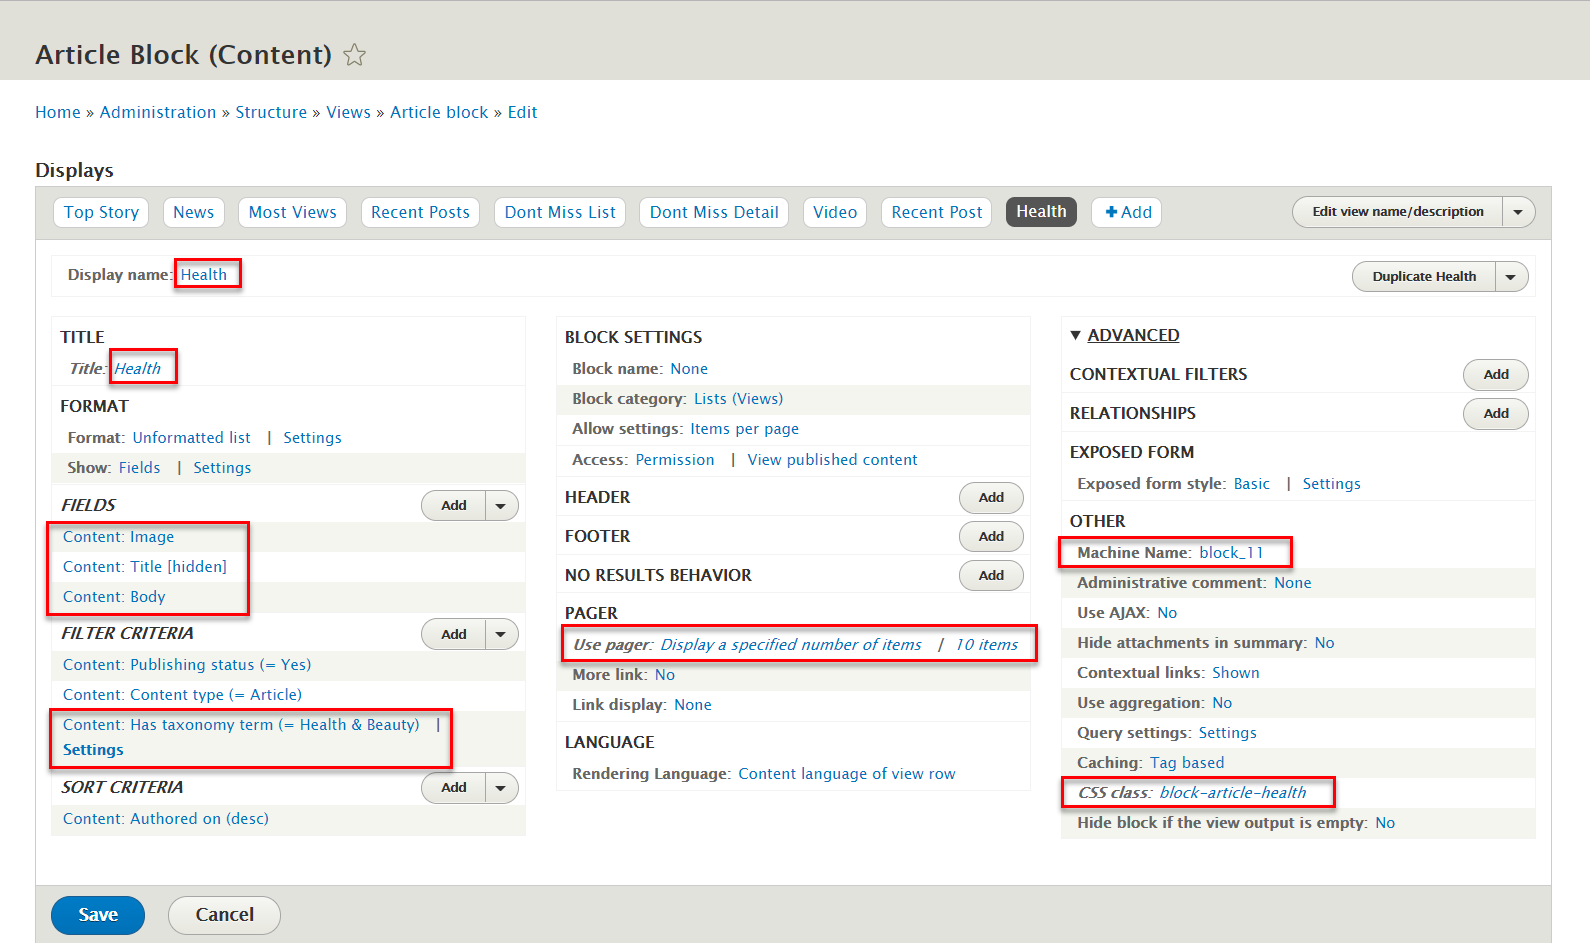
Step 4: At Display name and Title areas, change name Health

Step 5: At FIELDS areas, click add button to create Content: Image field and set following properites:
Step 6: At FIELDS areas, click Content: Video Title field and set following properites:
Step 7: At FIELDS areas, click add button to create Content: Body field and set following properites:
Refer to following HTML code:
                                        {{ title }}


                                        {{ body }}
Step 8: At FILTER CRITERIA areas, click add button to create Content: Has taxonomy term field and set following properites:
Step 9: At SORT CRITERIA areas, click Content statistics: Views today link to remove this field
Step 10: At PAGER > Use pager area, click Display a specified number of items to change options this field
Step 11: At PAGER > Use pager area, click 1 items to change options this field
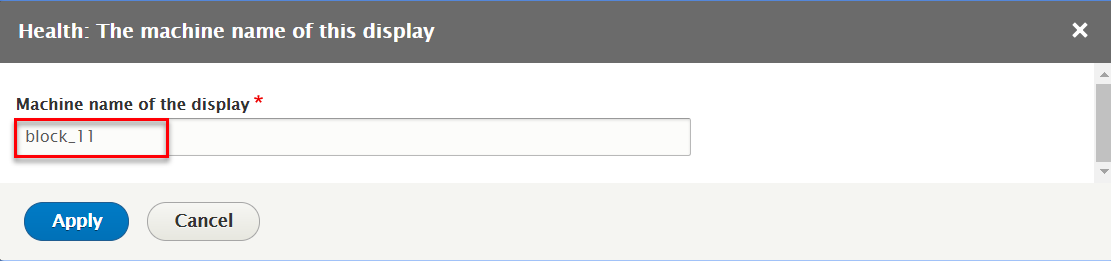
Step 12: At OTHER > Machine Name area, change machine name block_11
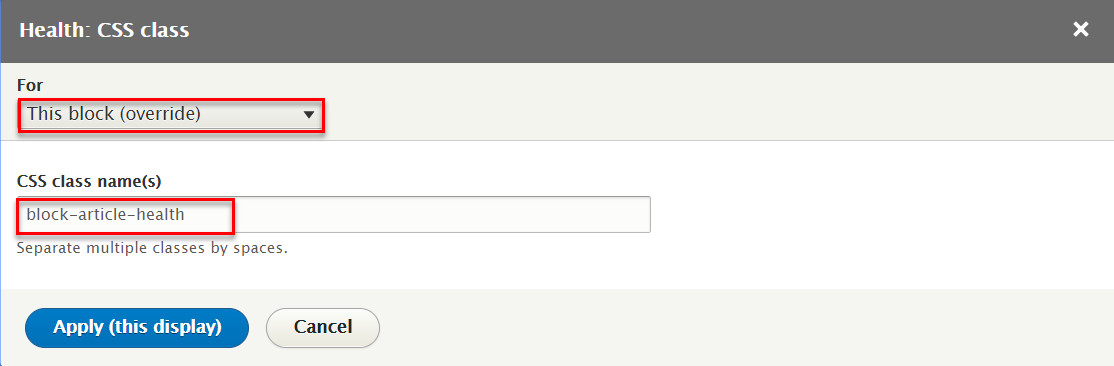
Step 13: At OTHER > Css class area, change Css class block-article-health
Step 14: Click Save button to save view
1.2 Configure Health block
Step 1: Navigate to Structure > Block layout
Step 2: Find Slideshow click Place block button
Step 3: Find Article Block: Health Lists (Views) click Place block button and set following properites:

Step 4: Click Save block button.
Education page
1. Education Featured
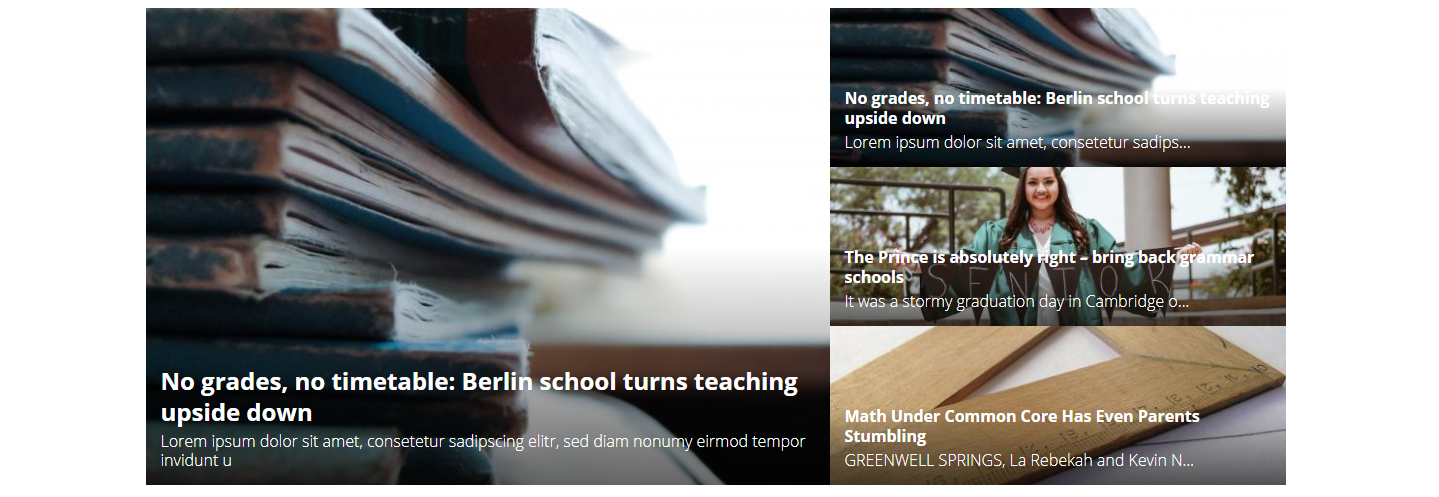
1.1 Create Education 1 block
Step 1: Navigate to Structure > Views
Step 2: Find Article block click Edit button
Step 3: Click Add link to create Education 1 block and set following properites:

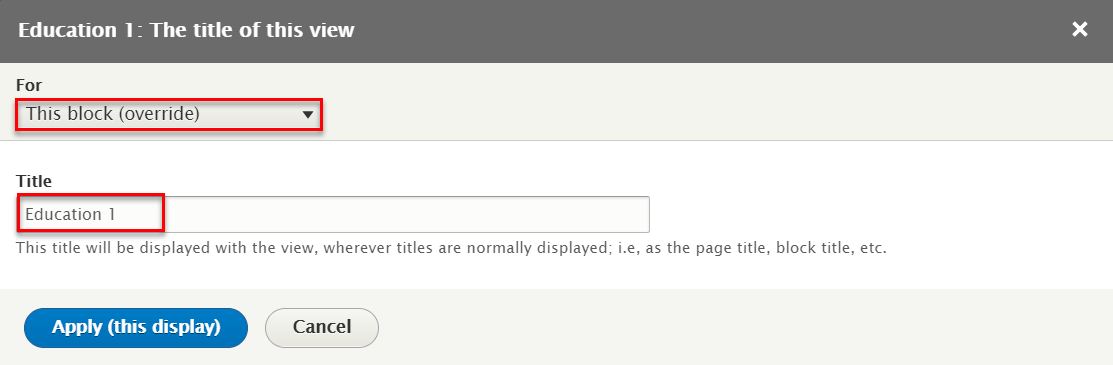
Step 4: At Display name and Title areas, change name Education 1

Step 5: At FIELDS areas, click add button to create Content: Image field and set following properites:
Step 6: At FIELDS areas, click Content: Video Title field and set following properites:
Step 7: At FIELDS areas, click add button to create Content: Body field and set following properites:
Refer to following HTML code:
                                    {{ title }}


                                    {{ body }}
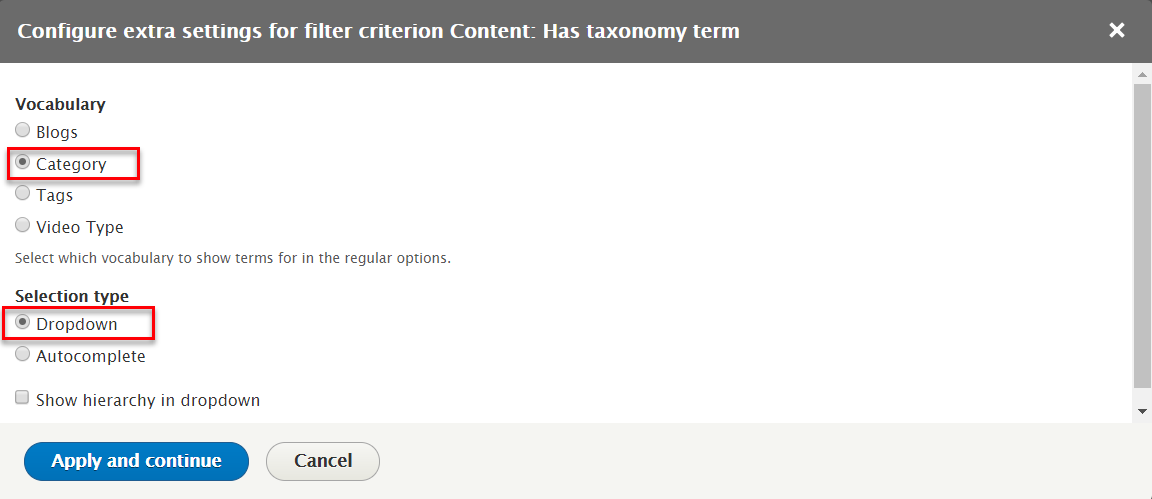
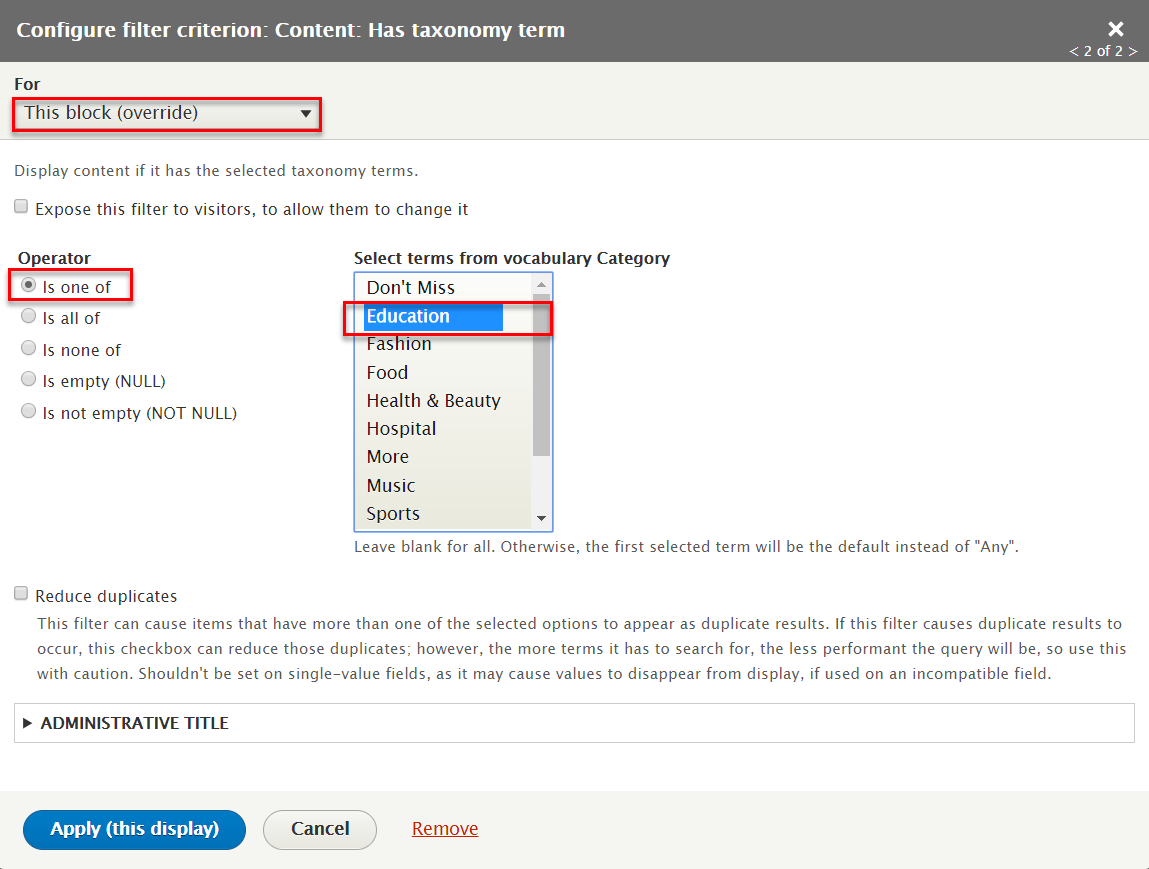
Step 8: At FILTER CRITERIA areas, click add button to create Content: Has taxonomy term field and set following properites:
Step 9: At SORT CRITERIA areas, click Content statistics: Views today link to remove this field
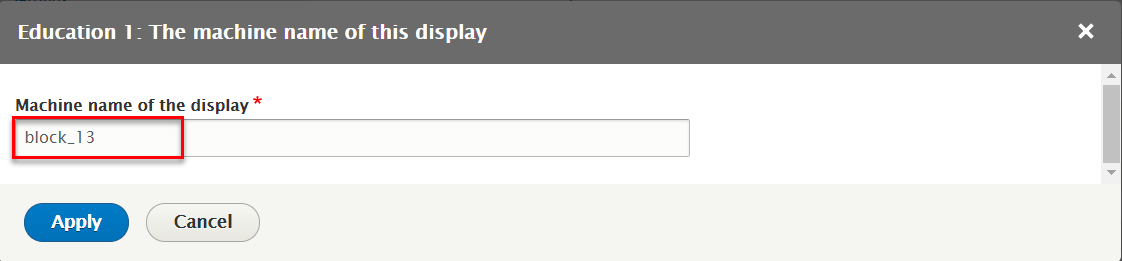
Step 12: At OTHER > Machine Name area, change machine name block_13
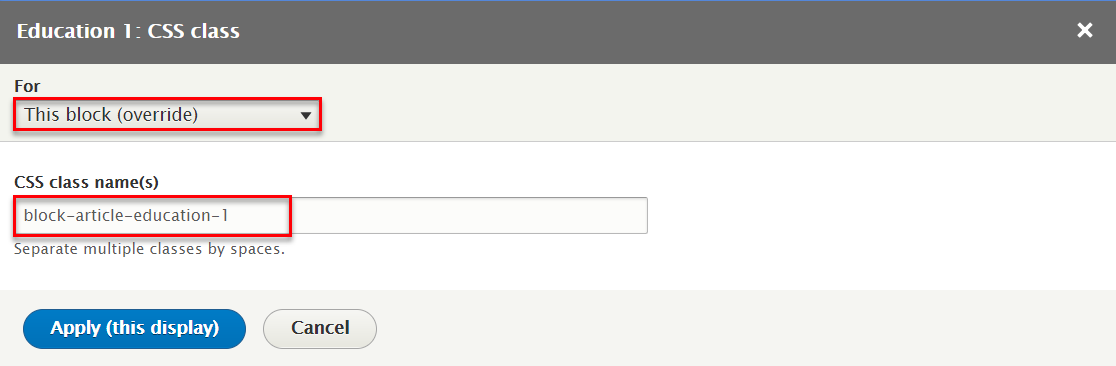
Step 13: At OTHER > Css class area, change Css class block-article-education-1
Step 14: Click Save button to save view
1.2 Create Education 3 block
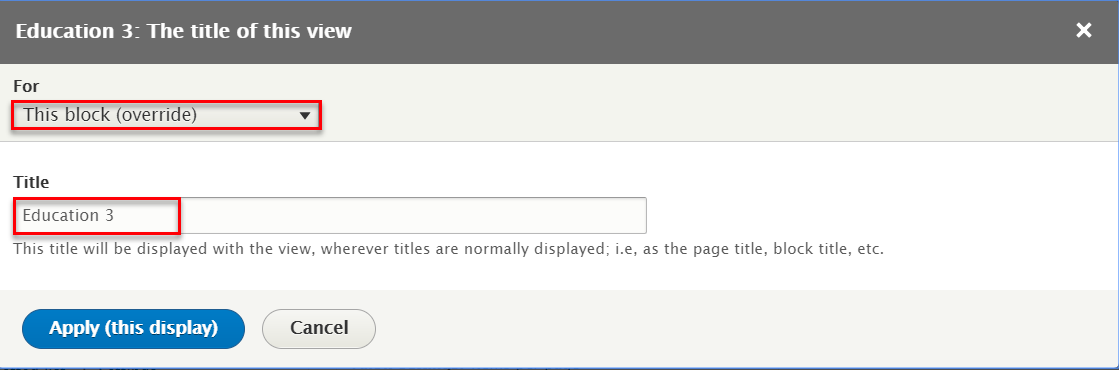
Step 3: Click Add link to create Education 3 block and set following properites:

Step 4: At Display name and Title areas, change name Education 3

Step 5: At FIELDS areas, click add button to create Content: Image field and set following properites:

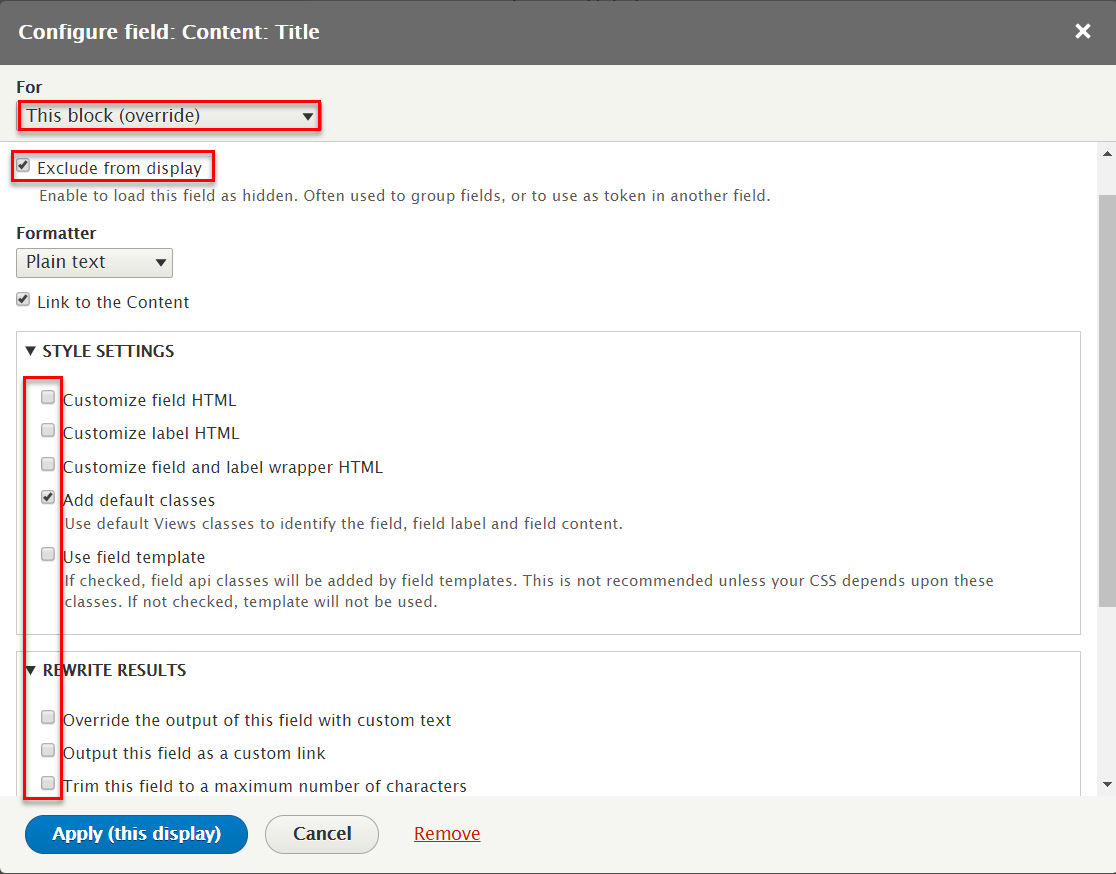
Step 6: At FIELDS areas, click Content: Video Title field and set following properites:
Step 7: At FIELDS areas, click add button to create Content: Body field and set following properites:
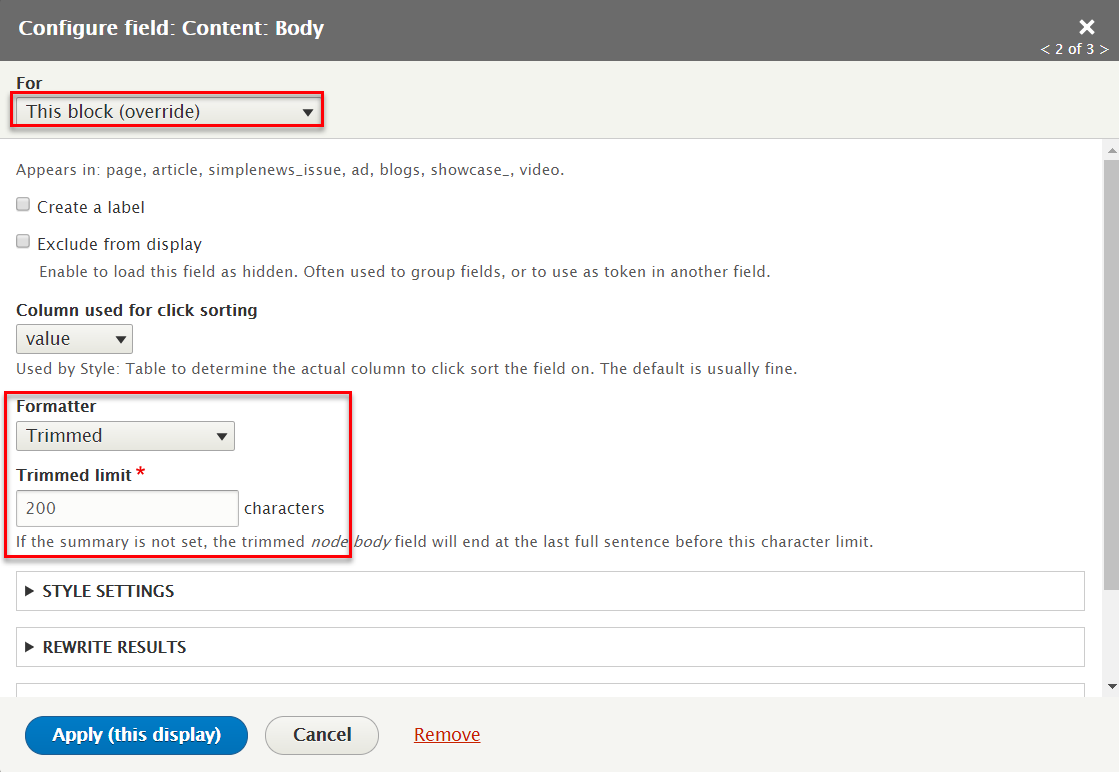
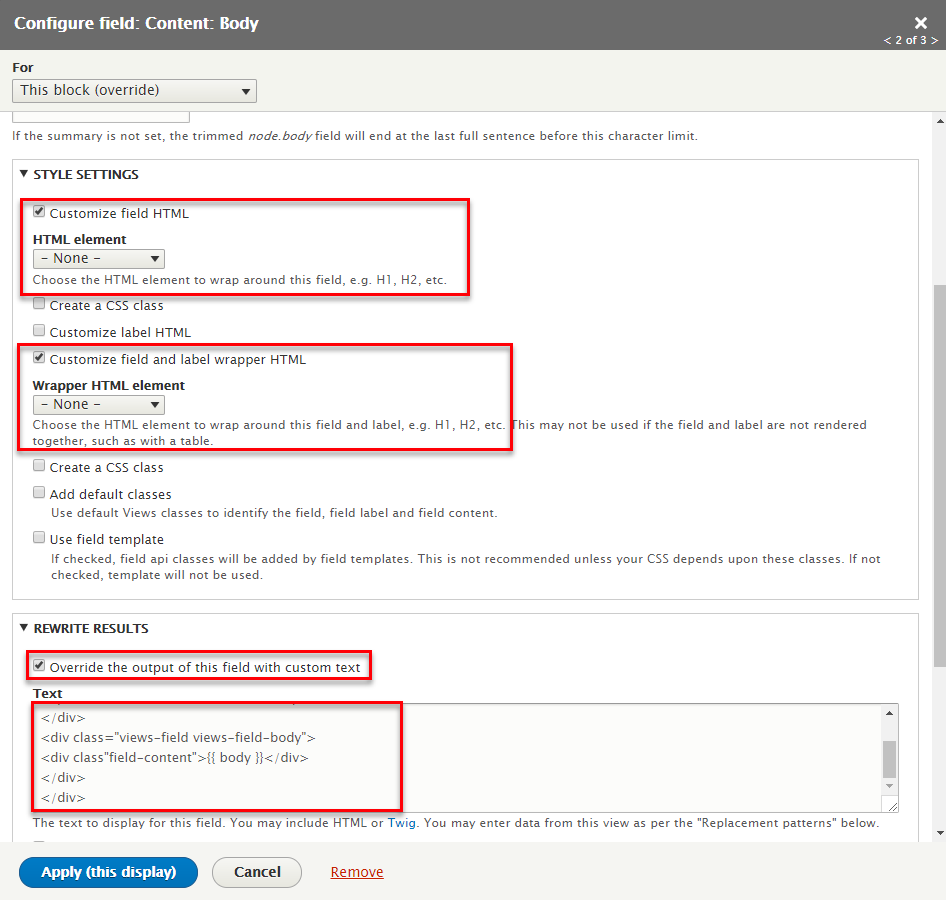
Refer to following HTML code:
                                {{ title }}


                                {{ body }}
Step 8: At FILTER CRITERIA areas, click add button to create Content: Has taxonomy term field and set following properites:
Step 9: At SORT CRITERIA areas, click Content statistics: Views today link to remove this field
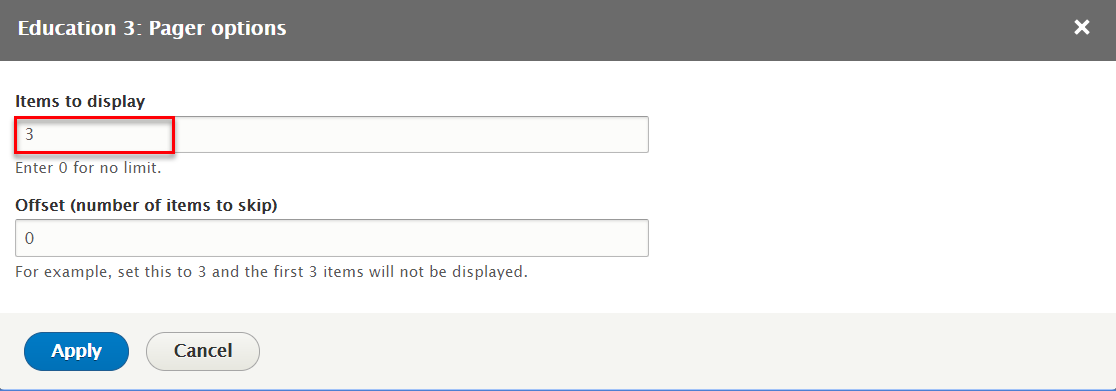
Step 10: At PAGER > Use pager area, click Display a specified number of items to change options this field
Step 11: At PAGER > Use pager area, click 1 items to change options this field
Step 12: At OTHER > Machine Name area, change machine name block_13

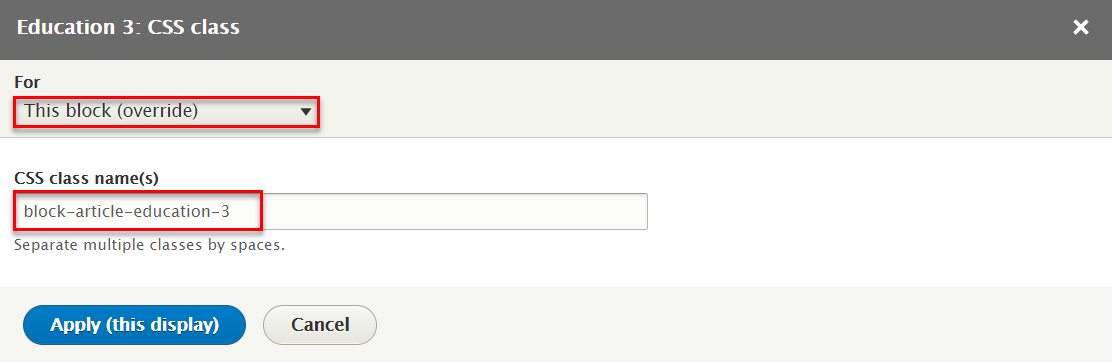
Step 13: At OTHER > Css class area, change Css class block-article-education-3
Step 14: Click Save button to save view
1.3 Configure Education Featured block
Step 1: Navigate to Structure > Block layout
Step 2: Find Featured click Place block button
Step 3: Find Article Block: Education 1 click Place block button and set following properites:

Step 4: Click Save block button.
Step 5: Find Featured click Place block button
Step 6: Find Article Block: Education 3 click Place block button and set following properites:

Step 7: Click Save block button.
Hospital page
1. Hospital slideshow

1.1 Create Hospital block
Step 1: Navigate to Structure > Views
Step 2: Find Article block click Edit button
Step 3: Click Add link to create Hospital block and set following properites:
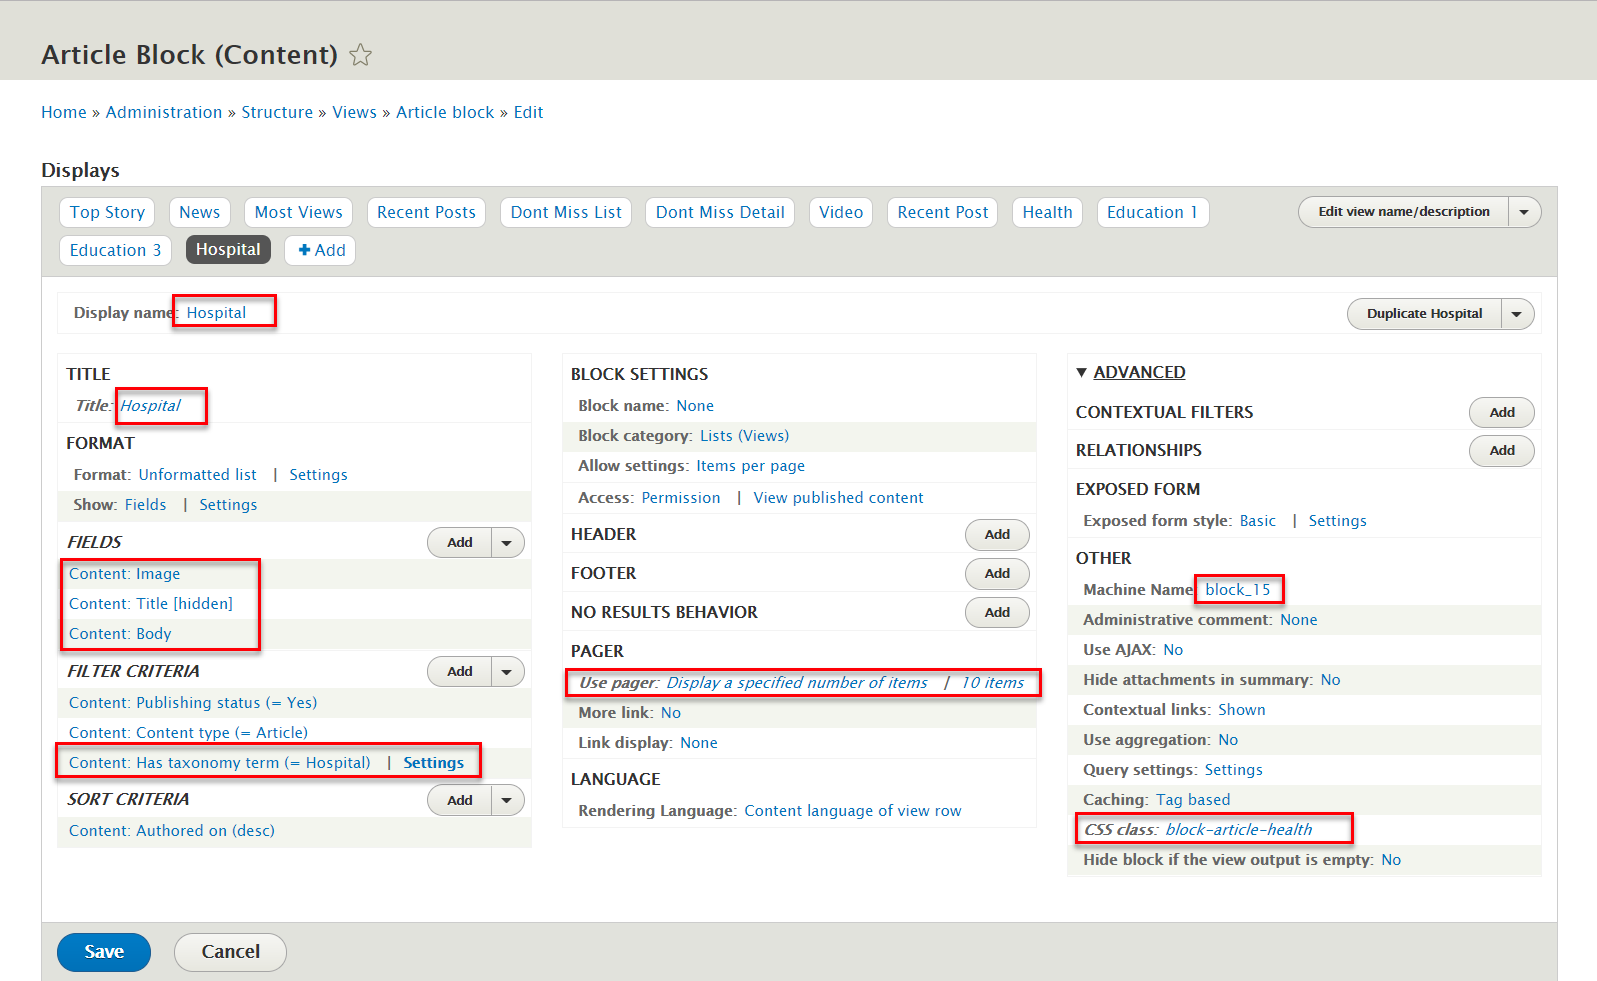
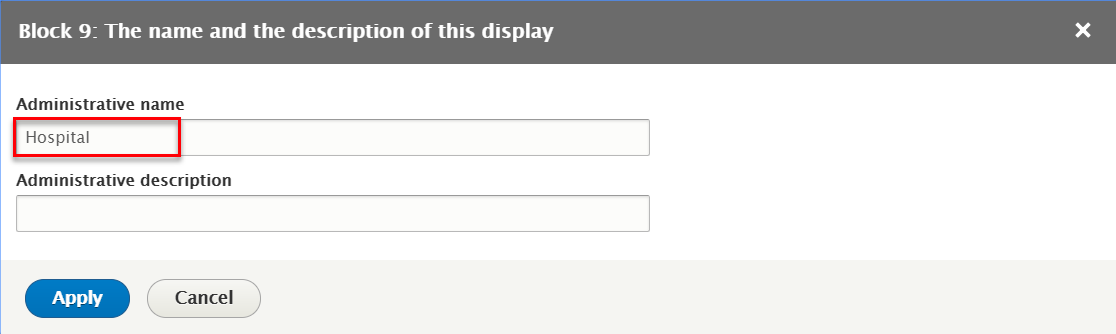
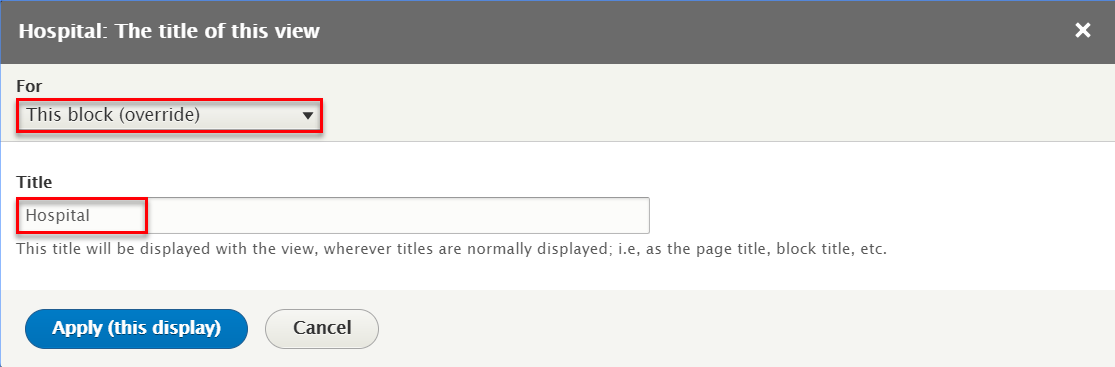
Step 4: At Display name and Title areas, change name Hospital
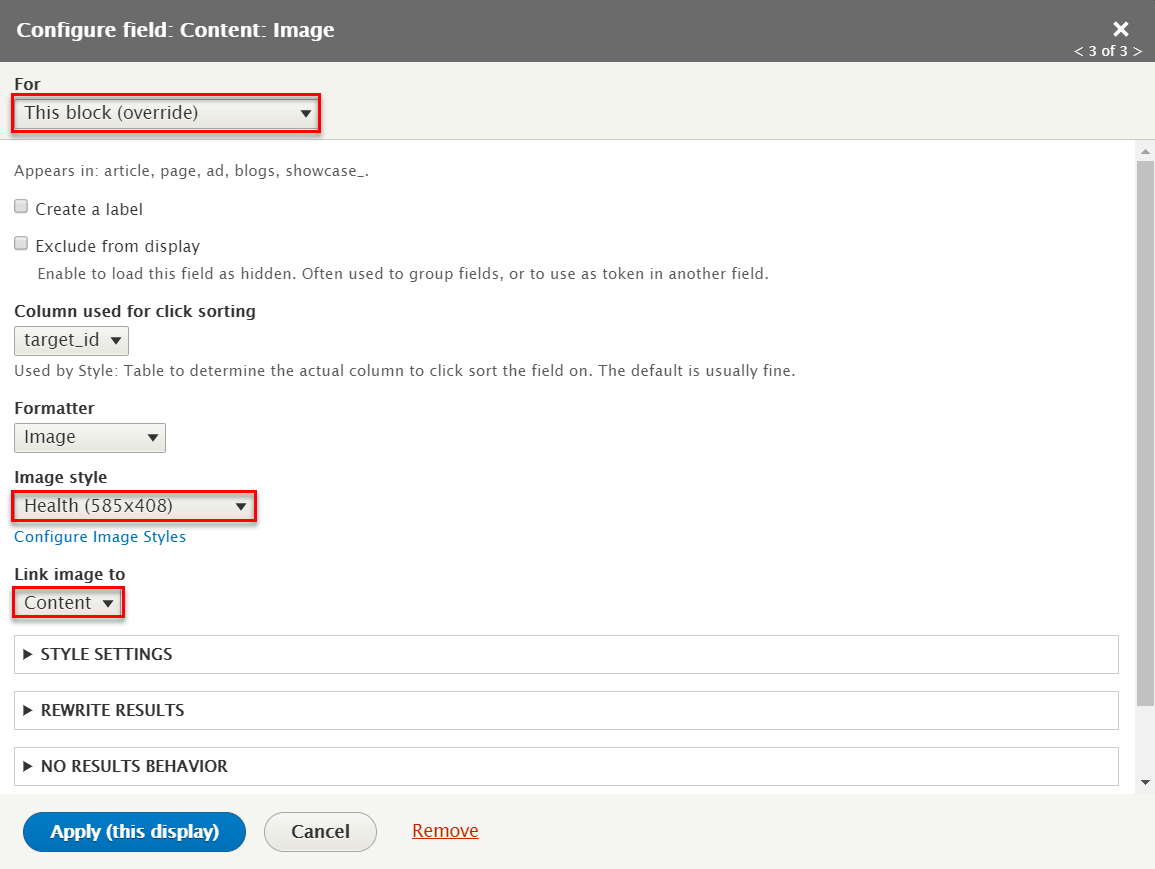
Step 5: At FIELDS areas, click add button to create Content: Image field and set following properites:
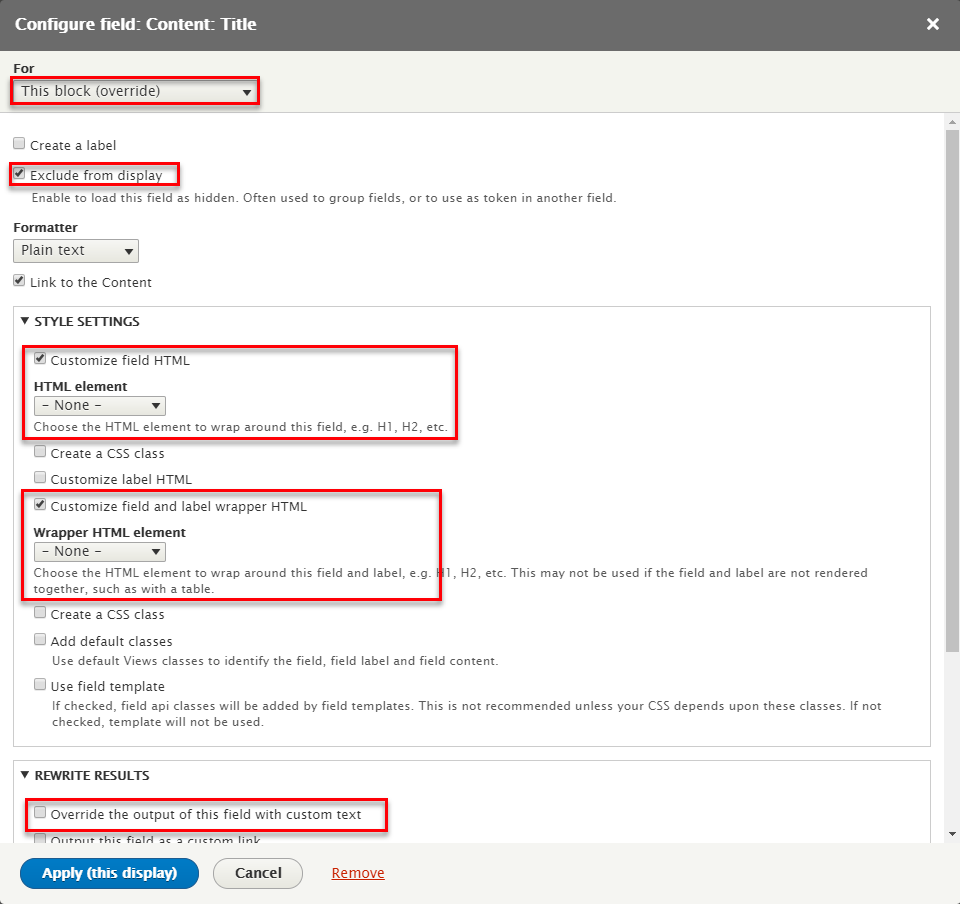
Step 6: At FIELDS areas, click Content: Video Title field and set following properites:
Step 7: At FIELDS areas, click add button to create Content: Body field and set following properites:
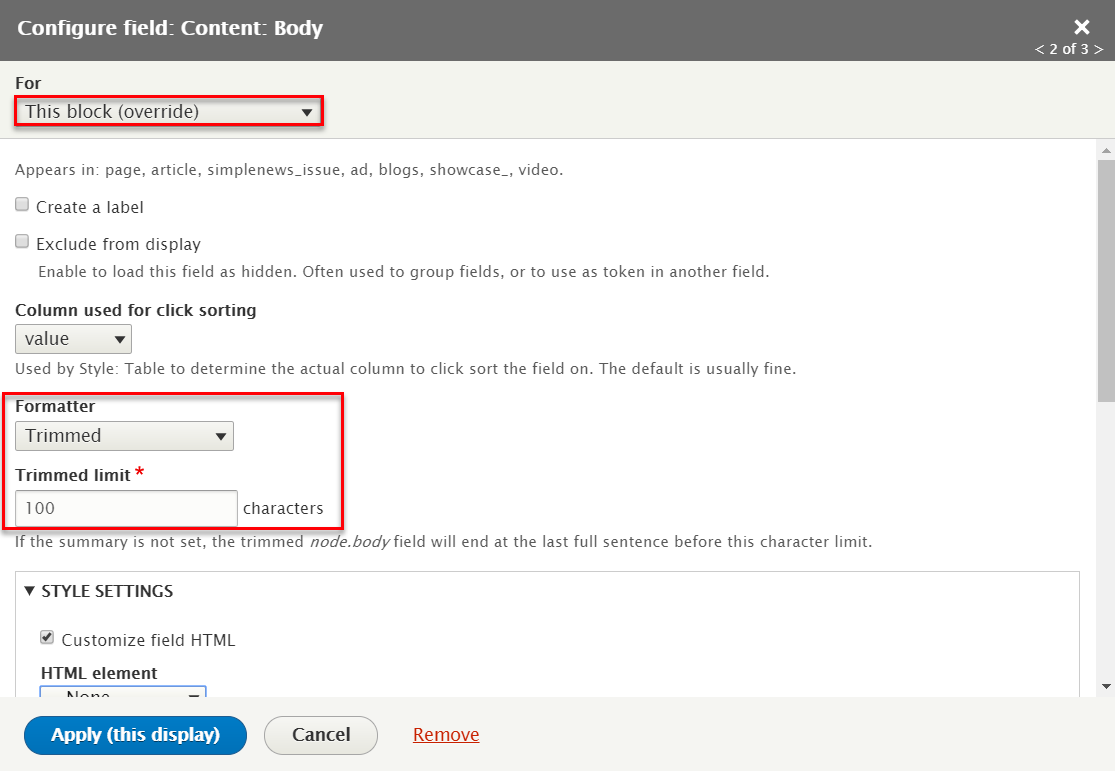
Refer to following HTML code:
                                    {{ title }}


                                    {{ body }}
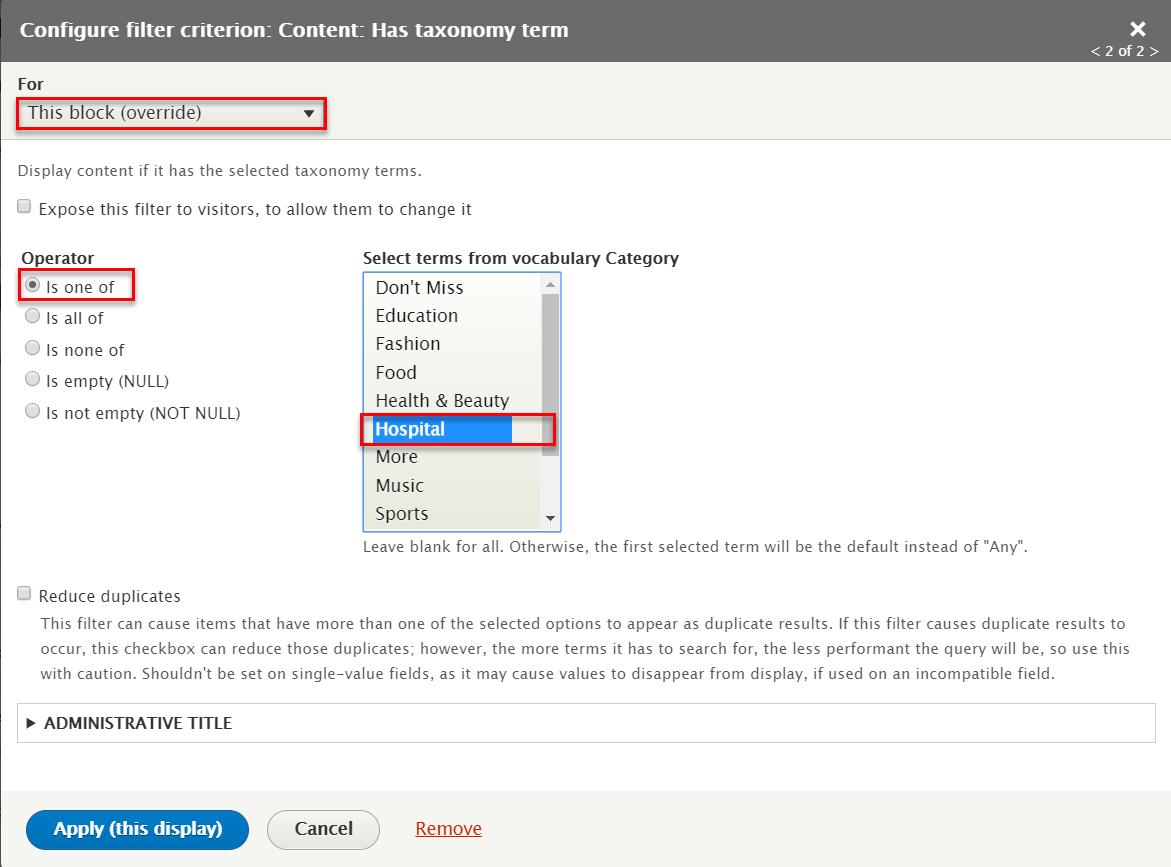
Step 8: At FILTER CRITERIA areas, click add button to create Content: Has taxonomy term field and set following properites:
Step 9: At SORT CRITERIA areas, click Content statistics: Views today link to remove this field
Step 10: At PAGER > Use pager area, click Display a specified number of items to change options this field
Step 11: At PAGER > Use pager area, click 1 items to change options this field
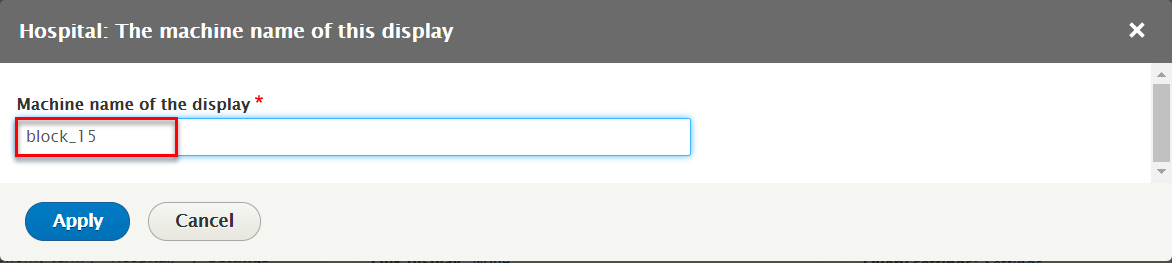
Step 12: At OTHER > Machine Name area, change machine name block_15
Step 13: At OTHER > Css class area, change Css class block-article-health
Step 14: Click Save button to save view
1.2 Configure Hospital block
Step 1: Navigate to Structure > Block layout
Step 2: Find Slideshow click Place block button
Step 3: Find Article Block: Hospital Lists (Views) click Place block button and set following properites:

Step 4: Click Save block button.
Sport page
1. Sport Highlight

1.1 Create Sport Highlight 1 block
Step 1: Navigate to Structure > Views
Step 2: Find Article block click Edit button
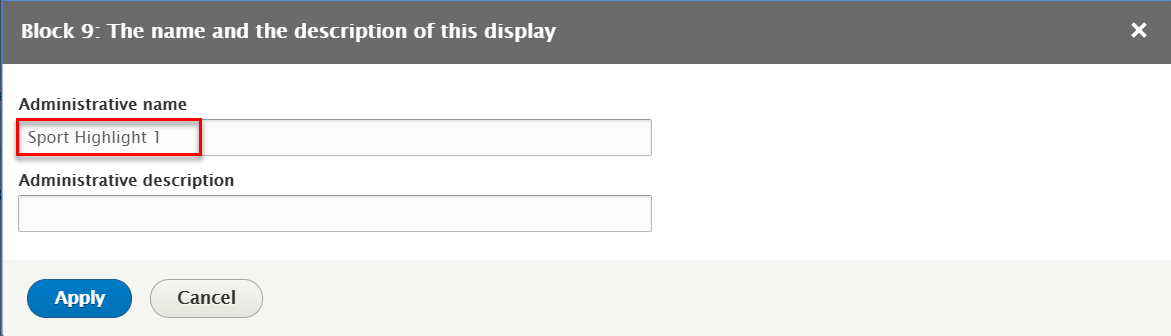
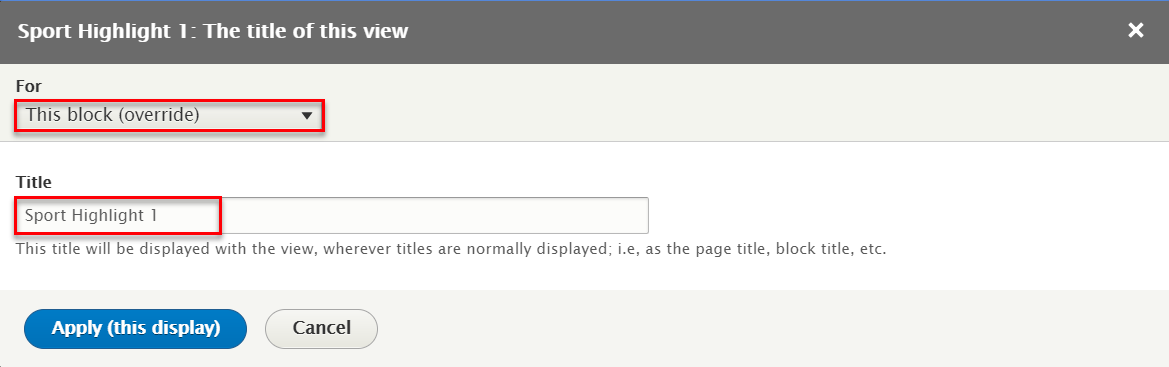
Step 3: Click Add link to create Sport Highlight 1 block and set following properites:
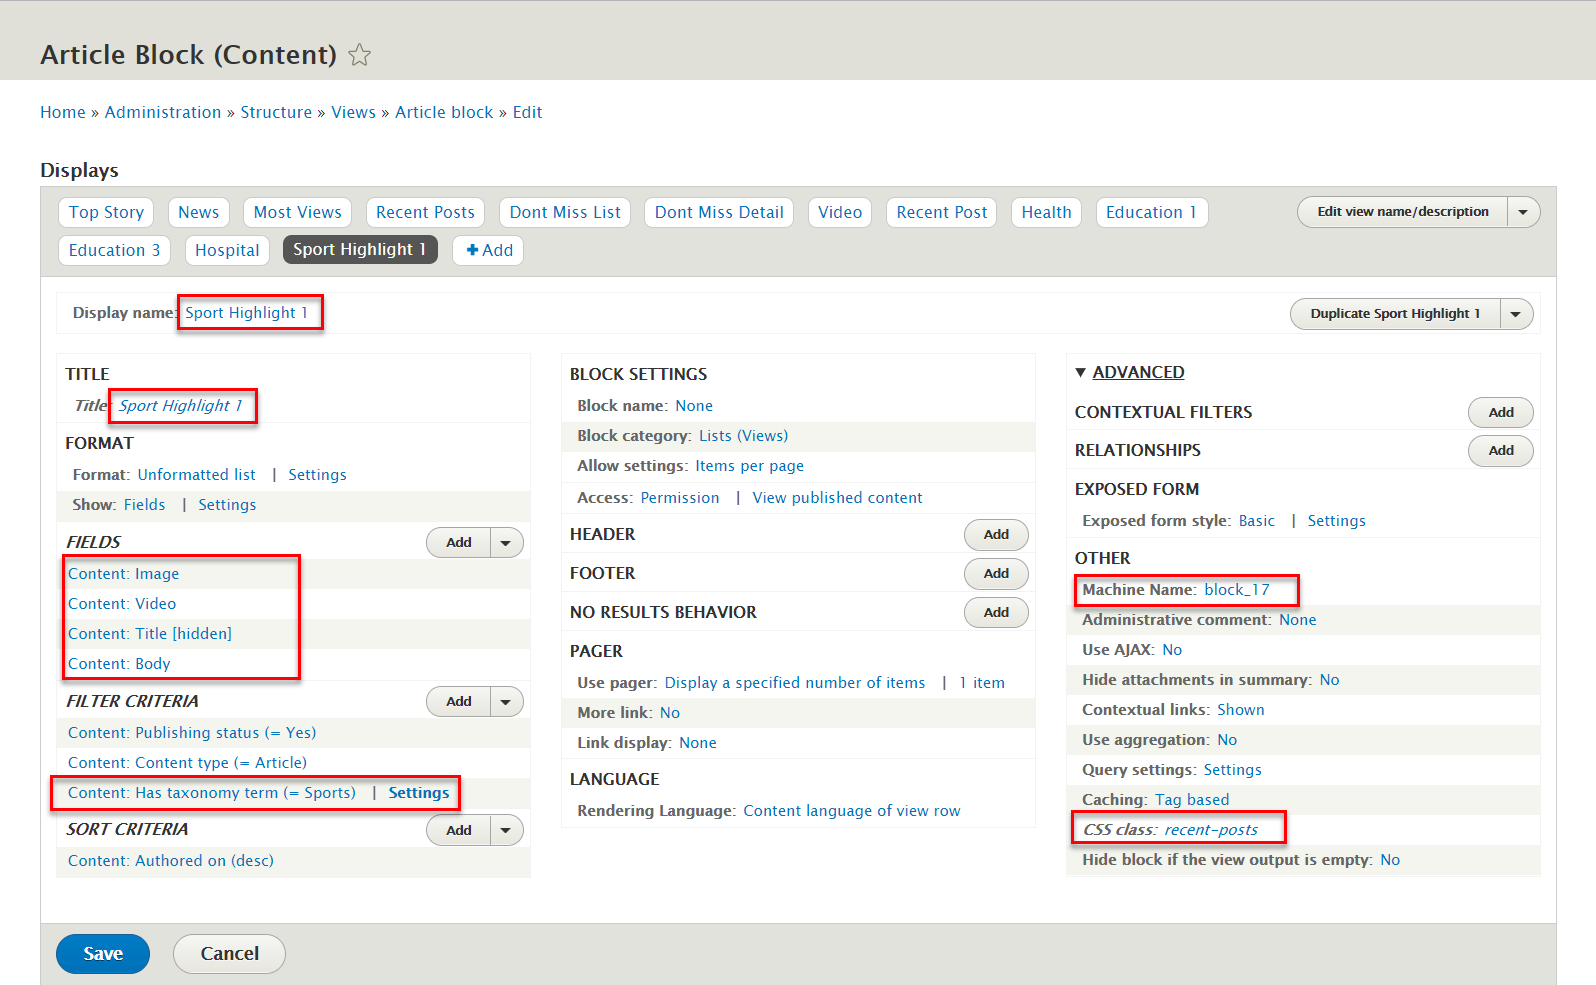
Step 4: At Display name and Title areas, change name Sport Highlight 1
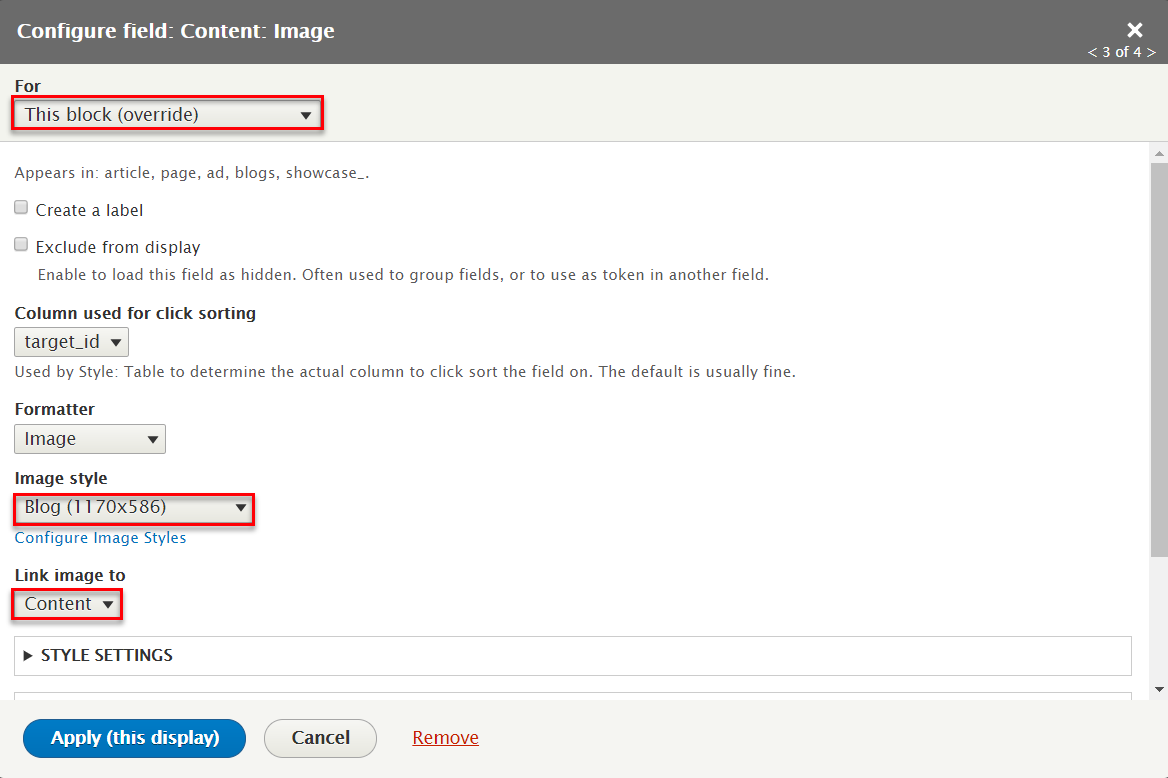
Step 5: At FIELDS areas, click add button to create Content: Image field and set following properites:
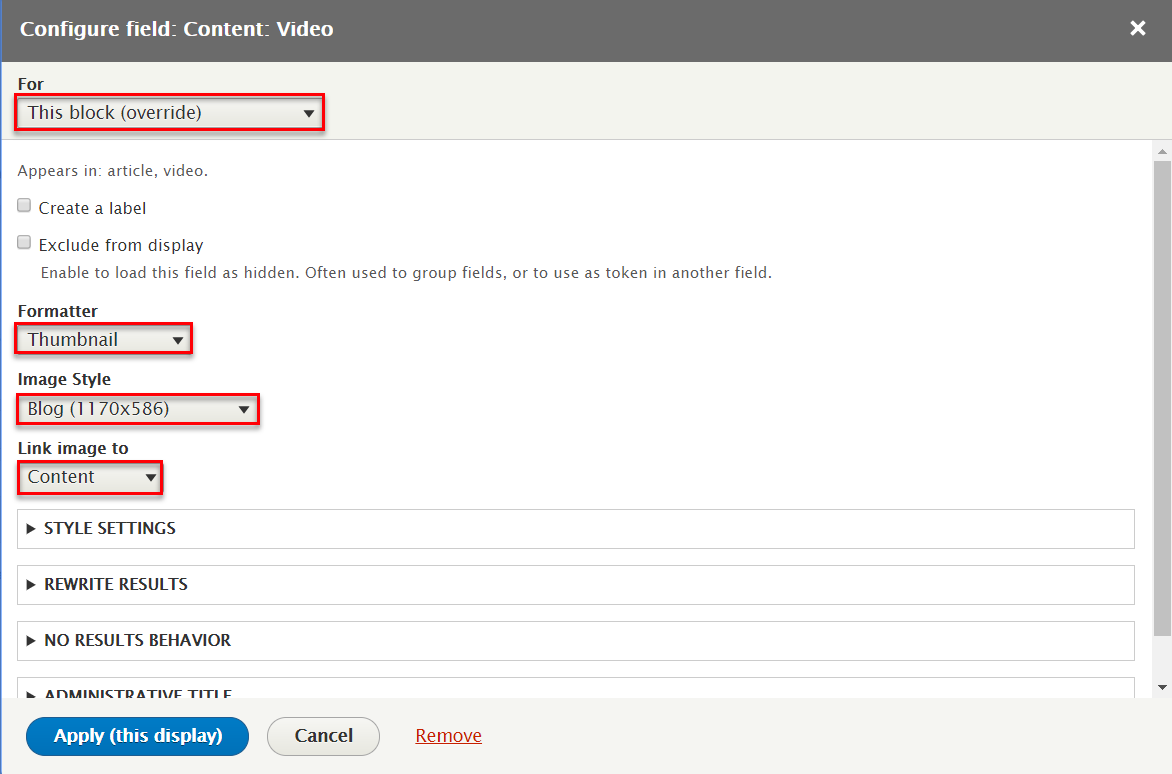
Step 6: At FIELDS areas, click add button to create Content: Video field and set following properites:
Step 7: At FIELDS areas, click Content: Title field and set following properites:

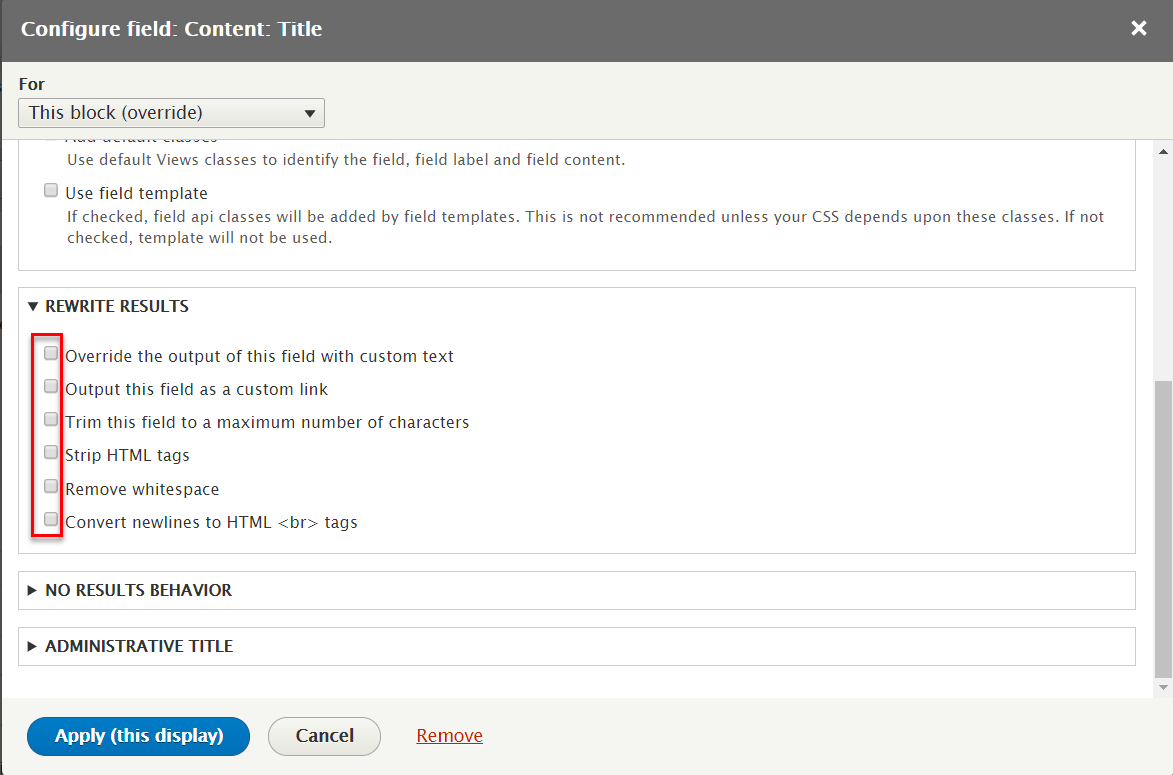
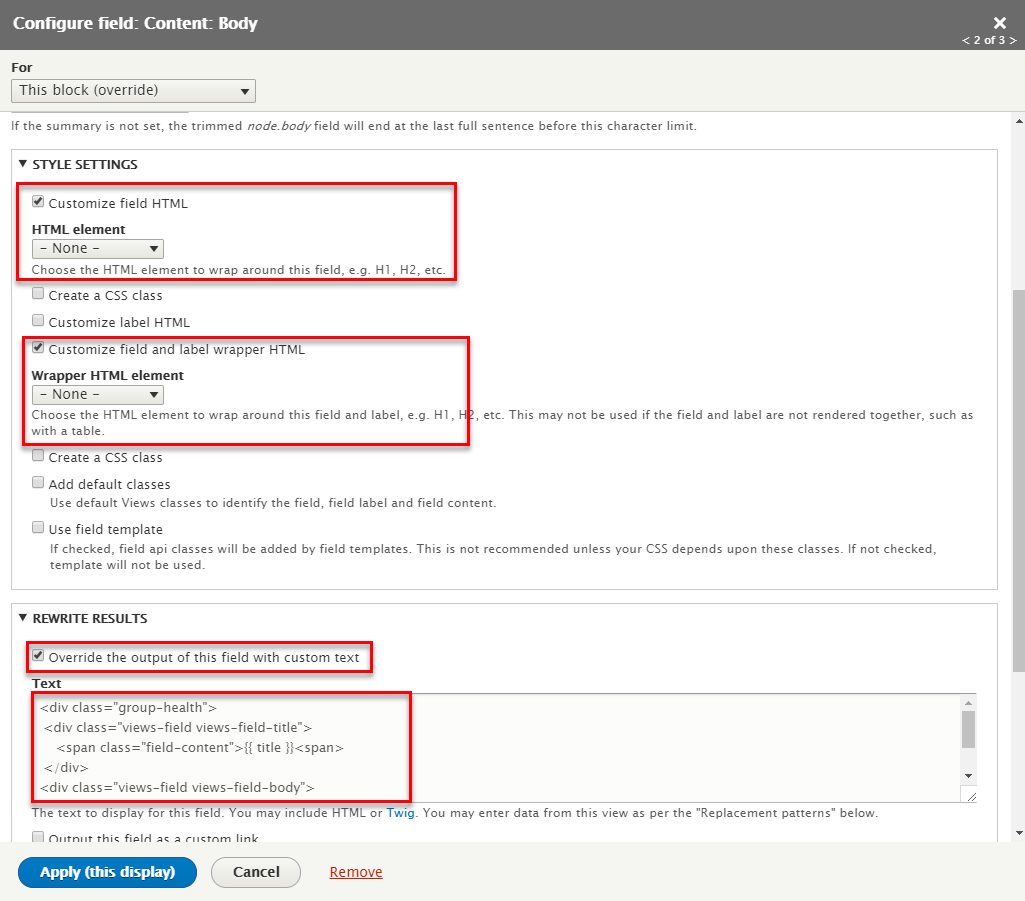
Step 8: At FIELDS areas, click add button to create Content: Body field and set following properites:
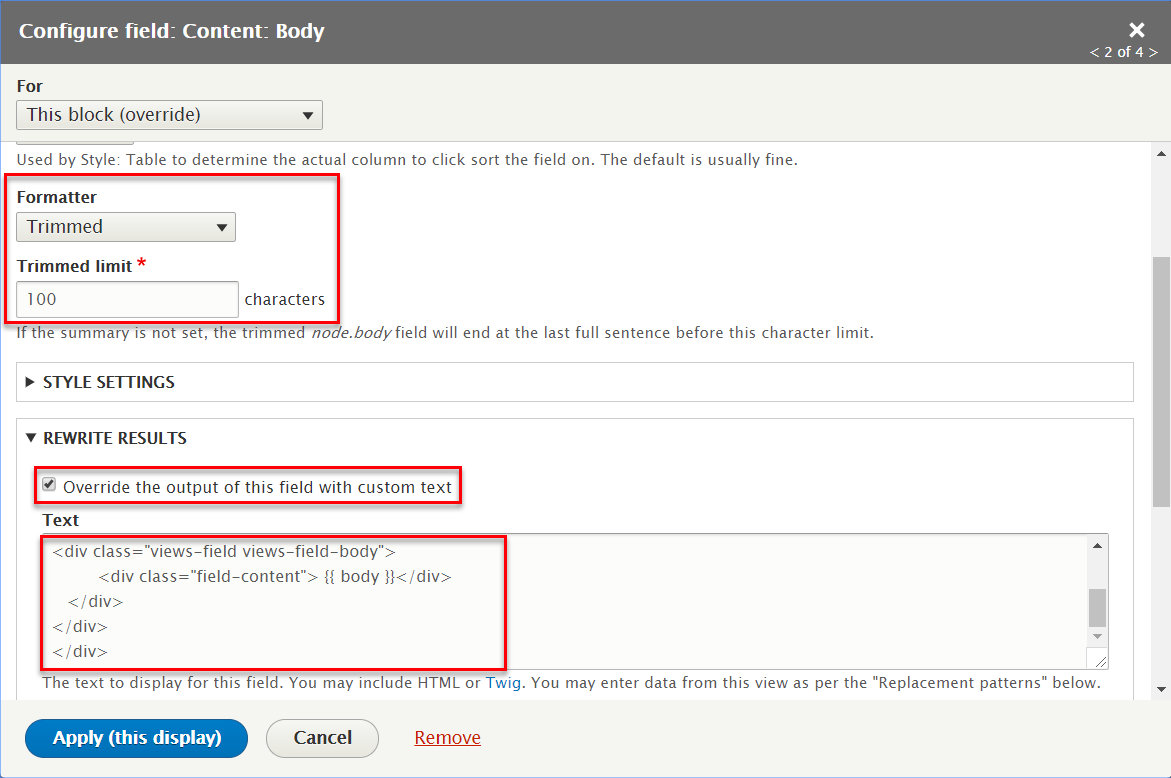
Refer to following HTML code:
                                              {{ title }}


                                              {{ body }}
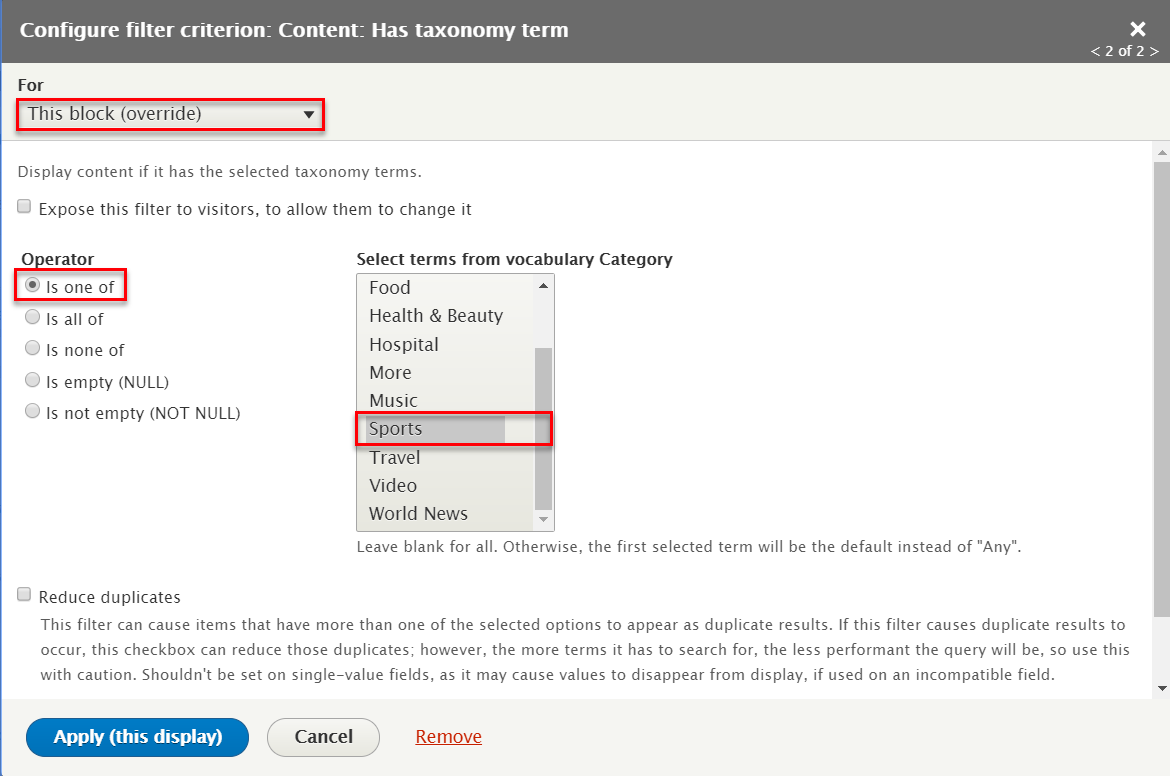
Step 9: At FILTER CRITERIA areas, click add button to create Content: Has taxonomy term field and set following properites:
Step 10: At SORT CRITERIA areas, click Content statistics: Views today link to remove this field
Step 11: At OTHER > Machine Name area, change machine name block_13
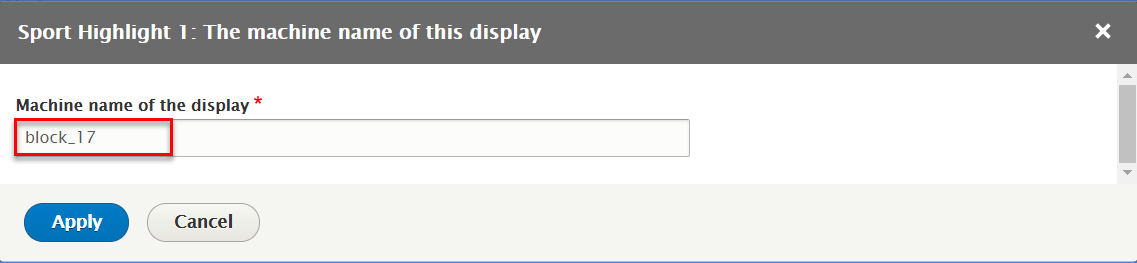
Step 12: At OTHER > Css class area, change Css class recent-posts

Step 13: Click Save button to save view
1.2 Create Sport 3 block
Step 3: Click Add link to create Sport Highlight 3 block and set following properites:

Step 4: At Display name and Title areas, change name Sport Highlight 3


Step 5: At FIELDS areas, click add button to create Content: Image field and set following properites:
Step 5: At FIELDS areas, click add button to create Content: Video field and set following properites:
Step 6: At FIELDS areas, click Content: Title field and set following properites:

Step 7: At FIELDS areas, click add button to create Content: Body field and set following properites:

Refer to following HTML code:
                                              {{ title }}


                                              {{ body }}
Step 8: At FILTER CRITERIA areas, click add button to create Content: Has taxonomy term field and set following properites:
Step 9: At SORT CRITERIA areas, click Content statistics: Views today link to remove this field
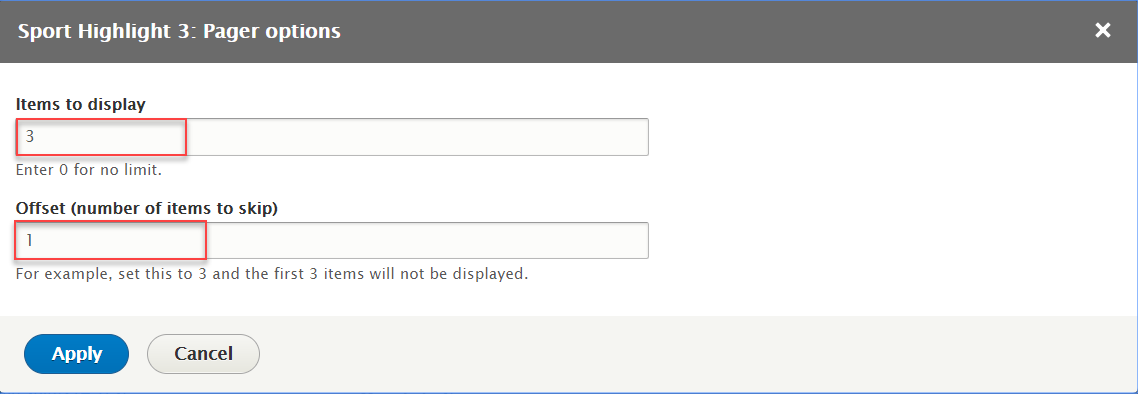
Step 10: At PAGER > Use pager area, click Display a specified number of items to change options this field
Step 11: At PAGER > Use pager area, click 1 items to change options this field
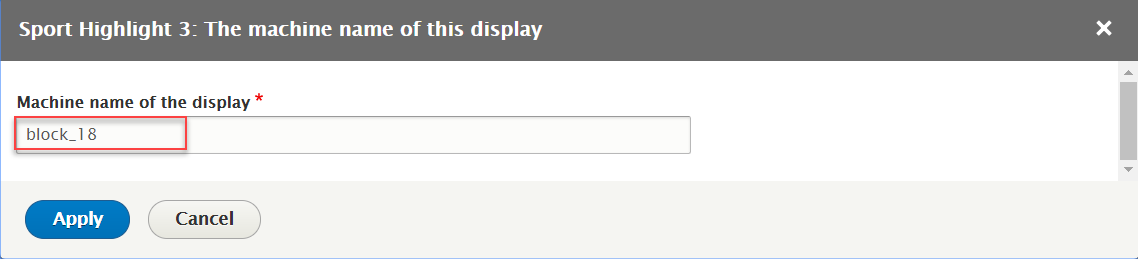
Step 12: At OTHER > Machine Name area, change machine name block_18
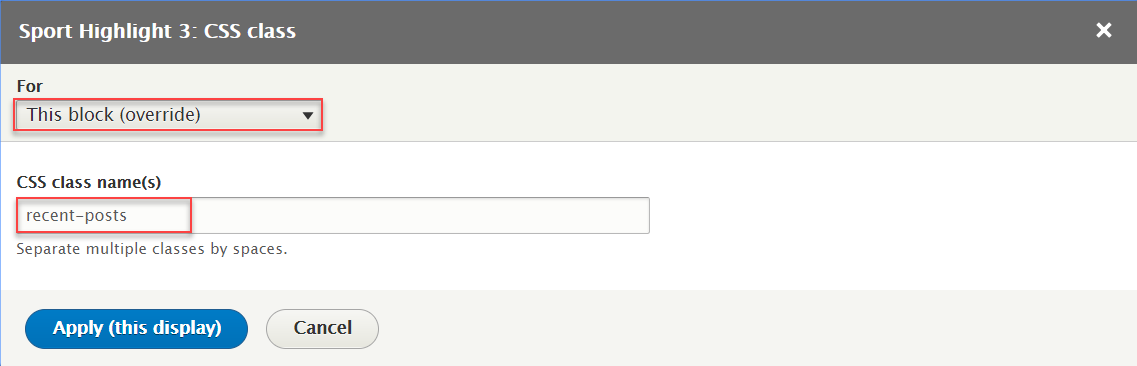
Step 13: At OTHER > Css class area, change Css class recent-posts
Step 14: Click Save button to save view
1.3 Configure Sport Highlight block
Step 1: Navigate to Structure > Block layout
Step 2: Find Highlighted click Place block button
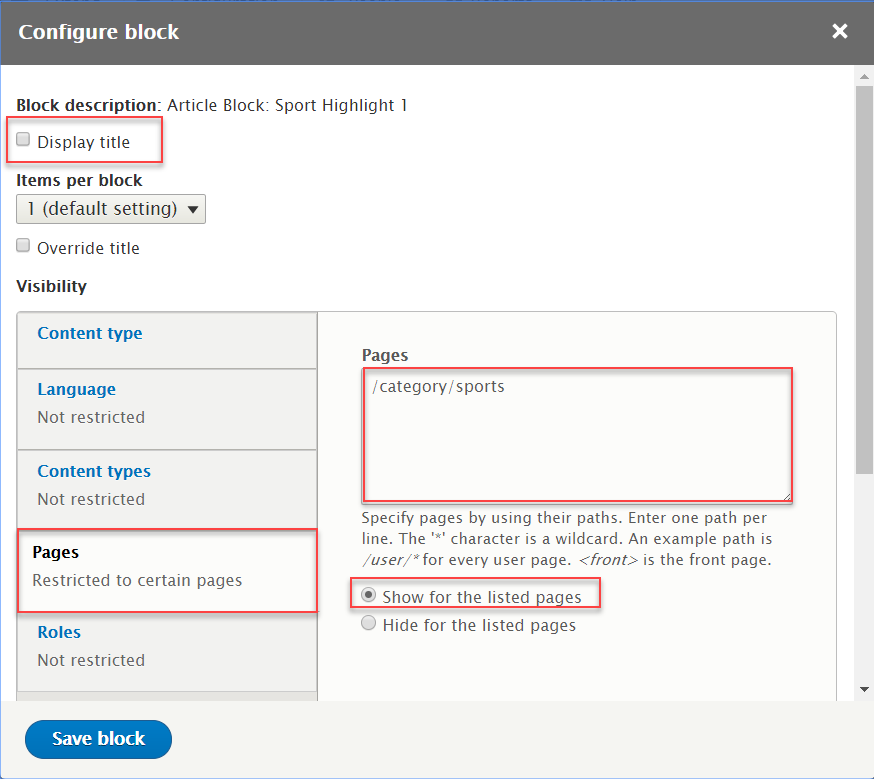
Step 3: Find Article Block: Sport Highlight 1 click Place block button and set following properites:
Step 4: Click Save block button.
Step 5: Find Highlighted click Place block button
Step 6: Find Article Block: Sport Highlight 3 click Place block button and set following properites:
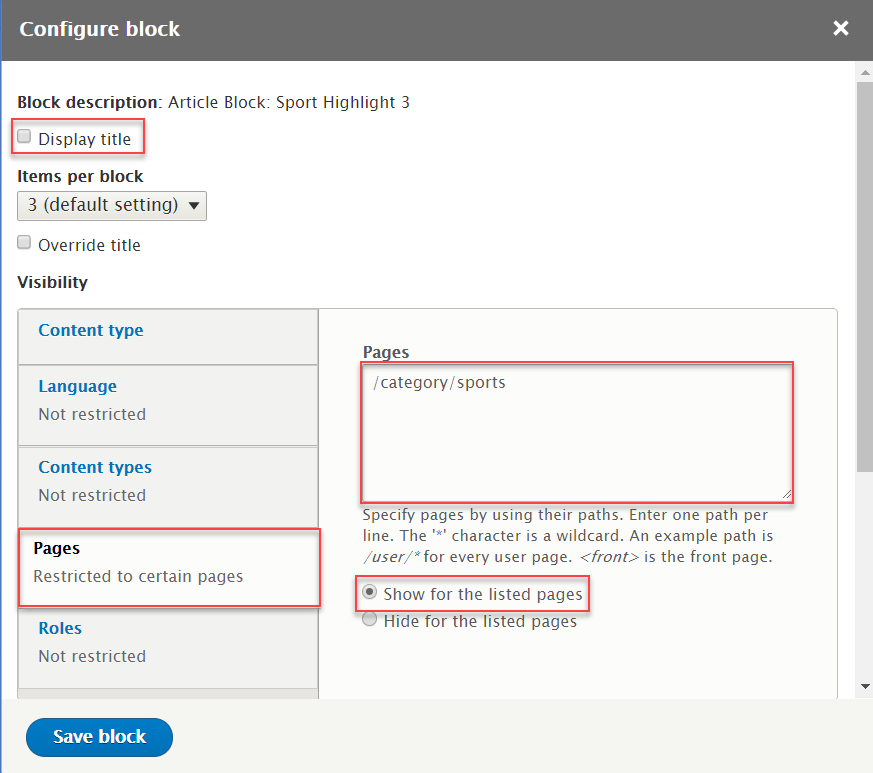
Step 7: Click Save block button.
Travel page
1. Travel slideshow

1.1 Create Travel block
Step 1: Navigate to Structure > Views
Step 2: Find Article block click Edit button
Step 3: Click Add link to create Travel block and set following properites:
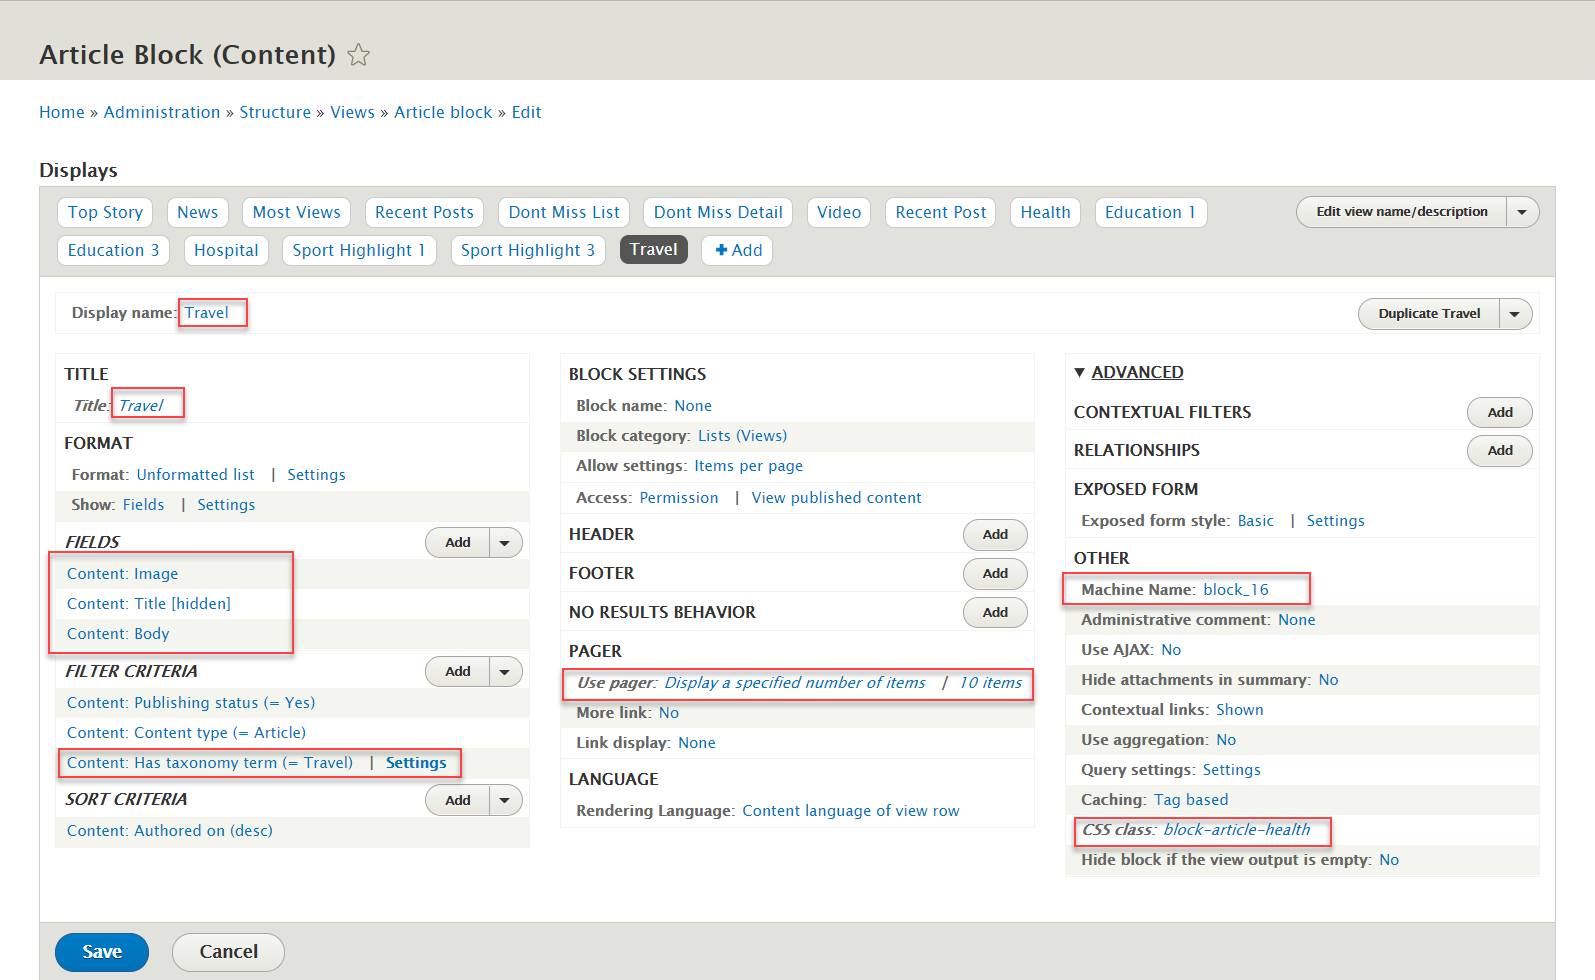
Step 4: At Display name and Title areas, change name Travel


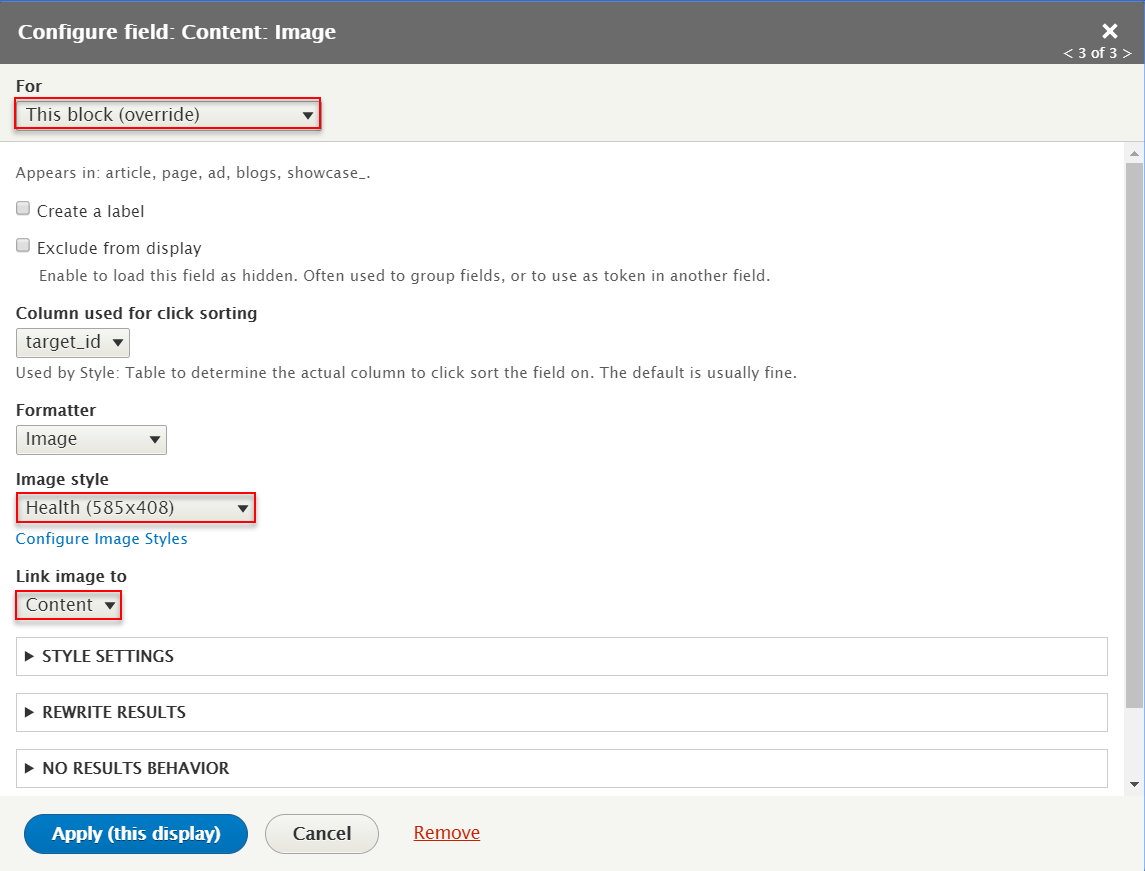
Step 5: At FIELDS areas, click add button to create Content: Image field and set following properites:
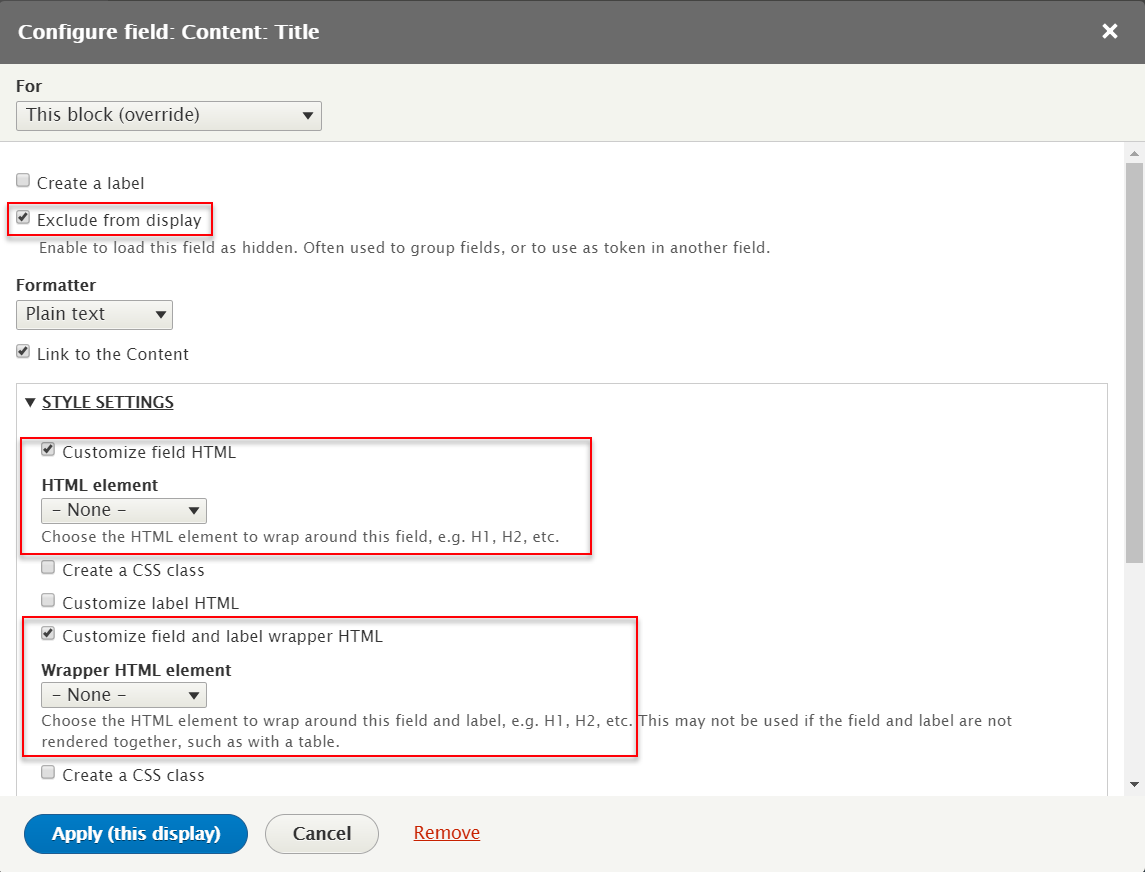
Step 6: At FIELDS areas, click Content: Video Title field and set following properites:
Step 7: At FIELDS areas, click add button to create Content: Body field and set following properites:

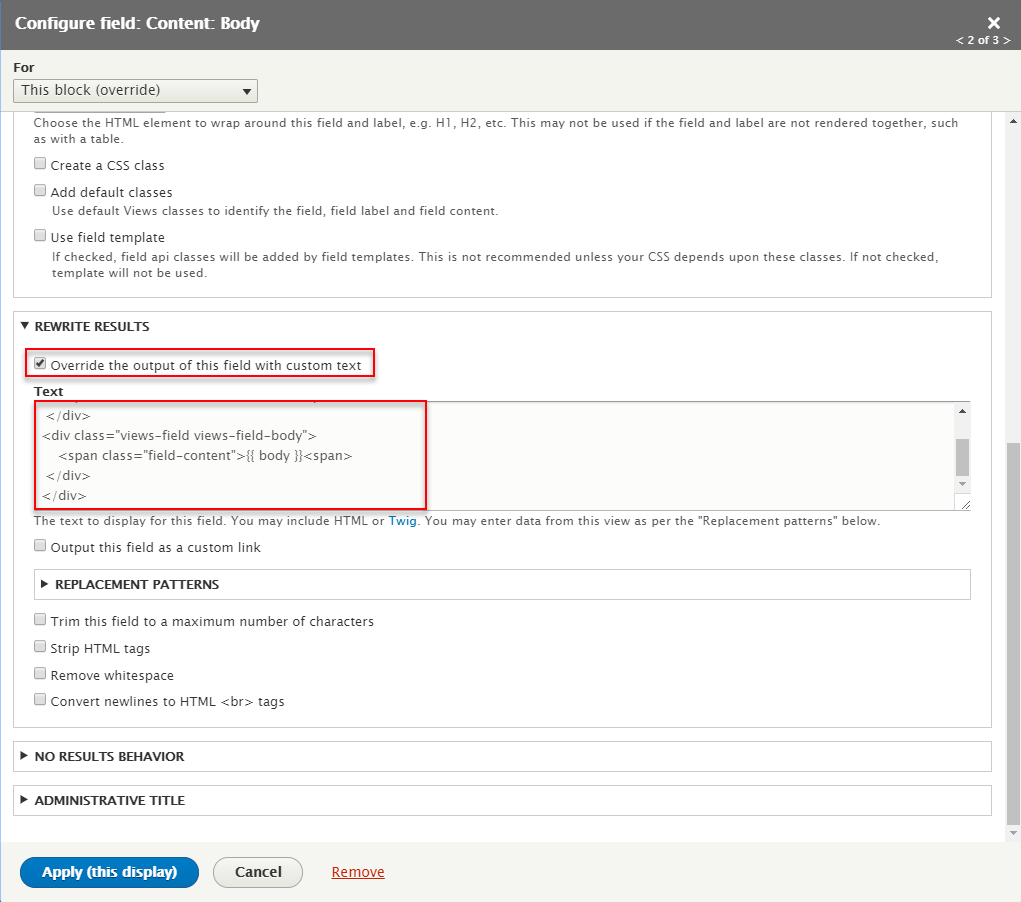
Refer to following HTML code:
                                    {{ title }}


                                    {{ body }}
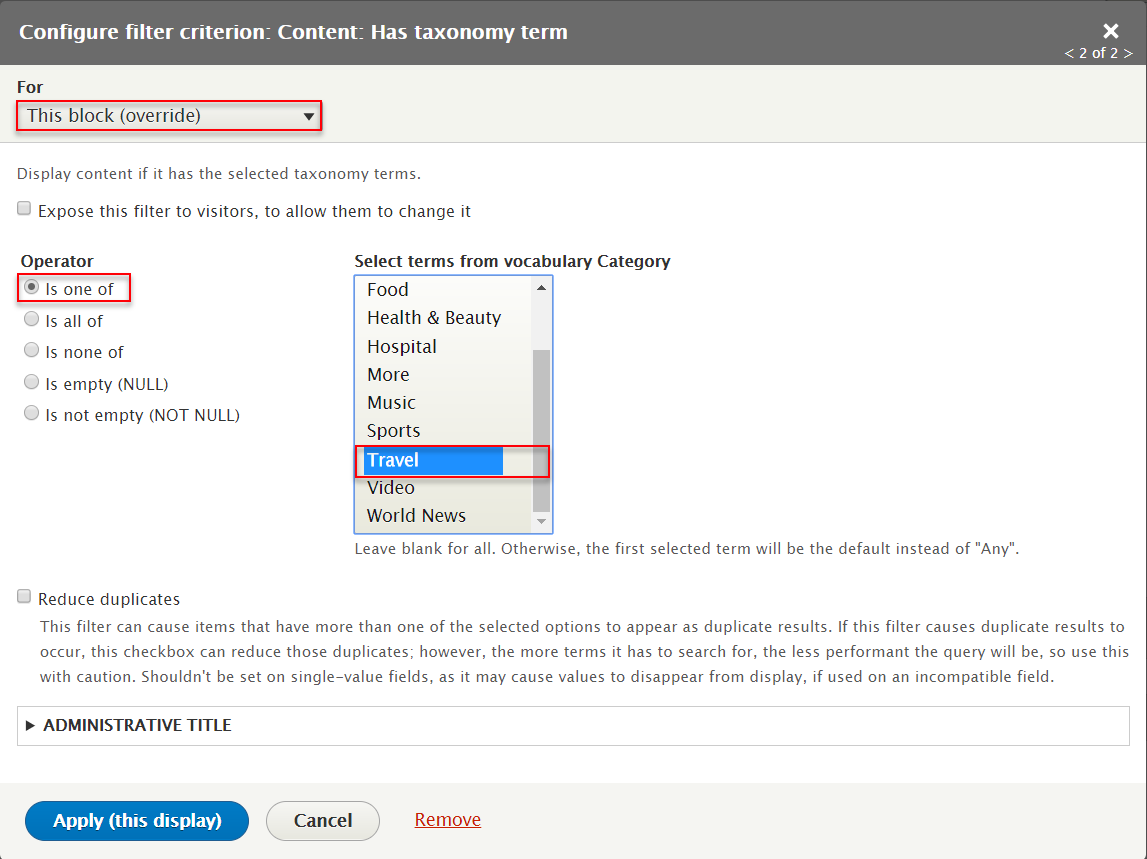
Step 8: At FILTER CRITERIA areas, click add button to create Content: Has taxonomy term field and set following properites:
Step 9: At SORT CRITERIA areas, click Content statistics: Views today link to remove this field
Step 10: At PAGER > Use pager area, click Display a specified number of items to change options this field
Step 11: At PAGER > Use pager area, click 1 items to change options this field
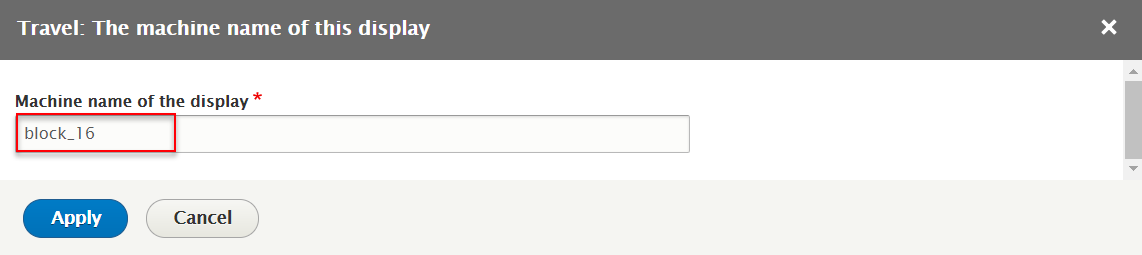
Step 12: At OTHER > Machine Name area, change machine name block_16
Step 13: At OTHER > Css class area, change Css class block-article-health
Step 14: Click Save button to save view
1.2 Configure Travel block
Step 1: Navigate to Structure > Block layout
Step 2: Find Slideshow click Place block button
Step 3: Find Article Block: Travel Lists (Views) click Place block button and set following properites:
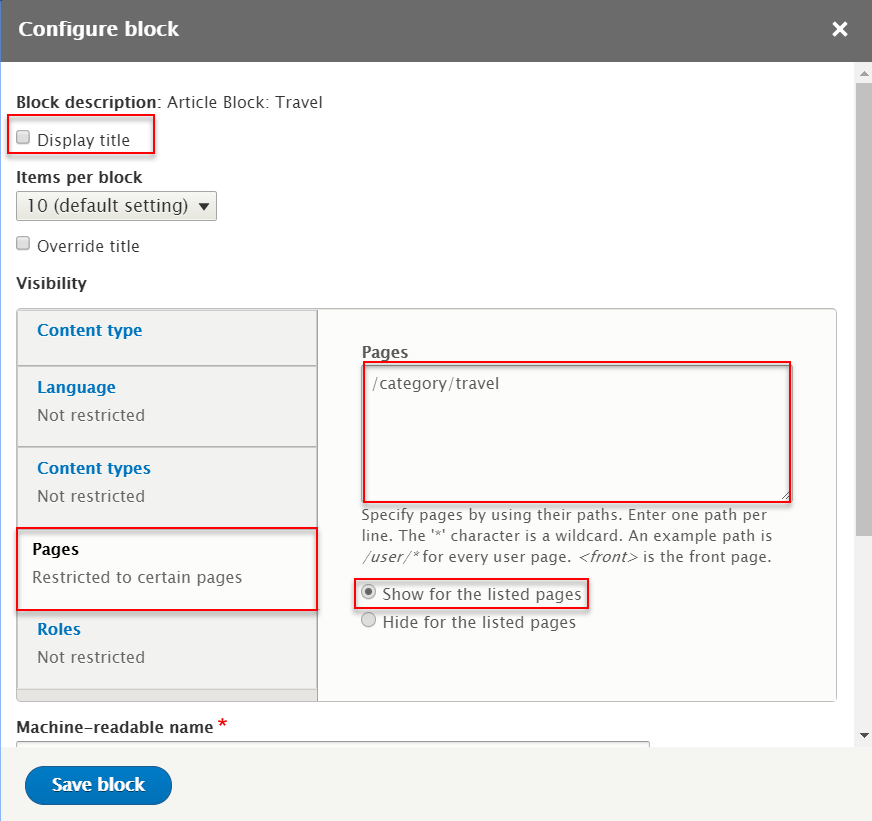
Step 4: Click Save block button.
You Might Also Like This block
Step 1: Navigate to Structure > Views
Step 2: Find Article block click Edit button
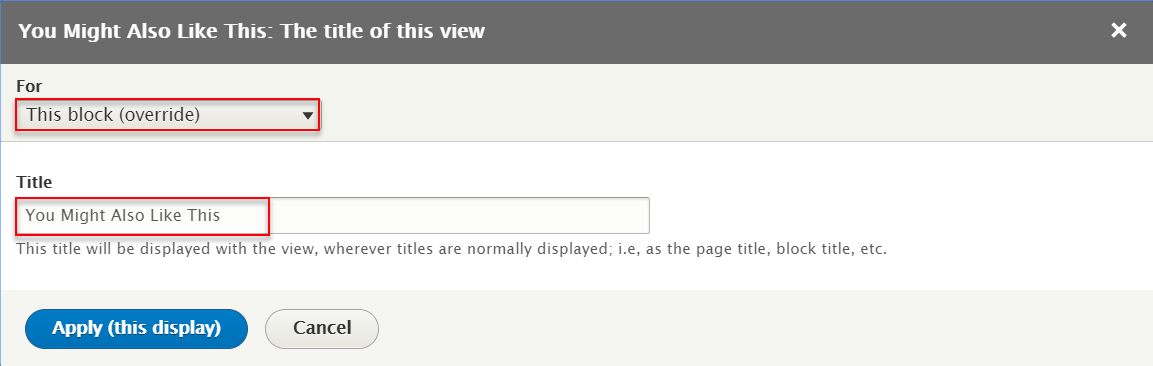
Step 3: Click Add link to create You Might Also Like This block and set following properites:
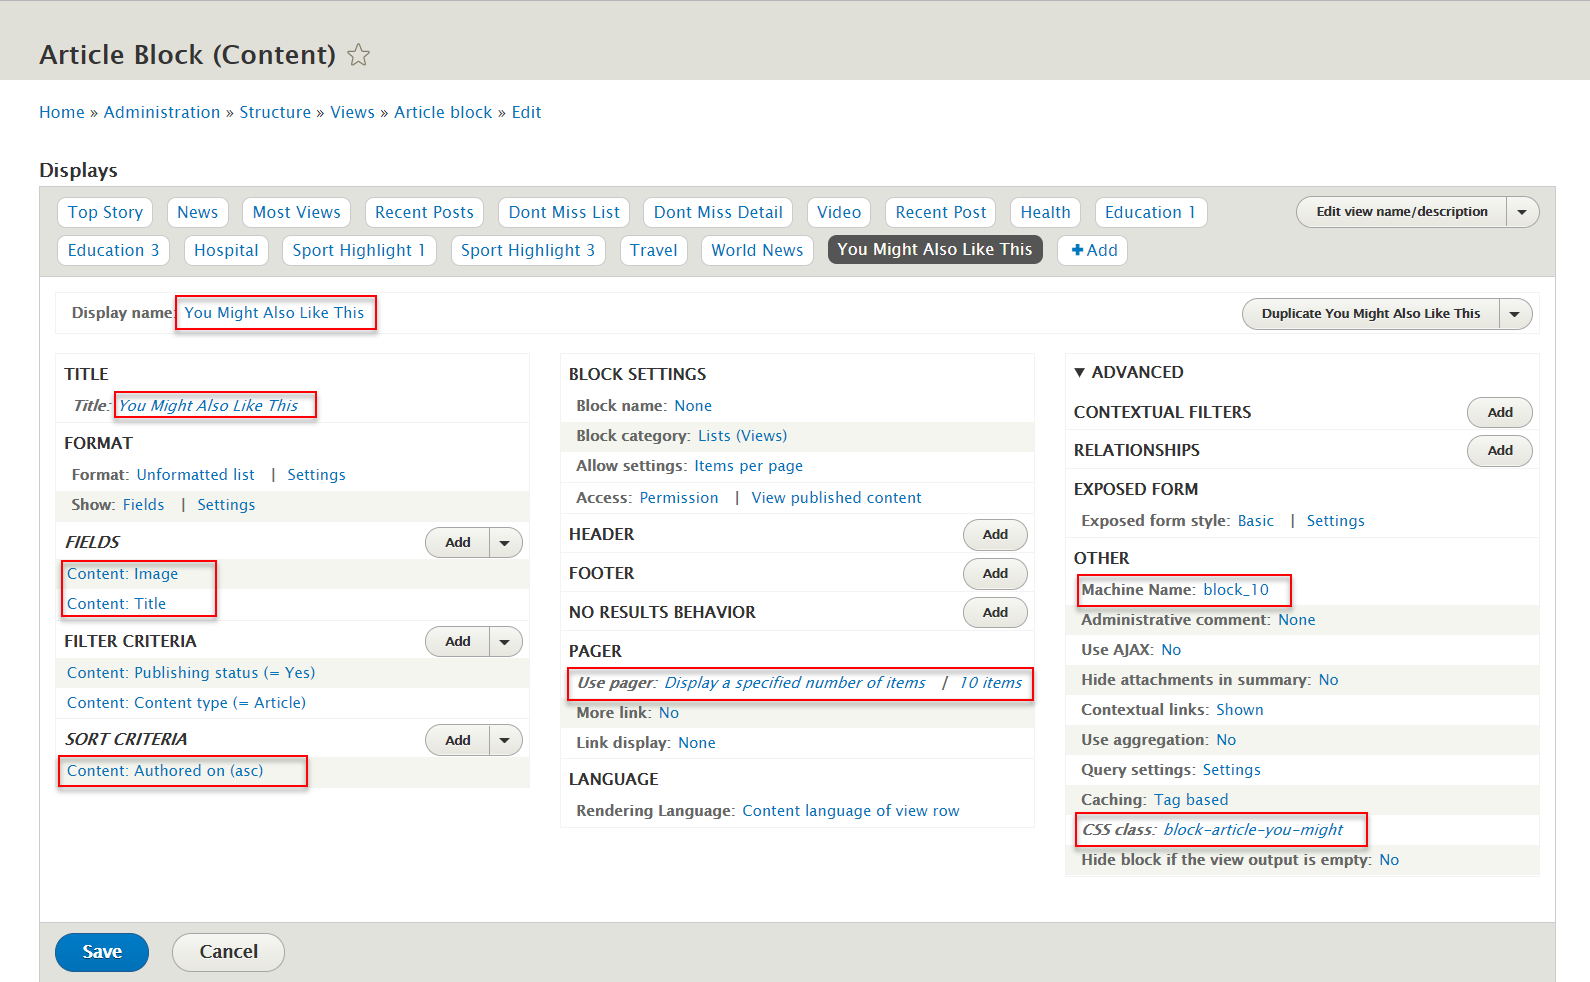
Step 4: At Display name and Title areas, change name You Might Also Like This
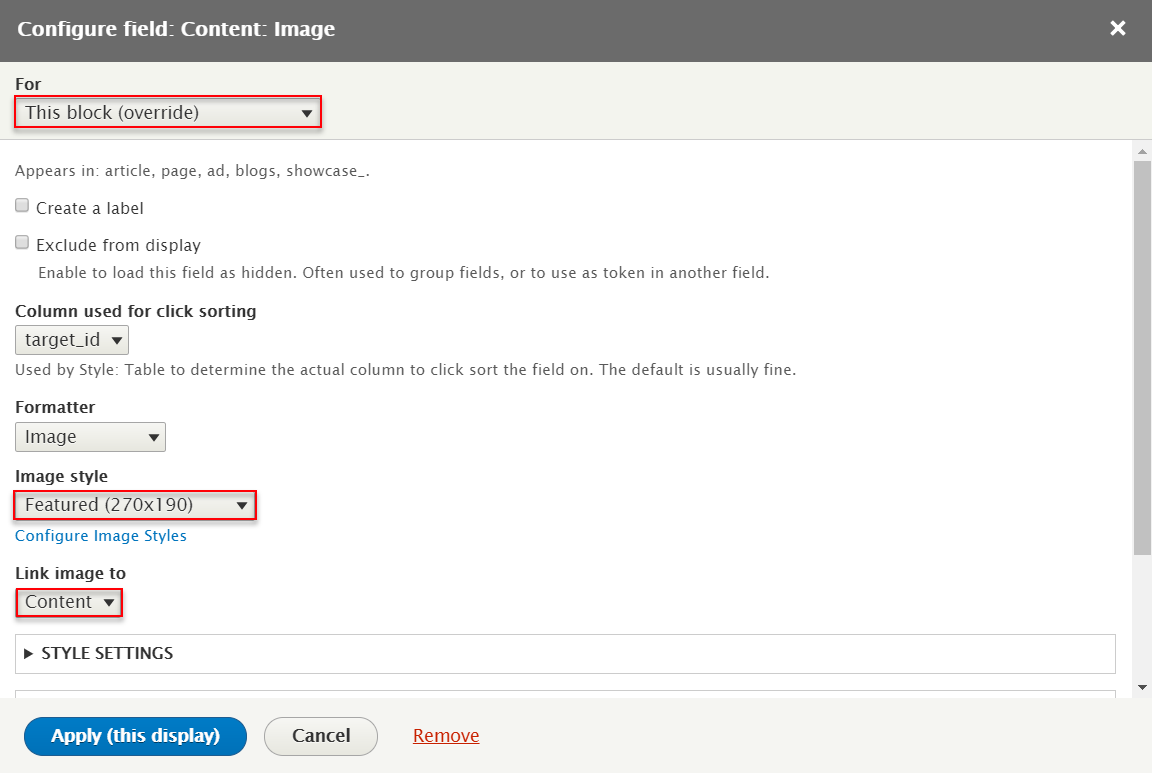
Step 5: At FIELDS areas, click add button to create Content: Image field and set following properites:
Step 6: At FIELDS areas, click Content: Title field and set following properites:
Step 9: At SORT CRITERIA areas, click Content statistics: Views today link to remove this field
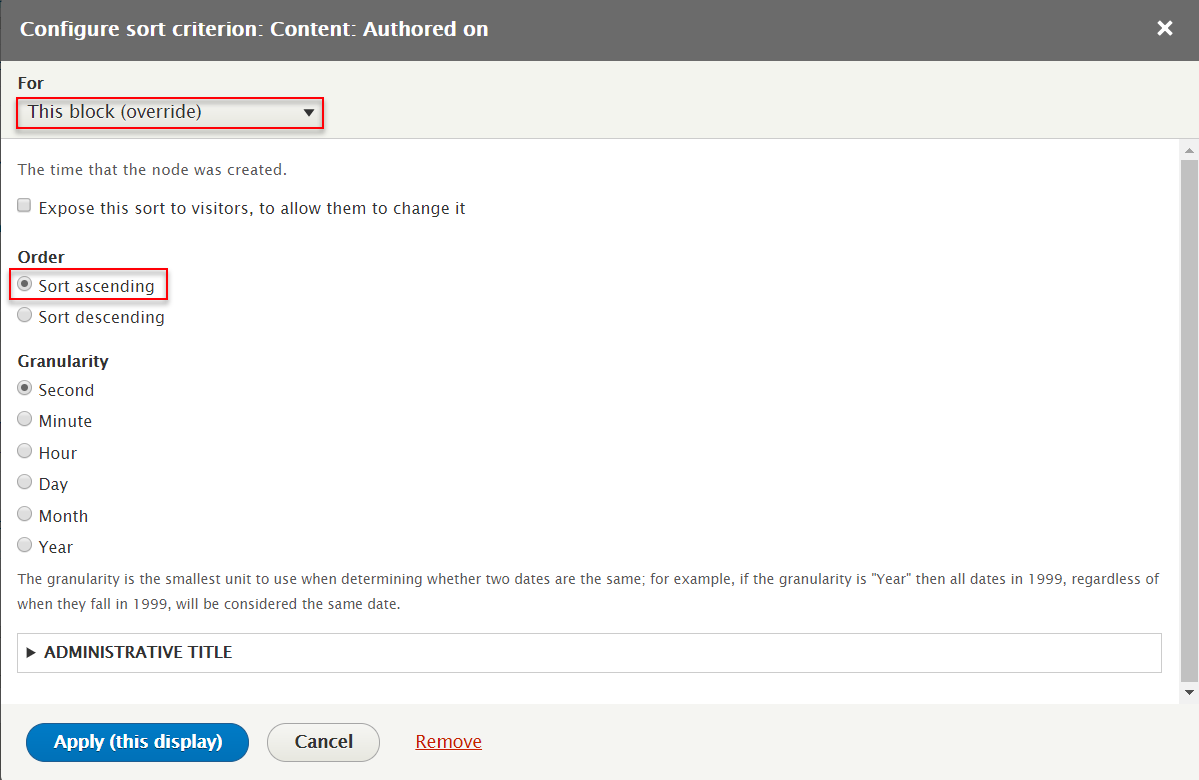
Step 9: At SORT CRITERIA areas, click Content: Authored on field and set following properites:
Step 10: At PAGER > Use pager area, click Display a specified number of items to change options this field
Step 11: At PAGER > Use pager area, click 1 items to change options this field

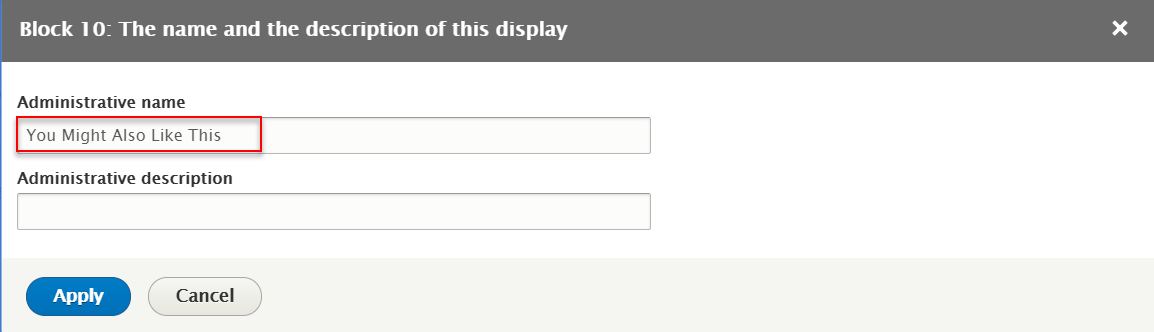
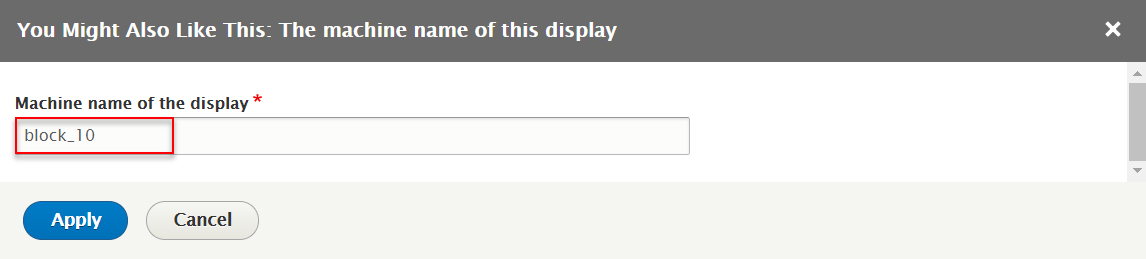
Step 12: At OTHER > Machine Name area, change machine name block_10
Step 13: At OTHER > Css class area, change Css class block-article-you-might
Step 14: Click Save button to save view